20121220-172330.jpg

For me, fine spirits are the best gift for the holidays. You can go with some aged rums…sipping tequilas…or classic cognacs. And then there’s the whole list of liqueurs…sweets for the end of the meal or a key ingredient in a flavorful cocktail. Here’s my list of favorite bottles…

Kelt XO Cognac: What makes this cognac special is that it leaves the Cognac region of France in barrels and gets loaded onto ships that travel the world for months at a time. The barrels of cognac mellow, as they slowly rock back and forth in the ship’s hold out in open seas, much like they did hundreds of years ago before we loaded pallets of product onto cargo planes. The ships then return to Cognac, where the spirit is unloaded and bottled. The result is an exceptionally smooth cognac that is still my favorite to date. What’s really cool is that each bottle has a summary of what ship it was on and where it traveled. The VSOP is great, but the XO is outstanding. And they say it makes a difference if the ships go around the world clockwise or counterclockwise!
Diplomatico Reserva Exclusiva Rum: If you’ve got a friend that likes sipping rum, this takes it to a whole new level. Made in Venezuela, it has a sweetness that you won’t want to mix…on the rocks is perfect. I have turned more friends on to this rum in the last couple of years than any other spirit I’ve discovered. Thanks to Jeff and Geremie, owners of Fluke restaurant in Newport, Rhode Island, for giving me my first sip of this wonderful rum years ago.

Jose Cuervo Reserva de la Familia tequila: I am not a fan of Jose Cuervo tequila in general. If all you want is a reposado or anejo, there are so many other better ones out there: Don Julio, Don Eduardo, Corazon, and Sauza Tres Generaciones just to name a few. And for silver, nothing beats Patron. But this top-of-the-line Cuervo is excellent, and you pay the price for the designer box as well as the tequila. Worth every penny.

St Germaine: a sweet liqueur crafted from hand-picked Elderflowers that grow in the Alps, and featured in an excellent house drink called The Elixir at Cooke and Brown Public House in Providence, Rhode Island, featuring Irish whisky, St Germain, honey, lemon and bitters.

Bols Genever: First made in Holland in 1575, this is the stuff the British fell in love with, tried to copy, and then shortened the name of their resulting product and called it “gin.” But it’s better than gin. Many a great cocktail starts with this key ingredient. One of my favorites is a take on the classic Negroni: combine 1.5 oz Bols Genever, 1 oz Gran Classico, and .5 oz Punt e Mes.

Coole Swan: Imagine a Bailey’s that tastes like melted vanilla ice cream, and you sort of have an idea of the flavor of this terrific cream liqueur. It’s a key ingredient in my espresso martinis. Here’s my recipe: 3 oz Belvedere vodka, 3 oz freshly brewed espresso, 1.5 oz Kahlua and 1.5 oz Coole Swan. Mix all ingredients in a shaker with ice. Shake vigorously. Makes 2 martinis. You will never drink another espresso martini as long as you live!

Rumchata: Horchata is a very popular drink in Hispanic countries. It comes from many ingredient combinations, but one of the most popular is rice, vanilla and cinnamon. Imagine a liquid version of rice pudding and you sort of get the idea. So if you add rum to it…you get a liqueur unlike anything you’ve had before. Very tasty.

Castries: This creamy liqueur takes its name from the capital city of the island of St Lucia….and it surprises me that it took this long for someone to come up with a peanut flavored liqueur. Sure, there are other nut liqueurs: almond liqueurs, like real Amaretto (not Disaronno, which is made from peach or apricot pits)…and hazel nut liqueurs like Frangelico. But this one is very different. It’s creamy, not clear, and delicious.
Sortilege: This liqueur made from Canadian whisky and maple syrup is the definition of liquid dessert. It’s hard to describe how good this stuff is. All I can say is: once you open it, it will vanish very quickly. I haven’t poured it on pancakes yet, but some hungover morning I will!
Cheers!

Anyone that plans a trip to New York City for the holidays with the kids (or even without the kids) better end up at FAO Schwarz, if they know what’s good for them! It’s a great store with loads of history and two huge levels of candy, toys, games, and the world-famous “Big Piano,” as seen in the Tom Hanks movie “Big.” Toy soldiers greet you at the door, inviting you into a world as far away from the hassle of Manhattan traffic as anything on 5th Avenue and 58th Street could be!

Most people don’t know that they can get a 45-minute private tour of FAO Schwarz, one hour before the store opens, guided by their own toy soldier. It’s a really fun experience that we had a couple of years ago, when my daughter turned 5 years old. But you can’t just show up. And there’s limited space. (We found that signing up for a tour after Christmas was the way to go.)

We found out about the private tours from a small ad in a local magazine: Time Out New York. There was no web address…just a phone number. I called…I made an appointment for the tour…it cost a ridiculously small amount of money…and we were in!

We showed up at our designated time and met our Toy Soldier, who led us through the entire store, giving us all kinds of information about the toys and the history of the building itself. The awesome part was that we were the only ones in the building, with the exception of store workers getting things ready for another day’s enthusiastic crowds.

toy1

And the best part of the tour: we got to dance around on The Big Piano privately, before the store’s doors opened up and the wild crowds rushed to get in line to take advantage of their 3 minutes on the piano. We got almost 15 minutes to dance around, take pictures and simply have a great time.

toy2

If you’re trying to think of what you can do to bring your next holiday trip to New York City to whole new level, this will make you a real hero with the kids.

Here’s a link I found with more information:

http://www.fao.com/shop/index.jsp?categoryId=3810526

And by the way…tip the toy soldier well. He still has to pay the rent!

This is my version of a holiday drink I was introduced to by my mother-in-law from the Upper Peninsula of Michigan. I knew I was marrying into the right family after one sip!

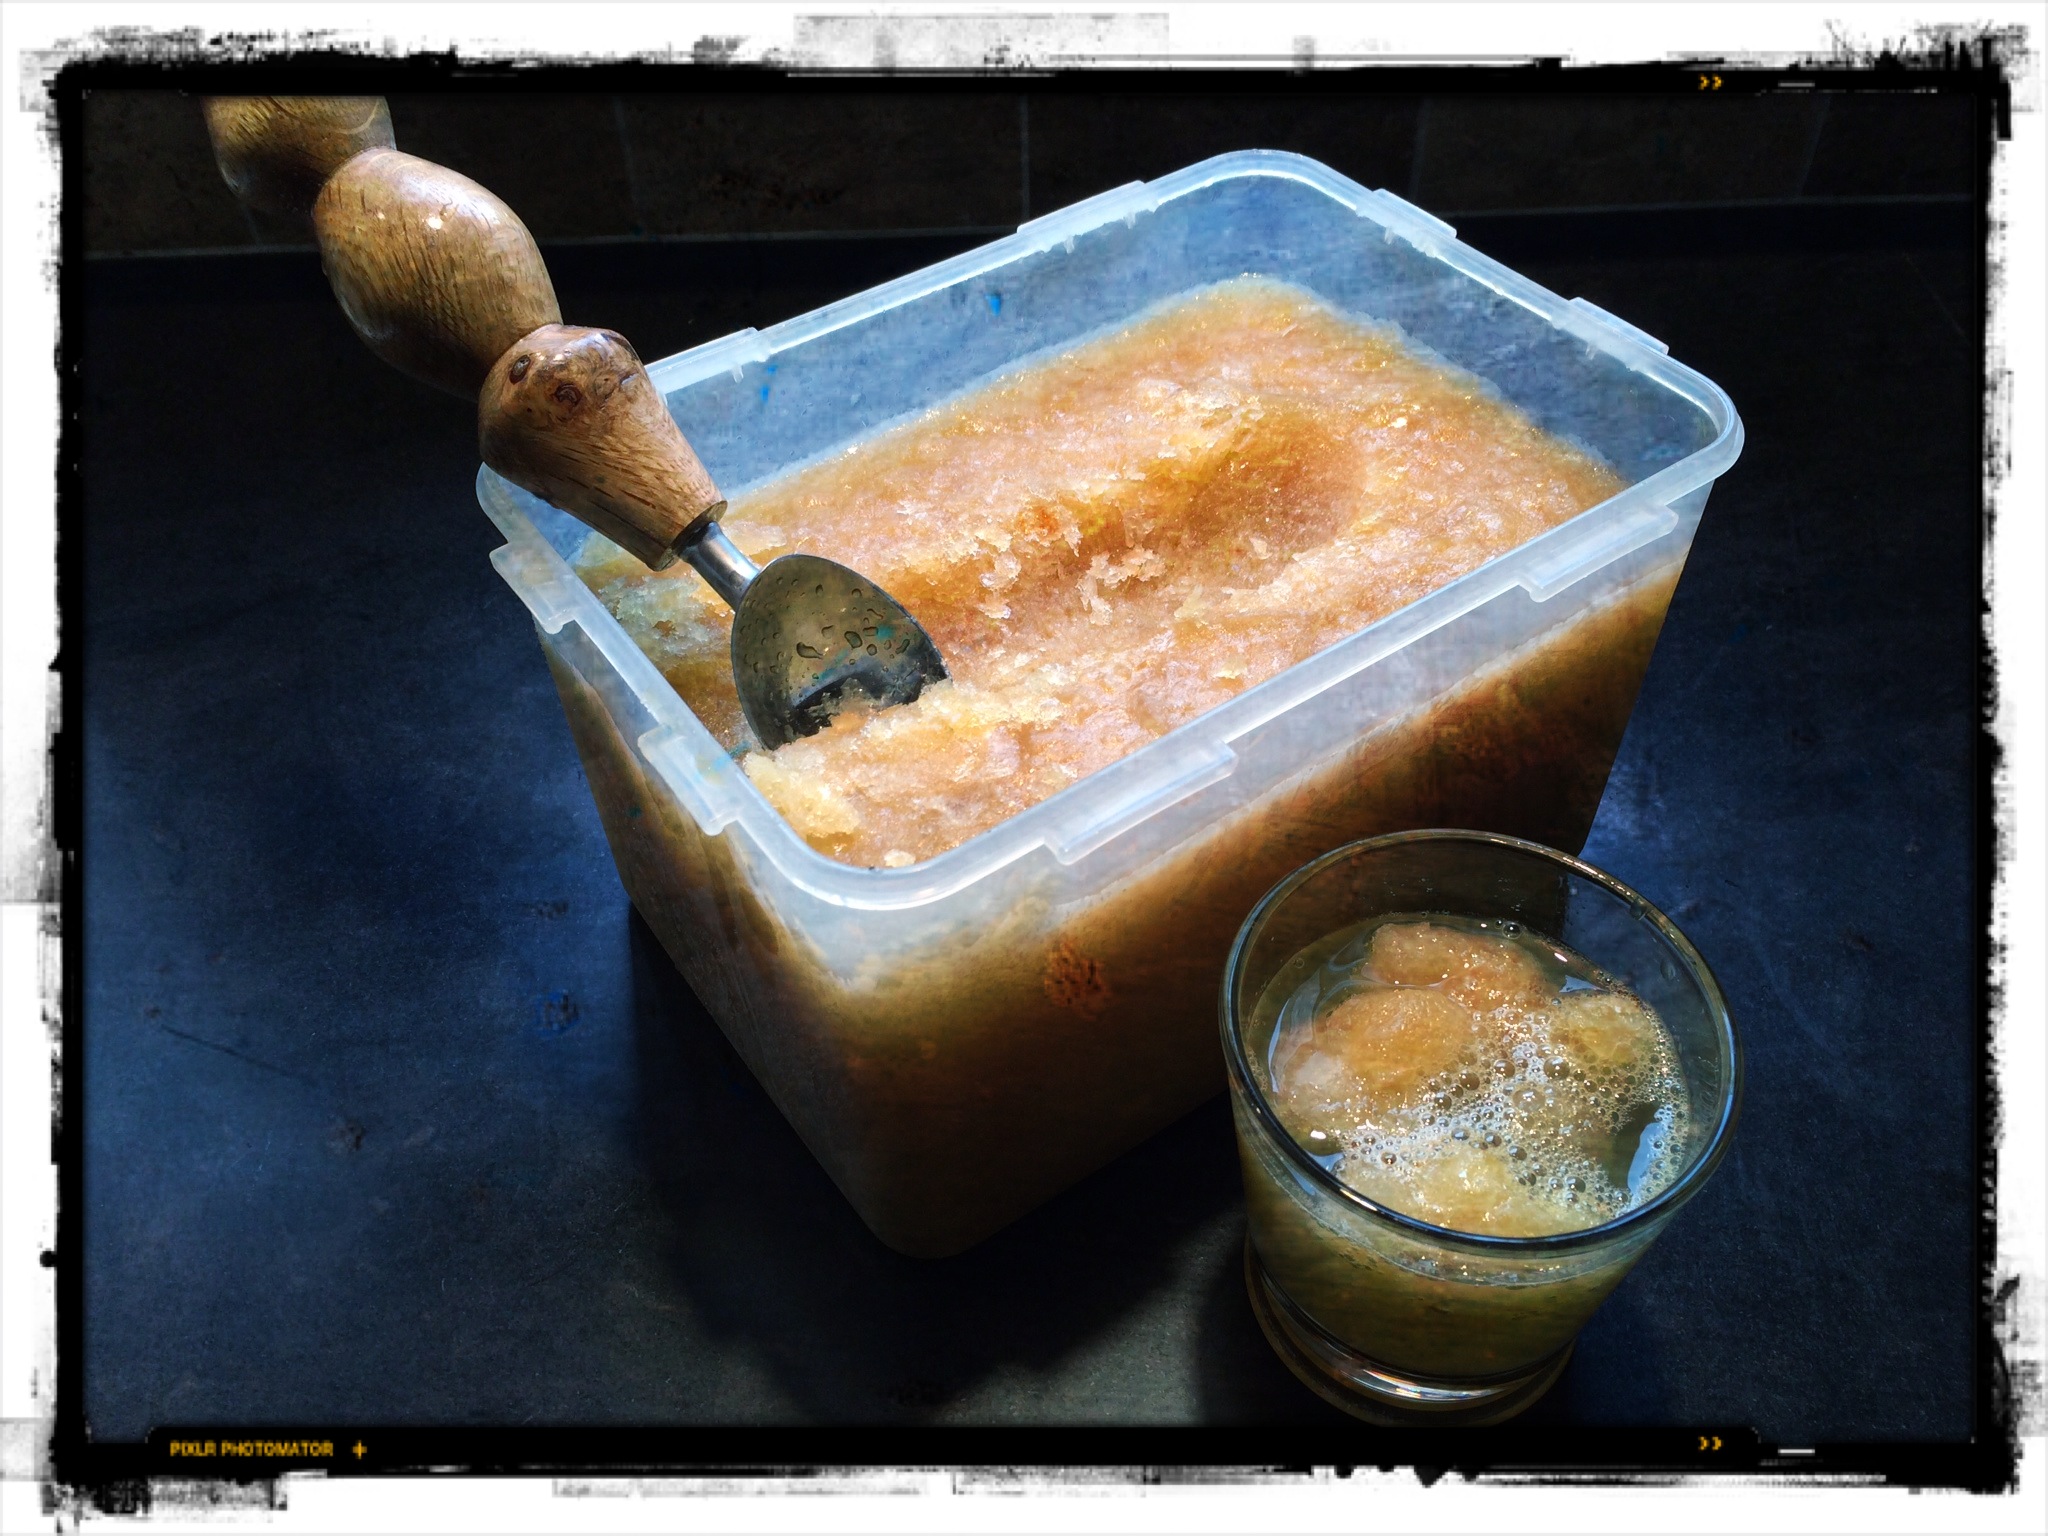
Whiskey slush

Ingredients:

9 cups water
2 cups sugar
4 “Constant Comment” tea bags
12 oz frozen OJ concentrate
12 oz frozen lemonade concentrate
2 cups whiskey (I use Crown Royal)
7Up or Sprite

Boil water and sugar, making sure sugar dissolves. Turn off heat and steep tea bags in liquid for 10 minutes. Discard tea bags.
Add OJ, lemonade and whiskey. Mix well, pour into a freezeable container with a lid. Freeze.
To serve: Scoop the slush out of the container (it doesn’t freeze solid) and mix in a tall glass with 7 Up.

Inspired by a garden full of fennel and my fanatical love for all things pork, this recipe just happened this past fall. I use Berkshire heritage pork when possible, a far tastier and healthier choice over standard pork you find in a supermarket. I get it at: http://www.heritagepork.com.

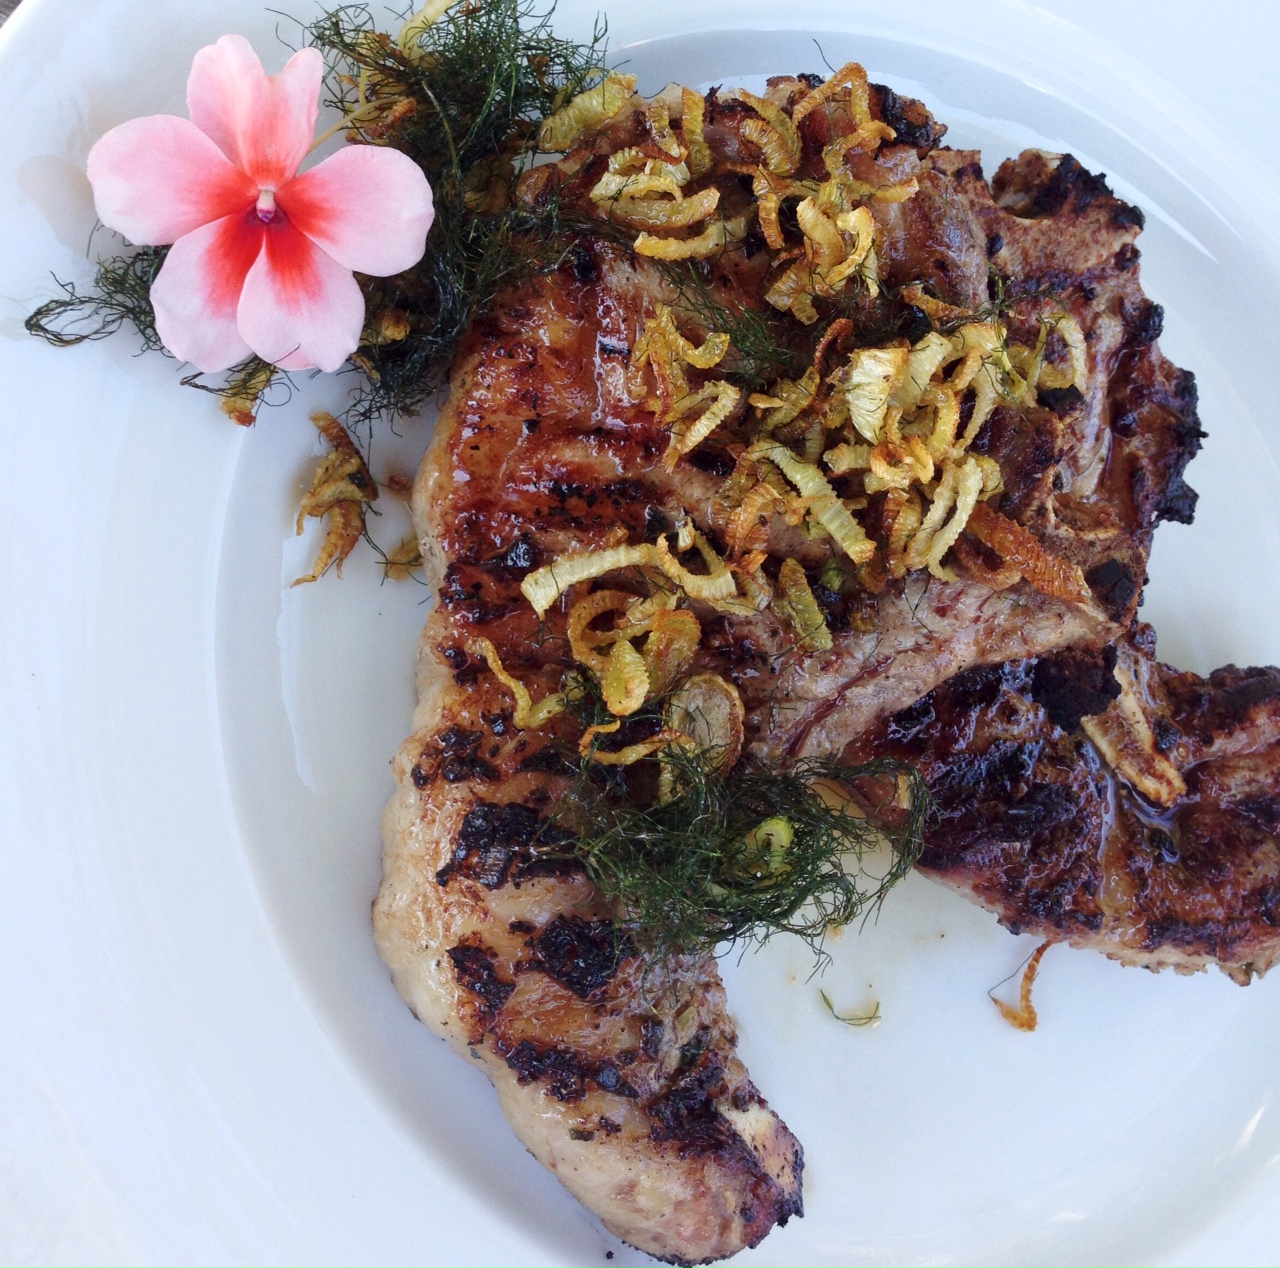
pork chop fennel


Ingredients:


4 Berkshire pork chops

4 tablespoons finely chopped fennel bulb

2 teaspoons finely chopped fresh sage

4 teaspoons garlic salt

1 teaspoon ground black pepper

3 tablespoons extra virgin olive oil

extra fennel bulb and fennel fronds

extra olive oil, salt and pepper for sauteing


Combine the chopped fennel, sage, garlic salt, black pepper and olive oil in a bowl. Mix well and spread it all over the pork chops. Let them stand for an hour at room temperature.

Light a hot grill. Grill pork chops until done…with quality pork, that does not mean cook it to death!

Chop extra fennel bulb into thin strips about an inch long. Remove fennel fronds from their stems. Saute bulb strips in olive oil, salt and pepper until they are almost crisp. Toss in fennel fronds and cook until fronds and bulb strips are crisp.

Serve pork chops with crispy fennel and fronds on top.

A few years ago, at Le Saint-Amour, a great restaurant in Quebec City, the dish I ordered had these small strange-looking root vegetables sitting next to the roasted duck entrée. They resembled tiny twisted parsnips…or caterpillars! I needed to know what these things were, and so I asked my French waiter, who came back with a piece of paper that had the word “crosne” written on it. He said: “I don’t know how they say it in English.”
Back at the hotel room, I went right to the laptop and started a search on-line and discovered that crosnes (pronounced crones) are also known as Chinese artichokes, and although they are somewhat common in European gardens, they are really difficult to find in the states.
The plant is a relative of mint (though the leaves have no aroma), a perennial, is easy to grow, spreads on its own, and has those small, convoluted and delicious root clumps (known as tubers to gardeners.) So what’s not to like? Well, apparently, it’s not the gardeners that don’t want to deal with them…it’s the cooks! The tubers are very small and therefore need a little extra effort to make sure they are washed clean before cooking. They don’t need to be peeled (now that would be a pain in the ass) but to many chefs, even the washing is too much of a hassle.
Now it seems that many more chefs are discovering crosnes, and they just can’t get a hold of them.
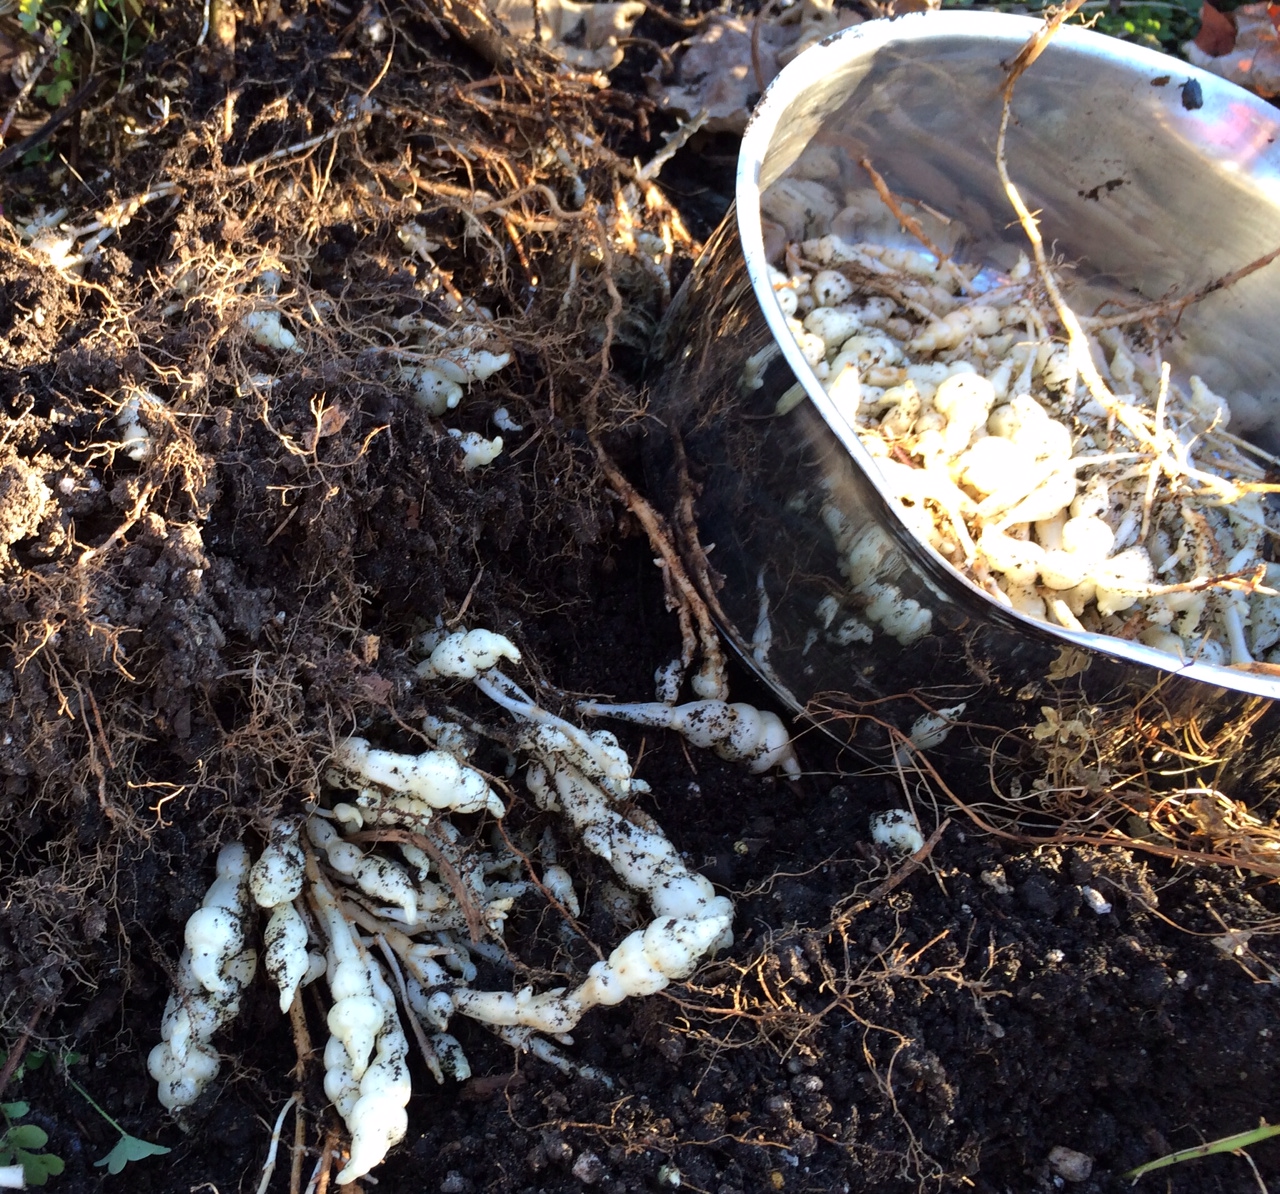
Harvesting crosnes in the garden. I leave the small tubers in the ground for next season's crop.

Harvesting crosnes in the garden. I leave the small tubers in the ground for next season’s crop.

As a rabid gardener, I found all of this pretty interesting so I searched for sources of buying crosne seeds or plants for my own garden. It took a while (most growers were in Europe or Great Britain), but I finally found a source in Oregon that sold the plants and I bought a few for my home garden.

A relative of the mint plant, crosnes are pretty hardy and are tough to remove once well established, so they need to be planted in an area where you don’t mind if they take over. The tubers are ready to harvest around October, and as long as I leave some in the ground over the winter, the crosnes will be back again the next year. Seems pretty low-maintenance for such a delicious little treat!

photo (2)

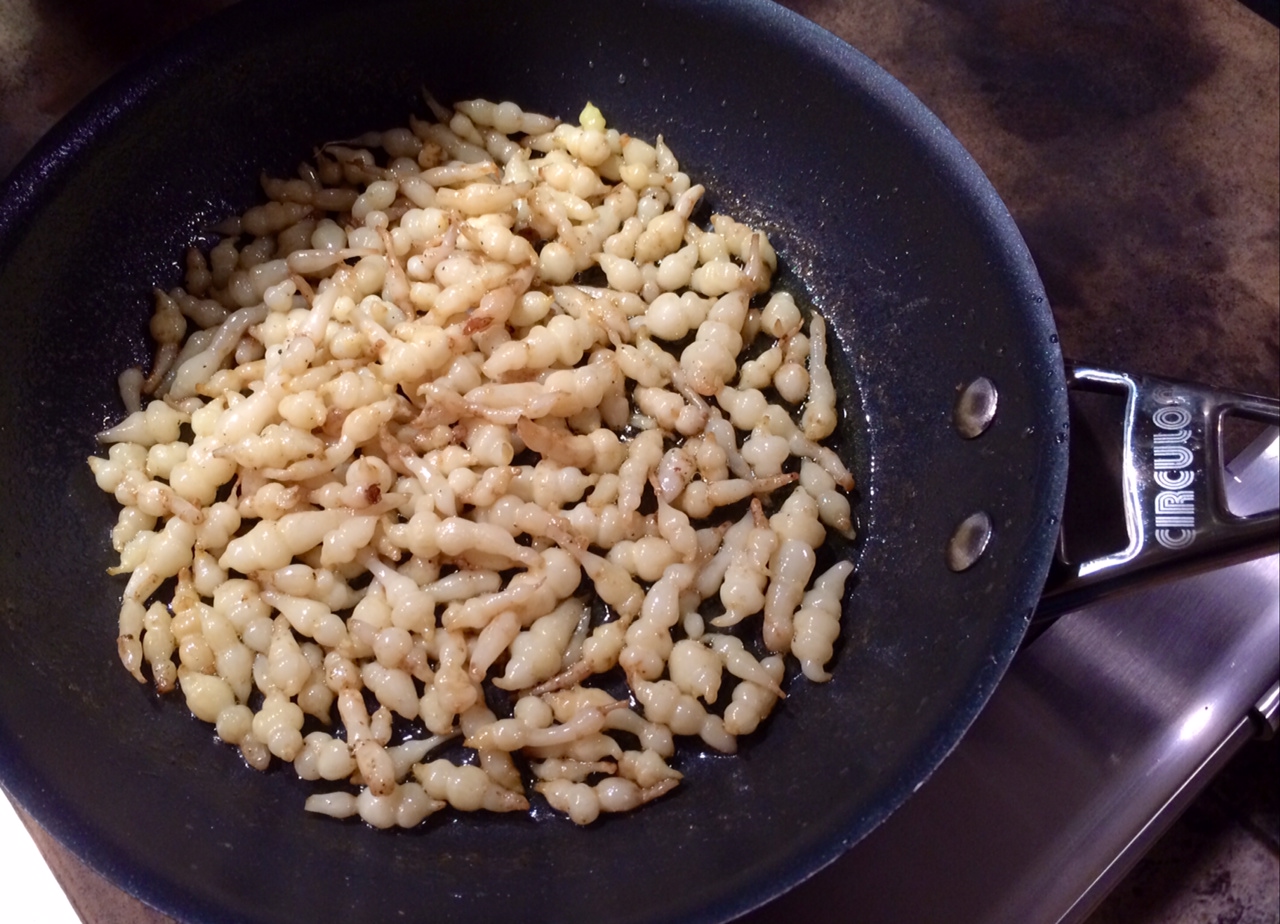
As for preparation, a light saute in olive oil and butter, salt and pepper is all they need, until cooked but crisp. They also go well with a deep, rich reduction like I had with my duck at Le Saint-Amour.

Let’s face it: there’s no such thing as healthy eggnog. This recipe kicks ass but is also a heart attack in a glass.

My buddy, Rick Sammarco, a former bartender at Mill’s Tavern in Providence, RI, credits his father, Al, for this eggnog. The original recipe calls for a lot more of everything. I’ve cut it down to a “more reasonable” size. It’s been so long since I bought ice cream, that I didn’t even know that the standard half-gallon size was replaced by a 1.5 quart size!

A word about salmonella: most cases are caused by raw chicken, not raw eggs. Eggs you get in the supermarket are washed so the chance of salmonella, found on the exterior, is minimal. (The inside of the egg is sterile.) Plus, you’re dumping a lot of booze into this drink and that will kill bacteria. In fact, some recipes say to make your eggnog weeks in advance to “sterilize” the drink.

eggnog


Ingredients:


1.5 quarts vanilla ice cream (I use Breyer’s)

1 pint half and half

15 whole eggs (raw)

½ teaspoon vanilla extract

1/4 teaspoon cinnamon

1/4 teaspoon nutmeg


At least 3/8 cup of each:

spiced rum (I use Capt. Morgan)

whiskey (I use Crown Royal)

brandy (I use E&J)


Let the ice cream soften 1 day in the fridge. Mix ice cream, eggs, vanilla, half and half in a blender.

Add spices and liquor. Blend until it’s frothy.

Taste, and add more cinnamon and nutmeg if you like.

After fully blended, let sit in fridge 12-24 hours for flavors to blend. Even longer is better.


Man, that’s a loaded headline if I ever saw one! Years ago, I read an article about how a Thanksgiving stuffing recipe credited to Marilyn Monroe was discovered. Apparently, she could also cook in the kitchen…go figure.

Dated around the time she was married to baseball great Joe DiMaggio while living in San Francisco, it was decided that the recipe was authentic for, among other reasons, its lack of garlic, which DiMaggio reportedly despised!

I tried the recipe years ago and tweaked it, adding garlic, of course. This makes a family sized platter of stuffing. Using a food processor to chop makes things much easier.

photo (1)

Ingredients:

20 ounces sourdough bread

1 lb chicken livers

1 lb ground beef

1 tablespoon cooking oil

8 stalks celery, chopped

2 large onions, chopped

4 cloves garlic, chopped

2 cups chopped parsley

4 eggs, hard-boiled, chopped

1/2 cup chopped prunes or raisins

2 cups grated Parmesan cheese

2 cups chopped walnuts, pine nuts or roasted chestnuts…or a combination

2 tablespoons fresh Rosemary, chopped

4 teaspoons dried oregano

2 tablespoons fresh thyme, chopped

4 bay leaves

2 tablespoons salt, plus more to taste

2 teaspoons black pepper


Break the sourdough into pieces and soak in a large bowl of cold water for 15 minutes. Wring the excess water out over a colander and shred bread into pieces.

Boil the chicken livers for 8 minutes in salted water, then chop until no piece is larger than a coffee bean.

In a skillet over medium-high heat, brown the beef in the oil, stirring occasionally and breaking up the meat, so no piece is larger than a pistachio.

In a large mixing bowl, combine the sourdough, livers, ground beef, celery, onions, parsley, eggs, prunes or raisins, Parmesan and nuts, tossing gently to combine.

In a separate bowl, combine the Rosemary, oregano, thyme, bay leaves, salt and pepper and scatter over the stuffing mixture. Mix again. Taste and adjust for salt.

Refrigerate, covered with foil, until ready to bake.

To bake: preheat oven to 350 degrees. Cook 1 hour with foil on top. Remove foil and cook for 1 hour more at 300. Keep an eye on it. Ovens vary, and you want it out of the oven before it gets too dry. If it does get dry, sprinkle a little chicken stock or water on it, cover with foil, and heat for 10 minutes.

The concept of a deep-fried turkey sounds pretty cool. But for me, it’s just too much damn work: finding a safe spot in the yard to blast the propane-fueled fryer so that you don’t burn your house down, standing outside and freezing your ass off while it fries, and then disposing of gallons of used oil at the end of it all. And making sure the oil is at the right temperature so you don’t get a scorched turkey on the outside and raw turkey on the inside. Sure, they now have indoor turkey fryers, but I’m not crazy about that idea, either.

I get great results by cooking my turkey in my Weber grill. The standard Weber allows you to cook up to a 15 lb. bird–big enough for my purposes–and it comes out crispy, smokey and delicious. If you’re afraid to try this for the first time at Thanksgiving when it really matters, wait a few months and buy a turkey when you have the craving and try it out.

The charcoal chimney with hot coals awaits.

Although I’ve stopped using charcoal briquettes a long time ago, and now strictly use natural hardwood charcoal, this recipe works best with Kingsford. The idea is for the coals to cook slowly and evenly. And never use lighter fluid…always start your fire with a few pieces of crumbled newspaper under a charcoal chimney.

Needed:

Weber grill, with the dome top

Kingsford charcoal briquettes (do not use Match Lite or other pre-soaked briquettes)

Heavy duty aluminum pan (disposable)

Ingredients:

Whole turkey, up to 15 lbs, thawed and previously brined (see my blog about brining a turkey)

Olive oil (to rub on turkey)

2 yellow onions, chopped

4 stalks of celery, chopped

½ lb (2 sticks) of unsalted butter, melted

1 tablespoon granulated garlic

1 tablespoon onion powder

2 tablespoons salt

1 tablespoon pepper

Spreading the coals away from the center of the grill.

If you want stuffing, make it separately and cook it separately. (A great recipe in my next blog.)

Light 8 to 10 lbs of charcoal in the grill…depending on the size of the turkey and how cold it is outside.

Remove the giblets from the turkey. Place the bird in the aluminum pan.

In a small bowl, mix granulated garlic, onion powder, salt and pepper Add any other seasonings you like.

Coarsely chop onions and celery. Place in a another bowl. Mix with the melted butter and 1/3 of the salt/pepper/garlic powder mixture. Place a small handful of this “stuffing” mixture in the neck cavity of the turkey. Place the rest in the body cavity (where the stuffing would usually go.) You can fasten the bird with turkey skewers if you like. This “stuffing” is strictly to flavor the turkey…you don’t eat it!
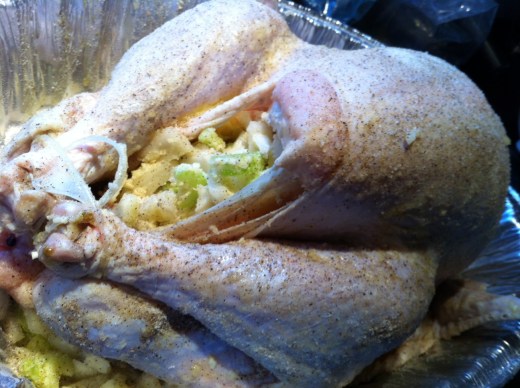
The rubbed, stuffed and seasoned bird.

Rub the outside of the entire turkey with the olive oil and sprinkle the rest of the garlic/onion/salt/pepper mixture on the outside of the bird. Make sure you get the bird on the bottom as well.

When the coals in the grill have ashed over, spread them to the outside edges of the Weber equally. Put the cooking grill rack in place. Place the aluminum pan with the turkey in the center of the grill, keeping it away from the direct heat of the coals. If using a meat thermometer, insert the probe into the thickest part of the breast, being careful not to hit the bone. Place the lid on the grill. (You may need to bend your pan a bit.) Open the vents on the bottom of the Weber as well as the lid. Important to get air circulating!

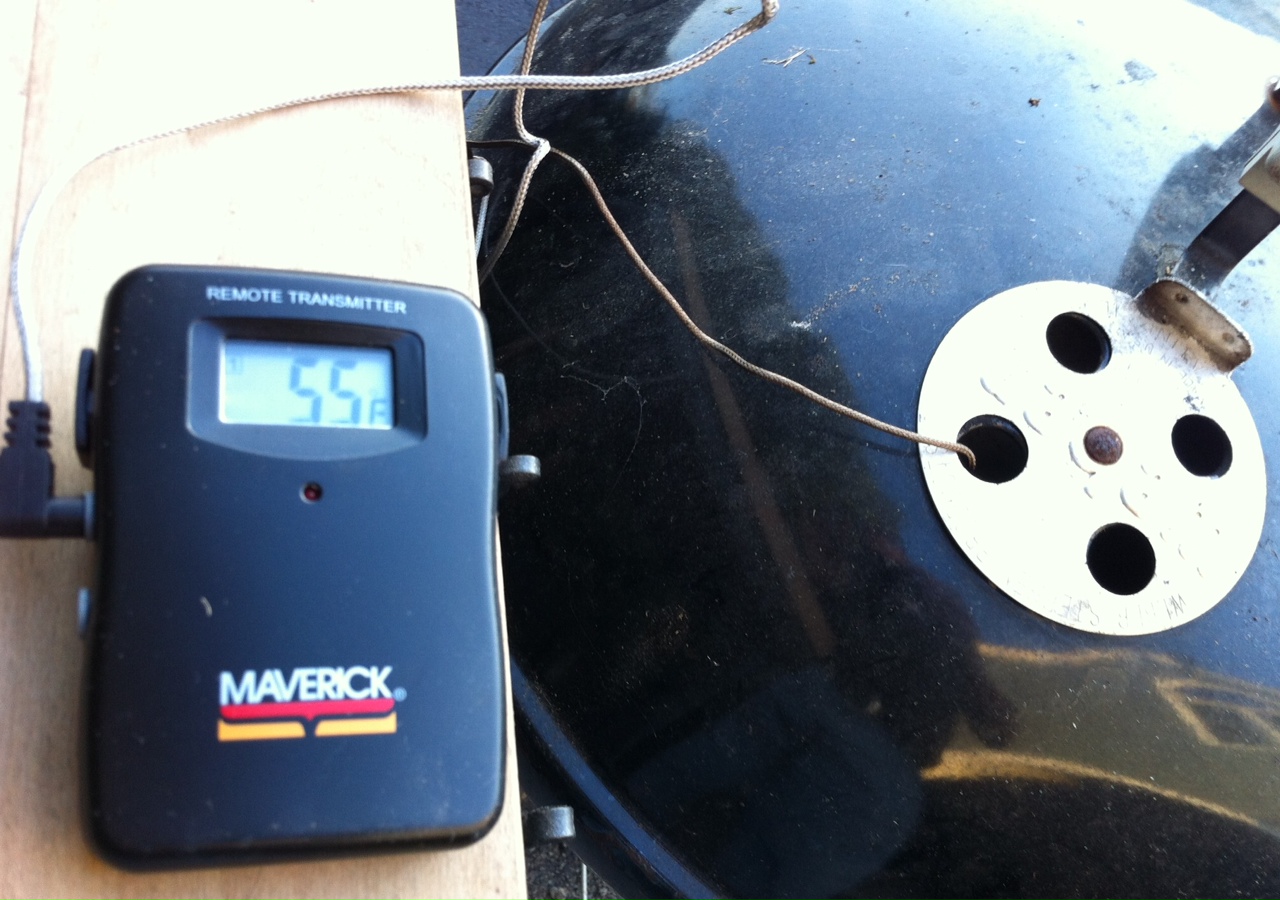
My meat thermometer calls me from as far as 100 feet away when the turkey reaches the optimum temperature that I pre-set. Time for a drink!

No basting is necessary.

Now here’s the tough part: DO NOT OPEN THE GRILL TO CHECK ON THE TURKEY! (If you must look, shine a flashlight into the vent holes on the lid to take a peek at the pop-up timer, if there is one.) The whole point is to keep the heat inside the kettle. You’ll know your turkey is done when no more smoke or heat rises from the grill, and the turkey inside stops making sizzling noises.

Remove the turkey and let it rest at least 15 minutes before carving.

Beautifully grilled, cooked to 180 degrees in less than 2 hours!

Brining is a simple process of soaking a hunk of protein in a flavored salt solution for a time before cooking, resulting in a much more juicy and flavorful final product.

It’s basic high school science: the brine has a greater concentration of salt and water than the molecules of the protein (in this case, a turkey) that is soaking in it. By simple diffusion, the protein molecules suck up the salty water and retain it. When you cook the meat, some of the water evaporates, but the meat still has far more moisture in it than it would have without the brine soaking, and the result is a moister, delicious bird.

Some people use giant syringes to inject their turkeys with crazy solutions, but I think that the old way is still the best way when it comes to brining. Get a big pot, fill it with the brine, and soak the bird in it. Done.

Here’s my tried-and-true turkey brining recipe. Once the brining is done, you can cook the turkey whatever way you like best. I use a method where I grill it inside a Weber grill with charcoal. It comes out smokey and absolutely amazing. I’ll have that info in the next blog.

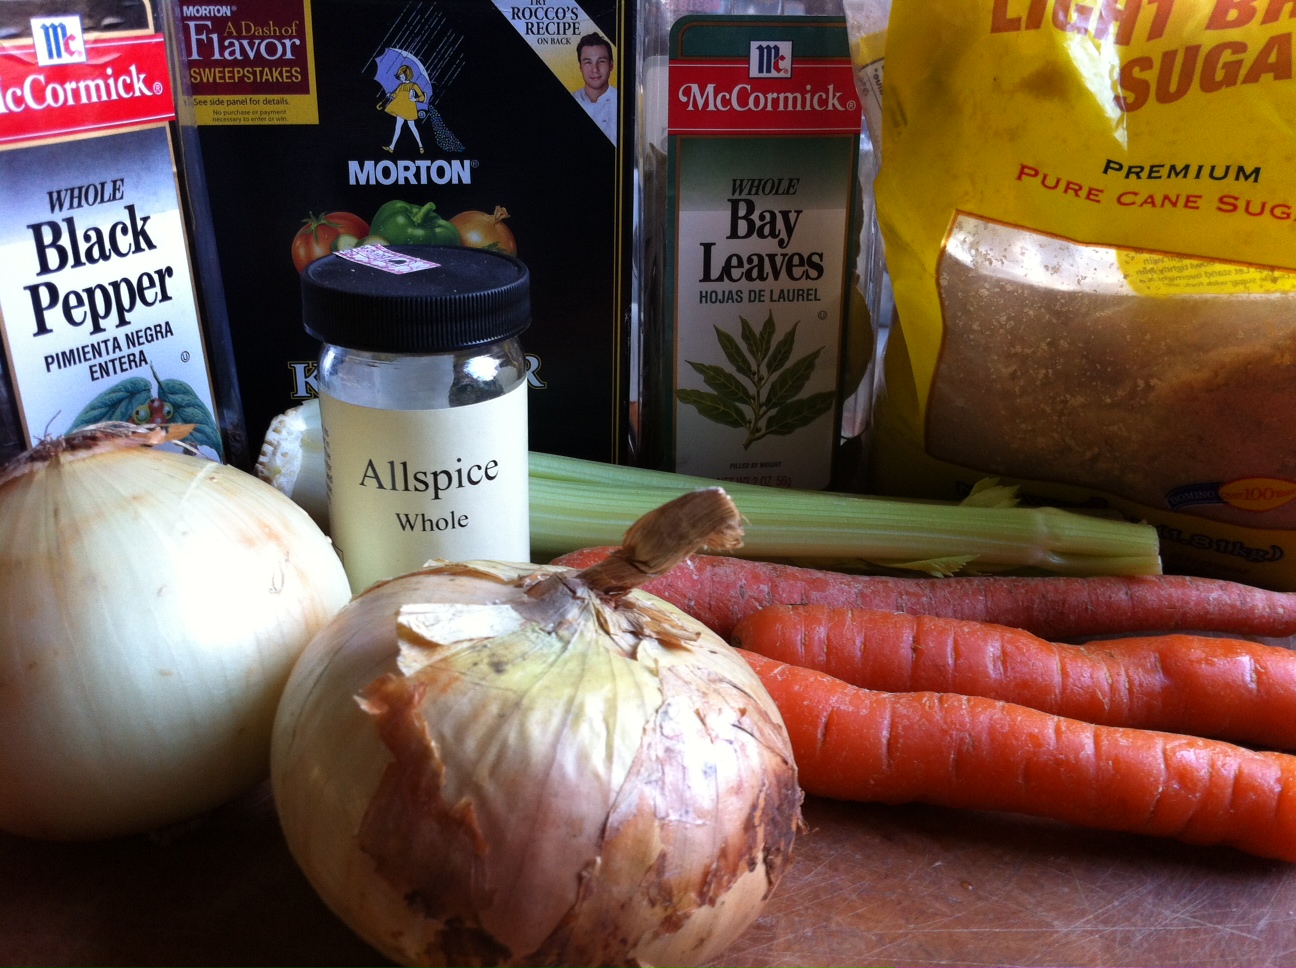
Ingredients:

1 gallon of water
2 onions
3 carrots
3 stalks celery
1 cup kosher salt
1 tablespoon black peppercorns
1/2 cup light brown sugar
1.5 teaspoons whole allspice
4 bay leaves
1 gallon of ice water
14–15 lb turkey, thawed

Pour first gallon of water in a large pot. Quarter the onions, carrots and celery (no need to peel them) and add to the water. Add all the other ingredients, except ice water and turkey.

Let the pot come to a boil for a few minutes. Remove from heat and let brine cool down to room temperature.

Remove giblets from turkey and place the bird in a container just big enough to hold it and 2 gallons of liquid.

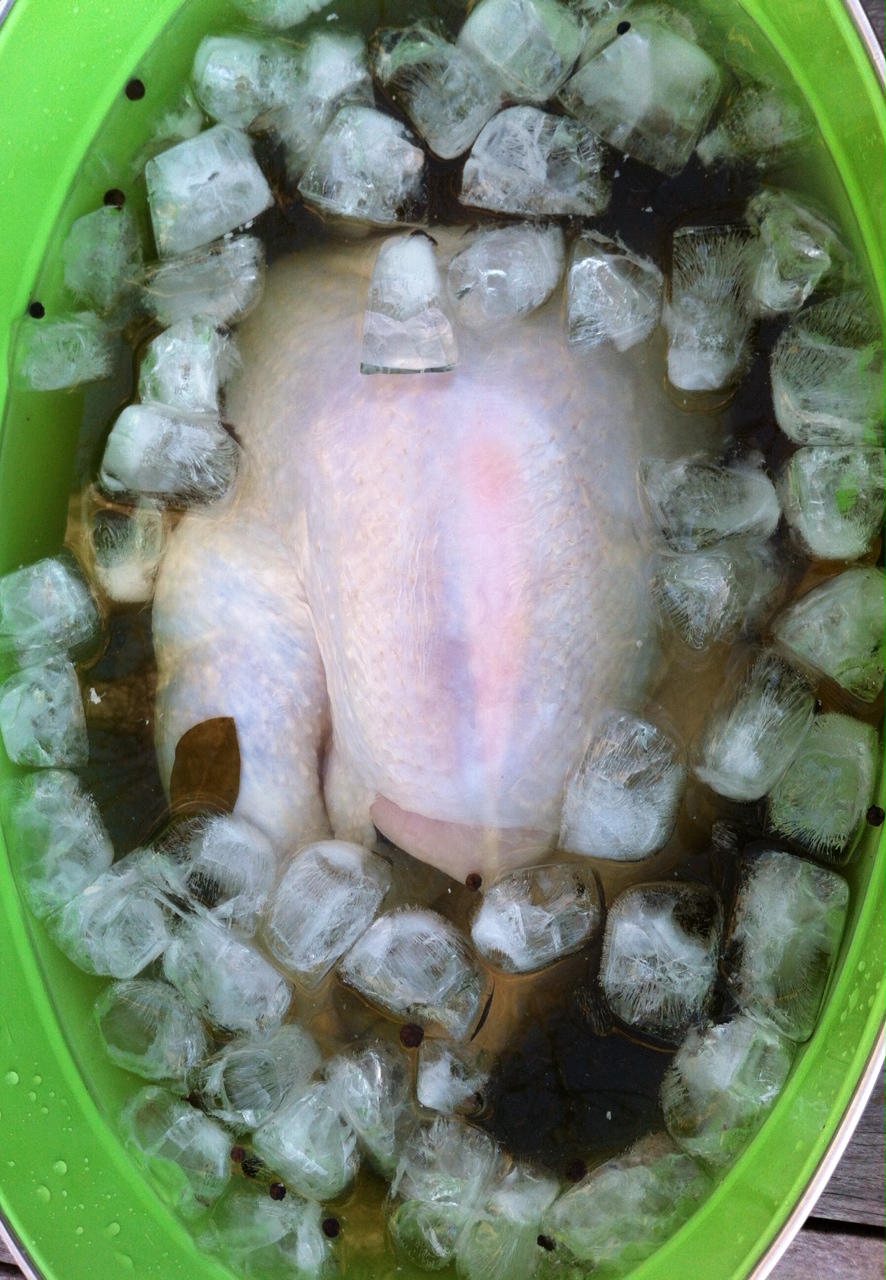
Pour the now-cooled brine over the turkey, then pour in the gallon of ice water.

Make sure the turkey doesn’t float up by placing a plate on top. Put turkey container in fridge for 5 to 8 hours, flipping the turkey over in the container halfway through.

Drain turkey, pat dry with paper towels, and then cook using your favorite recipe.

Next time: cooking your turkey on a Weber grill in a fraction of the time.

PRETZEL BREAD

Posted: November 12, 2013 in Food, Recipes, Uncategorized
Tags: , , , ,

Pretzel bread has become a foodie phenomenon in a very short period: not just the bun of choice at your favorite fast-food burger joint, but the go-to bread in any upscale restaurant.

Making pretzel bread at home had one major stumbling block for me: the need for lye,  which has nasty corrosive qualities that I don’t want to deal with in my kitchen. Even special baker’s lye was not an option. So when I found a pretzel bread recipe that used baking soda, a much milder and safer alkaline ingredient that I could simply pour down my drain after using, I knew it was time to bake.

pretzel bread

Ingredients:

½ cup water

½ cup milk

2 tablespoons butter, softened

3 cups all-purpose flour

2 tablespoons brown sugar

1 tablespoon yeast

2 teaspoons salt

1 egg, separated

Cooking spray

¾ baking soda

Kosher salt for sprinkling

Combine the water, milk and butter in a glass container and microwave about 45 seconds to melt the butter and warm the milk. Set aside.

I a mixing bowl, combine flour, brown sugar, yeast, salt and egg yolk. Slowly add the milk mixture and mix until the dough comes together. If it seems too dry, add small amounts of water. Knead the dough until it is smooth and springy, about 5 minutes.

Place the dough in a bowl sprayed with cooking spray. Flip it over so all sides get oiled, and then wrap the bowl with plastic wrap. Place in a warm place until the dough has doubled in size, about an hour.

Preheat oven to 375 degrees.

Turn out risen dough on a floured surface and divide into equal pieces. You can make 15 small slider-sized buns, 8 burger buns, 8 hot dog buns or any other shape you like. Once all the pieces have been rolled, cover them with a clean dish towel and set aside to rest.

While the dough is resting heat about 12 cups of water in a large pot. When it comes to a gentle boil, carefully pour the baking soda into it. It will foam and bubble vigorously.

Add the rested pieces of dough to the simmering water and poach them for about 30 seconds and then flipping them over for another 30 seconds. You may need to do this in batches.

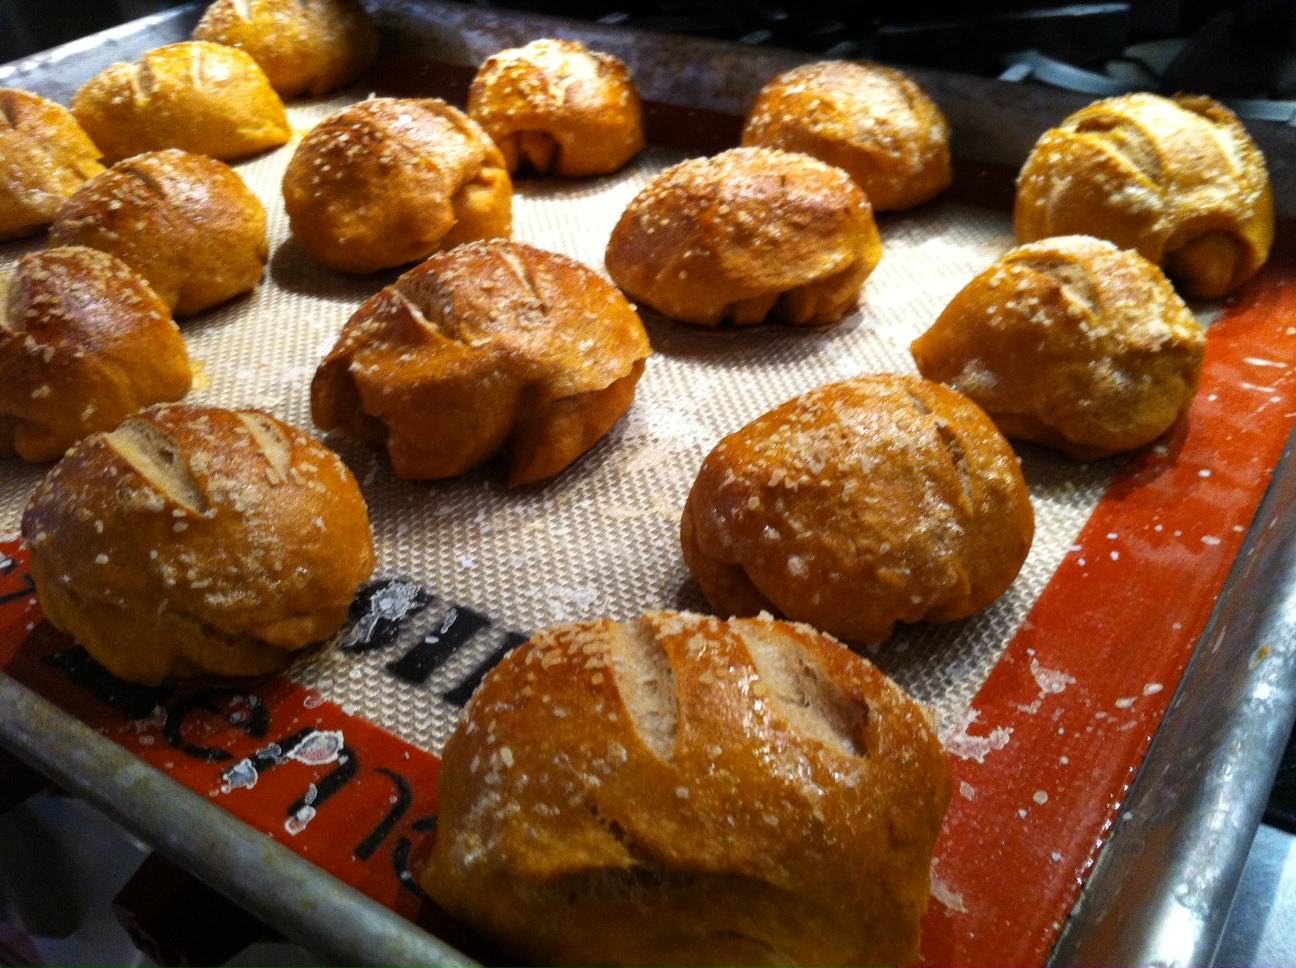
With a slotted spoon or spatula, lift the poached buns onto a Silpat baking sheet (or a baking sheet sprayed with oil, then sprinkled with cornmeal.)  Froth egg white with a fork, then brush each bun with egg white. Using a sharp knife, make a few slits on the top of the buns, about ¼-inch deep. Sprinkle with Kosher salt, then bake for 20 minutes until golden brown.