On an episode of “Top Chef,” Wolfgang Puck had the competing chefs make an omelet, something you would think they could do blindfolded. They all failed. An omelet may be a simple dish, but creating a really great omelet is an art form. It’s the same with fried calamari. When I see it on a menu, I almost always order it, because it’s my litmus test for the meal ahead. If the chef screws it up, I know he or she either doesn’t have the chops, or doesn’t care, and that will reflect on the other food served as well.

To me, what makes great friend calamari are three basic elements: it needs to be wild caught in the US and properly cleaned…it needs to be fried at the right temperature for the right amount of time so that it’s perfectly cooked and not greasy…and the coating needs to be light and crispy. This recipe does it for me…
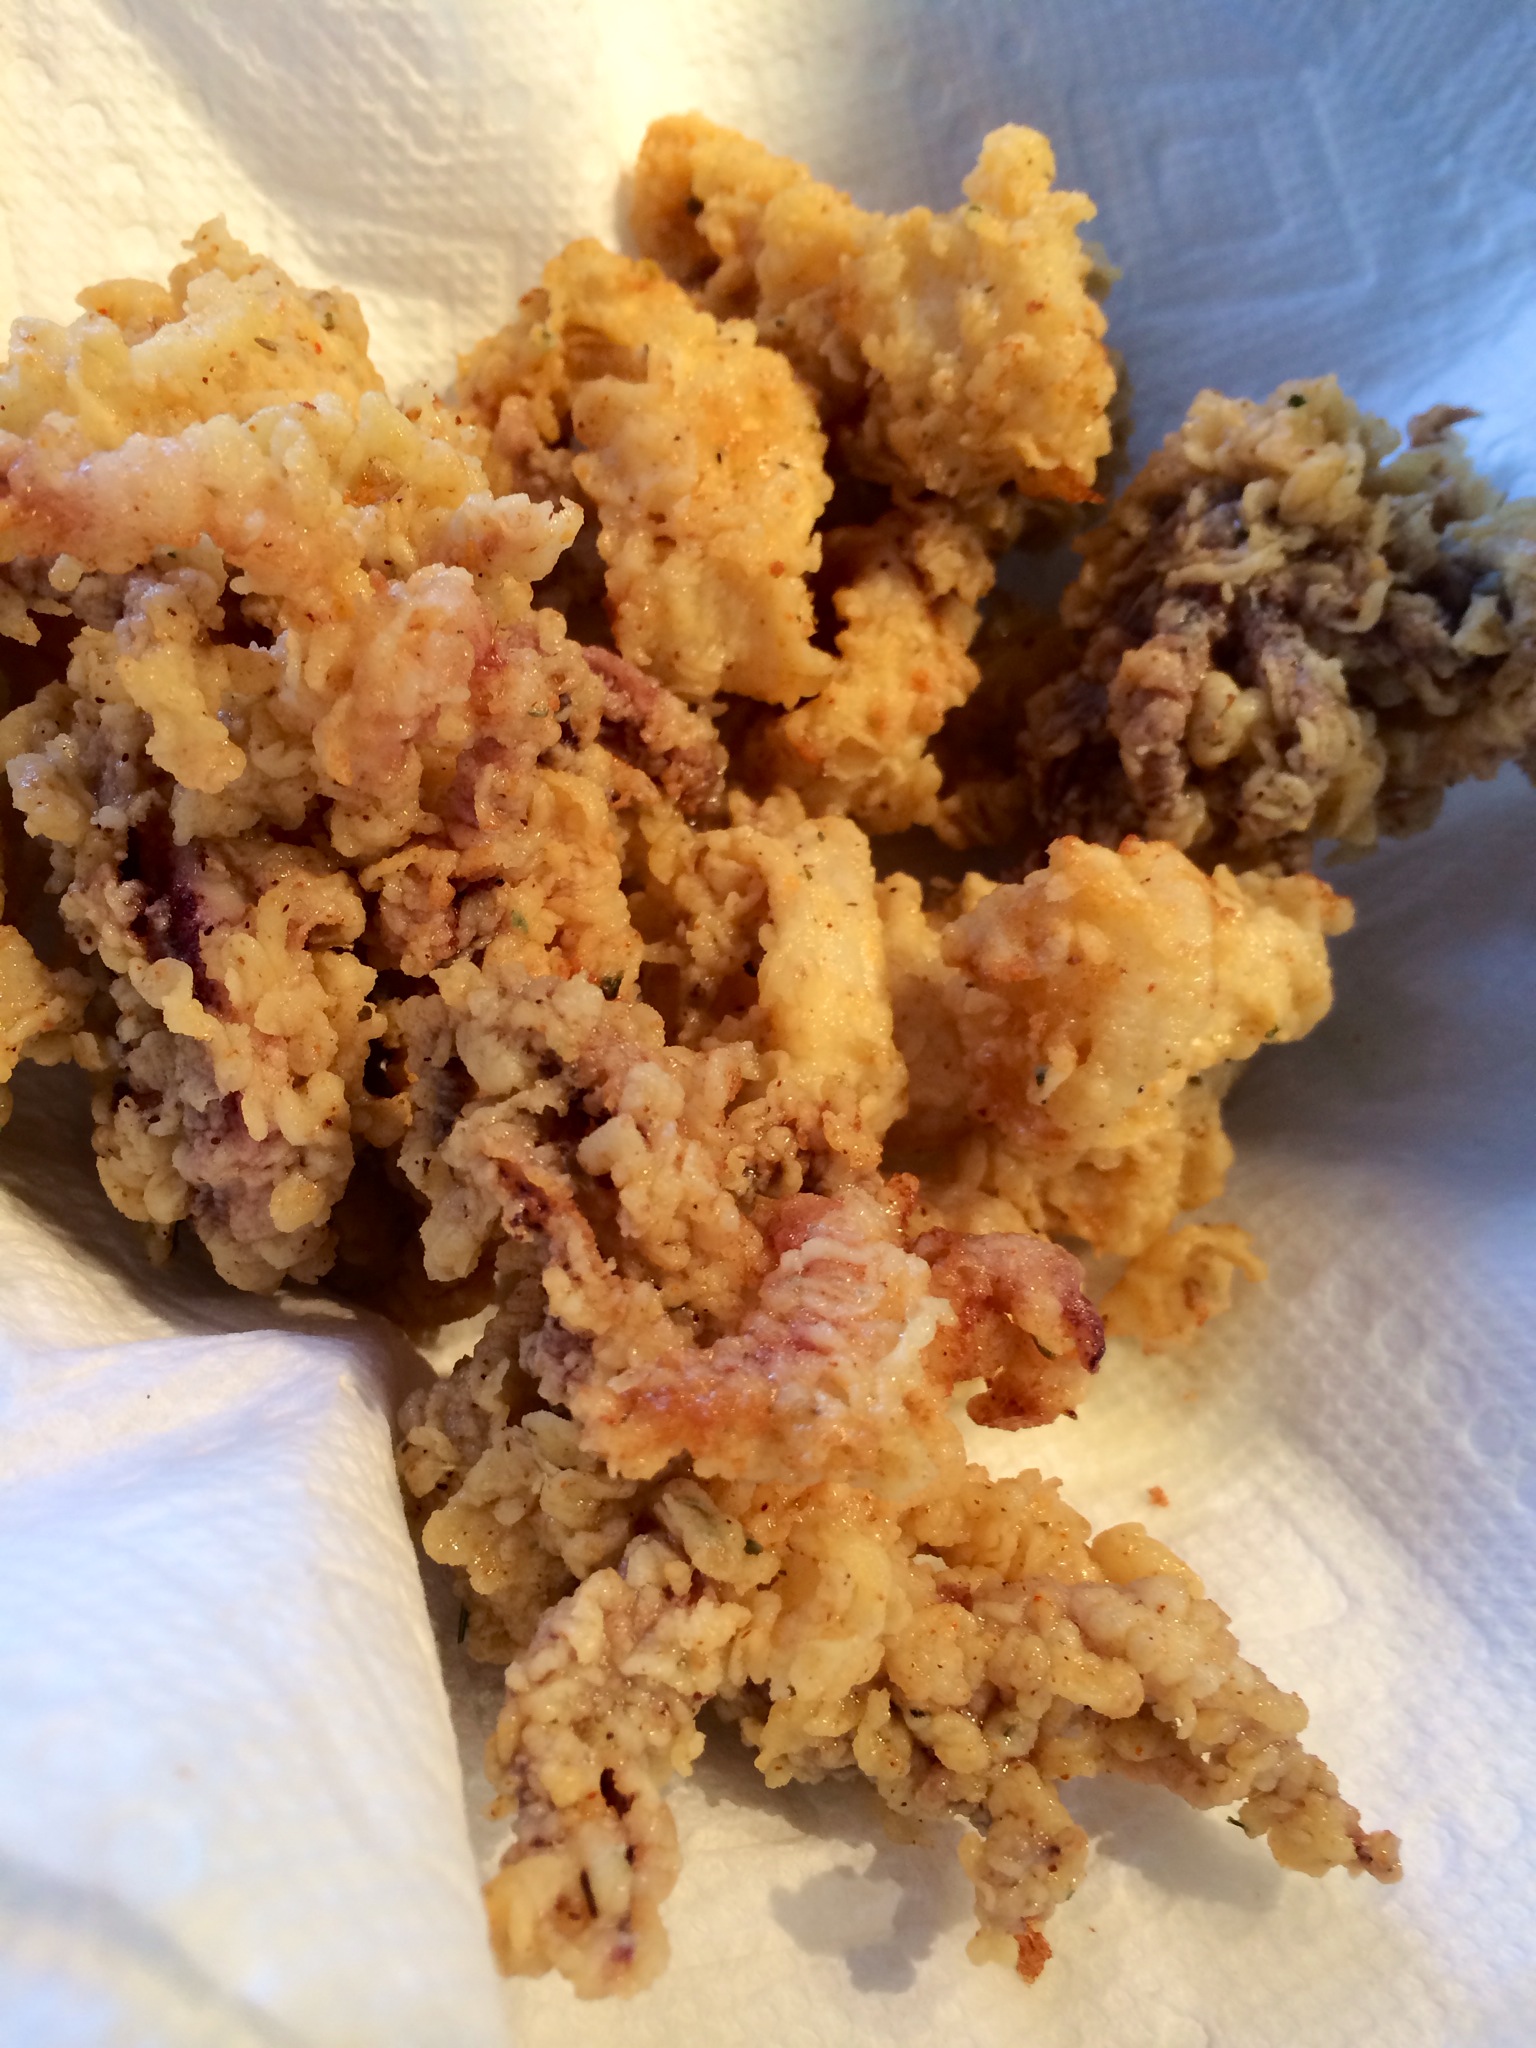
calamari

Ingredients:

1 lb. wild caught cleaned squid (thaw if frozen)

2 cups flour (I use 00 flour, but all purpose is OK, too)

2 teaspoons dried oregano

1 1/2 teaspoons paprika

1 teaspoon dried parsley

1/2 teaspoon granulated garlic

1 1/2 teaspoons salt

1/2 teaspoon black pepper

1 cup milk

1 large egg

oil, for frying ( I use non-GMO canola oil or peanut oil)

Thaw the squid and slice into bite-sized rings. In a bowl, whisk the milk and the egg together. Toss in all the squid pieces into the bowl to coat. Place the bowl in the fridge for at least 15 minutes.

In another bowl, combine flour, oregano, paprika, parsley, garlic, salt and pepper. Set aside.

Fill a large pan halfway with oil…or use a deep fryer if you have one. Preheat the oil to 350 degrees.

Working in small batches, remove the squid from the milk and egg mixture, let some of it drip off, then place the squid in the flour mixture and toss to coat. Shake off any excess flour and place immediately into the hot oil. Fry until golden brown, about 4 or 5 minutes. Serve immediately with tartare sauce, tomato sauce, hot peppers, whatever you like.

Commentary on oil: I cook almost exclusively with olive oil. But for hot frying like this recipe requires, I go with non-GMO canola oil…or peanut oil if that’s not available. Despite what you read, most oils that are hailed as “healthy:” regular canola, corn, soybean, sunflower, safflower…are bad for you. But if you fry your food at the proper temperature using good clean oil, very little oil will stay on your food.

I’ve made some changes to my bacon blog of over a year ago, taking many more steps toward true bacon greatness. Scroll down for my updates…

There are few foods as magical as bacon. Add bacon to just about any dish you’re preparing, and it elevates it to incredible new heights of flavor. The BLT is possibly the greatest sandwich ever invented: just a few simple, fresh ingredients, when placed together, transforming into one of the most amazing treats on planet Earth.

And it all depends on the bacon.

For many years, I’ve bought my bacon on-line from Burger’s Smokehouse, a family run business in Missouri that not only sells some great bacon (get the thick-sliced country bacon—my favorite), but also smoked turkeys, ham and more. The prices are excellent and they include shipping.

But it was time to take the next step: I had to make my own bacon!

Bacon comes from the pork belly. So I bought a few slabs of insanely good pork from my friends at Fire Fly Farms in Stonington, CT (www.fireflyfarmsllc.com), and followed the simple curing techniques outlined in a great book about making all kinds of prepared meats (sausages, salamis, and of course, bacon): “Charcuterie,” by Michael Ruhlman and Brian Polcyn.

To cure bacon, all you really need is some salt and some sugar, and what they in the curing biz call “pink salt,” which is not to be confused with salt that happens to be pink, like Himalayan salt you would find in a spice catalog. Pink salt is bright pink—to let you know that this is special salt that should only be used in small quantities for curing. And the reason for that is because it has nitrites. Nitrites delay the spoilage of the meat, and help keep the flavors of spices and smoke. That’s good. But nitrites can break down into nitrosamines, which have been known to cause cancer in lab animals. But let’s face it: you would need to eat a ton of cured meat to really worry about this.

To make the basic dry cure:

1/2 lb. kosher salt

4 oz sugar

1 ounce (5 teaspoons) pink salt

Combine these ingredients well. You won’t need all of it unless you’ve got a lot of pork belly. An important note: kosher salts do not all weigh the same, so that’s why I go by the weight and not a cup measurement.

Once you rub the pork belly with the basic dry cure, place it in a Ziploc bag, squeeze the air out of it, and seal it well. Place in the fridge for about a week, flipping it over a few times to let gravity do its work. You’ll see that the salt will draw moisture out of the meat and form a brine. This brine will continue to cure your pork belly, so leave it in there.
Once the pork belly has been cured, wash the brine off the meat, pat dry with paper towels. Now it’s time to cook. You can simply cook the pork belly at 200 degrees for about 2 hours, until the internal temperature reaches 160 degrees, or do what I did: place the pork belly in a digital smoker, cooking it at 250 degrees for 1 hour, then adding hickory chips and smoking it at 250 degrees for another hour.

That’s it. You have achieved bacon!

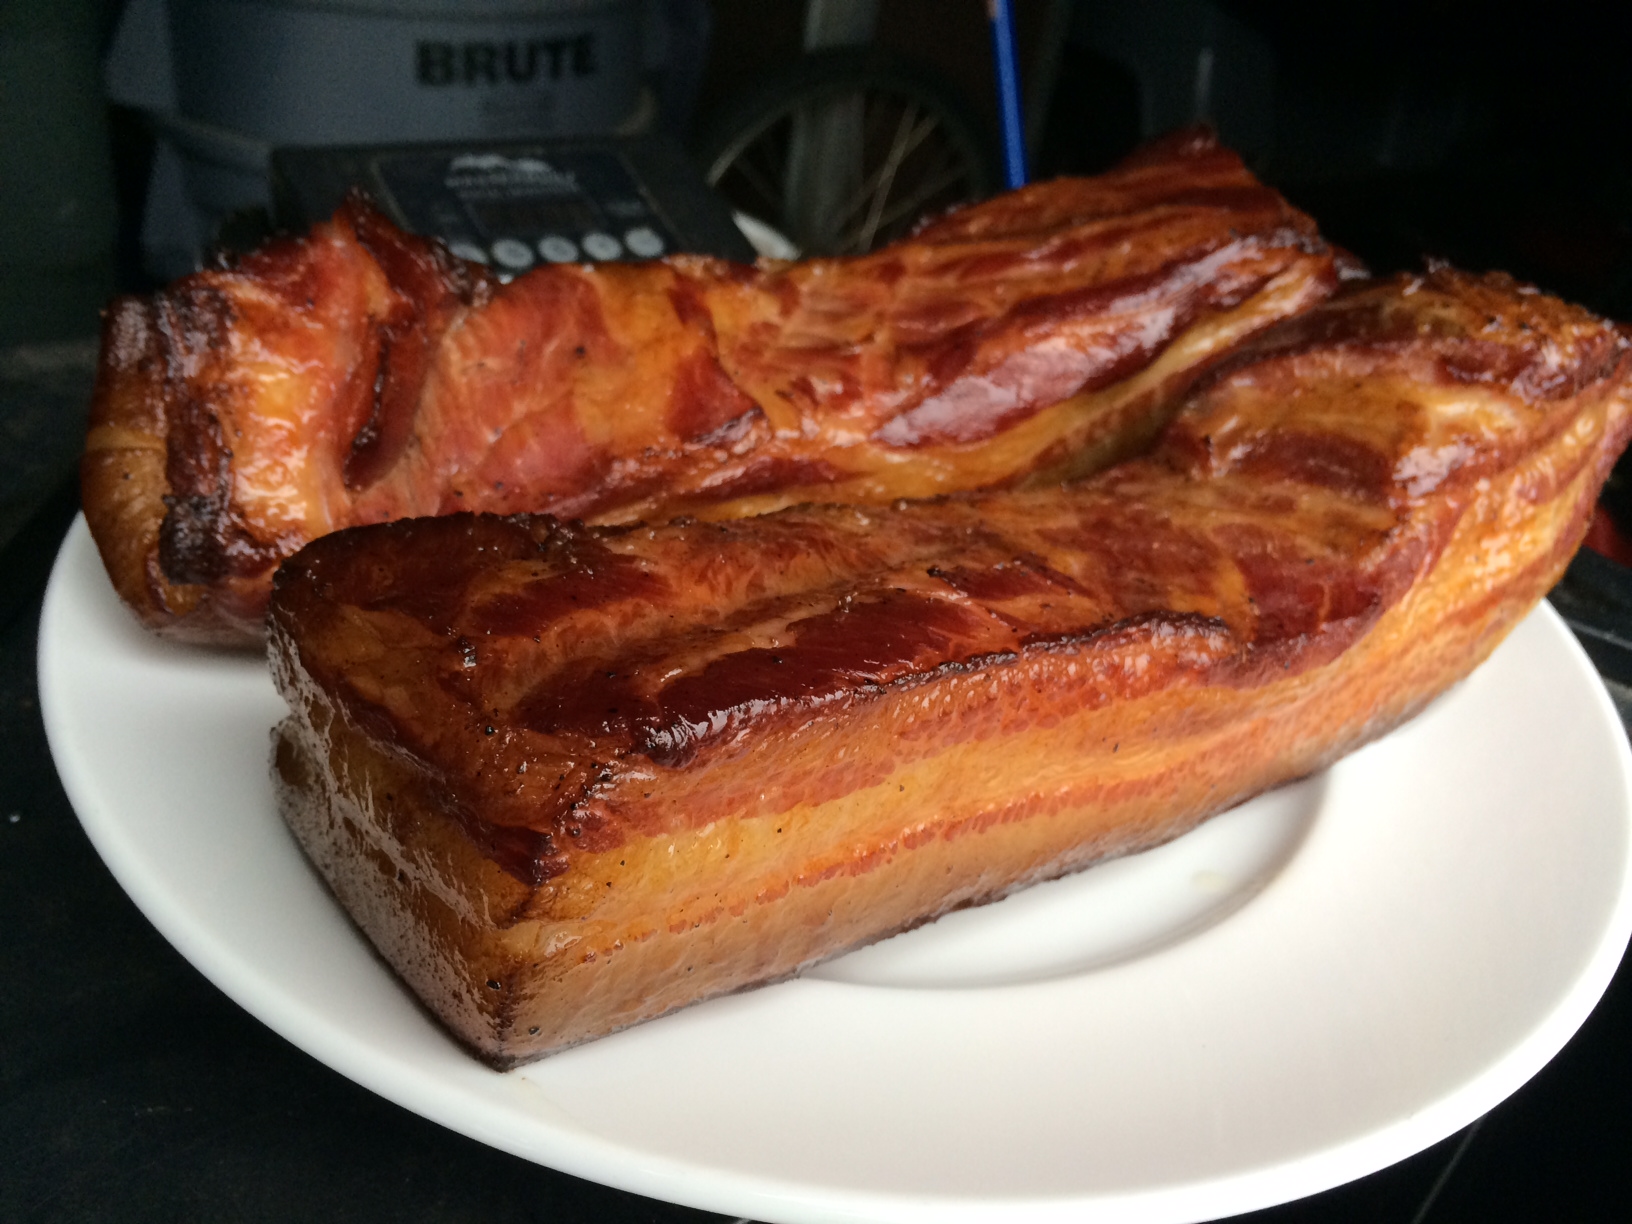
Bacon, straight out of the smoker.

Bacon, straight out of the smoker.

Let me tell you…that first slice you cut off that bacon and toss in a pan to lightly fry for a few moments will be the best bite of bacon you have ever had in your life!
The reward is so worth the effort. If you don’t want to bother going online or if you don’t have a local farm to buy your pork, simply go to your favorite butcher and ask for pork belly. It’s usually available. And if you’re making one slab of bacon, why not make it three or four? It freezes well. And…you will eat it. You know you will!

Sliced, and ready for frying.

Sliced, and ready for frying.

Since I posted the above information, I’ve had the opportunity to tweak my bacon curing recipe. The result was a more balanced, less salty bacon with tons of flavor…

Ingredients:

1/4 cup of the basic dry rub (recipe above)

1/2 cup light brown sugar

1/2 teaspoon ground black pepper

Combine these ingredients and rub on all sides of the pork belly. Place in Ziploc bags and squeeze all the air out of them. Place in a container in the fridge and turn them over every day to let gravity do its work. A brine will form inside the bag…this is good. It will cure the pork belly. After about a week, remove the pork bellies and rinse them with cold water. Pat them dry with paper towels and then proceed to the smoker.

Bellies in the smoker

Bellies in the smoker

I use a digital smoker, so I set the temp for 250 degrees and cook the pork bellies at this temperature for one hour. I then add hickory chips and smoke the bellies at 25o degrees for one more hour.

Smoked bacon

Smoked bacon

At this point, you have achieved bacon! While the bellies are still warm, you can easily slice off the pork skin off the belly. I discard it. Slice the bacon into whatever thickness you like, and fry some up immediately! Once the rest of the bacon has cooled to room temp, cut them into chunks, wrap individually, and freeze until ready to use.

Frying in the pan!

Frying in the pan!

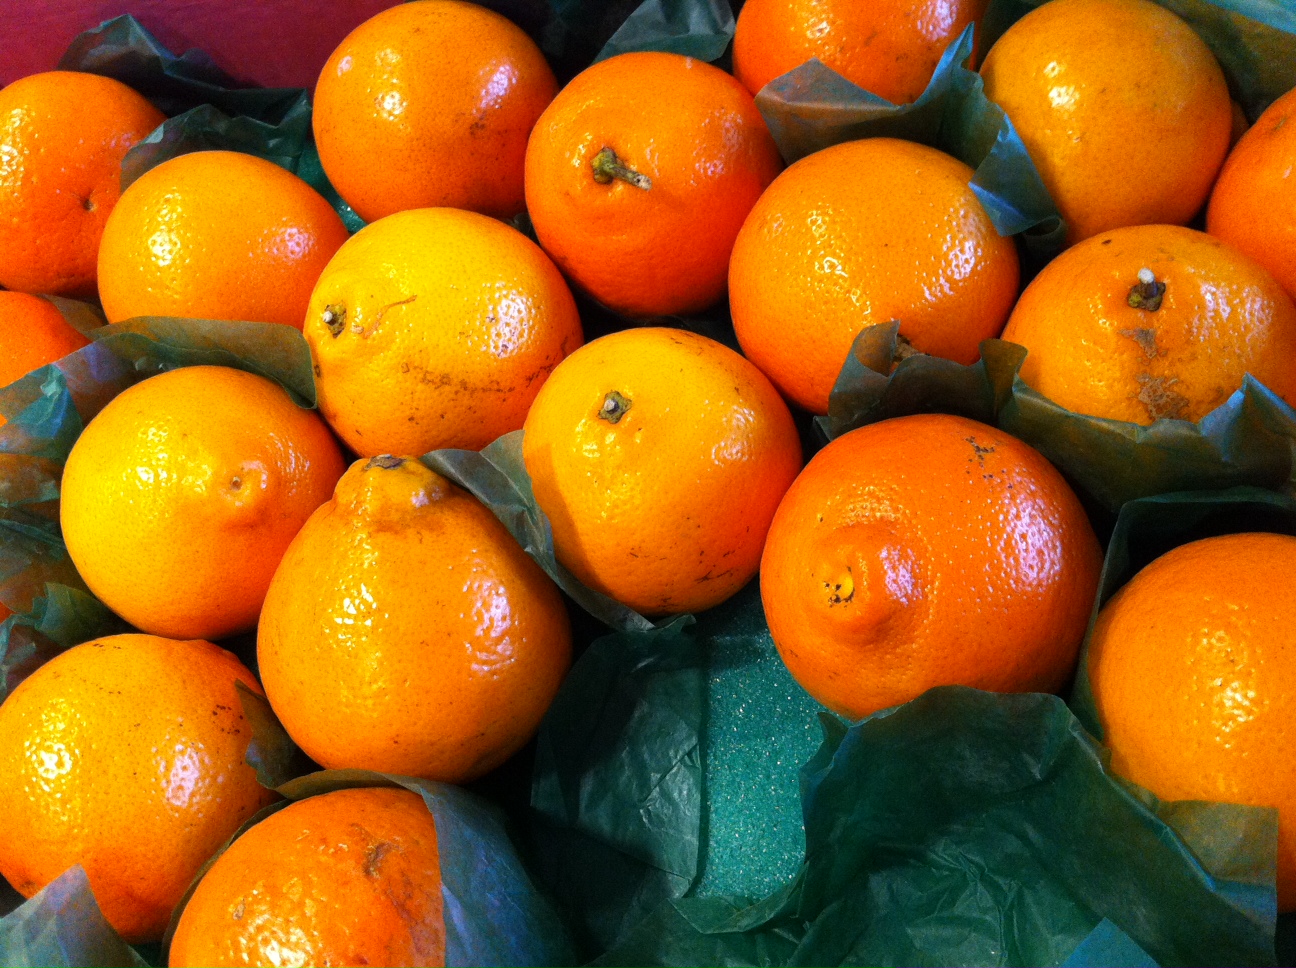
My wife’s aunt in Florida sends us an awesome gift every year. It’s a box of Cushman’s HoneyBells. They look like fiery red bell-shaped oranges, and they are the sweetest and juiciest fruit you will ever have! But they’re not really oranges at all.
honey bells
HoneyBells are a unique natural hybrid of Dancy Tangerine and Duncan Grapefruit. The plants are grafted to a sour orange root-stock, and when the tree reaches maturity, it looks just like a grapefruit tree…but with oranges growing on it.
HoneyBells are available for a very short time every winter…and that time is NOW. So if you’re at all interested, check out http://www.honeybell.com/. Cushman’s was bought out by the fruit giant Harry & David some years ago, but the excellent quality of the product and their fine service has not changed.
I usually make my signature margarita, the Algarita, with pineapple juice. But when I get those HoneyBells in the mail, my recipe takes on a new twist:
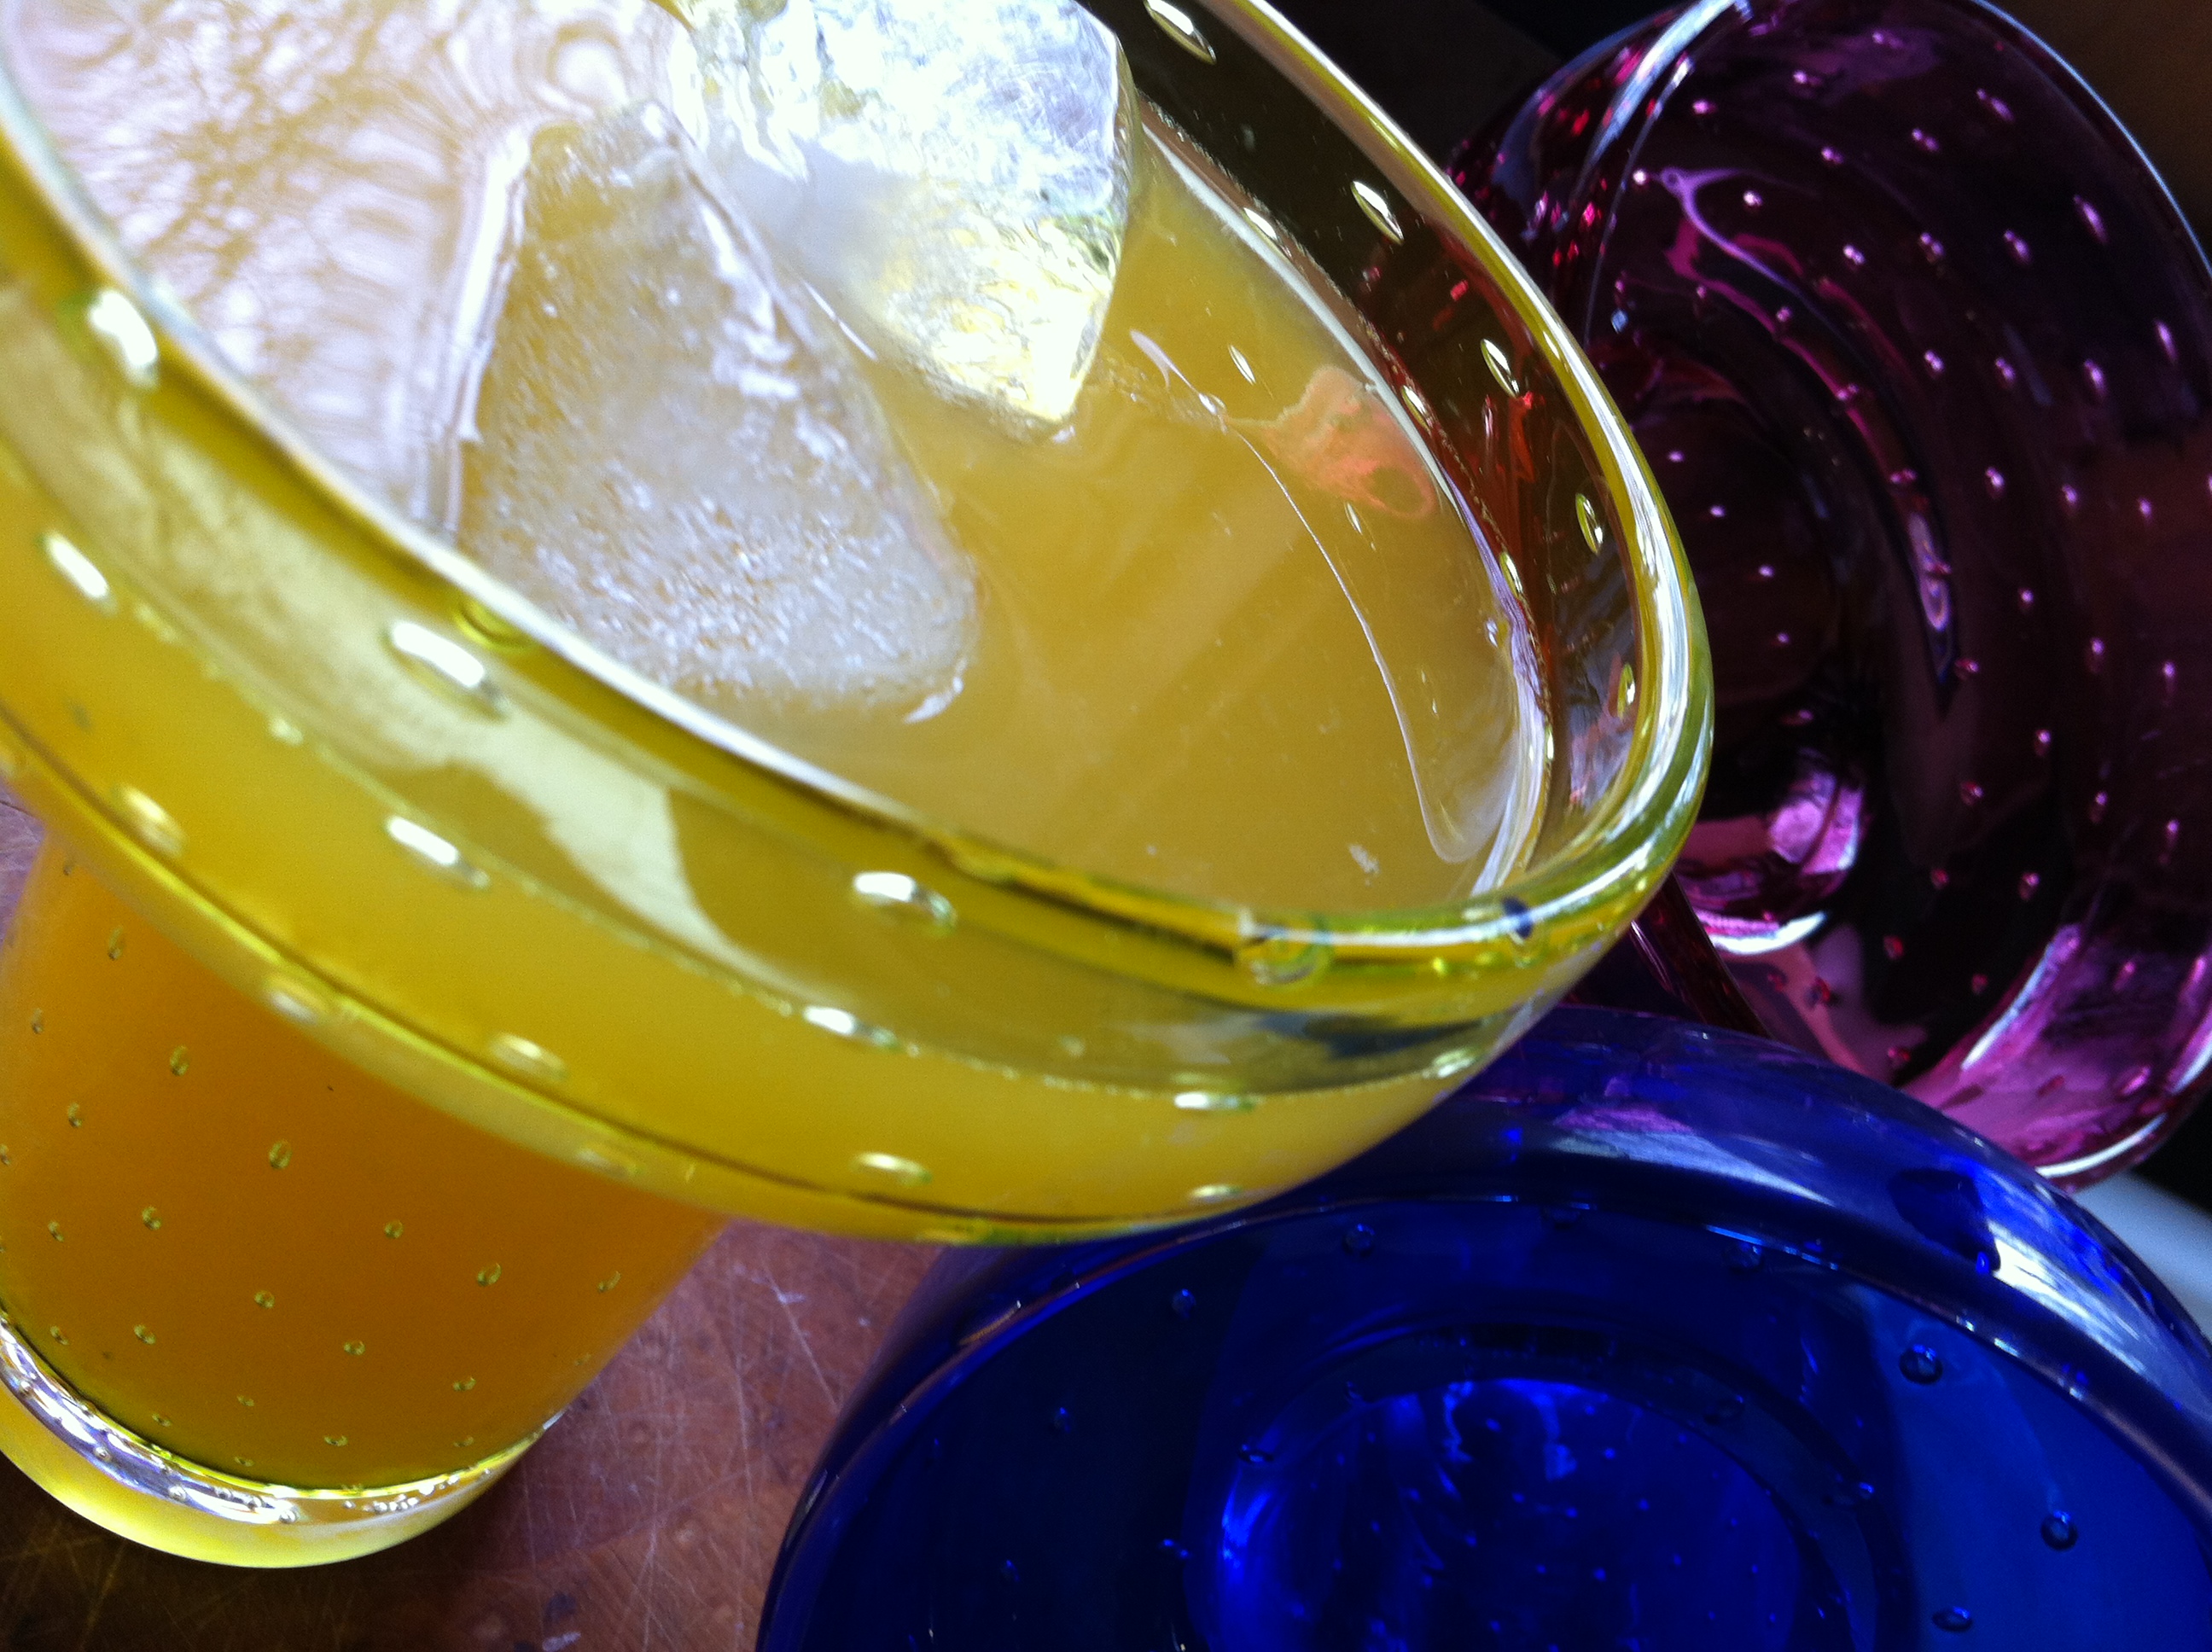
algarita 1
HONEYBELL ALGARITAS
2 oz Patron silver tequila
1/2 oz Cointreau orange liqueur
4 oz fresh squeezed HoneyBell juice
1/2 oz fresh squeezed lime juice
Fill a tall glass with ice and add all the ingredients. Stir vigorously. Pour into a large margarita glass. Garnish with lime wedge. Salt optional.
photo3.jpg
The HoneyBell clock is ticking…get ‘em soon or you’ll need to wait a year!
Any other time of the year, substitute pineapple juice, orange juice or a combination of both for the Honey Bells.

One of the most incredible dishes I’ve had on the beautiful island of Santorini, Greece, is lobster with pasta. It’s one of those dishes that takes time to prepare, because the pasta lobster sauce they make is a labor of love…time consuming and so spectacular.

To try to replicate that lobster sauce we had in Santorini, I started with a kick-ass lobster stock. It’s simple but flavorful:

Stock ingredients:

clean, empty claws, tails and bodies from two 1-1/2 lb. lobsters

12 cups water

1/2 onion

3 celery stalks

1 carrot

Place all ingredients in a large pot and set on high heat. Crush lobster shells with potato masher. Cook until it is reduced by half.

Strain the stock, discarding the lobster shells and veggies. Bring the stock back to the heat and reduce until all you have left is 1 cup of intense stock.

Cooking the stock

Cooking the stock

Now that I have the stock, I can make the sauce!

Sauce ingredients:

1/2 onion, finely chopped

1 garlic clove, finely chopped

pinch of Italian red pepper flakes

teaspoon parsley

extra virgin olive oil

1/2 cup lobster stock

1/4 cup San Marzano tomato sauce (see below)

splash of white wine (I use Alice white Chardonnay)

salt and pepper

1/2 lb. cooked pasta

Add some olive oil to a pan and saute the onions until translucent. Season with salt and pepper. Add the garlic and cook for 10 seconds. Add the red pepper flakes and parsley.

Add 1/4 cup of the lobster stock and let it cook, reducing by half. Add the other 1/4 cup of lobster stock and the tomato sauce. Let it cook for a couple of minutes and add the white wine. Cook for a few minutes more.

Cook pasta and drain even before it reaches the al dente stage. Place the pasta in the pan with the sauce, heating and coating thoroughly. Serve immediately.

For the San Marzano tomato sauce: I take a can of San Marzano tomatoes and place it in a food processor or Vita-Mix and blend until I get sauce. Pour into a pan and reduce over medium heat by half, until sauce has thickened.

It’s so easy to make your own mustard. And really good mustard. Mustard that hasn’t been sitting on the store shelf for a year. Mustard with real flavor.

Once the mustard is made, you’re supposed to wait a few weeks before using, letting its heat mellow a bit. But I enjoy it right from the start. Feel the burn!


mustard

The great thing about this recipe is that you make it with your favorite beer, so use what you drink and you’ll have a mustard like no one else. I used Samuel Adams Boston Ale for this recipe.


Ingredients:

1/4 cup yellow mustard seeds

1/4 cup brown mustard seeds

3/4 cup Sam Adams Boston Ale

1/4 cup apple cider vinegar

2 Tbsp. honey

2 Tbsp. brown sugar, firmly packed

2 garlic cloves, smashed

1 bay leaf

2 tsp. fleur de sel

1/8 tsp. freshly ground pepper


Put the yellow and brown mustard seeds in a bowl and pour in 1/2 cup of the beer. Push the mustard seeds down to submerge them in the beer. (I lay a sheet of plastic wrap down on top to keep them submerged.) Cover and refrigerate for 24 hours.

Combine the remaining 1/4 cup of beer, the vinegar, honey, brown sugar, garlic, bay leaf salt and pepper in a small saucepan. Bring the mixture to a boil over medium-high heat, stirring to dissolve the honey and the sugar. Boil for 1 minute, the immediately remove the pan from the heat and let it cool to room temperature.

Toss the garlic and the bay leaf in the trash and pour the liquid into a blender. Add 3/4’s of the plumped mustard seeds and blend to break the seeds. Add the remaining 1/4 of the mustard seeds and pulse just once to mix. You want the mustard thick, with some whole seeds remaining.

Put the mustard in an airtight container in the fridge for at least 3 days, and up to a week, depending on how mellow you want it and how much waiting you can tolerate! After about 3 weeks, the mustard will be at its peak…but it will keep in the fridge for several months. (I can’t imagine it will last that long.)

I can’t believe it took this long to write about something that is near and dear to my heart…and liver.

I’ve been making a Lithuanian honey liqueur called Krupnikas for over 30 years. (And no, I won’t be posting my secret recipe here.) It’s a honey-based liqueur that is popular in eastern Europe, especially in countries like Lithuania (where my parents were born) and Poland. Though most of the Krupnikas that I’ve tasted is similar, no two recipes are exactly alike.

krupnikas

If you Google “Krupnikas,” you’ll find many different recipes for the stuff…some pretty good, some incredibly awful…and none as good as mine! But still…you can make it at home. I make it with grain alcohol, but if that’s not available in your state, you’ll have to settle for vodka.

My Krupnikas making story started with my uncle, who would make batches of the stuff in his kitchen. Because I am the godfather of my cousin, Victor (his son), starting at the then-drinking age of 18, I got a bottle from my uncle every Christmas…and by New Year’s that bottle would be gone. It wasn’t long before I got very tired of waiting 51 weeks for another bottle and I asked my uncle if he would share his recipe with me. He never did that, exactly, but he did let me sit in on a brewing session and take notes.

I took my notes home and tried to decipher what I wrote. Since there was no such thing as the internet back then, I drove all over New York in search of some of the more exotic spices used in making Krupnikas. I became a regular in several Asian and Indian stores, where they looked at me somewhat suspiciously as I brought my spices to the counter for purchase.

Over the decades, through trial and error, I tweaked and even drastically changed my uncle’s original recipe to the one that I proudly call my own today. You can’t buy it in a store (obviously), but if you have tons of money and want to go into business with me, I’m sure we can work something out! Or become my best friend and you’ll get a bottle every Christmas…and then you’ll be the one waiting 51 weeks for another!

krup glasses

Versions of Krupnikas are available in liquor stores: Old Krupnik is a Polish liqueur, and the German brand Barenjager is another. And brands like Dewar’s and Jack Daniels are adding honey to their spirits as well.

Though quite different from my own recipe, there is one authentic Lithuanian style Krupnikas made in the United States. Based out of Durham, North Carolina, the Brothers Vilgalys Spirits Company (www.brothersvilgalys.com) has a pepperier version that uses local North Carolina wildflower honey. President of the company, Rim Vilgalys, the son of my good childhood friend from New York, has done what I never got around to do: make this fabulous elixir available to the public. You’ll find it at ABC stores throughout the state of North Carolina. On line, you’ll find it at Federal Spirits, based in Washington, DC…a very interesting website full of regional spirits from around the USA and Canada. www.federalspirits.com

Sveiks! (Cheers!)

Chicken parmigiana, much like pizza, is a bit more difficult to make than you might think. Sure, there’s plenty of crappy chicken parm out there, made with processed frozen chicken cutlets, bad sauce and cheap cheese. But to make a really fantastic, mind-blowing chicken parm, that’s a real skill…one that I’ve honed over my many bachelor years. So when it was time to cook something that would impress the hell out of the woman who is now my wife, I have no doubt that is was my chicken parm that won her over.

The key to this recipe is simple: don’t skimp on the quality ingredients. And my recipe makes a lot. Trust me: you will want leftovers.

Gooey, cheesy, orgasmic.

Gooey, cheesy, orgasmic.

Ingredients:

6 Chicken breasts, the best quality you can get your hands on

Alz Italian bread crumb seasoning (see recipe below)

3 eggs

olive oil for frying

Alz “Don’t Call It Gravy” tomato sauce (see recipe below)

Fresh mozzarella cheese

oregano

Thaw the chicken breasts. Lay them flat on a cutting board, and you’ll see where the chicken tender is on the side of the breast. Cut the tender off and set aside, leaving the breast which is thinner at one end and thicker at the other. Slice the breast in half lengthwise at the thicker end, keeping the knife level, so that you wind up with 2 pieces of breast meat that are the same thickness, but one will be a longer piece (the bottom) and one about half its size (the top part you sliced off.) Do this with all the breasts.

By slicing the breasts lengthwise into evenly thick pieces, there is no need to pound the hell out of the chicken breasts.

Pour the olive oil into a large frying pan. Next to the pan, set up two bowls: one with Alz Italian bread crumb mix and in the other: crack the eggs and whisk them.

Now it’s your standard breading procedure: chicken meat in the egg, then in the breadcrumbs, coating well. Shake off the excess and place carefully in the pan of olive oil when the oil comes to temperature for frying.

Fry the chicken in the oil until golden brown. You want it cooked all the way through, but not overcooked. Place fried chicken pieces on paper towels to absorb excess oil. Do this with all the chicken. The fried chicken at this point is delicious all by itself: chop and place in a salad, or make a chicken sandwich. My daughter gets these instead of store-bought chicken tenders, and she loves them.

Cover a baking sheet with aluminum foil. Ladle out enough  sauce to create a thin layer of sauce on the bottom of the sheet. Place fried chicken breasts on top of the sauce. Cover the breasts with more sauce, then place pieces of sliced fresh mozzarella on top. Sprinkle top with a little oregano.

Place the baking sheet in a pre-heated 350 degree oven and bake until the cheese has melted and just starts to brown. Serve with pasta.


ALZ “DON’T CALL IT GRAVY” TOMATO SAUCE

It’s not hard to make a good tomato sauce. But it takes a little work to make an amazing tomato sauce. Honed from a recipe handed down by a friend-of-a-friend’s Italian grandma, it is one very important part in two of my favorite Italian comfort food recipes: my (meat)balls…and my kick-ass chicken parmigiana recipe.

Ingredients:

1 medium onion, finely chopped

2 cloves garlic, finely chopped

1/2 cup extra virgin olive oil

10 cups ground and peeled tomatoes…or 3 cans (28 oz) tomatoes (real San Marzanos preferred)

2 teaspoons each: dried oregano, basil and parsley

3/4 teaspoon each anise seed and fennel seed

1 1/2 teaspoons salt

1/2 teaspoon black pepper

2 bay leaves

1 small can (6 oz) tomato paste

1 teaspoon sugar, optional

Heat olive oil in a large pot and add onions. Cook until onions are translucent, then add garlic. Stir for 10 seconds.

Add tomatoes and cook until orange foam disappears, stirring frequently.

Add oregano, basil, parsley, anise seed, fennel seed, salt, pepper, and bay leaves. Stir to combine. Add tomato paste, stirring well. Let sauce just come to a boil (which helps the paste thicken the sauce), then reduce to a simmer, and cook uncovered for at least an hour, stirring constantly, until sauce reaches desired consistency.


ALZ ITALIAN BREAD CRUMB SEASONING

If I can’t make my own breadcrumbs from old bread, I’m OK with buying store-bought breadcrumbs. But I always buy them plain, and then season them myself. And for this recipe, I don’t use Panko.

Ingredients:

1 cup plain breadcrumbs

2 teaspoons dried parsley

1 teaspoon dried oregano

1 teaspoon dried basil

1 teaspoon salt

1/4 teaspoon black pepper

1/2 teaspoon granulated garlic

1/2 teaspoon onion powder

Combine all ingredients well.

Why does bacon taste “off” when it’s infused, mixed with chocolate, or even on a fast food burger? And Bakon, the bacon infused vodka you can buy at your local liquor store, is another example of “it’s better when you do it yourself.”

To make bacon infused vodka, I use the bacon I love to eat: my own homemade stuff. But your favorite store-bought bacon will work just as well.

bacon vodka

Some bacon infused vodka recipes have you cook the bacon and soak the strips in vodka for a week or so. But I like this idea better:

Cook your favorite bacon in a pan. Eat the bacon. Set the fat aside. For a 750 ml bottle of vodka, use 2 tablespoons bacon fat. Place both in  a mason jar, shake well, and let it sit at room temperature for about 6 hours, shaking occasionally. After 6 hours, place the mason jar in the freezer. The alcohol will not freeze, but the fat will. After 30 minutes, strain through paper coffee filters and you’ve got bacon infused vodka!

Cheers!

2013 IN REVIEW

Posted: December 31, 2013 in Uncategorized

My thanks to all of you for checking my blog out in 2013. Party your ass off, but have a safe and happy new year! Please tell your friends to follow this blog and don’t forget to “like” my Facebook page: https://www.facebook.com/Livethelivecom?ref=hl

See you in 2014! ~~AL

The WordPress.com stats helper monkeys prepared a 2013 annual report for this blog.

Here’s an excerpt:

The concert hall at the Sydney Opera House holds 2,700 people. This blog was viewed about 9,400 times in 2013. If it were a concert at Sydney Opera House, it would take about 3 sold-out performances for that many people to see it.

Click here to see the complete report.

I know that winter has only started. But I’m cold, dammit, and I’m thinking about the Caribbean!

One of the tastiest rum drinks you can make, and one that certainly brings you back to the Caribbean—or at least makes you feel like you’ve been there—is the legendary Painkiller. It was invented on the tiny island of Jost Van Dyke in the British Virgin Islands, at the famous Soggy Dollar Bar. Located on White Bay, a stretch of the whitest most beautiful sand in the Caribbean, surrounded by beautiful turquoise waters, there is no dock. You have to anchor your boat offshore and swim…hence the name: the Soggy Dollar.

SOGGY1

Daphne Henderson was the owner of the Soggy Dollar years ago, and she is credited for inventing the Painkiller, which used Pusser’s rum, a British rum that is readily available here in the United States. Charles Tobias, a businessman that received permission from the British Royal Navy to commercialize Pusser’s rum in 1980, tasted the Painkiller and realized the potential of this amazing drink. He took some Painkillers home to the island of Tortola, where he experimented in recreating that drink, coming up with what he thought was something that was as good as—if not better than—the original. He called it the Pusser’s Painkiller.

Tobias never found out what Daphne Henderson’s original recipe was, but when he brought his own Pusser’s Painkillers back to the Soggy Dollar, and had a tasting battle between the two recipes, his recipe apparently won 10 out of 10 times. With 4 Pusser’s bars and restaurants in the Caribbean and 2 more in the states, Tobias quickly made the Pusser’s Painkiller the signature drink of these now-famous establishments…and perhaps the most popular drink among the sailing community in the US, Caribbean and West Indies.

The drink itself is simple…

PUSSER’S PAINKILLER

4 parts pineapple juice

1 part cream of coconut

1 part orange juice

Combine these 3 ingredients, with lots of fresh grated nutmeg in a glass with ice. How much Pusser’s rum you use depends on how hammered you want to get! A Pusser’s #2 uses 2 parts rum…a Pusser’s #3 uses 3 parts rum…and a Pusser’s #4 uses 4 parts rum!

I’ve had several Pusser’s #4’s back in the day when there was a Pusser’s bar on the island of St John in the USVI many years ago. I’ve also sampled them in the BVI at the 2 Pusser’s locations on Tortola.  But I still prefer going back to Jost Van Dyke and knocking back a few at the place where the Painkiller was born, the greatest beach bar on planet Earth: The Soggy Dollar Bar.

I don’t know when I’ll get a chance to go back. But my bathing suit is already packed.

SOGGY2

Thanks to my buddy, Dr Chezwick, for the photos. No children were harmed during this catamaran trip.