Posts Tagged ‘recipe’

And May is National Hamburger Month. How can you go wrong? First, a favorite burger recipe, then one for brisket.

The Inside-Out Burger: If I’m making bacon cheeseburgers to bring to a barbecue, even if it’s on my back deck, instead of bringing a package of bacon and a package of cheese and a stack of burgers, I put all the ingredients inside the patties themselves. As the burgers cook, the fat from the bacon and the gooey cheese melt and combine with the burger meat to make a really tasty and moist burger.

image

2 lbs. ground beef
1/2 cup sharp cheddar cheese, cut into 1/4″ cubes
1/2 lb. bacon, cooked crisp, cooled and crumbled
garlic salt
avocado oil or pork fat

In a bowl, combine the beef, the cheese and the bacon, mixing well so that all the ingredients are evenly incorporated. Form the beef into 1/4 lb. patties. Refrigerate them until you’re ready to cook to firm them up.

Heat a cast iron skillet and add a drop of oil or pork fat. Place the burgers in the hot skillet to sear and sprinkle with the garlic salt. When browned, flip the burgers and place the skillet in a 350-degree oven to finish cooking.

image


Brisketta: There’s a wonderful Italian roasted meat dish called Porchetta (por-ketta). The classic version consists of a pork belly that is seasoned and then wrapped around a pork loin. The meat is tied, then roasted slowly for hours, basted with wine and the meat juices until the pork is cooked and the outside skin is crackly and crispy. Then it’s sliced like a log and served as a sandwich or a main dish.

I decided to use the same method of cooking for beef brisket, and I called it “Brisketta.”

image

I flipped the brisket fat-side-down on my cutting board and carefully sliced it down the middle horizontally to make two large–even thinner–slabs of meat. The bottom half, with the fatty side of the brisket, would eventually be my outside layer. The top half would be my inside layer.

image

I took the top half and slathered some of my seasonings on it. Then I rolled it tightly into a log. I slathered more of my seasonings onto the bottom half of the brisket, then rolled it around the first log, so that the fattiest side of the brisket would now be on the outside of this large meat log. I tied the meat log up tightly with butchers’ twine and let it rest in my fridge overnight.

image

7 lbs. beef brisket
1 tablespoon fennel seed, toasted and cooled
5–3″ strips of bacon, cooked and cooled
2 tablespoons oregano
2 tablespoons parsley
2 teaspoons basil
2 tablespoons salt
1 teaspoon pepper
2 teaspoons granulated onion
1 teaspoon granulated garlic
Grated zest of 2 lemons
1/2 cup olive oil

Pour the fennel seed in a hot, dry pan on the stove. Toast the seeds until they release their aroma, but don’t let them burn. Set aside to cool.

Crumble the bacon strips and place in the bowl of a food processor. Add the cooled fennel seeds, oregano, parsley, basil, salt, pepper, onion, garlic, and lemon zest.

Run the food processor and slowly pour in the olive oil, until you have a paste much like pesto.

Slice the brisket in half horizontally. Save the piece with the fatty side for last, because this is the piece that will wrap around the others, with the fatty side out. Smear the rub on the first piece of brisket and roll it tightly into a log. Smear the rub on the second piece of brisket and wrap it around the first piece, making sure the fatty side is on the outside.

Once you’ve rolled both pieces into a single meat log, scored the fatty exterior with a knife and rub any leftover seasoning paste onto it. If you have none left, simply season with salt and pepper.

Tie the meat log tightly with butchers’ twine, tucking in all loose ends.

At this point, you can place the meat log in the fridge until ready to cook, remembering to remove it at least an hour before cooking so that it comes back to room temperature.

Pre-heat an oven or smoker at 250 degrees. Place the meat log directly on the grate, with a pan underneath to catch the dripping fat. Place a bowl of water in there as well, to keep the meat moist while it cooks. Cook for 4 1/2 hours, or until the interior temperature reaches 130 degrees. Let it rest an hour before slicing…if you can wait that long!

image


Out on the North Fork of Long Island, there’s a steak restaurant called the Elbow Room. It’s nothing fancy…old school cooking. But they’re famous for their steaks because of a super-secret marinade. Ages ago, I spotted a newspaper article that claimed they found out what that secret marinade was, and they published it. Whether this really is the official Elbow Room marinade or not, I have to say it’s pretty darn tasty and it makes for a delicious steak on the grill.


My biggest concern with the marinade was the salt factor, since it uses soy sauce. But the ribeye I had was almost an inch-and-a-half thick, which meant that it could sit in the marinade for a long time…my ribeye sat in it for 8 hours. If you choose to use a thinner cut of meat, you might need to reduce your marinating time.

The recipe uses a product called Gravy Master, available in most supermarkets. Look for it in the section where you find gravies and instant potatoes.


1 cup soy sauce
1/4 cup Gravy Master
2 large Vidalia onions
2 cloves of garlic
2 teaspoons celery seed
1/2 teaspoon black pepper


Combine the onions and garlic in a large food processor and purée. Add the remaining ingredients and run the processor until it’s smooth and sort of resembles root beer.


Marinate the beef in the marinade overnight, or for as long as possible. The thicker the cut of meat, the longer you can marinate it.

Looks delicious, but it hasn’t been cooked yet! Straight out of the marinade.


Light the grill. I prefer pure hardwood charcoal because that’s where the flavor is. If I’m just cooking one steak, I get my camping grill out. It lights quickly and easily, and it doesn’t waste a whole lotta charcoal.


Always use a charcoal chimney, never lighter fluid…unless you like the taste of petroleum products in your food.
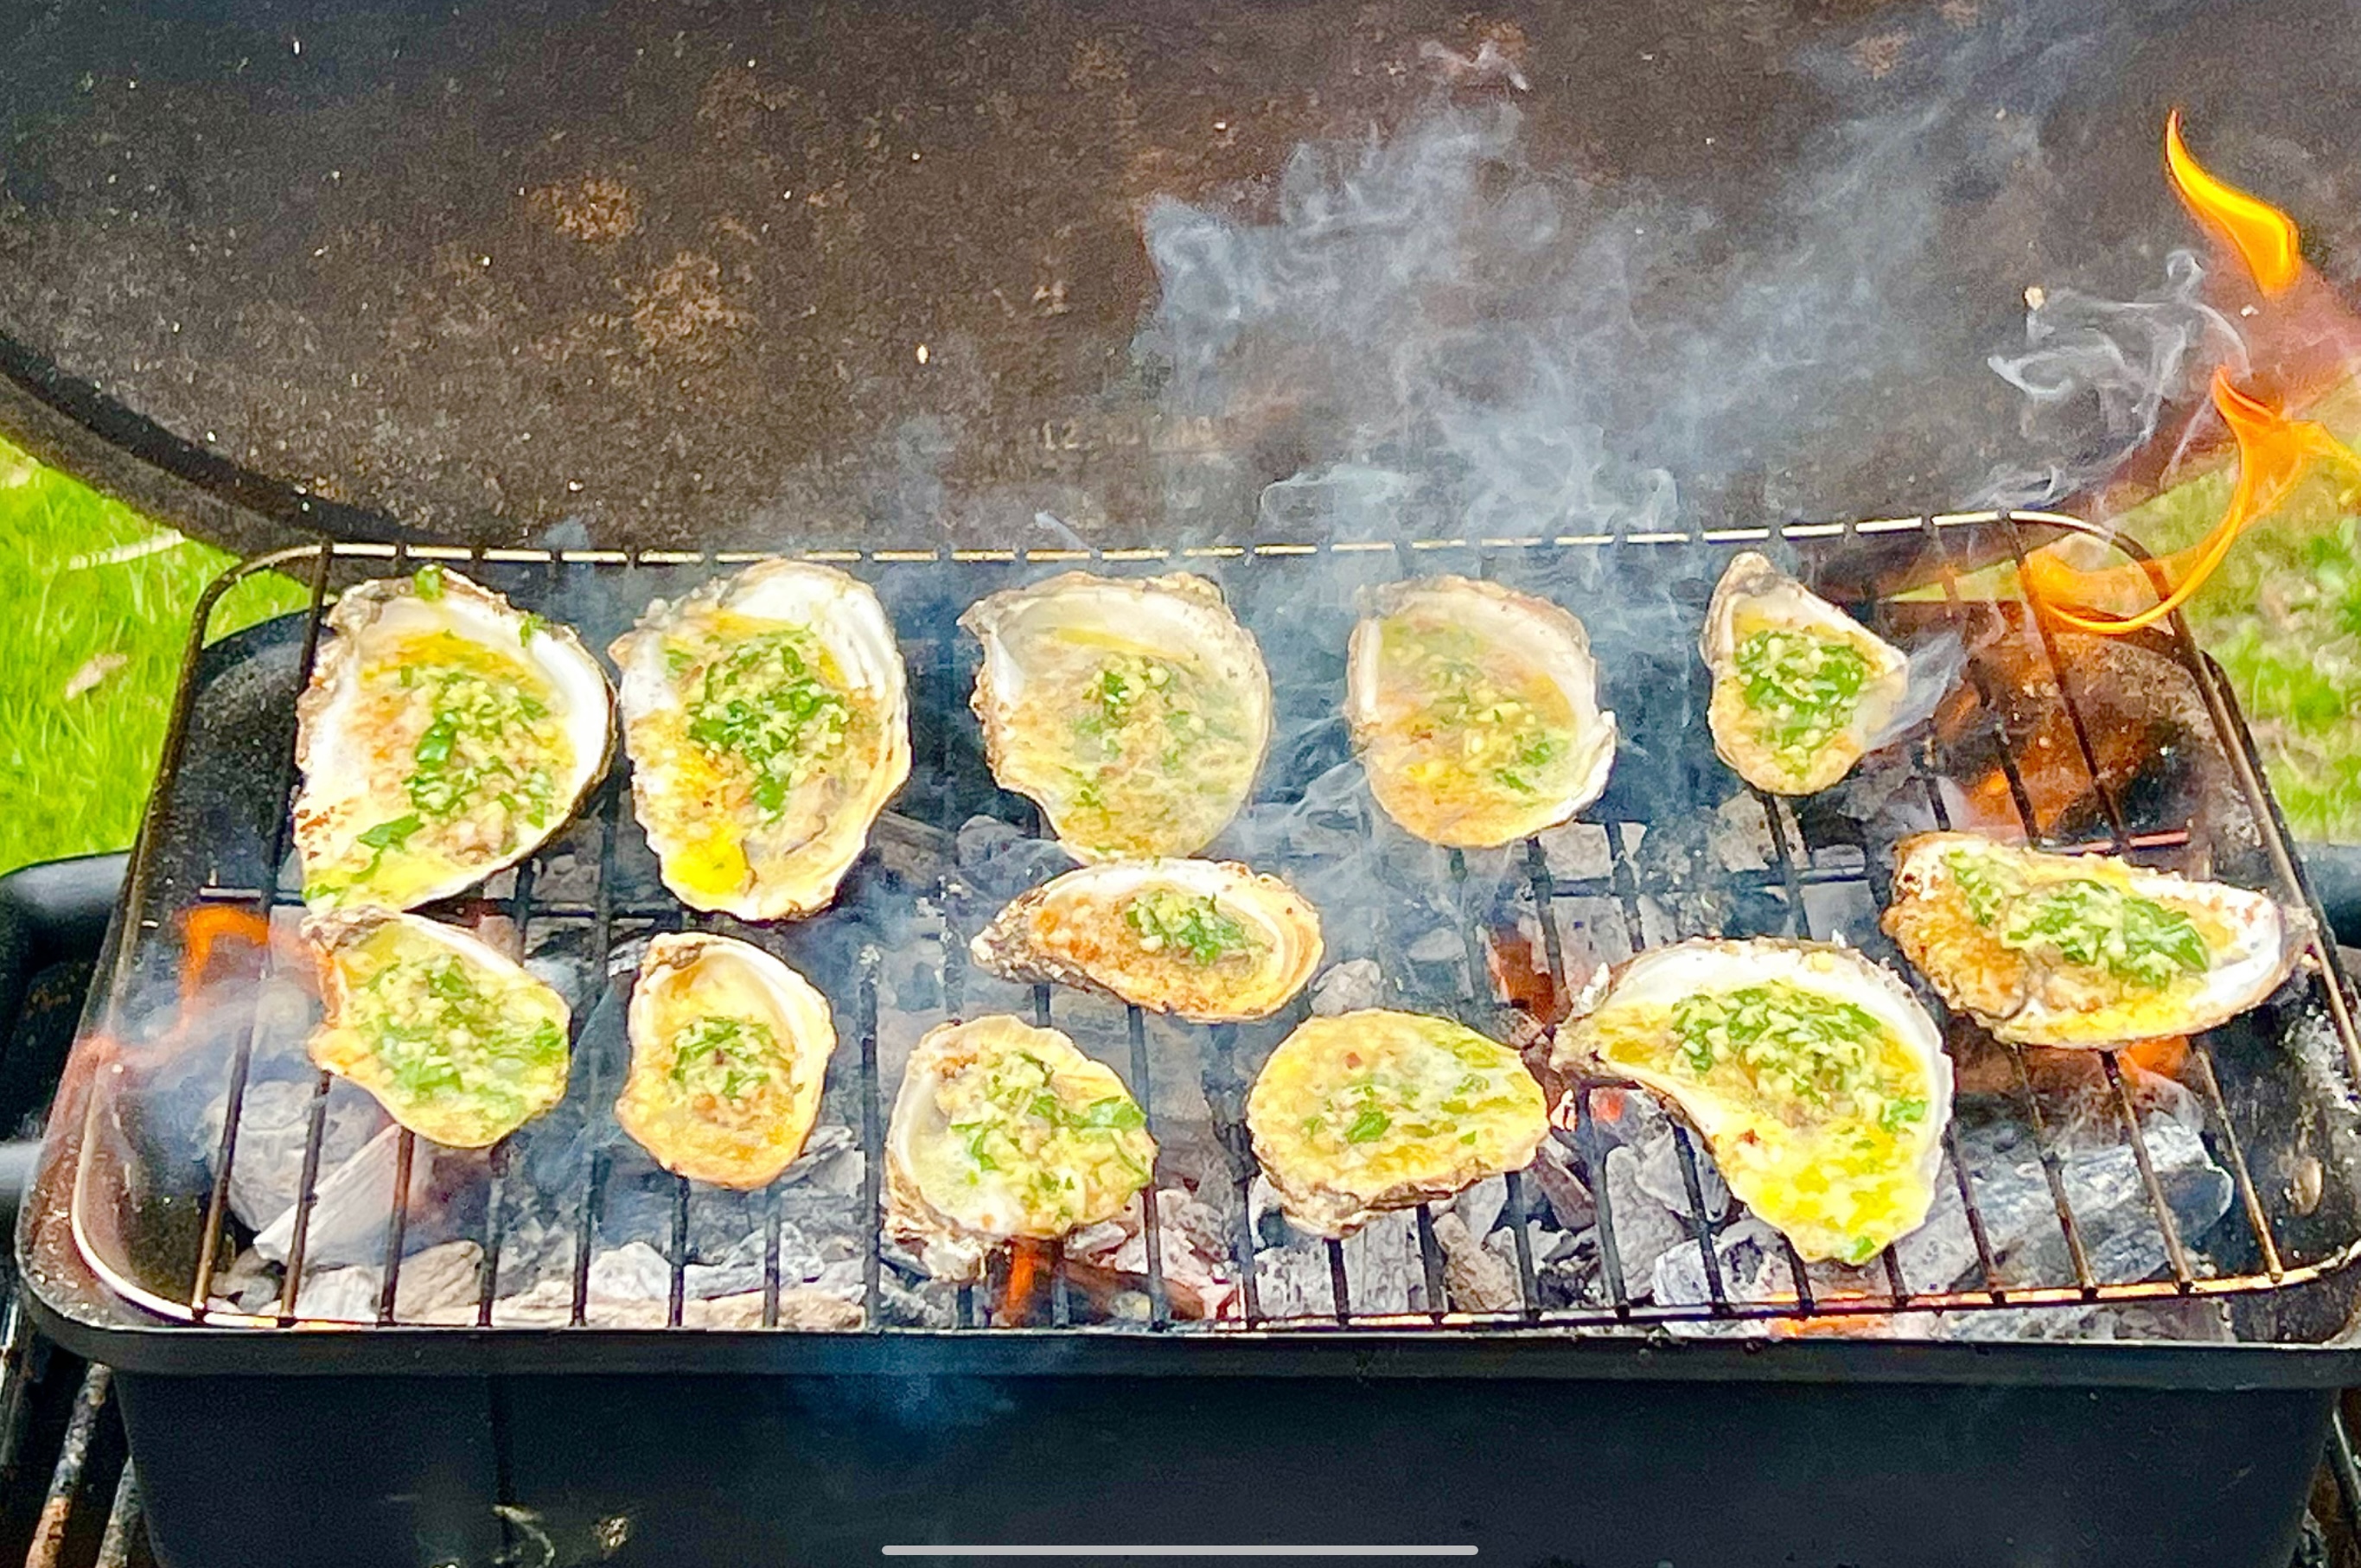
 

Pure hardwood charcoal gives you a hot fire. I like to sear the beef really well on both sides, then move the steak to a cooler spot on the grill and close the cover. I’ll let the beef cook until it gets to a perfect medium-rare.


If you try this marinade on burgers–and it’s great on burgers–simply brush the burgers with the marinade as you place them on the grill. Go easy or you’ll get a very salty burger.


Marinated grilled ribeye with a side of fried rice…an easy combination of veggies and rice leftovers I had in the fridge with a dash of soy sauce.


Grilling makes food taste great, but sometimes you don’t want to stand out there in a cloud of smoke while your friends are at the table, sipping wine and having a good time without you.

This is a great dish for those that want to pass on the grill for a day. It’s a delicious salad that you can serve warm or cool. You can make it the day before. Wrap it in plastic, and keep it in the fridge. Then, when your guests arrive, let it warm to room temperature. Taste for seasoning before serving. If you’re not a fan of quinoa, brown basmati rice works well, too. And use what’s fresh and in season. If you can’t find asparagus, some chopped and lightly sautéed squash works just as well.


FullSizeRender (8)


1 1/3 cup dry quinoa (or 1 cup basmati rice)
Chicken stock
Juice of 1 lemon
2 lbs. wild-caught American shrimp, peeled and de-veined (16 to 18 count)
1 cup of asparagus stalks, cut into 1″ lengths
1/2 cup minced scallions, green part only
1 cup chopped fresh dill
1 cup chopped fresh flat-leaf parsley
1 English cucumber, peeled, seeded and medium-diced
1/4 cup red onion, small diced
1/2 cup seeded and chopped tomatoes
3/4 lb. good feta cheese, crumbled
Extra virgin olive oil
Salt and pepper


Prepare the quinoa according to the package directions, using chicken stock instead of water. Once it’s cooked, place it in a large bowl. (1 1/3 cups dry quinoa should give you about 3 cups of cooked quinoa.)

Place the chopped asparagus on a sheet pan, drizzle with olive oil, and sprinkle with salt and pepper. Toss them to combine and spread them out in a single layer. Roast them for just a few minutes at 350 degrees. Set them aside to cool to room temperature. (You can also simply sauté the asparagus in a pan on the stove top with olive oil, salt and pepper.)

Place the shrimp on the same sheet pan, drizzle with olive oil, and sprinkle with salt and pepper. Toss them to combine and spread them out in a single layer. Roast for 5 to 6 minutes at 350 degrees, until the shrimp are cooked through. Turn them once while cooking. Don’t overcook them! (again…you can simply sauté the shrimp in a pan on the stove top with olive, salt and pepper.)

Add the shrimp to the quinoa, then add the asparagus, lemon juice, scallions, dill, parsley, cucumber, onion, tomatoes, 2 teaspoons salt, and 1 teaspoon pepper. Add the feta and stir carefully.

Set it all aside at room temperature for 1 hour to allow the flavors to blend…or, if you’re not serving soon, place the bowl in the fridge. Before serving, allow it to warm almost to room temperature. Taste it and season again, if needed, before serving.


I love avocado, and using it in this chicken burger recipe gives each bite a creamy, fatty richness the chicken needs.  It’s a simple burger, with just a handful of ingredients, but it’s really full of flavor.

If you want to go lo-carb, you can skip the breadcrumbs (and the bun for that matter.) If you’re going gluten-free, simply use GF breadcrumbs and buns and you’re all set to go.

If you don’t like avocado, leave it out. There’s still plenty of flavor.

Wanna add cheese? Go for it.

The bacon is optional, but what burger isn’t better with bacon?

The one thing I wouldn’t substitute is ground turkey for the chicken. To me, ground turkey is the cardboard of the meat world. It’s just nasty, and I won’t eat it.

chicken2

1 lb. ground chicken
1/4 cup breadcrumbs
1 ripe avocado, sliced into small cubes
1/2 teaspoon salt
1/4 teaspoon black pepper
pinch granulated garlic
slices of bacon, cooked
Sauce (recipe below)

chicken1

Combine the chicken, breadcrumbs, chopped avocado, salt and pepper, and garlic in a bowl and mix them thoroughly but carefully so that you don’t squash the cubes of avocado. I like to put the meat in the freezer for about 10 minutes to firm it up a bit.

Form the meat into burger patties. It will be a bit sticky, but just make sure you get the avocado evenly distributed. (I find that using gloves and lightly spraying my hand with avocado oil helps me make the patties without sticking.) Chill the patties again in the freezer for about 10 minutes to firm them up some more before cooking.

Pre-heat the oven to 350 degrees.

Heat a little avocado oil (or bacon fat!) in an oven-proof pan, and place the burgers in it when it’s hot. Let the burgers sear on one side, then flip them. (Make sure they sear well, or they’ll fall apart when you try to flip them.) Place the pan in the oven to finish cooking. It’s chicken…so you don’t want to undercook your burgers!

When they’re ready to serve, place the patties on a bun and with a slice of or 2 of bacon and slather with this burger sauce…

1/2 cup mayonnaise
1 tablespoon ketchup
1 tablespoon yellow mustard
1 tablespoon dill pickle relish
1/4 teaspoon garlic powder
1/4 teaspoon paprika
Pinch cayenne pepper

Combine all the ingredients in a bowl. Mix well. Refrigerate covered for a few hours to blend the flavors.

The 152nd running of the Kentucky Derby is this Saturday, May 2nd, and although I’m not a big horse racing fan, I am a huge fan of the official drink: the Mint Julep!

The Mint Julep is such a perfect, classic and historic bourbon drink, it seems silly to wait until Derby Day to have one. Of course, as any aficionado of spirits will tell you, there are as many right ways as wrong ways of making one.

The first step in my Mint Julep is making the simple syrup. Learning from one of my old radio buddies, my pal Rick O’B, I infuse mint into my simple syrup to take my cocktail to the next level. I use the standard ratio of 1 cup of clean, filtered water to 1 cup of sugar. I place the sugar and water in a saucepan and heat until just boiling. I’ve found that it needs to reach this stage for the sugar to really dissolve.

Waiting for the sugar to dissolve.

As soon as it starts to boil, I remove the saucepan from the heat, and throw in a handful of freshly picked mint leaves, stirring to make sure the mint gets in there, and then I leave the saucepan to cool to room temperature.


Once it’s at room temp, I strain the simple syrup into a squeeze bottle, and place it in the refrigerator to cool. It will keep for about a week.

An equally important ingredient for a perfect Mint Julep is the ice: specifically, crushed ice from clean, filtered water. Don’t even think of using tap water for any cocktail much less this one. Why ruin a good bottle of bourbon by going cheap on the ice? I make my own ice cubes, then put them in an untreated canvas ice bag and bash them with a mallet to the perfect crushed size. But if you don’t want to go through all the trouble, just buy a bag of good ice. Untreated canvas bags for crushing ice can be purchased online from bar supply companies for about $30. I got an untreated canvas tool bag (the exact same shape and size) at Home Depot for 3 bucks.


Da bag.


The next step is a little tougher: which bourbon to choose. The explosion of choices on the bourbon market has made it all but impossible for the average imbiber to know which bourbon is best for their tastes. If you’re a beginner, I suggest you go to a trusted bartender and explain that you’re new to the bourbon world, and could you have the tiniest of tastes and sniffs of what he’s got at his bar. Chances are, you’ll get a sampling of some of the better known brands: Maker’s Mark, Woodford Reserve, perhaps Buffalo Trace or Bulleit, and the standard Jim Beam. This is a very good start. (Also, hinting to your spouse and friends that “I’m trying new bourbons” around your birthday or Father’s Day inevitably gets you a few bottles as well!)

My go-to bourbon for Mint Juleps used to be Eagle Rare 10-year-old when it was around $32.99 a bottle. Now it can be as high $100! (Although the bourbon craze has calmed quite a bit recently, and prices are slowly going down.) My latest go-to bourbon is 1792 Small Batch. At $29, it’s almost unbelievable, like someone made a mistake in the stock room! Very tasty on its own and great for mixing. Others that work well and are around the same price range include Buffalo Trace, and Larceny. I’m actually not a fan of the official bourbon of the Derby: Woodford Reserve.

Finally, a Mint Julep needs a metal–not glass– Julep cup. Made of pewter, it frosts on the outside as you stir your drink, keeping your beverage ice-cold on even the hottest of days.


3 oz. bourbon
1 oz. mint-infused simple syrup
crushed ice
Julep cup
Fresh mint for garnish

Crush the ice and pack it into the Julep cup, even letting it dome slightly over the top. Don’t worry…the alcohol will melt it.

I like to add 1.5 ounces of bourbon, then the ounce of simple syrup, another 1.5 ounces of bourbon on top, and then a quick squirt of simple syrup to top it off. Break off a few mint leaves from the stem and push them into the ice. A beautiful layer of frost will form on the outside of the cup. Add more ice, if necessary, and garnish with a sprig of mint.


A nice selection of bourbons. This is an old photo: that Pappy Van Winkle is long gone…but I saved the bottle!


So much bourbon, so little time!


When my daughter hangs out with me, I always ask her what she wants me to cook for her, and there are a few “Dad” recipes that are her favorites. This is one of them, especially when fresh asparagus is available. And as any parent will tell you, if your kid is craving a dish that has vegetables in it, count yourself lucky–and make it!!
Prepping asparagus is easy, and you don’t need a knife to cut off the woody bottoms of the stalks. Simply bend the stalks at the bottom and they will naturally snap off at the right point.
4 mild Italian sausages, sliced into pieces 1/2″ thick
1 lb. penne pasta
1/2 onion, finely chopped
1 cup chopped fresh trumpet mushrooms (white button mushrooms work, too), optional
2 cups fresh asparagus, sliced into 1-inch pieces
1 clove garlic, passed through a garlic press
1 cup homemade chicken broth
6 fresh sage leaves, finely chopped
1/2 cup freshly grated Parmigiano Reggiano cheese
extra virgin olive oil
salt and pepper
Have the pasta water salted and boiling, and add the pasta, cooking until just a bit more undercooked than al dente.
Heat a large pan, and drizzle in some olive oil. Sauté the sausage pieces until browned and cooked through, but not overcooked. Remove the sausages from the pan and place them in a separate bowl. Remove all but 2 tablespoons of the fat left behind in the pan.
Place the pan back on stove and sauté the onion until translucent. Add the garlic, and sauté for 10 seconds. Add the sage, and saute for 10 seconds, stirring. Add the chopped mushrooms and saute for a few minutes, then add the chicken broth, and simmer until almost all the liquid has evaporated. Pour the contents of the pan into the bowl with the sausages.
Return the pan to the stove, add a little more olive oil, and on medium heat, sauté the asparagus pieces. Cook them until they are al dente, not too soft. Once the asparagus has reached this stage, return all the contents of the sausage/mushroom bowl to the pan to heat through. Drain the pasta, and add it to the pan as well, combining all the ingredients. If it looks too dry, add a little pasta water to the pan. Season with salt and pepper.
Make sure you serve this hot, with grated Parmigiano Reggiano on top, and drizzle lightly over the top with extra virgin olive oil.

I moved to my current home in the fall of last year. One of the toughest things to say goodbye to in my previous garden was my asparagus patch. Over the years, I had grown loads and loads of delicious asparagus, but sadly, there was no good way to transport that patch to my new place.

I’ve got a much smaller garden space at my current home, a small space that gets full sun, and despite its limited size, asparagus is too important of a crop to leave out. So I bought a bunch of plants this spring, and planted them. And now I have to wait. They say you’re not supposed to harvest asparagus for at least a couple of years to let the new bed establish, but I found that pretty much impossible to do…I have to have at least a bit of a taste.

Hoping to get some spears next season!

In the meantime, I can only look back at my previous success with asparagus…

The home garden is already showing signs of activity. Overwintered dill and arugula seeds are sprouting. And cool weather seeds that I’ve sown early: peas, turnips, radishes, and others are doing the same.

asparagus2013

Asparagus is really easy to grow. You just need the space, and the plants practically do the rest.
Space them about a foot apart, and before you know it, you will have a vast network of tasty stalks sprouting through the soil every spring. They are so much better than anything you can buy in a supermarket.
In the start of the growing season, the stalks don’t even make it into the house. I cut them and just eat them straight out of the garden. Eventually, they make the move to the kitchen, where I love to simply place them on a baking sheet and drizzle a little olive oil over them. Salt and pepper…and then in a 400-degree oven until they’ve caramelized.
Sometimes I toss some tasty chives with blossom buds on top of the asparagus and roast.

In the past, I’ve had I so much asparagus that I just didn’t know what to do with them all. So I started pickling them…a really easy process that ensured I had delicious asparagus well into the summer.

Several bunches of asparagus spears
2 cups white vinegar
1 cup cider vinegar
1 1/2 cups sugar
3 cups water
20 peppercorns
Garlic cloves, peeled
Kosher salt (1 teaspoon per quart-sized Mason jar. Use less for smaller jars.)
Bring the vinegar, water, sugar and peppercorns to a boil. Set the pan aside.
Trim the bottom of the asparagus spears so that the spears are just slightly shorter than the height of the quart-sized Mason jar you will use. Or cut them into pieces that will fit smaller jars.
Pack the jars as tightly as you can with the asparagus spears. (They will shrink when processed.) Add the garlic clove and 1 teaspoon of salt to every quart-sized Mason jar…less for smaller jars.
Fill the jars with the vinegar mixture and seal them tightly.
Process the jars for 10 minutes. Let them cool before placing them in the refrigerator. If you know you’re going to eat all the asparagus in the next week, processing isn’t really necessary.

DOES YOUR PEE SMELL FUNNY WHEN YOU EAT ASPARAGUS?

Asparagus has a sulfur-containing compound identified by scientists as methyl mercaptan. A colorless gas, this compound is also found in blood, feces, garlic, eggs, cheese and even skunk secretions. Another ingredient found in asparagus is asparagine. Present in foods like dairy products, seafood, poultry, fish and nuts, this amino acid is known to have a distinctive smell when heated. To metabolize both methyl mercaptan and asparagine, your body needs to break these compounds down and it’s this breakdown that’s responsible for your urine’s strange smell.

Since both methyl mercaptan and asparagine are associated with the sense of smell, there is debate over which ingredient is actually responsible for the asparagus-urine phenomenon. It could be one, or both.

Many people claim that, regardless of asparagus consumption, their urine does not smell. There are multiple theories about that as well. The first claims that everyone’s urine is in fact affected by asparagus, but only about half of the population have the specific gene that is required to smell the change. On the other hand, the second theory states that only half of the world’s population has the gene that’s required to break down the compounds found in asparagus and, if the body doesn’t break them down, no smell is emitted. In fact, one study published in the British Journal of Clinical Pharmacology found that only 46 percent of British people tested produced the odor while 100 percent of French people tested did. So whatever the reason, asparagus will forever be known as the vegetable that makes your urine smell strange.

I was minding my own business, watching an episode of “Diners, Drive-Ins and Dives” on Food Network. Guy Fieri went from a barbecue joint to an Italian restaurant. Pulled pork at the BBQ place, arancini at the Italian. Then it hit me….

It just so happened that I had slow-roasted a pork shoulder that day. It just so happened that I had an opened box of Arborio rice I wanted to use up. It just so happened that I had several containers of homemade chicken stock in the freezer, an open bottle of white wine in the fridge, already opened packages of mozzarella and Parmigiano Reggiano, and a small container of ricotta. And I just made a batch of tomato sauce from my garden tomatoes.

I mean, come on! This recipe practically wrote itself!

First, I made the risotto. There were 3 cups of Arborio rice left in the package, so I used it all up…

2 tablespoons olive oil
3 cups Arborio rice
2/3 cup dry white wine
10 cups (or so) homemade chicken broth
1/2 cup grated Parmigiano Reggiano

I brought the chicken broth to a low simmer in a saucepan.

In a large skillet, I warmed the olive oil and rice over medium heat for a few minutes.
I added the wine and sautéed for another minute or two, until it had been absorbed.
I added the hot broth to the rice about a half-cup at a time, stirring until the broth absorbed completely each time before doing more.

I continued adding the broth a half-cup at a time and stirring until it was fully absorbed and the rice was Al dente and creamy, not mushy. This usually takes about 20 minutes…and you don’t always have to use up all the broth.

I removed the pan from the heat, and stirred in the Parmigiano Reggiano.
I set it aside and let it cool.

In a saucepan, I warmed the tomato sauce up.

Meanwhile, I chopped the mozzarella up into small cubes, a little bigger than a 1/4″ square.

I took the pork out of the fridge, and finely chopped up about a pound of it. I didn’t know if I would need that much, but it was a good start. I added about a 1/2 cup of ricotta cheese to it, mixing well, making it into a paste.

Using a scoop, I made small meatballs out of the pork mixture, pushing a cube of mozzarella into each one before rolling it into a little meatball.

Then, scooping up some of the cooled risotto with my hands, I molded it around the meatball, forming a larger rice ball, setting aside on a tray.

I used plain gluten-free breadcrumbs in this recipe to keep it GF, but regular breadcrumbs are just fine. I like to make my own breadcrumbs by toasting GF bread and then putting it in a food processor. This gets it to a crumbly stage. If I want it fine, I move the breadcrumbs to a blender to grind it down to almost a powder, first adding oregano, parsley, basil, salt, pepper, granulated garlic and granulated onion, then blending well.

With the oil in my fryer hot and ready to go at 350 degrees, I roll each rice ball in the egg, and then the seasoned breadcrumbs.

Then I place them gently in the fryer, being careful not to overcrowd them.

I fry them until they’re golden brown.

I place the fried arancini on a wire rack to cool, sprinkling them with sea salt while they’re still hot.

Chicken thighs are the best: their fat content makes them perfect for the grill because they don’t dry out like chicken breasts do. And I always leave the skin on for extra crispy flavor. I bought a package of chicken thighs the other day and decided to go Asian with my flavors, baking them in the oven so that they cook evenly, and then finishing them off on the grill to get that delicious smokey flavor and char.

I marinated the chicken thighs in the sauce for several hours before cooking. If you have the opportunity to marinate them overnight in the fridge, that’s even better. Just remember that if you want to use the marinade as a dipping sauce later on, divide it in half from the very beginning. Use half to marinate the chicken, and save the other half for later. If any of the marinade touches raw chicken, you can’t use it as a dipping sauce. (Salmonella!) So keep them separated.


3/4 cup ketchup
1/2 cup soy sauce
1/2 cup hoisin sauce
1/2 cup maple syrup
1/4 cup Chinese chili garlic sauce
1/4 cup brown sugar
1 tablespoon rice vinegar
2 garlic cloves, minced

Combine all the ingredients in a bowl, mixing well. Use half of it to marinate the chicken, and save the other half for dipping sauce or brushing on to the chicken later.

The Bell & Evans chicken thighs that I bought came in a package that works perfectly for marinating. One less thing to clean up!

If you’re cooking the same day, let the chicken marinate at room temperature for three hours. If you’re marinating overnight in the fridge, let the chicken come to room temperature before cooking.


Preheat the oven to 325°.


Place the chicken thighs on a sheet pan and bake until they are cooked through.…but not overcooked. If you’re not using the grill, place them under the broiler and watch them carefully, as the sugars in the marinade could burn. Give them some nice char.

If you’re using the grill, light a fire and spread the coals so that you have a medium-hot flame. Grill the chicken thighs until they have a beautiful char on them, being careful not to burn them. Brush more of the marinade on them as they cook, if you like.

Serve the chicken thighs with the dipping sauce on the side.


My daughter’s home for spring break, and I’m not surprised this is one of the dishes she’s requesting while she’s here. Guess I gotta get to work!

I think I spent half of my childhood in the kitchen, watching my Mom and grandmother make koldūnai (kohl-doo-nayh), the Lithuanian version of a pierogi, by hand, at lightning speed. They would roll a simple dough into a log about 1″ in diameter, then cut it into 1″ pieces, twirling each piece between their fingers to make a flat pancake, filling each with a small spoonful of meat or mushrooms, then folding it over, crimping the edges to make a crescent-shaped dumpling. It blew my mind that they could crank out over a hundred of these little masterpieces in no time, placing them on a cookie sheet and freezing them until it was time to cook.


One of the main reasons why I prefer Lithuanian koldūnai over the basic Polish pierogi is the filling. For me, standard pierogi fillings like potatoes, cheese, and sauerkraut just don’t cut it. My Mom would mix ground beef with chopped onions sautéed in butter, a couple of eggs, and milk crackers soaked in milk. She’d add salt and pepper, then spoon that beautiful beef blend into her koldūnai.


The other delicious stuffing, usually reserved for special holidays like Christmas Eve and Easter, was made from mushrooms. Italy may lay claim to the porcini, but the fact of the matter is, Lithuania is bolete heaven. (We call them baravykai.)


When they’re dried and rehydrated, their incredible flavor is so intense, you don’t need many of them to flavor a large amount of regular button mushrooms. We’d get our dried boletes from relatives in Lithuania every year. Mom would place a handful in some boiling water and let them steep until they swelled up and could easily be chopped and added to the other mushrooms. She’d then pour the mushroom liquid into the pan as well, not wasting a bit of that magical porcini flavor. The mushrooms were simply sautéed in butter, cooled, and then used to fill the koldūnai.


I found that my Mom’s log method was too much work. I roll the dough out into a sheet with a rolling pin, then cut circles with a glass. Yes, that’s mac-and-cheese up front!


A few years ago, I decided it was time to try my hand at making koldūnai. As I recall, my Mom simply mixed water with flour to make the dough, kneaded it into a log, and off she went. I decided to go with the rolling pin and glass cutting method, because I found it to be a bit easier creating more uniform koldūnai.


The biggest challenges I had making koldūnai was my own clumsiness and lack of experience. Once I got the hang of it, things moved along steadily, and it didn’t take long for me to make a decent batch–not all perfect, but not bad for a first try.


My recipe follows. If you’re on a gluten-free diet, have no fear! That recipe is at the bottom of the blog.


The rolling pin method.


This time around, I made four kinds of koldūnai: traditional (ground beef as well as mushroom) and non-traditional (mac & cheese and pulled pork.)  Patty’s Pierogis, a restaurant in nearby Fall River, Massachusetts, and featured on Food Network’s “Diners, Drive-Ins and Dives,” is where my daughter first had mac & cheese pierogis. She was instantly hooked and begs for them every year.


Here’s my beef recipe…


1/2 onion, finely chopped
1 pat of butter
1 lb. ground beef
1 egg
1/2 cup breadcrumbs

Finely chop the onion and sauté it in the butter until translucent. Let it cool, then add it to 1 lb. of thawed ground beef. Add the egg and the breadcrumbs. Season with salt and pepper. Mix the ingredients thoroughly and keep the meat in the fridge until you’re ready to use it.


Two pots of boiling salted water: one for the meat-filled koldūnai, and one for the mac-and-cheese filled koldūnai.

Two pots of boiling salted water: one for the meat-filled koldūnai, and one for the mac-and-cheese filled koldūnai…so I don’t get ’em mixed up!


In my childhood home, you cannot possibly serve koldūnai without sour cream on the side and without spirgučiai (spir-guh-chay), chopped and fried bacon and onions, that are sprinkled on top.


1 lb. bacon, finely chopped
1 large onion, finely chopped

In a large pan, fry the chopped bacon until it’s almost crisp. Never drain the fat! Add the chopped onions and cook until they are soft. Set aside.  (My Mom always kept a stash of spirgučiai in a container in the fridge, and sprinkled them on anything and everything.)


duni 4


Making the dough is simple.


2 cups all-purpose flour
1 cup water

I don’t use salt in the dough because I boil the koldūnai in salted water later.


Combine the ingredients in a bowl, mixing with your hands. Keep adding flour in small amounts until the dough isn’t wet and sticky. When it forms a nice ball, remove it from the bowl and place it on a floured surface and knead it a bit more. Cut the ball into quarters, and work with these smaller pieces of dough.


For the rolling-pin method, roll each quarter out until the dough is about 1/8″ thick. Cut circles out of the dough using a cookie cutter, rocks glass, or whatever else you have handy. Add about a teaspoonful of filling in the center of the dough (a melon baller works great), then fold the edges over and pinch them with your fingers. Flip it over and pinch again, making sure none of the filling seeps out. A tight edge means the koldūnai won’t break open when you put them in boiling water.


Who knew a rocks glass had more uses than just to hold a great Manhattan?


Some stuffed with mac and cheese!


I recently discovered these “pierogi makers.” You lay the dough in them, add your filling, and then close them. They automatically crimp the edges for you. They work pretty well…sometimes. It’s faster with the traditional method.


I always double-check the crimped edges, because your koldūnai will fall apart in the boiling water if you don’t seal them well!


Place the koldūnai on a sheet pan dusted with flour, and when you’re done, place the sheet pan in the freezer.


Ready for the freezer!


Sometimes the chef gets punchy after making koldūnai all day long!


Get a large pot of salted water boiling. Drop the koldūnai in gently, being careful not to overcrowd them. If the dough is thin, the koldūnai will be ready when they float up to the surface. A thicker dough will need longer cooking. The best way to know if they’re done is by taking one out, cutting it open and having a look (and taste!)


When plating, sprinkle generously with spirgučiai, and serve with sour cream on the side.


duni 4


If you need to go gluten-free…good news! You can still have your koldūnai! The mushroom filling is already gluten-free. For the breadcrumbs in the beef filling, I take slices of Udi GF bread, toast them, and zap them in a food processor. Excellent breadcrumbs! And I use store-bought GF mac-and-cheese.


GF Mac and cheese, with a little extra cheddar.


For a rustic dough, this recipe works great. (Thanks to my sister, who shared it with me.)


Excellent GF flours.


1 1/2 cups all-purpose gluten-free flour (I use Cup4Cup)
1 1/2 cups rice flour (I use Cup4Cup Wholesome Flour)
2 eggs
pinch of salt
water

Combine the flour and salt in a bowl. Add the eggs and mix. (I use my hands for this.) Slowly add water to the dough until it pulls from the sides of the bowl and makes a nice ball of dough. I cut the dough in half and use a well-floured rolling pin to roll it flat.


The finished product! The rice flour gives it a darker, grainier texture. A more rustic taste, but still delicious!


A newer, less rustic gluten-free version here…


These are also gluten-free, but I used a different recipe and a different brand of flour. I mixed 2 cups of King Arthur GF flour with one cup of water and 1 teaspoon of xanthan gum. Then I added more flour or water, depending what was needed, to get the right consistency. A very easy to work with dough!