Author Archive

With Thanksgiving around the corner, I’m sharing my favorite holiday dishes I post every year around this time.

My Mom loved that nasty, gooey cranberry log that oozes out of the can. It would hit the bowl with a splurt and would wiggle for about an hour. I’m more than happy to avoid that and make this delicious side dish, which has become mandatory at our Thanksgiving table every year…


1 medium-sized butternut squash, washed and peeled with the seeds removed
Olive oil
Salt
1 cup fresh cranberries
¼ cup sunflower seeds
¼ cup pumpkin seeds or pepitas
¼ cup sesame seeds
¼ cup maple syrup, more if you like it really sweet


image


Pre-heat the oven to 400 degrees.

Once you’ve washed, peeled and seeded the butternut squash, cut it into ½” cubes. Sprinkle a little olive oil and salt on them and toss them to coat. Then spread the squash cubes in a single layer on a baking sheet. Bake them for about 30 minutes or until they’re golden on the edges.

Remove the squash from the oven and pour the cranberries into the hot tray. Mix gently. Pour the squash/cranberry mix into a smaller, deeper baking pan.

Increase the oven temperature to 425.

In a separate bowl, combine the sunflower seeds, pumpkin seeds and sesame seeds. Sprinkle the seeds evenly over the squash/cranberry mixture. Drizzle the maple syrup over everything and place the baking pan in the oven. Cook for another 20 minutes, until the seeds have roasted.

Drizzle a bit of maple syrup over the top just before bringing the pan to the table.


With Thanksgiving just a couple of weeks away, I’d like to share my recipe for what I consider to be the perfect turkey.

I always get asked if I deep-fry my turkey for Thanksgiving. I think it’s way too messy and time-consuming for nothing better than an “OK-tasting” bird. I lived in the South for a few years, and my friends fried a turkey on several occasions. I wasn’t impressed.

First, you need to find a safe spot in the yard to blast the propane-fueled fryer so you don’t burn your house down. Then you need to stand outside and freeze your butt off while it fries, while your friends and family are all indoors having cocktails. Then you need to get rid of gallons of used oil, and clean up a huge mess at the end of it all. And through all this, you need to make sure the oil is at the right temperature so you don’t get a scorched turkey on the outside and a raw turkey on the inside.

No, thanks.

I get great results by cooking my turkey in my Weber grill. I’ve cooked it this way every Thanksgiving for about 30 years. The standard Weber allows me to cook up to a 15 lb. bird–big enough for my purposes–and it comes out crispy, smokey and delicious. If you’re afraid to try this for the first time at Thanksgiving when it really matters, buy a turkey right now, grill it, and bring a bunch of turkey sandwiches to work to share with your friends….then wait for their reaction.

Or be bold! Go for the gusto the first time around. I did it that way and I never looked back.

The charcoal chimney with hot coals awaits.

The charcoal chimney with hot coals awaits.

Although I’ve stopped using charcoal briquettes for basic grilling a long time ago, and now strictly use natural hardwood charcoal, this recipe works best with Kingsford briquettes. They burn slowly and evenly. I never use lighter fluid…I always start my fire with a few pieces of crumbled newspaper under a charcoal chimney.

The tools you need:
A Weber grill, with the dome top
Kingsford charcoal briquettes (don’t t use Match Lite or other pre-soaked briquettes)
A charcoal chimney, easily found at Home Depot or Lowe’s
A heavy-duty disposable aluminum pan
Ingredients:
Whole turkey, up to 15 lbs., thawed and brined (see my previous blog about brining a turkey)
Olive oil (to rub on the turkey)
2 yellow onions, chopped
4 stalks of celery, chopped
½ lb. (2 sticks) of unsalted butter, melted
1 tablespoon granulated garlic
1 tablespoon granulated onion
2 tablespoons salt
1 tablespoon pepper

Spreading the coals away from the center of the grill.

Spreading the coals away from the center of the grill.

If you want stuffing, it’s always wise to make it separately and cook it separately.

Light 8 to 10 lbs. of charcoal in the grill…depending on the size of the turkey and how cold it is outside.

If you brined the turkey first, you’ve already removed the giblets. If you’re not brining, go ahead remove the giblets from the thawed bird now. Place the turkey in the aluminum pan.

In a small bowl, mix the granulated garlic, granulated onion, salt, and pepper. (Definitely add any other seasonings you might like.)

Coarsely chop the onions and celery. Place them in a another bowl. Mix them with the melted butter and 1/3 of the garlic/onion/salt/pepper mixture.

Place a small handful of this onion and celery “stuffing” mixture in the neck cavity of the turkey. Place the rest in the body cavity (where the stuffing would usually go.) You can fasten the bird with turkey skewers if you like. This “stuffing” is strictly to flavor the turkey…you don’t eat it!

The rubbed, stuffed and seasoned bird.

The rubbed, stuffed and seasoned bird.

Rub the outside of the entire turkey with the olive oil and sprinkle the rest of the garlic/onion/salt/pepper mixture on the outside of the bird. Make sure you get the bird on the bottom as well.

When the coals in the grill have ashed over, spread them to the outside edges of the Weber grill equally. Put the cooking grill rack in place. Place the aluminum pan with the turkey in the center of the grill, keeping it away from the direct heat of the coals. If you’re using a meat thermometer, insert the probe into the thickest part of the breast, being careful not to hit the bone. Place the lid on the grill. (You may need to bend your aluminum pan a bit.) Open the vents on the bottom of the Weber as well as the vents on the lid. It’s important to get air circulating!

My meat thermometer calls me from as far as 100 feet away! Time for a cocktail!

My old-school meat thermometer calls me from as far as 100 feet away! (Newer thermometers are wireless and talk to your smart phone.) Time to join family and friends for a cocktail!

No basting is necessary.

Now here’s the tough part: DO NOT OPEN THE GRILL TO CHECK ON THE TURKEY! (If you must look, shine a flashlight into the vent holes on the lid to take a peek at the pop-up timer, if there is one.) The whole point is to keep the heat inside the kettle. You’ll know your turkey is done when no more smoke or heat rises from the grill, and the turkey inside stops making sizzling noises. The internal meat temperature should be around 165 degrees.

And believe it or not, a 15-lb. turkey will be cooked in about 2 hours!

If you’re using a meat thermometer (recommended), remove the turkey when it hits about 155 degrees, wrap it in foil, leaving the thermometer still in the bird, and let it rest at least 20 minutes. The temperature will go up a bit to 165 or even a little higher, before it starts going down.

Beautifully grilled, and perfectly cooked in less than 2 hours!

Beautifully grilled, perfectly cooked!

The side dishes for Thanksgiving are as important as the main course.  In the next couple of blogs, I’ll share my recipes for Oysters Rock-a-Fellow and butternut squash with cranberries.

I just got messaged by my college buddy, Adam, about brining a turkey for Thanksgiving. The man must be psychic, because I was just about to publish this! I get requests to publish my holiday recipes every year, so, with only a couple of weeks to go until Turkey Day, let’s get it started…

No matter what method you prefer to cook your bird, brining it beforehand will make it so much tastier and juicier. You really need to try it…and it’s easy to do.

It’s basic high school science: the brine has a greater concentration of salt and water than the molecules of the protein (in this case, a turkey) that is soaking in it. By simple diffusion, the protein molecules suck up the salty water and keep it. When you cook the meat, some of the water evaporates, but the meat still has far more moisture in it than it would have without the brine soaking, and the result is a moister, more delicious bird.

Some people use giant syringes to inject their turkeys with crazy solutions, but I think that the old way is still the best when it comes to brining. Get a big pot, fill it with the brine, and soak the bird in it. Done.

Here’s my tried-and-true turkey brining recipe. Once the brining is done, you can cook the turkey whatever way you like best. I use a method where I grill it inside a Weber grill with charcoal. It comes out smokey and absolutely amazing. I’ll have that info in my next blog.

You must brine a thawed bird, so use your favorite method to thaw your turkey so that it’s ready on Thanksgiving morning. Brining can take 4 to 6 hours, so start early!

For this recipe, you’ll need a large pot to boil the brine ingredients, and then a larger pot to hold the turkey submerged in the brine. I use a turkey no bigger than 15 lbs. for two main reasons: there are only 3 people in our family, and the Weber grill I use can’t handle anything bigger.

image

1 gallon of water
2 onions
3 carrots
3 stalks celery
1 cup kosher salt
1 tablespoon black peppercorns
1/2 cup light brown sugar
1 1/2 teaspoons whole allspice
4 bay leaves
1 gallon of ice water
14–15 lb turkey, thawed

Pour the first gallon of water in a large pot. Quarter the onions, carrots and celery (no need to peel them) and add them to the water. Add the salt, black peppercorns, brown sugar, allspice, and bay leaves.

Let the pot come to a boil for a few minutes. Remove it from the heat and let the brine cool down to room temperature.

Remove the giblets from the thawed turkey and place the bird in a container just big enough to hold it and 2 gallons of liquid.

Pour the now-cooled brine over the turkey, then pour in the gallon of ice water.

Make sure the turkey doesn’t float up by placing a plate on top. Put the turkey container in the fridge (or a cold garage or basement) for 4 to 6 hours, flipping the turkey over in the container halfway through.

After 4 to 6 hours, drain the turkey, rinsing off any spices that stuck to it, then pat it dry with paper towels. Now it’s ready to cook, using your favorite recipe.

If I’m brining a turkey for Thanksgiving, I do the brining in the morning and the turkey is ready to cook by early afternoon. And grilling it on a Weber grill only takes a couple of hours. It’s fast, requires no basting, and is absolutely delicious! That’s next time…

I love these ribs. They’re one of the the first cookbook recipes I ever tried, and still one of my favorites. In fact, I just made them last night!
I like making these because they don’t require hours on the grill. They’re gooey, sweet and absolutely delicious!
 image
¾ cup soy sauce
 1/4 cup hoisin sauce
5 lbs. pork ribs
Zest and juice of 1 lemon
2 whole star anise
2 cinnamon sticks (3”)
1/2 cup honey
4 cups chicken broth
Mix the soy sauce and the hoisin in a bowl, and set aside. These are the marinade ingredients.
If the ribs are large, cut them into individual pieces. If smaller, cluster 2 or 3 ribs together. Place them in a large pot. Cover them with water and bring it to a boil. Boil for 5 minutes. Drain.
Place the ribs on a baking sheet lined with non-stick aluminum foil or with a rack and coat them with the marinade. Let them sit for 10 minutes.
Pre-heat the oven to 350 degrees. Bake the ribs on the baking sheet for 30 minutes.
While the ribs are baking, start the sauce in a large non-stick pan or pot that will hold all the ribs: combine the lemon zest and juice, star anise, cinnamon sticks, honey and chicken broth. Bring it to a boil, then reduce it to a simmer.
When the ribs have finished baking, add them to the sauce pot and simmer (covered) for at least 15 minutes or until the rib meat is tender.
Turn the heat on high, uncover the pot and cook until the sauce is reduced to a glaze that coats the ribs. Be sure to reduce the heat as the sauce thickens or the sugars in the honey will burn! When the ribs are sticky and gooey, they’re ready.
Substituting grapefruit for the lemon works really well, too!


Here in Southern New England, the most popular brand of chicken salad you can buy is called Willow Tree. They’ve made it for over 50 years, and people crave it like crack. And it’s good: moist and “mayonnaisey”.

But I’ve never been a fan of “secret” ingredients, and Willow Tree is full of ’em, so my task was to make something that was as good as Willow Tree, with known ingredients. I got close…real close! As always, I use pastured chicken and organic veggies when possible. And since I use chicken breasts only, I found that boiling the breasts in stock instead of water keeps the meat more flavorful.

Another option: I like to roast a whole chicken, devouring the dark meat, then using the breast meat for the chicken salad. I use the carcass and scraps for chicken stock. Nothing goes to waste!

image

1.5 lbs boneless skinless chicken breasts
4 pints salt-free chicken stock (I use home-made)
1/2 cup mayonnaise (I live on Hellman’s)
1/4 cup finely chopped celery
2 tablespoons finely chopped Vidalia onion
1 teaspoon light brown sugar
1/8 teaspoon granulated garlic
1/2 teaspoon salt
1/8 teaspoon black pepper

Heat the chicken stock in a large pot. Bring it to a boil and add the chicken breasts. Bring it to a boil again, then simmer uncovered for about 7 minutes.

Turn the heat off, cover the pot with a lid, and let the breasts sit in the pot for 30 minutes. After 30 minutes, remove the breasts to a cutting board and allow them to cool. Save the chicken stock for another use, like soup. (See below.)

Meanwhile, in a large bowl, combine the mayonnaise, celery, onion, brown sugar, granulated garlic, salt and pepper. Mix them thoroughly to combine.

When the chicken has cooled, shred the breast meat into bite-sized pieces and then transfer it into the bowl with the mayonnaise mixture. Mix thoroughly and chill before serving.

I love my chicken salad on a Martin’s Long Roll.

BONUS: I don’t waste the chicken stock left over in the pot. I chop some carrots, celery and onion and throw them in there. I reserve some of the chicken breast meat–just a bit–and throw it in there, too. I add a little salt and pepper, and a pinch of dried Bouquet Garni. I bring it to a boil, then reduce the heat to a simmer and cook until the veggies are al dente. Pasta or potatoes optional. Makes an awesome chicken soup!

If you want to freeze the soup, I would leave the potatoes or pasta out, adding them only when I’m reheating the frozen soup. That keeps them from getting mushy.

THE BURRATA BURGER

Posted: November 2, 2020 in Uncategorized

Some of my favorite recipes happen when I’ve got a few leftover ingredients in the fridge that I really want to use up. The challenge is to make them work together.

Burgers are easy solutions to this dilemma, because, let’s face it: just about anything can go on a burger!

My thoughts behind this recipe went to a combination of things: a little garlic bread, a little Caprese salad, and, of course, a burger.

I had some burrata in the fridge. If you thought you couldn’t improve on mozzarella cheese, get yourself some burrata. The outer shell of the burrata is mozzarella, while the inside generally contains stracciatella and cream. It can be made from milk, or if it’s really decadent: Italian buffalo milk.

I use burrata instead of mozzarella when I make my Caprese salads…a combination of the cheese, fresh basil, and ripe tomatoes, drizzle with a high-quality balsamic vinegar.

I had kaiser rolls in the freezer. I wanted to go one step further, so I slathered them with my garlic bread smear, and toasted them.

And my burgers are always grass-fed beef, seasoned with salt and pepper, and pan-seared before finishing them in the oven.

I started with the garlic bread spread first.

Pre-heat the oven to 350.

1 stick (4 oz.) unsalted butter, softened
1 large clove garlic, squeezed through a press
1/2 teaspoon granulated garlic
1/2 teaspoon salt
1/2 teaspoon oregano
1/2 teaspoon parsley

I combined these ingredients in a bowl, mixing well, then smeared them on my kaiser roll halves, toasting them in the oven.

I got a pan very hot on the stovetop (cast iron is always best) and added a little fat. I use bacon grease if I have it. Otherwise I go with a high smoke point oil like avocado oil.

I seasoned the burger with salt and pepper, and placed it in the hot pan, searing it on one side, then flipping it to the other. I just want to sear the meat. I don’t want to cook the burger in the pan or it will overcook when I place it in the oven to finish.

I cut the burrata in half (it gets a little messy), and placed half of it (cut-side-down) onto the burger.

I placed the pan in the oven to finish cooking the burger and to melt the cheese. (If your pan isn’t oven-proof, get a tray that is, and just move the burger onto it and into the oven.)

I cooked the burger until it was medium-rare and the cheese had melted.

I placed the burger on the toasted roll and added a nice slice of farm-fresh heirloom tomato.(Fresh basil is optional.) And I drizzled over the top with some good balsamic.

That took a cheeseburger to a whole new level!

This is a story about something that is near and dear to my heart…and liver.

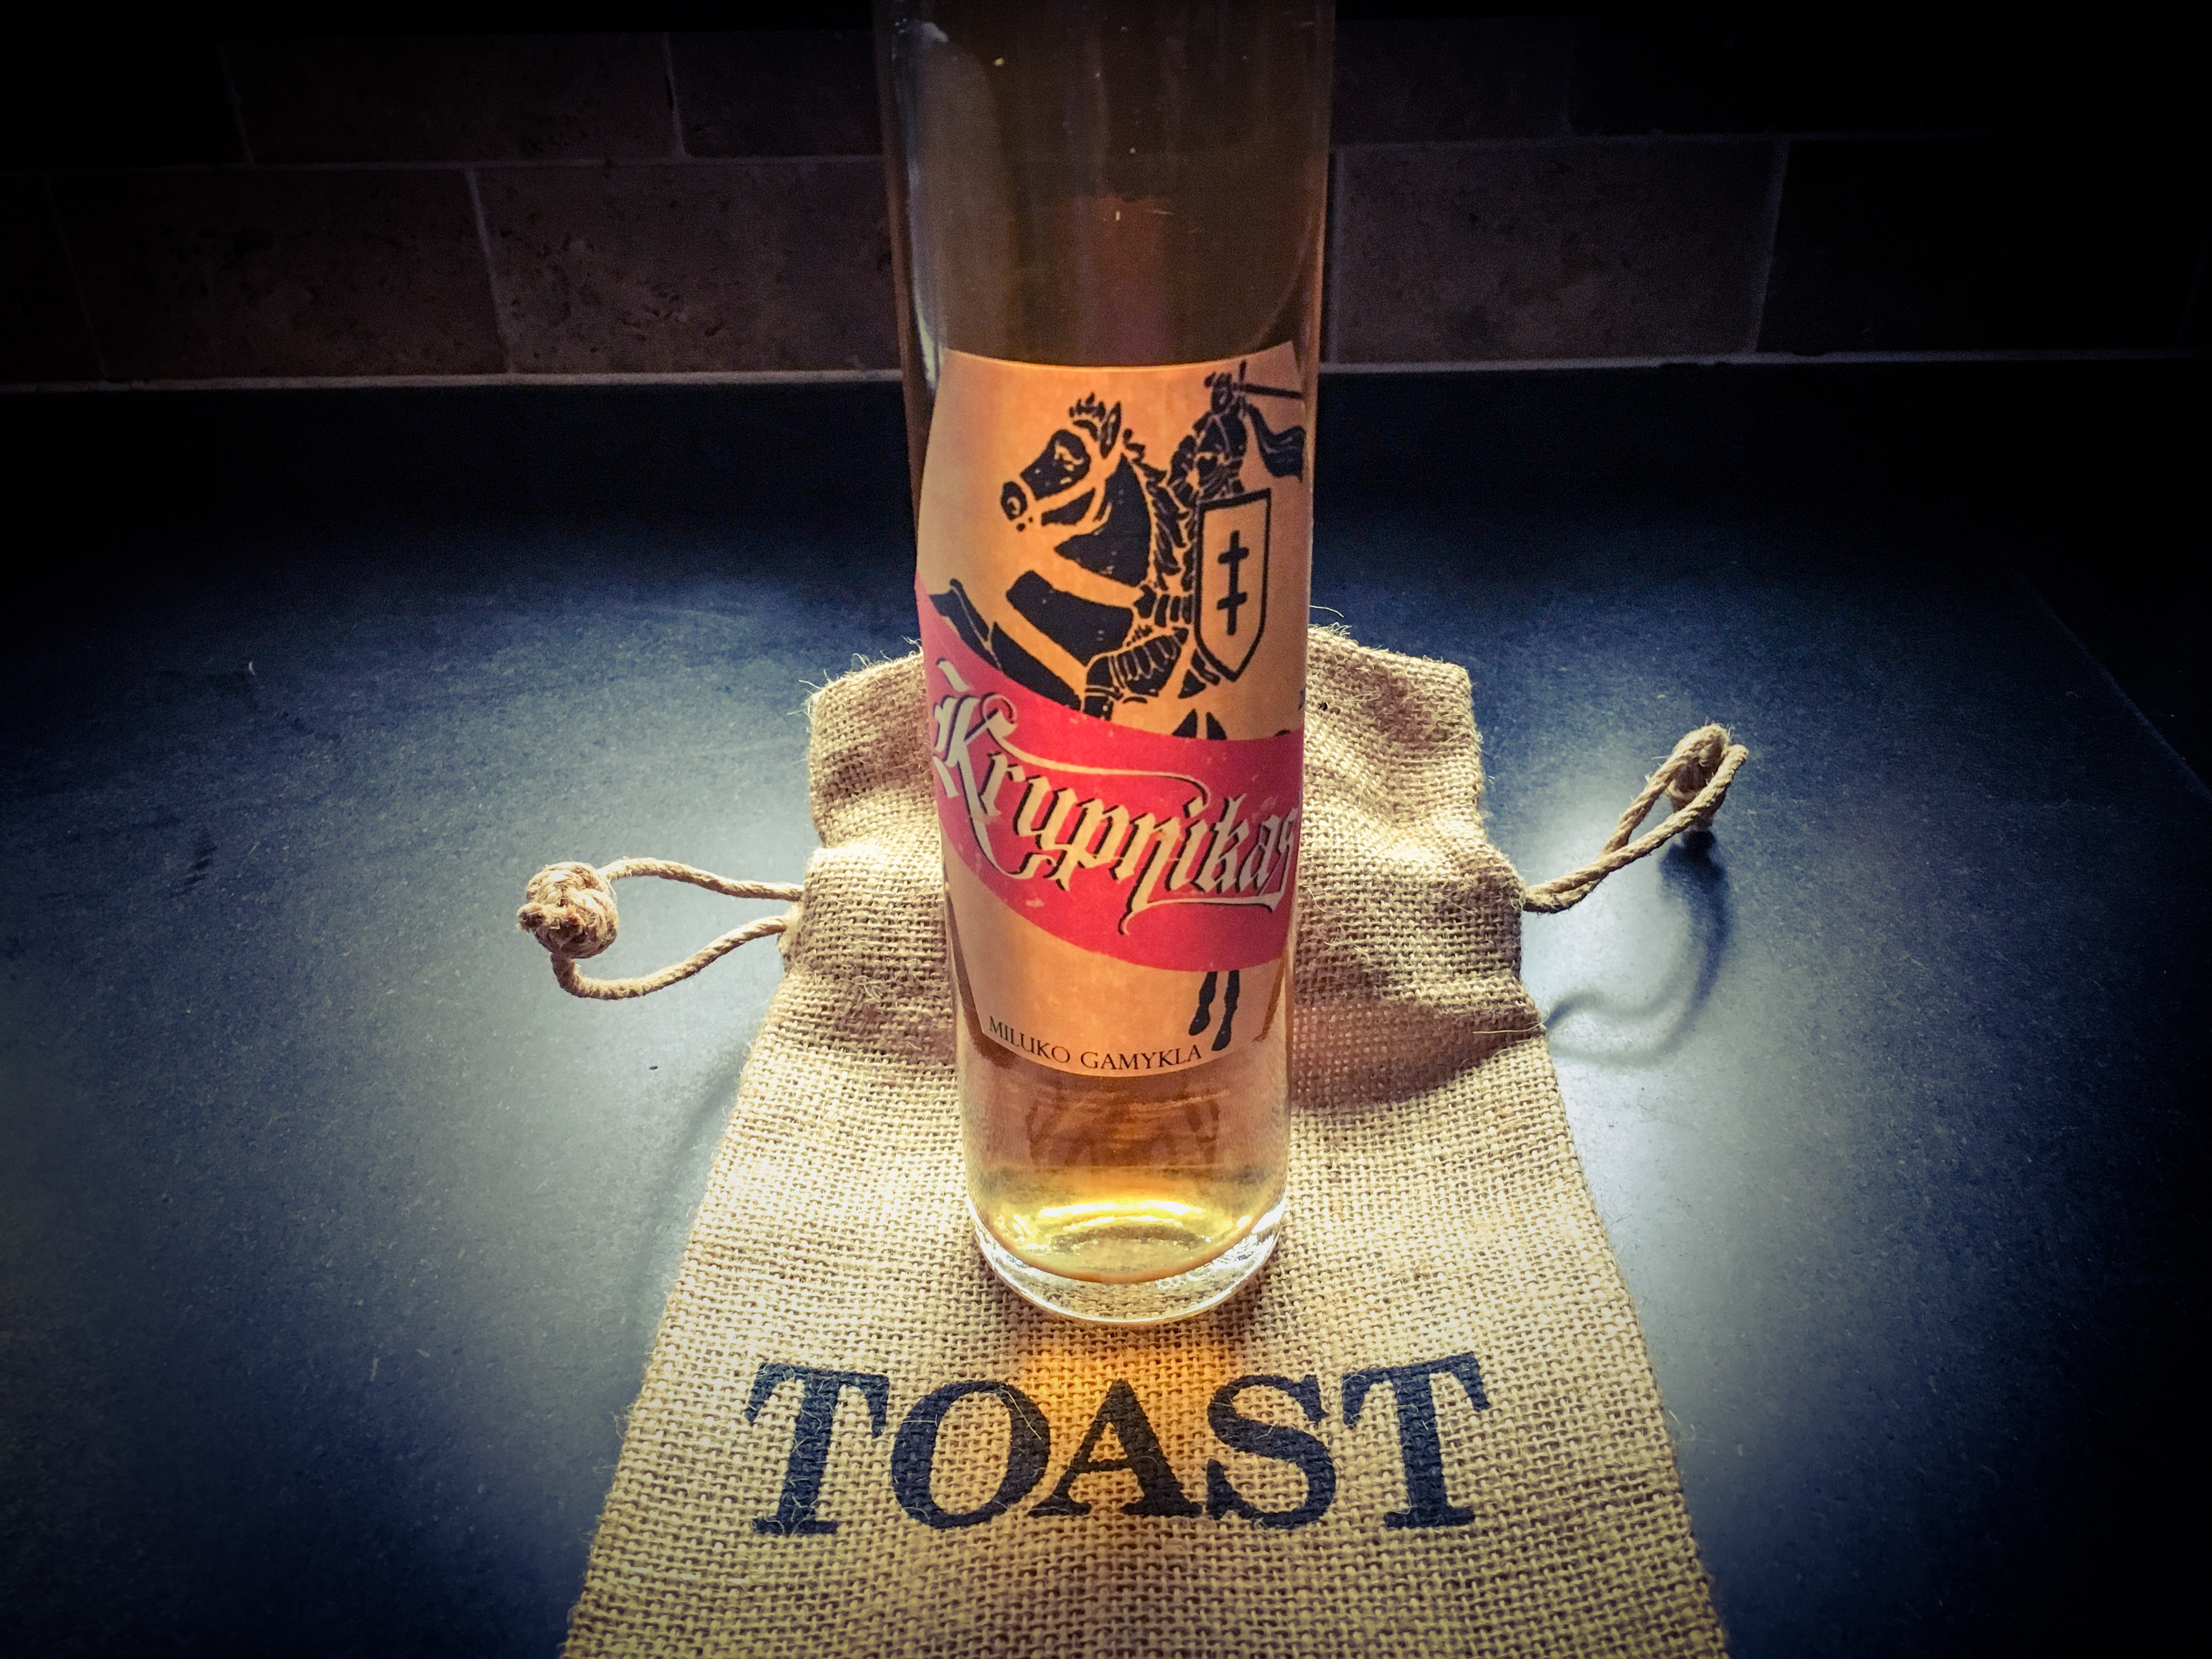
I’ve been making Krupnikas for over 40 years. (And no, I won’t be posting my secret recipe here.) It’s a honey-based liqueur that is popular in eastern Europe, especially in countries like Lithuania, where my parents were born. Though most of the Krupnikas that I’ve tasted is similar, no two recipes are exactly alike…and that’s where the arguments begin!

I have many friends that make Krupnikas. Some use a leaner approach (like me)…others go for the everything-in-one-basket approach. I’m not sure that more is necessarily better. Some friends claim that it isn’t real Krupnikas if you don’t use black pepper. But I’ve been to many pubs and restaurants in Lithuania and have never been served Krupnikas with black pepper in it. Other recipes include ginger, turmeric, and saffron. I don’t include any of these ingredients in my recipe.

krupnikas

If you Google “Krupnikas,” you’ll find many different recipes…some pretty good, some incredibly awful…(but none as good as mine!) I use grain alcohol…there’s no distilling involved. There were times in the last 40 years when grain alcohol was not readily available to me, and my Krupnikas production came to a screeching halt for a while. But these days, I find it easily. (Here in New England, it’s sold in Rhode Island and Massachusetts.) Desperate times without grain alcohol forced me to try vodka instead, but I never liked the final result.

There’s a version of Krupnikas that dates back to the early 1900’s in the coal region of northeastern and east central Pennsylvania, where Lithuanian immigrants created their own version, using moonshine as a base. They named it “Boilo,” and many people make this recipe every year during the Christmas holidays even today. But it’s more like a cousin of Krupnikas, if there can be such a thing.

Traditional Krupnikas uses a variety of unusual spices, none of which have their origins in Lithuania, so it’s interesting to hear how these exotic ingredients made their way via various trade routes to eastern Europe.

The story goes that Krupnikas was created by Benedictine monks in the 1500’s, and that it became popular in both Lithuania and Poland for celebrations like birthdays, weddings, and holidays. But when the Soviets shut down all Krupnikas production, the recipes went “underground,” passed down from generation to generation through closely guarded family recipes. That’s why everyone thinks their family recipe is the best!

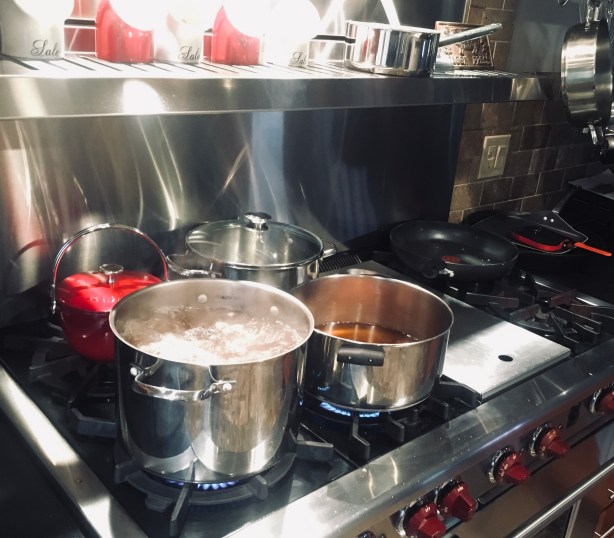
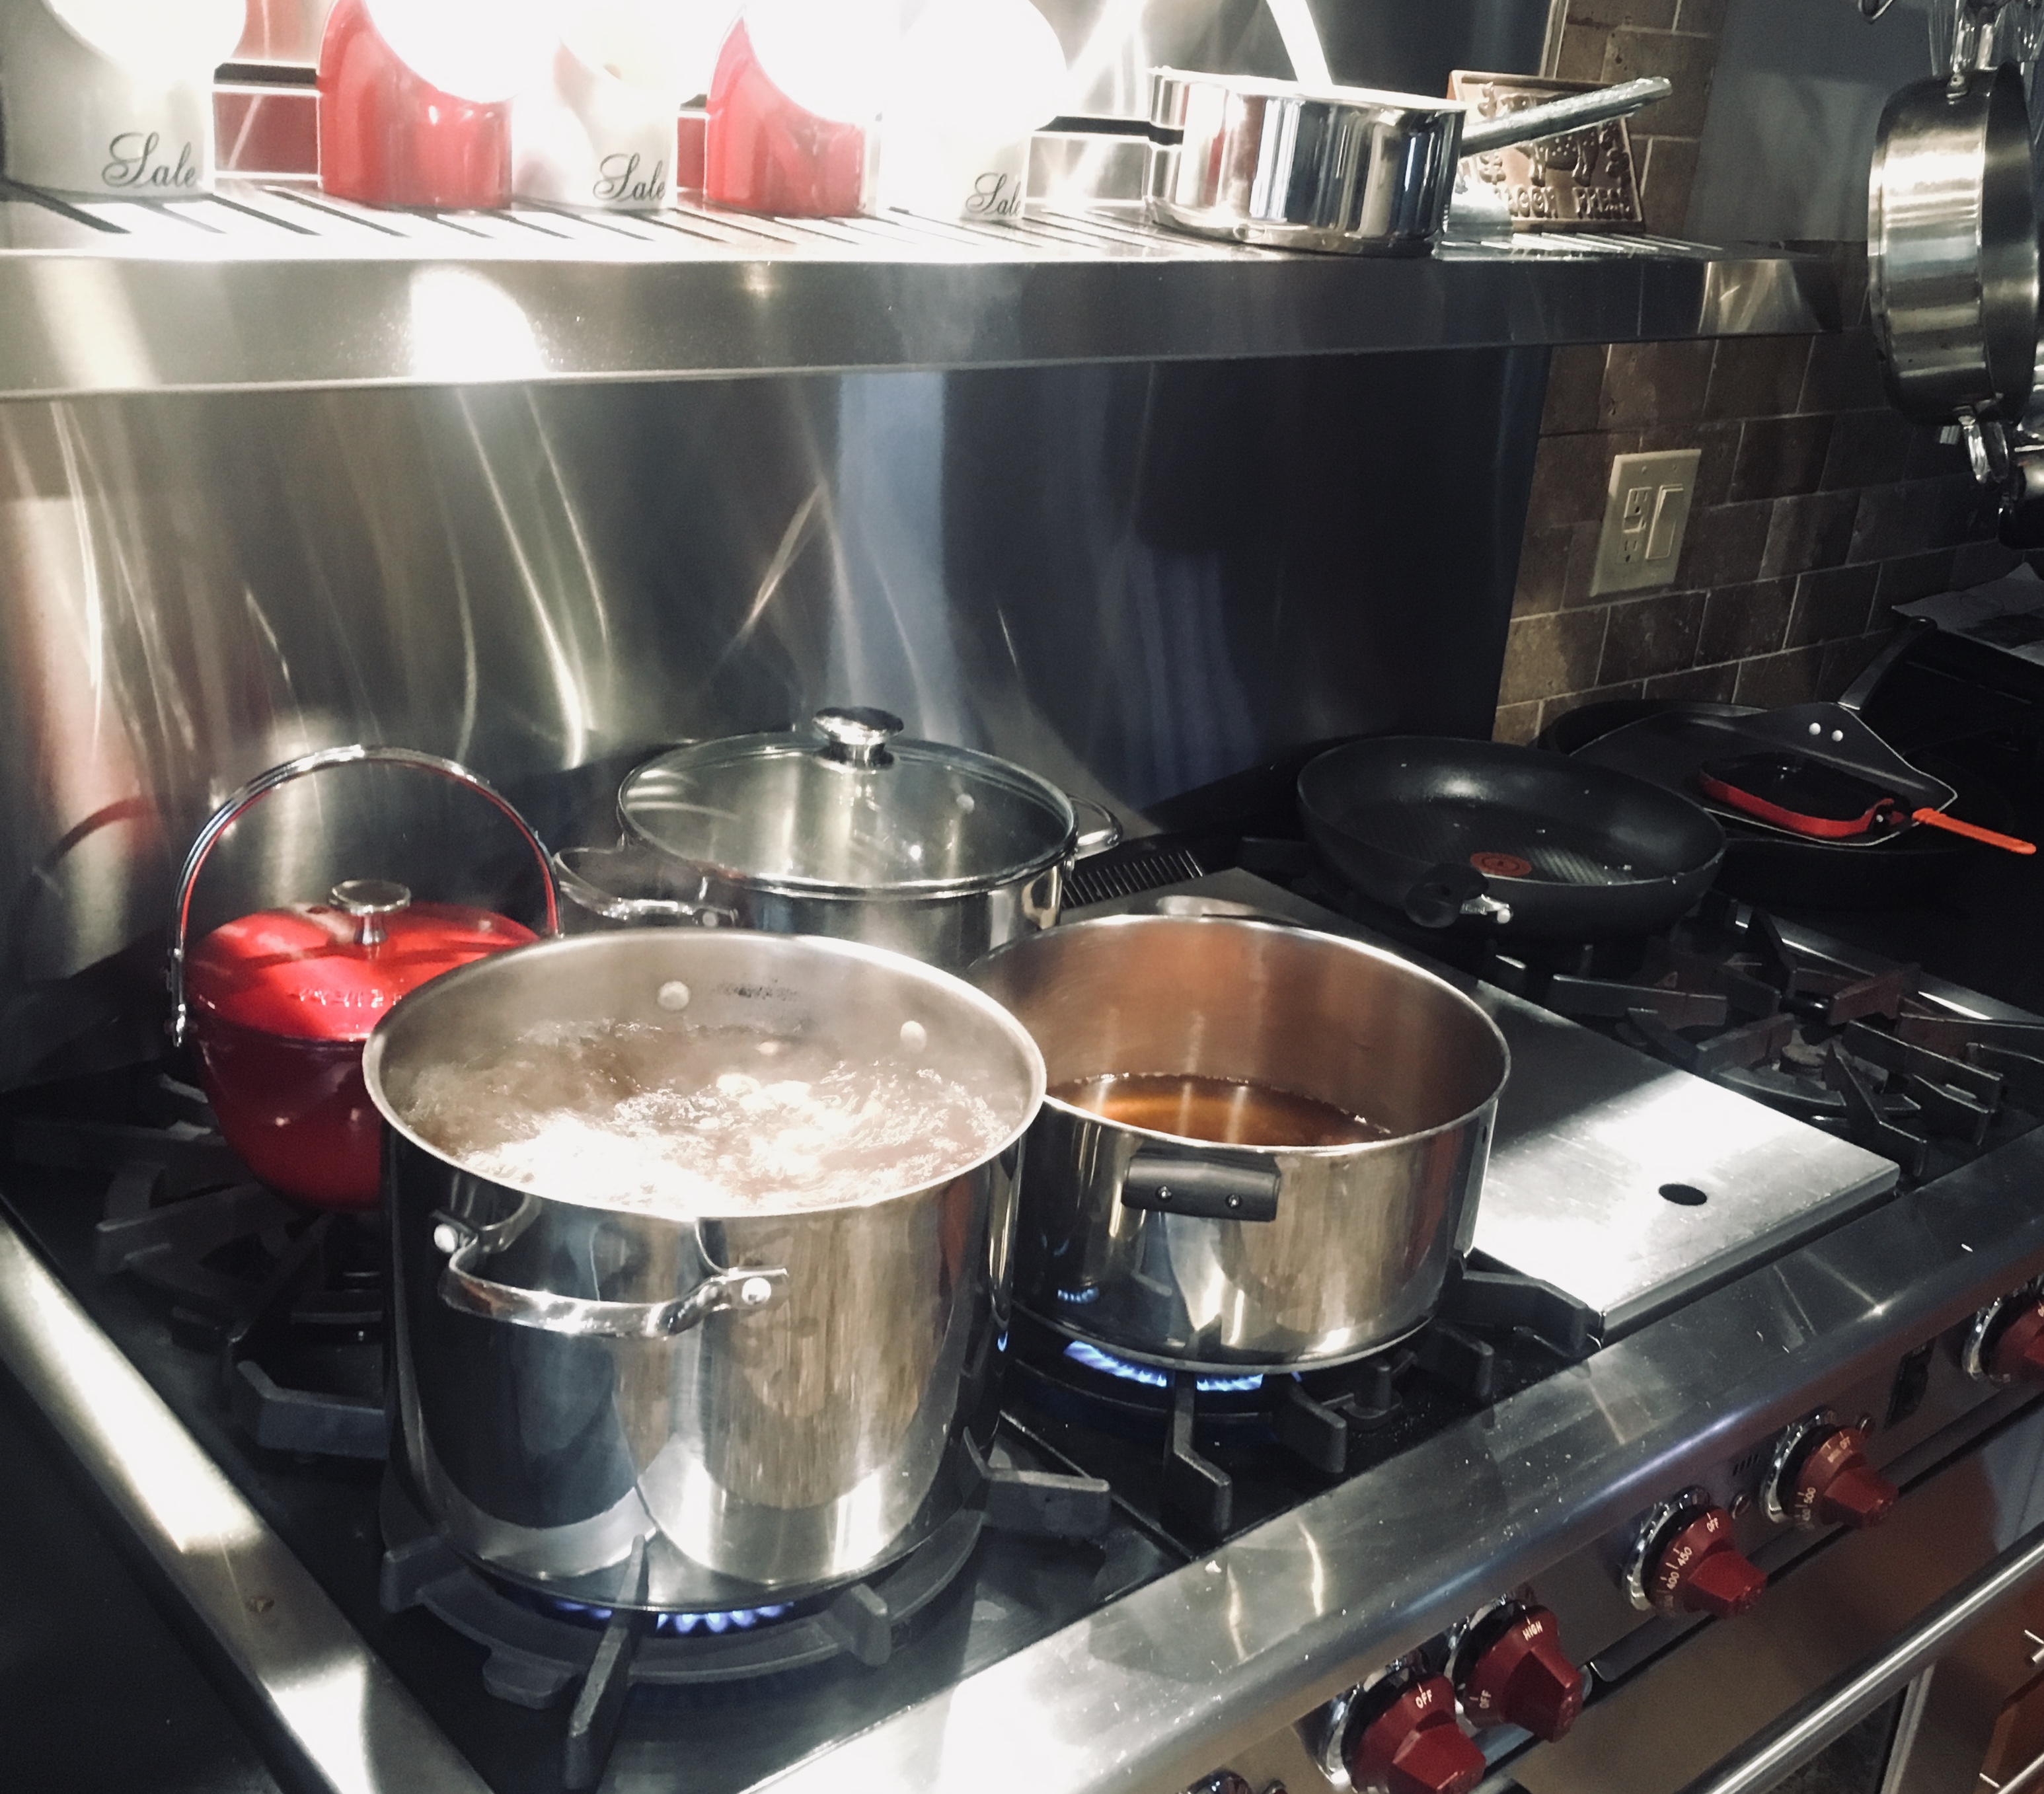
One pot for honey, one pot for the various spices I use…to be combined later.

My own Krupnikas making story started with my uncle, who would make large batches of the stuff in his tiny Richmond Hill, Queens, NY, kitchen. Because I am the godfather of my cousin, his son, I received a bottle as a gift from my uncle every Christmas. By New Year’s, that bottle would be gone. It wasn’t long before I got very tired of waiting 51 weeks for another bottle and I asked my uncle if he would share his recipe with me. He never did that exactly, but he did let me sit in on a brewing session and take notes in a cramped corner of his kitchen.

I took my notes home from my uncle’s house and tried to decipher what I wrote. Since there was no such thing as the internet back then (what we call “the dark ages,” kids), I drove all over New York City in search of some of the more exotic spices used in making my uncle’s Krupnikas recipe. I became a regular at several Asian and Indian stores, where, at first, they looked at this tall, geeky white dude somewhat suspiciously as I brought my spices to the counter for purchase.

Over the decades, through trial and error, I changed my uncle’s original recipe to the one that I proudly call my own today. You can’t buy it in a store, but if you have tons of money and want to go into business with me, I’m sure we can work something out! Or become my best friend and you’ll get a bottle at the end of every year…and then you’ll be the one waiting 51 weeks for another!

krup glasses

Versions of Krupnikas are available in liquor stores: Old Krupnik is a Polish liqueur, and the German brand Barenjager is another. And many whiskies, like Dewar’s and Jack Daniels, now have honey-flavored spirits as well.

Though quite different from my own recipe, there are two authentic Lithuanian-style Krupnikas liqueurs made in the United States by acquaintances of mine.

Based out of Durham, North Carolina, the Brothers Vilgalys Spirits Company (www.brothersvilgalys.com) has a pepperier version that uses local North Carolina wildflower honey. President of the company, Rim Vilgalys, the son of my good childhood friend from New York, has done what I never got around to do: make this fabulous elixir available to the public. You’ll find it at ABC stores throughout the state of North Carolina.

bvsco-krupnikas

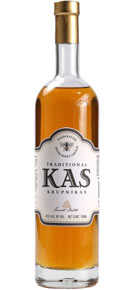
The second brand, made by a childhood friend, is made and sold in the New York area and goes by the name of KAS Krupnikas. (www.kasspirits.com)

kas_krupnikas_new

Both are pretty darn good. But are they as good as mine? I think you already know my answer to that question!

Sveiks! (Cheers!)

HOMEMADE MUSTARD

Posted: October 25, 2020 in Food, mustard, Recipes, spicy
Tags: , , ,

It’s so easy to make your own mustard. And really good mustard. Mustard that hasn’t been sitting on the store shelf for a year. Mustard with real flavor.

Once the mustard is made, you’re supposed to wait a few weeks before using, letting its heat mellow a bit. But I enjoy it right from the start. Feel the burn!

mustard

The great thing about this recipe is that you make it with your favorite beer, so use what you drink and you’ll have a mustard like no one else. I used Samuel Adams Boston Ale for this recipe.

1/4 cup yellow mustard seeds
1/4 cup brown mustard seeds
3/4 cup Sam Adams Boston Ale
1/4 cup apple cider vinegar
2 tbsp. honey
2 tbsp. brown sugar, firmly packed
2 garlc cloves, smashed
1 bay leaf
2 tsp. sea salt
1/8 tsp. freshly ground pepper

Put the yellow and brown mustard seeds in a bowl and pour in 1/2 cup of the beer. Push the mustard seeds down to submerge them in the beer. (I lay a sheet of plastic wrap down on top to keep them submerged.) Cover and refrigerate for 24 hours.

Combine the remaining 1/4 cup of beer, the vinegar, honey, brown sugar, garlic, bay leaf, salt and pepper in a small saucepan. Bring the mixture to a boil over medium-high heat, stirring to dissolve the honey and the sugar. Boil for 1 minute, the immediately remove the pan from the heat and let it cool to room temperature.

Toss the garlic and the bay leaf in the trash and pour the liquid into a blender.

Pour off any remaining beer left in the bowl with the mustard seeds. Add 3/4’s of the plumped mustard seeds to the blender and blend to break the seeds. Add the remaining 1/4 of the mustard seeds and pulse just once to mix. You want the mustard thick, with some whole seeds remaining.

Put the mustard in an airtight container in the fridge for at least 3 days and up to a week, depending on how mellow you want it and how much waiting you can tolerate! After about 3 weeks, the mustard will be at its peak…but it will keep in the fridge for several months. (I can’t imagine it will last that long.)

My daughter and I love any foods that are heavy on the garlic, so this is a special treat we make when diets don’t matter! It’s buttery, it’s garlicky, it’s carby, and it’s absolutely delicious!

I use 2 kinds of garlic in my garlic bread: fresh and granulated. I think it adds a richer flavor than either one alone. And passing the fresh garlic through a press ensures that it will cook quickly and not leave you with that raw garlic taste in your mouth.

Although I love French baguettes, they’re too thin and crisp for garlic bread. I buy that long, soft, Italian loaf you can find in just about any supermarket bakery. When it bakes, the outside edges have a crisp bite to them, while the inside of the loaf stays soft…exactly what you want! The Italian loaf is big, so not only do I cut it lengthwise, I then cut each piece in half. This will make enough for us to enjoy one evening, and still store some in the freezer for a future craving.

This recipe makes enough for 1 garlic bread, 1 cheesy garlic bread, and also the bread you’ll be putting in the freezer for another time.

The delicious final product…but I digress…

2 sticks (8 oz.) unsalted butter
2 large cloves garlic, squeezed through a press
1 teaspoon granulated garlic
1 teaspoon salt
1 teaspoon oregano
1 teaspoon parsley
grated mozzarella cheese…a few ounces

In a bowl, let the butter soften to room temperature. Once it’s soft, squeeze the fresh garlic cloves through a garlic press and add them to the butter. Then add the granulated garlic, salt, oregano and parsley. Using a fork, mix the ingredients really well until you have a beautiful garlic and herb butter. (Once it’s mixed, I find it’s easier to spread with a spatula.)

Spread the garlic butter evenly on all 4 pieces of bread you’ve cut. Use it all up! Going thin on the butter serves no purpose here!

Place one of the loaves on a baking sheet. Add the grated mozzarella to one of the other loaves, and place it on the baking sheet as well.

Regular garlic bread on the left, cheesy garlic bread on the right…ready to go into the oven.

Pre-heat the oven to 400 degrees.

With the other two pieces of bread, I simply put them together…with cheese inside or not…

…and wrap them in aluminum foil. I place that in a freezer bag and keep it frozen until we have another craving. When it’s time to cook, I pre-heat the oven to 350, and bake the loaf in the foil for about 25 minutes. I take it out of the foil at the very end and bake another 5 minutes to get it to crisp up.

Ready to be devoured!

With the oven at 400, I bake my garlic bread and cheesy garlic bread for about 10 minutes, or until the edges of the bread start to turn a golden brown and the cheese on the cheesy side starts to melt.

I cut each piece in half so my daughter and I share in the 2 breads. There’s never any leftovers!

Some people don’t like cooking with veal because of the way the animals are treated, and I completely understand because I’m one of those. But…I’m fortunate that I can buy my veal from a nearby dairy farm, Sweet & Salty Farm in Little Compton, RI, where the animals are grass-fed and raised humanely. That makes for happier animals and incredibly flavorful meat…and no guilt about using it.

If you can’t get humanely raised veal, pork and beef work, too.

I also buy veal bones from Sweet & Salty Farm, roasting them on a sheet pan in a 400-degree oven for 30 minutes, then placing them in a large pot of water. I take some chopped carrots, onions, and celery, toss them in a little olive oil, and place them on a sheet pan, roasting them in the oven until they’ve caramelized, then add them to the pot with the veal bones. The secret to a great veal bone broth is to boil the bones and veggies for as long a time as possible. Restaurants will do this for days, replacing the water in the pot as needed. At home, I’ll start the broth in the morning and finish it by evening, straining out the veggies and bones at the very end of the cooking time.

The subtle flavor of veal can get lost with heavy seasonings, so I keep it simple. The addition of veal bone broth amplifies the flavor and keeps the meatballs from drying out.

img_0245

1 lb. ground veal
1 cup toasted breadcrumbs (I use Udi’s bread to make it gluten-free)
2 teaspoons parsley
1 teaspoon oregano
1/2 teaspoon basil
1 teaspoon salt
1/2 teaspoon black pepper
1/2 teaspoon granulated garlic
1/2 teaspoon granulated onion
1 egg
extra virgin olive oil
1 lb. pasta, cooked firmer than al dente
2 cups veal bone broth or beef stock
salt and pepper for seasoning
2 tablespoons half-and-half
2 tablespoons butter
1 cup of frozen organic peas

Pre-heat the oven to 350 degrees.

Make the meatballs: In a bowl, combine the veal, breadcrumbs, parsley, oregano, basil, salt, pepper, garlic, onion and egg, mixing the ingredients thoroughly. Don’t over-mix.

Form the meatballs one by one, about golf ball size, and place them in an ovenproof pan. I line the pan with non-stick aluminum foil for easy clean up. Cook the meatballs for about 10 minutes. Don’t overcook them! (Even if you’re using pork, 10 minutes is OK because you will be cooking them longer. )

In a saucepan, heat the veal bone broth or beef broth. Once the meatballs have cooked in the oven, transfer them to the pot of broth and cover it with a lid, keeping the heat on low. If the broth doesn’t cover the meatballs, turn them every once in a while to keep them moist on all sides. Simmer the meatballs in the broth for about 30 minutes, then transfer them to a large sauté pan.

Turn the saucepan with the veal broth on high and reduce it to about 1/2 cup. Season it with salt and pepper.

In a large pot, cook the pasta to a bit firmer than al dente in well-salted water. Drain it and set it aside.

In the large sauté pan with the meatballs, add the butter and the half-and-half. Add the reduced veal broth, the pasta, and the peas.

Gently mix the ingredients in the pan until the peas have warmed through and the sauce clings to the pasta. Serve immediately.