Archive for the ‘Food’ Category

Though it may sound Japanese, the word “saganaki” refers to a small frying pan used in Greek cooking. The most famous of these dishes, simply called saganaki, is a fried cheese, often flamed at the end with a little ouzo.

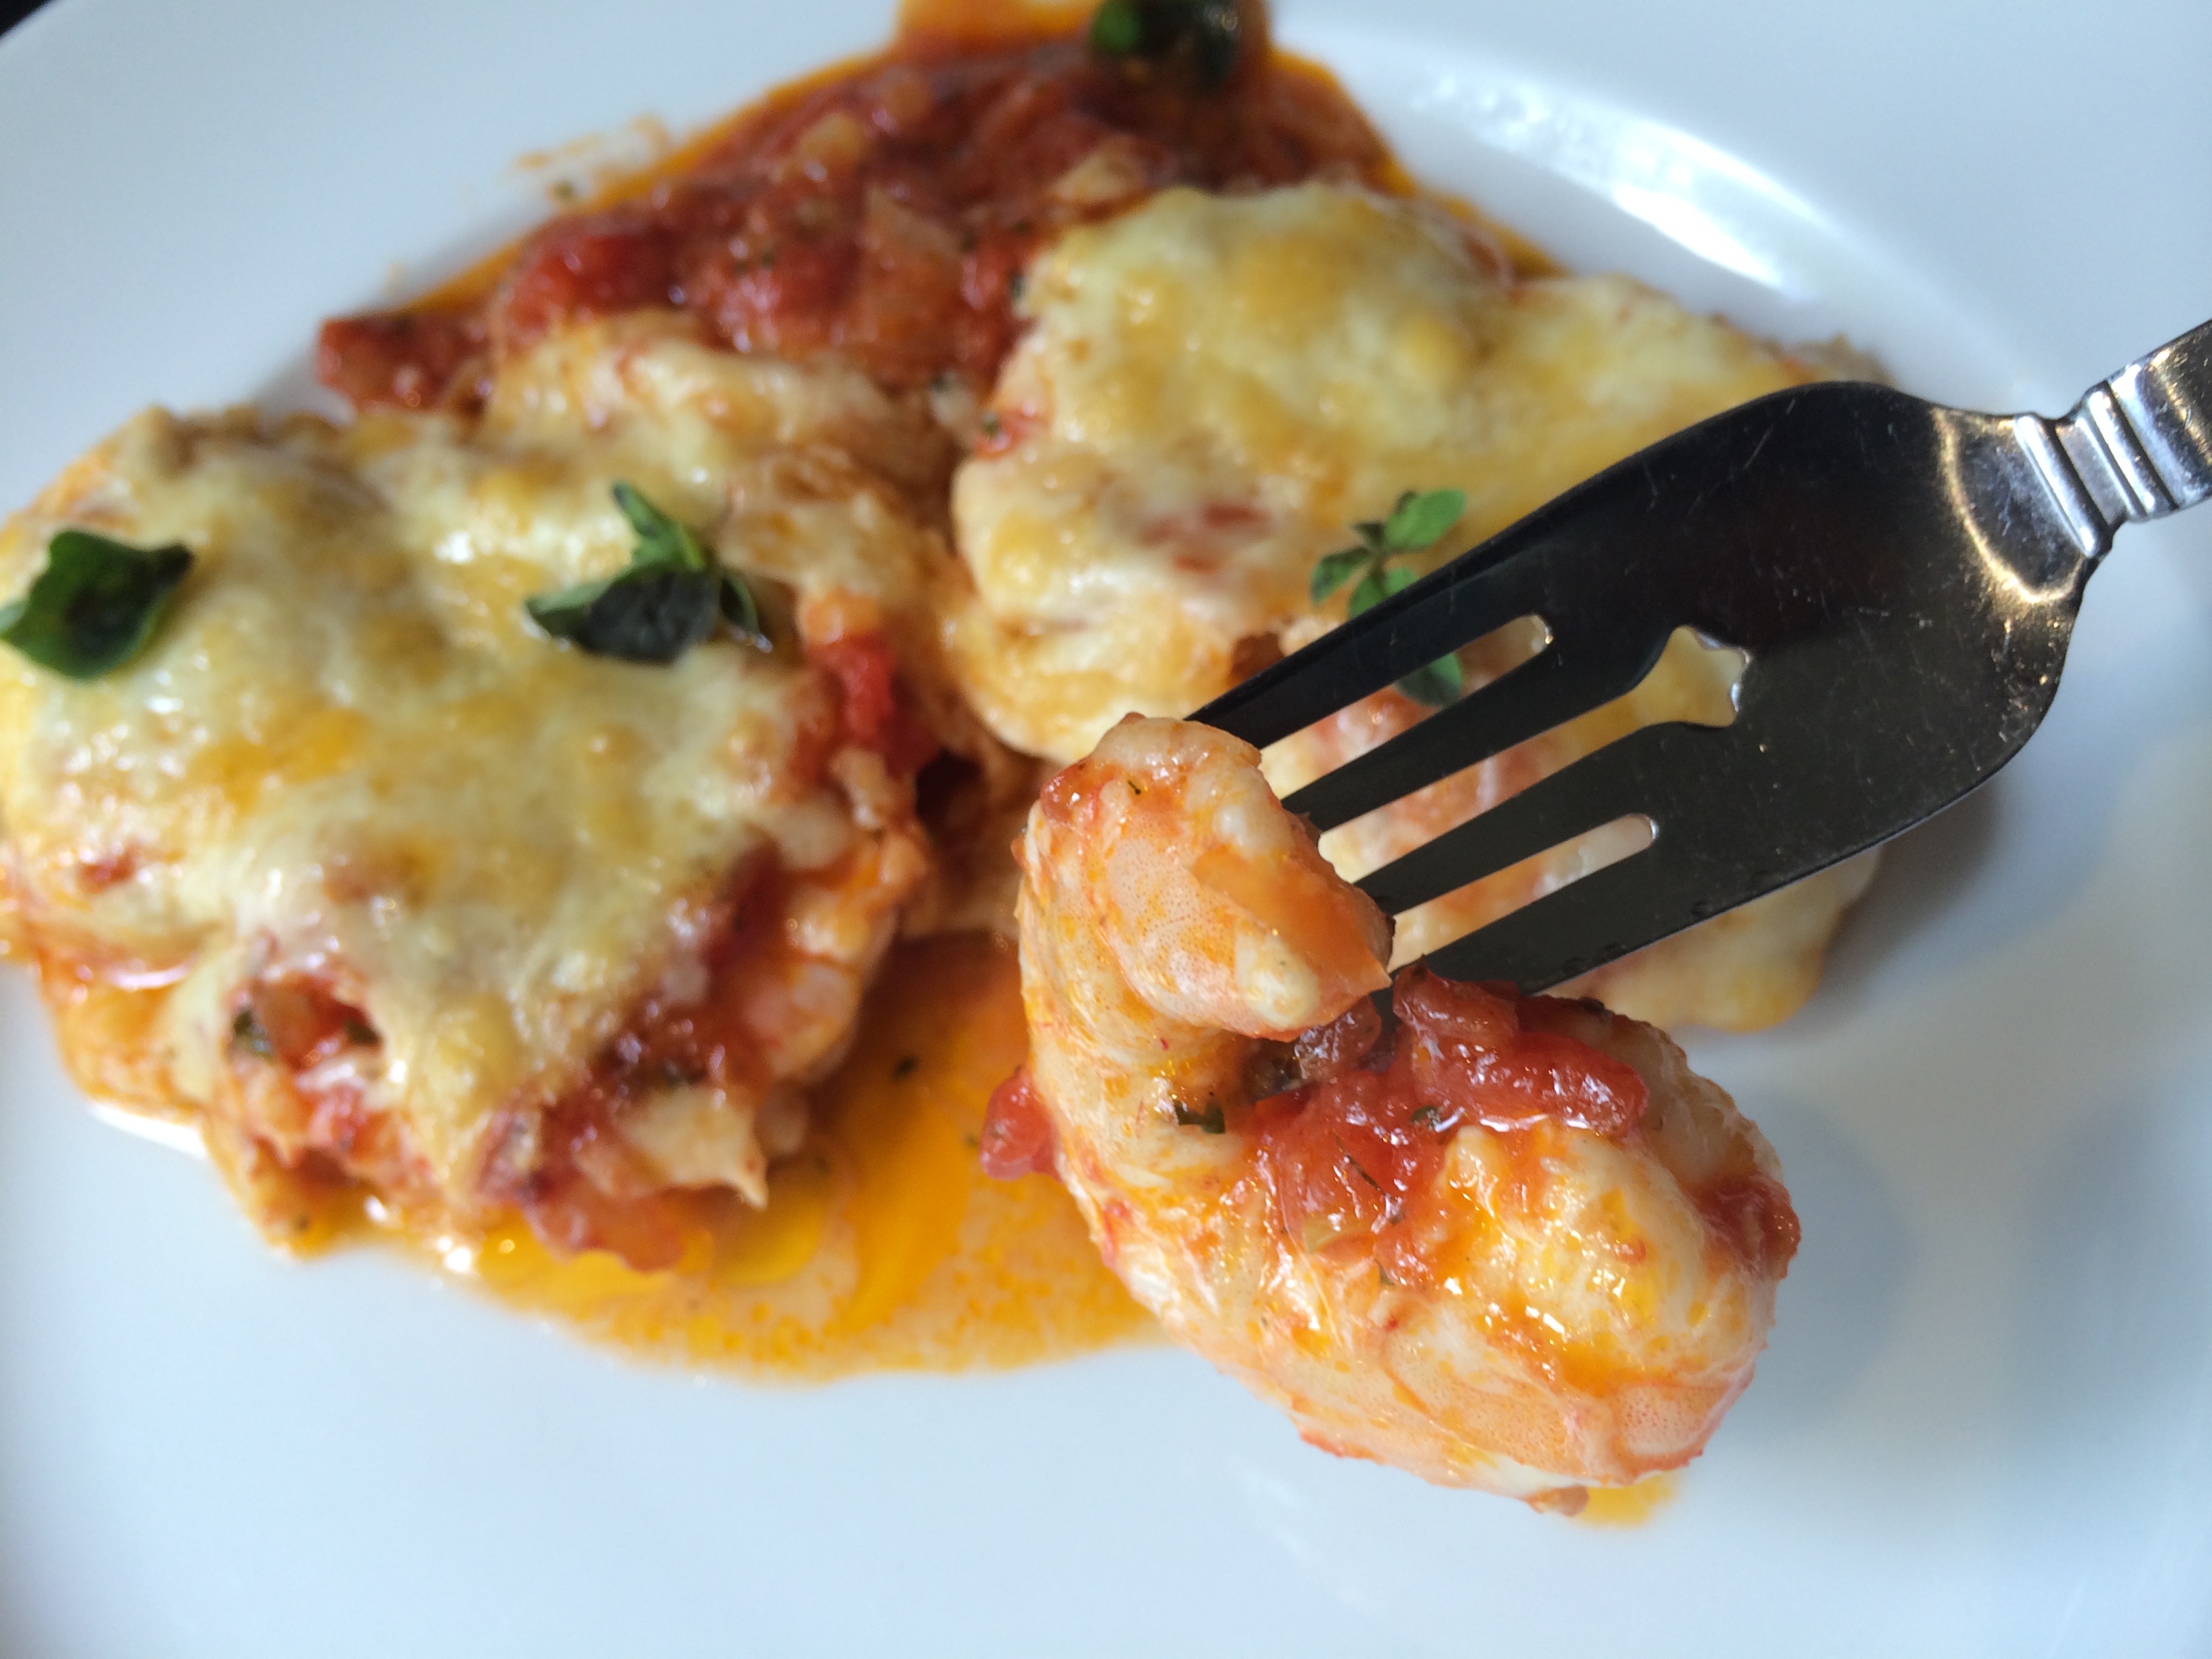
Shrimp saganaki is one of my favorite Greek dishes, and it usually involves cooking shrimp in a tomato-based sauce with plenty of feta cheese sprinkled in. It’s simple yet fantastic if the ingredients are fresh. Doesn’t hurt to be sitting in a taverna on the beautiful island of Santorini while eating it, either!


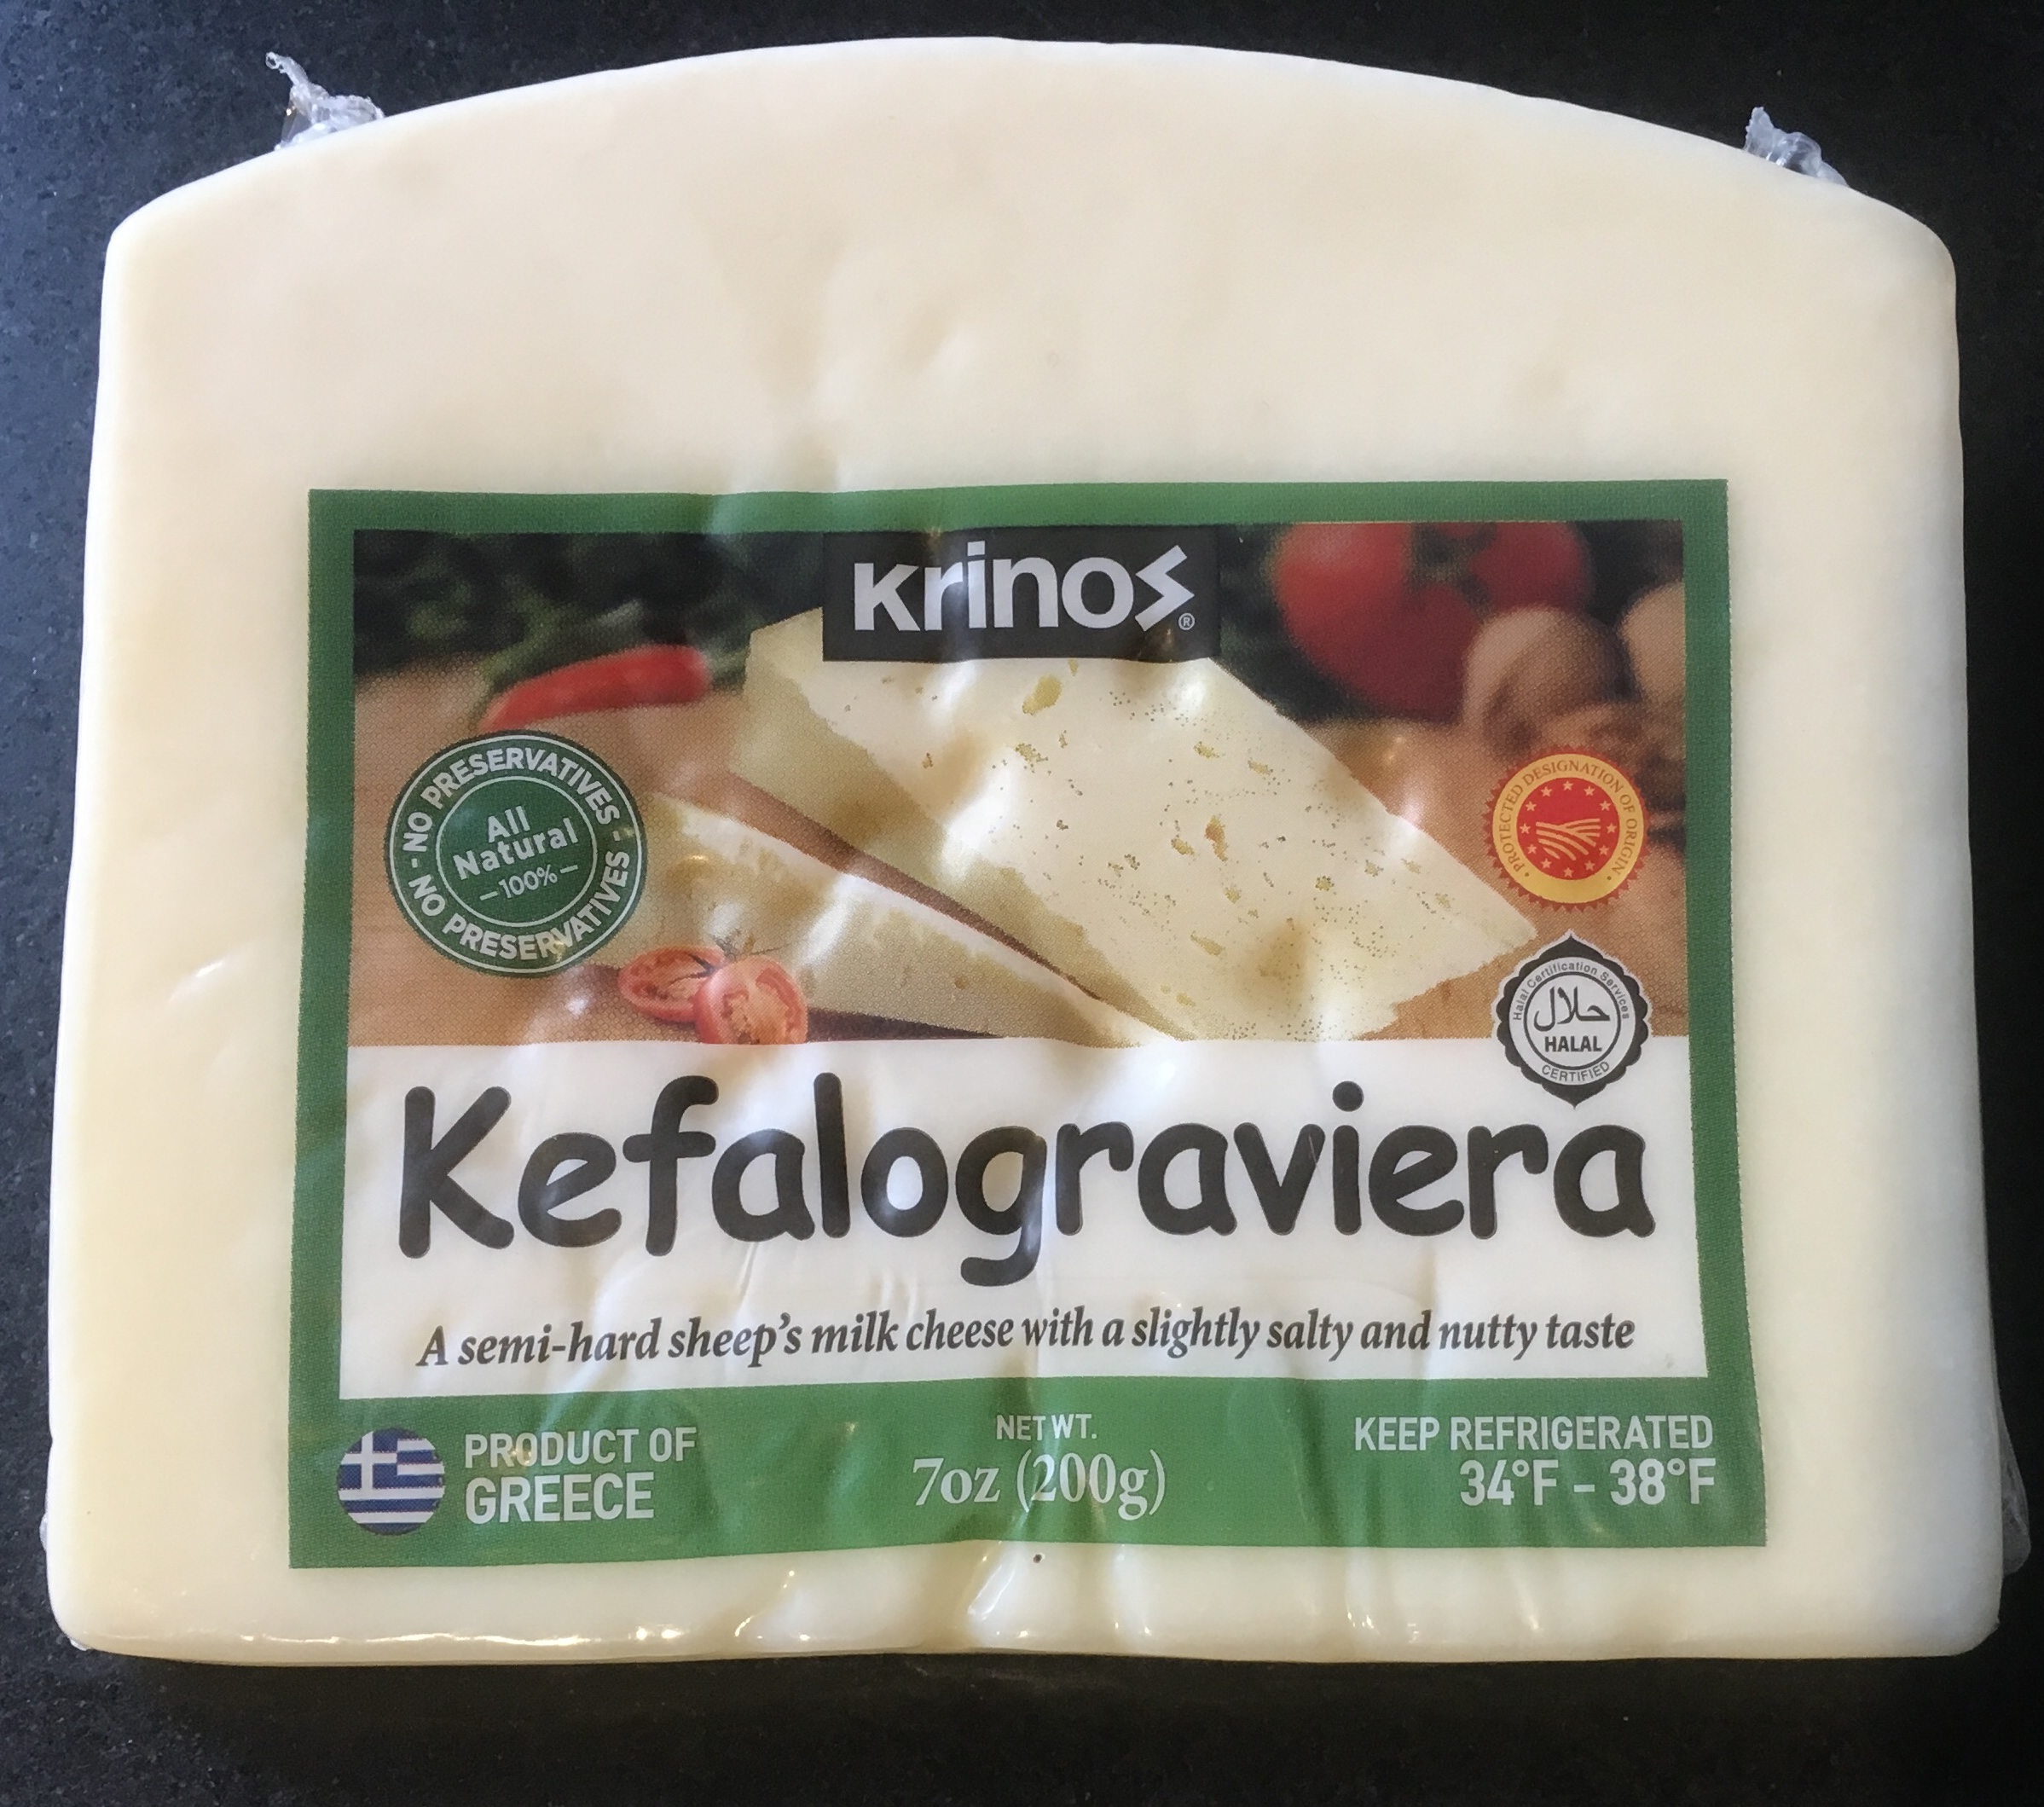
You can find Graviera cheese in most supermarkets.


I found a slab of Graviera cheese at a local supermarket, and decided to recreate shrimp saganaki using that instead of feta. It was pretty darn amazing.

I like using peeled and deveined 24–30 shrimp, because larger shrimp don’t always cook through. These smaller shrimp will be bite-sized and delicious.


Melty, gooey, delicious!

Melty, gooey, delicious!


200g package (7 oz.) grated Graviera cheese
1 can (28 oz.) whole tomatoes
1 lb. (about 24) shrimp, peeled and deveined
1 medium onion, chopped
juice of 1/2 lemon
1/4 cup olive oil
2 cloves garlic, through a press
pinch red pepper flakes
1 1/2 tablespoons fresh dill, finely chopped
1 tablespoon fresh oregano, finely chopped
1 1/2 tablespoons Ouzo
salt and pepper


Peel and devein the shrimp (or you can buy them that way already.) Place them in a bowl. Squeeze the juice of  1/2 of a lemon on to the shrimp and toss. Set them aside.

In a large pan, saute the onions in the olive oil until translucent. Add the garlic and cook for a few seconds more.

Crush or puree the tomatoes and add them to the pan. Add the red pepper flakes, dill and oregano, and salt and pepper. Add the Ouzo.

Let this sauce cook down for a bit until all the flavors have blended together.

Pour a layer of the sauce on the bottom of a metal broiler-proof pan. Lay the raw shrimp in a single layer into the sauce. Cover the shrimp with the rest of the sauce and sprinkle the grated Graviera on top.

Place the pan in a pre-heated 350-degree oven and bake until the cheese is golden brown and bubbly and the shrimp have cooked through. I like to finish it under the broiler for a few minutes to get the cheese brown and melty.


shrimp saganaki


A few years ago, we were invited to a very cool retro summer party: cocktails and appetizers from the 60’s, and everyone contributed to the music by bringing in their favorite songs on vinyl. (I brought in a copy of the First Edition’s “Just Dropped In (to See What Condition My Condition Was In)” featuring a very young Kenny Rogers. Very trippy.

We were also asked to contribute to the apps, so I brought waffle chips with clam dip.


image

2 8-oz. packages cream cheese, softened
3 6-oz. cans of chopped clams, drained, liquid reserved from one can
1 tablespoon fresh lemon juice
2 teaspoons Worcestershire sauce
1/2 teaspoon salt
1/4 teaspoon black pepper

Combine all the ingredients, except the clam liquid, in a bowl and mix them well with a fork.

Add 1 tablespoon of the clam liquid and mix well. Keep adding the clam liquid until the dip reaches a consistency you like.

Serve with the potato chips.


image

Now’s the time to head to your local farm stand and pick up a bag of gorgeous plum tomatoes, before the season is gone! And this is what you do with them…

These are not sun-dried tomatoes. They’re better, because fresh plum tomatoes are still moist after roasting, with a bit of that magic tomato liquid in every cup! A great, simple platter to offer at parties.

Tomatoes before

Tomatoes before.

12 to 18 halved, seeded plum tomatoes
1/4 cup extra virgin olive oil
2 tablespoons organic cane sugar
Freshly ground pepper
Fleur de Sel or sea salt

Pre-heat the oven to 250.

Line a baking sheet with foil and rub it lightly with olive oil.

Arrange halved and seeded tomatoes on it in a single layer, cut side up. Drizzle evenly with 1/4 cup olive oil, sprinkle with 2 tablespoons sugar, and season with pepper to taste.

Bake the tomatoes until they are still juicy but slightly wrinkled, about 3 hours. Transfer them to a platter and let them cool slightly.

Just before serving, sprinkle the tomatoes with Fleur de Sel, and garnish if you like, with chopped parsley leaves, mint leaves, or basil. (Bacon bits sound pretty good, too!)


Tomatoes after

Tomatoes after!

I really love the deep flavor of soy sauce and the sweetness of hoisin on poultry. Peking duck is the best example of this, but since I live in Rhode Island, I don’t get a chance to jump in the car and drive to Chinatown in Boston or New York at the drop of a hat. I had to come up with a plan B…and a good plan B!

I found it while looking through an old Chinese cookbook I had bought many years ago. Written by legendary NY Times food critic Craig Claiborne and Virginia Lee, “The Chinese Cookbook” has become my bible for all of my Asian dishes.

I use chicken instead of duck. It’s cheaper, easier to find, and I can easily buy a whole pasture-raised chicken from local farms here in Rhode Island. But it is just as delicious.

As long as you use gluten-free soy sauce and hoisin sauce (La Choy and Kikkoman make them and they’re found in just about any supermarket), this recipe is gluten-free.


Cantonese chicken


1 whole chicken, about 6 lbs., or 2 smaller chickens (pictured)
1 tablespoon peanut oil
1 tablespoon soy sauce
4 teaspoons Chinese five spice powder
2 teaspoons granulated garlic
2 teaspoons salt
1/2 teaspoon black pepper
6 tablespoons hoisin sauce
2 teaspoons sesame oil


Remove all the giblets from the chicken and discard. Rub the soy sauce first all over the chicken. (The chicken will absorb the flavors better if you do it before you rub the bird with the oil.) Then rub the peanut oil all over the chicken.

Combine the Chinese five spice, garlic, salt and pepper in a bowl. Season the entire chicken, including inside the cavity, with this mixture.

Pre-heat the oven to 325 degrees. Place the chicken in a pan lined with aluminum foil (cleanup will be easier) and bake.

Meanwhile, combine the hoisin sauce and sesame oil in a small bowl. When the chicken is about 15 minutes away from being done, brush it with the hoisin/sesame oil mixture. Cook it another 15 minutes until the chicken has a nice dark glaze. Don’t let it burn!

Let it rest about 15 minutes before carving.


I love pastrami. I love ribs. So why can’t the two get along? (Using my best announcer voice): Well now they can!!

I’ve seen a few recipes that use pastrami ingredients on foods other than pastrami and I thought it could work with pork ribs as well. I was right. And for these ribs, you don’t need a smoker. They bake in the oven, then get finished under a broiler for that tasty char that you always look for in a grilled rib.

There’s a 2-step process to making these ribs. First, you combine the rub ingredients and let the ribs hang out in the fridge overnight. Then you bake them and broil them the next day, brushing a special sauce on them.

I prefer St. Louis-style ribs because they cook more evenly and have lots of meat. I prefer a heritage breed like Berkshire pork (also known as kurobuta) because of it has fantastic flavor, “good” fat, and is humanely raised.

Time to get ribbin’…


1/4 cup freshly ground black pepper
1 tablespoon ground coriander
1 tablespoon light brown sugar
1 tablespoon mustard powder
1 tablespoon paprika
1/4 teaspoon cayenne pepper
1/4 cup distilled white vinegar
2 tablespoons salt
2 racks St. Louis-style pork spare ribs (about 5 lbs.), preferably Berkshire pork

To make the rub, combine the black pepper, coriander, brown sugar, mustard powder, paprika and cayenne in a bowl. Mix well. To grind larger amounts of pepper and other spices, I use a small coffee grinder that I keep just for spices. It does the job quickly and easily.

My spice grinder.


Cut the racks of ribs into halves, removing the skin on the back of the ribs that can make it tough. Brush both sides of the ribs with the white vinegar, and then season with the salt. Pat the ribs with the spice rub, and place them on a rimmed baking sheet. Place the baking sheet in the fridge for at least an hour. Overnight is better.

Vinegar, salt and then the spice rub.


Pre-heat the oven to 325. Transfer the ribs to a large roasting pan, or you can use the rimmed baking sheet. Place the ribs fatty side up, and add 1/2 cup of water to the pan. Cover the ribs with aluminum foil and bake them for about 2 hours.

After 2 hours, remove the ribs from the oven and let them sit at room temperature, still covered by the foil, for about 30 minutes.

Out of the oven and ready to be brushed with sauce.


1/4 cup Dijon mustard
3 tablespoons apple cider vinegar
3 tablespoons honey
2 tablespoon soy sauce

In a small bowl, combine the Dijon mustard, apple cider vinegar, honey and soy sauce. If the honey’s very thick, I place the glass jar (no lid) in the microwave for a few seconds to make it flow better. (Don’t do this if it’s in a plastic container, and don’t microwave for too long–honey will foam up and make a big mess!)

Pre-heat a broiler.


Brushing the ribs with the sauce.


Take the foil off the ribs and brush them with the sauce. Then place the ribs under the broiler until lightly charred, about 3 minutes. Slice into individual ribs or devour a slab at a time!

Charred and delicious!


Before you can have great shrimp cocktail, you have to do 2 things: buy the right shrimp and cook the shrimp the right way. The right shrimp is nothing less than wild-caught American shrimp. If you’re buying shrimp from Asia, your supporting a system that uses slave labor, where shrimp are fed chemical pellets and swim in feces. If it doesn’t say wild-caught American shrimp on the package or at your local seafood store, it’s crap. Give your store owner hell for selling it.

Cooking shrimp the right way is something I learned living in the South. My wonderful friends and neighbors taught me many things about food, and the right way to cook shrimp is near the top of the list.

Shrimp was never meant to be cooked to death. It doesn’t matter if you start with fresh shrimp, store-bought shrimp, or even frozen shrimp…the same rules apply: 1) Season your water. 2) Bring it to a boil, then reduce to a simmer and let it get happy for 10 minutes. 3) Drop in the shrimp and raise the heat. 4) Remove the shrimp AS SOON AS the water returns to a boil.

The seasoning for the water, commonly called shrimp boil, makes or breaks the flavor of your shrimp. For years, I used Zatarain’s Crawfish, Shrimp and Crab Boil in a bag. And it was good. But at some point, I realized I had to get serious and make my own boil.

2 quarts water
2 cloves garlic, smashed
1/2 lemon, squeezed, then drop the lemon in
1 small onion, peeled and quartered
4 bay leaves
1 tablespoon black peppercorns
1 tablespoon salt
1 tablespoon whole allspice
1 teaspoon cayenne pepper
1 teaspoon celery seed
1 teaspoon whole cloves
1 teaspoon brown mustard seed
1 teaspoon dry thyme

Combine all the ingredients in a 4–6 quart pot. Bring it to a boil, then reduce to a simmer, put a lid on the pot, and let it simmer for 20 minutes.

After 20 minutes, remove the lid and pour in your shrimp. (I prefer unpeeled.) Stir well, bring the heat back up to high, and remove the shrimp AS SOON AS it returns to a boil! The shrimp are cooked! Done!

Strain the shrimp and place them in a bowl with crushed ice on the bottom. Add more crushed ice on top of the shrimp, and place the bowl in the fridge until you’re ready to serve.


Freshly shucked oysters and clams, or in this case, beautiful boiled wild-caught American shrimp, all call for an equally amazing cocktail sauce…and this sauce kicks butt! And it features a key ingredient that you might not expect: vodka. The small amount of vodka in the mix makes the cocktail sauce easy to scoop even when stored in the freezer. Just scoop out what you need, let it thaw, and put the rest back in the freezer until next time.

image


2 cups ketchup
4 tablespoons prepared horseradish
1 tablespoon fresh lemon juice
1 teaspoon Worcestershire sauce
1/2 teaspoon Frank’s Red Hot, or other hot pepper sauce
5 grinds of fresh black pepper
1/4 teaspoon salt
1 teaspoon good quality vodka, like Tito’s

Combine all the ingredients. Store in a tight plastic container in the freezer.

It’s National Bacon Lover’s Day!


And who doesn’t love bacon? …Especially when you can slather it on anything with this fabulous aioli!

Don’t let the innocent photo fool you. This stuff is addictive, thanks to the addition of bacon and bacon fat! And the food processor makes this aioli light as a cloud. Spread it on burgers. Use it on a BLT. Goes great with tuna. Or just get some chips and use it as a dip. Inhale!


avocado


3 avocados, seed removed and scooped out of their skins
6 strips of bacon, fried crisp, chopped and cooled…bacon fat reserved
juice and zest of 1 lemon
2 eggs, room temperature
1 clove garlic
1 cup extra virgin olive oil
salt, preferably Fleur de Sel
Freshly grated black pepper

In a food processor, blend the avocados, bacon pieces, lemon juice and zest, eggs, and garlic. With the processor still running, add the bacon fat slowly, then add the olive oil. Add a good pinch of salt and a few grinds of pepper.

You can substitute vegetable oil for the olive oil if you feel it’s too strong. But this is not for the weak!

Note: Yes, this baby uses raw eggs. If you’re queasy about that, there are raw egg substitutes in many supermarkets. I don’t use raw eggs often, but I do here…and in a really good Caesar salad.


Here in New England, oysters are plentiful. We don’t just slurp ’em down: we go out and dig our own…we have our favorite buck-an-oyster bar for any given day of the week…and we debate over the best variety, from east coast to west, north to south.


oysters

Fresh oysters deserve an amazing cocktail sauce, and my recipe kicks butt: lots of horseradish, lots of flavor, and a secret ingredient: vodka. Not only does it give it a kick, it keeps it from freezing solid, so I can keep the cocktail sauce in the freezer until I need it.

2 cups ketchup
4 tablespoons prepared horseradish
1 tablespoon fresh lemon juice
1 teaspoon Worcestershire sauce
1/2 teaspoon Frank’s Red Hot, or other hot pepper sauce
5 grinds of fresh black pepper
1/4 teaspoon salt
1 teaspoon good quality vodka, like Tito’s

Combine all the ingredients. Store in a tight plastic container in the freezer.


Fresh shucked oysters with pickled red onion ice.

Freshly shucked oysters with pickled red onion ice.


When I’m in Portland, Maine, I visit one of the best oyster bars in the country: Eventide. Besides some wickedly creative dishes, they consistently have a fantastic variety of fresh oysters to choose from. And they offer a variety of “accoutrements” to go with them: anything from a red wine mignonette to kimchee ice. My favorite is the pickled red onion ice. All you need is a shot glass with a freshly shucked oyster inside, a half-shot of chilled vodka on top, and some pickled red onion ice, and you’ve got the best oyster shooter on planet Earth. I even suggested the shooter to the manager at Eventide. It has yet to make it to the menu. (But I remain hopeful!)


An oyster shooter with pickled red onion shaved ice. Bottoms up!

An oyster shooter with pickled red onion ice. Bottoms up!


I’ve managed to come up with a pretty good version of the pickled red onion ice at home, and I serve it alongside my cocktail sauce.

2 large red onions
1 tablespoon sugar
3 tablespoons apple cider vinegar


Peel and quarter the onions. Drop them in a medium-sized pot and cover with about a quart of water. Bring it to a boil and cook it down until it has reduced to a cup of concentrated onion water after straining.

Bring the strained onion water back to the stove, and on medium heat, add the sugar and vinegar, stirring. When the sugar dissolves, remove it from the heat and let it cool to room temperature before pouring it into a container and placing it in the freezer.

When it’s time to eat oysters, remove the block of red onion ice from its container, and, using a fine metal grater, shave the ice over the top of the freshly shucked oysters and devour immediately!


fullsizerender-5


Sausage is something most home cooks don’t even try because of the amount of work it needs: grinding the meat with that perfect fat-to-lean ratio…keeping everything on ice…buying a sausage stuffing machine and the casings to go with it.

It’s a big hassle, requiring some special equipment and a lot of time. And the clean-up is a pain.

Here’s a ridiculously easy method I discovered that allows me to slap together some very tasty sausage in just minutes. I prefer to use ground pastured Berkshire pork for this, because it’s humanely raised and absolutely full of flavor. But any good quality ground pork will do. I’ve found that most ground pork is already pretty fatty: usually a 70/30 ratio…and that’s perfect for this recipe. (By the way, if you don’t eat pork, I would venture a guess and say that 70/30 beef would work just as well with this recipe.)

If you’re watching calories, like I am, you know that fat is the biggest killer. But you’ll find that a well-cooked sausage patty renders out a lot of fat, and if you go one step further and really give it a squeeze between paper towels after cooking, you’ll find that 1 gram of cooked ground pork = about 2 calories. Compare that to bacon, where the fat doesn’t render out as quickly: 1 gram of bacon = 5 calories. All that porky sausage goodness for fewer calories! It’s not diet food, but hey…


Delicious homemade sausage.


1 lb. ground pork (the best quality you can get)
1 teaspoon salt
1/2 teaspoon pepper
1/4 teaspoon sage
1/4 teaspoon rosemary
1/4 teaspoon thyme
1 egg


I like to combine the salt, pepper, sage, rosemary and thyme in a bowl first, mixing them together well. That way, when I’m seasoning the pork, it’s all evenly distributed.


All the seasonings mixed together.


Combine the pork, the seasonings and the egg in a bowl and mix well. Place the bowl in the fridge for at least 15 minutes to let the meat rest. Overnight is even better. (Do it the night before, and you’ve got it all ready to cook the next morning with your eggs!)


The sausage mix has rested overnight. Time to cook!


In the morning, if you’re not sure if you’re going to like the pork the way you’ve seasoned it, simply grab a pinch of the  meat off and fry it in a pan to taste it. If you like what you have, fry away. If not, season the meat a little more before making the patties. These are your sausages, after all!


A 1/4 cup measure makes it easy to make equally-sized sausage patties.


I like to use a 1/4 cup measure to scoop out sausage patties. Once I’ve got them all made, I heat a pan over medium-high heat. No oil is necessary, because the pork has plenty of fat!


Once the patties are in the hot pan, I squish them down flat.


Once I’ve placed the patties in the hot pan, I squish them down with a spatula, and cook them on one side until it’s nice and crusty. Then I flip them, squish them down again, and continue cooking all until they’re golden brown on both sides. Remember: you’re starting with raw pork, so make sure it’s cooked all the way through.


They look like they’re done!


Delicious, and no casings to worry about. The patties freeze well, whether you freeze them raw or cook them a bit first. If you’re going to freeze them, place them on a sheet pan and pop that in the fridge for about an hour, until the patties are frozen solid. Then place them in a freezer bag or container. That way, the patties won’t stick to each other.


Ready for the freezer!


When cooking them straight out of the freezer, I like to drop the frozen patties into a non-stick pan and I add just a touch of water. I put a lid over the pan and let it cook for just a minute, flipping the patties and cooking for a minute more, to thaw them out. Then I remove the lid off the pan, and let the patties cook all the way through. The water will evaporate, and the patties will have enough fat in them to cook without adding any more.

PRETZEL BREAD

Posted: August 2, 2020 in Food, Recipes, Uncategorized
Tags: , , , ,

As much as I’m a fan of sourdough–or any great bread for that matter–pretzel bread has a special place in my heart.

Making pretzel bread at home had one major stumbling block for me: the need for lye,  which has nasty corrosive qualities that I don’t want to deal with in my kitchen. Even special baker’s lye was not an option. So when I found a pretzel bread recipe that used baking soda, a much milder and safer alkaline ingredient that I could simply pour down my drain after using, I knew it was time to bake.


image


½ cup water
½ cup milk
2 tablespoons butter, softened
3 cups all-purpose flour
2 tablespoons brown sugar
1 tablespoon yeast
2 teaspoons salt
1 egg, separated
Cooking spray
¾ cup baking soda
Kosher salt or pretzel salt for sprinkling

Combine the water, milk and butter in a glass container and microwave about 45 seconds to melt the butter and warm the milk. Set aside.

In a mixing bowl, combine the flour, brown sugar, yeast, salt and egg yolk. Slowly add the milk mixture and mix until the dough comes together. If it seems too dry, add small amounts of water. Knead the dough until it is smooth and springy, about 5 minutes.

Place the dough in a bowl sprayed with cooking spray. Flip it over so all sides get oiled, and then wrap the bowl with plastic wrap. Place in a warm place until the dough has doubled in size, about an hour.

Pre-heat the oven to 375 degrees.

Turn out the risen dough on a floured surface and divide it into equal pieces. You can make 15 small slider-sized buns, 8 burger buns, 8 hot dog buns or any other shape you like. Once all the pieces have been rolled, cover them with a clean dish towel and set them aside to rest.

While the dough is resting, heat about 12 cups of water in a large pot. When it comes to a gentle boil, carefully pour the baking soda into it. It will foam and bubble vigorously.

Add the rested pieces of dough to the simmering water and poach them for about 30 seconds and then flip them over for another 30 seconds. Don’t overcrowd the pot; you may need to do this in batches.

With a slotted spoon or spatula, lift the poached buns onto a Silpat baking sheet (or a baking sheet sprayed with oil, then sprinkled with cornmeal.)

Froth the egg white with a fork, then brush each bun with the egg white.

Using a sharp knife, make a few slits on the top of the buns, about ¼-inch deep. Sprinkle them with Kosher salt, then bake for 20 minutes until golden brown.