Archive for the ‘Rhode Island’ Category

Despite almost universal opposition to the cruel way calves are treated, the Humane Society says the veal industry shows little signs of changing. That’s why many people simply refuse to eat veal. I was one of them.

The veal industry is a by-product of the dairy industry. To get the dairy cows to produce milk, they are impregnated every year. Half of their offspring are male, no use to the dairy business, and those are the calves that become veal.

I said I was one of the people who didn’t eat veal. What changed was my source. A few years ago, Sweet and Salty Farm (www.sweetandsaltyfarm.com), a dairy farm down the road from me in Little Compton, Rhode Island, began selling their own line of yogurt and cheese. And like most dairies, when calves are born, they have no use for the males. But rather than taking them away from their mothers and caging them for their short lives, they allow the calves to stay with their moms, nursing for up to four months before weaning. Then they graze in the fields by their mothers’ side, living a stress-free life. And when the time finally comes, they are dispatched humanely.

The result is incredible grass-fed veal I don’t feel guilty about eating: a rich, red in color…nothing like beef and a far better option than conventional veal. I also buy the veal bones from the farm to make a rich, flavorful veal stock, roasting the bones on a baking sheet with onions, carrots and celery…then moving them all to a large pot of water that cooks for 24 hours.

Traditionally, veal saltimbocca consists of veal medallions rolled with prosciutto and sage leaves. Often it is served with a marsala sauce. I got rid of the marsala–too sweet–and substituted a chardonnay. I added fontina cheese. And a guest’s aversion to spinach gave me the option to use kale…with bacon, of course!

By the way, if you’re not lucky enough to have a farm that humanely raises veal (or you’re still queasy about veal in general), this recipe works with chicken breasts, too.

img_0087


1 1/2 lbs. grass-fed veal, pounded thin and cut into medallions about 3″ around
1/2 lb. prosciutto, sliced paper-thin
1/2 lb. fontina cheese, sliced thin
1 cup all-purpose flour (I use Cup4Cup gluten-free flour)
1 teaspoon salt
1/2 teaspoon pepper
olive oil
butter
2 cups veal stock
1 cup un-oaked white wine (I like to cook with Alice White chardonnay)
1 tablespoon finely chopped fresh sage
1/2 yellow onion, finely chopped
12 oz. baby portobello mushrooms, thinly sliced
1 lb. spaghetti
2 bunches organic kale
3 strips bacon, finely chopped


Place the veal cutlets on a cutting board between a few layers of plastic wrap. Pound the cutlets to about 1/8″ thickness. Cut them into pieces about 3″ around, which will make them easier to handle.

Place the flour in a bowl and add the teaspoon of salt and 1/2 teaspoon of pepper. Mix well.

Heat a couple of tablespoons of olive oil and butter in a pan. Drop the veal medallions in the flour and coat both sides of the meat, shaking off any excess. Carefully lay the veal in the pan and cook the veal until it’s just barely browned. You don’t want to cook it all the way through. When the medallions have cooked, place them on a baking sheet. Cook the medallions in batches, adding more olive oil or butter to the pan if needed.

When you’ve cooked all the medallions, use the same pan to sauté the onion until translucent. Add the mushrooms and cook them down. (You can add a little of the veal stock to help the mushrooms release their liquid.) Add the rest of the veal stock, wine and sage. Cook over medium heat until it’s reduced by half. If the sauce looks a bit thin, make a quick roux in a separate pan by heating equal parts melted butter and flour until it forms a paste. Stir this paste into the sauce, making sure there are no lumps.

Back to the veal medallions: place a piece of prosciutto on top of each medallion, and then a slice of fontina on top of that. Keep the baking sheet with the medallions in a warm (150 degree) oven.

Boil the spaghetti in well-salted water until al dente. Strain and toss in a bowl with unsalted butter. Season with a bit more salt.

Hand-tear the kale and remove all the tough, woody stems. Wash the kale thoroughly in cold water, making sure you get all the dirt and sand that can be caught in its leaves. Heat some olive oil (and bacon fat, if you have it!) in a pan, and toss in the chopped bacon, just to warm the bits up. Working in batches, place a handful of kale in the pan, and when it wilts down a bit, place another handful in, and so on until you’ve got all the kale in. Season with salt and pepper, and keep tossing the kale until it has wilted to its desired doneness. (I like it to still have a bit of a crunch.)

When you’re ready to serve, turn the oven on broil and place the baking sheet with the veal medallions on the top rack. You want the cheese to melt, but you don’t want it to burn, so keep an eye on it!

Serve a few medallions on the plate, with spaghetti, kale and sauce on the side.


Here in New England, oysters are plentiful. We don’t just slurp ’em down: we go out and dig our own…we have our favorite buck-an-oyster bar for any given day of the week…and we debate over the best variety, from east coast to west, north to south.

So when a friend of ours who lives on Cape Cod dropped off about 5 dozen Barnstable oysters she just dug that morning, it was cause to celebrate.

oysters

Fresh oysters deserve an amazing cocktail sauce, and my recipe kicks butt: lots of horseradish, lots of flavor, and a secret ingredient: vodka. Not only does it give it a kick, it keeps it from freezing solid, so I can keep the cocktail sauce in the freezer until I need it.

2 cups ketchup
4 tablespoons prepared horseradish
1 tablespoon fresh lemon juice
1 teaspoon Worcestershire sauce
1/2 teaspoon Frank’s Red Hot, or other hot pepper sauce
5 grinds of fresh black pepper
1/4 teaspoon salt
1 teaspoon good quality vodka, like Tito’s

Combine all the ingredients. Store in a tight plastic container in the freezer.

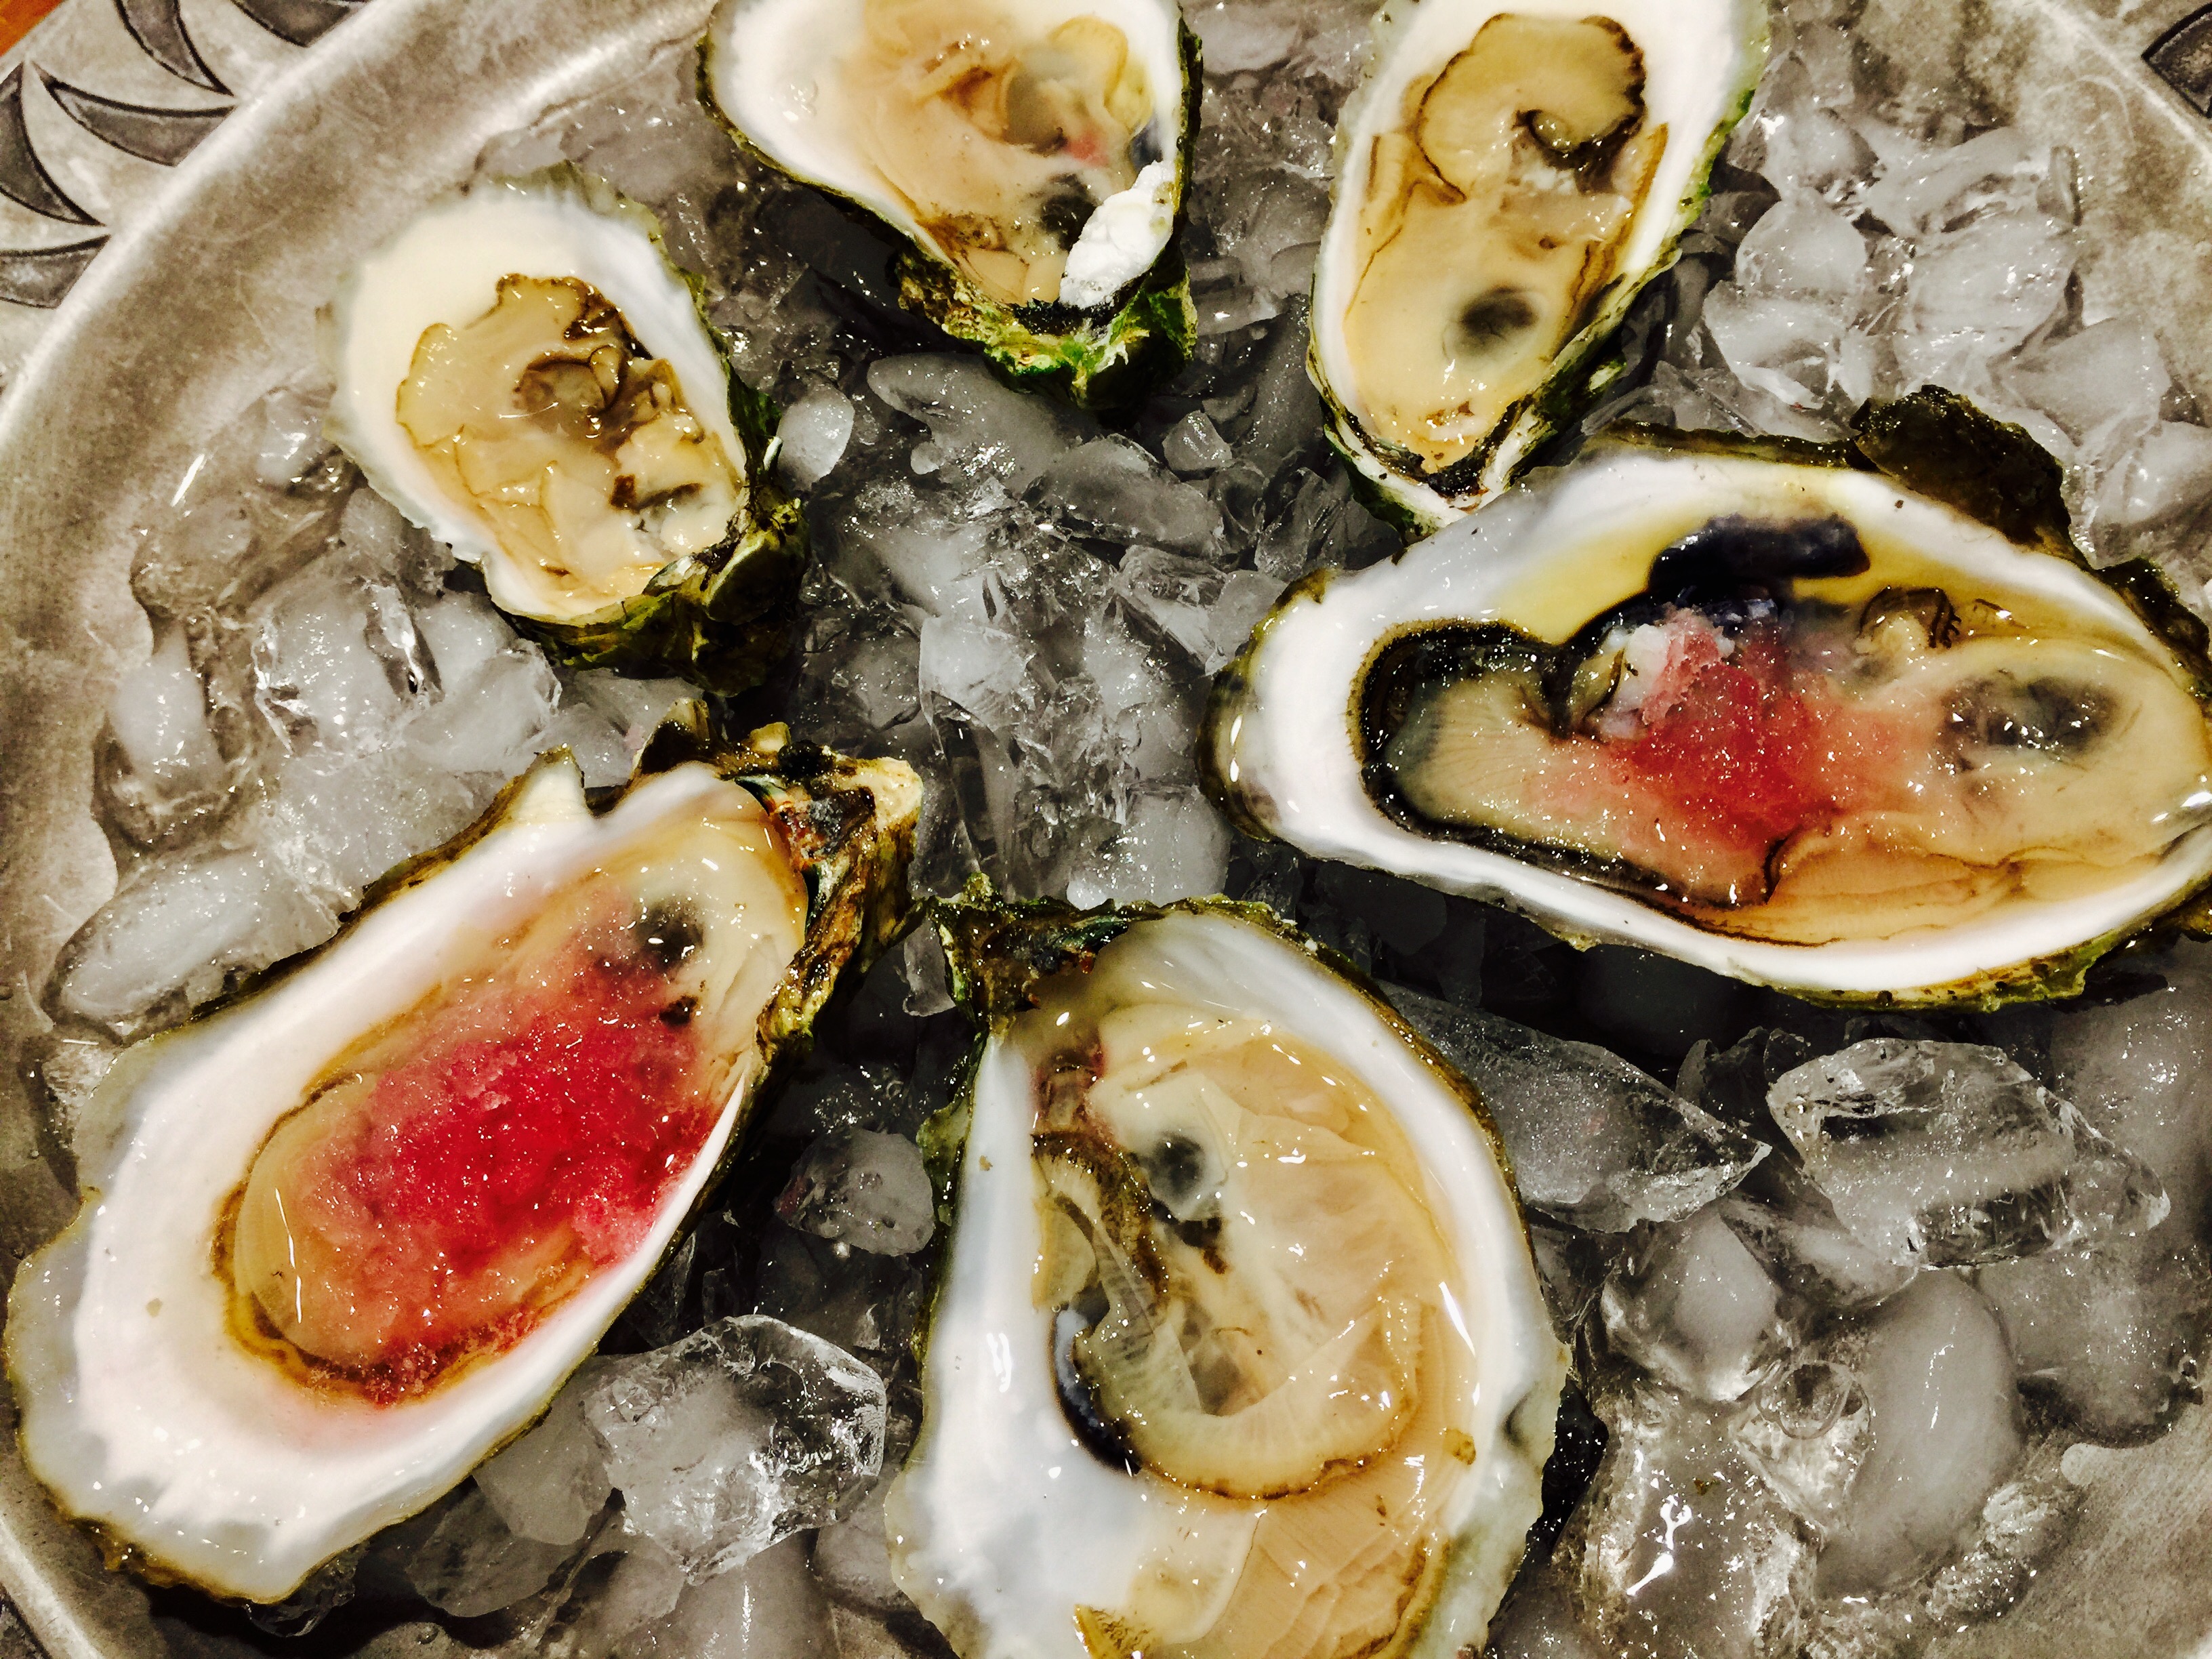
Fresh shucked oysters with pickled red onion ice.

Freshly shucked oysters with pickled red onion ice.


When I’m in Portland, Maine, I visit one of the best oyster bars in the country: Eventide. Besides some wickedly creative dishes, they consistently have a fantastic variety of fresh oysters to choose from. And they offer a variety of “accoutrements” to go with them: anything from a red wine mignonette to kimchee ice. My favorite is the pickled red onion ice. All you need is a shot glass with a freshly shucked oyster inside, a half-shot of chilled vodka on top, and some pickled red onion ice, and you’ve got the best oyster shooter on planet Earth. I even suggested the shooter to the manager at Eventide. It has yet to make it to the menu. (But I remain hopeful!)


An oyster shooter with pickled red onion shaved ice. Bottoms up!

An oyster shooter with pickled red onion ice. Bottoms up!


I’ve managed to come up with a pretty good version of the pickled red onion ice at home, and I serve it alongside my cocktail sauce.

2 large red onions
1 tablespoon sugar
3 tablespoons apple cider vinegar


Peel and quarter the onions. Drop them in a medium-sized pot and cover with about a quart of water. Bring it to a boil and cook it down until it has reduced to a cup of concentrated onion water after straining.

Bring the strained onion water back to the stove, and on medium heat, add the sugar and vinegar, stirring. When the sugar dissolves, remove it from the heat and let it cool to room temperature before pouring it into a container and placing it in the freezer.

When it’s time to eat oysters, remove the block of red onion ice from its container, and, using a fine cheese grater, shave the ice over the top of the freshly shucked oysters and devour immediately!

fullsizerender-5


Every Rhode Island home needs to have a box of corn meal in case of Johnny Cake emergencies. If you’ve never had a Johnny Cake before, you’re missing out on a simple, delicious Rhode Island treat. But that’s a topic of another blog. The point is, I always keep a box of white corn meal in my pantry, and I used it to make the coating for my chicken.

fullsizerender-4


Corn meal is great, because it adds a wonderful crunch while keeping my recipe gluten-free, an important factor in my house. But even if you don’t have to be on a GF diet, corn meal adds great flavor.

To keep the batter light, I add flour to the corn meal.


2 cups buttermilk (whole milk is fine, too)
1 tablespoon hot sauce (I use Frank’s Red Hot)
4 lbs. chicken wings
1 cup white corn meal
1 cup flour (I use Cup4Cup, a gluten-free flour)
1 1/2 teaspoons salt
1/2 teaspoon pepper
1/2 teaspoon granulated garlic
1/2 teaspoon granulated onion
1/2 teaspoon paprika
oil, lard or a combination of the 2 for frying

fullsizerender-3


Pour the buttermilk or whole milk into a large Ziploc bag. Add the hot sauce. Drop in the chicken wings, seal the bag,  and let them soak in the mixture in the fridge for at least several hours…overnight is better. Place the bag in a bowl to prevent bag leakage accidents.

In a separate bowl, combine the corn meal, flour, salt, pepper, garlic, onion, and paprika. Mix well.

Pre-heat the oven to 350 degrees.

I like to use a combination of olive oil and pork lard when frying. Carefully take the wings out of the bag one by one, and drop them in the bowl with the cornmeal mix, coating the chicken well on all sides, then shaking off the excess. Place the chicken wings in the hot oil carefully.

Cook the chicken in the oil on both sides for just a few minutes, until golden. You’re not trying to cook them all the way through.

Place the chicken pieces on a foil-lined baking sheet. when you’ve fried all the chicken, place the baking sheet in the oven and cook until the wings are done, about 25 minutes.


It may be the end of November, but the kale in my  garden is still growing! As the nights get longer and colder here in Southern New England, the first thing I go for is a great bowl of soup.

When I first posted my recipe of Portuguese kale soup, I was told by many Portuguese friends that my soup wasn’t authentic so I couldn’t call it that. Fair enough. Well, my Portuguese pal, Paula, has a great soup recipe that has been passed down from her Mom. Her Mom even adds chicken feet to the stock, which Paula chooses to leave out. Like most Portuguese soup recipes I’ve seen, there’s a ton of carbs: often potatoes with pasta with a lot of beans. But damn, it’s good! My version follows.

Paula’s Portuguese Soup

3 cans garbanzo beans
2 cans white cannellini beans
1 can pink beans
1 fennel bulb
Large bunch of kale
5-6 potatoes
1 cabbage
2 sticks hot chourico
Beef ribs
1 cup dry macaroni (elbows)
Red crushed pepper wet-optional

Drain and puree  3 cans of garbanzo beans in a food processor. Put the puree in a large pot with about a gallon of water.  Chop the chourico, and add it to the puree along with the ribs. Boil for 20 minutes. Chop the fennel bulb and cabbage into 2 inch squares.  Add the fennel and cabbage to soup and boil for 30 minutes.  Add the chopped kale, and boil for 30 minutes. Add the cubed potatoes and before the potatoes are done, add the remaining drained cans of beans. Add macaroni and cook for a short time at the end.

My version of the classic Portuguese kale soup.

My version of the classic Portuguese kale soup.

Here’s my version: carb-friendly and gluten-free, but still packs a lot of flavor.

4 cups home-made chicken or beef stock
4 cups water
1 cup lentils, rinsed in cold water
1 onion, finely chopped
1 carrot, finely chopped
2 stalks celery, finely chopped
1 clove garlic, through a press
1 lb. chourico, peeled and chopped into small cubes (I use Mello’s, out of Fall River, Mass.)
1 large bunch organic kale
salt and pepper

Add the stock and water to a large pot. Heat until boiling. Add the lentils.

In a saucepan with a little olive oil or bacon fat, saute the onions, carrots, celery, and garlic for a few minutes. Add the chopped chourico and saute a few minutes more. Add the contents of the saute pan in the pot.

Wash and de-stem the kale, tearing the leaves into smaller pieces. Add the leaves to the pot and stir. The stems go in your compost pile. (You can also use them in a juicer.)

Cook the soup until the lentils are al dente. Taste and season for salt and pepper before serving.

Chourico is as important to the Portuguese as bacon is to us Lithuanians. Here in Southern New England, they pronounce it “sha-rees,” not the exaggerated Spanish “chaw-reezo,” like you hear on the Food Network.

I was joking with a friend the other day that if I won the lottery, I could buy a lifetime supply of chourico at my favorite store: Mello’s in Fall River, Mass. His response was: “Is there such a thing as a lifetime supply of chourico?!”

Good point!

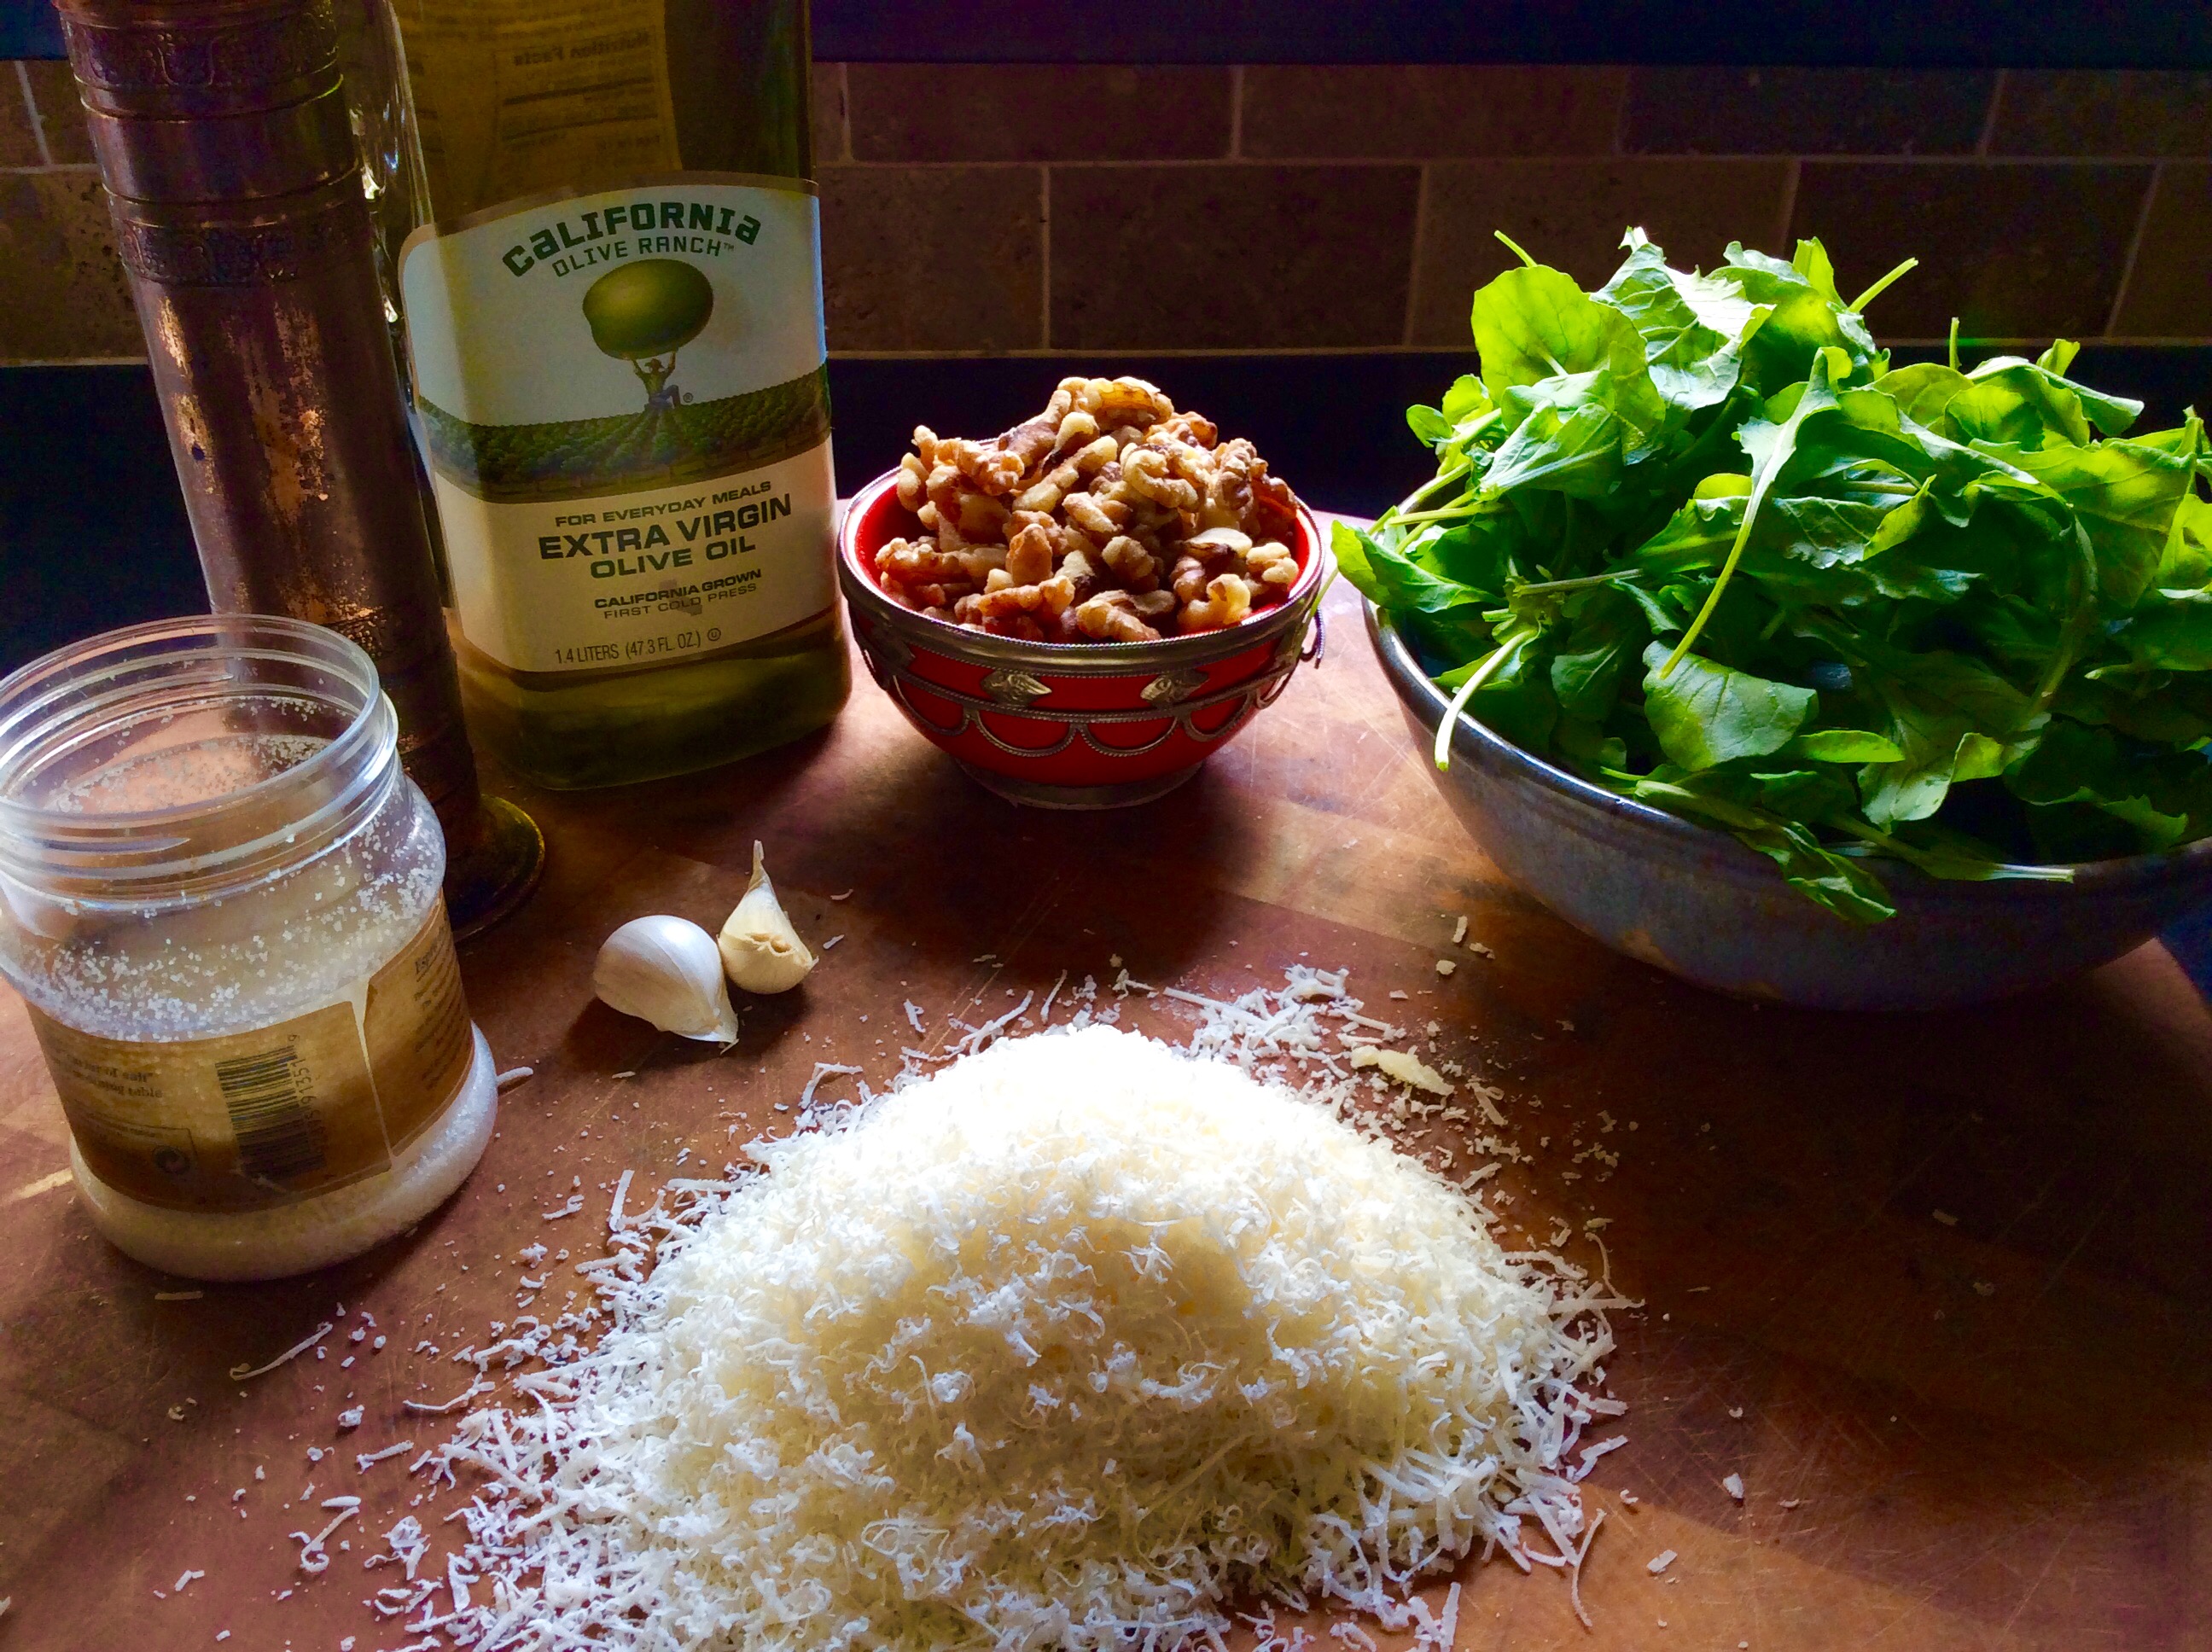
If you’ve had really great chourico, you’re always looking for new ways to include it in your cooking. And arugula is one of the easiest greens to grow in the spring or fall garden. Even now, in November, I’ve got lots of it growing, just waiting to be turned into pesto.

Inspired by chef Chuck Hughe’s recipe, this is a great chourico appetizer that’s really easy to make. Whip up the arugula pesto ahead of time and keep it in the fridge. Then when guests come, just slice the chourico, saute it in a pan until brown, and serve.

fullsizerender

3 cups fresh baby arugula
1/2 cup walnuts
1/2 cup olive oil
1 clove garlic
1 teaspoon salt
1/4 teaspoon pepper
1/2 cup + one tablespoon grated Parmigiano Reggiano or other good quality parmesan cheese
2 lbs. chourico, sliced into 1/2″ pieces

Combine the arugula, walnuts, olive oil, garlic, salt, pepper and the 1/2 cup of cheese in a food processor or blender and blend until smooth. Set the tablespoon of cheese aside for garnishing later.

fullsizerender-1

Remove the casing from the chourico and slice it into 1/2″ thick pieces. Saute the chourico in a pan until both sides are caramelized and golden.

Place the chourico on a plate, topping with some of the pesto. Sprinkle a touch of the grated cheese to garnish. Serve immediately, while the chourico is still hot!


fullsizerender-3


The corn is still out on farm stands in my neighborhood, and it’s really hard to resist, despite the fact that corn is at the top of the loaded-with-pesticides list of veggies. Organic farmers struggle with corn because it demands a lot and produces little in return, but you can find it if you look hard enough. It’s easier to find it frozen, but that’s something you don’t want to do in season, especially when you see those beautiful ears just waiting for you at the local farm stand!

By now, I’m sure you’ve seen those videos where the person takes corn still in the husk, pops it in the microwave, and then slips out a perfect ear of corn without any silk minutes later. If you haven’t, here’s one of them…

There are 2 problems with this method: 1) It takes forever to do a dozen ears…and 2) It ruins the damn corn!

corn1

Why would anyone who’s passionate about fresh corn, stick it in a microwave and nuke the living hell out of it? Fresh corn needs a minimalist approach. It should be eaten practically raw…not bombarded with gamma rays and dehydrated in to shriveled kernels.

I love my corn right off the cob…and I still stick to the tried-and-true method of putting it in a pot of water and boiling it for a very short time. Do I get a few strands of silk? Sure. That’s part of the deal. Real corn has silk…just like real fish has bones. Get over it.

My wife and daughter like their corn off the cob. In that case, I shuck the corn, standing the raw ear up in a bowl or bundt pan, slicing down with a knife to remove the kernels. I then lightly saute the corn in a pan with unsalted organic butter and a pinch of Fleur de Sel. Those pieces that have several rows of kernels stuck together, across and down, are the favorites.

corn2


One other way I’ve cooked corn is the “cooler corn” method, which is great when you have a really large crowd to feed. Get your favorite cooler and make sure it’s clean inside. Shuck your corn and place the ears in the cooler. Boil a large pot of water on the stove and then pour the hot water over the corn. Close the cooler lid tightly and let it sit for about 20 minutes. You’ll have perfect corn for a crowd every time.


The definition of a consomme is: “a clear soup made with concentrated stock.” I might add “mind-blowing” to that sentence, especially with this recipe. The key to success– and this is crucial–is to use absolutely garden-fresh, in-season ingredients. If you try this with greenhouse or supermarket tomatoes, you’re just wasting your time.

FullSizeRender (9)

4 1/2 lbs. of fresh garden tomatoes (my favorite is the heirloom: Brandywine)
1 large bunch of fresh basil, leaves and stems
1 2-inch piece of fresh horseradish, peeled
1 clove of garlic, peeled
1 tablespoon white wine vinegar (I use Alessi)
2 oz. vodka (I use Tito’s)
sea salt and pepper


Remove the core of the tomatoes, but leave everything else, including seeds and skin.

Put all the tomatoes, basil, horseradish, garlic, vinegar and vodka in a blender or food processor. You might need to do this in batches if your equipment can’t handle it all.

Process until you get a kind of slush.

Line a mixing bowl with a double layer of cheesecloth and pour the tomato slush mixture into it. Gather up the corners of the cheesecloth carefully, and tie them securely so you can lift the bundle up by the knot. Hang the bundle from a hook over a clean bowl in the fridge so that it catches the liquid that drips out, and leave the whole thing in there overnight. The liquid that drips out will be clear. (You can place an optional slice of beet in the bowl to add color, but I choose not to, because I think it changes the flavor.)

Cheesecloth bundle dripping overnight in the fridge.

Cheesecloth bundle dripping overnight in the fridge.

To serve, chill bowls (or in this case: the sipping glasses) in the fridge. When ready to serve, ladle out the consomme and garnish with a tiny basil leaf. A drop of excellent quality olive oil is optional.

Synthetic cheesecloth apparatus. The real thing works better.

Synthetic cheesecloth apparatus. The real thing works better.


I tried using a synthetic cheesecloth for this recipe, and I found that it doesn’t filter out enough of the solids to make a clear consomme. You could use it along with real cheesecloth, just to use the stand, or just hang it all in real cheesecloth, as described in this recipe.

Nothing says summer here in New England like a lobster roll. But I don’t go to a clam shack to get one. The prices are ridiculous, the meat can be overcooked, and they often add ingredients I don’t want.

I start with fresh lobster. I get it from my lobster man buddy, Gary, just down the street at his dock in Tiverton, RI.

A view of the Sakonnet River from the back of Gary's lobster boat, the Edna Mae

A view of the Sakonnet River from the back of Gary’s lobster boat, the Edna Mae

The next step is to cook it right. I use sea salt in a large pot of boiling water. I make sure the water is at a rolling boil before the lobsters go in. And I cook them for no more than about 8 minutes.

Lobster catch LTL

After the lobsters have been removed from the pot and have cooled for a few minutes, I get to work: cracking the claws and tail and removing every bit of beautiful meat I can find. I even take the legs off and push a rolling pin over them to extract the meat inside. The tomalley (the green liver and pancreas) and roe (eggs) are delicacies not to be missed, but for the purpose of making lobster salad, I don’t use these parts. I save them for a separate treat. And I use the legs and cleaned empty shells to make lobster stock. Nothing goes to waste!

Lobster roll LTL

Everyone has their own opinion about lobster rolls: what goes in ‘em…and perhaps more importantly, what doesn’t. I am no exception. For me, no veggies whatsoever: no chopped celery, no lettuce, no pickle. No paprika or Old Bay seasoning. A pinch of celery salt? Sure. Mayonnaise? Only Hellman’s. White pepper, not black, and just a touch. Salt? A pinch of Fleur de Sel. And the secret weapon to bring out all the flavors: the tiniest squeeze of fresh lemon juice…not enough to give it a lemon flavor…just to brighten the taste.

I prefer those long Martin’s potato rolls: straight out of the bag or lightly grilled with a little melted butter brushed on.


With a week of rain followed by a week of sunshine, the garden has really taken off. Nights are still too cool (in the 40’s) for tomatoes to go out, so they’re hanging out in my greenhouse until they’re ready to be transplanted.

Happy bees buzzing around the blossoms of my old and still productive apple tree.

Happy bees buzzing around the blossoms of my old and still productive apple tree.


Strawberries and asparagus share the same bed. A good combination: by the time the asparagus harvest is over, the strawberries fill in the bed. And by the time the strawberries are all picked, the asparagus stalks shoot upward to produce the ferns that will recharge the plants for next year's crop.

Strawberries and asparagus share the same bed. A good combination: by the time the asparagus harvest is over, the strawberries fill in the bed. And by the time the strawberries are all picked, the asparagus stalks shoot upward to produce the ferns that will recharge the plants for next year’s crop.


...And a check on the first bed I sowed this season: peas on the left, happy arugula, Asian greens, spinach and more on the right.

…And a check on the first bed I sowed this season: peas on the left, happy arugula, Asian greens, lettuce, spinach and more on the right.

Here’s the bed from 3 weeks ago…and the start of the season…

FullSizeRenderFullSizeRender

Fresh salads from the garden have already included: lettuce, Asian greens, scallions, arugula, spinach, asparagus, pea tendrils, fresh oregano, and kale.