Source: Entrepreneurs are Everywhere Show No. 6: Al Milukas, and Zahra Aljabri and James Faghmous
Entrepreneurs are Everywhere Show No. 6: Al Milukas, and Zahra Aljabri and James Faghmous
Posted: October 17, 2015 in Uncategorized2
GROWING VEGGIES WITHOUT A GARDEN
Posted: October 13, 2015 in Food, garden, potatoes, spuds, tomatoesTags: garden, plants, potato, sweet potato, VEGGIES
If you grow tomato plants in pots, you already know that you don’t need an actual garden plot to have a successful harvest of fresh produce. Herbs and greens can also be grown without much effort.
But have you tried potatoes or sweet potatoes?
POTATOES
Growing potatoes in pots is actually better in many ways than growing them in your garden. They can take up some serious garden space, especially tough for gardeners that have a relatively small space to grow their veggies. Putting potatoes in pots makes them concentrate their growing efforts on the limited space they’re given, and I’ve found that they produce a sizable harvest despite their restrictions.
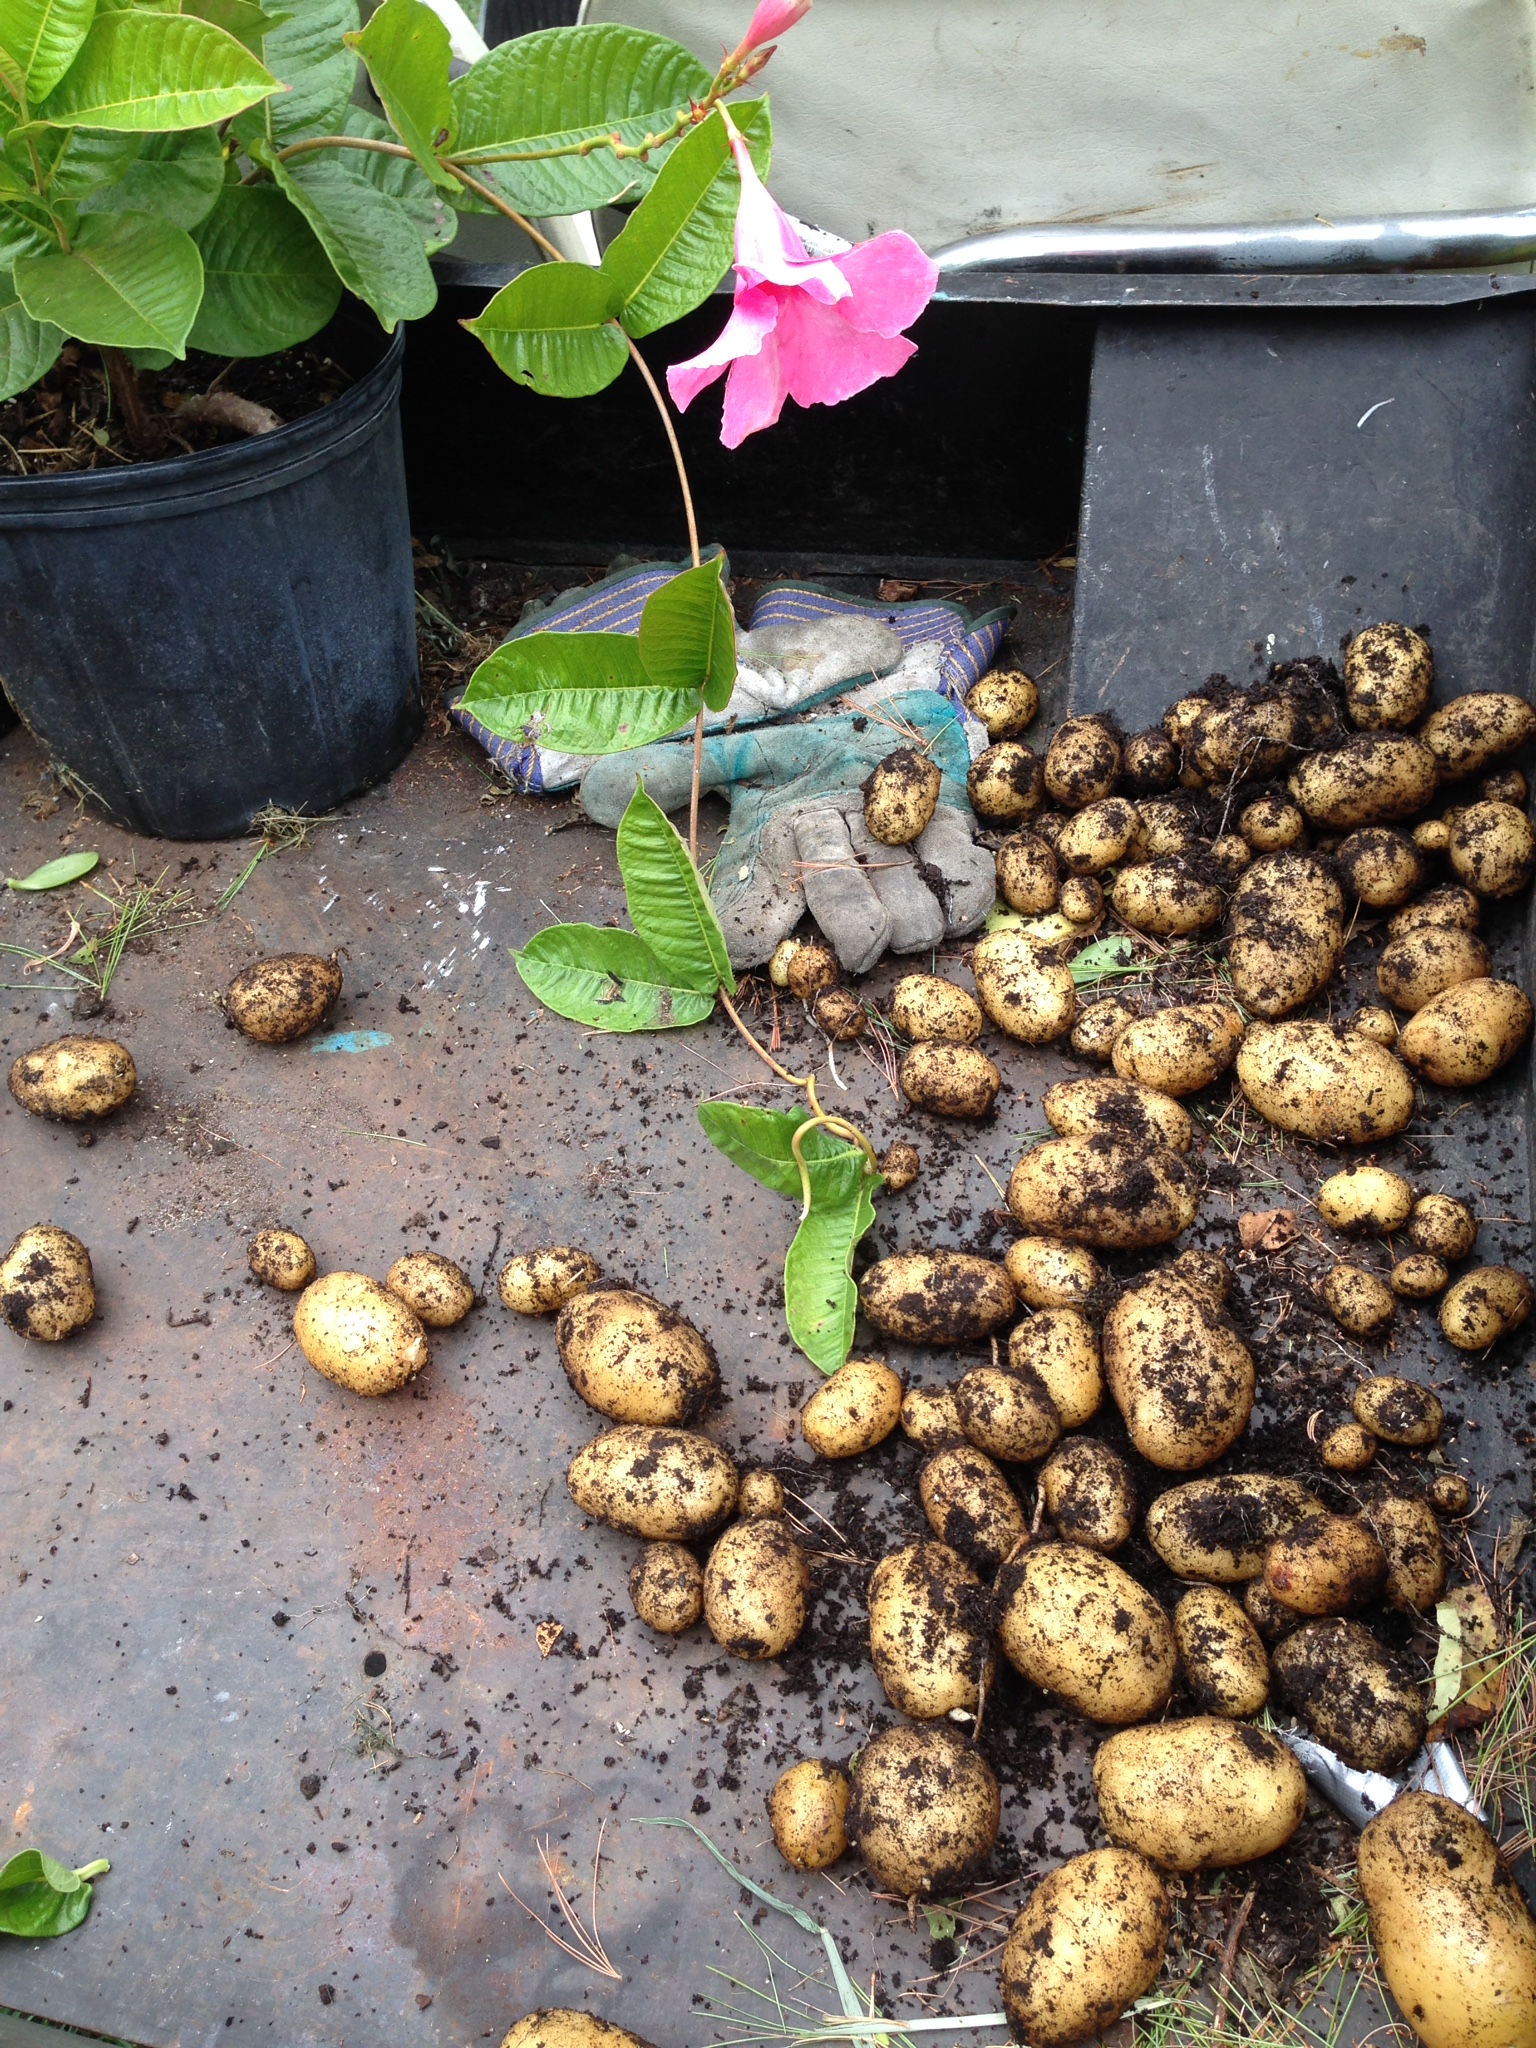
You can buy seed potatoes from gardening companies online but you can also go to the store and simply buy a bag of organic potatoes. Have some of them for dinner, and leave the rest in a corner without sunshine to sprout right in the bag. Because they’re organic, they haven’t been sprayed with a sprout-inhibitor, and you’ll see that they’ll start to grow in no time. (You can also place each potato in a glass of water to aid in sprouting.) Once the potatoes sprout, cut each into 2 or 3 pieces, each piece with a bud. Get a large pot you want to grow them in (plastic is lighter and easier), making sure it has holes in the bottom for drainage, and fill it with only 3 inches of soil. Gently press the potato buds into this soil about 4 inches apart and water them. Every week as they grow, keep adding soil to the pot all the way up the stems to just under the top leaves. When you’ve filled the pot with soil, let the potatoes continue growing…they’re now on their own. They will bloom, and then the stems will start to wither and die. When the stems have died off (if you can wait that long!) simply tilt the pot over and you’ll pour out your potato harvest! Lots of fun for the kids to find this “buried treasure.”

Sweet potatoes growing in my yard in a pot with elephant ears.
SWEET POTATOES
My wife loves sweet potato vines to decorate flower pots. So instead of buying decorative sweet potato vines that don’t produce edible fruit, I buy edible sweet potato plants from a reliable garden catalog. I simply stick them in the potting soil next to our favorite flowers and let them grow all season long. The decorative leaves will cascade down the sides of the flower pots, but inside, under the soil surface, they’ll be secretly making delicious sweet potatoes!
When the growing season is over, gently dig away the potting soil in the pot (I use my hands to prevent damaging the sweet potatoes) and admire your harvest!

Potatoes and sweet potatoes need to be store in a cool place away from sunlight (and away from onions.) A cool garage works great.
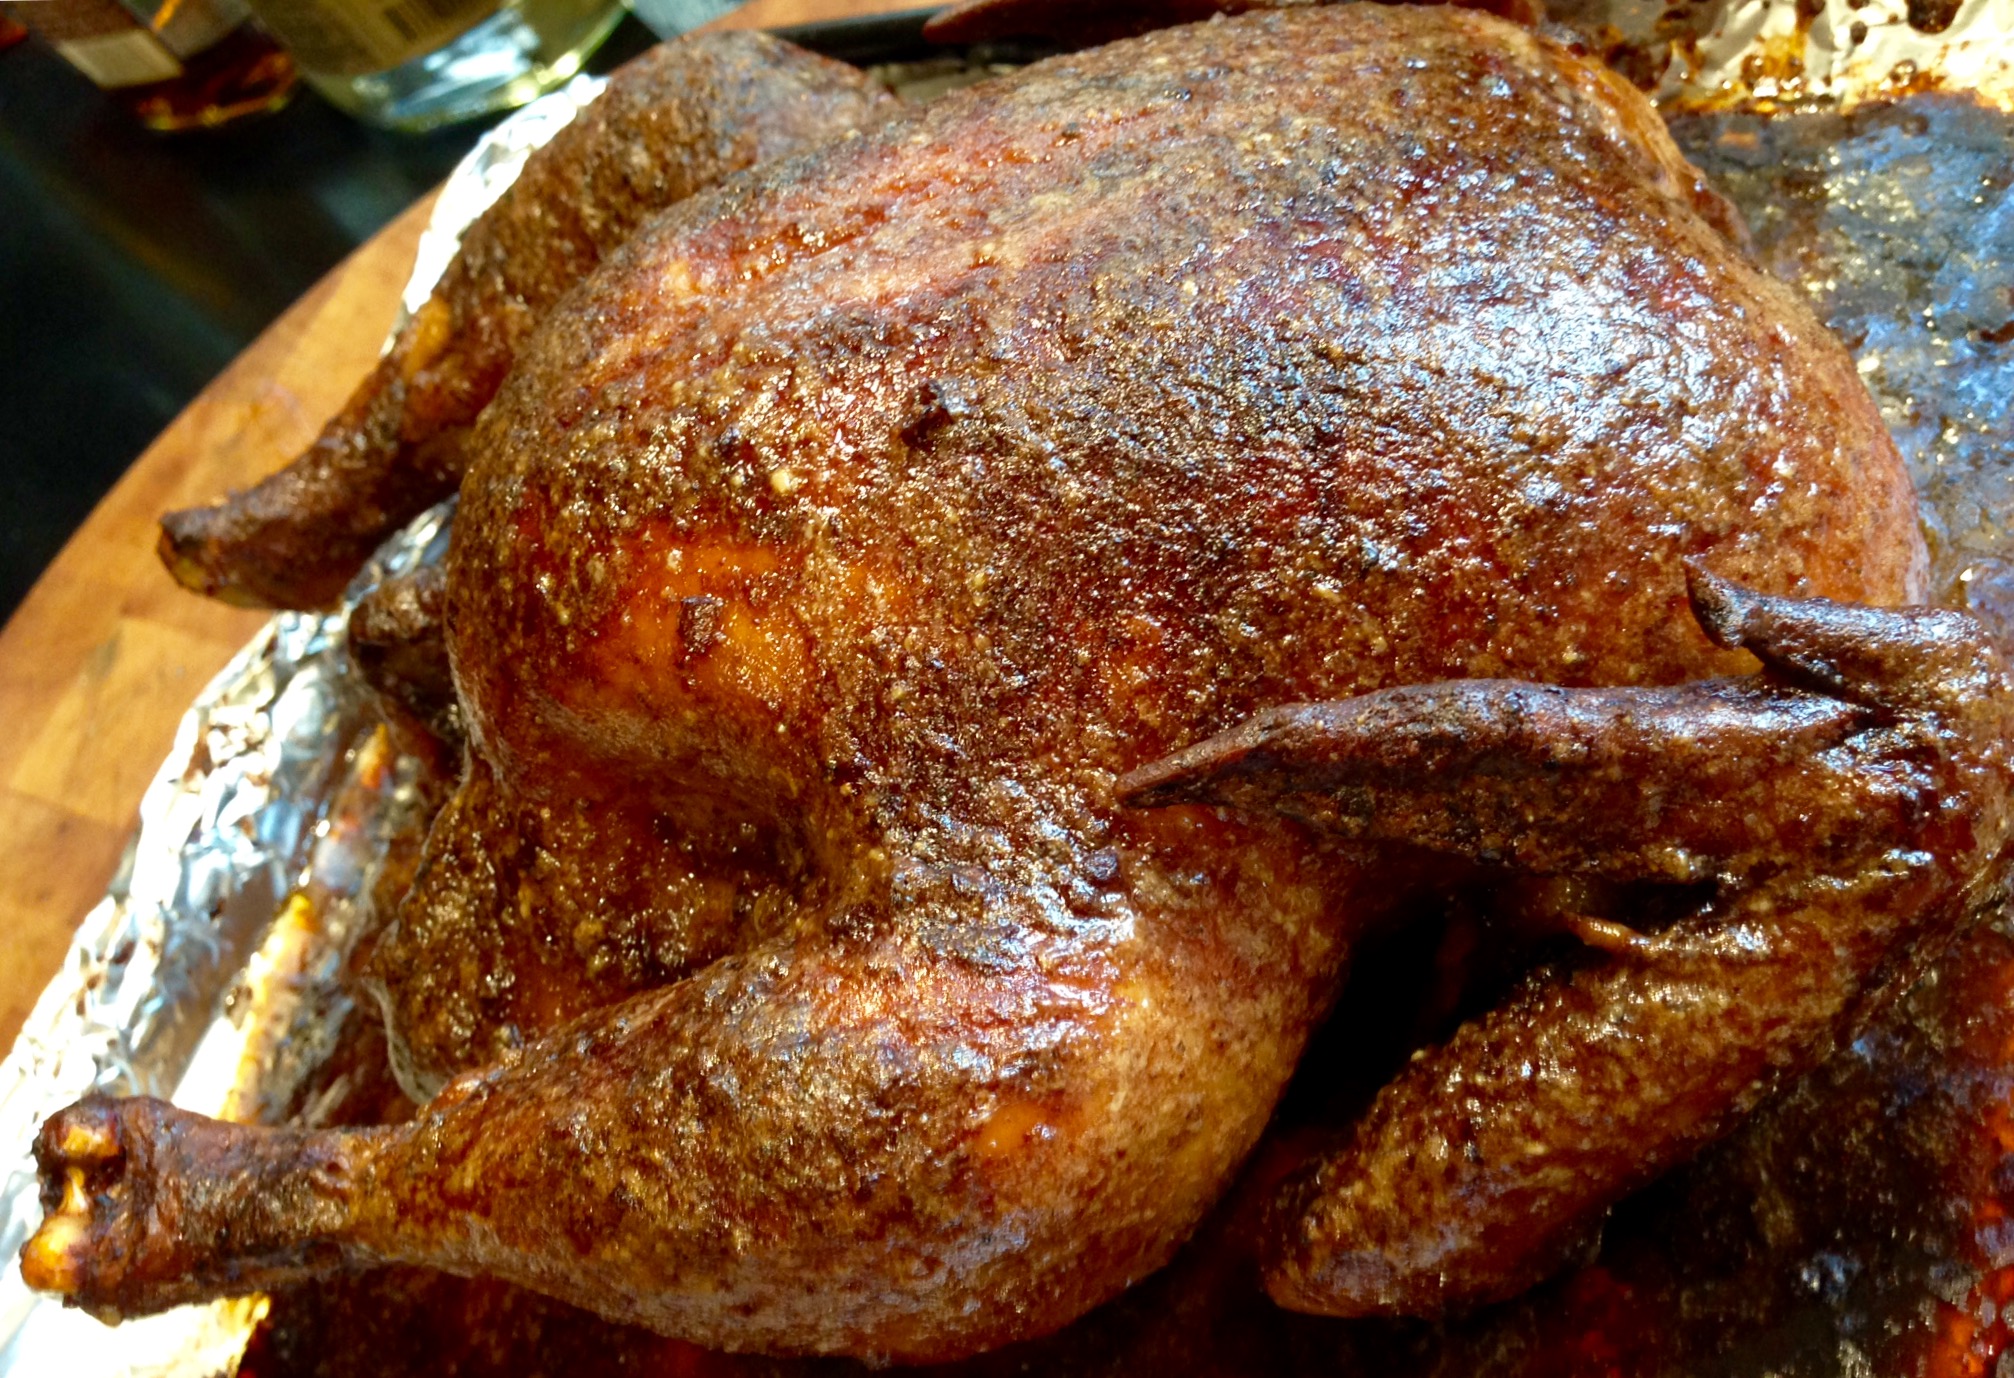
ASIAN CHICKEN
Posted: October 10, 2015 in Carnivore!, chicken, Food, RecipesTags: Asian, chicken, chinese, food, recipes
When I’m jonesing for really good Chinese food, I have to make it myself. I live in the boonies, nowhere near my favorite Chinatown restaurants of Boston or New York City. This chicken satisfies my cravings.
1 pastured whole chicken, about 5 lbs.
Soy sauce
Coconut oil
1 tablespoon Chinese Five Spice
1 teaspoon granulated garlic
1 teaspoon salt
1/2 teaspoon pepper
4 tablespoons soy sauce
4 teaspoons sesame oil
1 tablespoon honey
1 tablespoon peanut butter
1 tablespoon orange juice
2 teaspoons rice vinegar
1/4 teaspoon Sambal chili paste
Pre-heat oven to 325.
Rub the chicken with the soy sauce, and then rub it with the coconut oil.
In a bowl, combine the Chinese Five Spice, garlic, salt and pepper. Rub this all over the bird, placing some in the body cavity as well.
In a separate bowl, combine the glaze ingredients: soy sauce, sesame oil, honey, peanut butter, orange juice, rice vinegar and Sambal.
Cook the bird until it’s about 10 minutes before it’s done. Then brush the glaze on the bird and return it to the oven for 5 minutes. Do this twice.
Let the bird rest before carving.
THE BATTLE FOR THE CHAIR IN THE SKY
Posted: October 6, 2015 in travelTags: airlines, credit cards, flying, frequent flyer, miles, travel, trips
On the surface, the idea of frequent flyer miles is a great one: rack up a bunch of miles for every flight you take or associated credit card you swipe, and before you know it, you have enough miles to fly somewhere on this planet for free! It’s a system that has allowed my family to travel far more often than we could otherwise. We flew on points to Spain…to New Zealand…to Paris…to Lithuania…and next year, we’re going to Greece and Turkey.
But the battle to get there can be a tricky one, and you need to know how to play the game. A game where the rules can change without warning.

Rule 1: One airline, one card. If I’d collect points from a handful of airlines, I’d have just as many points, but they’d be spread out–not enough to get anywhere on any one airline. And airline cards can be expensive. When Delta raised the yearly fee of their card to $185, I told them to go pound sand. Now I only use an American Airlines Aadvantage Mastercard and literally put every single possible purchase I make on that card because American Airlines is convenient for me. All the airlines have some kind of card, so do a little research and decide which one works best for you.
By the way, I do cheat on the “one card only rule:” I also have a Starwood Preferred Guest American Express card. I’ve found that I get the most bang for my buck with the Starwood group of hotels. They include Westins, W’s, Sheratons, St. Regis, and more.
Rule 2: No expense is too small to put on the card. A burger at a drive-thru, a couple of things at the supermarket. Every point counts, and once you get that ingrained in your brain, you’ll make serious headway. I pay all my bills with my credit card, when possible: utilities, cell phones, the post office, doctors visits. Even most appliance or house repairs can now be paid by credit card, so why write a check?
Rule 3: Pay your credit card off on time. The reason why it’s worth collecting points with your credit card is because you’re making purchases you would’ve done with cash anyway. The moment you get to the point where you’re paying interest on your credit card, you’re paying more per point, and then you may as well give up the fight and just buy your plane ticket.
Rule 4: Don’t let your miles expire. You worked hard to collect them. Always check to make sure your miles aren’t going to expire before you can use them. Sometimes all it takes is a simple credit card transaction to buy yourself and extra year’s life on your miles.
Rule 5: Do the math. If you’re flying somewhere and have enough miles for a free trip, check out the deals on your flight before you use your miles. If you can get a really cheap flight, you’re better off paying for it, and saving your miles for a future trip that might cost a lot more.
Rule 6: Look into upgrades. Sometimes you don’t have enough miles to buy a whole ticket but you might have enough to upgrade yourself from coach to Business Class. A nice perk if you’re going on a long flight!
Rule 7: When possible, book it yourself. Sometimes you can do all of your trip planning online. If you’ve got a simple round-trip flight, you can save yourself some money by booking it yourself. If you use a representative on the airline’s 800-number, there could be a fee of $40 or more for them to book it for you. But if you’ve got a more complicated route, with several stops and different cities, you may decide that a live person on the phone is the way to go.
Rule 8: Go First Class, even if you’re not flying First Class. When looking for flights online, I’ve found that I get better flight choices if I say I want to go First Class, even though I know I don’t have the points to do it. If I tell the airline upfront that I want to fly coach, they automatically treat me like a second-class citizen and show me trips that require several stops to get to my destination. If I tell them I want to go First Class, lo and behold, I get non-stop flights! Once I get to those flights, it’s often easy to downgrade to coach, but now I have a non-stop flight instead of a 2 or 3-stop flight.
Rule 9: Computers won’t give you answers to questions you don’t ask. I was trying to book 3 Business class seats. Every time I looked on line, I was told no. Then it dawned on me: see if there are 2 Business class seats on the flight I want. Bingo! The computer only told me what I asked for: 3 seats not available. It didn’t volunteer info for any alternatives. So I booked the 2 good seats for my wife and daughter, and I grabbed a 3rd seat in coach for myself. A little sacrifice, but worth it since we had the flight we wanted and we were all on the same plane.
Rule 10: Hang up!! This rule has helped me the most with hotel reservations and especially with airlines. If you call the 800 number, and the representative that answers the phone seems clueless or refuses to help you to your satisfaction, HANG UP AND DIAL AGAIN. There are hundreds of people answering those phones. Some will be good and some will be totally clueless. I’ve found that younger people are hard-working but are afraid to bend the rules even a little because they want to impress their boss and keep their jobs. The veterans are more interested in impressing you and are experts in finding ways around the rules that the young people haven’t figured out yet. Don’t ever settle. This is your big trip! A great rep on the phone can make all the difference.
KICKIN’ CUCUMBER COCKTAIL
Posted: October 4, 2015 in Cocktails, Cucumbers, drink recipes, Drinks, Food, garden, mixology, UncategorizedTags: cocktails, cucumber, drinks, mixology, recipes, vodka
Happy National Vodka Day! If you think cucumbers are boring, this drink will change your mind. Garden-fresh cukes are always best.

4 fresh cucumbers, peeled and seeded
Small ice cubes
1 cup loosely packed fresh mint leaves
2 teaspoons granulated organic cane sugar
3 tablespoons fresh lime juice
1/2 cup vodka (I like Tito’s)
1 oz. orange liqueur (I like Cointreau)
Peel and seed the cucumbers. Coarsely chop them and then purée in a food processor until smooth. Strain through a fine sieve, pressing solids to extract as much liquid as possible. Or, if you have one, use a juicer. Set the cucumber juice aside.
To a large glass pitcher, add the mint leaves, sugar and lime juice. Muddle the ingredients so that the mint leaves release their oils. Add 3/4 cup (at least) of the cucumber juice. Add the vodka and Cointreau. Muddle again briefly.
Fill tall drinking glasses with ice cubes. Strain the cocktail into glasses. Garnish with a cucumber spear or mint.
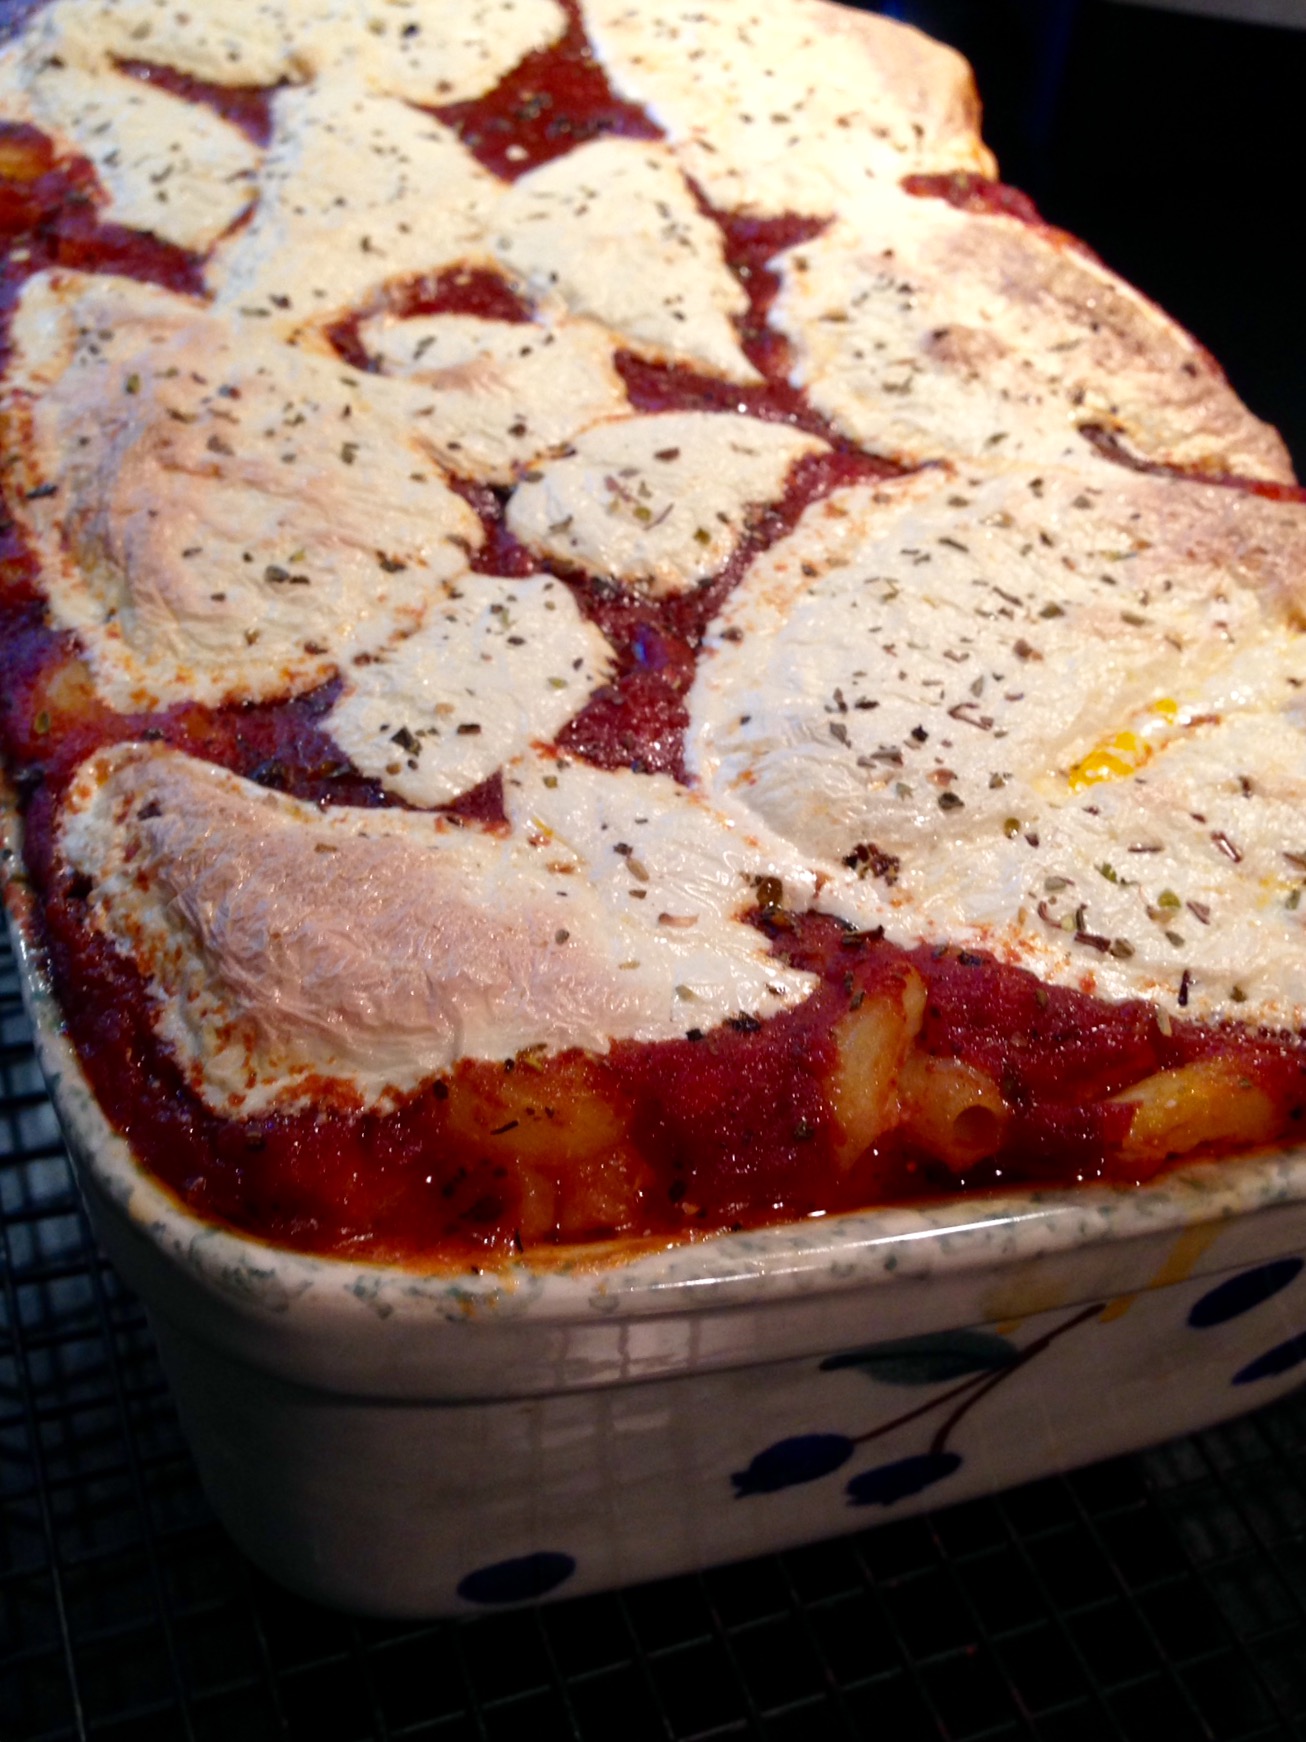
BAKED ZITI
Posted: October 1, 2015 in cheese, Food, Italian, pasta, Recipes, tomatoesTags: baked ziti, cheese, food, ITALIAN, mozzarella, pasta, penne, recipes, ricotta, ziti
My interest in food and cooking goes back to my first restaurant job as a teenager, at an Italian restaurant called Pizza City East in my hometown of Plainview, NY. (There was also an original Pizza City on Crossbay Blvd. in Ozone Park, Queens.) It was there that I learned how to open clams by the bushel, how to make the perfect cappucino, and how to use basic restaurant kitchen equipment like the convection oven and the fryer. I peeled thousands of shrimp for scampi, washed barrels of lettuce for salads, and grated hundreds of pounds of mozzarella for pizza.
I also made baked ziti by the barrelful. It was much easier to make in large quantities than lasagna, and it basically contained all the same ingredients. No worries about making perfect layers. No pasta sheets sticking together. Just put all the ingredients in an oven-proof baking pan, mix them around and throw them in the oven. And it tasted great.
Now I make baked ziti, or shells, or elbows–whatever pasta I have on hand–at home, using gluten-free ingredients.

To make the perfect baked ziti, it’s important to have a good helper.
I substitute whole milk for the usual bechamel sauce used in many lasagna recipes. Since this dish is gluten-free, I can’t use the flour required to thicken bechamel sauce, and gluten-free flour doesn’t work here.
1 lb. regular or gluten-free pasta
2 lbs. (32 oz.) ricotta cheese
1/4 cup Parmigiano Reggiano cheese
12 oz. mozzarella cheese, grated
1 cup whole milk
1 can (28 oz.) whole tomatoes
1/2 teaspoon granulated garlic
1 teaspoon salt
1 teaspoon oregano
1 teaspoon basil
1 teaspoon parsley
In a bowl, mix together the ricotta cheese, Parmigiano Reggiano, half of the mozzarella, and the milk.
Pour the contents of the tomato can in a blender and blend until smooth. Add this to the bowl and combine.
Add the granulated garlic, salt, oregano, basil, and parsley to the bowl and combine again.
Cook the pasta until just before al dente. You want it to be chewy because it will still bake in the oven. Drain the pasta and place it in an ovenproof baking dish.
Add the contents of the cheese and milk blend bowl to the pasta and stir thoroughly to combine. It’s going to be mushy.
Pre-heat the oven to 350°.
Top the baking dish with the rest of the mozzarella cheese. Sprinkle a little oregano on top. Bake for 30-45 minutes, until the cheese on top has melted and it’s bubbling hot.
Let it rest for about 10 minutes before serving.

Baked elbows. This time, I added meatballs.
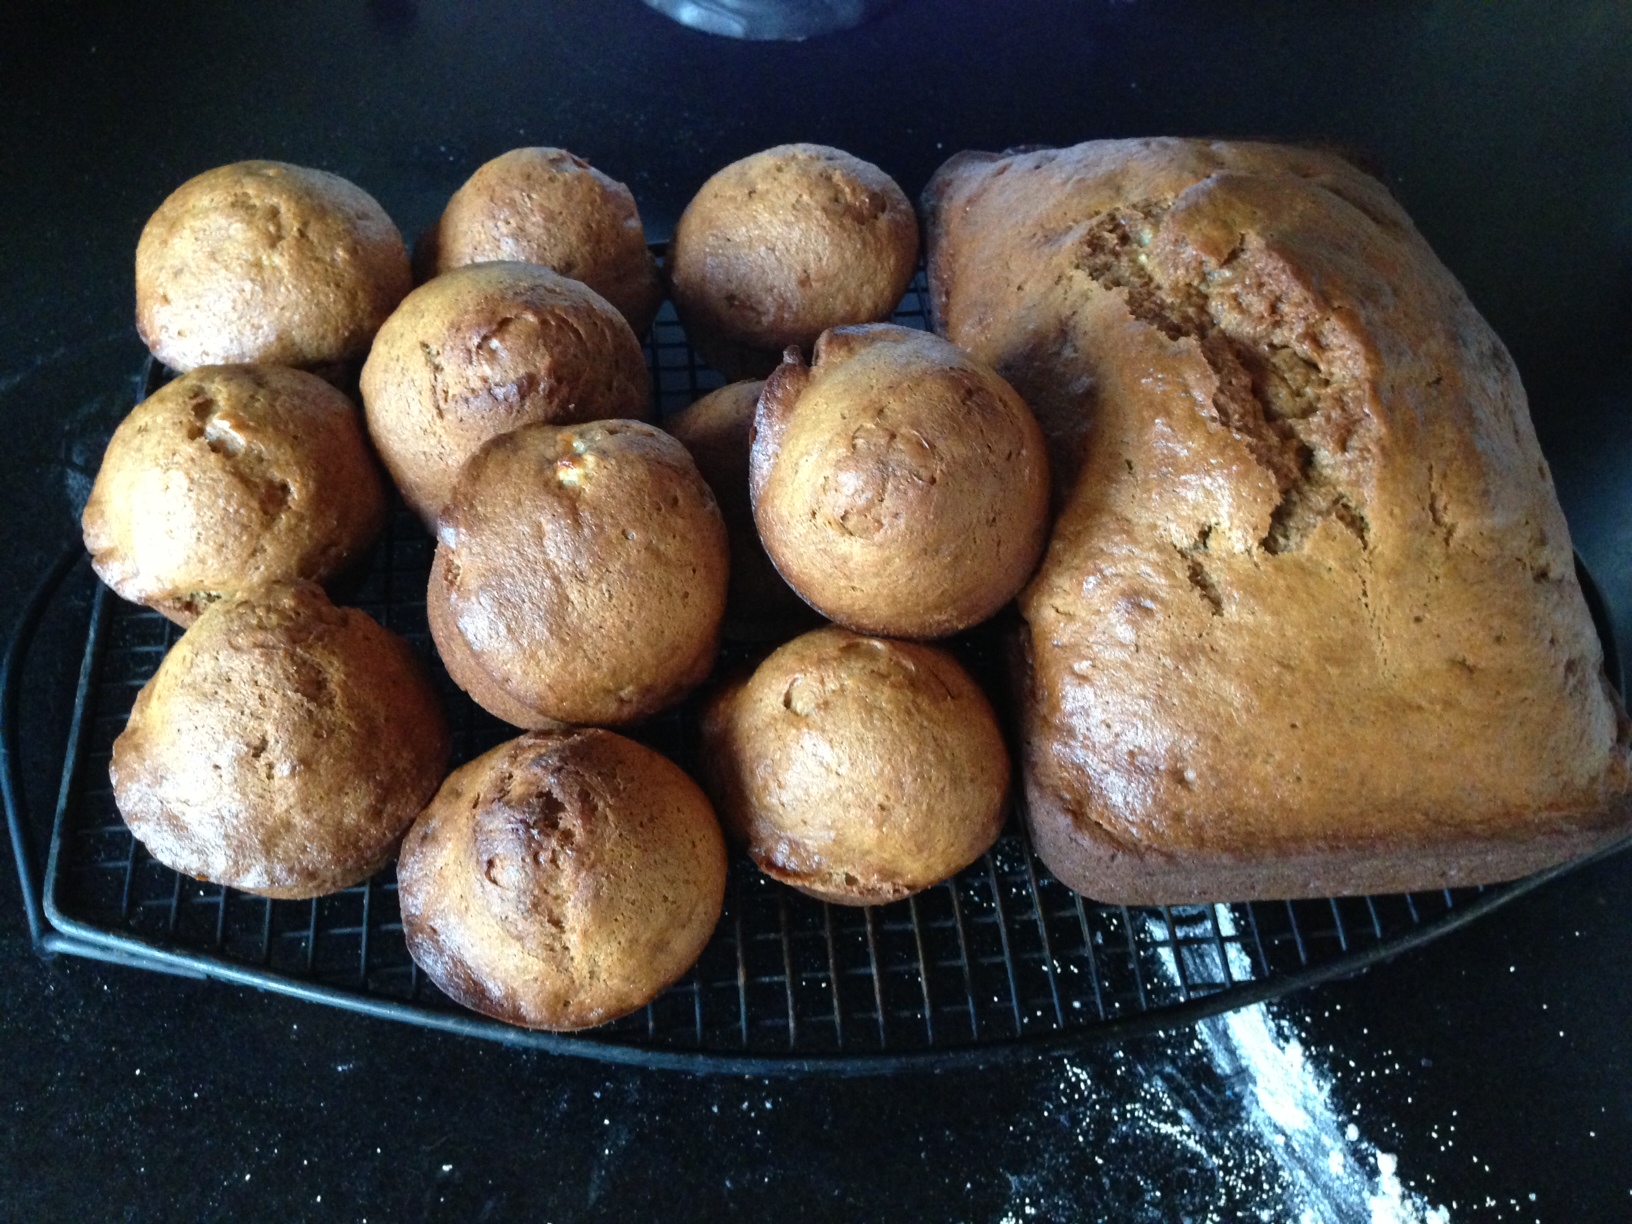
BANANA BREAD: WITH OR WITHOUT THE GLUTEN
Posted: September 27, 2015 in breakfast, FoodTags: BAKING, BANANA, BREAD, food, GF, gluten-free, recipes
My original banana bread recipe blog is featured directly below. It’s awesome. But my wife’s dietary needs required that I make some changes. My gluten-free version of the recipe, at the bottom of the page, is so good, you won’t miss the wheat!
The original recipe…
What makes this banana bread special is that it uses whole wheat flour…less sugar…and no artificial extracts that make most banana breads taste like crap. It relies on very ripe bananas to give it its wonderful natural flavor.
It’s not always easy to get bananas to ripen exactly when you’re trying to make your banana bread recipe. So here’s what I do: I by a large bunch of bananas and let them get very ripe at room temperature. I then take 5 at a time (for this recipe), peel them, and place the bananas in a Ziploc bag in the freezer. When it’s time to make banana bread, I just pull one of those Ziplocs out of the freezer, let it thaw, and mash with a potato masher.
3 cups all-purpose flour
1/2 cup whole wheat flour
2 tsp baking soda
1/2 tsp salt
1 1/4 cup sugar
3/4 cup vegetable oil
2 eggs
5 medium-sized bananas, peeled and mashed
2 tsp real vanilla extract
Cooking spray
Pre-heat the oven to 350 degrees.
Combine the all-purpose flour, whole wheat flour, baking soda and salt in a medium bowl. Set aside.
Combine the sugar and oil in a mixing bowl and mix at medium speed for 2 minutes. (I use the whisk attachment.) Add the eggs, one at a time. Beat until the mixture is light and lemon colored.
With the mixer running at low speed, add the flour mixture alternately with the bananas, beginning and ending with the flour mixture. Blend well after each addition. Add the vanilla extract and blend some more to mix.
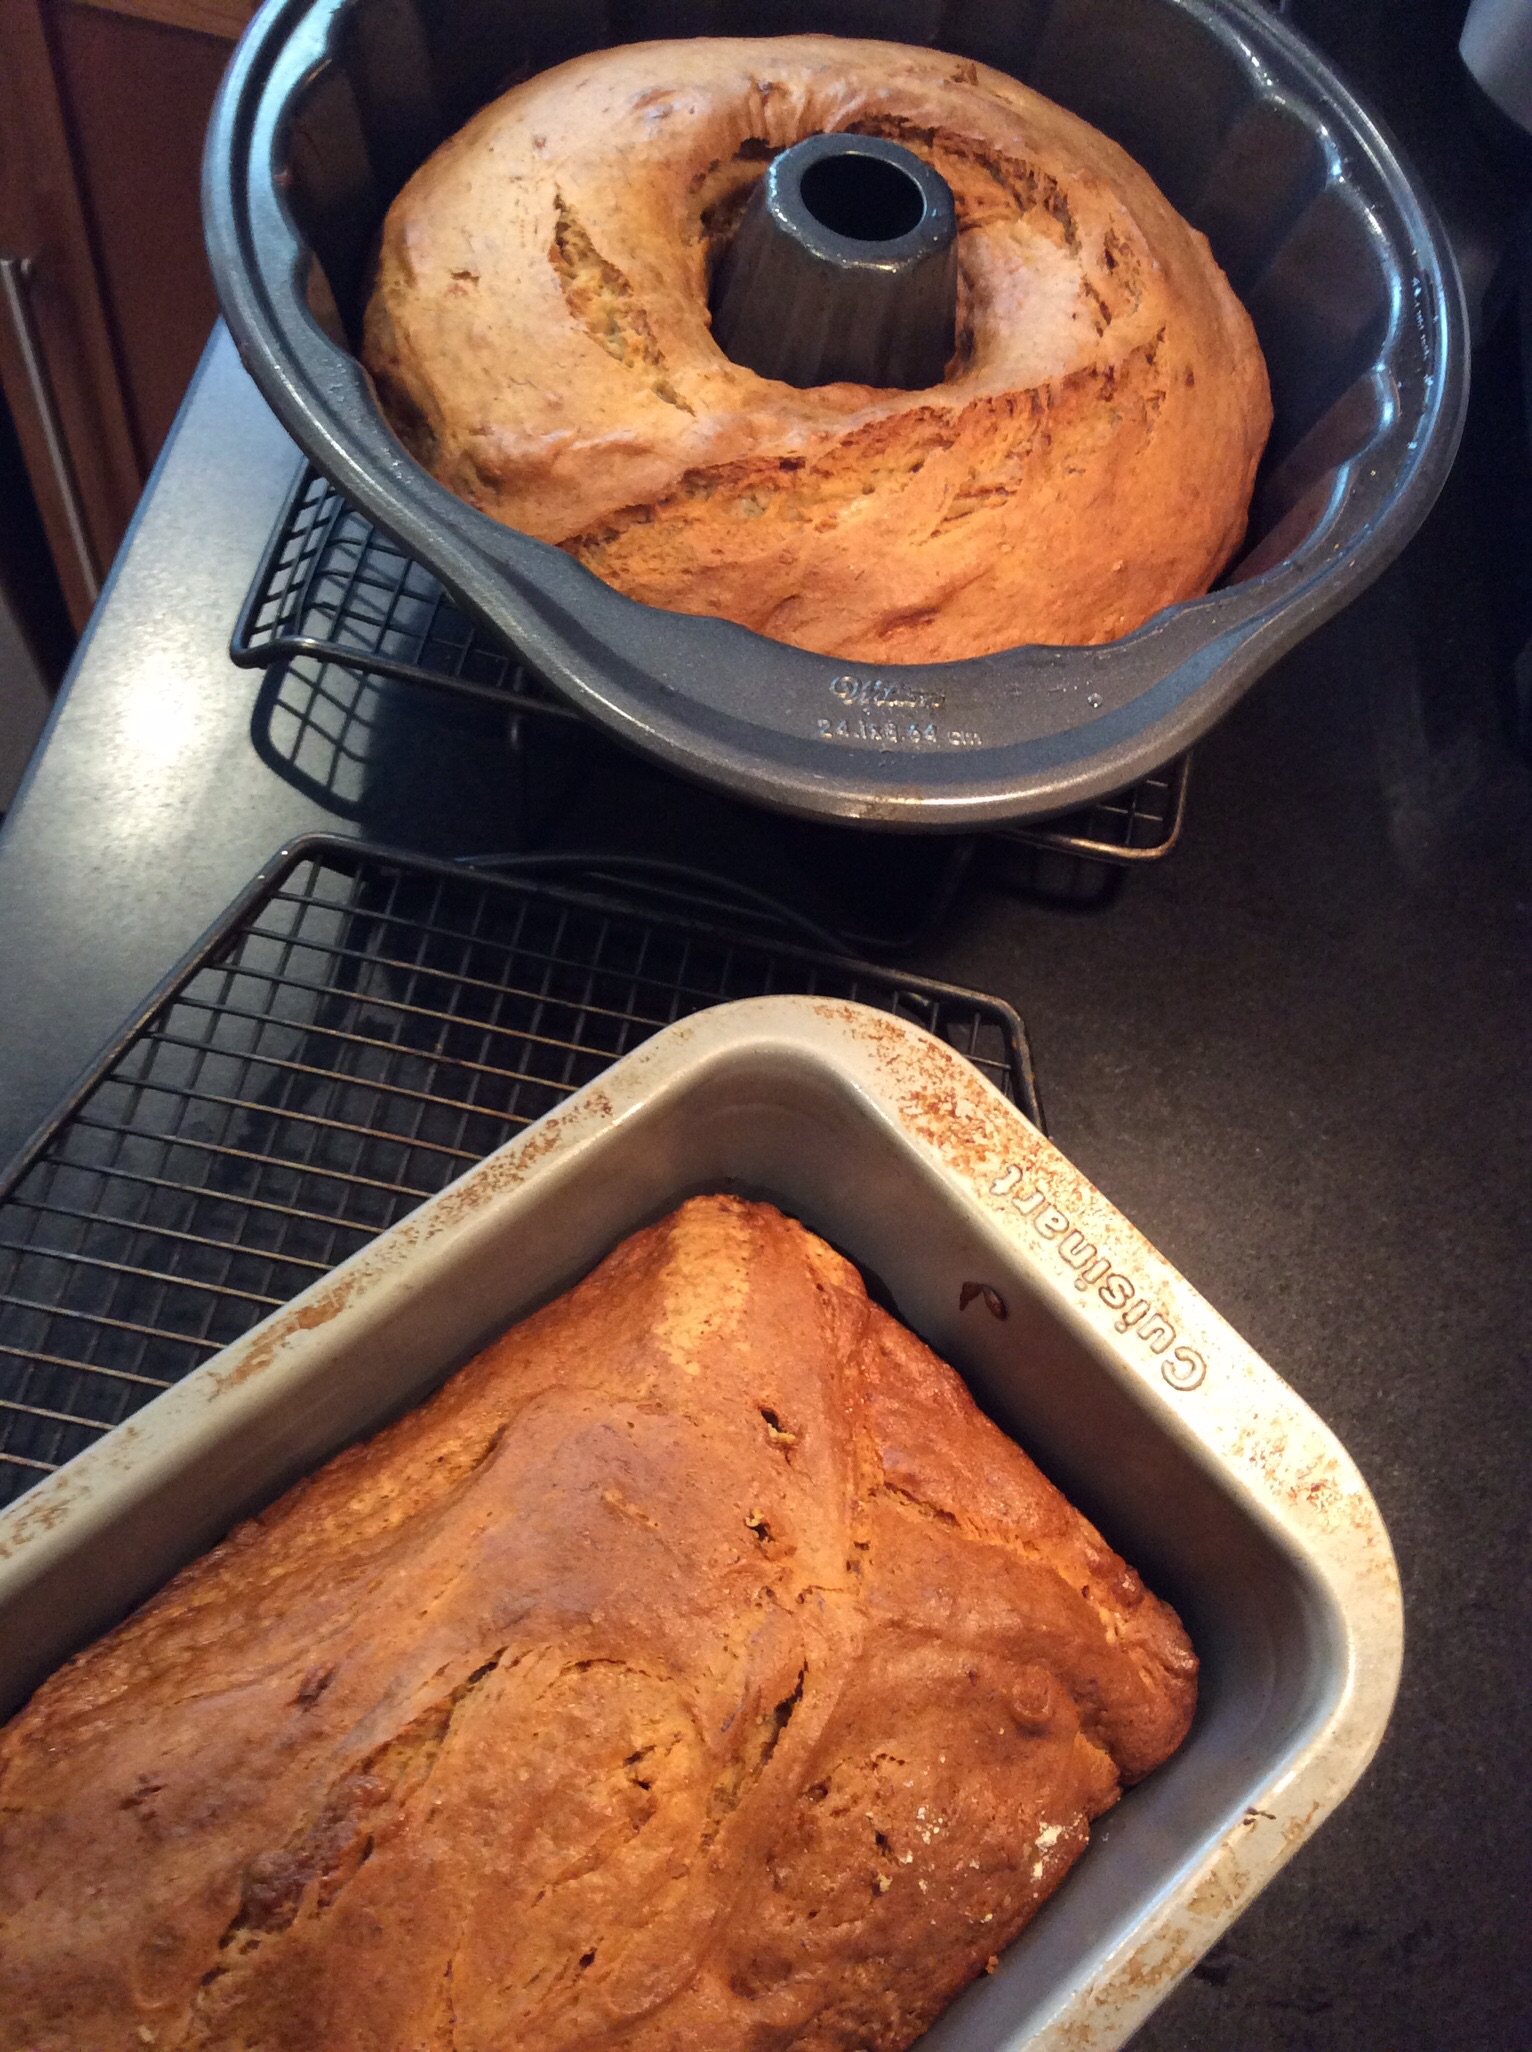
Pour the batter into 2 loaf pans that have been sprayed with cooking spray. Bake for 45 minutes or until a wooden pick inserted in the center comes out clean. Cool 15 minutes in the loaf pan on a wire rack.
Remove from the pan and let it cool completely on the wire rack before slicing.
The gluten-free recipe…
Wow…things have changed since I made the original recipe! First, the flour: My go-to gluten-free flour is the brand called Cup 4 Cup. You can find it in most supermarkets. I only use this flour in this recipe.

If you want a slightly more “rustic” flavor, you can substitute 1/2 a cup of corn meal for 1/2 a cup of the flour. I now use organic cane sugar instead of regular sugar. I no longer use vegetable oil, especially not canola, so I use healthier avocado oil. Eggs are pastured when I can get ’em. Bananas are organic. And I rub the pans with coconut oil instead of using cooking spray.

4 cups gluten-free flour
2 teaspoons baking soda
1/2 teaspoon salt
1 1/4 cup organic cane sugar
3/4 cup avocado oil
2 eggs
5 medium-sized bananas, peeled and mashed
2 teaspoons real vanilla extract
coconut oil
Pre-heat the oven to 350 degrees.
Combine the flour, baking soda and salt in a bowl. Set aside.
Combine the sugar and oil in a mixing bowl and mix at medium speed for 2 minutes. (I use the whisk attachment.) Add the eggs, one at a time. Beat until the mixture is light and lemon colored.
With the mixer running at low speed, add the flour mixture alternately with the bananas, beginning and ending with the flour mixture. Blend well after each addition. Add the vanilla extract and blend some more to mix.
Pour the batter into 2 loaf pans that have been rubbed with the coconut oil. Bake for 45 minutes or until a wooden toothpick inserted in the center comes out clean. Cool 15 minutes in the loaf pan on a wire rack.
Remove from the pan and let it cool completely on the wire rack before slicing.
THE PERFECT HARD-BOILED EGG
Posted: September 23, 2015 in breakfast, Food, UncategorizedTags: boiling, EGGS, food
Sometimes the basics are the toughest to achieve. This is a method that I learned a long time ago from chef Sara Moulton, once a familiar face on Food Network, and it has served me well.

First: about the eggs. It’s great to want the freshest eggs you can get your hands on. I’m lucky that I have a farm down the street that has absolutely fresh pastured eggs. The problem with this is that a super fresh egg will be difficult to peel. So save your super fresh eggs for frying and scrambling. Use slightly older eggs for boiling. (The ones you get at the supermarket are usually just right.) The reason for this is that
a membrane sits between the eggshell and the egg itself, and it wants to stick to the egg when the egg is very fresh. But if the egg is slightly older, the membrane will stick to the shell and will make peeling much easier.

New egg (left.) Older egg (right.)
Once you’ve got your eggs, put them in a pot of cold water and then turn on the heat to high. Don’t cover the pot. Let the pot just come to a boil, then turn the heat off. At this point, put a lid on it and set your timer for 15 minutes.
After 15 minutes, you will have absolutely perfect hard-boiled eggs.
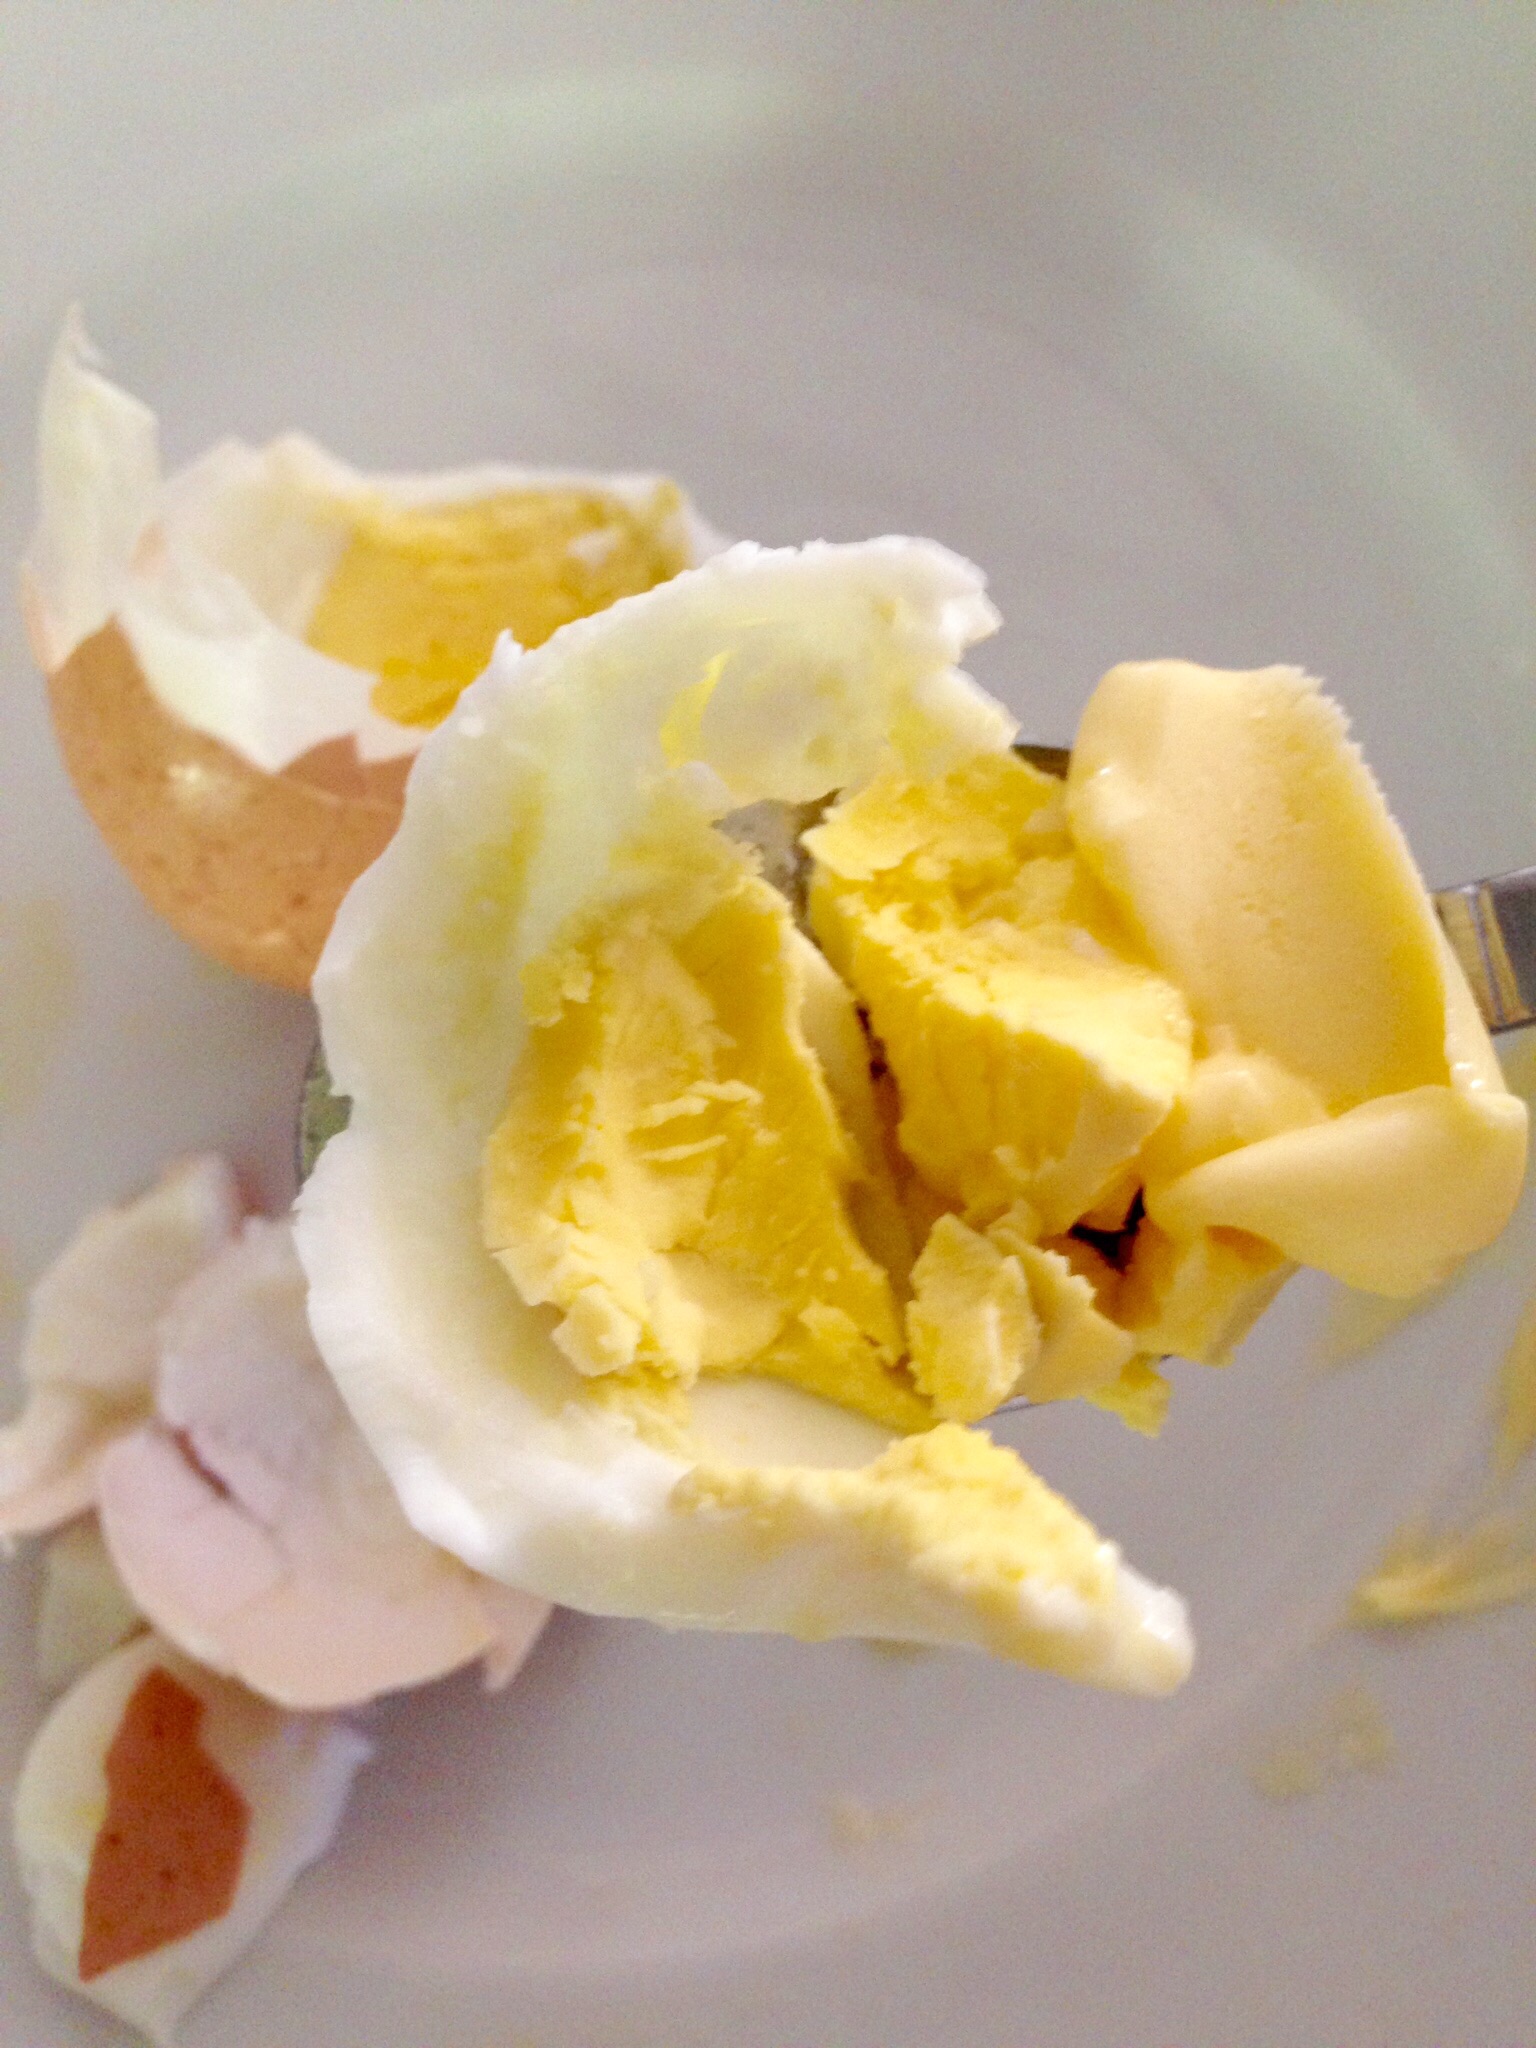
I grew up eating hard-boiled eggs all the time, and so for me, there is nothing better than a spoon with cold salted butter scooping into a warm a hard-boiled egg. Cholesterol be damned!

PASTA AGLIO E OLIO MEETS STEAMED CLAMS IN WINE
Posted: September 20, 2015 in Food, frying, Italian, pasta, Recipes, seafoodTags: CLAMS, food, garlic, garlic and oil, pasta, recipes
What can I say? I was craving both dishes, so I combined them. I figured: if I love each one of them, I’d be crazy over both together! Just make sure, like I had to do, that your spouse isn’t around that night if they don’t like a lot of garlic. You’ll reek for a week! But damn, it was crazy-good!
Pasta
1/4 lb. bacon, finely chopped
1 onion, finely chopped
18 small clams, washed and purged*
1 teaspoon fresh oregano, finely chopped
1/4 cup white wine
Good quality olive oil
6 large garlic cloves, finely chopped
1/4 cup fresh parsley, finely chopped
In a large pot, salt some water and bring to a boil. Cook the pasta until al dente.
In another large pot on medium-high heat, fry the bacon until it’s crisp. Add the onions and saute until they’re translucent. Add the clams, oregano and wine, and cover the pot with a lid. Reduce heat to medium. The clams are cooked when they open. Discard any unopened clams.
In a frying pan, heat the olive oil to medium. Add the chopped garlic and fry until just crispy. Toss in the parsley and stir to combine.
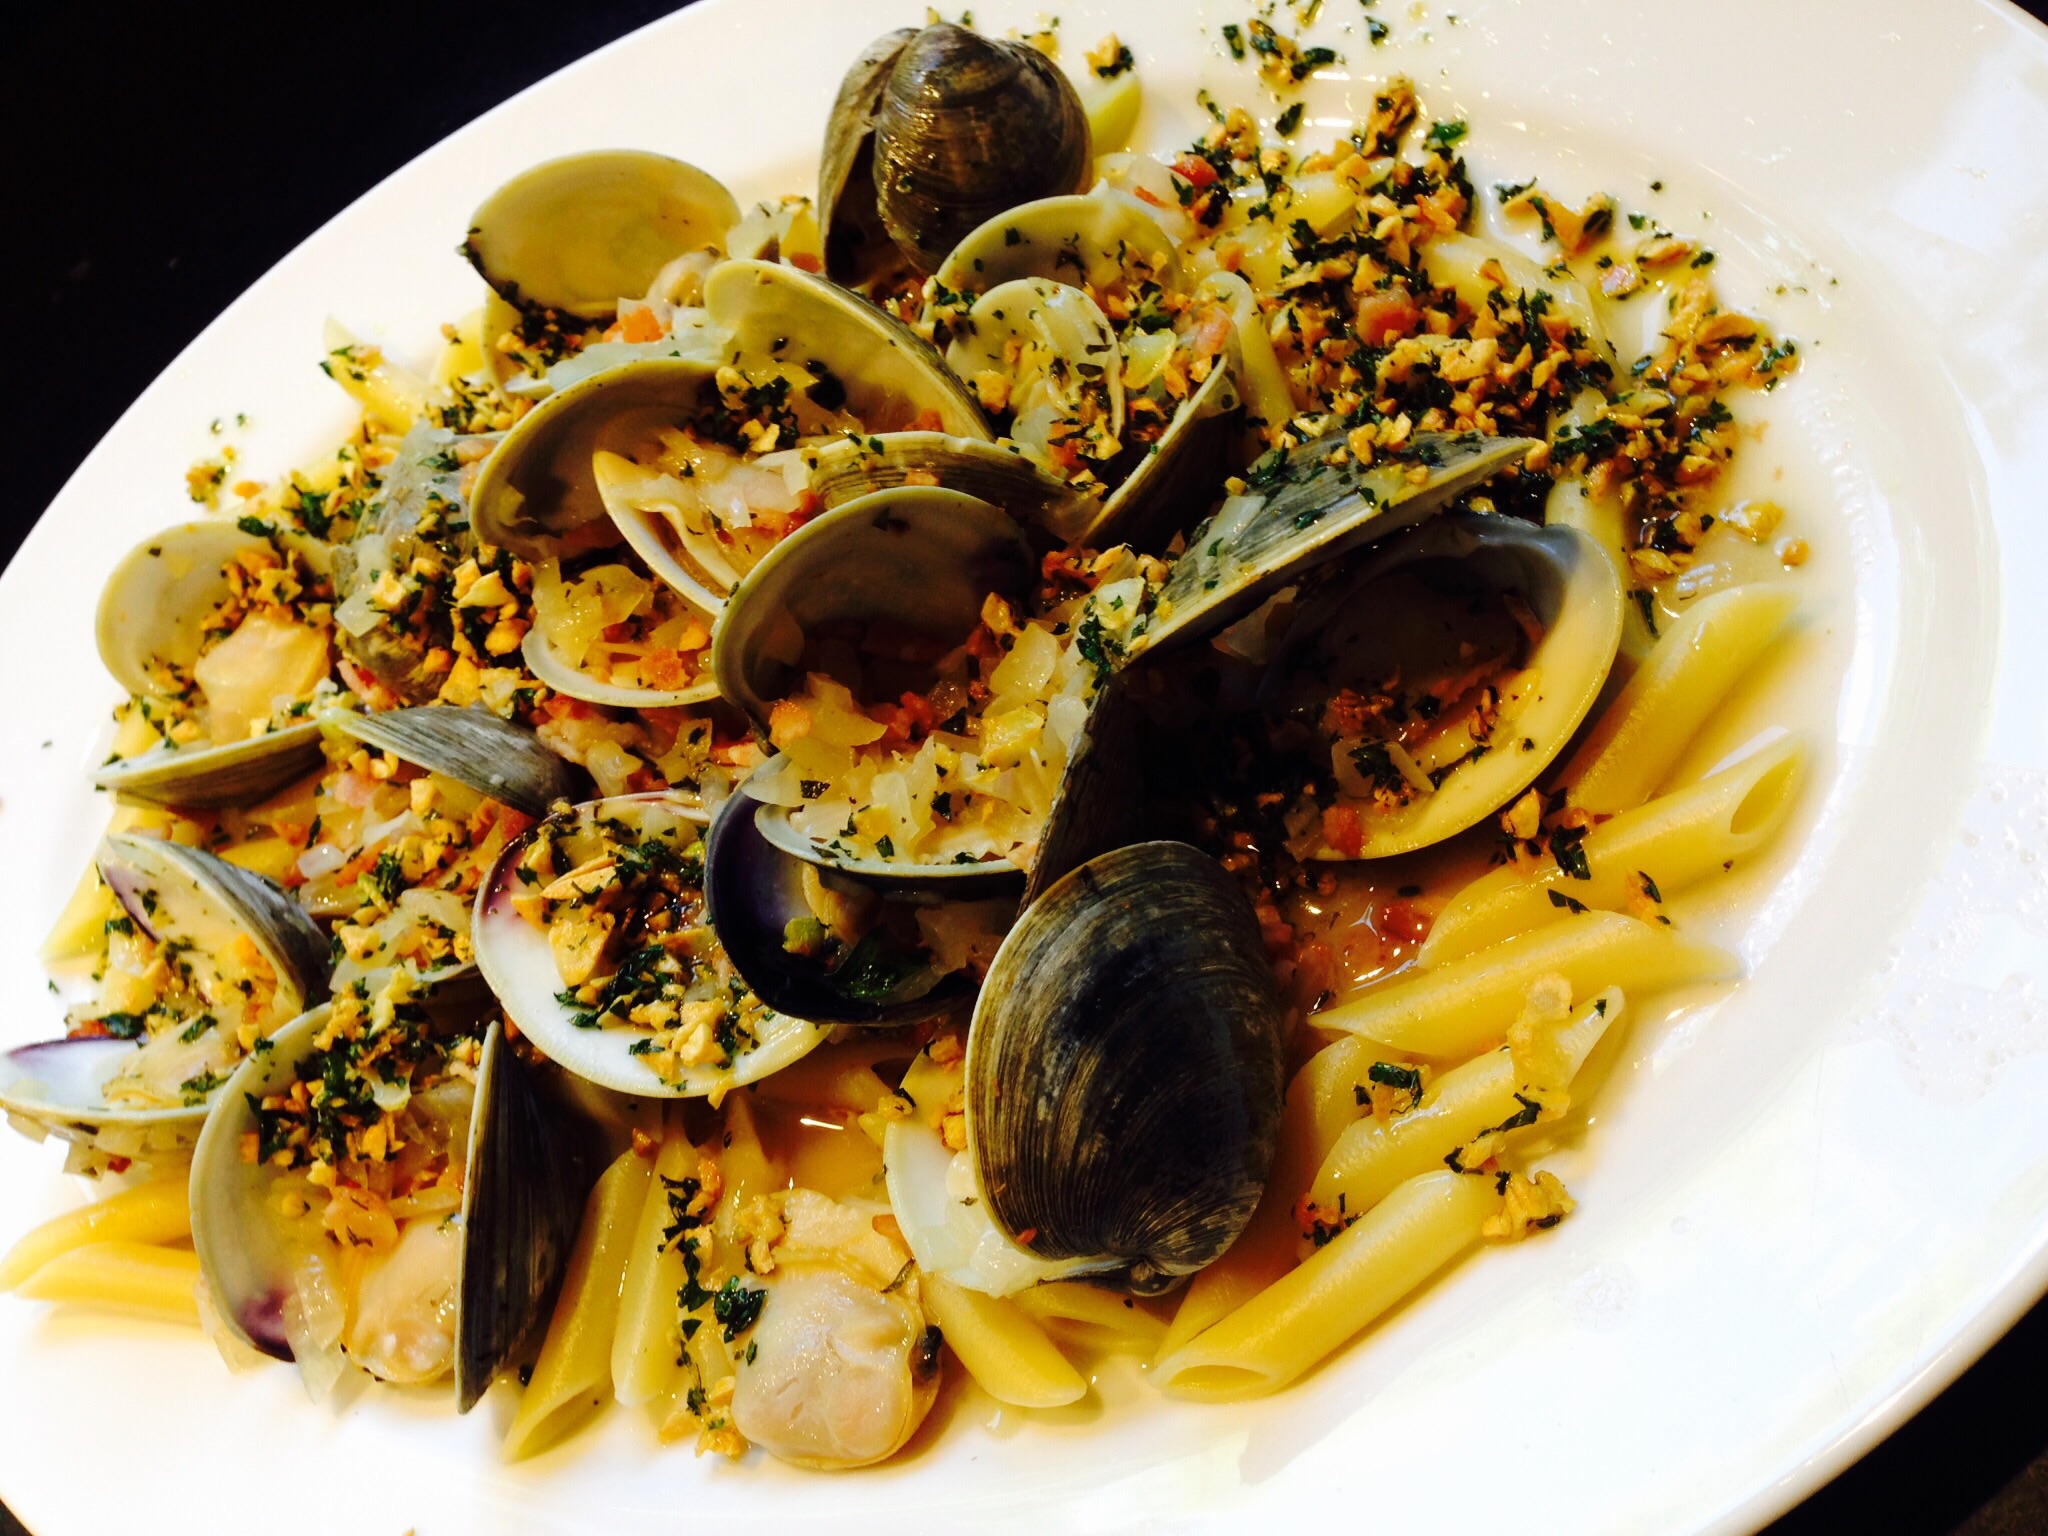
Place the pasta in a bowl or plate. Pour clams and juice over the pasta. Pour the fried garlic and oil all over the clams.
*Purging clams: Clams can be pretty sandy and gritty, so it’s important not only to scrub the outside of the shell, but to purge them as well. Clams should be stored in a bowl in the fridge with a wet dish towel over them, never in water. Once you’re ready to use them, fill a bowl with water and add salt (think salty like ocean water) and a tablespoon of corn meal. Mix this around, then add the clams and let them sit in this solution in the fridge for a couple of hours. The clams will purge (clean themselves) out. Discard the liquid and rinse the clams before cooking.
TUNA TARTARE
Posted: September 16, 2015 in Food, Recipes, Rhode Island, seafood, tuna, UncategorizedTags: FISH, food, raw, recipes, seafood, tartare, tuna
The key to great tuna tartare is super fresh tuna. And although I get it practically off-the-boat fresh here in RI from the folks at The Local Catch, a group that sells only fresh, local and sustainable seafood, I still freeze my tuna before using it. It’s easier to cut tuna cleanly into cubes when it’s still a bit frozen.
1 lb. super-fresh tuna
1/4 cup olive oil
zest of 1 lime
1/4 cup fresh lime juice
1/2 teaspoon wasabi powder
1 1/2 teaspoons soy sauce
1/2 teaspoon hot pepper sauce (I use Frank’s)
1/2 teaspoon sea salt
1/2 teaspoon black pepper
1/4 cup scallions, minced (white and green parts)
1 avocado, chopped into 1/4″ cubes
1 1/2 teaspoons toasted sesame seeds (optional)
Chop the tuna into 1/4″ cubes or smaller. Place in a large bowl and keep in the fridge.
In another bowl, combine the olive oil, lime zest and juice, wasabi powder, soy sauce, hot pepper sauce, salt and pepper, and scallions. Pour this over the tuna and mix gently.
Add the chopped avocado to the bowl and mix gently.
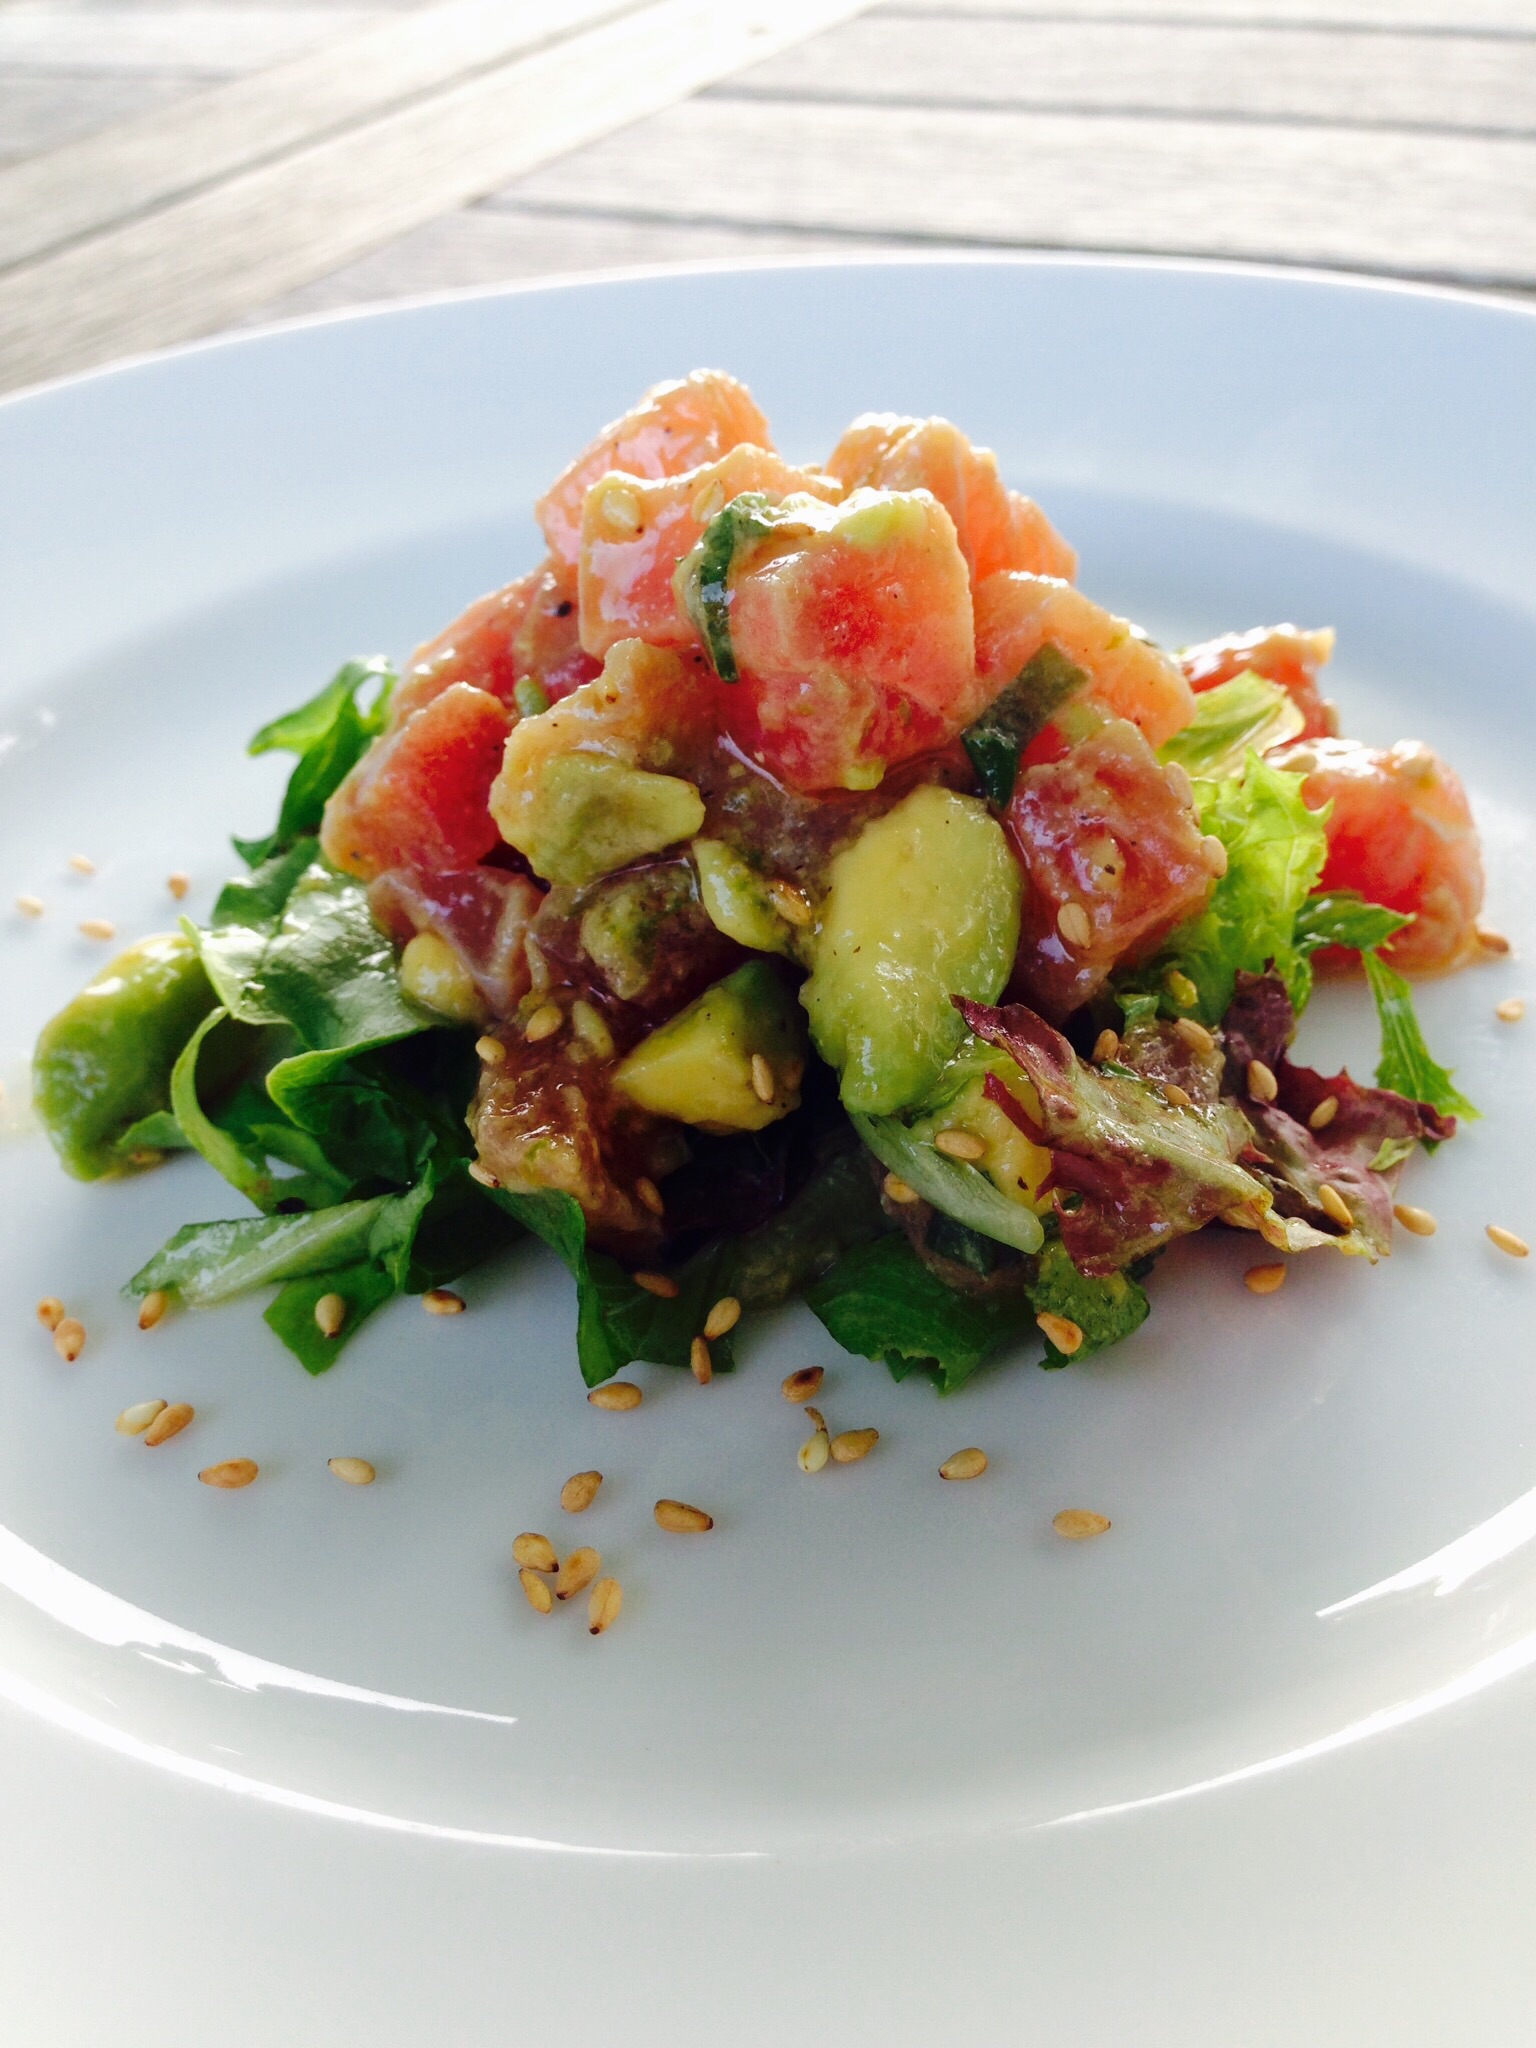
Let it sit in the fridge for at least an hour for the flavors to combine. Before serving, take the bowl out of the fridge and let it warm just slightly. Taste for seasoning. Top with sesame seeds.
Serve on crackers or over fresh greens.
