The heat of the summer always has me craving a cold beet soup my Mom made…
It’s interesting that an Eastern European country that is as far north as Newfoundland has one of the most refreshing cold summer soups of any country in Europe. It’s a cold beet soup called Šaltibarščiai (pronounced shul-tih barsh-chay) and it’s classic Lithuanian cooking at its best.
No summer was complete without my Mom’s Šaltibarščiai on the table, and my Dad always insisted on eating it with boiled potatoes on the side.
There are many different variations of this soup. For example, many Lithuanians today use keffir instead of buttermilk. My Mom always insisted buttermilk tastes better, and I have to agree.
1 quart buttermilk
4 hard-boiled eggs, peeled and chopped
3 cucumbers, peeled, seeded and chopped
8 beets, cooked, peeled and chopped
1 tablespoon finely chopped fresh dill
1 scallion, finely chopped, greens only
salt
a pile of boiled potatoes (optional)
Pour the buttermilk into a large bowl. If it’s very thick, you can dilute it a bit with fresh water.
Peel and chop the eggs and toss them in the bowl. Peel, seed and chop the cukes…then into the bowl.
I love Love Beets, hermetically sealed cooked and peeled beets, ready to use, available in most supermarkets. (In the old days, my Mom would simply use canned beets.) I open a couple of packs of LoveBeets, pouring the beet juice into the bowl. I chop the beets and add them as well.
Grab some fresh dill and chop it finely. Add it to the bowl. Finely chop the greens of one or two scallions and sprinkle some salt on them. Rub the salt into the scallions, mashing them a bit, softening them. Then add them to the bowl.
Stir everything together, put a lid on the bowl, and let it chill in the fridge for a few hours.
Remove it from the fridge, stir, and season with more salt if needed before serving.
I overheard a conversation at a Portland, Maine, restaurant where the server told one of their customers that Portland has the most restaurants, per capita, in the country, second only to San Francisco. I would not doubt that for a minute. Although I live just minutes away from Providence, Rhode Island, a pretty darn good food town in itself, what makes Portland so very special is the fact that you can park your car and walk everywhere. And the variety of foods you can sample is hard to beat.
The bar at Crispy Gai.
The food craze in Portland started many years ago with the granddaddy of them all, a restaurant that is still kicking butt: Fore Street. Fire roasted meats and fish, served in a beautiful dining room, with tasty crafted cocktails… it’s a fine dining experience. You definitely want to save for that special occasion. But for this trip, my mission was to have a small bite in many different places, and so I chose to visit ForeStreet again another time.
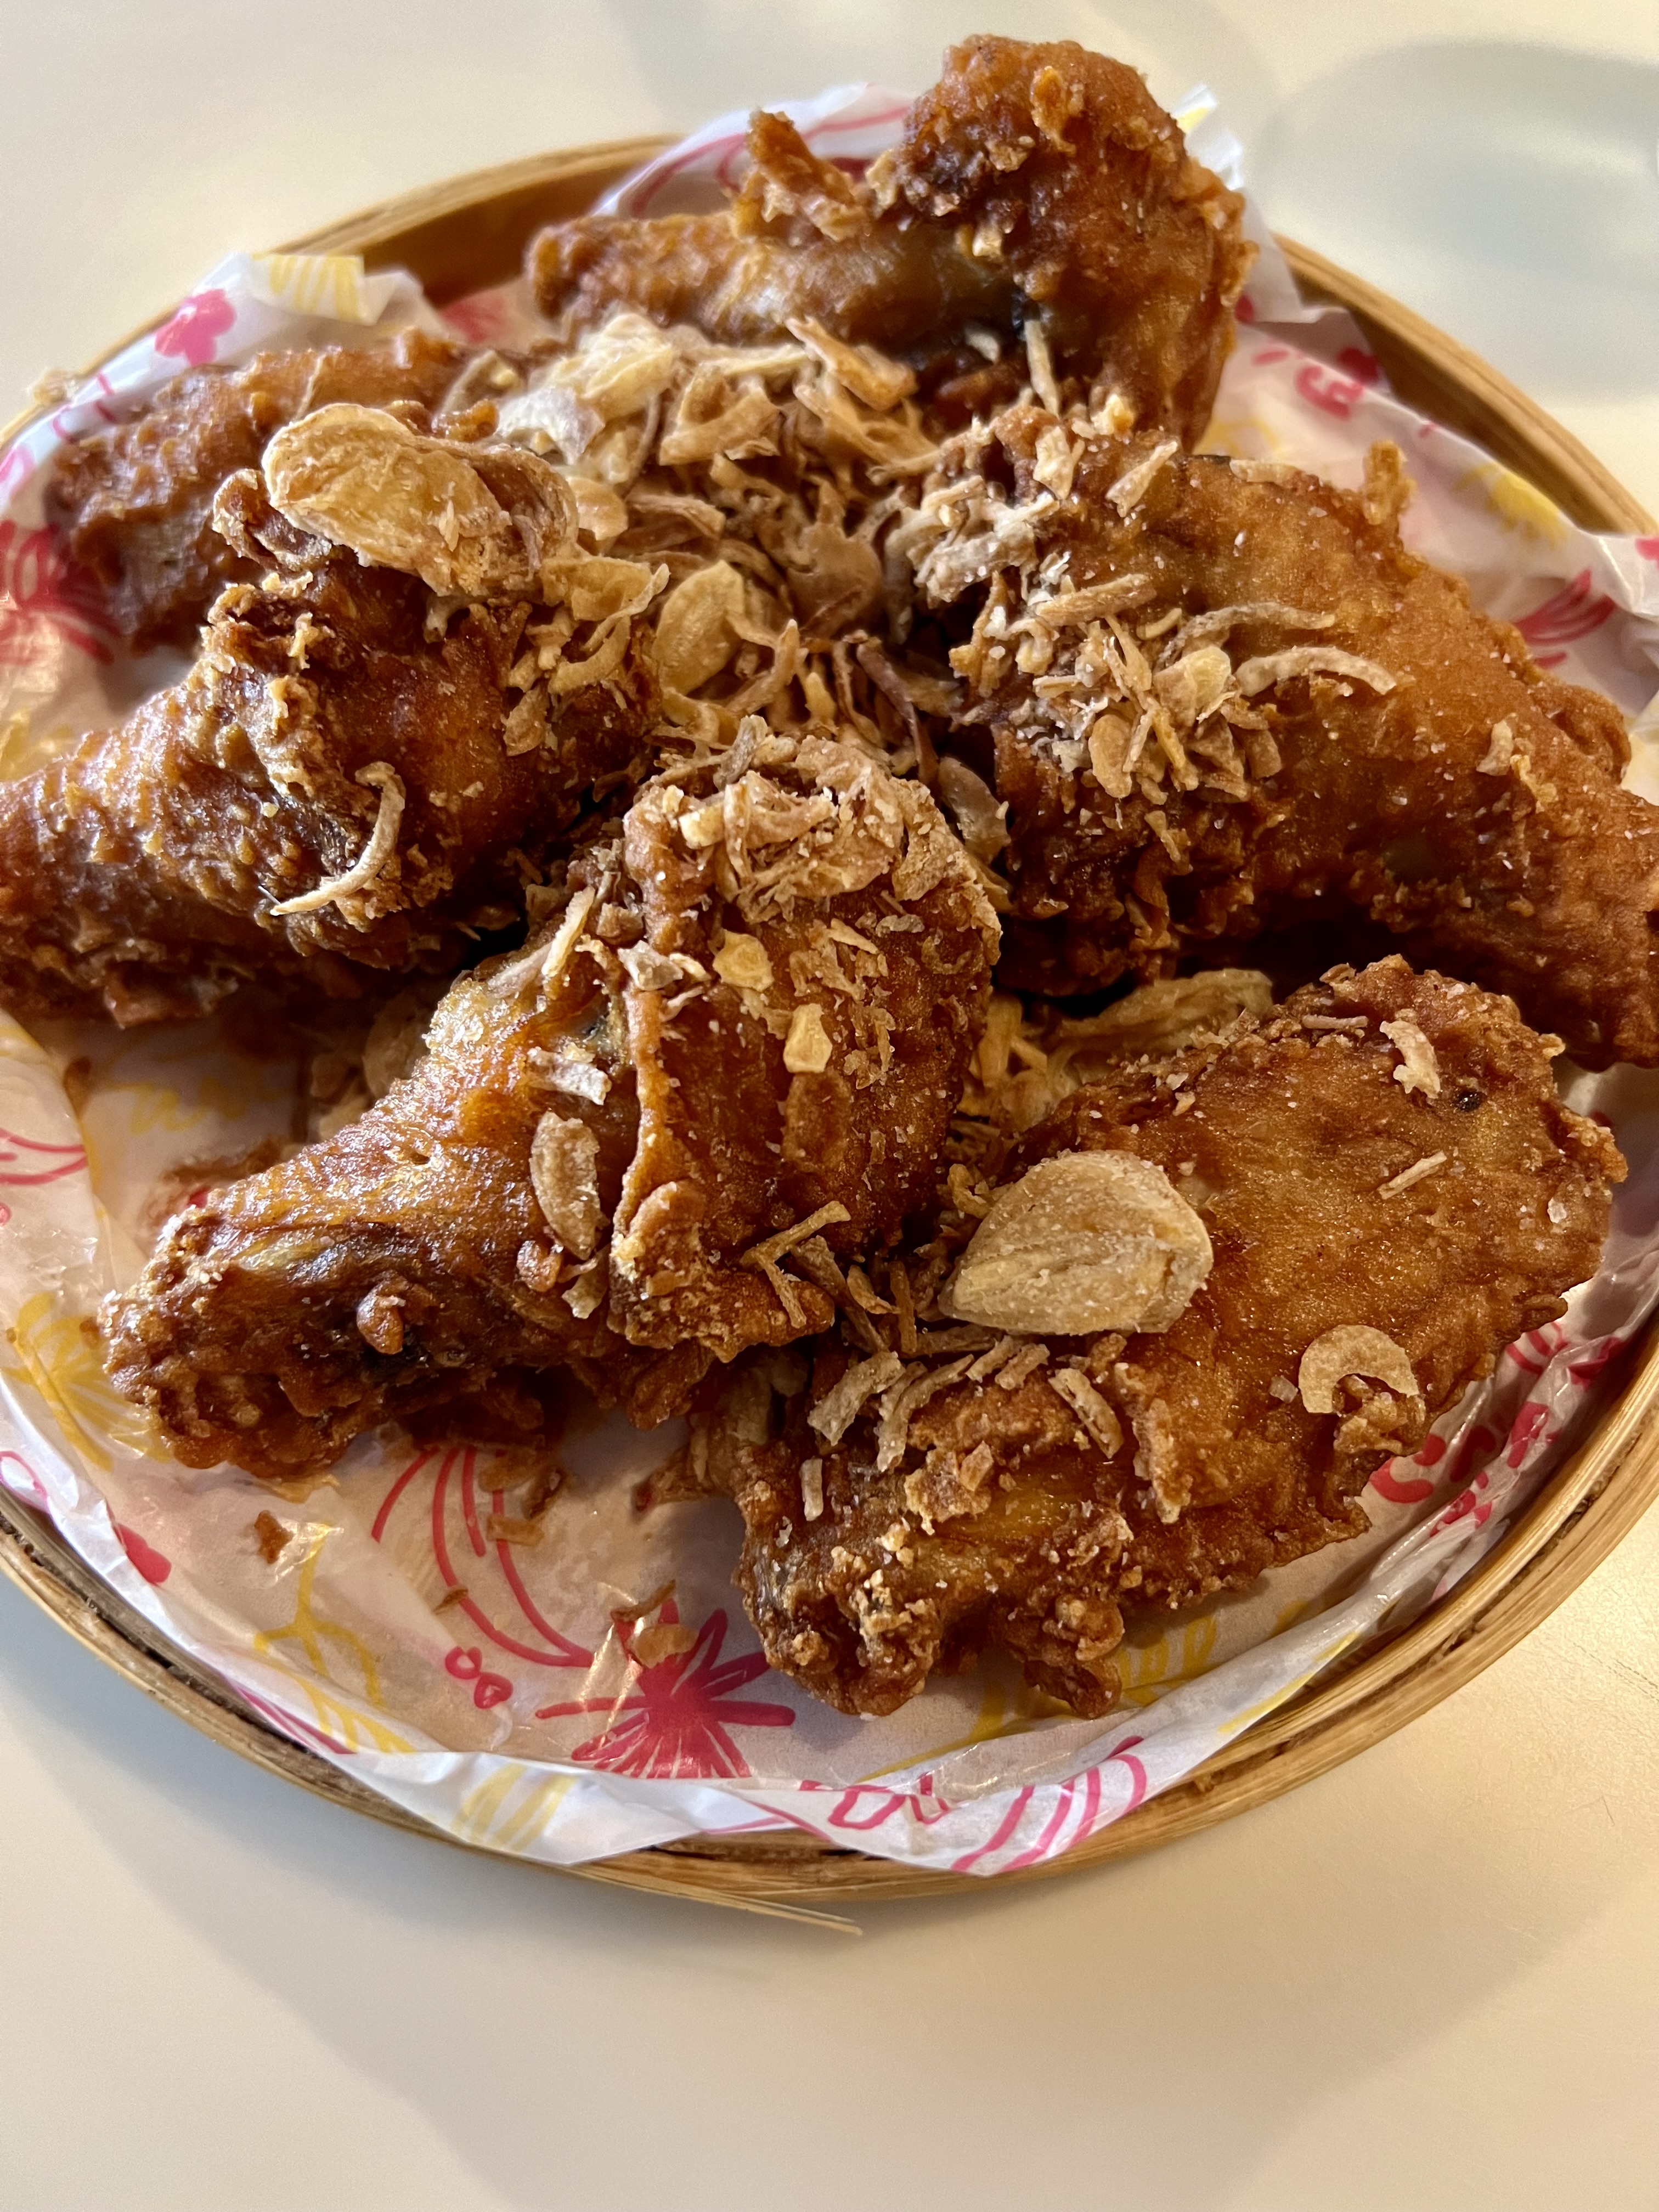
My first stop was Crispy Gai, a small, energetic Asian bistro. I was there before the lunch crowd at 11 AM, but I could imagine this place just jamming on weekends.
Their Hat Yai fried chicken wings were to die for and the Siu Mai dumplings were fantastic.
After that, I checked into my hotel, got my room early, and walked down Commercial Street to the main focus of my trip: a magnificent trio of restaurants, all located around the same corner of Middle Street.
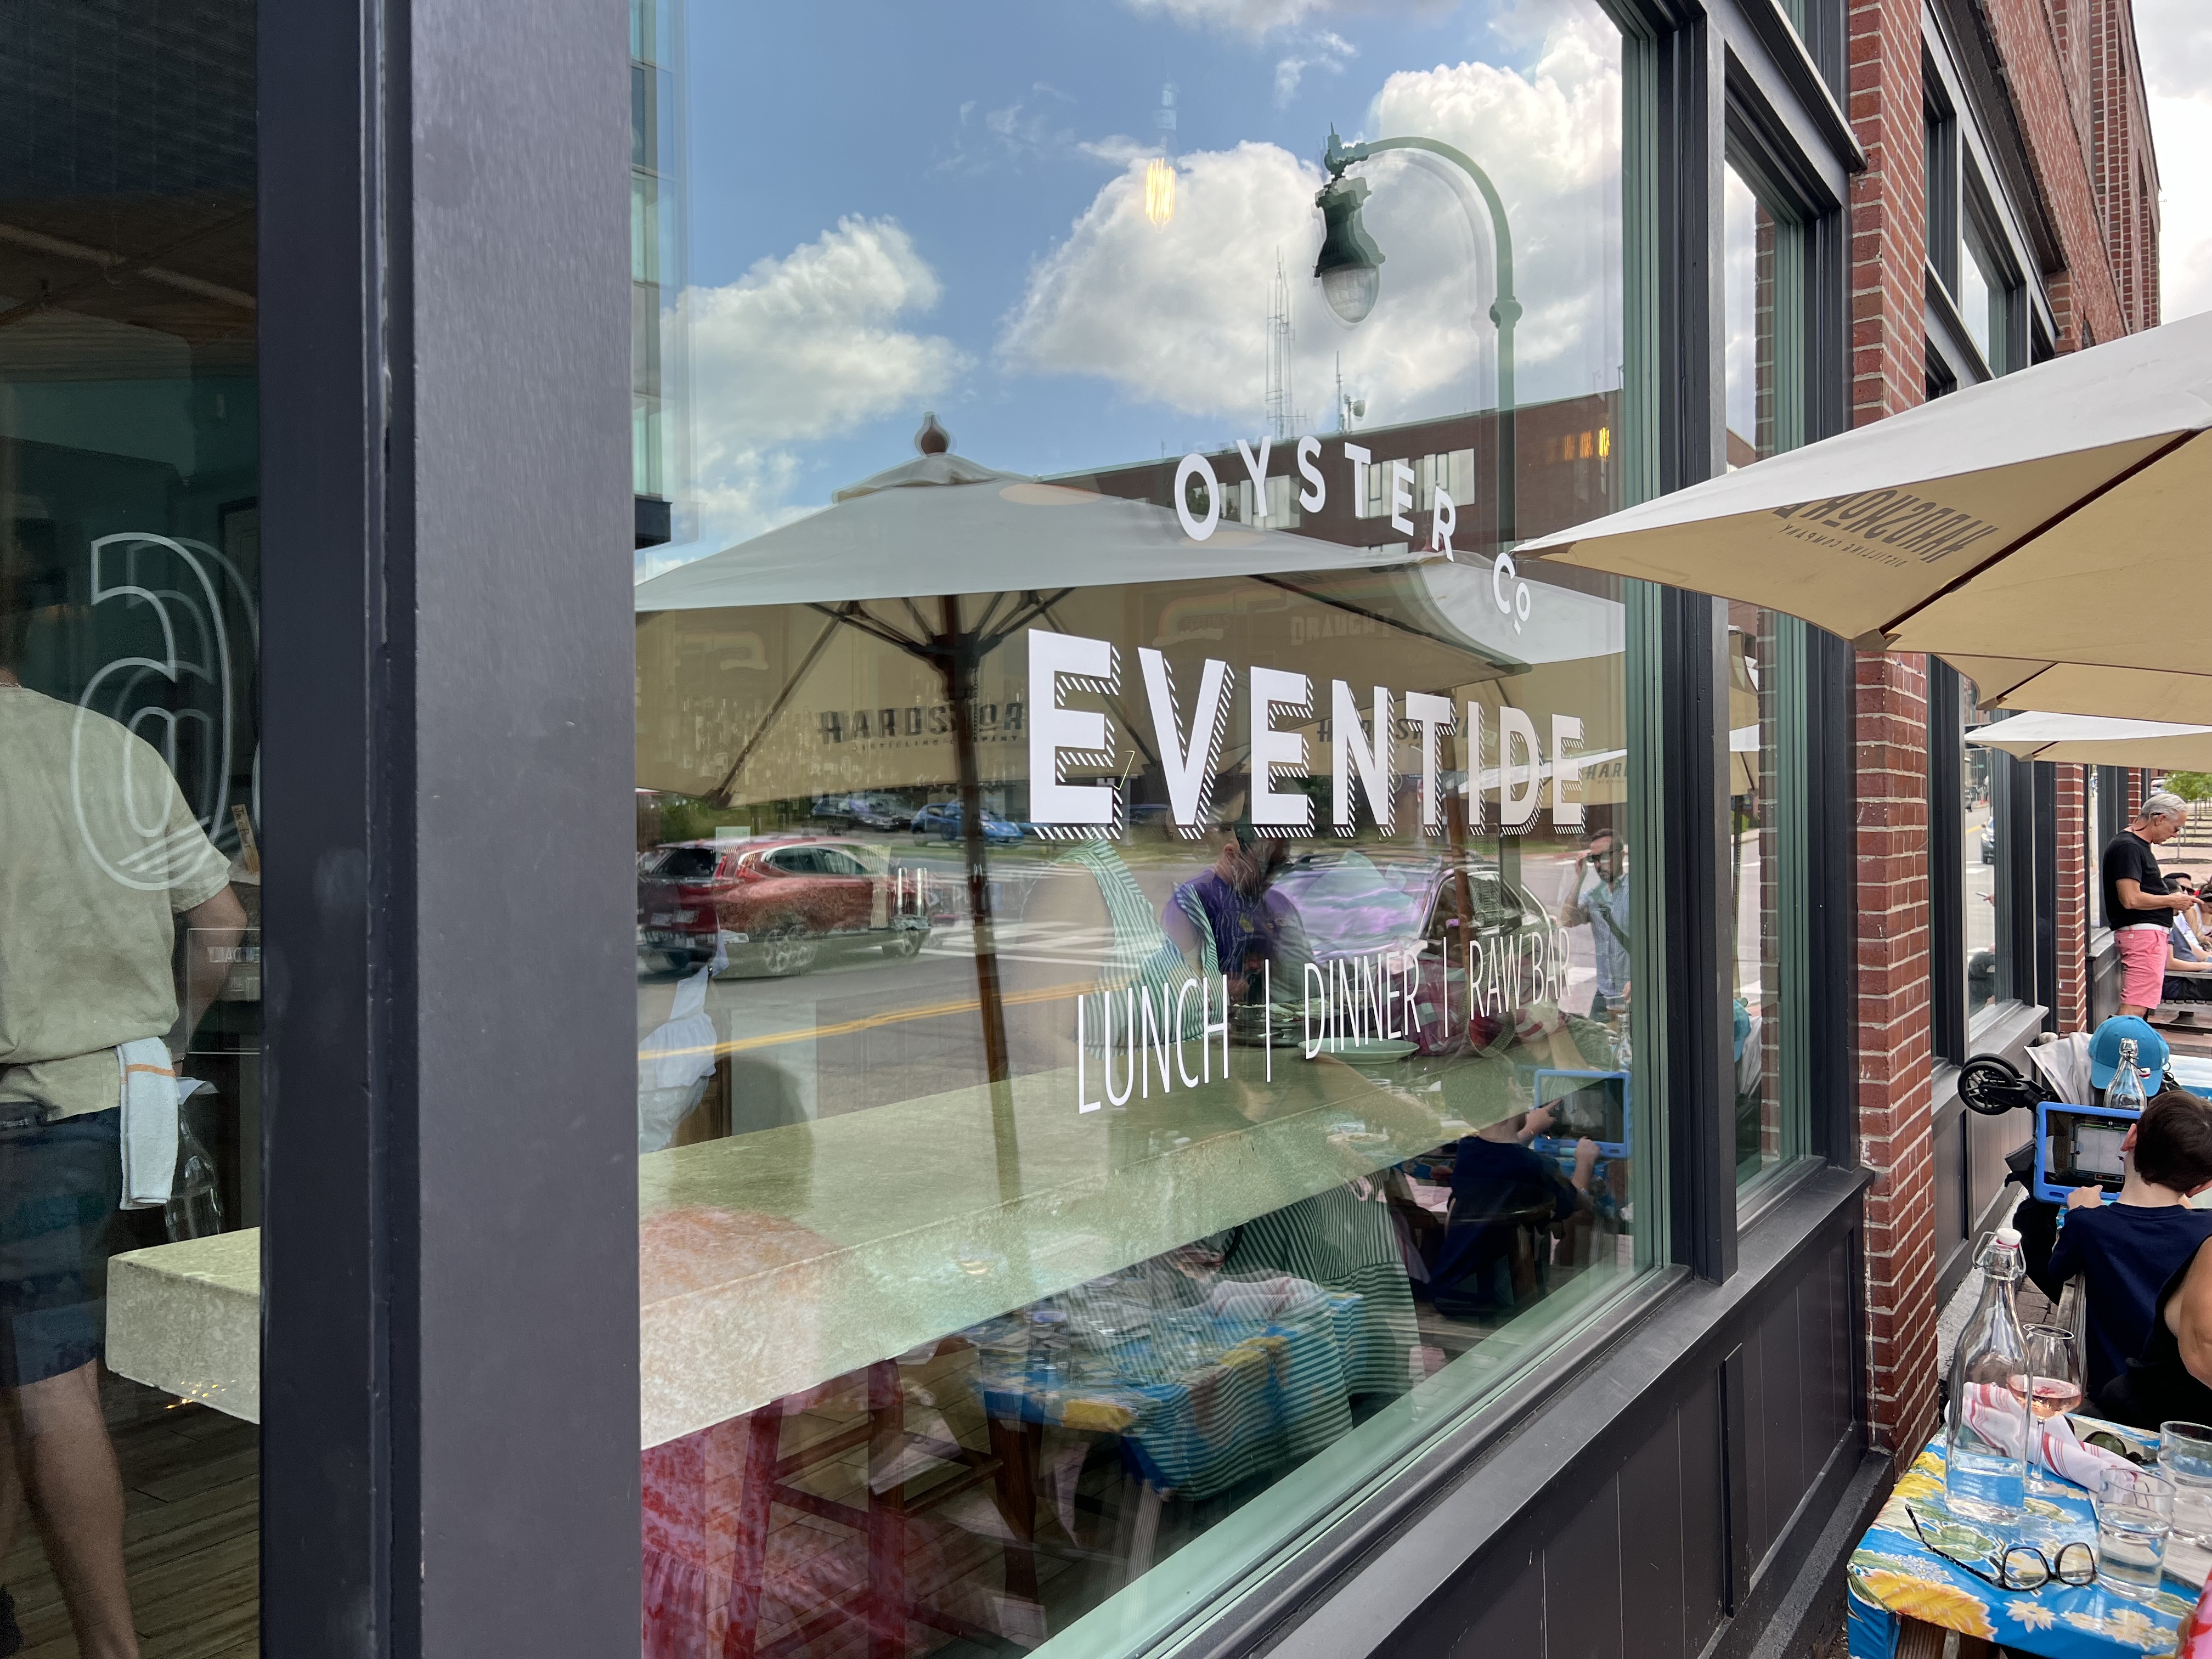
Perhaps the one restaurant that has made the most noise when it comes to luring foodies into Portland, is Eventide. It’s been featured in countless food magazines, and they even have a second (smaller) location near Fenway Park in Boston.
I started coming here years ago, when nobody even heard of this place, and you could get a seat right away. Now, no matter what day you go, and no matter what time of day it is, you’ve got to wait.
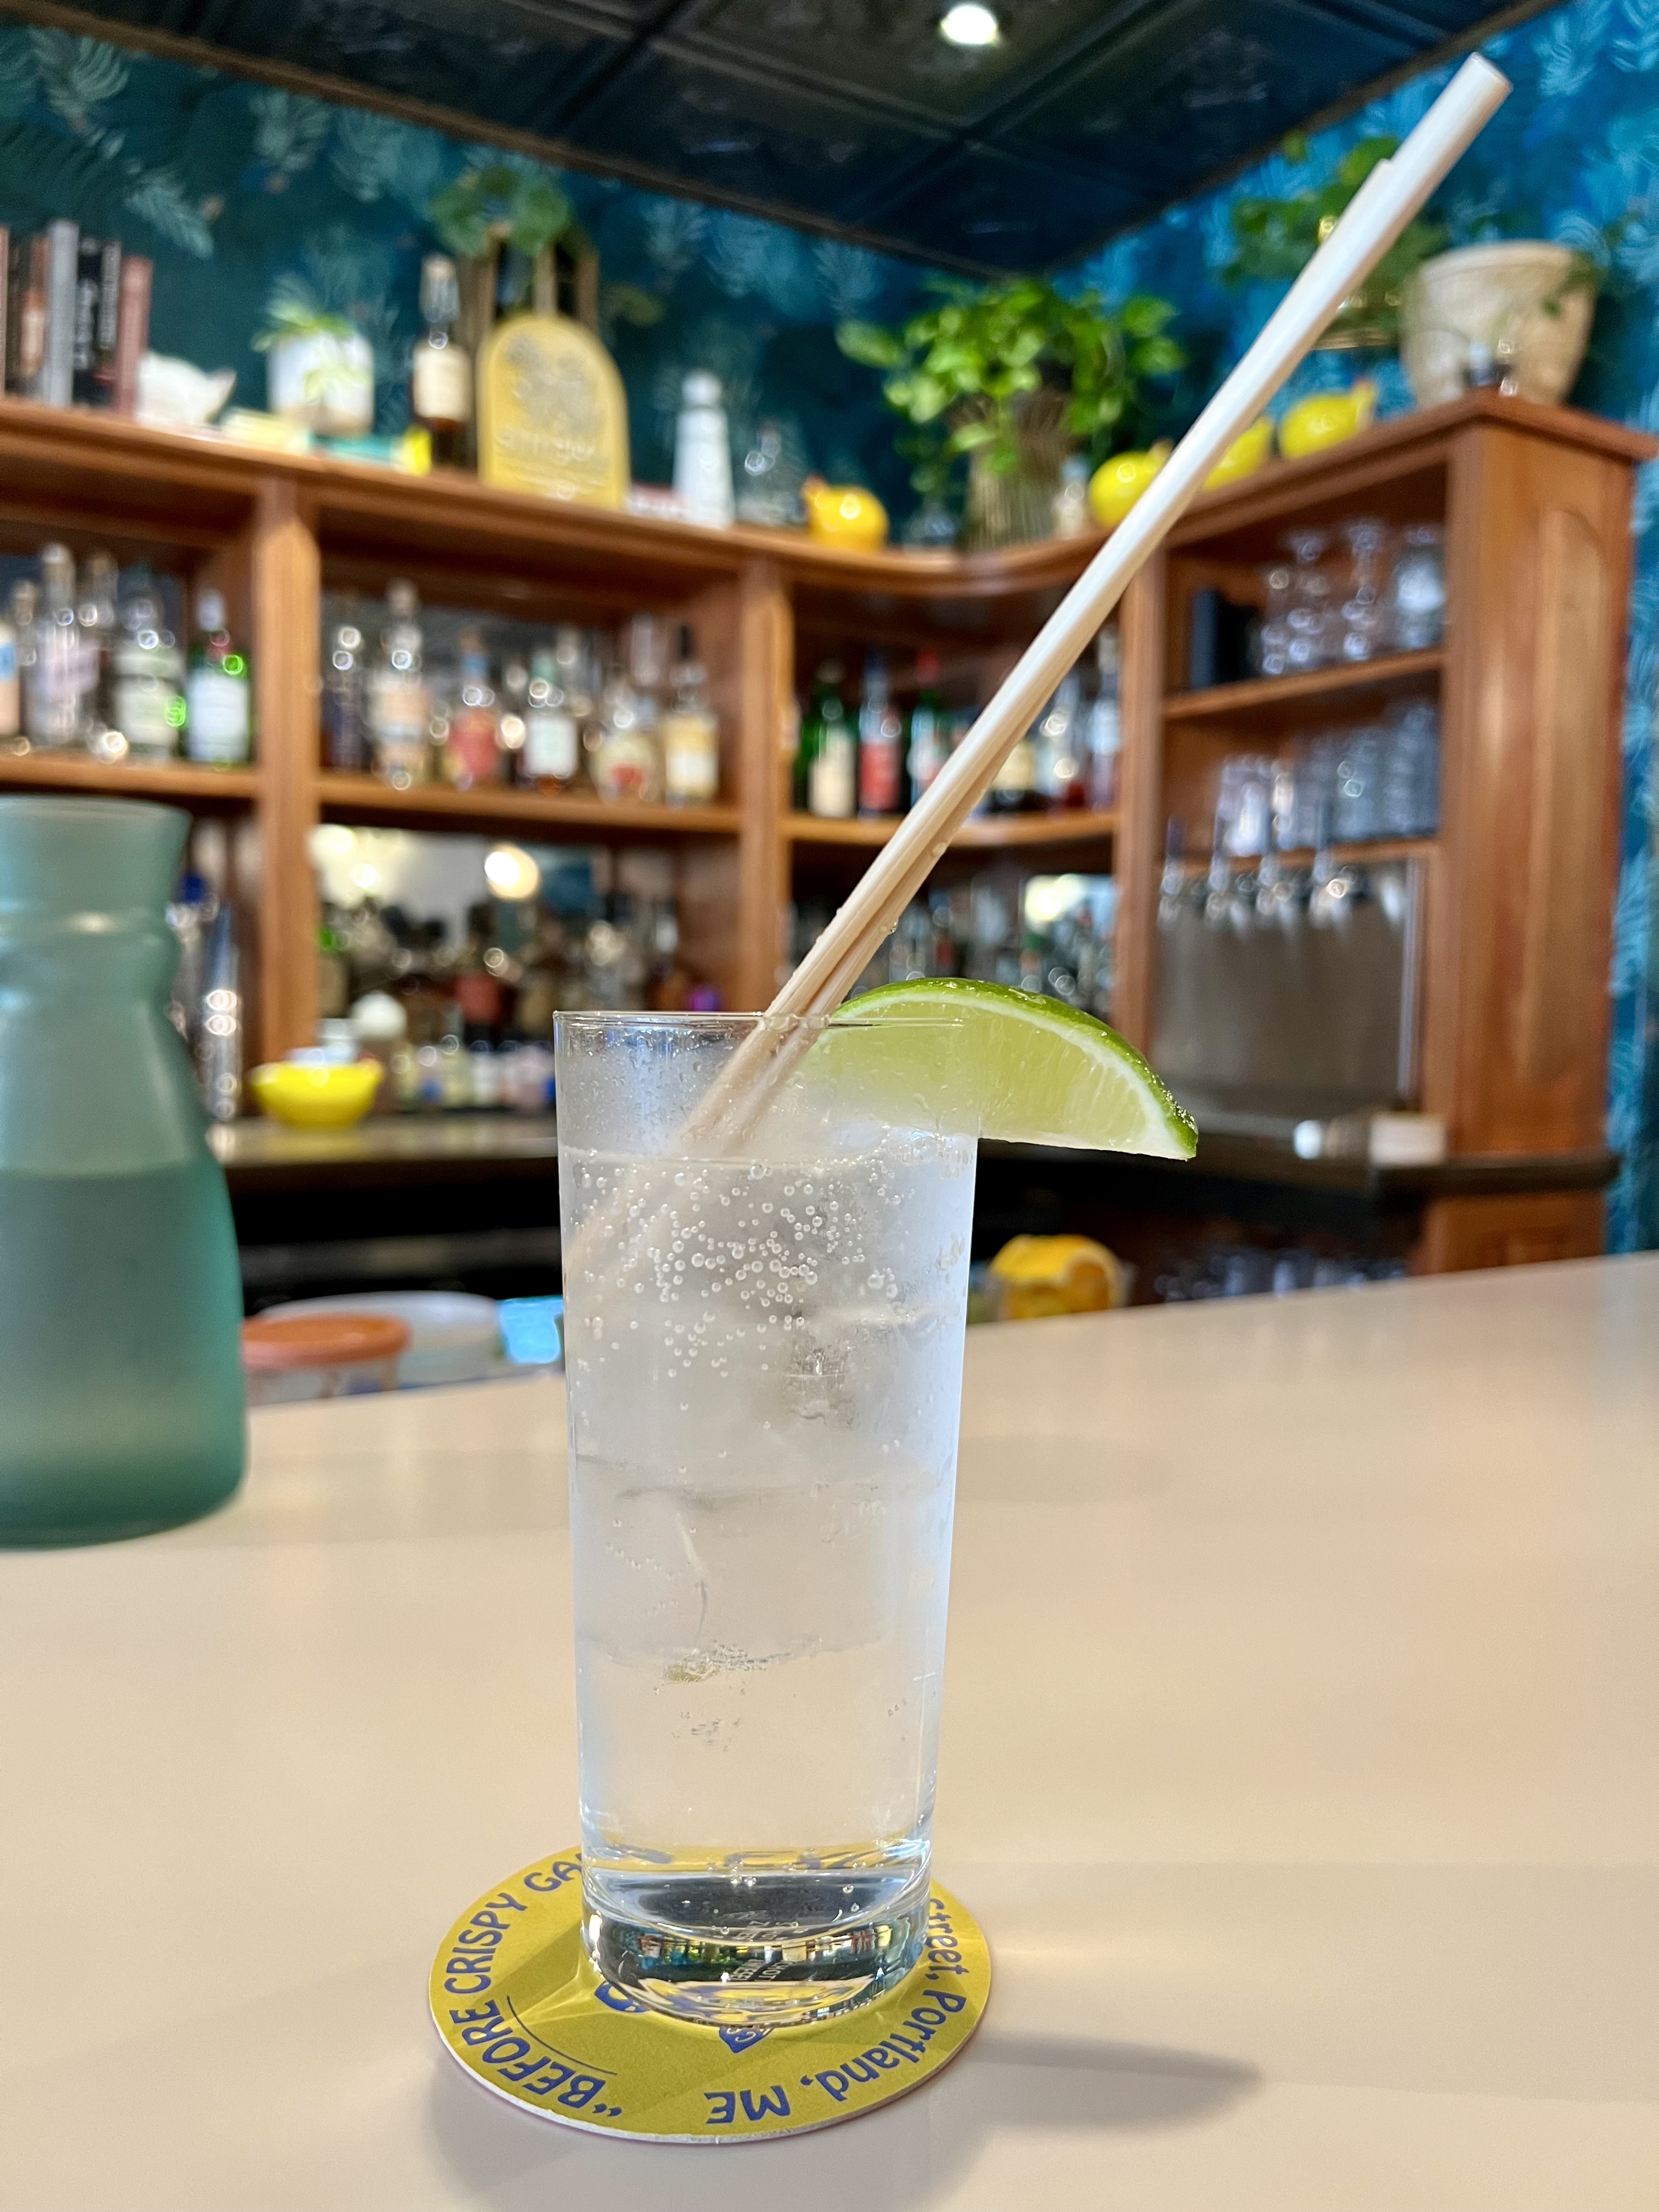
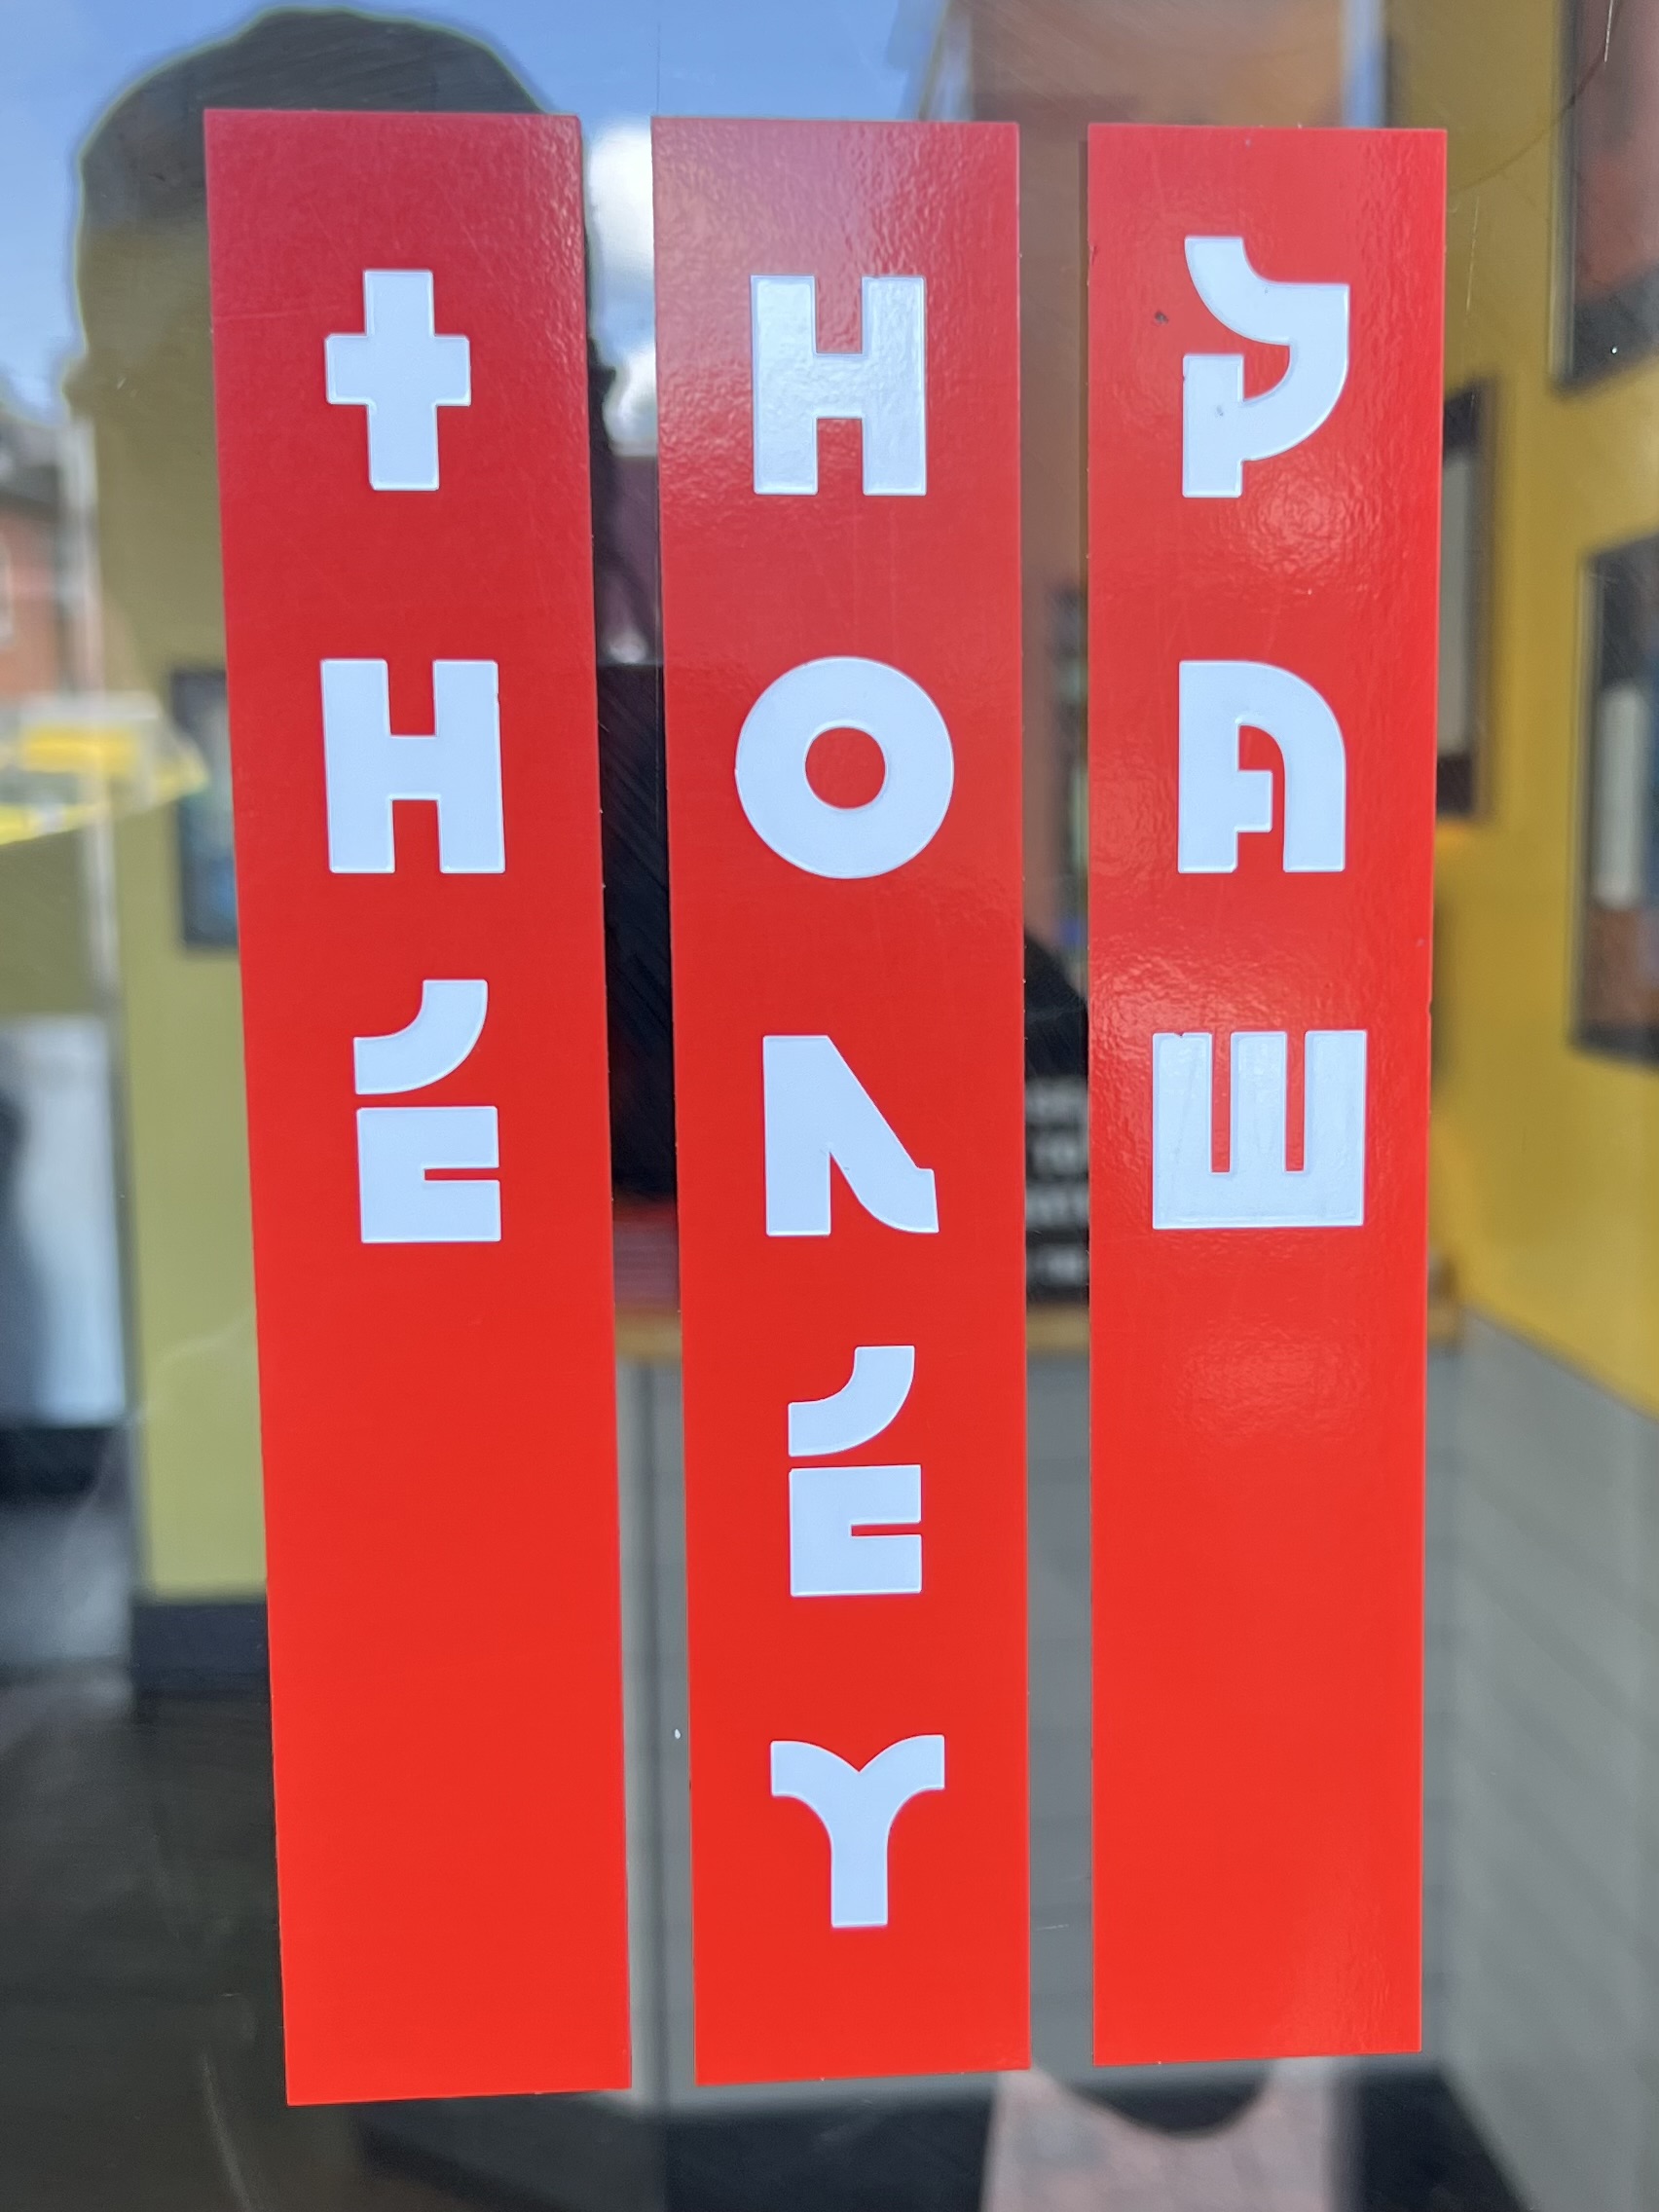
So here’s my secret: walk up to the maître d’ and give her your name and phone number. They will text you when a space becomes available. That gives you just enough time to go next-door to The HoneyPaw for a quick bite and a drink.
Owned by the people that run Eventide (in fact, they share one long kitchen that runs the length of the back of the building), The Honey Paw features incredible, creative, and eclectic Asian-themed dishes with really fresh ingredients.
The Honey Paw bar.
I enjoyed a fabulous plate of bluefin tuna crudo with a Hendrick’s and tonic.
And just as I was finishing the last sip of my drink, I got a text that my space at Eventide next door was waiting for me.
If you’re a regular at Eventide, you may go there for the oysters. They certainly do have a huge selection. But for someone like me who rarely gets to visit, it’s all about the creativity, and their chefs really shine. I’ve had the lobster roll and the bao buns and all that stuff, so for me, it’s all about the specials on the chalkboard, and this time, a BLT, using cured and smoked Toro tuna as the bacon, instantly caught my eye.
Words cannot describe how fantastic this sandwich was!
I really wish I lived closer to Portland because I would go to Eventide every single day until I got sick of it. (And I don’t think I ever would!)
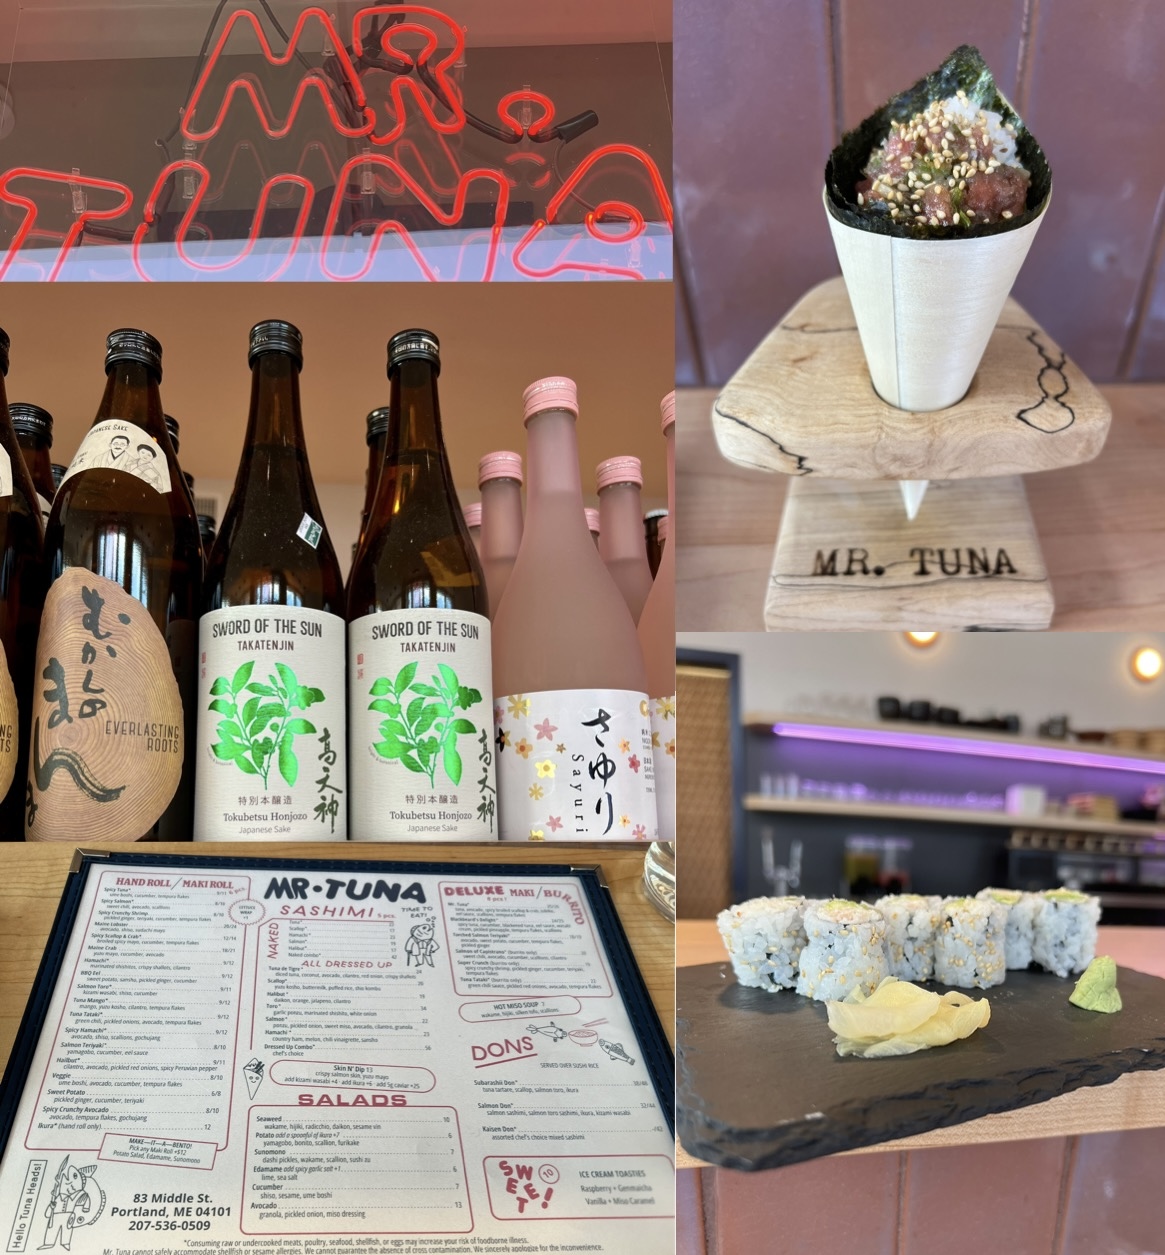
So I washed my TBLT down with another Hendrick’s and tonic (you can see where this is going!) and I crossed the street to a brand new spot, at least for me, called Mr. Tuna.
Fresh sushi is the name of the game here, and I enjoyed an Otoro hand roll and a Maine crab maki roll. This time, I accompanied my bites with an excellent glass of refreshing sake.
To say I was stuffed at this point was an understatement. I’m glad I had a bit of a walk back to my hotel to burn at least a few calories. But a power nap was definitely in order if I was to continue my journeys into the evening!
On the way back to my hotel, the Courtyard by Marriott on Commercial Street, I noticed a new hotel called the Canopy, which featured a rooftop bar named Luna. I decided this would be my first stop after my much needed nap.
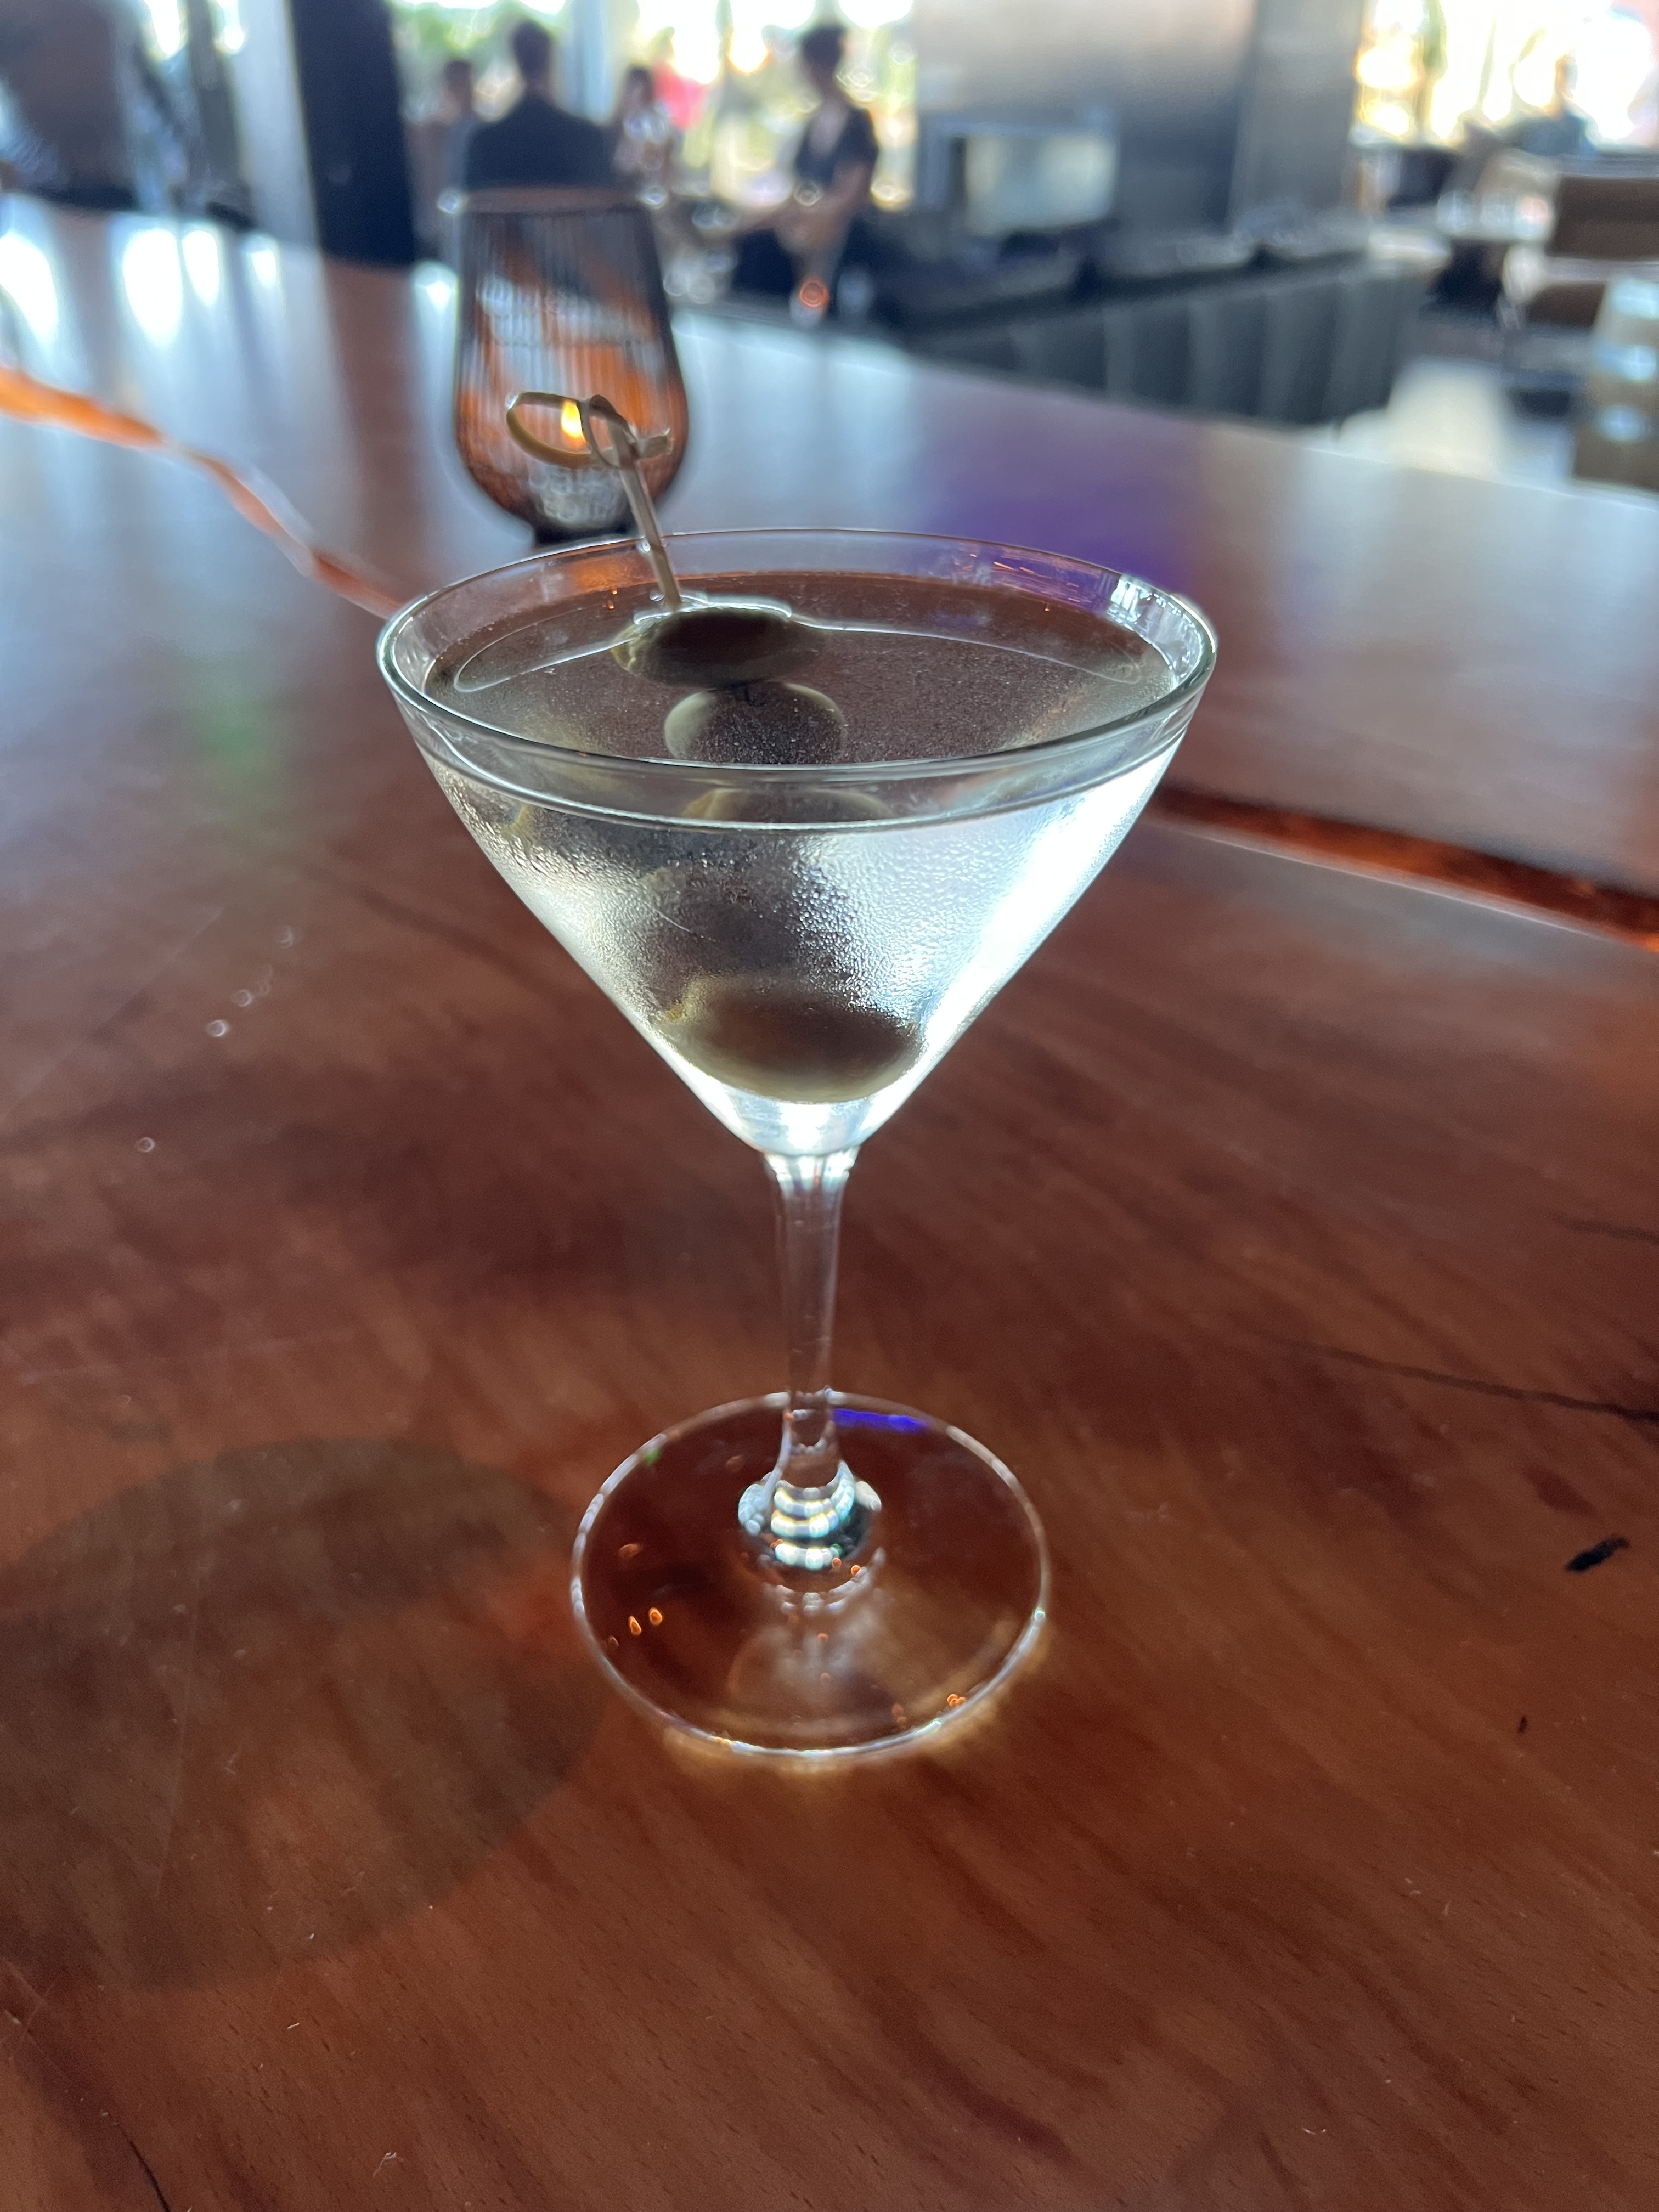
Luna is on the sixth floor of the Canopy hotel, and when I arrived, it was absolutely packed with well-dressed couples, enjoying drinks and the fantastic views of Portland Harbor.
I managed to get my first cocktail pretty quickly, and soon I found a seat at the bar. But then the masses moved in and the two bartenders, though very skilled and hustling as fast as they could, were completely overwhelmed by the crowd. It took forever for me to get my second drink. A third bartender was absolutely necessary there. It is, after all, summertime in Portland…
I didn’t have any of the food at Luna, because the menu was not impressive. Basic bar bites that didn’t really do anything for me. So after a couple of drinks, I made my way down the elevator once again to Commercial Street.
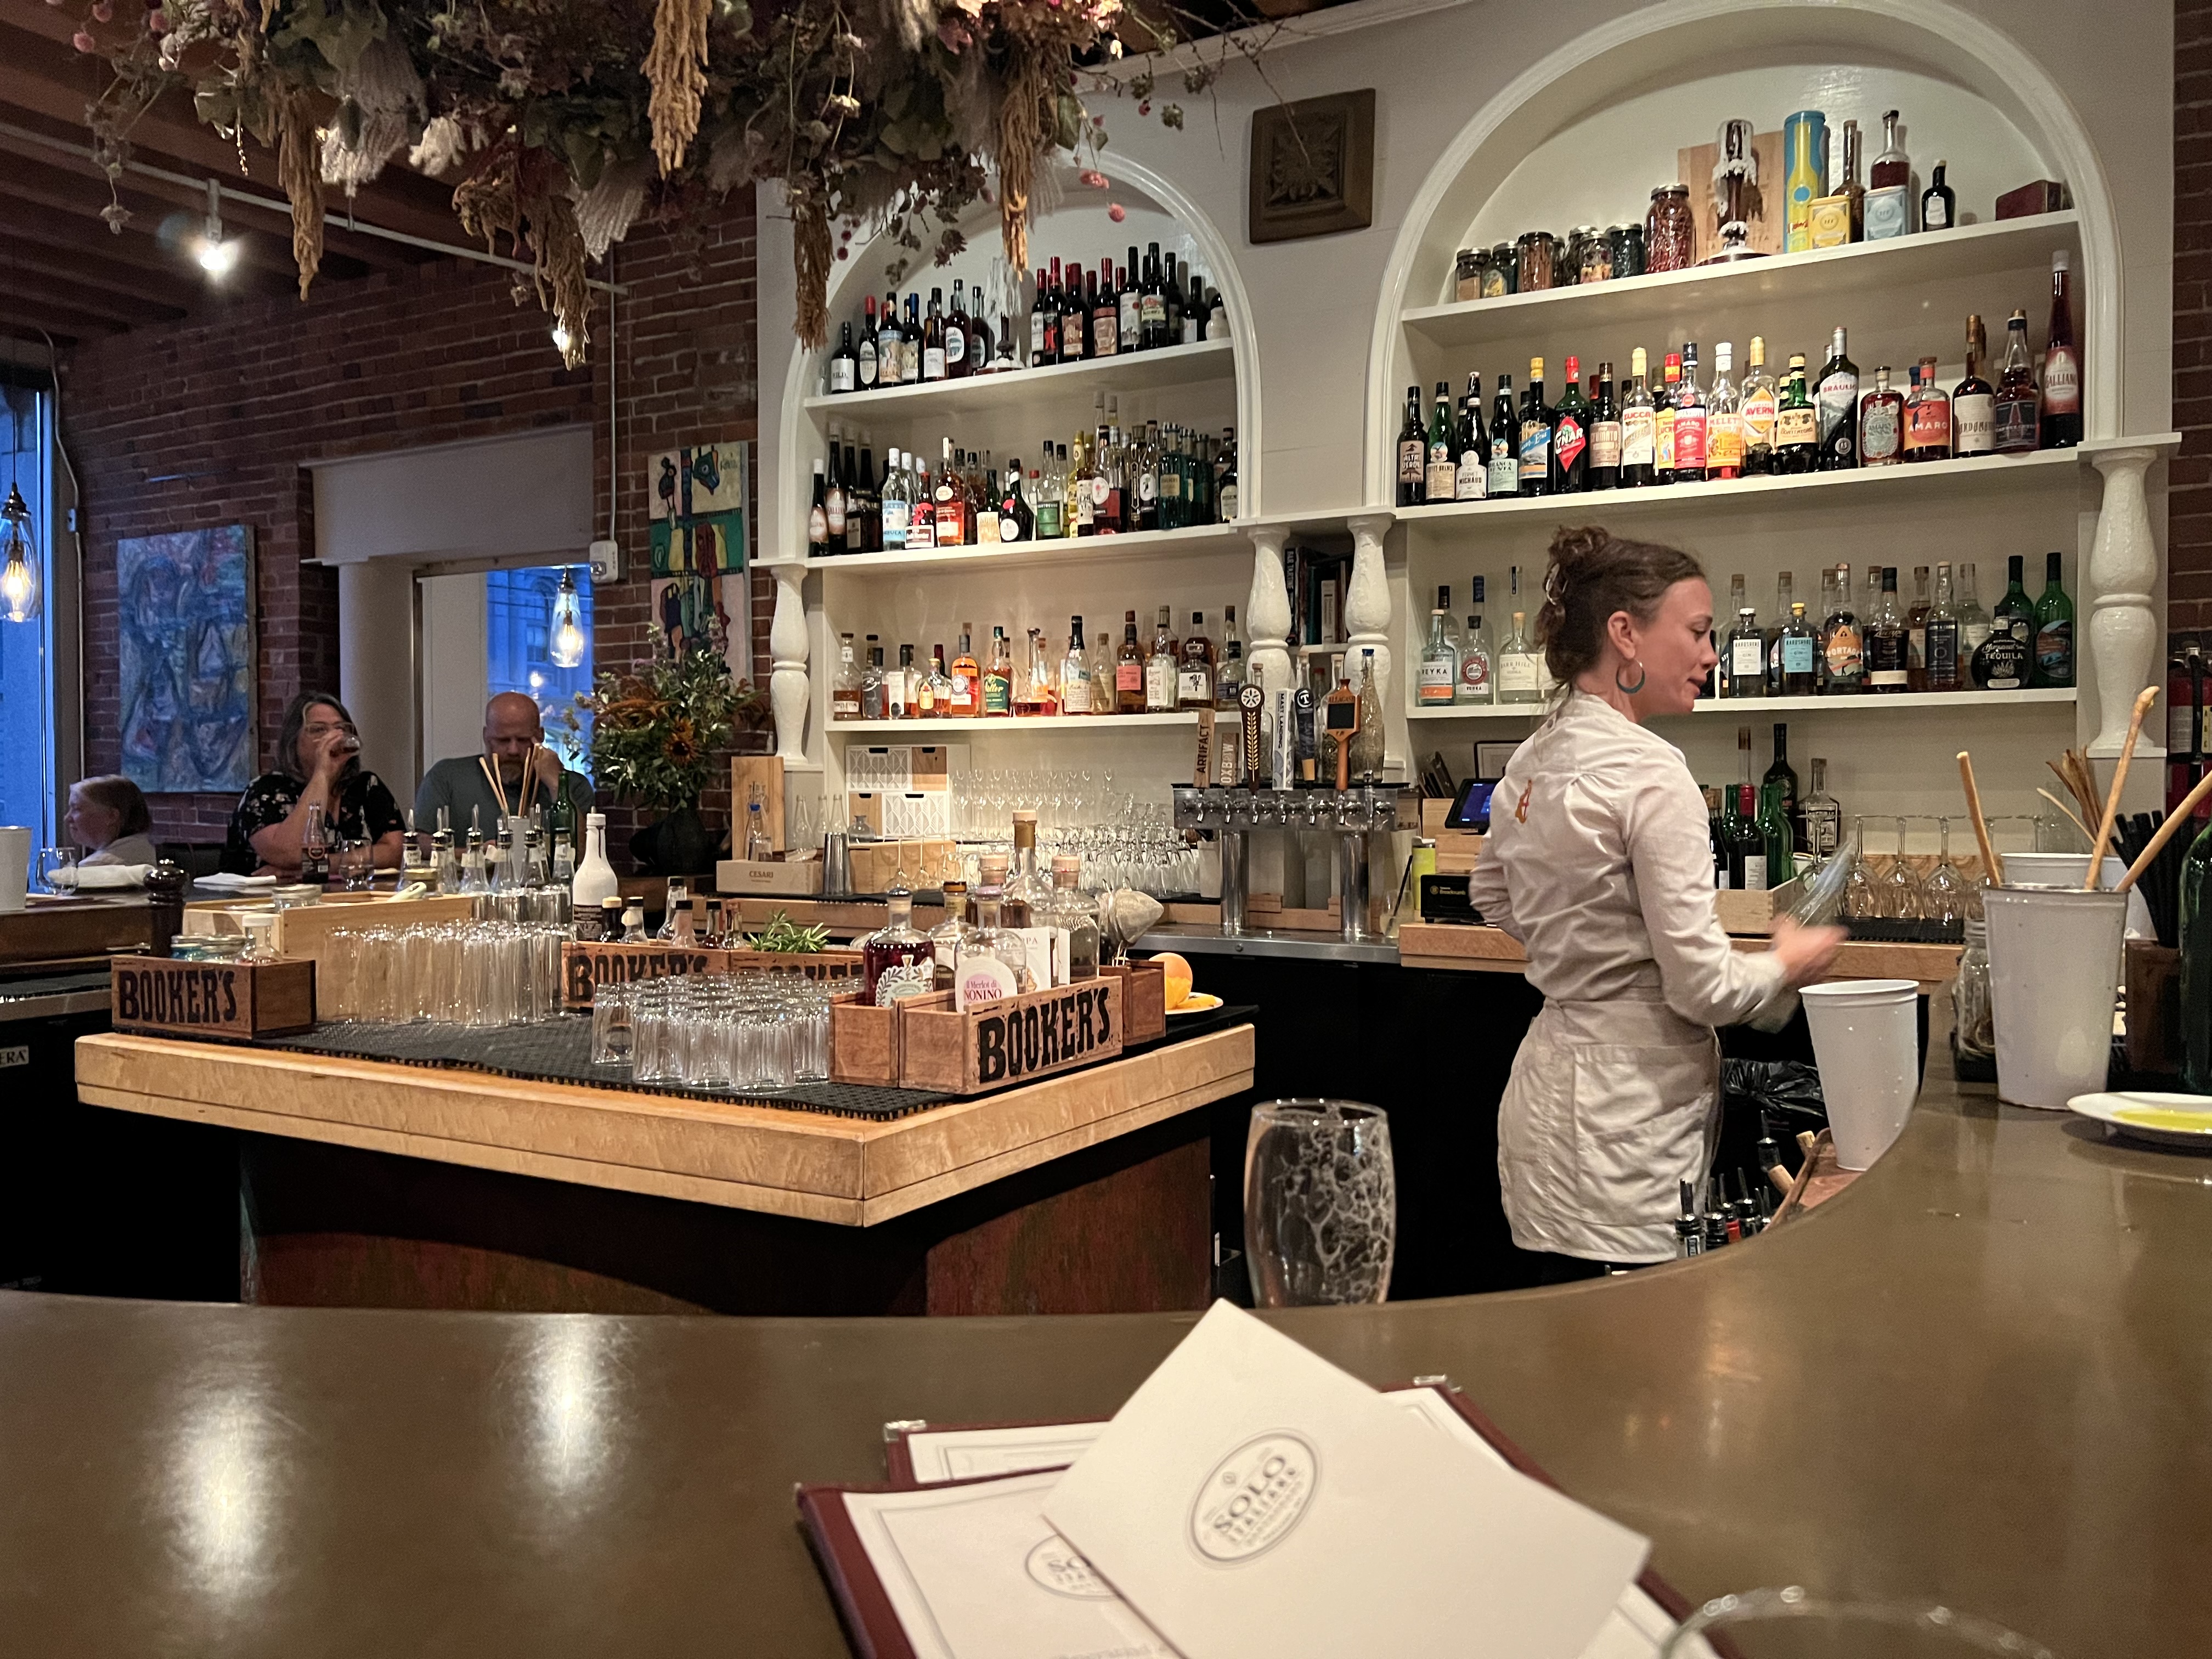
I wanted to finish my adventure on a happy food note, and I was craving pizza. But I didn’t want to go to a pizzeria. That’s when I remembered having had wonderful appetizers at the bar at Solo, an Italian restaurant on Commercial Street, just a short walk down from where I was.
I grabbed a seat at the bar and enjoyed a Negroni.
The menu was full of fantastic crudos that would’ve tempted me at any other time, but I was craving pizza, so I went for the Donna Scala, a sourdough focaccia with mozzarella, San Marzano tomato sauce and fresh basil. The perfect way to end a long day of eating and drinking.
My food day started at 11 AM and ended just before 11 PM. Someday, I will come back to Portland and do this again. But I think a diet is in order right now…
Every summer, I try to grab a few free days and drive up the Maine coast. It’s only a few hours from my home in Rhode Island, but it’s a different world. People are friendlier, life is slower, the fresh seafood is astounding, and it’s just damn beautiful.
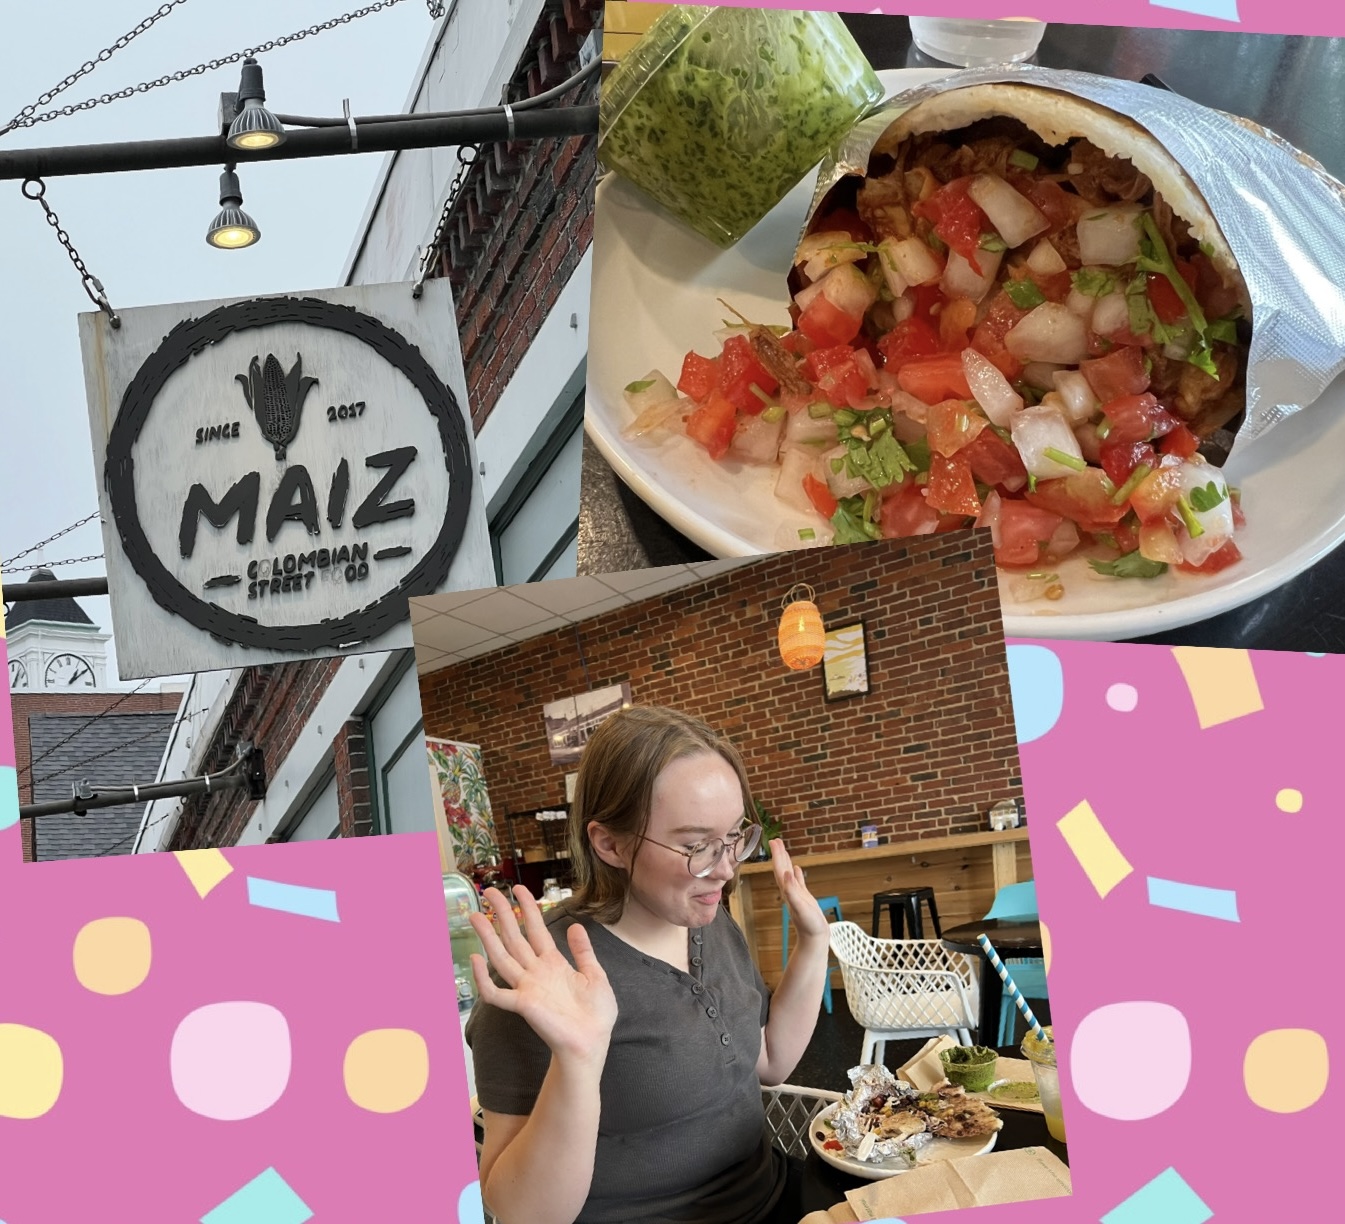
On the way up, my daughter and I made a quick stop, right off the highway in Portland, for some Colombian street food at Maiz. The arepas were overflowing with goodies, and we enjoyed every bite.
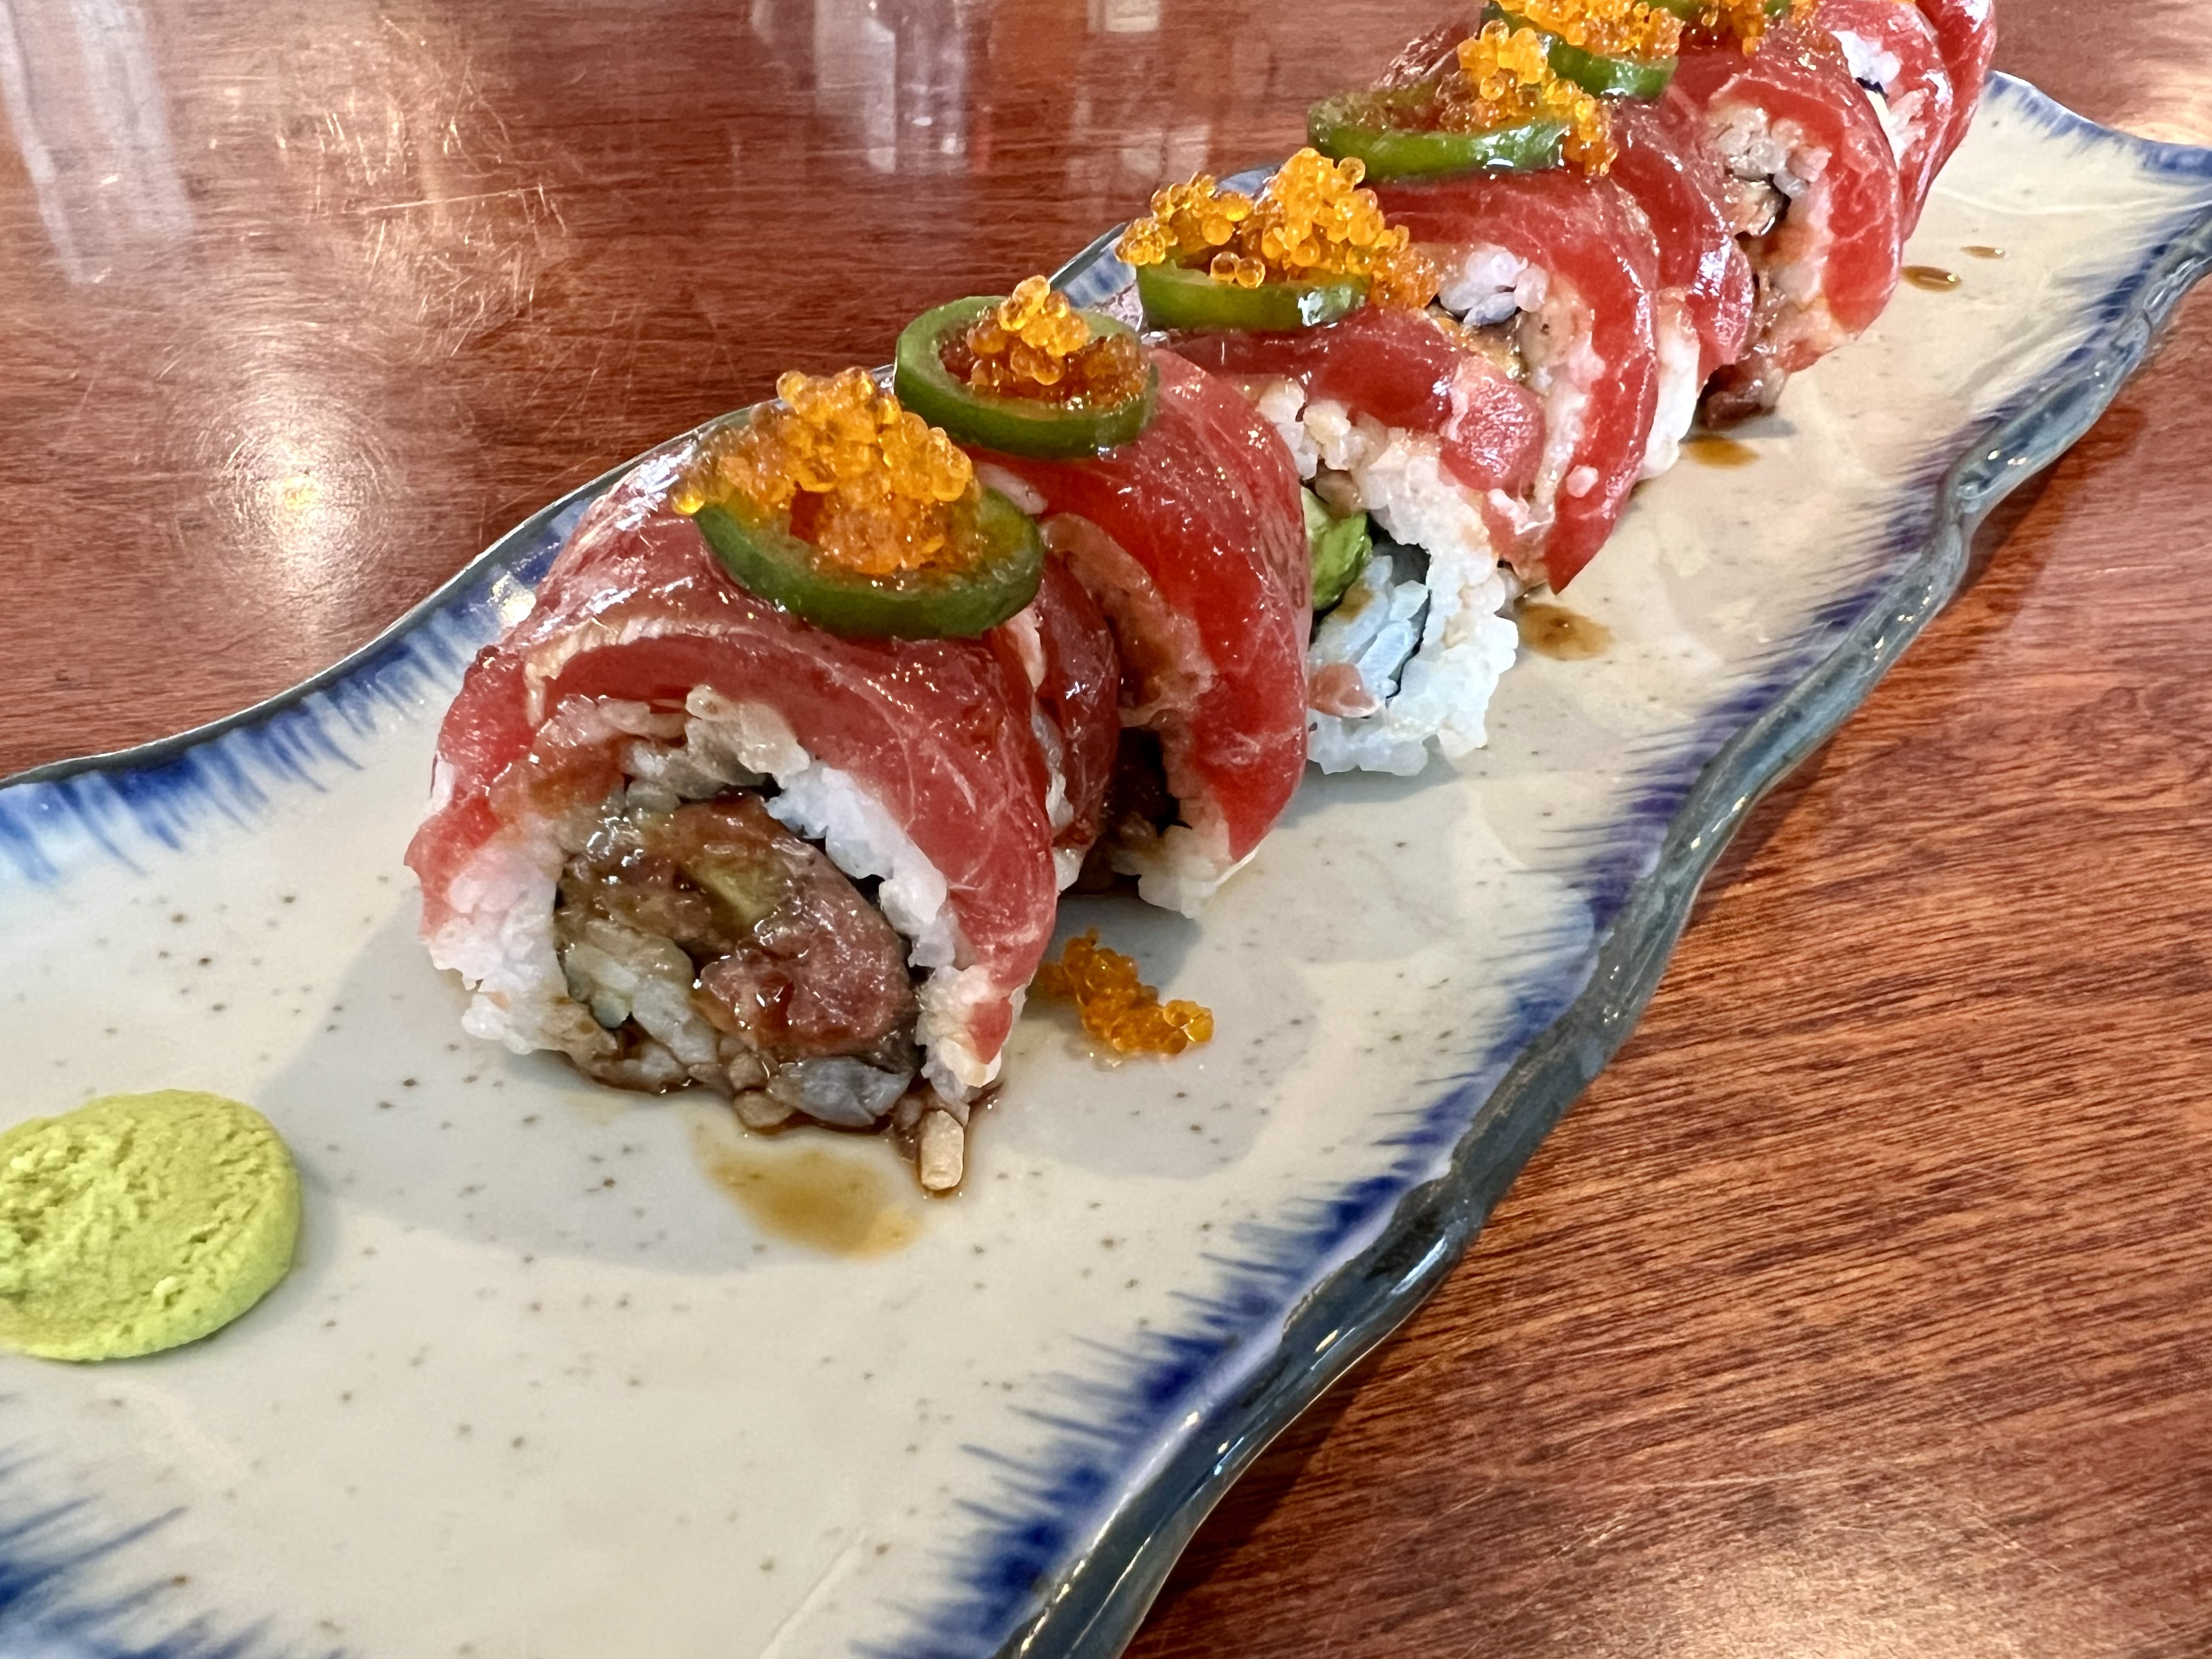
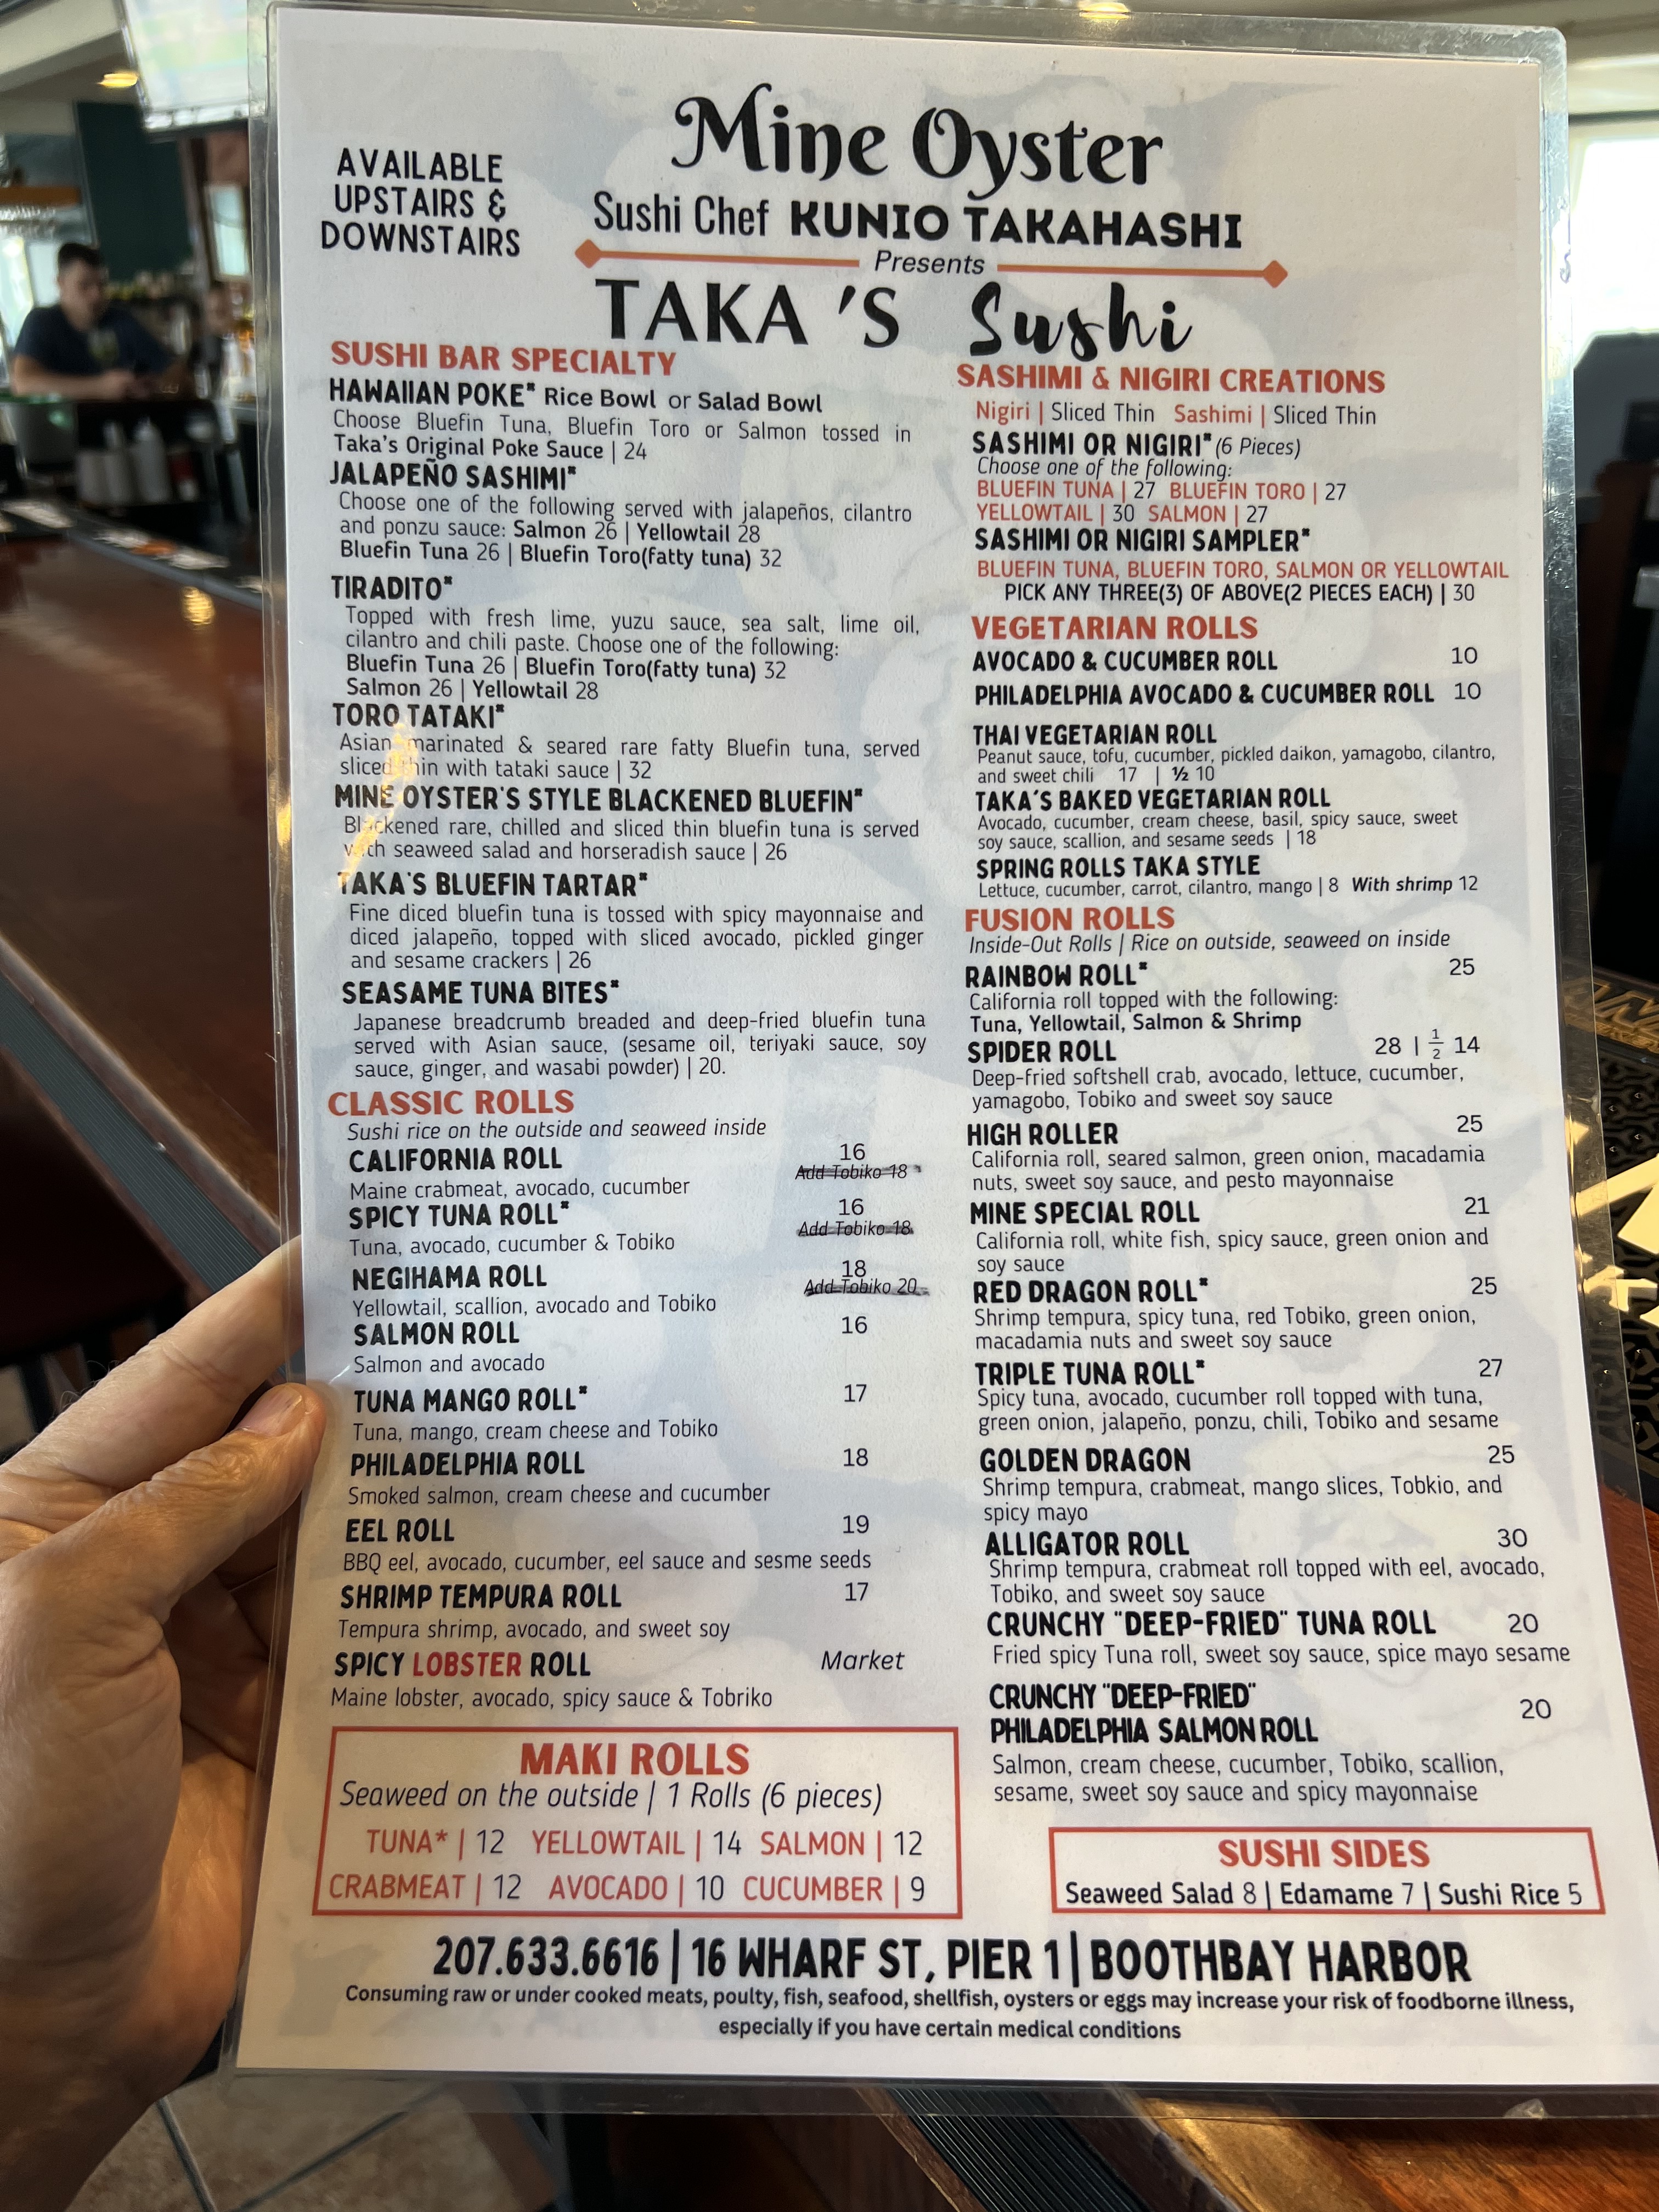
Our first overnight stop is usually Boothbay Harbor, because we love the quaintness of that little town, and my sister lives not too far away in Newcastle. Of course, I also love Boothbay Harbor because it’s the home of one of my favorite restaurants, Mine Oyster.
It’s nuthin’ fancy, but they have a massive menu, and I go there for one thing, and one thing only: the incredible fresh-off-the-boat tuna they always serve up. Sushi chef, Taka, is a master, and the specialty roles they have are like no other place I’ve ever been. I spent two nights in Boothbay Harbor, and both nights I dined at Mine Oyster. I just couldn’t get enough.
We did explore the area, however, and another favorite stop was Deb’s Bristol Diner, in Bristol, Maine. My daughter and I have been there several times before and the food is just terrific, as long as you’re willing to wait in line. No reservations here, but once you take a bite of the food, you don’t care anymore.
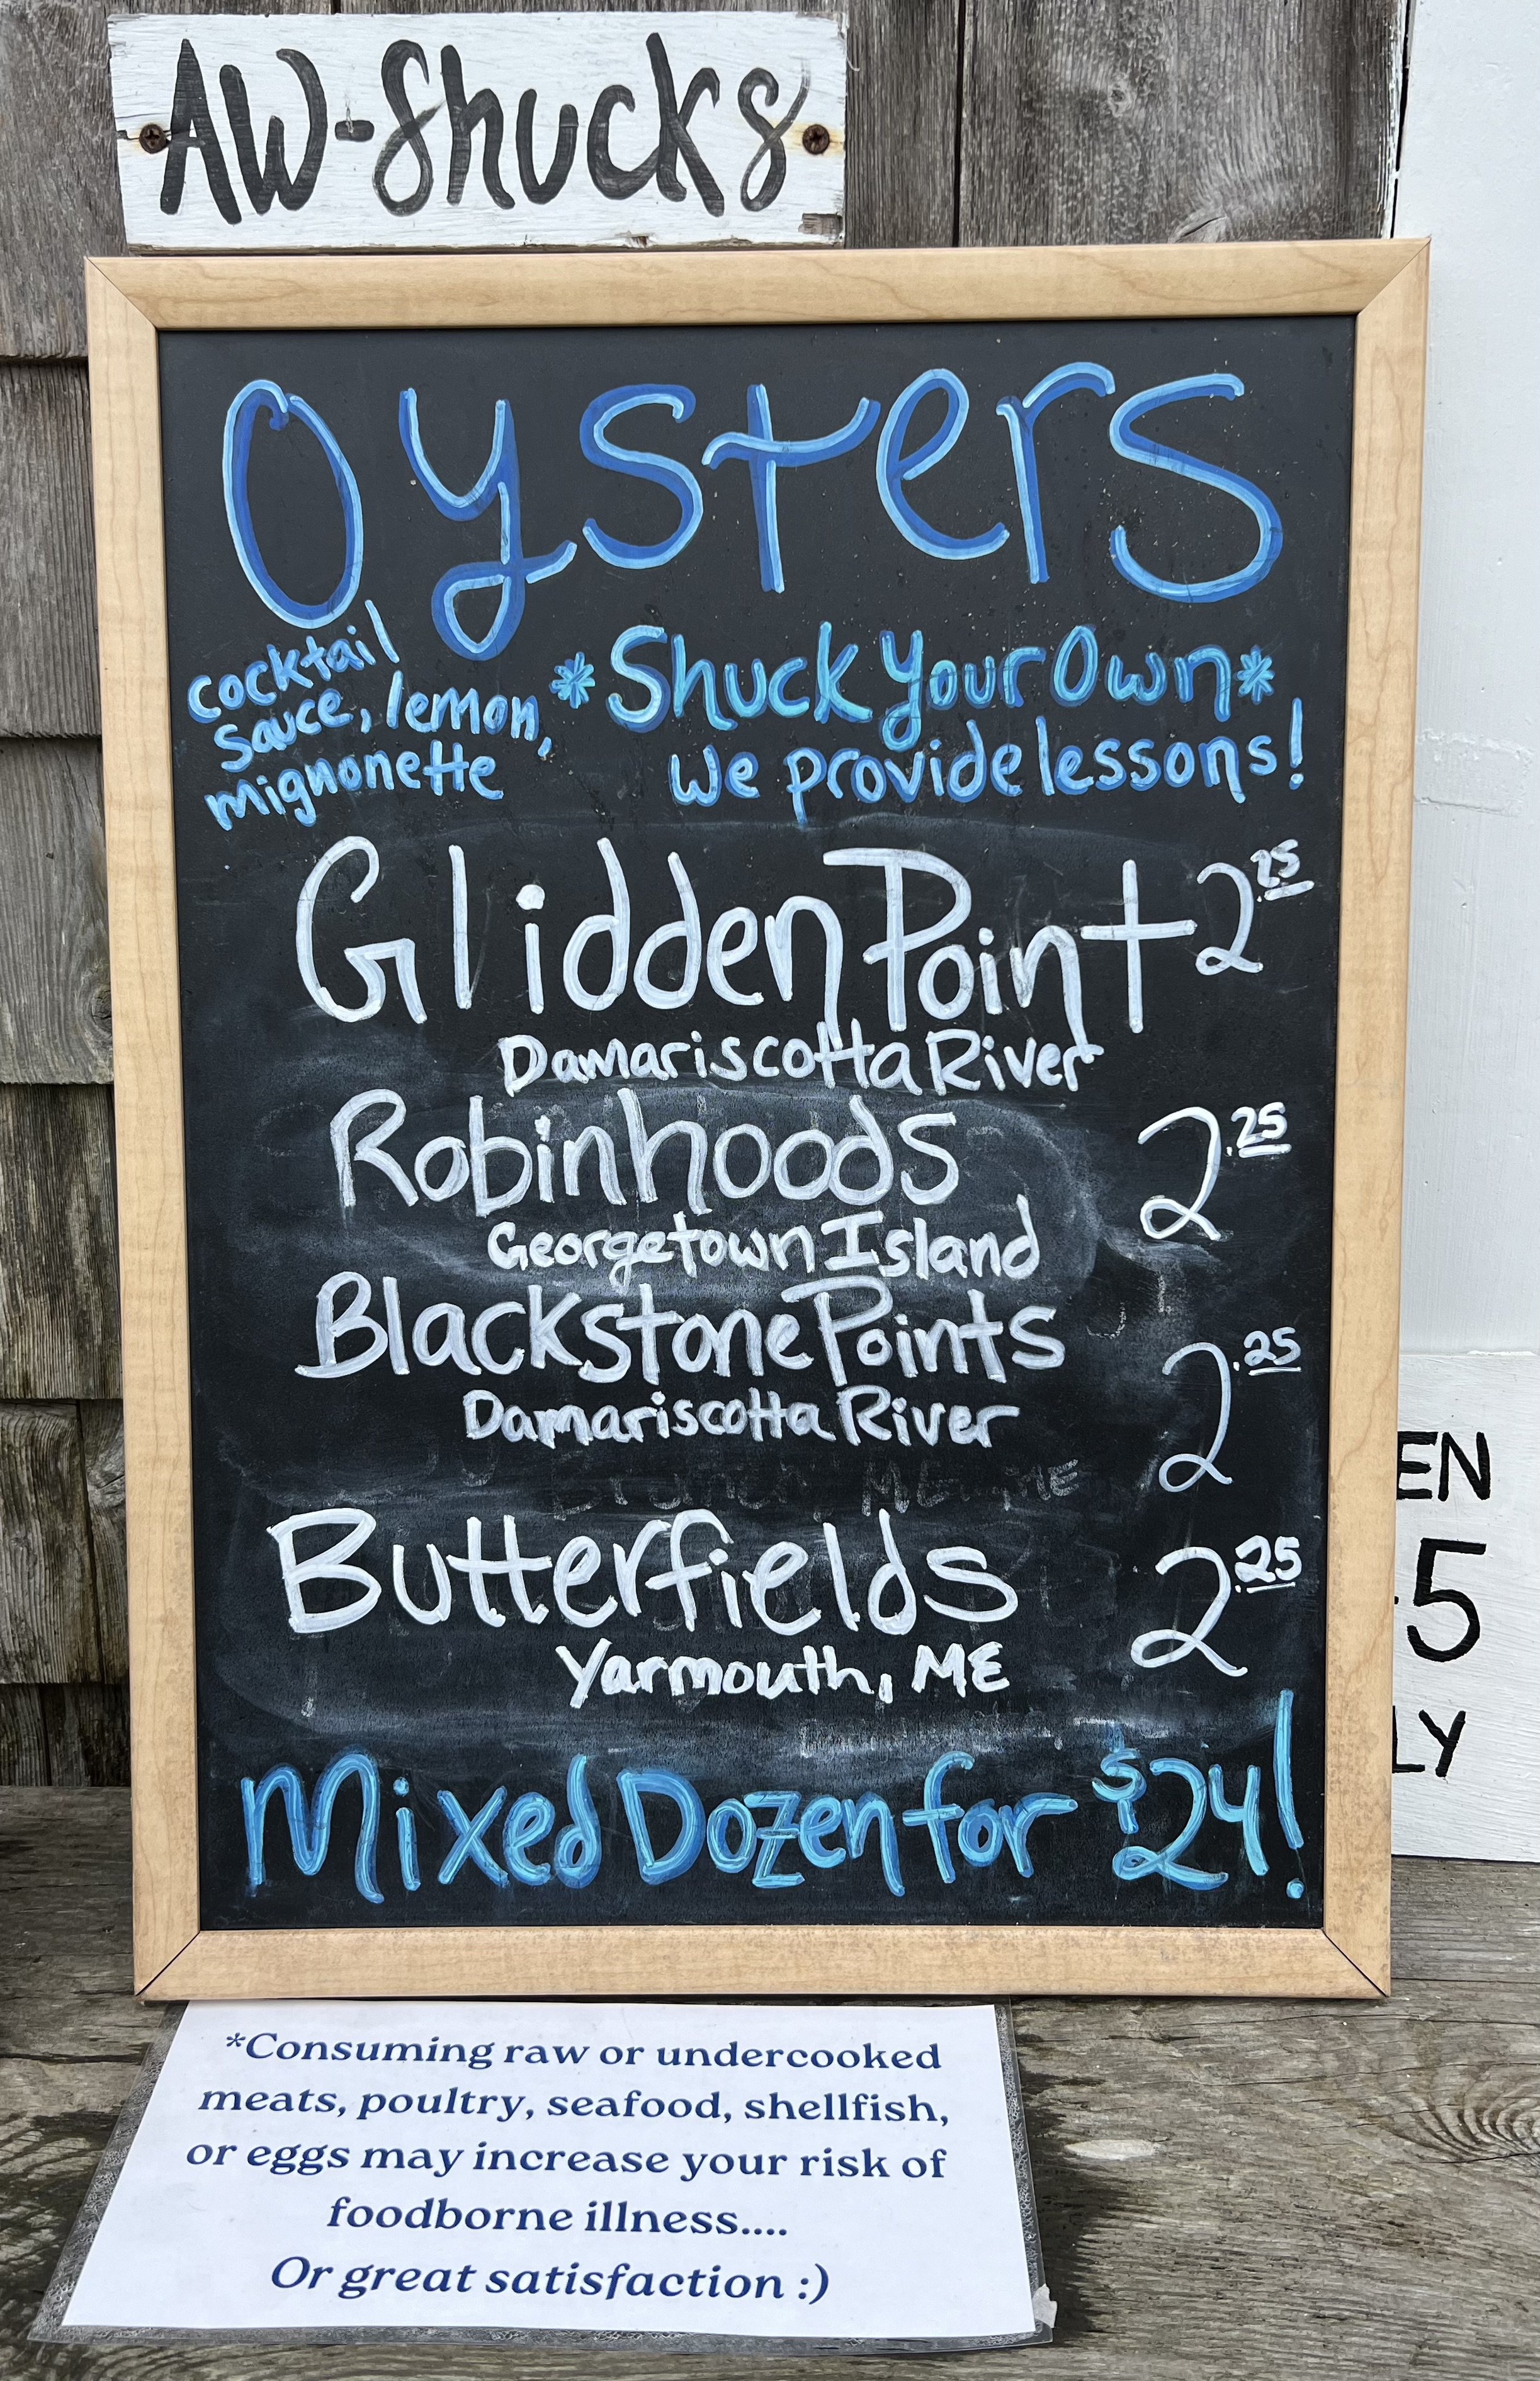
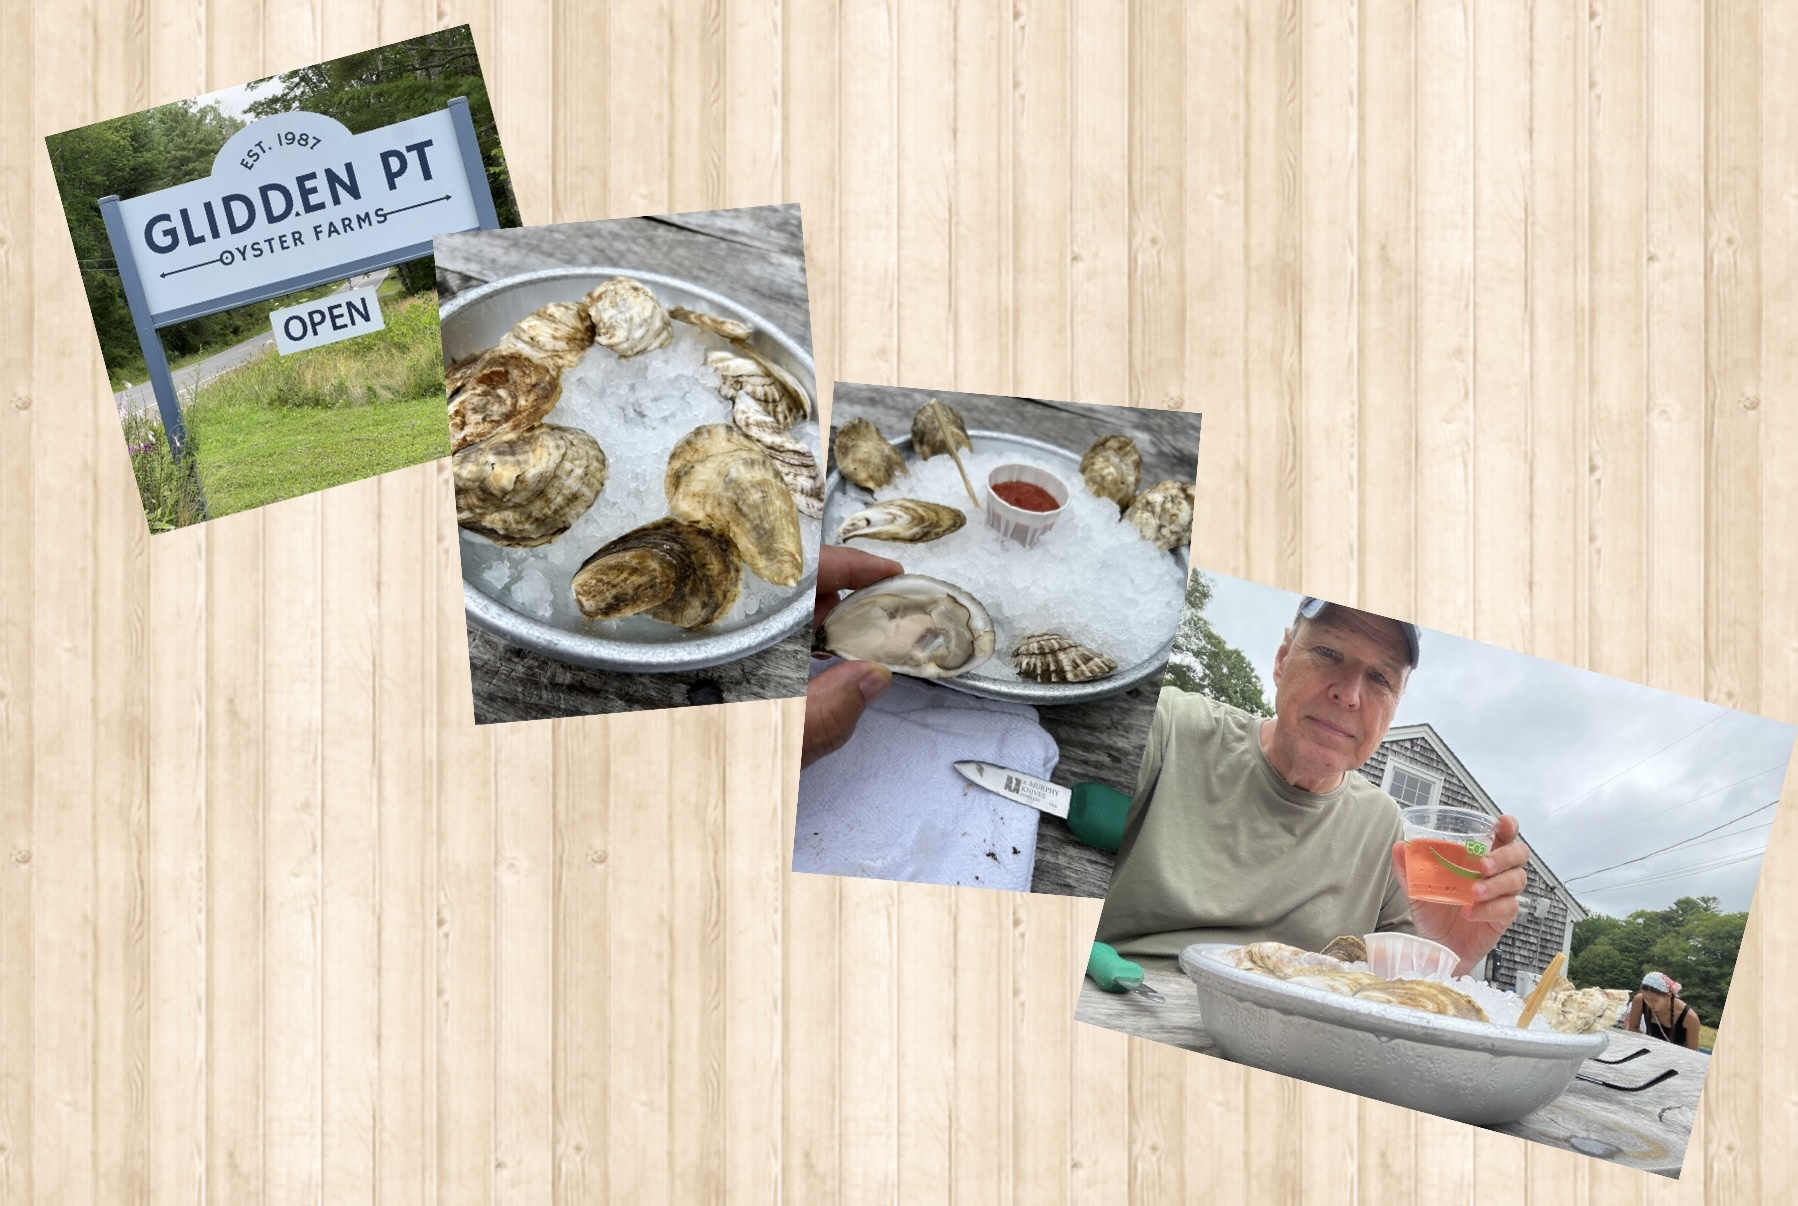
I dropped my daughter off at New Harbor, where she took the Hardy Boat, the ferry to Mohegan Island, and I headed back to Boothbay, stopping at Glidden Point Oyster Farm. I’ve passed this property before, but they’ve always been closed. This time, I got to shuck my own oysters and sip on some Maine-made rhubarb wine.
Some of my other favorite stops for food in Boothbay Harbor include Ports of Italy for, what else, Italian. The Red Cup Coffeehouse to get the day started with some caffeine and a bagel. Pier 1 Pizza and Pub for that nice slice. And the Downeast Ice Cream Factory for something sweet at the end of the day.
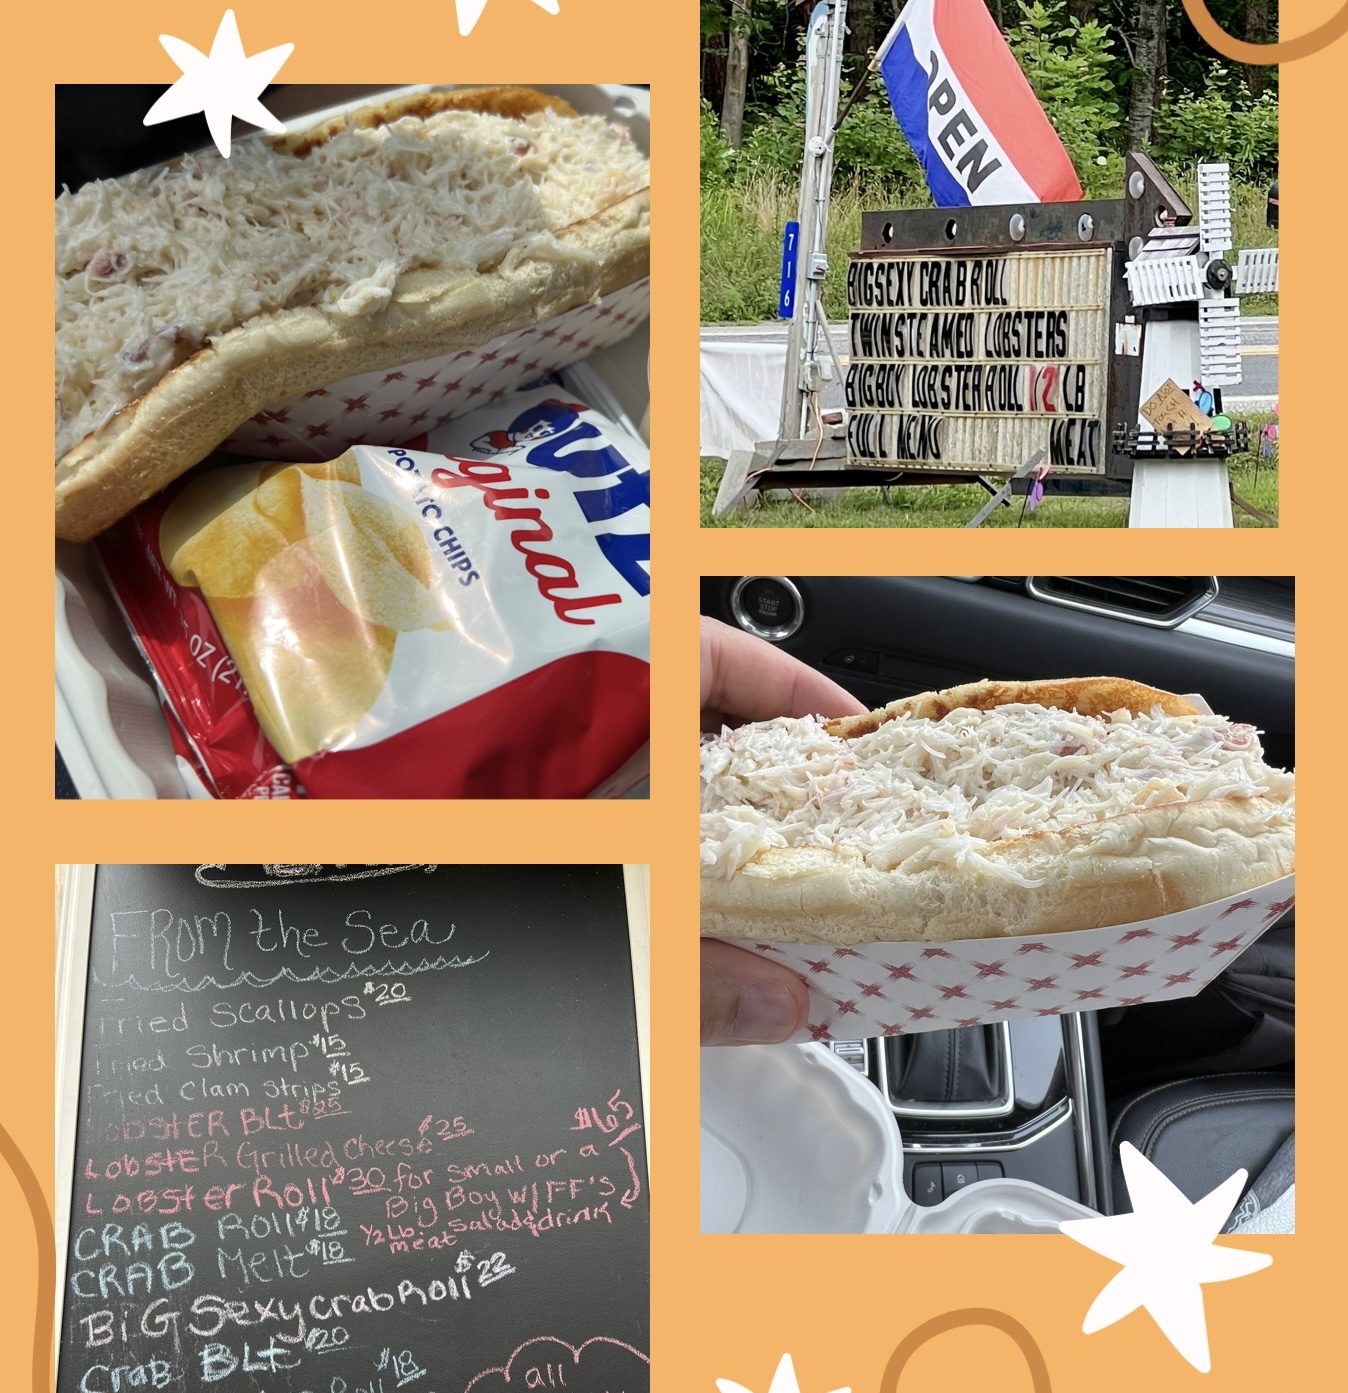
Somewhere in all these travels, on the outskirts of Boothbay, my attention was drawn by a sign at Karen‘sHideaway, which boasted a “big sexy crab roll.” Naturally, my curiosity was piqued, and what I got was a hefty serving of freshly caught Maine Jonah crab, tossed in mayo, and served on a toasted bun with strips bacon under the crab. Bacon instead of lettuce? That is damn sexy!
I headed North on Route 1 from Boothbay to Rockport, Maine, my next destination.
I had time for a bite for lunch, and no place in this area is better for lobster than McLoon’s Lobster Shack on Spruce Head Island.
I had discovered McLoon’s years ago, back before it seemed the rest of Maine had discovered it. Now, the place is jammin’, but the quality of their lobster rolls remains the same: excellent!
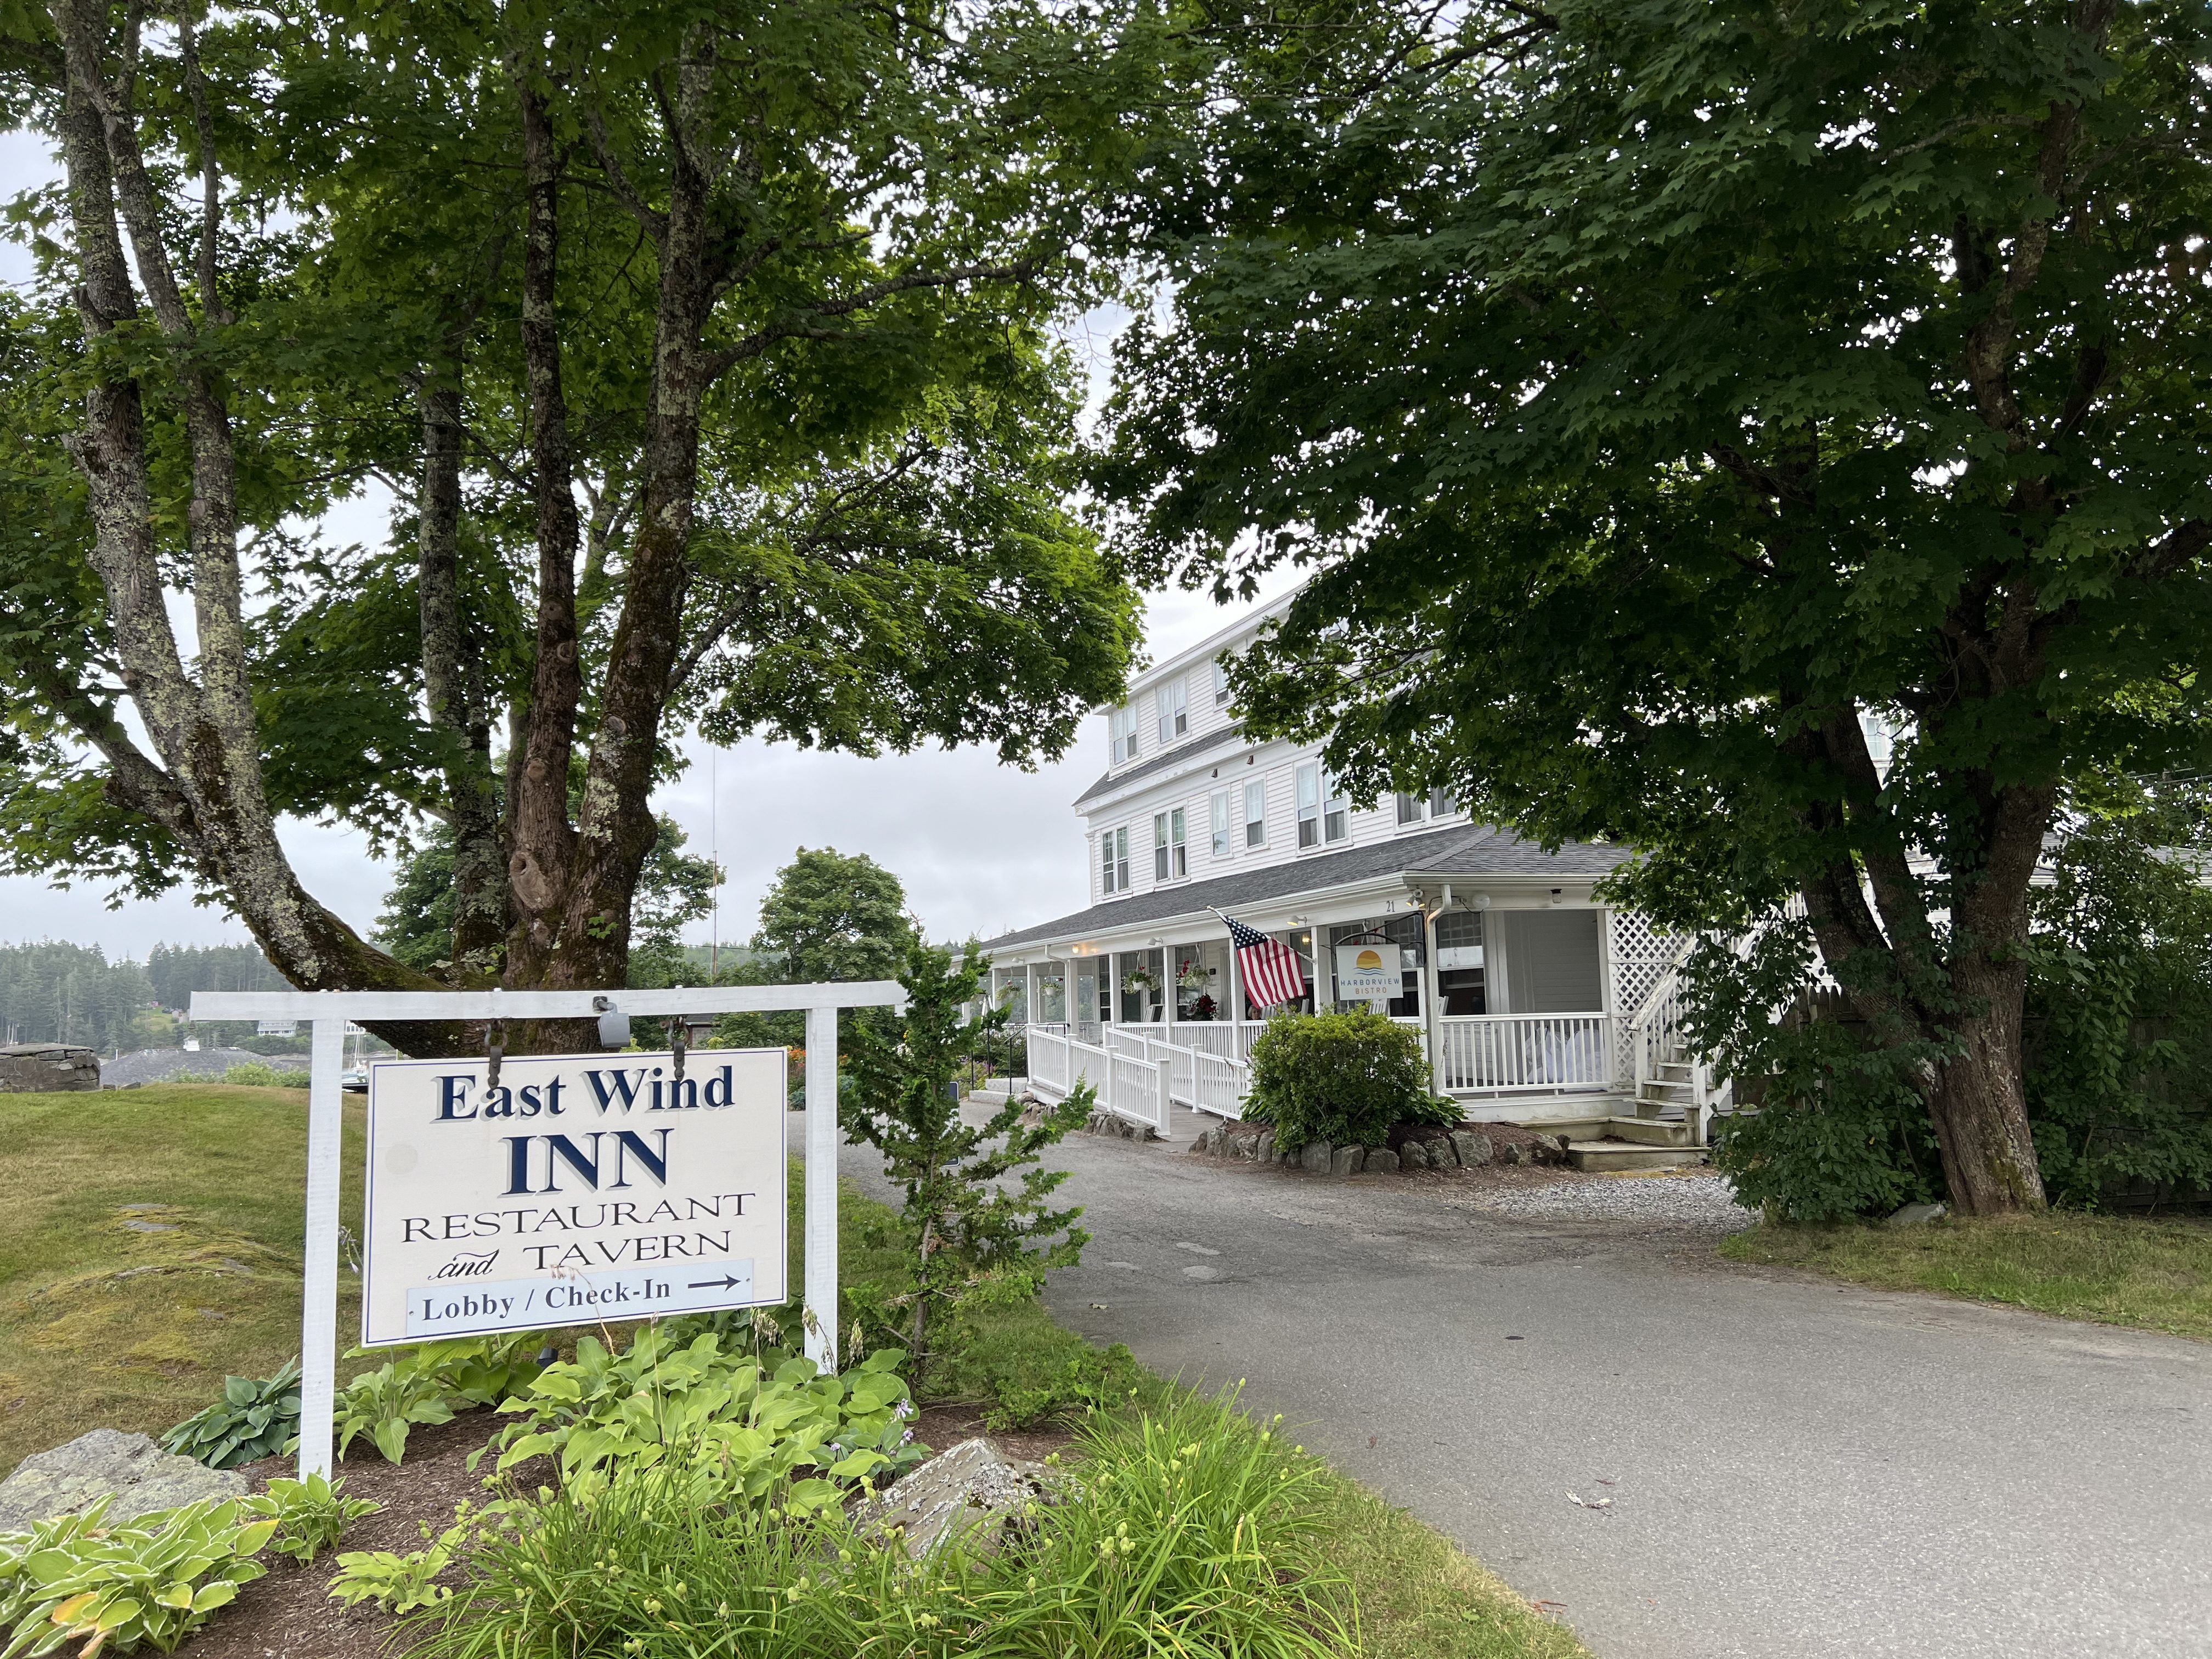
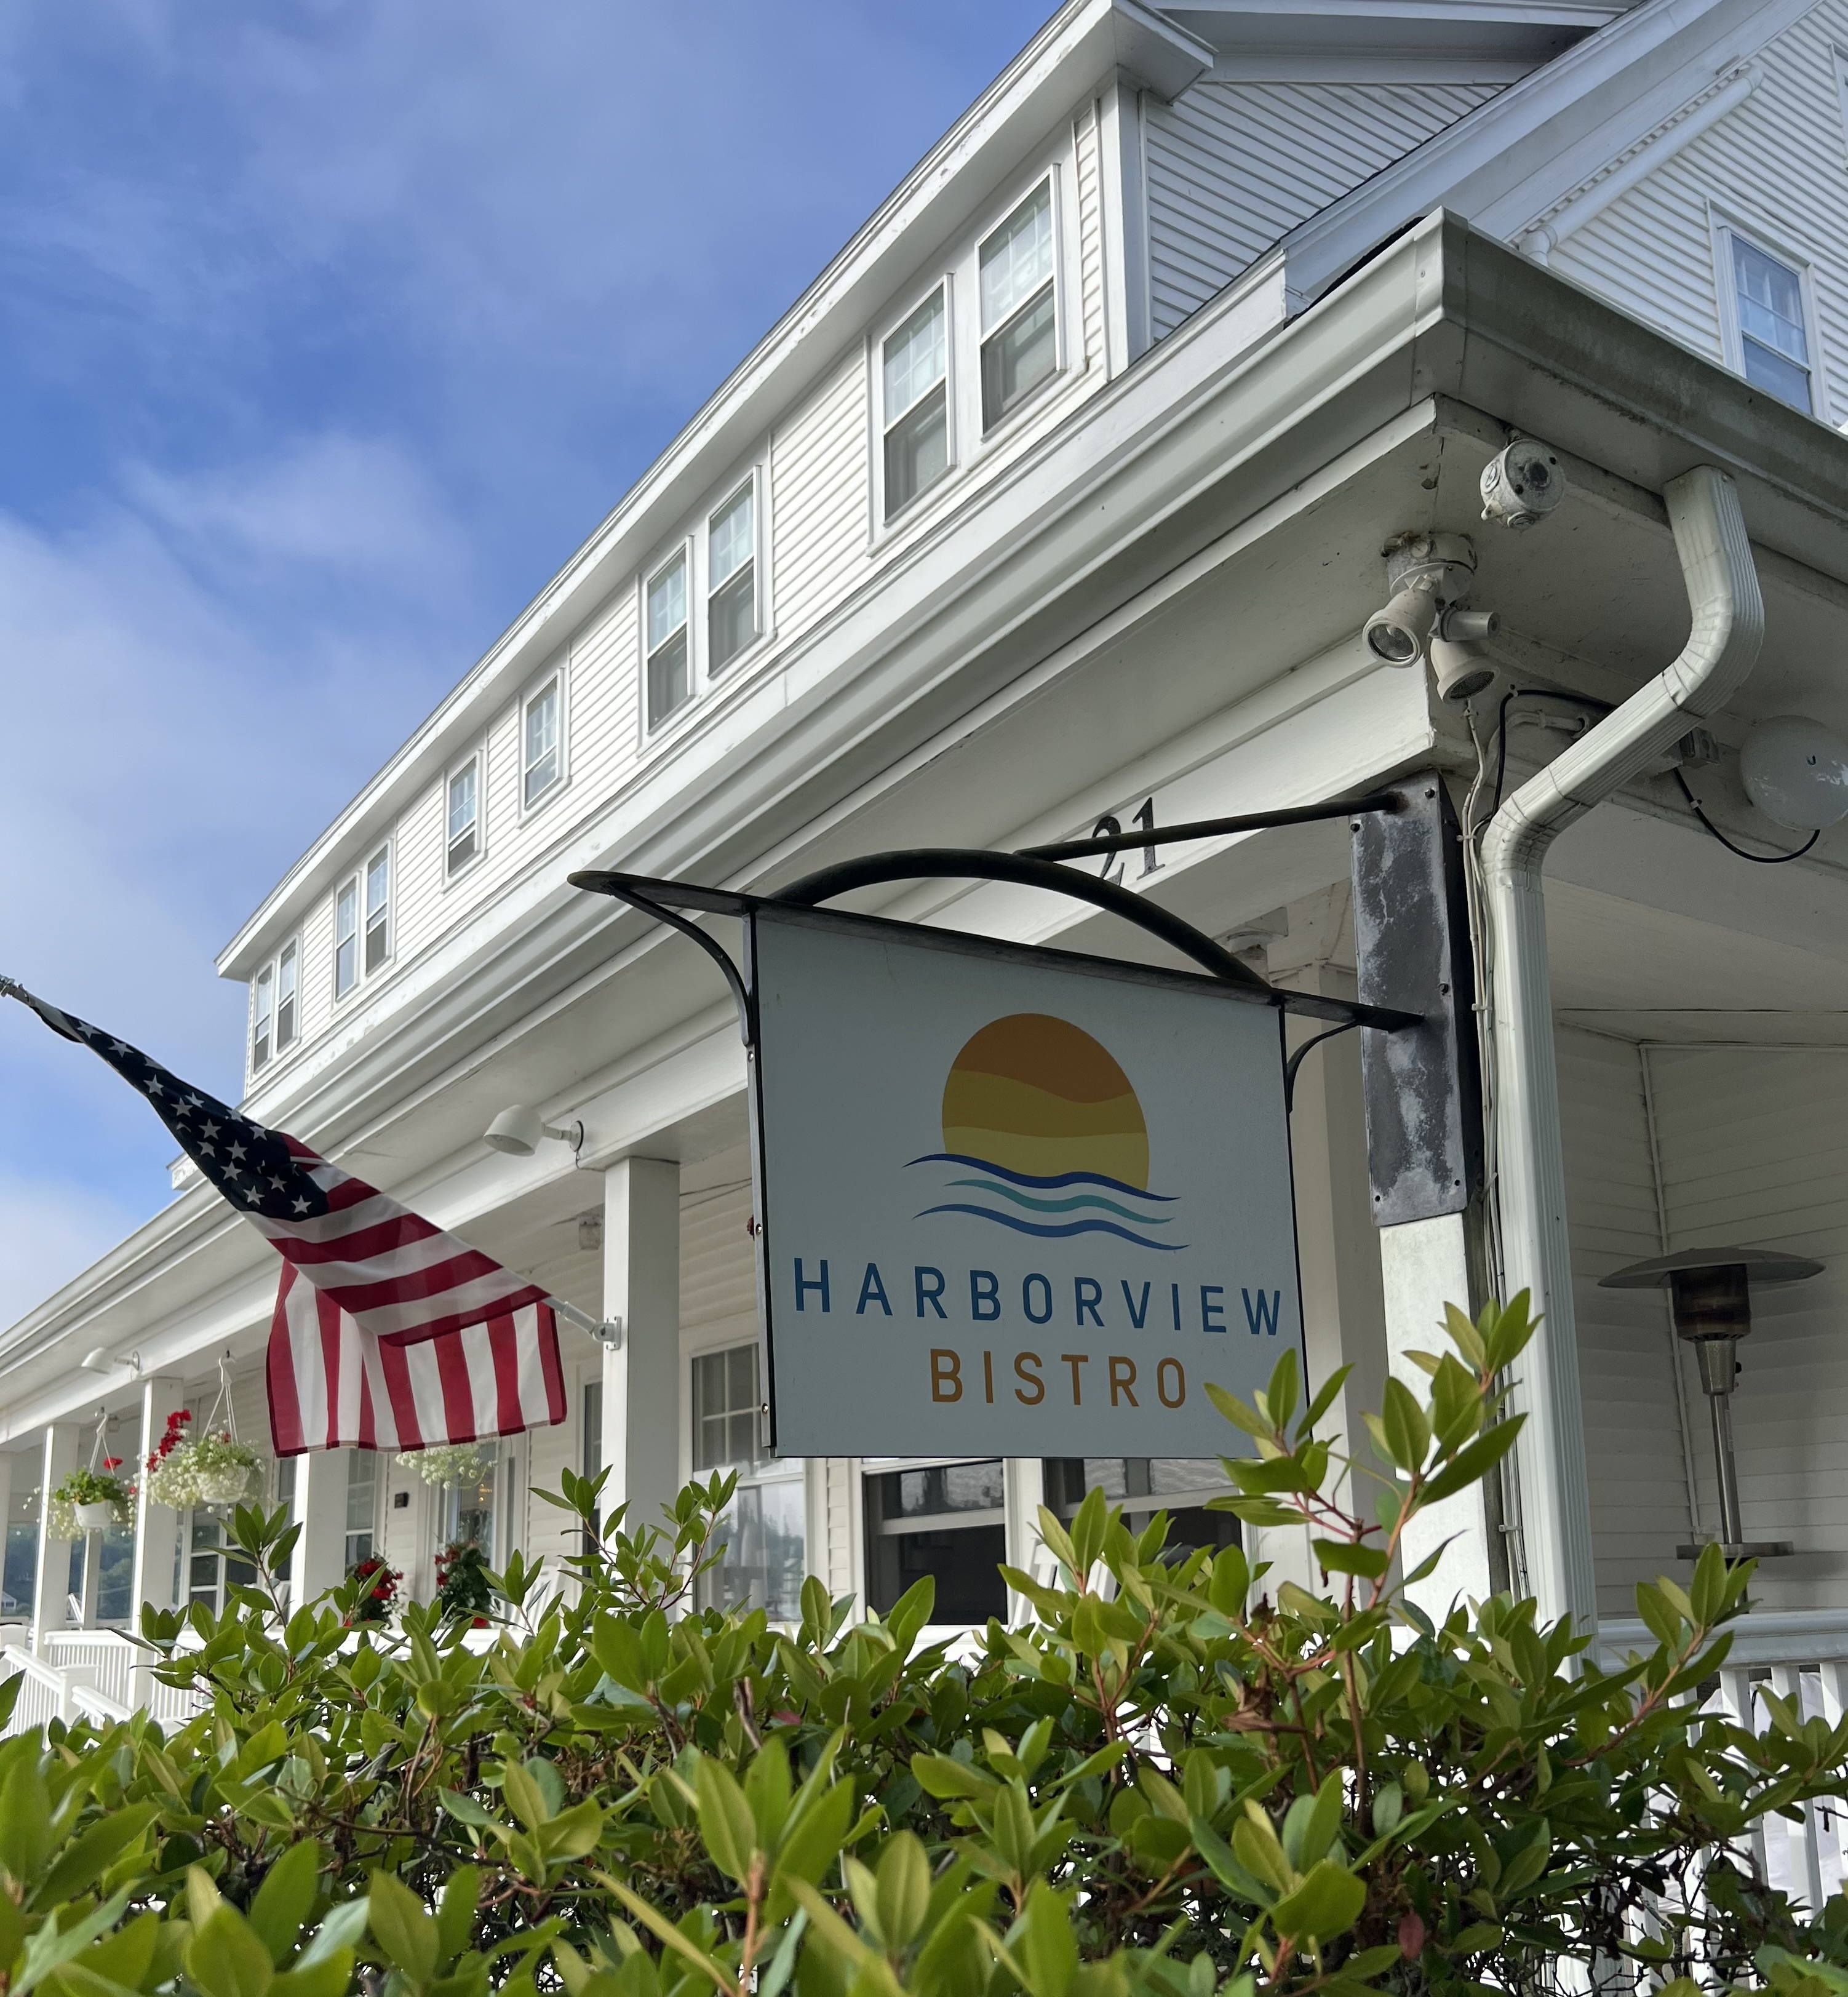
I had intended to go to Primo, a James Beard award-winning restaurant that is one of my all-time favorites. But my overnight accommodations at the East Wind Inn in Tenants Harbor was further away from the restaurant than I thought, somehow, and rather than drinking and driving, I decided to stay at the inn and sample some of their food and drink in their basement bar, known as the Quarry Tavern. I wasn’t disappointed.
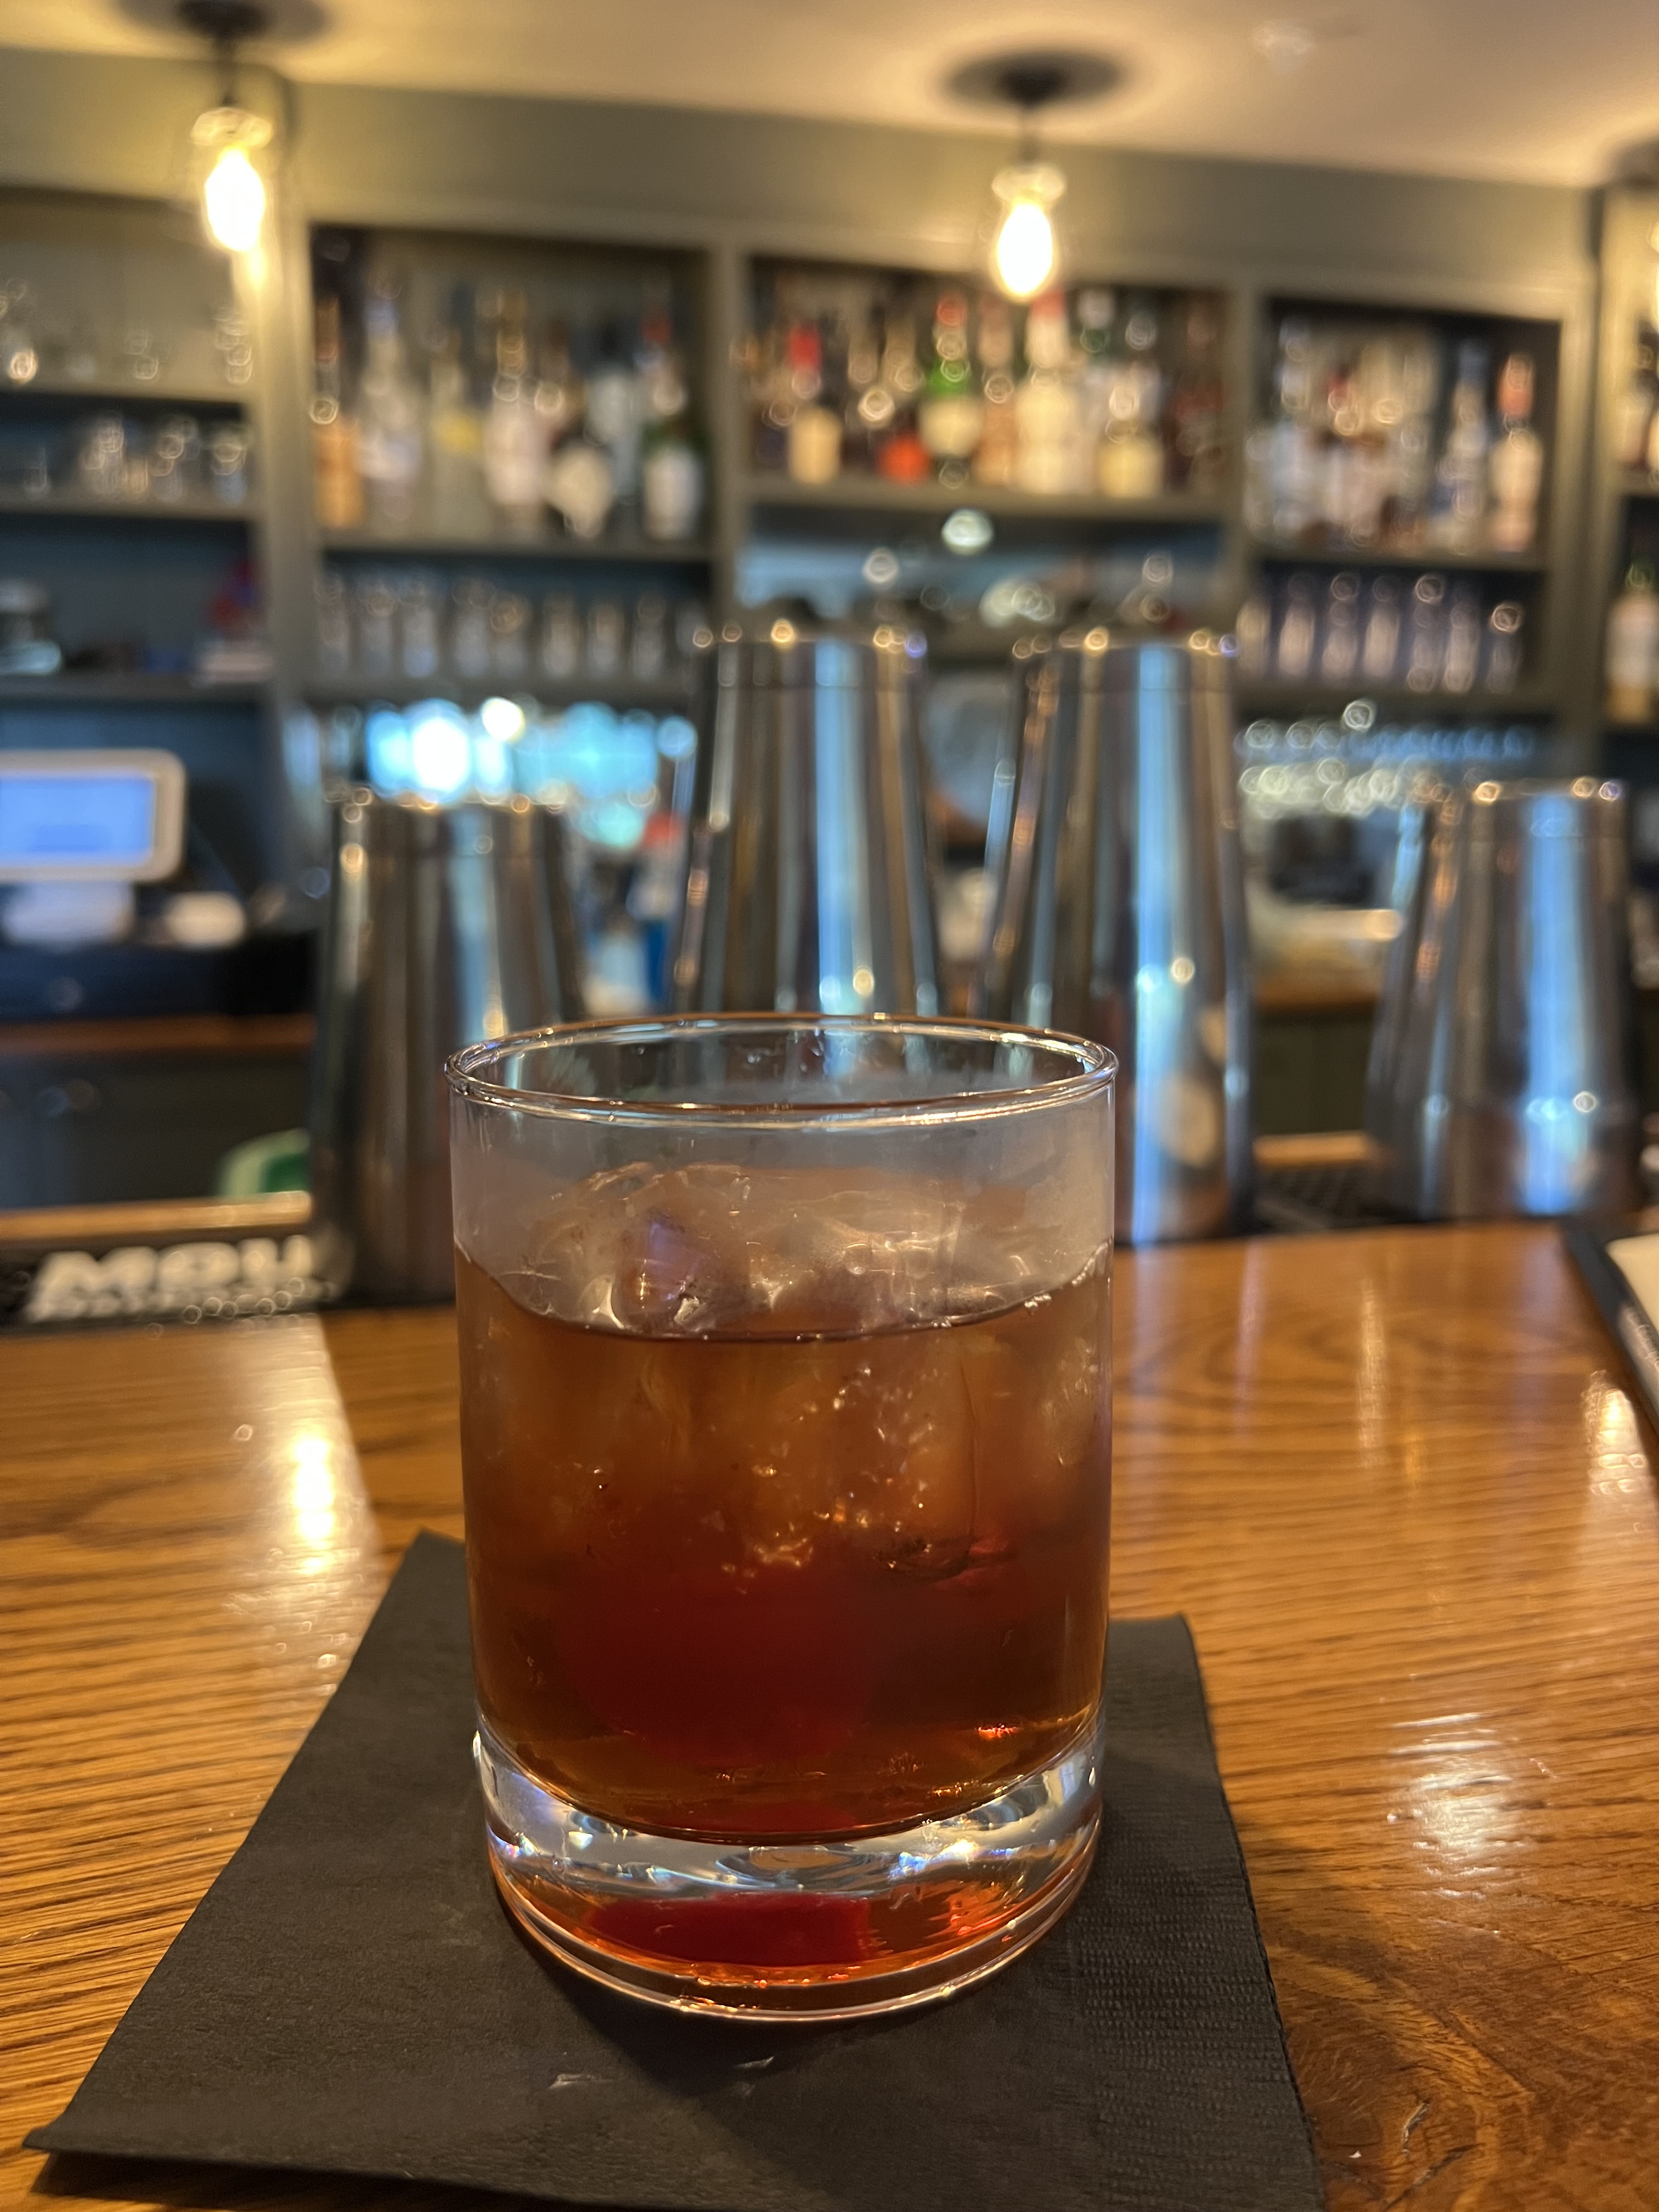
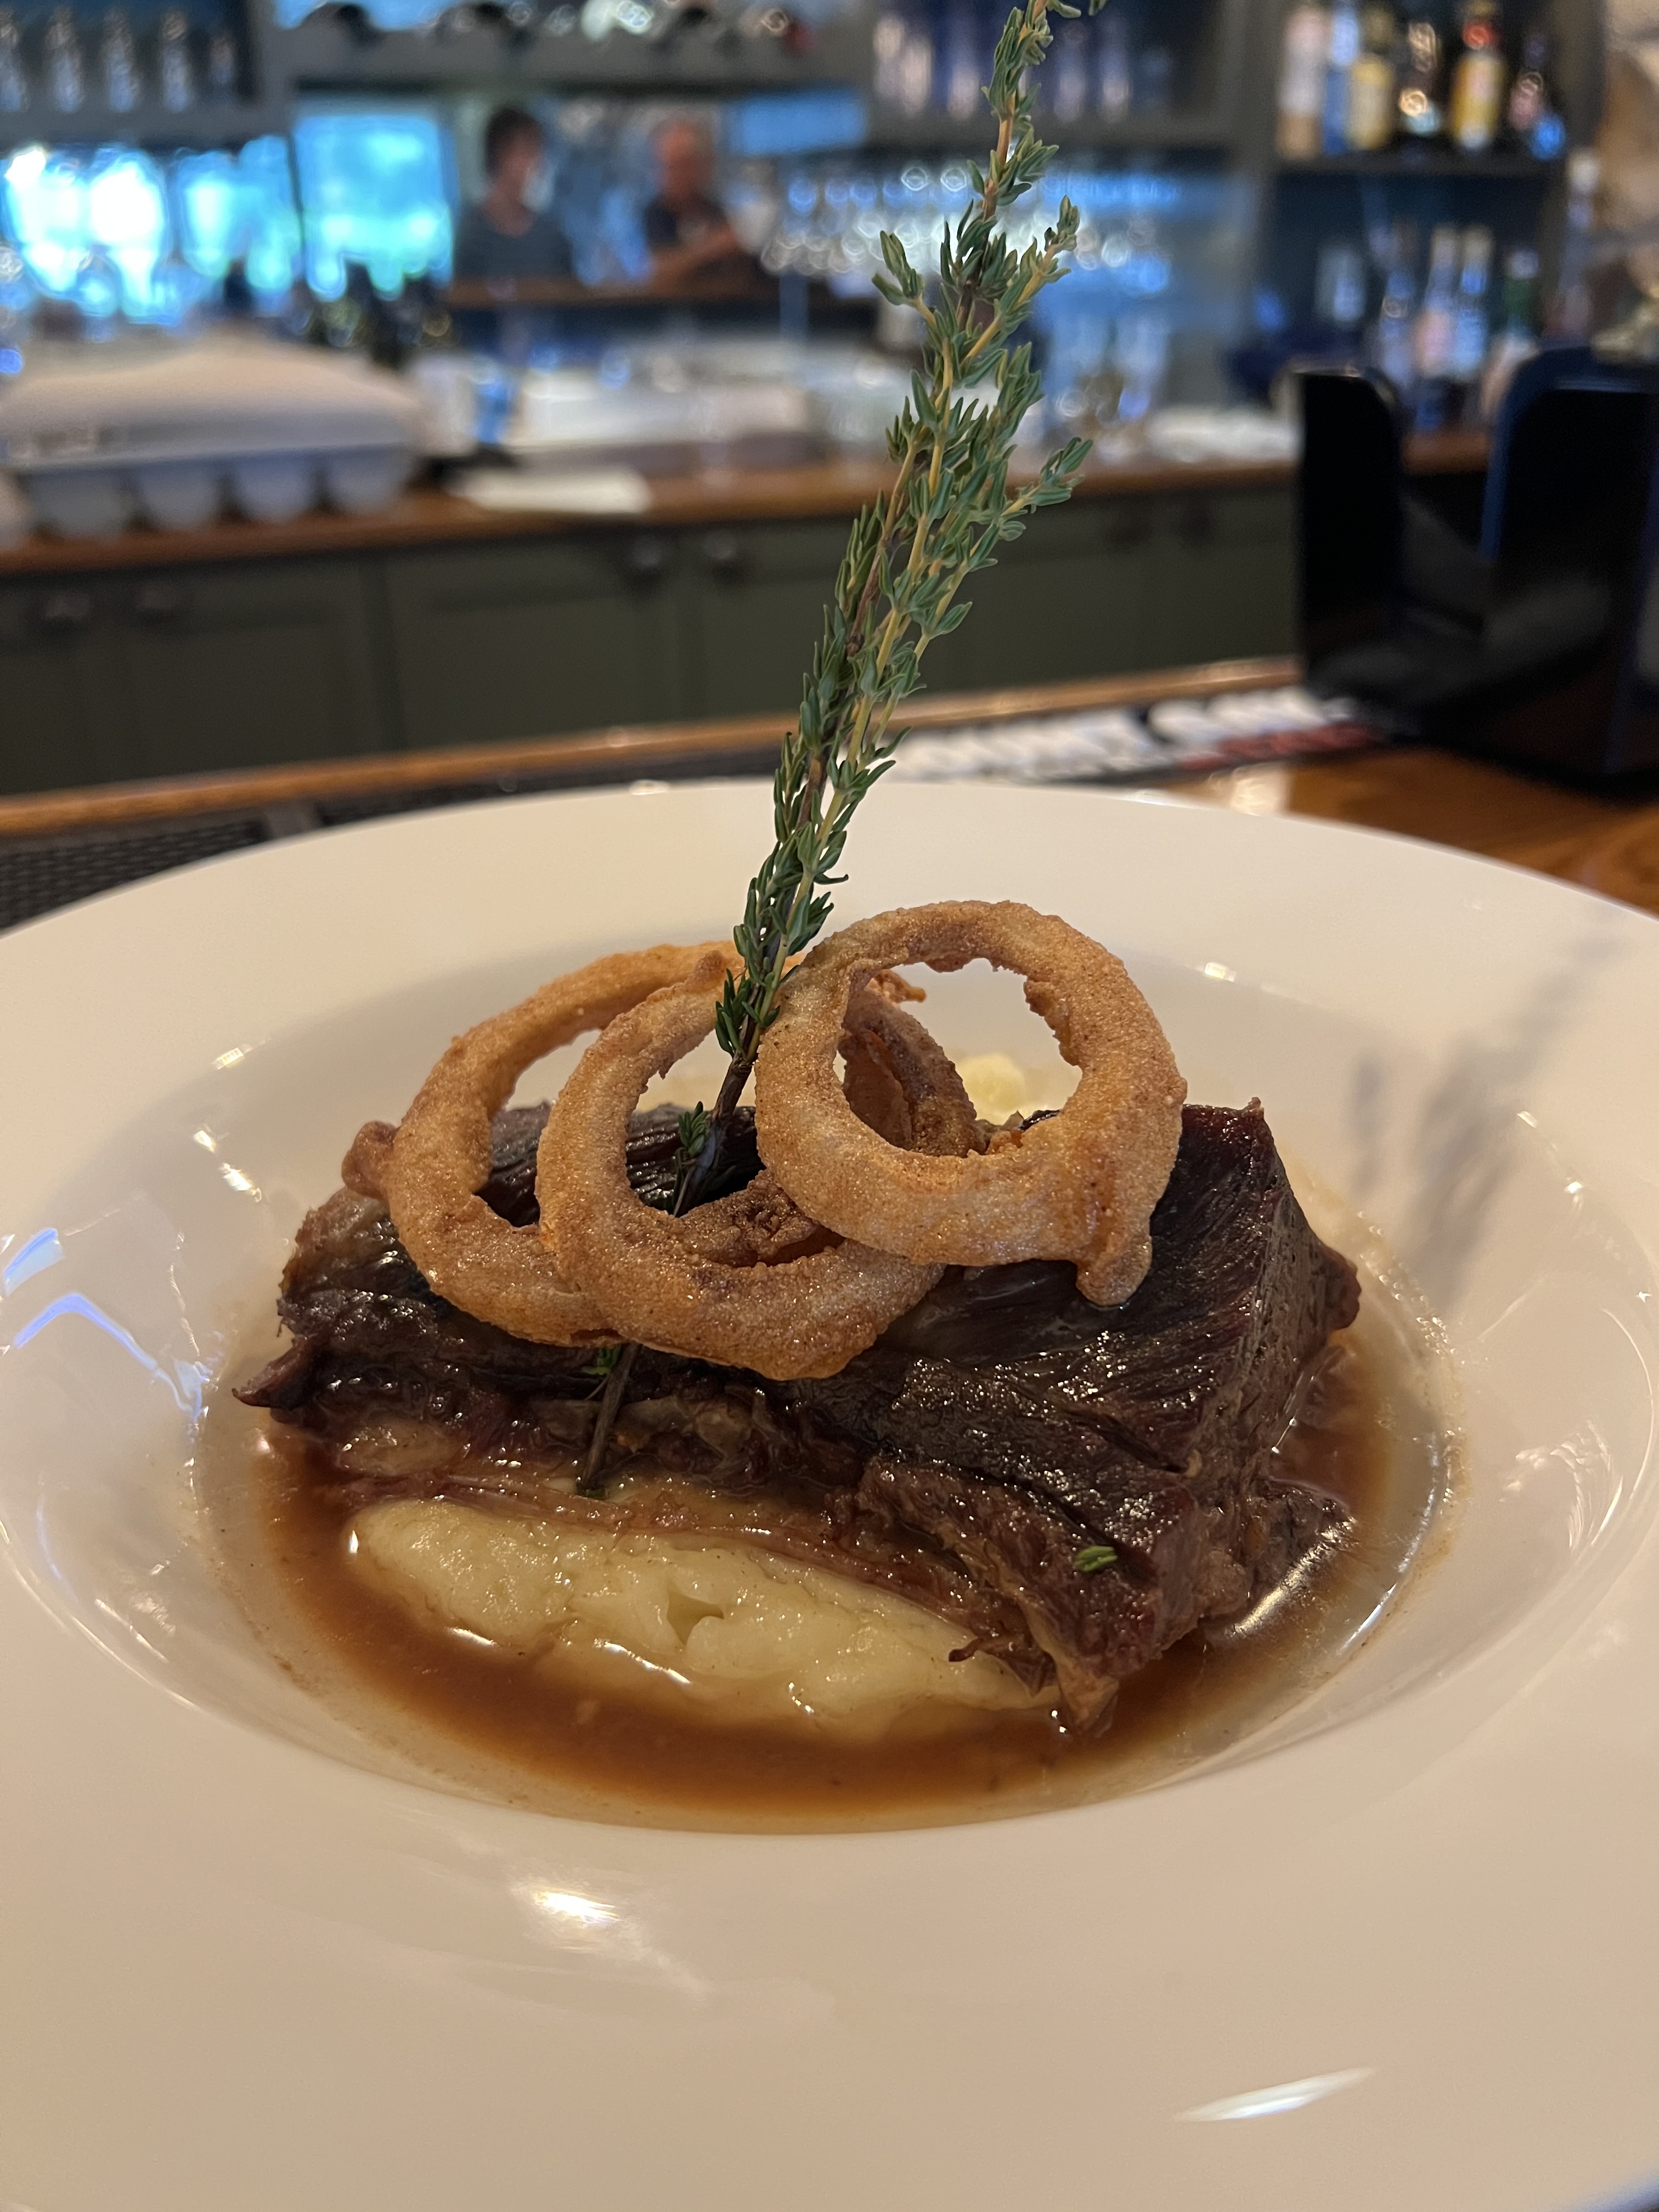
I sat at the bar, which only seats five people, and enjoyed a Caesar salad and a main course of beautifully prepared beef short ribs.
It was a nice break from all the seafood that I had gorged on for the last two days. (I also knew that I was going to be eating more seafood the following day, when I headed to Portland.) It was a good move on my part. I had a few cocktails, and all I needed to do was walk back to my room at the end of the night.
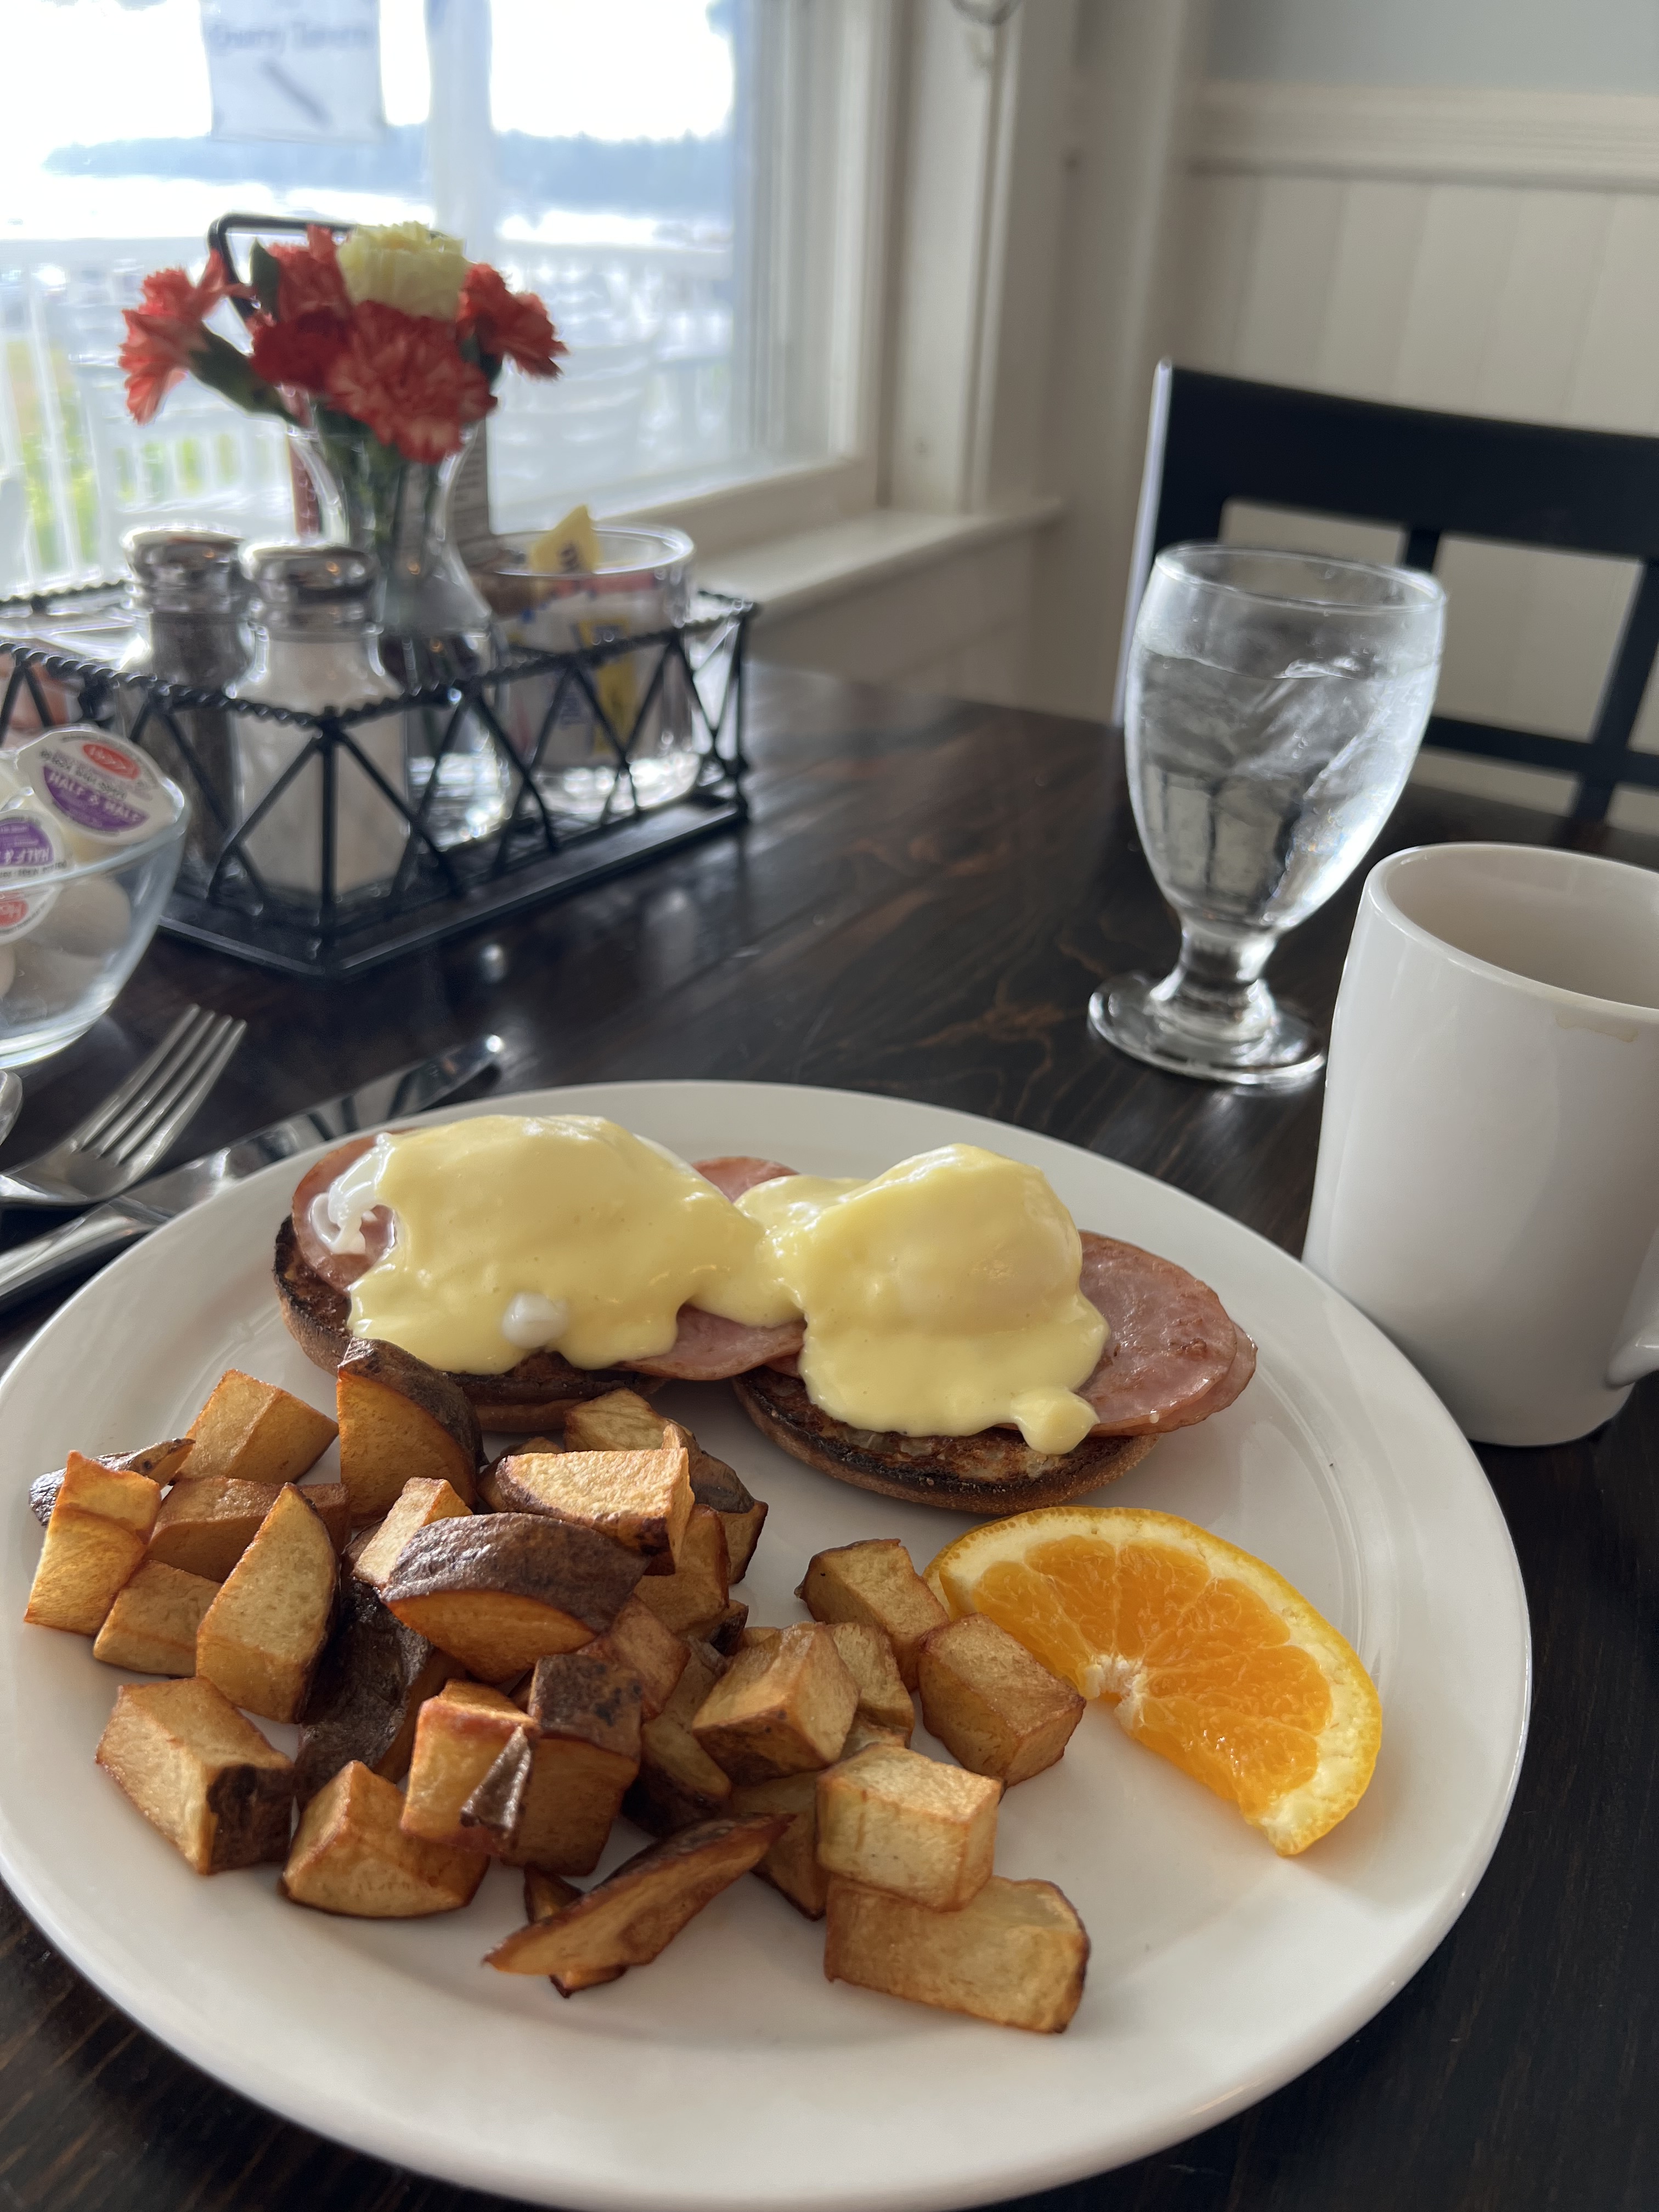
The next morning, I enjoyed a fabulous free Eggs Benny breakfast at the inn’s Harborview Bistro – – part of the deal when you get a room – – and then I hit the road, heading south toward Portland (and home), where another full day of feasting would begin.
If you do your share of Italian recipes, a common product found in just about any store has many people confused: San Marzano tomatoes. Most good cooks agree that San Marzano tomatoes are some of the best canned tomatoes you can buy.
But unfortunately, the label can say “San Marzano tomatoes” even if they are not real San Marzano tomatoes.
San Marzano is a region in Italy near Naples and Mt. Vesuvius, and the special combination of climate and volcanic soil make these plum tomatoes world-famous. They have less water, fewer seeds and are picked off the vine when perfectly ripe, then processed the same day.
But San Marzano is a variety of tomato, too…and so you can have a can of San Marzano tomatoes that are not from San Marzano. And to add to the confusion, there’s actually a brand of tomatoes called San Marzano, with tomatoes grown in the United States. Bet your sweet bippy the sellers of these tomatoes are counting on you not to know the difference!
Sold everywhere, but not real San Marzanos from Italy. Grown in the USA.
The company has now changed their label, just calling it “SMT.”
Real San Marzano Tomatoes are a very old variety, extremely limited in quantity, grown and produced exclusively in the San Marzano region of Italy. Because production is so very limited, the Italian Government and the European Union have formed a way of protecting consumers from fraud by having San Marzano tomatoes tightly controlled. DOP, or denomination of protected origin, is the mechanism that the government is using to control the production and marketing of genuine San Marzano tomatoes. Labels for DOP products must be individually numbered and manually applied to each can in specific lots and government officials must oversee this application. So here’s the deal: unless you see “DOP” on the label with a hand-stamped number on the can, it’s not a real San Marzano tomato.
Nope. Italian, and the correct variety, but not from the region.
Nope. “San Marzano region,” but not necessarily the variety.
I had a ridiculous harvest of shishito peppers in my garden this year, all from a mere eight plants. They were so prolific, I ate blistered shishitos almost every day for weeks on end…and that was after I gave away pounds of them to friends.
I was at my wits’ end. The season was waining, but I had bags and bags of shishitos in my fridge. Then on Instagram, my friend Ron exclaimed: “Pickle them!”
I had no idea you could do that!
Pickling shishitos…why didn’t I think of this sooner?
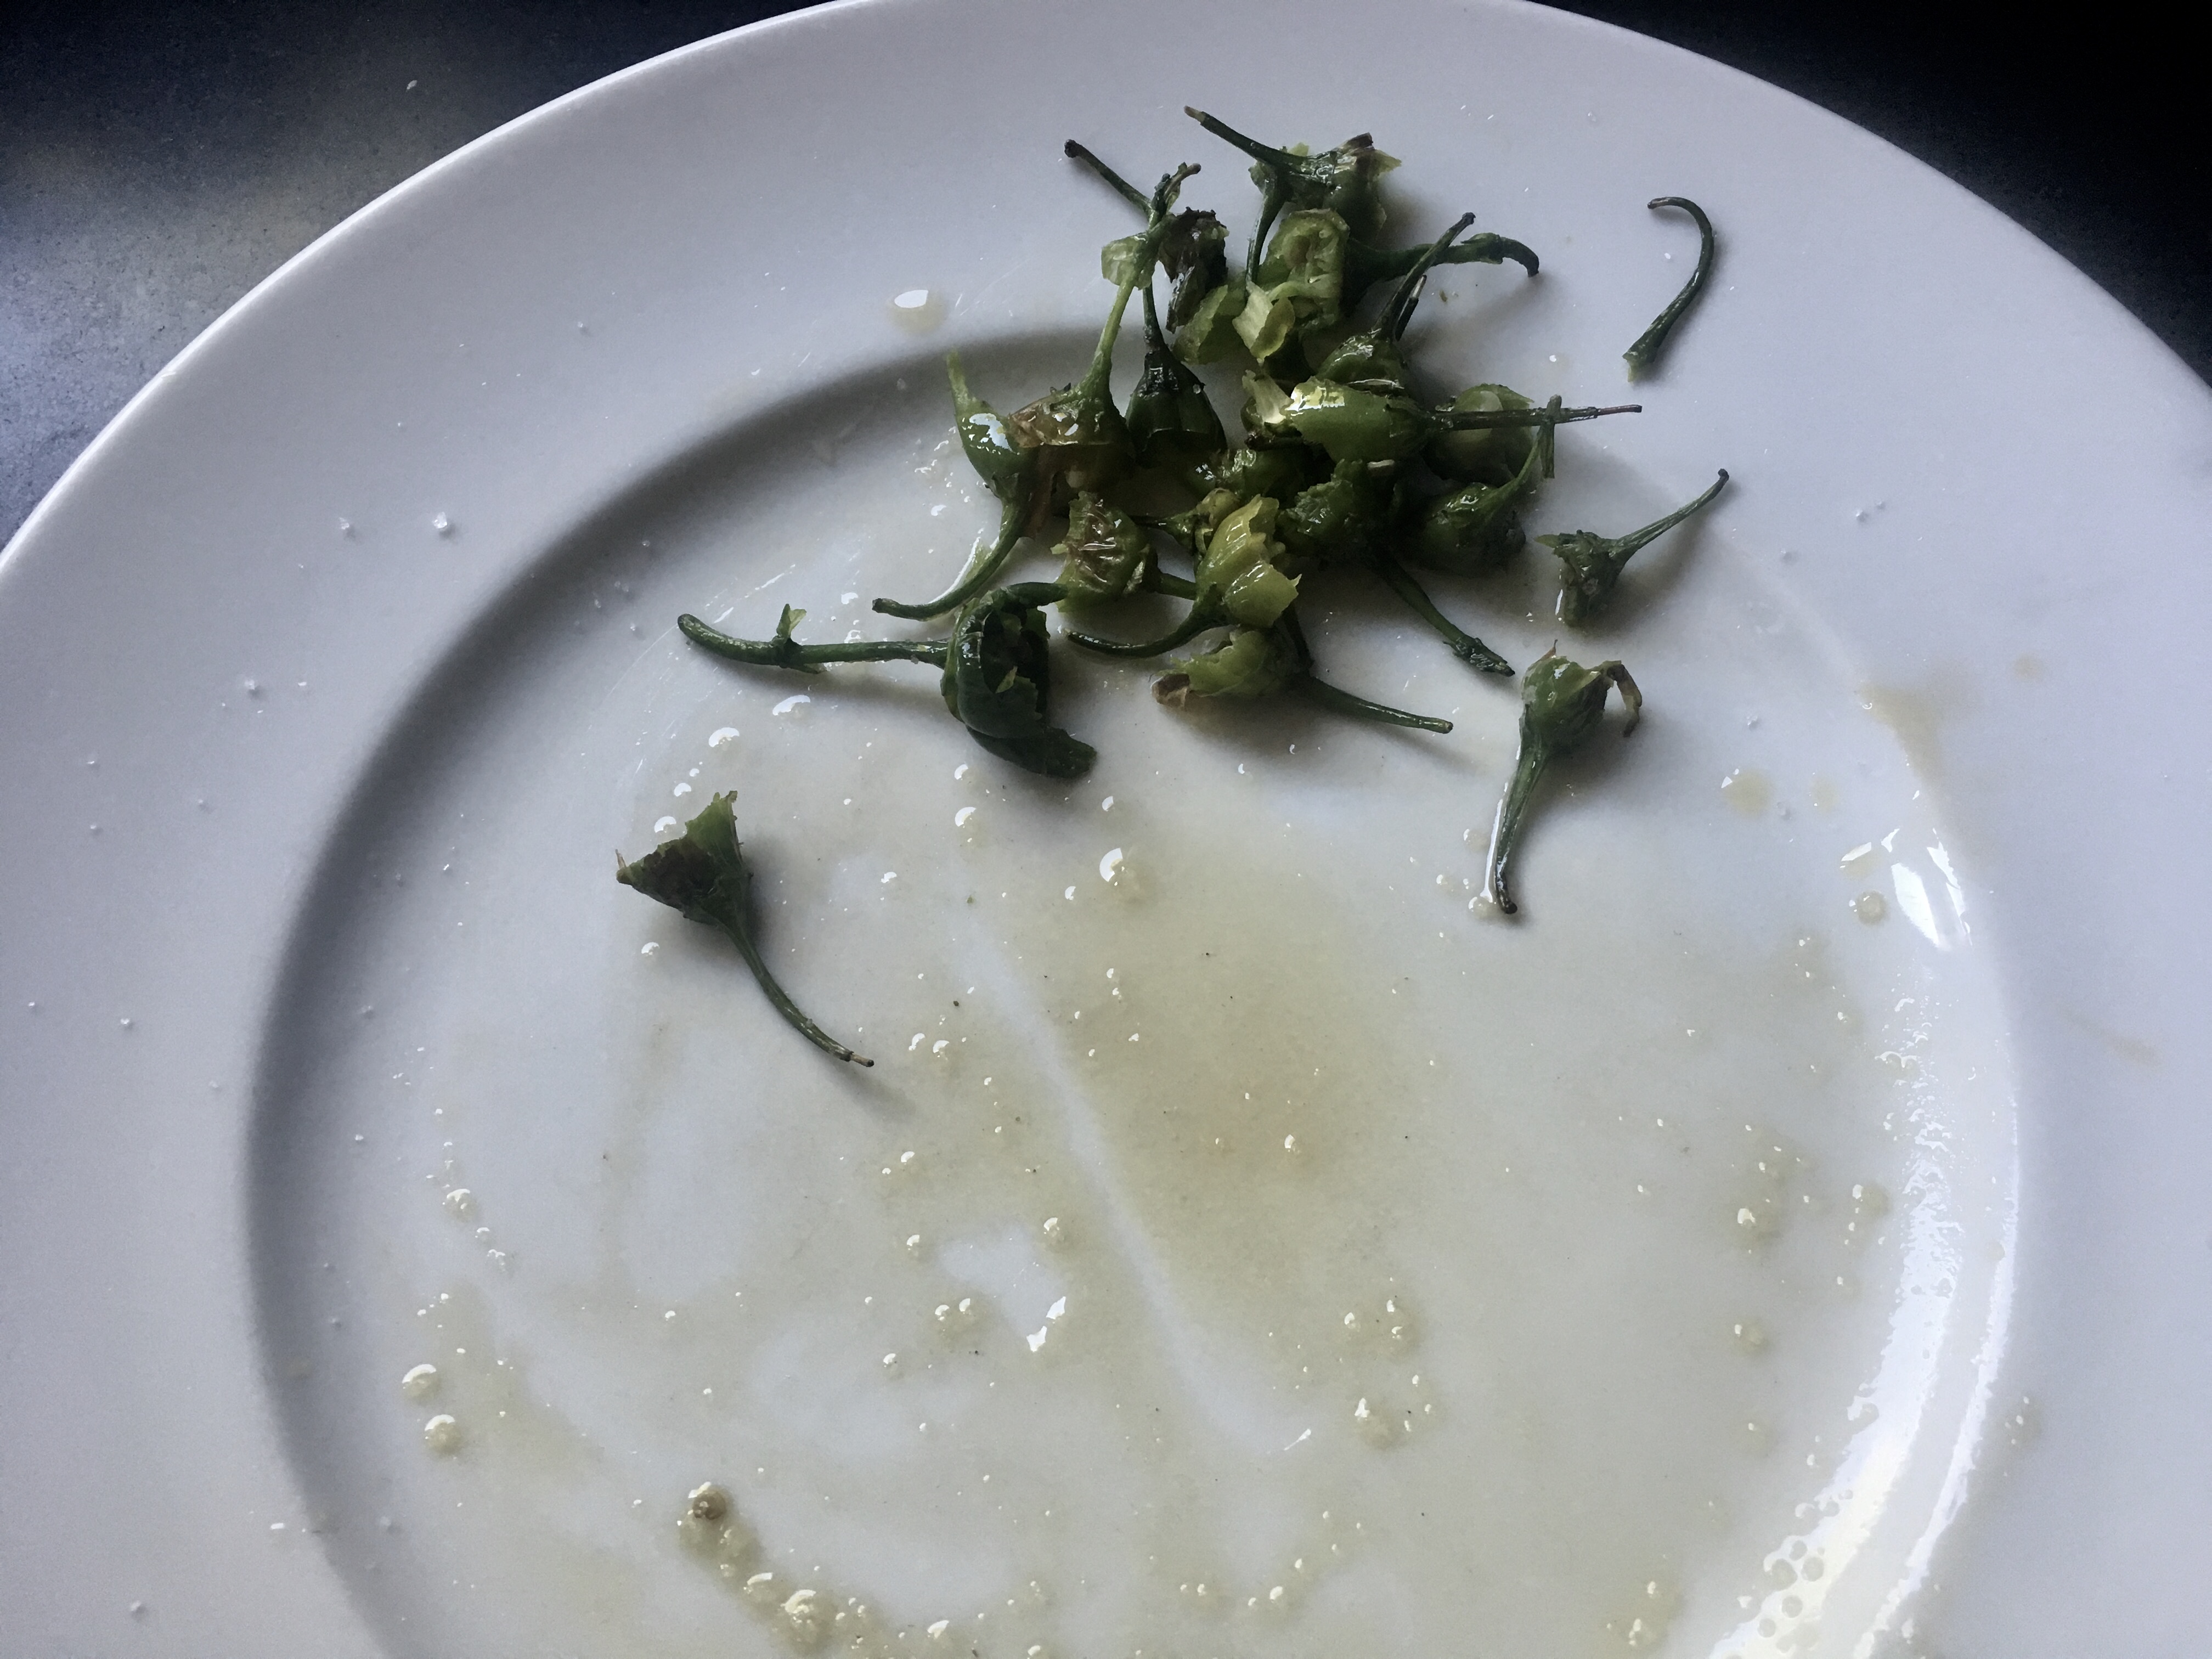
So, thanks, Ron. You saved the harvest! And by the way… While the pickling brine was boiling, I blistered and ate another batch of shishitos! (Needed to do something while I was waiting… )
Blistered shishitos gone!
The original recipe for pickled shishitos suggested that I boil the pickling spices and then combine them with sliced shishitos. But I didn’t like the idea of having whole peppercorns and other spices getting stuck in my teeth. I wanted their flavor, but I didn’t want to bite into them whole. (If you’ve ever accidentally bitten into a peppercorn, you know what I mean.)
So I strained the brining liquid after boiling, and then combined it with the shishitos. I got all the flavor, and none of the grit.
I cut the stem ends off the shishitos, then sliced them into rings.
2 cups vinegar
2 cups water
4 garlic cloves
2 tablespoons sugar (I use organic cane sugar)
2 tablespoons pickling spices
1 tablespoon black peppercorns
2 teaspoons sea salt
1 pound shishito peppers, sliced into rings
Boil a couple of Mason jars in a large pot to clean them. Let them air dry completely.
In a saucepan over high heat, combine the vinegar, water, garlic cloves, sugar, pickling spices, black peppercorns, and sea salt. Bring it to a boil, then lower the heat to medium and let to boil for 5 to 8 minutes.
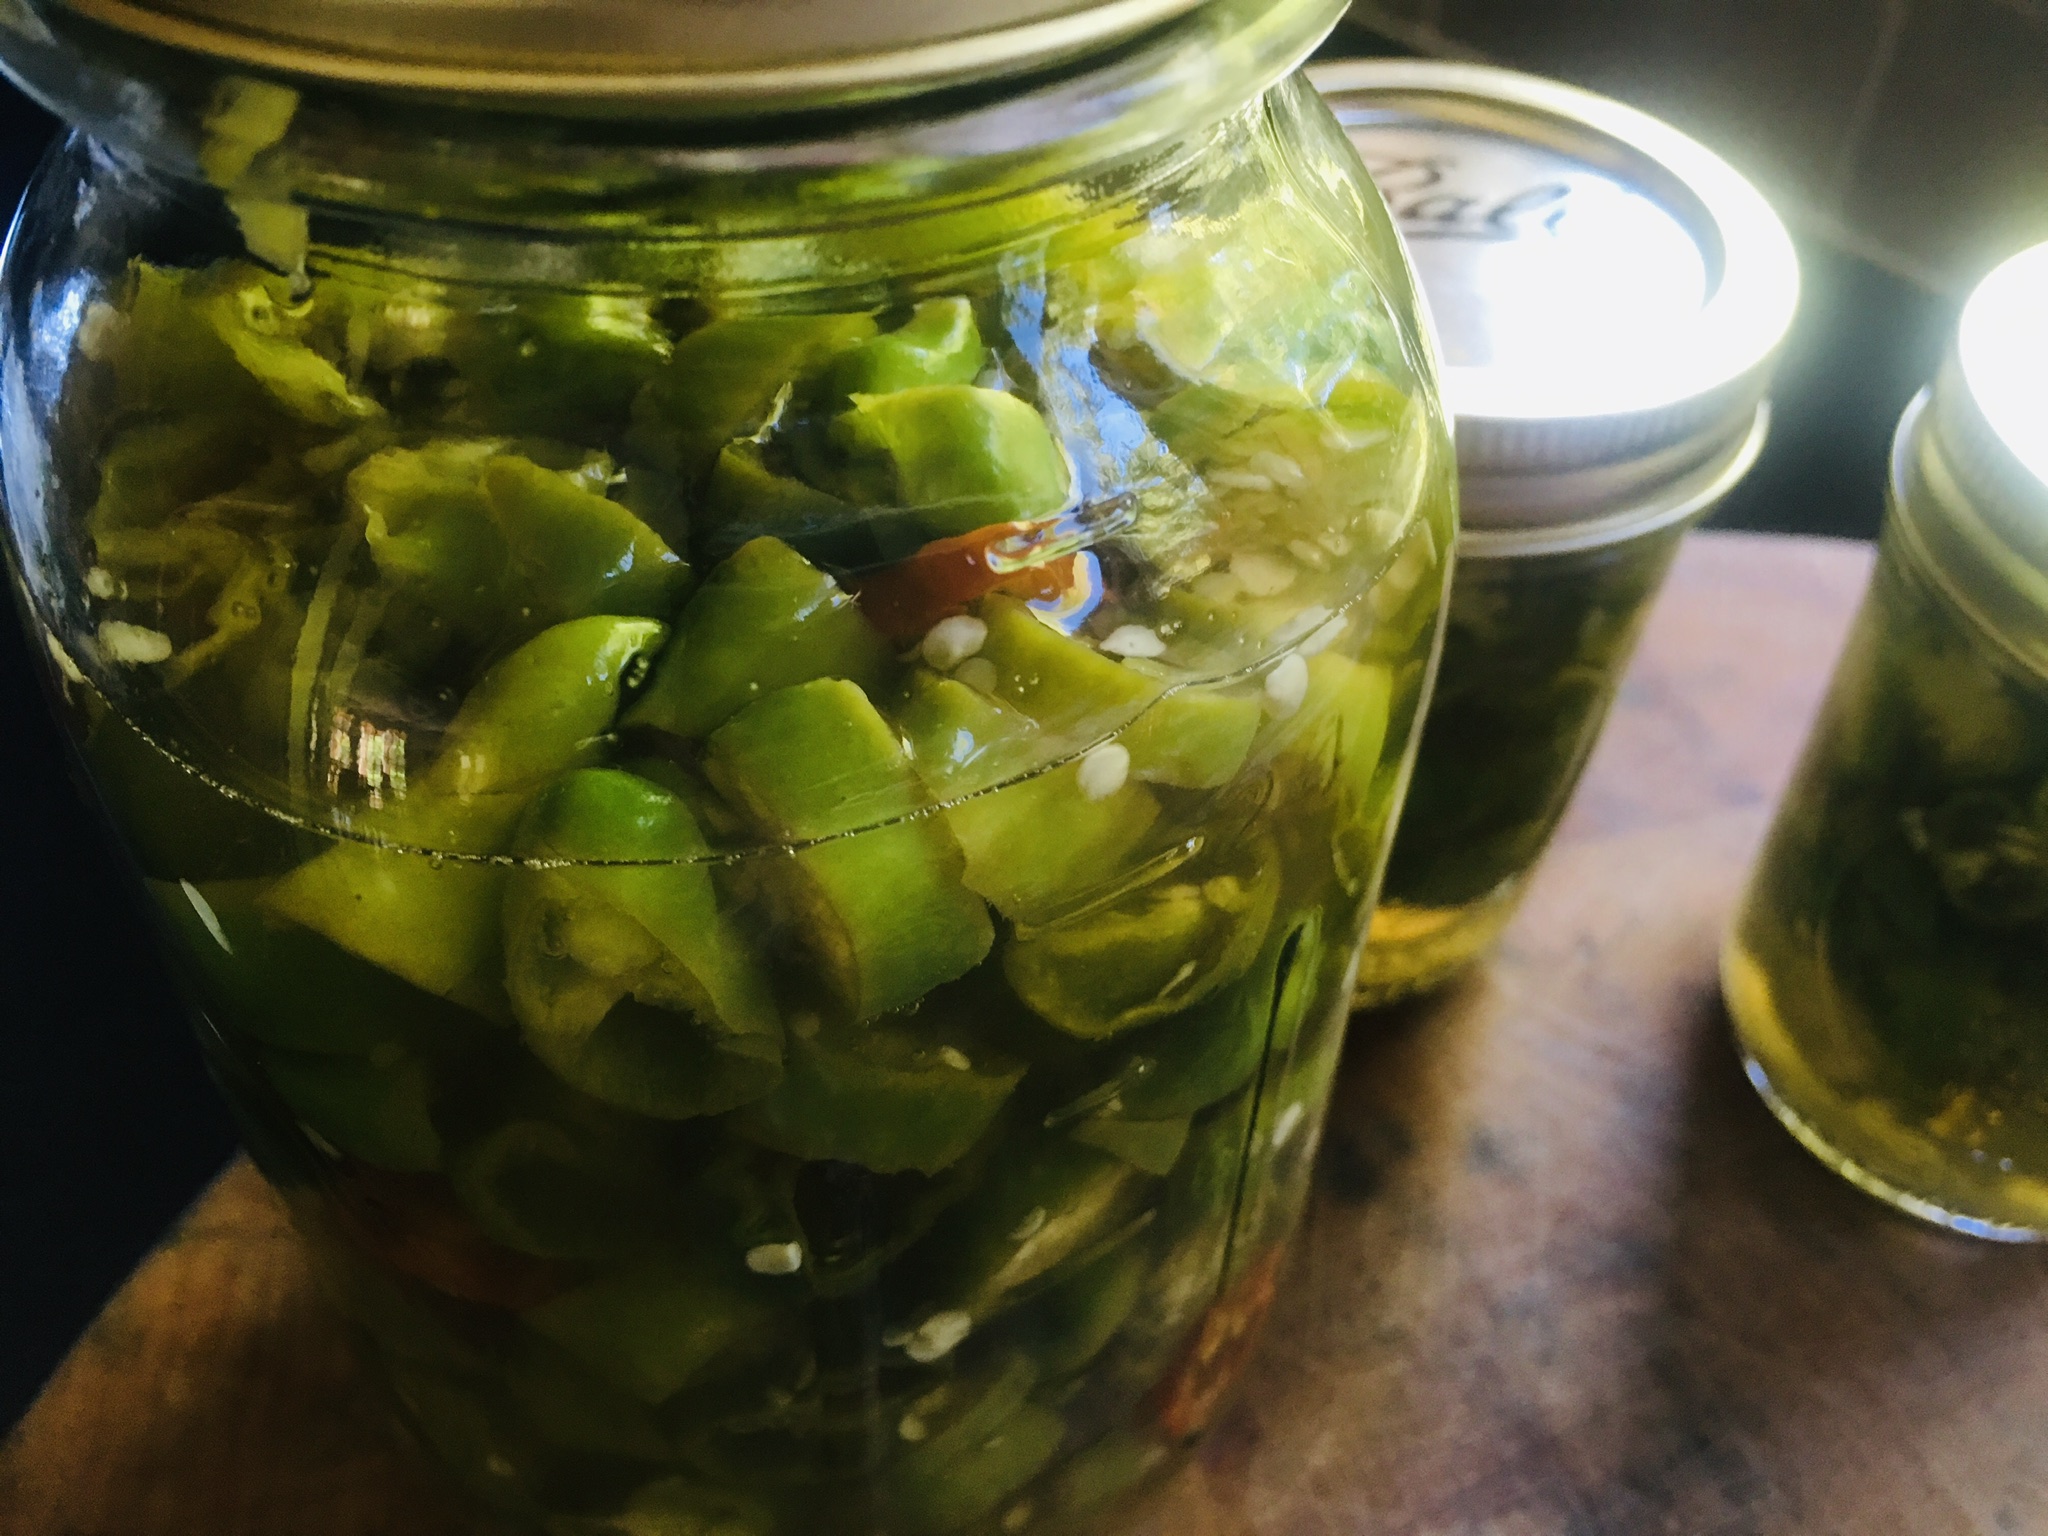
The take pickling liquid off the heat and strain it into a bowl. Discard the spices. Add the sliced shishitos into the pickling liquid, mixing well, and let it sit for 3 to 5 minutes.
Spoon the mixture into the Mason jars and seal them tightly. Let them cool to room temperature. (You should hear the lids of the Mason jars make a popping noise to seal properly.)
Once the peppers have cooled, place the jars in the fridge and let them sit in the fridge for a week or so until the flavors combine.
The pickled shishitos are great on salads, sandwiches, cheese platters, and anything else that needs a kick in the pants!
Out on the North Fork of Long Island, there’s a steak restaurant called the Elbow Room. It’s nothing fancy…old school cooking. But they’re famous for their steaks because of a super-secret marinade. Ages ago, I spotted a newspaper article that claimed they found out what that secret marinade was, and they published it. Whether this really is the official Elbow Room marinade or not, I have to say it’s pretty darn tasty and it makes for a delicious steak on the grill.
My biggest concern with the marinade was the salt factor, since it uses soy sauce. But the ribeye I had was almost an inch-and-a-half thick, which meant that it could sit in the marinade for a long time…my ribeye sat in it for 8 hours. If you choose to use a thinner cut of meat, you might need to reduce your marinating time.
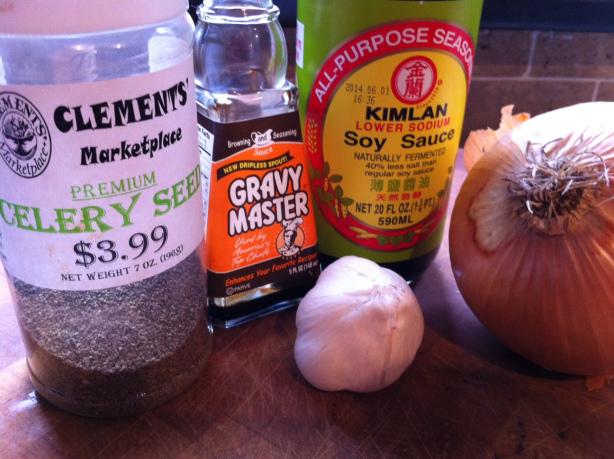
The recipe uses a product called Gravy Master, available in most supermarkets. Look for it in the section where you find gravies and instant potatoes.
1 cup soy sauce
1/4 cup Gravy Master
2 large Vidalia onions
2 cloves of garlic
2 teaspoons celery seed
1/2 teaspoon black pepper
Combine the onions and garlic in a large food processor and purée. Add the remaining ingredients and run the processor until it’s smooth and sort of resembles root beer.
Marinate the beef in the marinade overnight, or for as long as possible. The thicker the cut of meat, the longer you can marinate it.
Looks delicious, but it hasn’t been cooked yet! Straight out of the marinade.
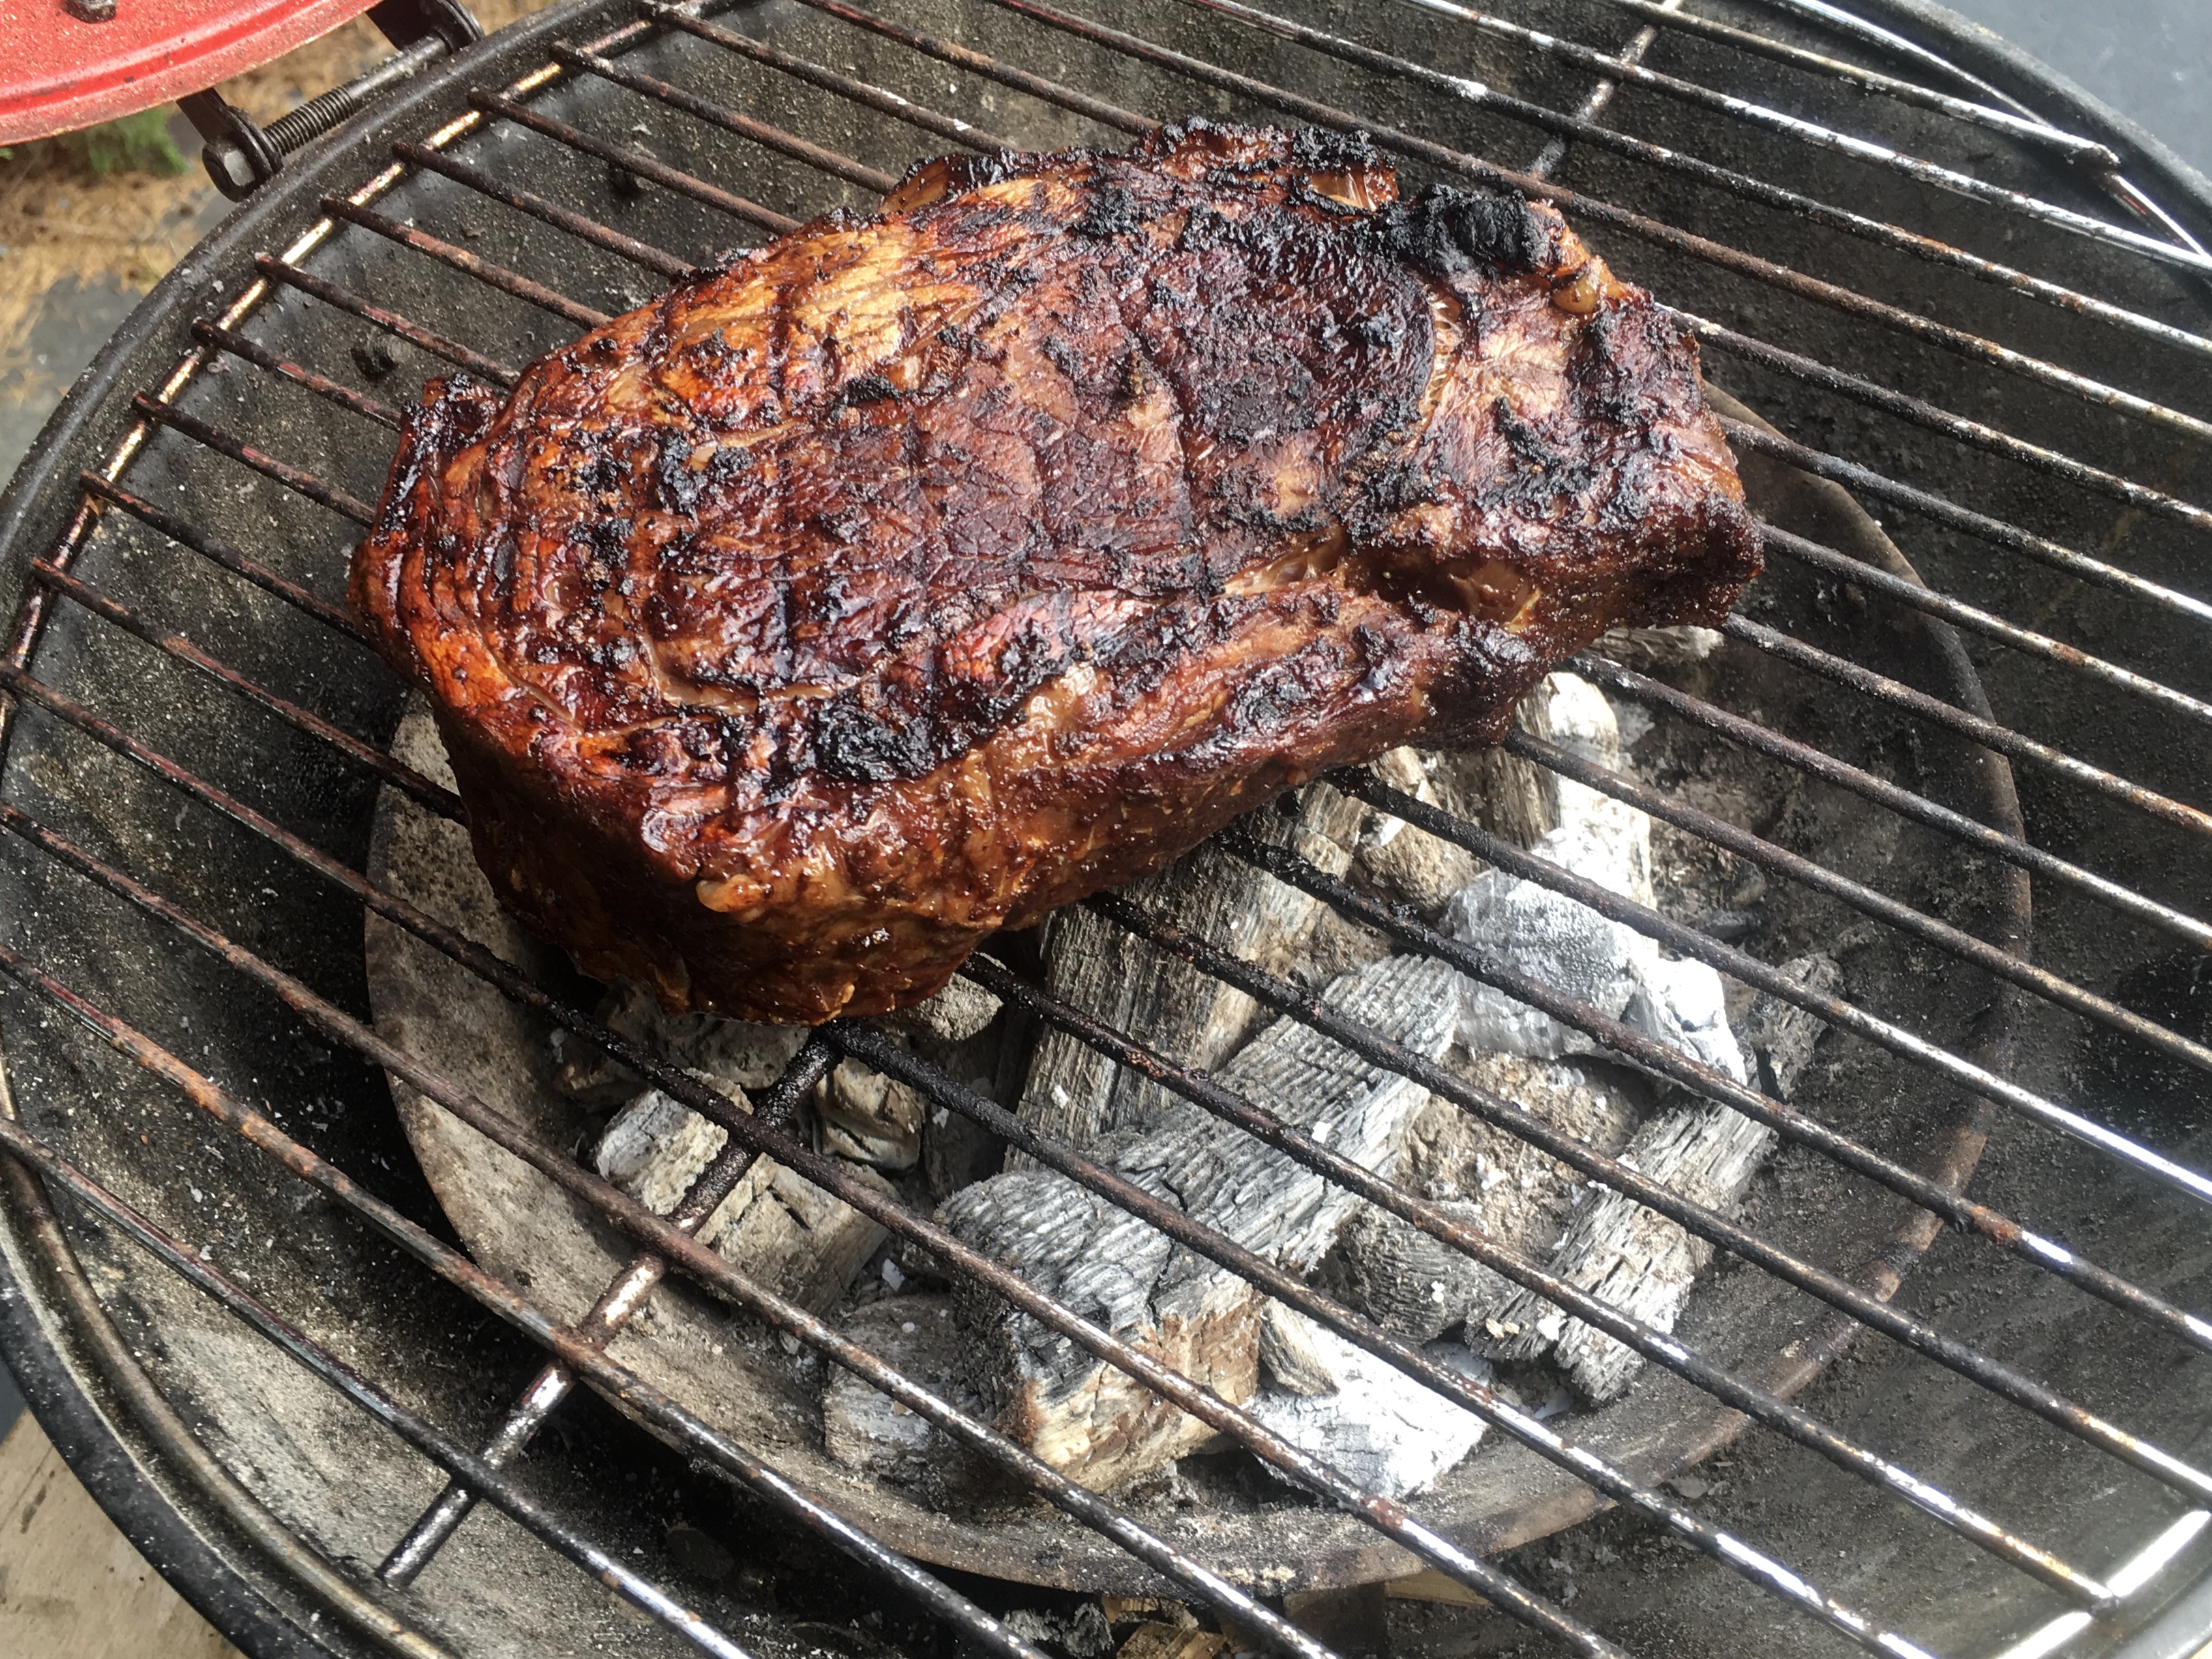
Light the grill. I prefer pure hardwood charcoal because that’s where the flavor is. If I’m just cooking one steak, I get my camping grill out. It lights quickly and easily, and it doesn’t waste a whole lotta charcoal.
Always use a charcoal chimney, never lighter fluid…unless you like the taste of petroleum products in your food.
Pure hardwood charcoal gives you a hot fire. I like to sear the beef really well on both sides, then move the steak to a cooler spot on the grill and close the cover. I’ll let the beef cook until it gets to a perfect medium-rare.
If you try this marinade on burgers–and it’s great on burgers–simply brush the burgers with the marinade as you place them on the grill. Go easy or you’ll get a very salty burger.
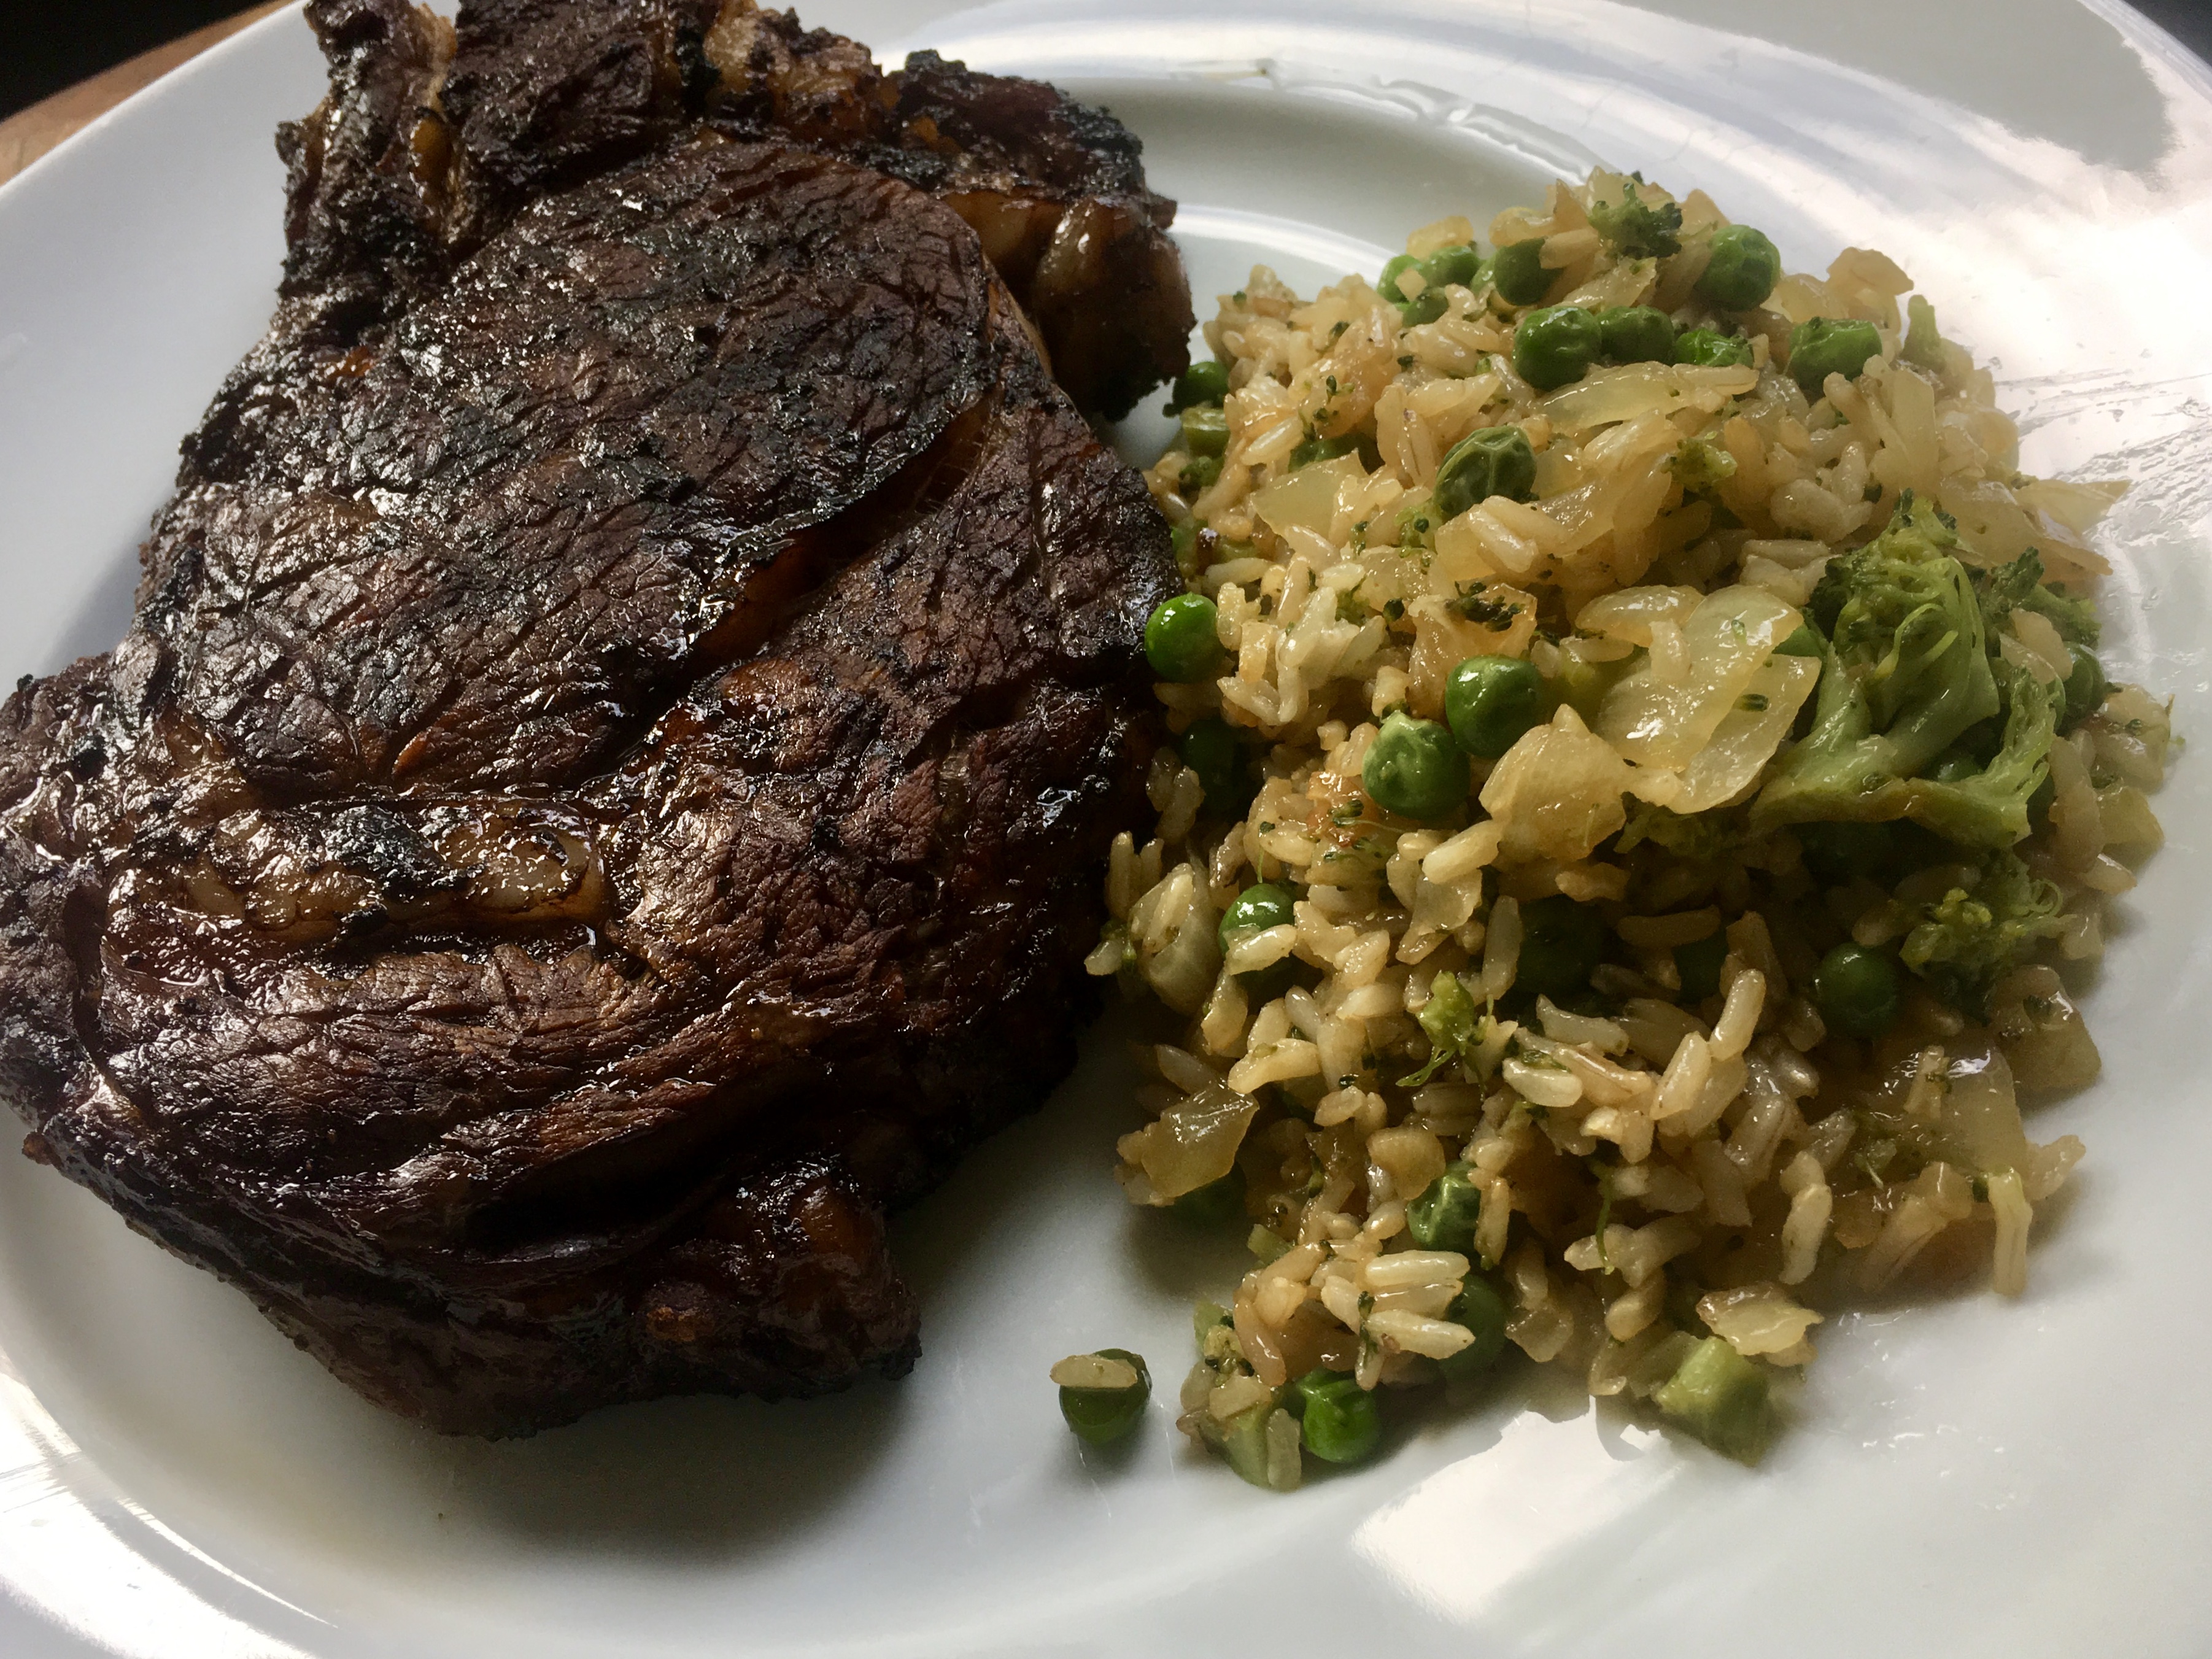
Marinated grilled ribeye with a side of fried rice…an easy combination of veggies and rice leftovers I had in the fridge with a dash of soy sauce.
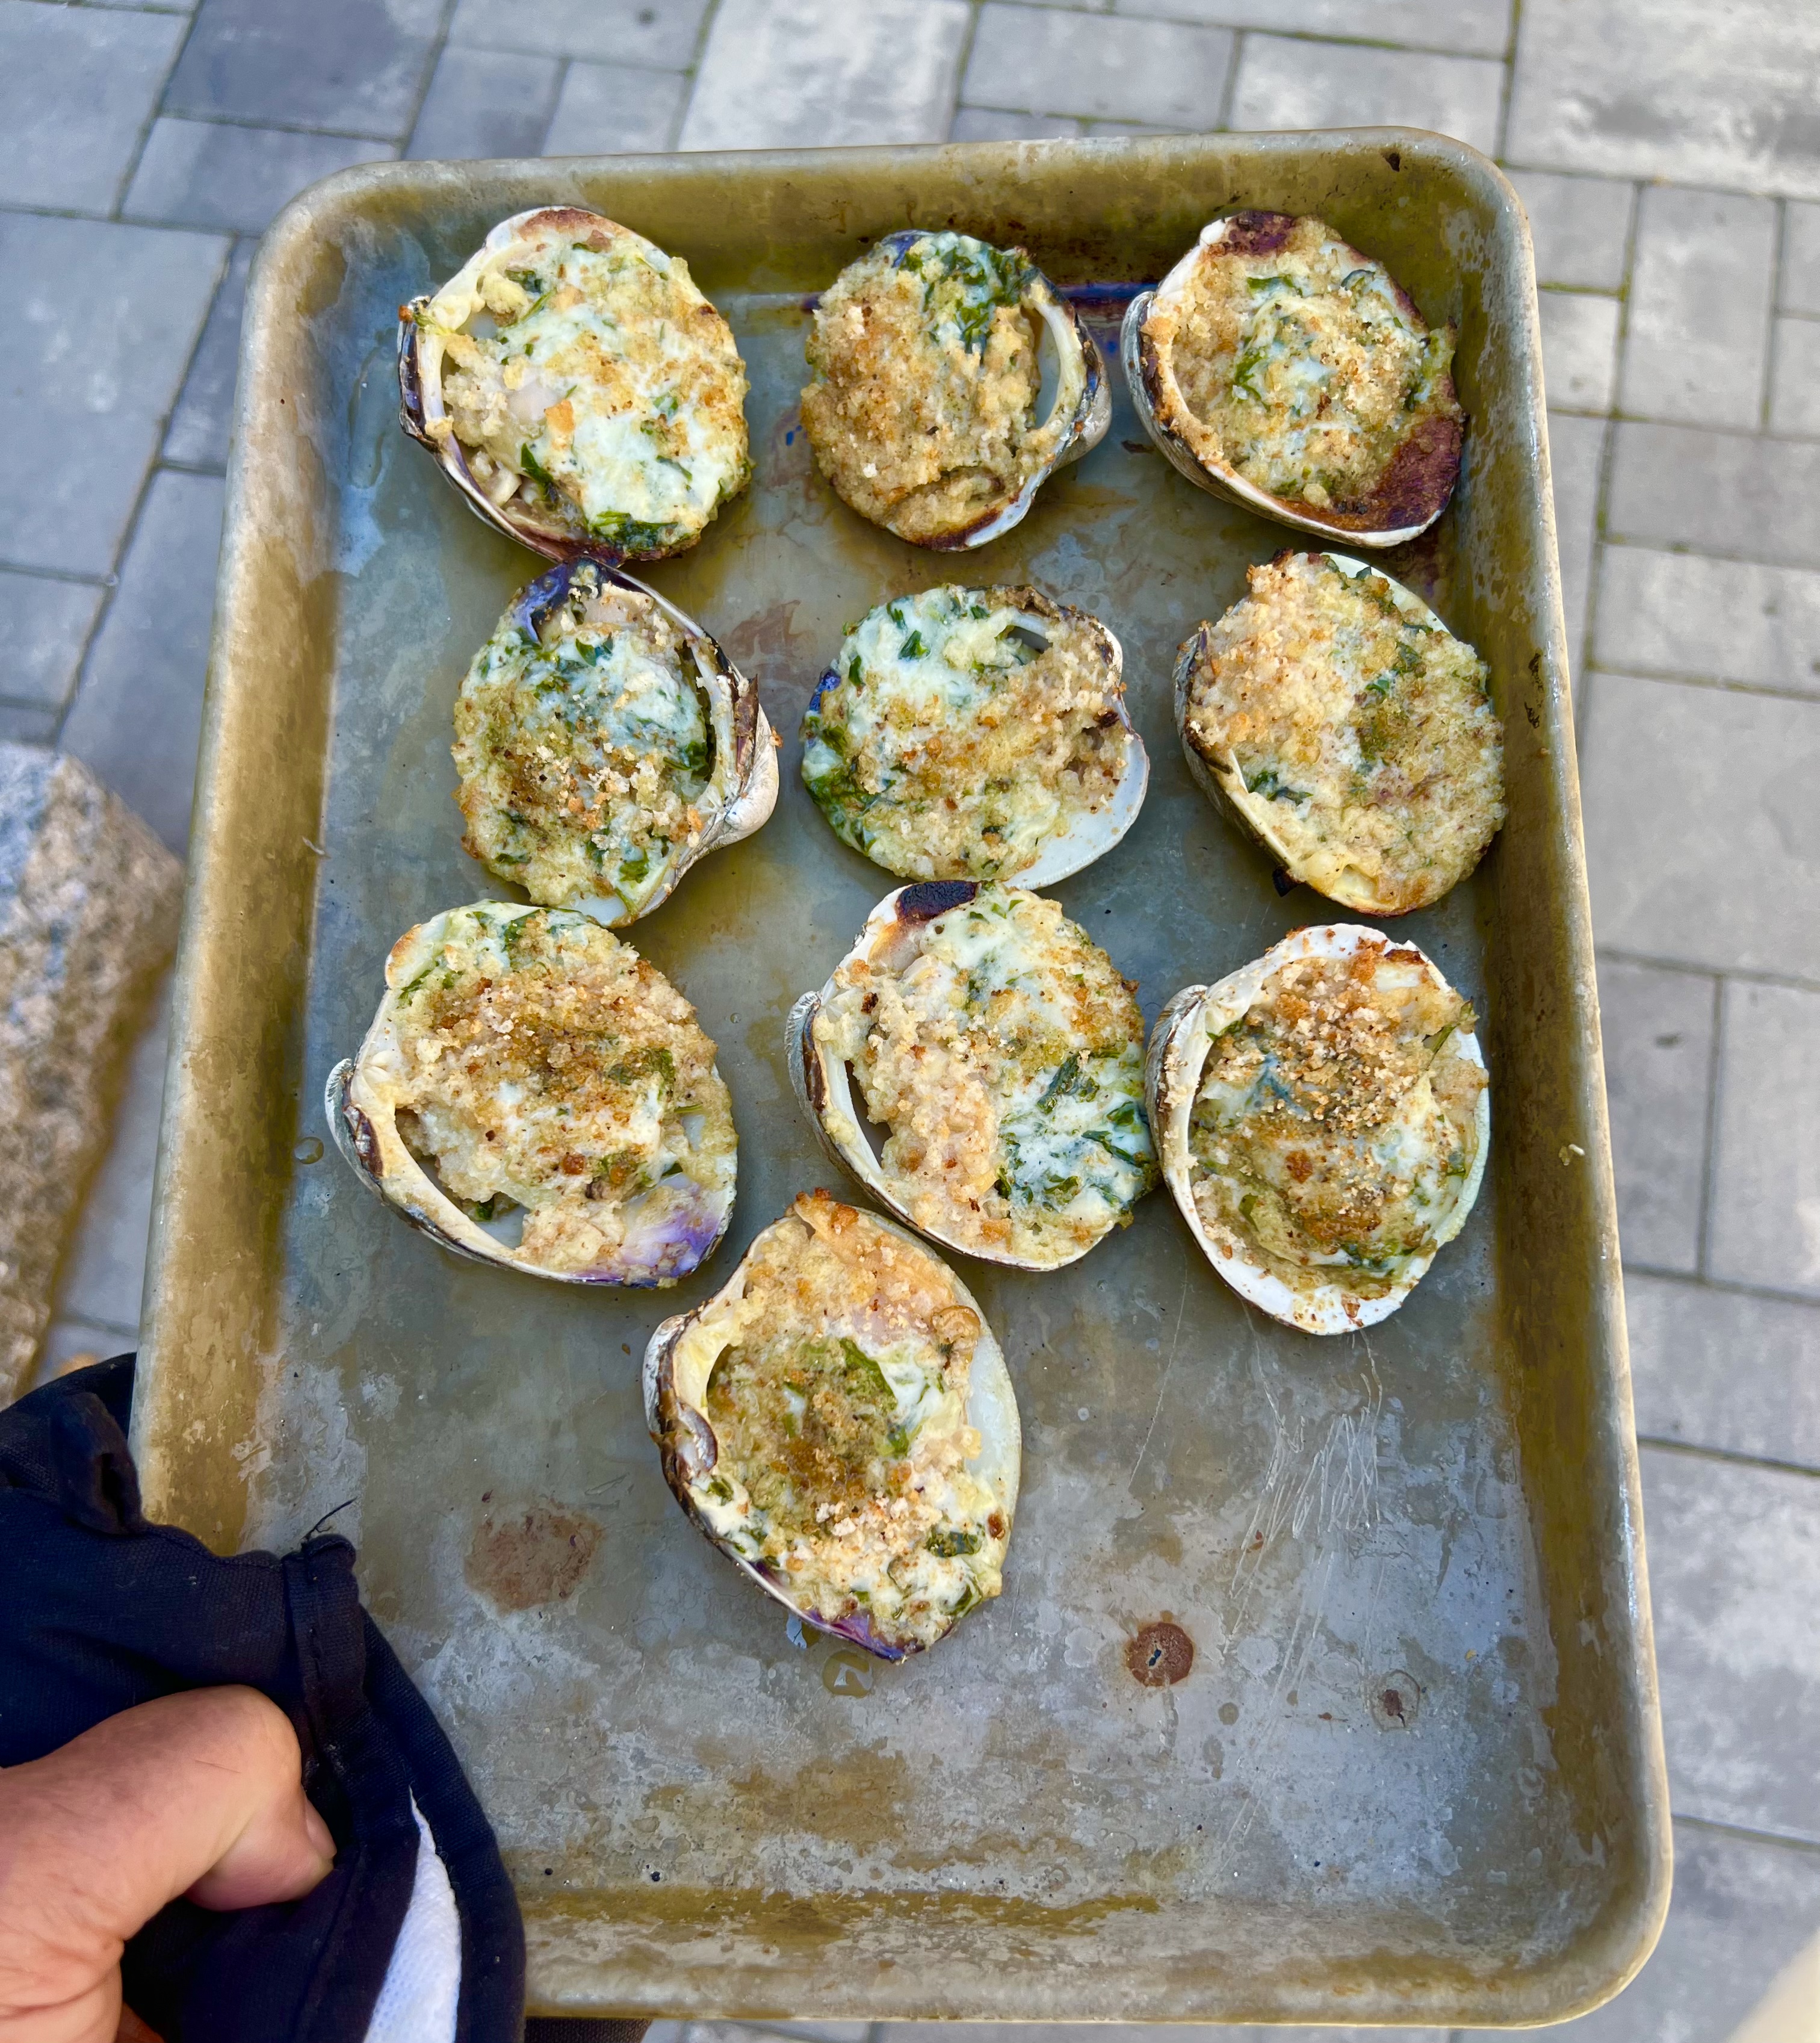
Ever since I had char-grilled oysters in New Orleans, I’ve been obsessed. I’ve made them at least once a week every week since I’ve been back. But the other day, I went to my local seafood store and I saw some beautiful clams, and I thought: Why not try those on the grill?
I had some friends over a couple of days ago, and I made my Oysters Rock-a-Fellow recipe for them, and I had some leftover gooey cheesy stuffing that goes on top of the oyster. I thought: Why not use it on the clams and then put them on the grill?
A hybrid recipe of two previous recipes, and it really worked!
The first step is to make the gooey cheesy stuffing mix ahead of time.
1/4 cup unsalted butter 1 small onion, finely chopped 1 garlic clove, finely chopped 1/4 cup low-fat milk salt and pepper 3 cups (tightly packed) fresh arugula, finely chopped, about a 5 oz. container 6 oz. mild cheddar cheese (the white one), grated 6 oz. mozzarella, grated Fine bread crumbs (Using GF breadcrumbs will keep this dish gluten-free)
Melt the butter in a pan and add the onion and garlic. Sauté until translucent, then add the milk, salt and pepper, and the arugula. Sauté for a few minutes, stirring, so that all of the arugula wilts down. Slowly add the cheddar until it all melts, then add the mozzarella, stirring slowly, until you have one big gooey mass of goodness in the pan.
Pour the gooey cheese mix into a shallow pan and place it in the fridge for a few hours. It will firm up and you will be able to cut it easily into cubes that you will then place on top of the clams.
Once the cheese mixture has firmed up, and it’s time to cook, start a hardwood charcoal fire in your grill.
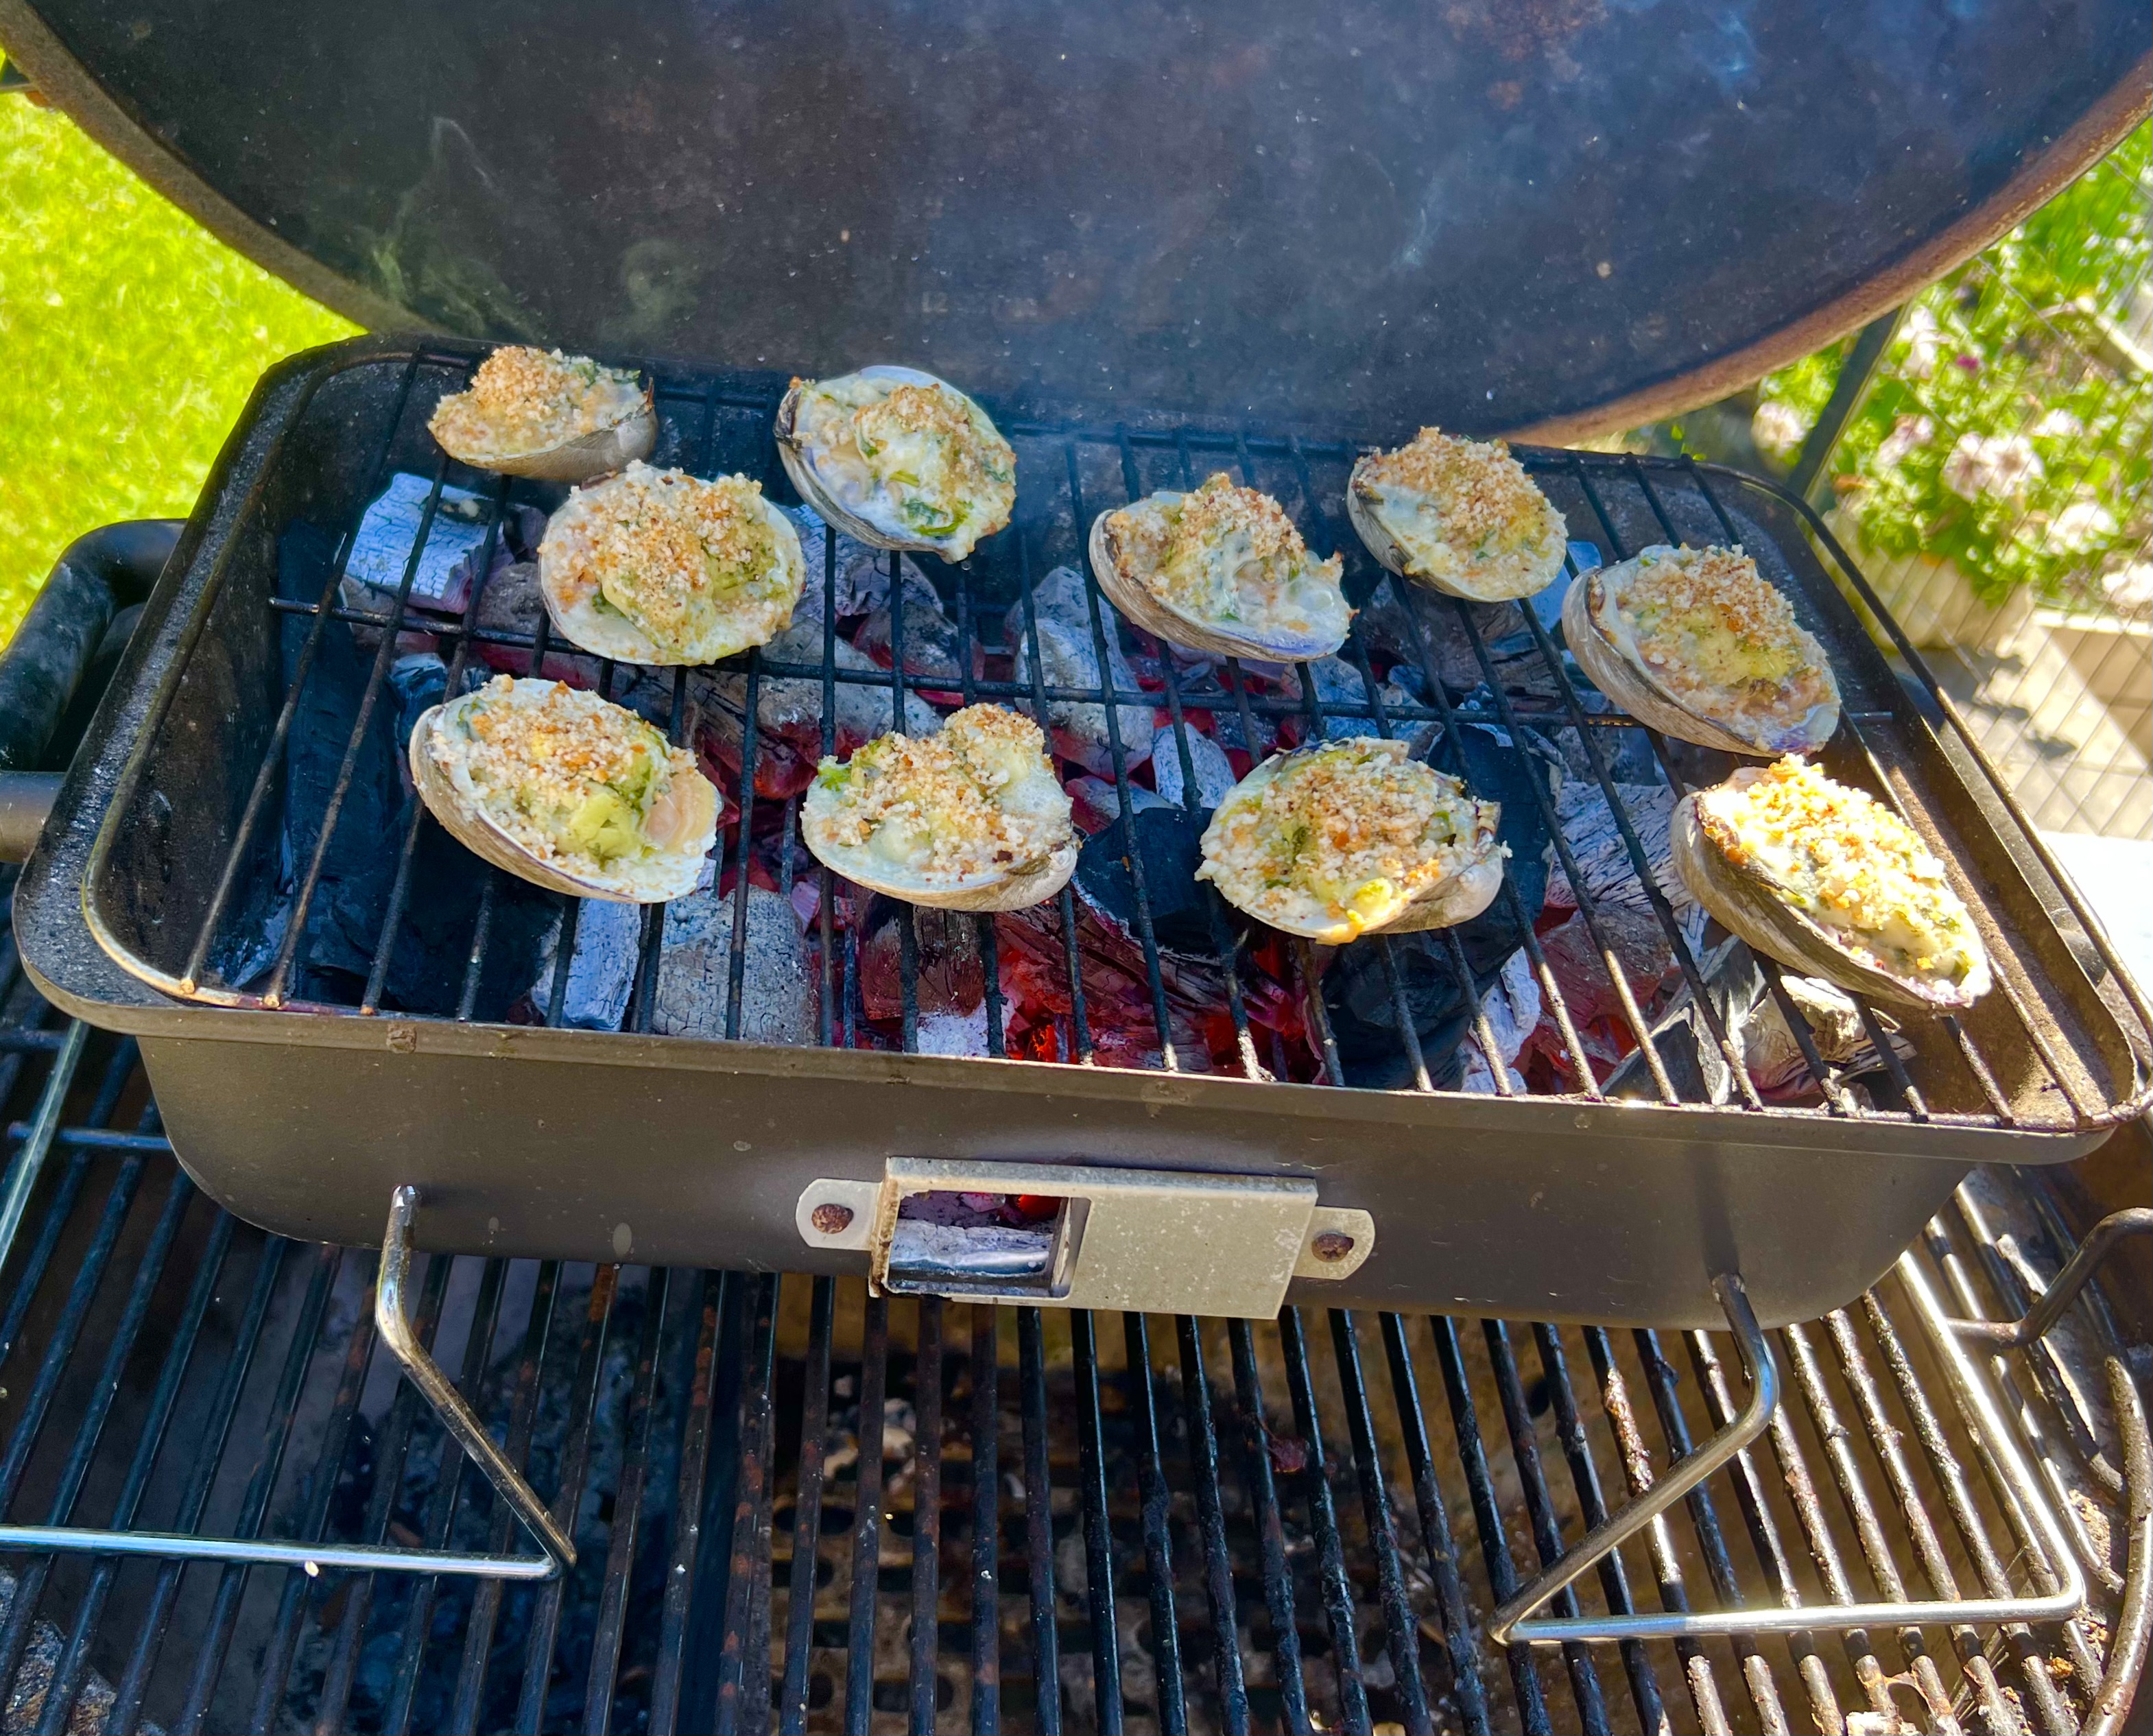
Open the clams and put them on a tray, topping each clam with a cube of the firm cheese and arugula stuffing mix.
Sprinkle the breadcrumbs on top of each clam.
When your charcoal grill fire is hot, place the clams on the grill and cook until the cheesy topping melts and the clams have a nice char to them.
They will be lava hot when they come off the grill, so give them a few minutes before eating!
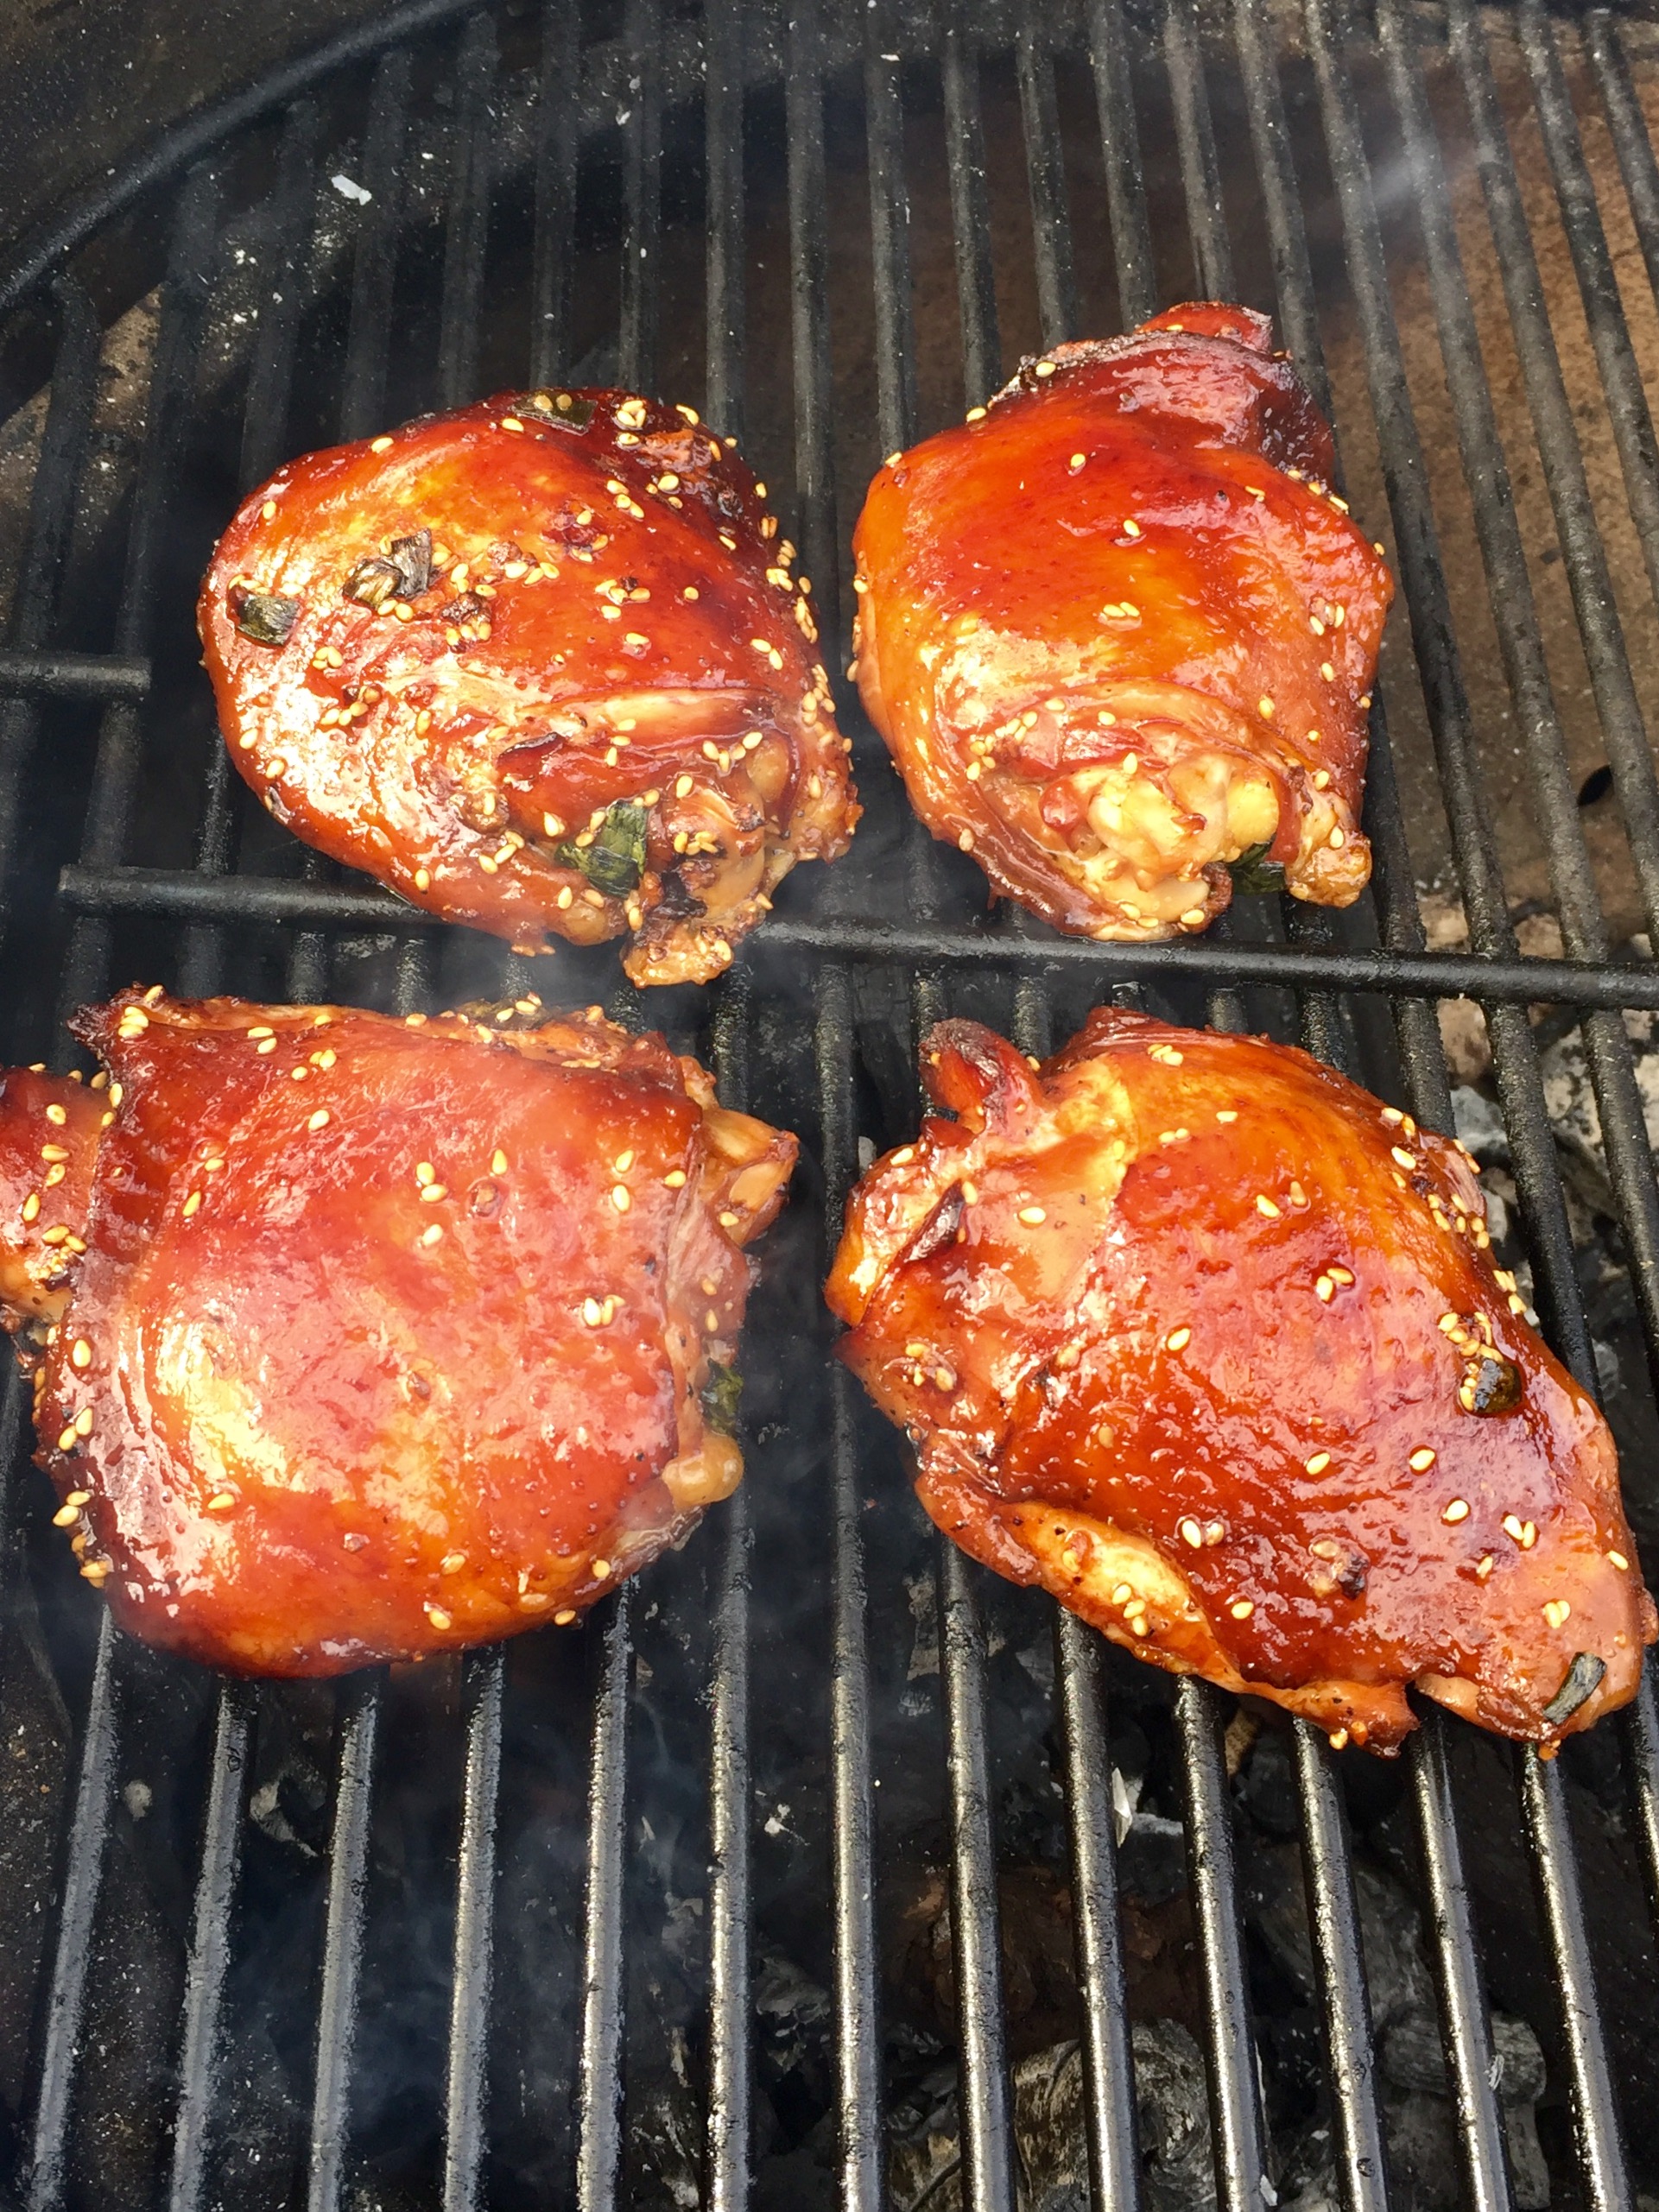
Bulgogi is the name given to the most common form of Korean barbecue. Unlike the daejibulgogi that I cooked in a previous blog, this one is not based on a chili sauce that can take the roof of your mouth right off.
I used chicken, though this would work with pork as well, and for the best flavor, it’s best to marinate the meat in the fridge overnight.
2/3 cup soy sauce
1/2 cup chopped scallions
6 tablespoons sugar (I use organic cane sugar)
5 tablespoons fresh garlic, grated or through a garlic press
5 tablespoons sesame oil
1 tablespoon sesame seeds
1 teaspoon black pepper
5 lbs. chicken pieces (I use skin-on thighs)
Combine all the ingredients except for the chicken in a bowl and mix well.
Place the chicken pieces in a large Ziploc bag and pour the marinade in. Seal the bag well and squish it around to make sure the marinade makes contact with the chicken. Place the bag in a bowl (to prevent accidental leakage) and keep it in the fridge overnight. Squish the bag around every few hours to make sure the marinade does its job.
When you’re ready to cook the next day, pre-heat the oven to 350 and remove the bag from the fridge and let it come to room temperature. Place the chicken on a sheet pan (discard the remaining marinade) and bake it for an hour, or until the meat temperature reaches about 160.
If you want that char and those grill marks, light a hot grill and push the coals to one side of the grill. Place the chicken pieces on the cool side of the grill and close the lid, opening the vents. Every few minutes, turn the chicken pieces over so they get nice grill marks but don’t burn.
I’ve always been fascinated by Korean barbecue. Every time I see it on TV or catch a recipe on an e-mail blast, my mouth waters and I say to myself that I’ve got to experience it some day. But the painful reality is: Korean barbecue can be really spicy…and I’m a total wuss.
Korean barbecue 101:Gogigui means “meat roast” in Korean, and it refers to the method of roasting beef, pork, chicken, and other meats. Meats can be marinated or not. Bulgogi is the name of the most common Korean barbecue. Meat is marinated with soy sauce, sugar, sesame oil, garlic and pepper, and then grilled. Galbi uses beef short ribs, and adds onions to the marinade. And the hot stuff is daeji bulgogi, because the marinade isn’t soy sauce-based, but based on the hot-n-spicy Korean chili paste known as gochujang.
All of the marinades looked delicious, but the hot one with gochujang would be my biggest challenge, so I decided to start there. I found a great recipe, and quickly realized that I would have to turn the heat way down if I was actually going to try to eat it! For example, the original recipe called for 2 tablespoons of white pepper. I totally left it out. And it called for a full cup of gochujang. Not only did I cut that part in half, I doubled many of the other non-spicy ingredients.
So is it authentic Korean barbecue? Probably not. But it’s my version of it. It’s got lots a flavor and still carries a bit of heat.
For gluten-free diets: finding GF hoisin and soy sauce is pretty easy these days. Look for the La Choy brand. But I haven’t been able to find gochujang that has a GF label.
3/4 cup ketchup
1/2 cup gochujang
1/2 cup hoisin sauce
1/2 cup honey
1/2 cup soy sauce
1/4 cup brown sugar
2 tablespoons freshly grated ginger
1 tablespoon freshly grated garlic (I use a garlic press)
1 tablespoon unseasoned rice vinegar
4 lbs. chicken pieces
Pre-heat the oven to 500 or its top temperature.
In a bowl, mix everything but the chicken pieces. Brush the sauce onto the chicken pieces, then wrap them in aluminum foil. (I like to tear a long piece of aluminum foil and lay it on top of a sheet pan. I place the chicken pieces on the foil, brush them with sauce on all sides, then fold the foil over the chicken, making one large pouch that holds all the meat.) Leave the pouch on the sheet pan and place it in the oven, then lower the oven temp to 350.
Cook the chicken for about an hour at 350, making sure it’s almost completely cooked. Juices should run clear, not bloody, when you poke it with a fork.
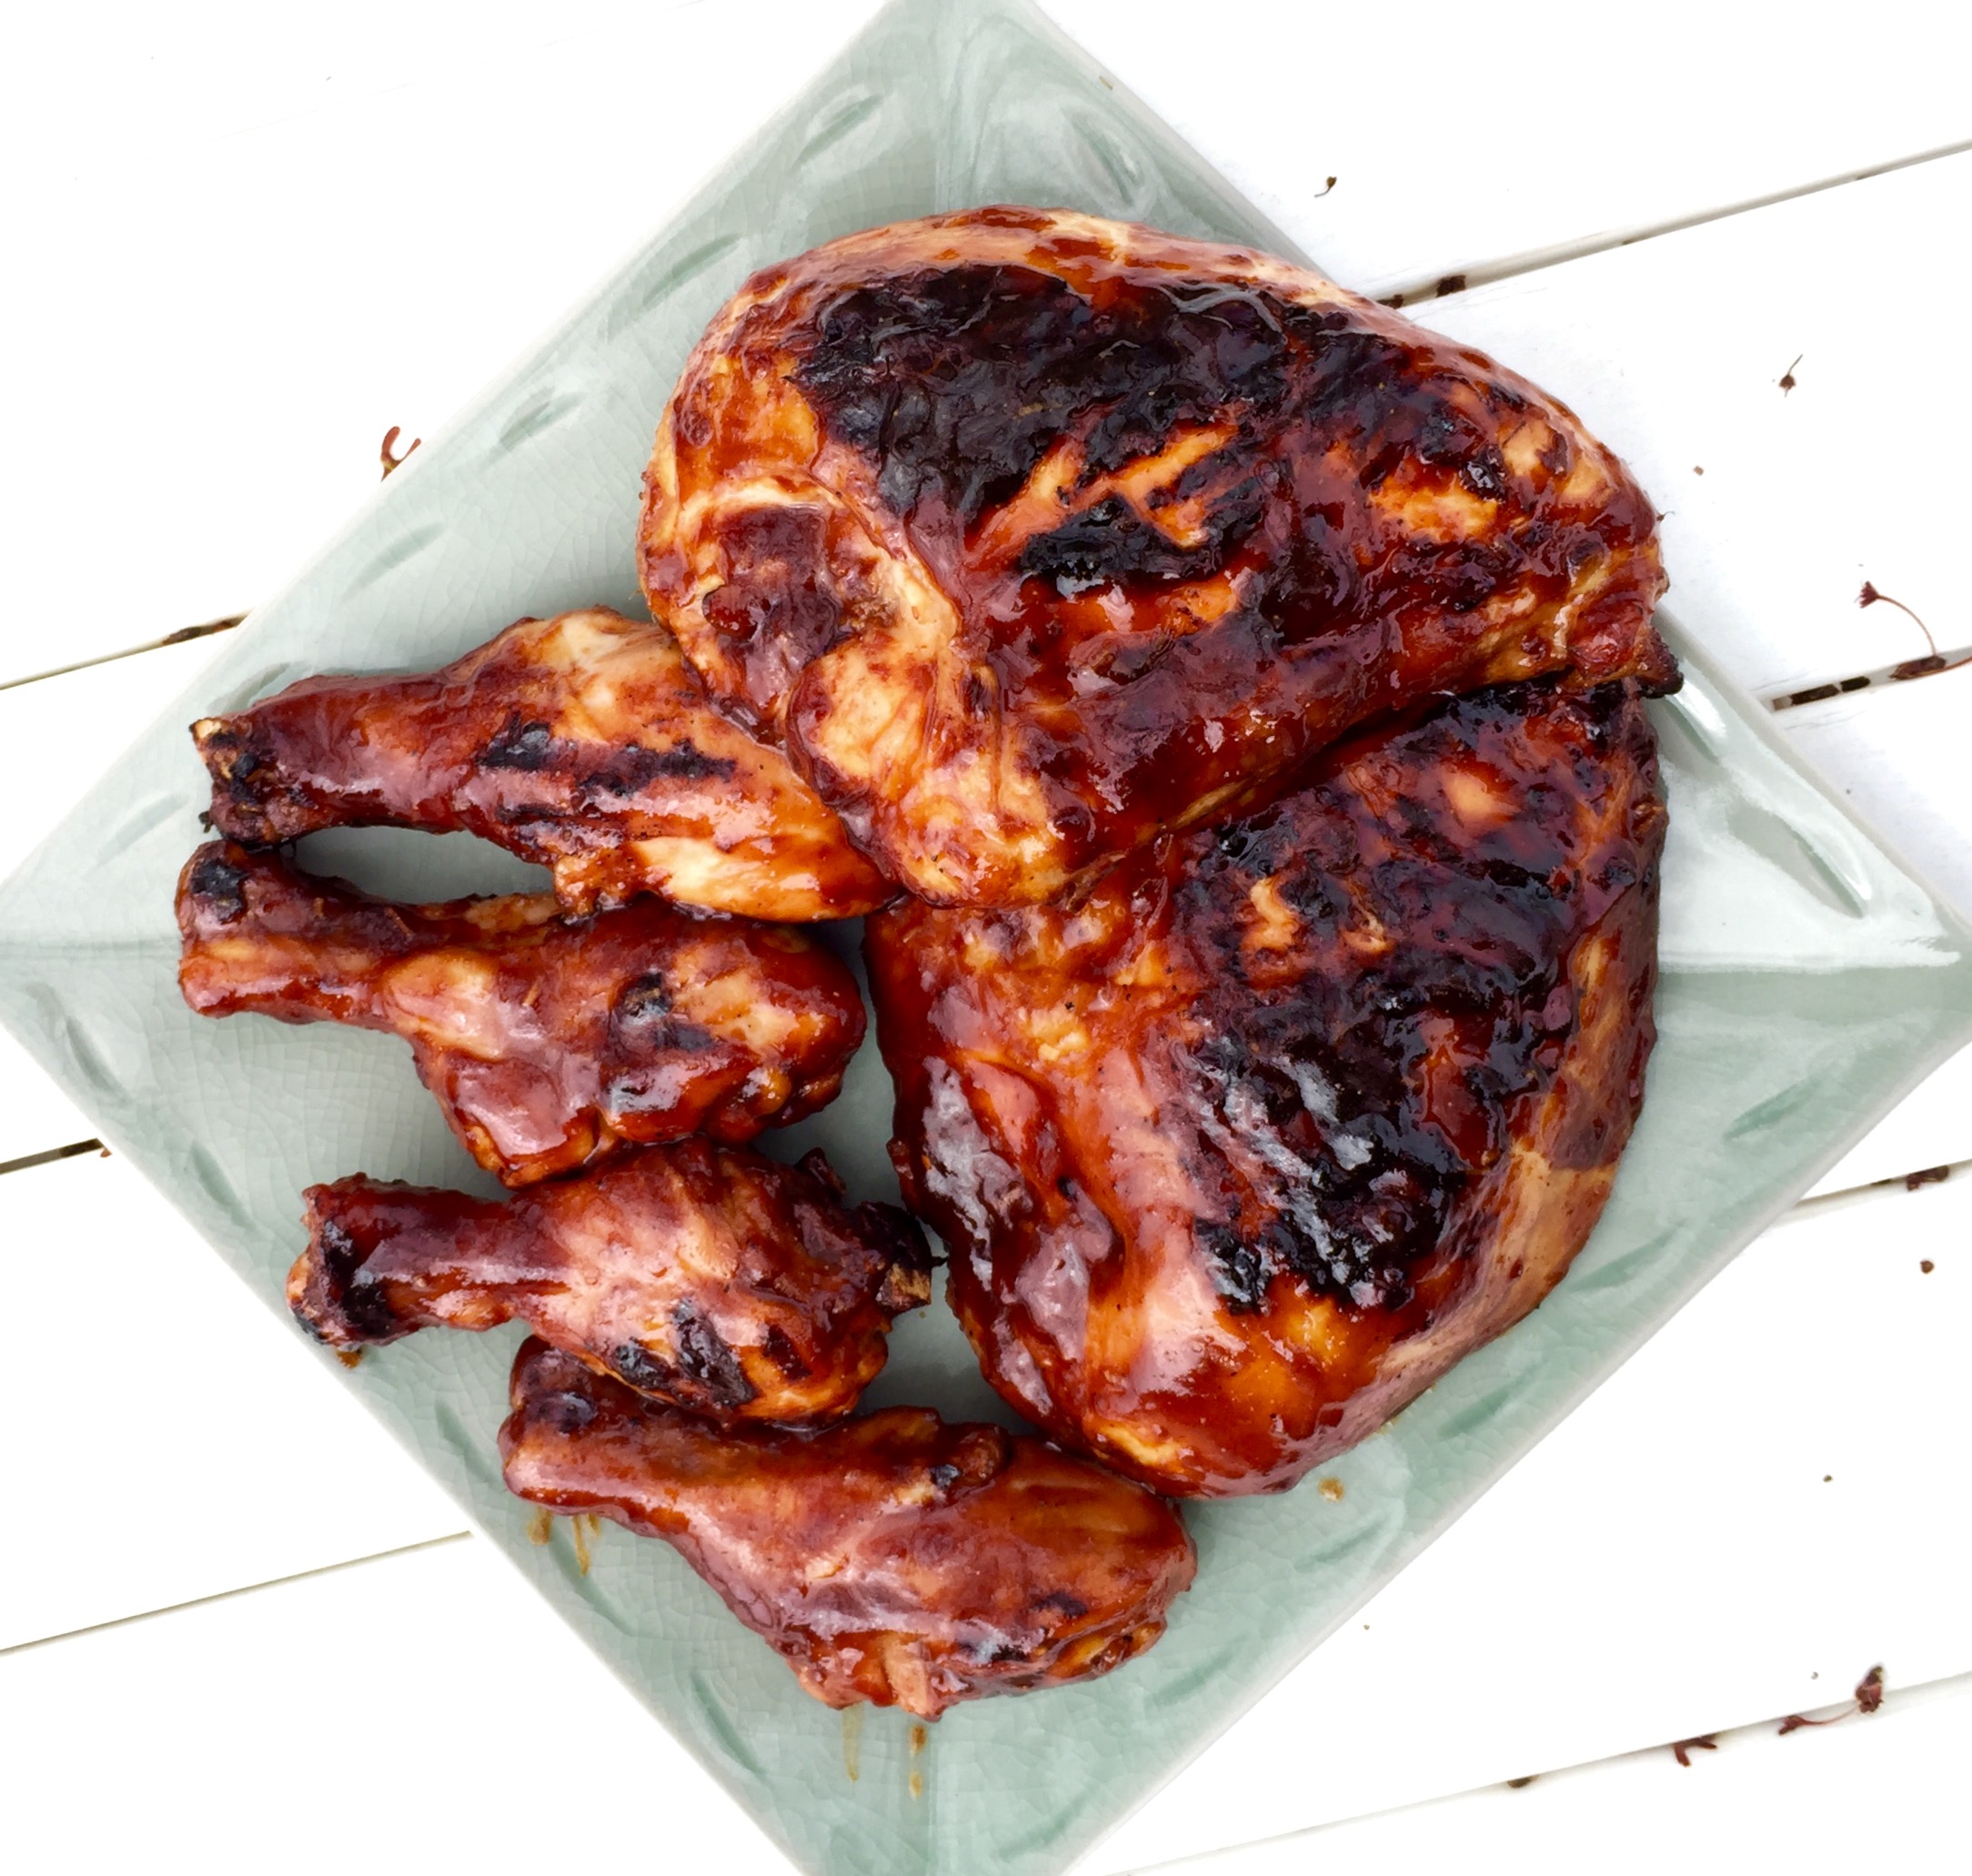
Start a hardwood fire on your grill. Push the coals to one side of the grill so you have a hot side and a cooler side with no coals underneath it. Place the chicken pieces on the cool side of the grill (if you put it on the hot side, it will stick and burn), brush with more sauce, and put the lid on the grill, making sure you have the vents open for air circulation.
See those 2 black bits in the foreground? That’s where the chicken stuck to the grill because I placed them over the hot coals. Don’t do that.
After a few minutes, lift the lid, flip the chicken pieces over, brush them with sauce again, and close the lid. Keep doing this until the chicken is nice and caramelized, with tasty grill marks.
If you want to serve some of the sauce on the side, it’s important to pour some of the sauce off and set it aside in the very beginning, so you’re not using the same sauce that the basting brush touched the raw chicken with.
I don’t have the patience to boil Mason jars and lids and all that. But I love me my pickles, especially when this year’s garden cranks out so many cucumbers!
This is such an easy way to make great pickles, it’s almost unbelievable…and no water is needed! The salt extracts just enough moisture to make it work. This method works great if you want fresh pickles to eat immediately, but if you want to keep them for long periods of time, you’ll have to go back to the old tried-and-true methods.
Fortunately for me, I devour these pickles as soon as they’re ready!
I originally used a plastic bag for this, but a plastic container also works well. Use what you have.
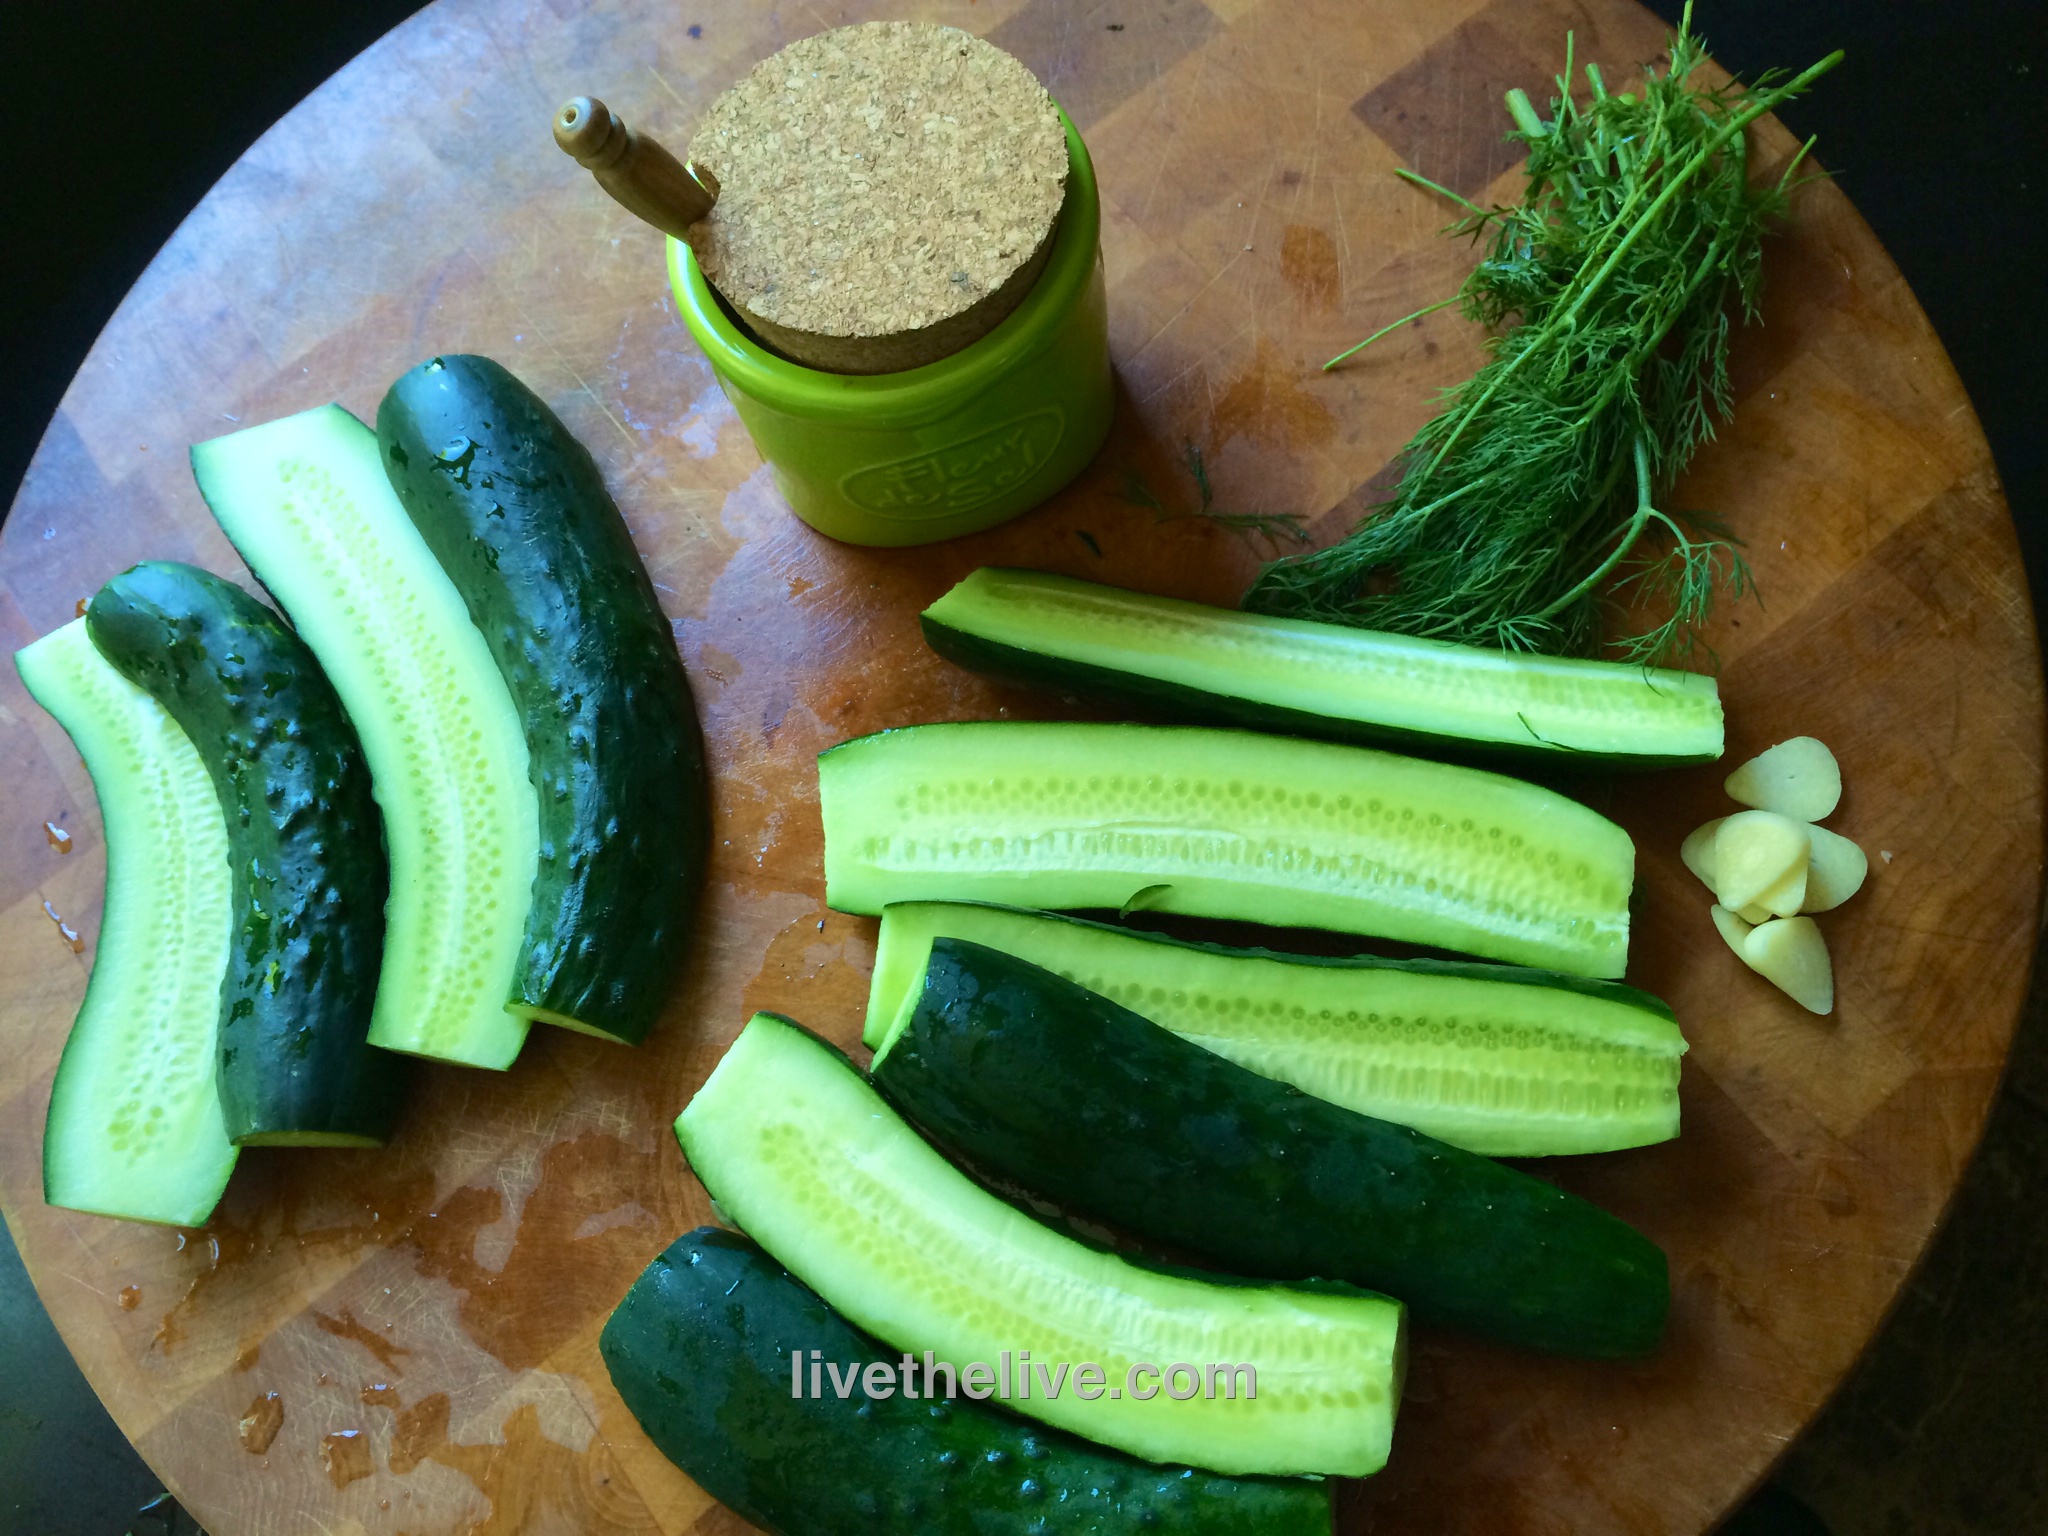
fresh cucumbers sea salt or Kosher salt a handful of fresh dill a couple of cloves of garlic, thinly sliced
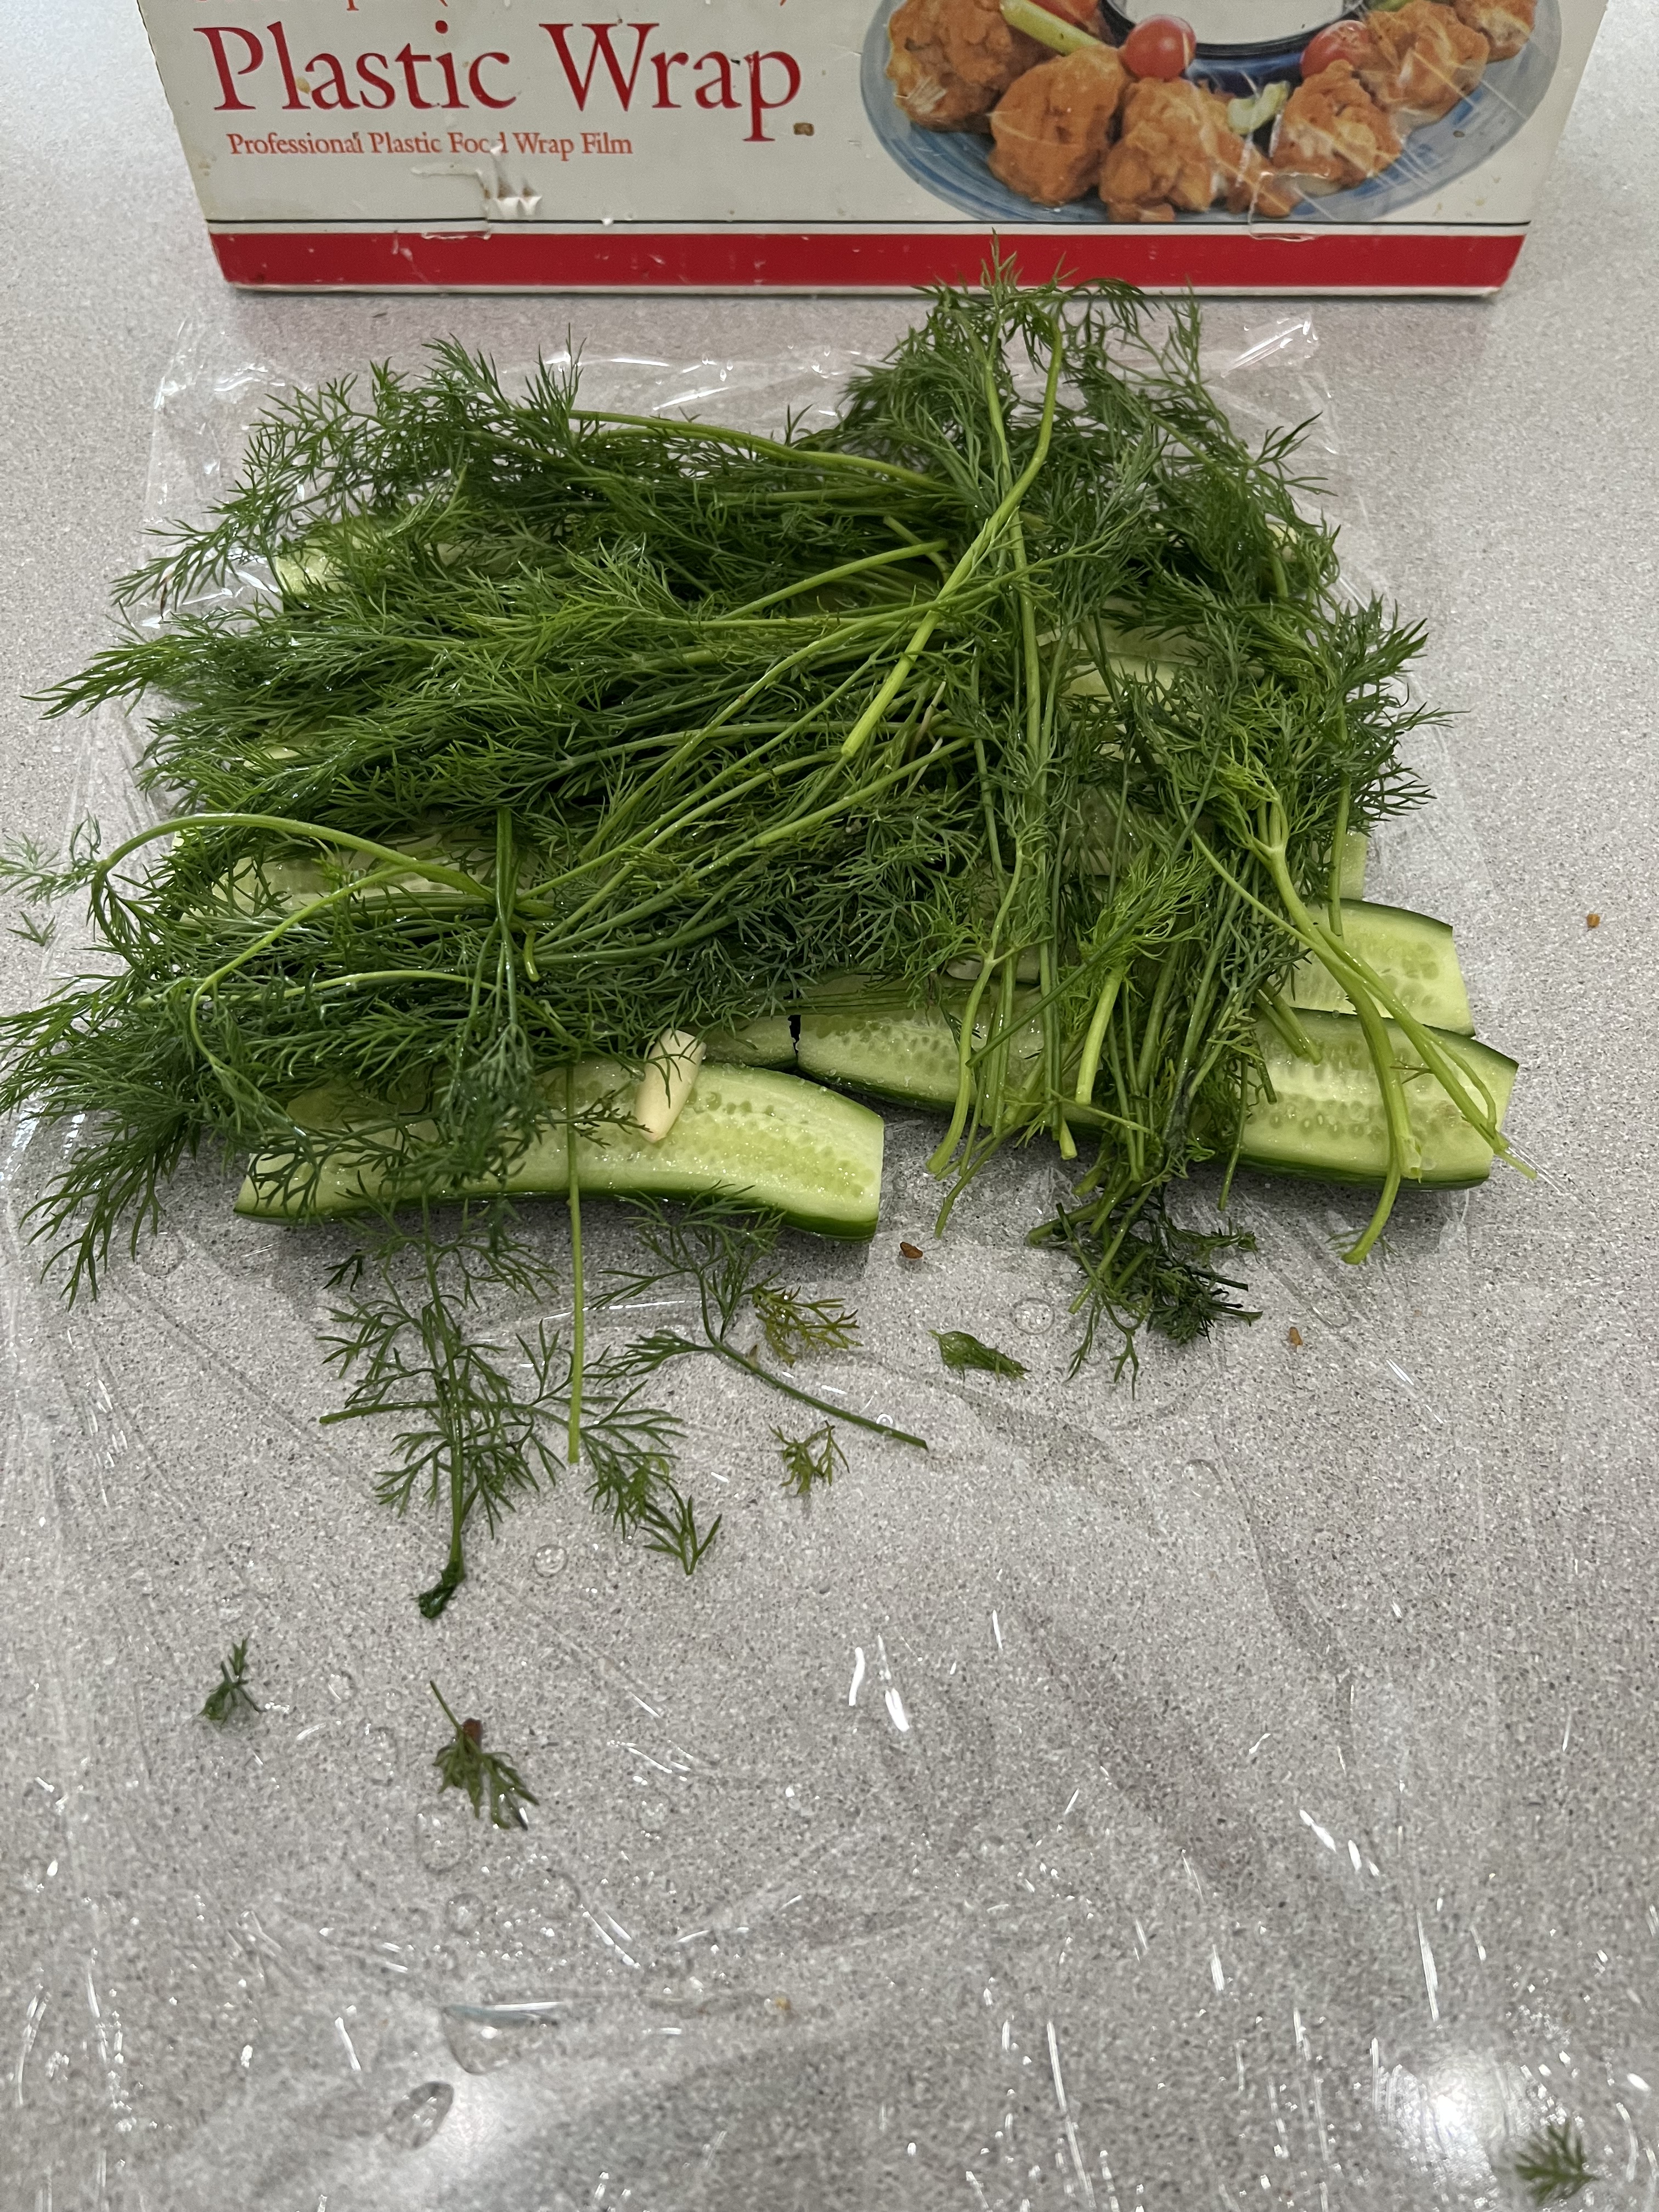
Cut the ends off the cucumbers and then slice them lengthwise, in half or in quarters. Lay them neatly next to each other in one layer in a container, or on a piece of plastic wrap, skin-side down. Sprinkle the salt over the cucumbers. Sprinkle some of the chopped garlic on top. Then, tear off some fresh dill and lay it to cover the pickles.
If using a container, you should be able to get a second row of pickles on top of the first, again sprinkling with the salt, garlic, and topping with dill.
Placing the lid on the container, squeeze out as much air out of the container as you can.
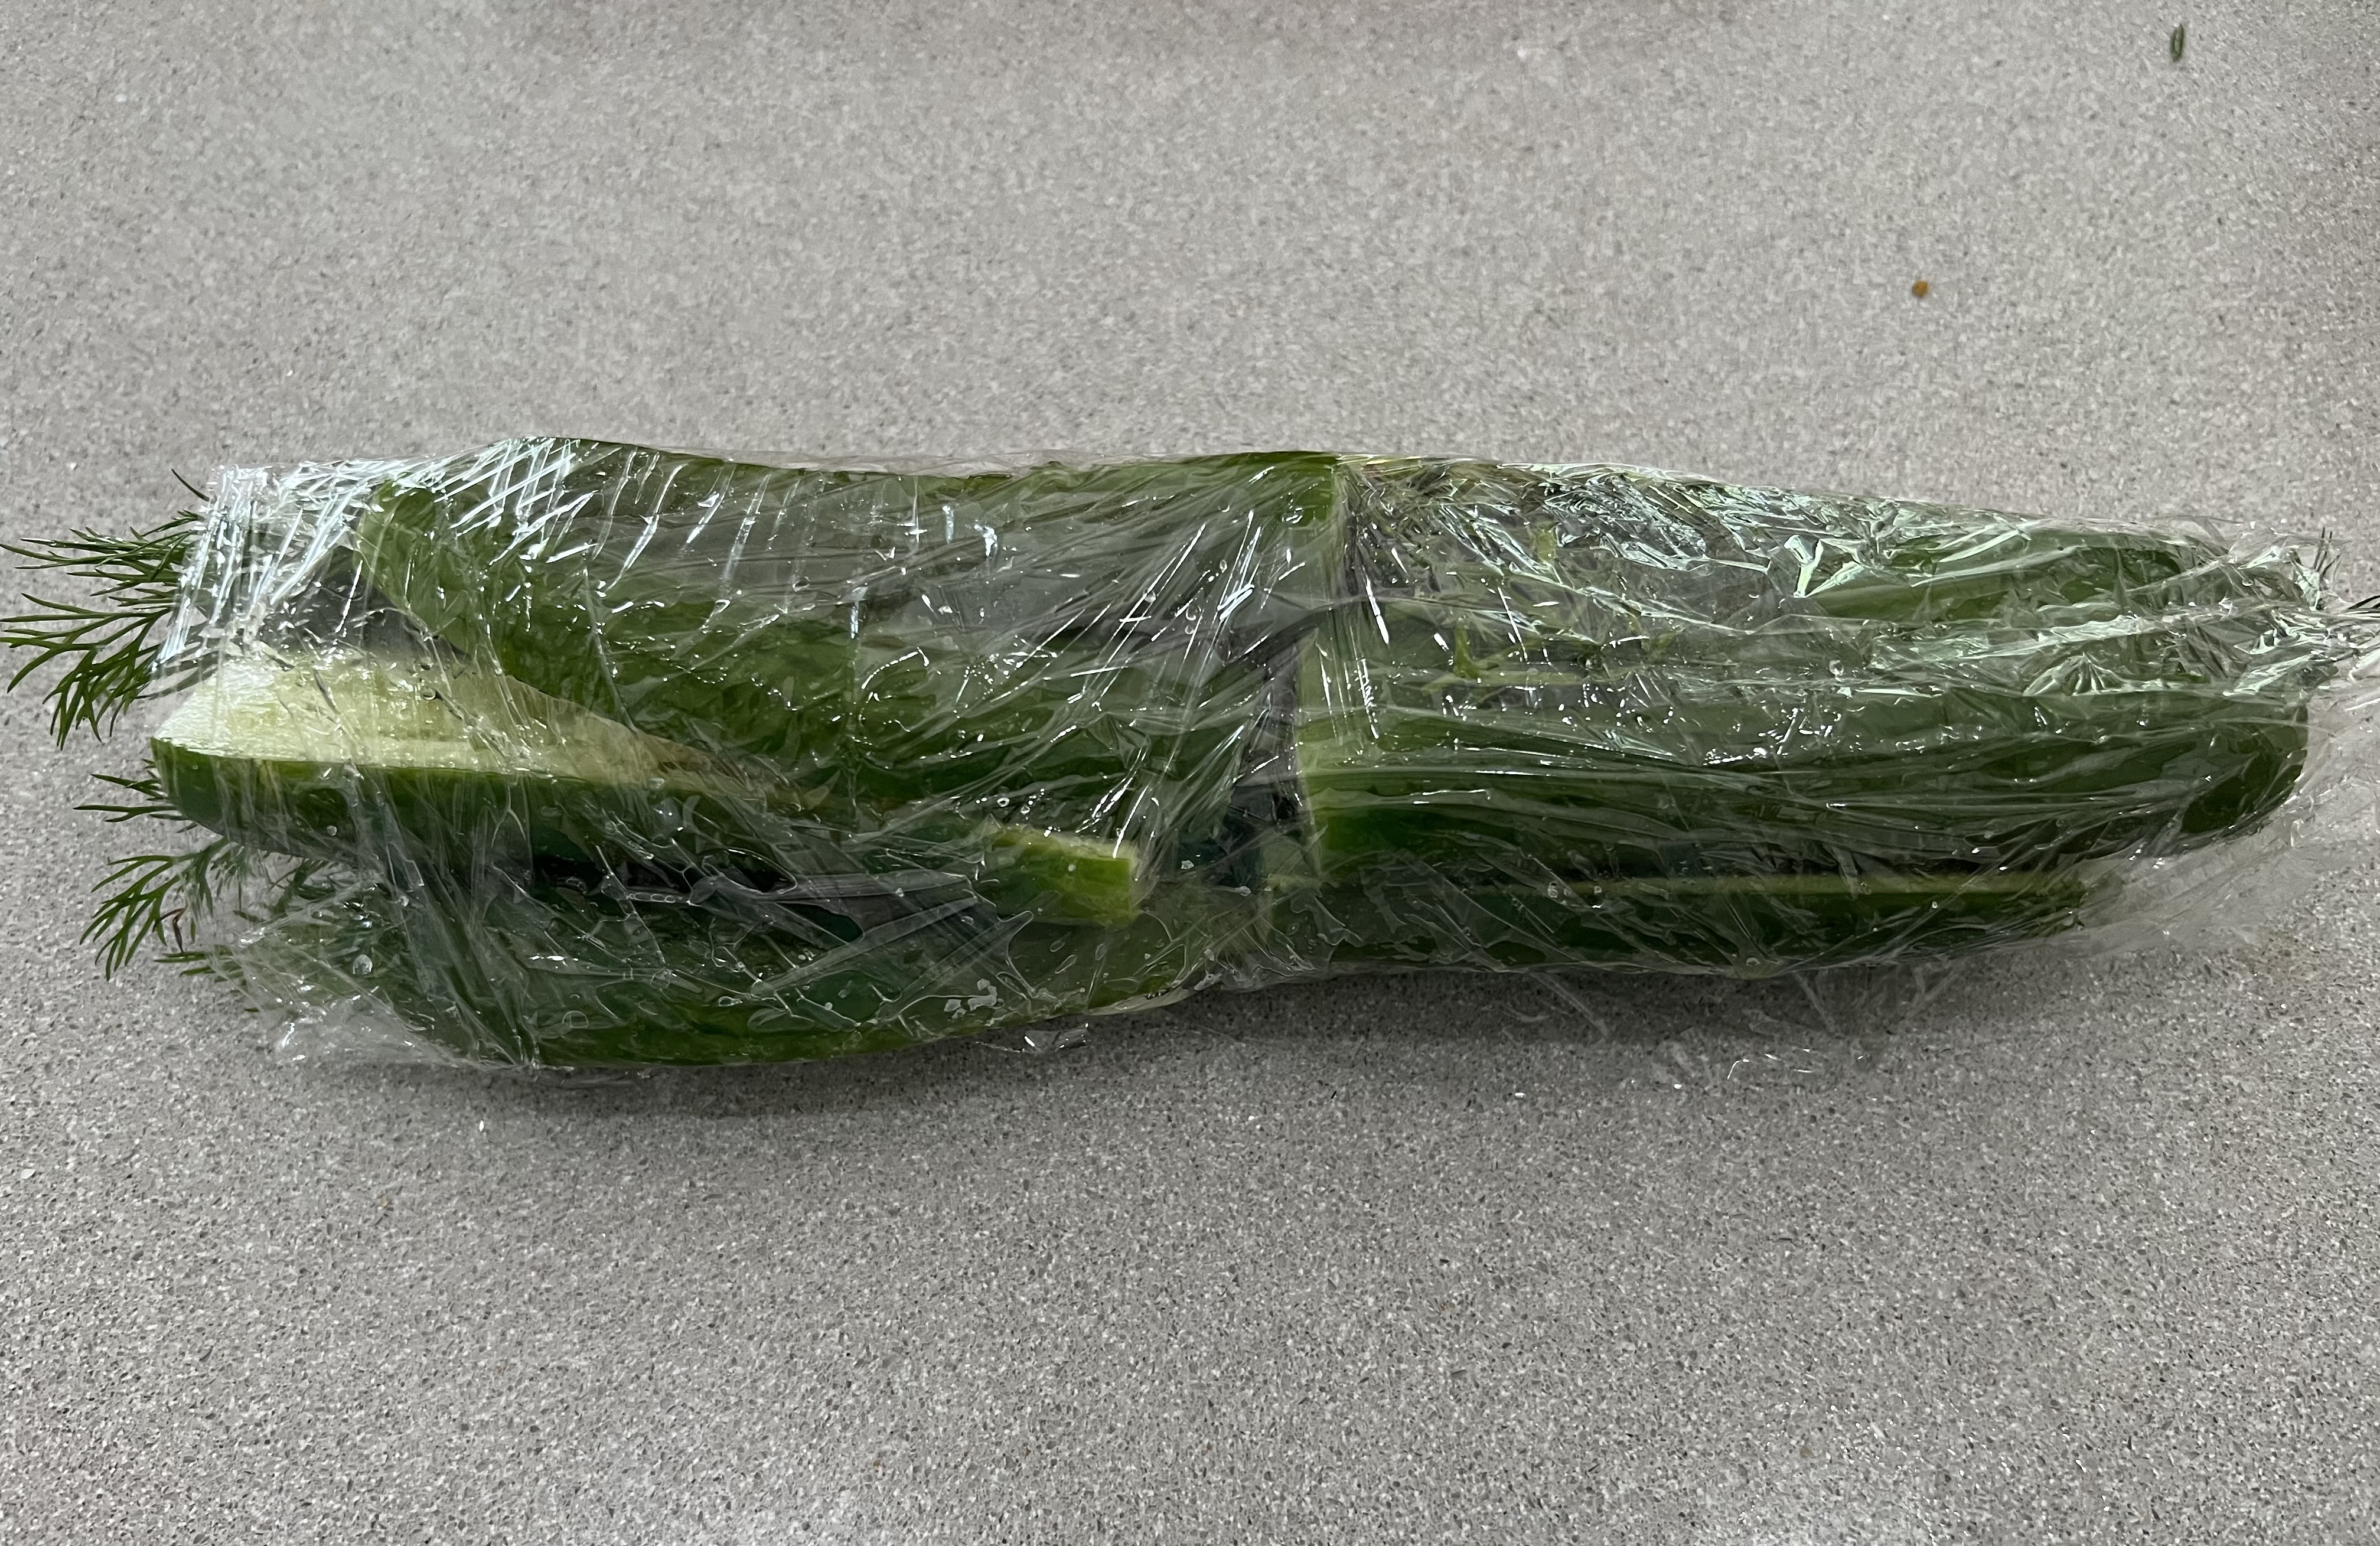
If using plastic wrap, roll it up tightly and place it inside a Ziploc bag, and seal it.
Put the container or bag in the fridge overnight. Making sure the lid is tightly sealed on the container, flip it over every few hours. (I always put a plate underneath it when it’s upside down in case it leaks a little.)
The plastic wrapped pickles don’t need to be flipped.
The pickles will be ready to eat the next day, but they’re even better after 48 hours.
I tried this one yesterday: pickles, sliced carrots, and even small onions in the same mix. Delicious!