Posts Tagged ‘food’

Remember when the only sugar substitute available was saccharin? Those pink packets of Sweet ‘n’ Low were on every diner table…your only choice other than sugar…and the sweet ingredient in the world’s first diet soda: TAB.
sweeteners
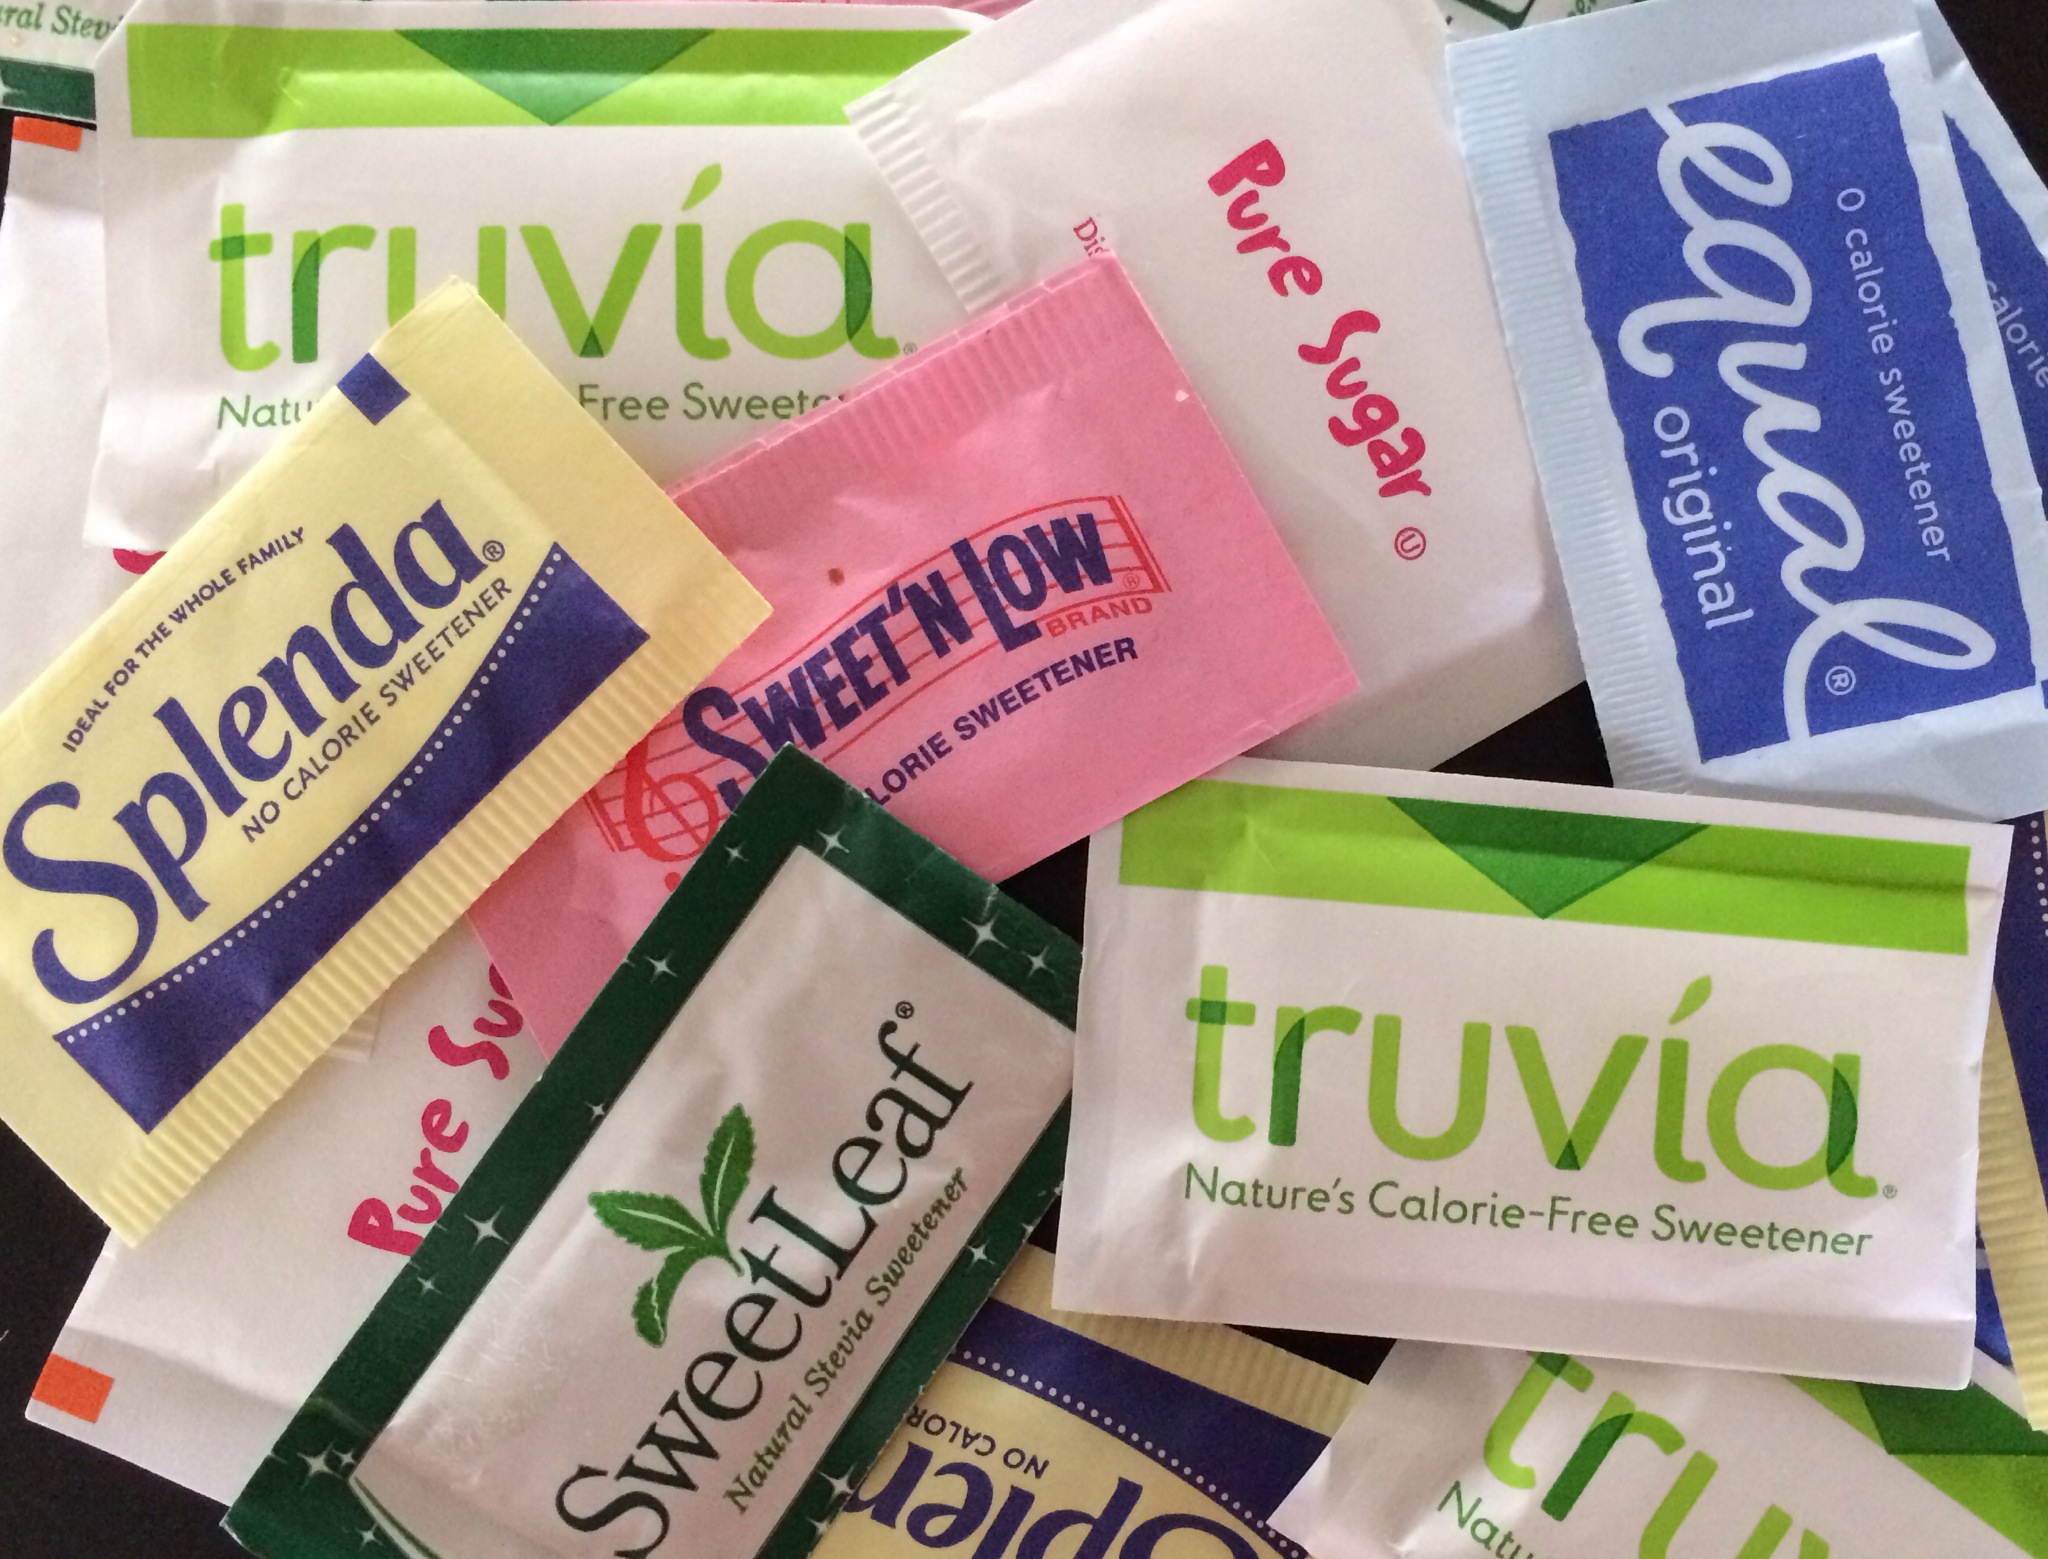
It was a long time before another sweetener came along, and in the beginning, we all thought Nutrasweet was the answer to our prayers. Sales of Nutrasweet skyrocketed, and one of the most interesting facts to come out of that time was that despite Nutrasweet’s amazing sales, sales of sugar remained steady. People were buying Nutrasweet to make things even sweeter, without the guilt of sugar! Equal is the brand name for Nutrasweet, the artificial sweetener that contains aspartame. Aspartame can cause seizures in some people, namely phenylketonurics, and they’re being told to avoid it. It also has an overly-sweet unnatural taste.
Enter Splenda,  the brand name for sucralose, in the yellow packets. Sucralose is a sugar alcohol. It does not affect your blood sugar and it has no calories. But sucralose is not a natural product: it’s a total guys-in-white-lab-coats creation. Almost no aftertaste, but now there are claims that Splenda alters and even kills important flora in your gut.
OK, so how about that cute little Stevia leaf? The sweetener in the Stevia leaf is natural, and marketing makes it seem like it’s the only ingredient in products like Truvia. But the fact is that the Stevia extract is extremely potent, so they use a very small amount of it.  So to “bulk it up,” they add erythritol, which is another sugar alcohol. The only good thing about this is that erythritol is indeed naturally occurring, so Truvia can rightly claim to be a “natural” sweetener.
Sweetleaf, besides being a song by Black Sabbathis another all-natural sweetener that combines the extract of the Stevia leaf with a soluble vegetable fiber called inulin. Sweetleaf has zero calories and does not affect blood sugar.
But the inulin left a real nasty aftertaste that had me throwing a boxful of packets into the trash after one sip.
 
Sugar itself is not evil, and most people who watch what they eat can probably use it. But if you’re diabetic…or if you guzzle sodas, juices, and sports drinks…and eat packaged and processed foods that have tons of hidden sugar (aka high fructose corn syrup)…a sugar substitute may be a good move.
 

Generally speaking, I’m not a fan of many gluten-free desserts or snacks. They claim to be healthy by avoiding wheat, but then compensate for the lack of flavor and texture by overloading with bad fats, salt and sugar. This brownie/cake combo is the exception. It’s full of great flavor, which make me happy, and is gluten-free thanks to ground hazelnuts, which makes my wife (on a GF diet) happy.

When buying hazelnuts, the most important thing to remember is that the nuts are raw and of the best quality you can find. No surprise: Amazon is a great source for that.

image

9 oz. ground hazelnuts
5 1/2 oz. (2/3 cup) sugar
4 oz. (1 stick) unsalted butter
4 eggs
1 oz. cocoa powder
1 tablespoon baking powder
A double-batch bakes a bundt pan perfectly. Make extra: it freezes well!

A double-batch bakes a bundt pan perfectly. Make extra: it freezes well!


Pour the hazelnuts into a food processor and grind them as fine as you can. It won’t be powdery, like flour, but like tiny particles. Dump them into a separate bowl.

Back in the food processor bowl, add the sugar and butter and pulse until combined.  Crack the eggs in a separate bowl, and add them slowly to the sugar and butter, pulsing to mix in between each addition.

Pour the ground hazelnuts into the mixture a little at a time, pulsing after each addition. Add the cocoa powder and baking powder, straining them through a sieve to keep out lumps, and pulse again. Scrape down the sides of the bowl and give it all one last mix.

Pour the batter into a buttered pan and cook at 350 for 30 minutes. Use a deeper pan so that the brownies don’t overflow as they rise while baking.


I grow several varieties of squash and pumpkins in my garden every year, so I’ve got an overload of blossoms. But it was only recently, after my daughter had a taste of fried squash blossoms at a favorite restaurant, Plum Point Bistro in Saunderstown, RI, did she start asking me to prepare them at home.

At the restaurant, we were served a savory version, the blossoms stuffed with ricotta cheese, lightly battered, fried and served with a delicious tomato sauce.

At home, we went for a sweeter version for breakfast, using gluten-free pancake mix as the base, experimenting with two fillings: raspberry preserves or strawberry cream cheese.

Because we need to keep things gluten-free in our home, I simply followed the directions on the box of pancake mix, using fat-free milk instead of whole milk and a little less of the dry ingredients to make the batter thinner than I would use for regular pancakes. I use King Arthur Gluten-Free Pancake Mix, which requires adding an egg and melted butter to make a smooth, slightly sweet batter. I set that aside and let it rest for a few minutes.

Next, it’s off to the garden to snip a handful of squash blossoms. I prefer the ones that are open. They’re easier to stuff, but it’s also easier to spot the little critters that like to make themselves comfortable inside. I carefully snip the blossoms off the plant, then give them a light shake, which is enough to convince the bugs inside to fly out. It’s pretty cool to find a happy bee inside every blossom that I snip.


Other than making sure all foreign particles (and insects) have been removed from the blossoms, no other preparation is needed. I snip the stems right up to the blossom, and they’re ready to be stuffed.


Blossoms stuffed with strawberry cream cheese and the fantastic raspberry preserves from Briermere Farms on the North Fork of Long Island!


I heat a few inches of olive oil in a pan, then start the process: I stuff the blossoms, closing the flower petals around the stuffing, then carefully dip them in the pancake batter, and release them gently into the oil, flipping them as they fry, until they’re golden in color.


I drain them on paper towels, dust them with powdered sugar, and they’re ready to be enjoyed.


I don’t have the patience to boil Mason jars and lids and all that crap. But I love me my pickles, especially when this year’s garden is cranking out cucumbers in record numbers!

This is such an easy way to make great pickles, it’s almost unbelievable…and no water is needed! The salt extracts just enough moisture, like when curing meat, to make it work. This method works great if you want fresh pickles to eat immediately, but you’ll need to use the old-fashioned pickling methods if you want to keep them for longer periods of time.

pickles


6 fresh cucumbers
1 1/2 teaspoons sea salt (I like Fleur de Sel)
handful of fresh dill
1 clove garlic, thinly sliced


Get a large plastic bag.  Add the salt, dill and garlic and gently mix everything in the bag.

Cut the ends off the cucumbers and then slice them lengthwise, in half or in quarters. Add them to the bag and gently mix again, trying not to crush or squeeze the cucumbers.

Roll the plastic bag tightly, squeezing the air out of the bag, then zip it and place it in the fridge overnight. The pickles will be ready to eat the next day, but they’re even better after 48 hours.


Summer’s in full swing, and let’s face it: you might be tired of grilling by now.

Don’t get me wrong…grilling makes food taste great, but sometimes you don’t want to stand out there in a cloud of smoke while your friends are at the table, sipping wine and having a good time without you.

This is a great dish for those that want to pass on the grill for a day. It’s a delicious salad that you can serve warm or cool. You can make it the day before. Wrap it in plastic, and keep it in the fridge. Then, when your guests arrive, let it warm to room temperature. Taste for seasoning before serving. If you’re not a fan of quinoa, brown basmati rice works well, too. And use what’s fresh and in season. If you can’t find asparagus, some chopped and lightly sautéed squash works just as well.

FullSizeRender (8)


1 1/3 cup dry quinoa (or 1 cup basmati rice)
Chicken stock
Juice of 1 lemon
2 lbs. wild-caught American shrimp, peeled and de-veined (16 to 18 count)
1 cup of asparagus stalks, cut into 1″ lengths
1/2 cup minced scallions, green part only
1 cup chopped fresh dill
1 cup chopped fresh flat-leaf parsley
1 English cucumber, peeled, seeded and medium-diced
1/4 cup red onion, small diced
1/2 cup seeded and chopped tomatoes
3/4 lb. good feta cheese, crumbled
Extra virgin olive oil
Salt and pepper


Prepare the quinoa according to the package directions, using chicken stock instead of water. Once it’s cooked, place it in a large bowl. (1 1/3 cups dry quinoa should give you about 3 cups of cooked quinoa.)

Place the chopped asparagus on a sheet pan, drizzle with olive oil, and sprinkle with salt and pepper. Toss them to combine and spread them out in a single layer. Roast them for just a few minutes at 350 degrees. Set them aside to cool to room temperature. (You can also simply saute the asparagus in a pan on the stove top with olive oil, salt and pepper.)

Place the shrimp on the same sheet pan, drizzle with olive oil, and sprinkle with salt and pepper. Toss them to combine and spread them out in a single layer. Roast for 5 to 6 minutes at 350 degrees, until the shrimp are cooked through. Turn them once while cooking. Don’t overcook them! (again…you can simply saute the shrimp in a pan on the stove top with olive, salt and pepper.)

Add the shrimp to the quinoa, then add the asparagus, lemon juice, scallions, dill, parsley, cucumber, onion, tomatoes, 2 teaspoons salt, and 1 teaspoon pepper. Add the feta and stir carefully. Set aside at room temperature for 1 hour to allow the flavors to blend…or, if you’re not serving soon, place the bowl in the fridge. Before serving, allow it to warm almost to room temperature. Taste it and season again, if needed, before serving.


I love me my onions! Raw, sautéed, caramelized, yellow, Spanish, Bermuda, Vidalia, Texas Sweets, scallion, pearl, Crimini, Walla Walla…they can do no wrong. In fact, my wife and daughter gave me the Lithuanian nickname: “Ponas Svogūnas.” (“Mr. Onion.”) I answer to it proudly.

I also love me my vodka martinis! So if I’m going to buy a top shelf vodka like Stoli Elit or Belvedere, I’m not going to ruin it with cheap vermouth, especially that nasty stuff they use to brine cocktail onions that come in a jar that’s been sitting on the liquor store shelf for about 10 years.

I looked at several do-it-yourself cocktail onion recipes, but I wasn’t inspired to try any of them until I found a package of already peeled pearl onions at Whole Foods one day. I have to be honest…I just won’t make them if I have to peel them.


Sure, these are much larger than the onions you find in a jar. But tell me how that’s a problem!


Once that time-saving ingredient was in my possession, I took my own recipe to make pickled asparagus and decided to try that with the onions. Awesome results!


1 lb. pearl onions, peeled
1 cup white vinegar
1/2 cup cider vinegar
1 1/2  cups water
3/4 cup sugar (I like turbinado cane sugar)
10 peppercorns
1 teaspoon salt (per quart-sized Mason jar)
2 cloves garlic


Combine the white vinegar, apple cider vinegar, water, sugar, and peppercorns in a medium-sized saucepan. Bring to a boil, making sure the sugar dissolves completely.

In a quart-sized Mason jar, add the teaspoon of salt and garlic cloves.


Pour a little of the hot vinegar liquid in the jar to dissolve the salt. Add the onions to the jar, then fill the jar to the top with the vinegar liquid.

Cover the jar tightly and turn it upside-down a couple of times to mix everything together.


Let the jar cool to room temperature, then move it to the fridge. You can eat the onions as soon as the craving hits you, but they taste better if you give them a few days.


We eat a ton of pesto at home, and I’m amazed at how much my 10-year-old daughter loves the stuff. Most of the time, it’s simply mixed with pasta. But we stir it into tomato sauce and smear it on grilled chicken or beef as well.

The herb garden, with basil in the foreground. Happy cucumbers are growing on the trellis in the background.

Basil is the main ingredient in my pesto, and it’s growing rapidly under the summer sun in my garden right now. And that’s key to great pesto: when Mother Nature says the basil’s ready, be sure you have all the other ingredients and get to work!

Basil, ready to be picked.

Besides that it tastes old, the problem with store-bought pesto is that it’s expensive. Although homemade pesto isn’t cheap, you can still save a lot of money by making it yourself.
Some of my tips for saving money: buy good quality ingredients in bulk. My go-to olive oil is California Olive Ranch Extra Virgin Olive Oil. It gets high ratings, tastes amazing, and can be found in those large cans at most supermarkets and in quantity on Amazon.
There’s been a rash of articles about already-grated parmesan cheese that is 50% wood fiber. Stay away from that junk and buy yourself a nice chunk of the real deal: Parmigiano-Reggiano. (Mario Batali calls it the “undisputed king of cheeses.”) Grate it yourself and taste the difference!
The most expensive (and questionable) ingredient in basic pesto is pine nuts. If you look on the back of the package (and you always should!) you’ll see that most pine nuts come from China. I don’t buy any food products from China…period. So sourcing “safe” pine nuts can be difficult. Again, Amazon can be a help with that.
One of the reasons you want real pine nuts and not some look-alike from China is something called “pine mouth” or “pine nut mouth.” A small percentage of people experience a reaction after eating pine nuts that makes their mouth taste like metal–imagine putting a handful of pennies in your mouth–and the taste stays in their mouths for a couple of weeks, ruining their taste buds for the foods they love. (Eventually, it wears off.) Some scientists say you get “pine mouth” by eating counterfeit pine nuts–varieties like those from China that are not the same species. Others say that you can get the reaction even from real pine nuts. Research on this continues, but all the more reason not to buy any foods from China and other questionable countries.
There are alternatives to pine nuts, and you’ll find many pesto recipes that substitute with almonds, pistachios or walnuts. I think those nuts change the taste of the pesto, plus they have a skin that leaves a gritty residue, which I don’t like. So I don’t use them. The one nut that I’ve found that does a pretty good job filling in for pine nuts is macadamia nuts. They are less expensive and usually come from Hawaii. Just remember to buy raw, unsalted macadamias.
So here’s my sure-fire pesto recipe. I make massive amounts of it, store it in plastic storage containers with a tightly sealing screw-top lid, and put them in the deep freeze. They last all year, and thaw out easily.
2 cups fresh basil, packed down a little
1 cup grated Parmesan cheese (preferably Parmigiano-Reggiano)
1/2 cup pine nuts (or raw, unsalted macadamia nuts)
1 cup extra virgin olive oil
1 garlic clove, crushed
1 teaspoon salt
Put all the ingredients in a food processor and let it rip!
 

KOHL-SLAW

Posted: July 5, 2017 in Food, garden, Recipes
Tags: , , , , ,

Kohlrabi is probably one of the most misunderstood vegetables around. Most people don’t know what to do with them. Kohlrabi is a member of the cabbage family and can be eaten raw as well as cooked.

For me, the real joy of kohlrabi is biting into a crunchy, sweet, freshly picked and peeled bulb right out of the garden. Unfortunately, much of the kohlrabi you find in a supermarket (or even a farm stand) is grown larger than a tennis ball, making it tough, woody and dry…and they usually remove all the leaves, which are delicious.

The kohlrabi harvest has begun in my home garden, and I make a slaw with the leaves and the bulb. I use my Awesomesauce recipe as the dressing.

FullSizeRender (10)


2 kohlrabi bulbs with leaves, de-stemmed
1 carrot, peeled
Awesomesauce:
1/2 cup mayonnaise
1 tablespoon ketchup
1 tablespoon yellow mustard
1 tablespoon dill pickle relish
1/4 teaspoon garlic powder
1/4 teaspoon paprika
Pinch cayenne pepper

Combine the Awesomesauce ingredients in a bowl and keep it in the fridge.

Wash the veggies thoroughly before using. Pull the leaves off the kohlrabi bulb, and remove the stems. Grab a bunch of leaves at a time, roll them up tightly, and slice as thinly as you can into thin ribbons. Place in a bowl. Do this with all the leaves.

Peel the thick skin off the kohlrabi bulb and slice it as thinly as you can. Then take the slices and cut thin sticks out of them. Toss into the bowl.

I like to peel the carrot with a veggie peeler, then finely chop the slices. Toss into the bowl.

Add Awesomesauce to taste and toss well.

FullSizeRender (9)

Cover and refrigerate, letting the flavors blend for a couple of hours before serving.

I love the flavors in Thai food…but I don’t enjoy extreme heat and my wife needs to avoid garlic and gluten. So this is my more balanced version of a Thai grilled chicken dish that is a real tasty change of pace from the standard grilled chicken at cookouts. This recipe also works in the oven.

thai chicken LTL


3 lbs. pastured or organic chicken pieces (I used drumsticks for this recipe)
2/3 cup soy sauce (I use La Choy soy sauce to keep things gluten-free)
1/2 cup fresh cilantro
2 tablespoons canola or peanut oil
2 garlic cloves, roughly chopped
1/2 teaspoon white pepper
1/2 cup sugar
1/4 cup white vinegar
1 teaspoon red pepper flakes or crushed dried chiles
1 teaspoon salt

For the marinade, combine the soy sauce, cilantro, canola oil, granulated garlic and white pepper in a food processor and let it run. Place the chicken pieces in a Ziploc bag and pour half of the marinade in. Save the other half for basting later. Seal the bag and let the chicken marinate in the fridge overnight, or at room temperature for a few hours, squishing the bag around so that all the chicken gets marinated.

For the sauce, combine the sugar, white vinegar, pepper flakes and salt in a saucepan. Bring it to a boil and make sure the sugar dissolves. Remove it from the heat and let it cool to room temperature.

After marinating overnight, discard the used marinade in the Ziploc bag. Place chicken pieces over a hot hardwood fire or bake them in an oven at 350, basting them with the leftover marinade until fully cooked. If the coal fire gets too hot, move the chicken to a cooler part of the grill to prevent burning. If using the oven, switch to the broiler at the end to give the chicken a nice char.

Serve the chicken with the sweet pepper sauce drizzled on top.

The first unusual thing you notice about the classic dish, New Orleans Barbecue Shrimp, is that it’s not cooked on a barbecue grill and it has no barbecue sauce.

So why the name?

Its origin goes back to the mid-1950’s, to an Italian restaurant in New Orleans called Pascale’s Manale. (It’s still there. http://www.pascalsmanale.com) A regular customer had just returned from Chicago, where he had dined on an amazing shrimp dish. He asked the chef at Pascale’s Manale to try to replicate it, and what resulted was actually better than the original. And though no barbecue grill or sauce was used, it is believed that they gave it the name “BBQ Shrimp” to cash in on the backyard barbecuing craze that was all the rage at the time.

The classic New Orleans Barbecue Shrimp is served with shell-on shrimp, so you have to make a big, buttery mess of yourself as you devour it. And it’s served with plenty of crusty French bread.

Unfortunately, with a gluten-free household, I have to skip the bread. So I make rice on the side, and instead of leaving the shell on the shrimp, I peel and de-vein them, using the shrimp shells to make a stock I cook the rice in.

image

For the seasoning…
1 1/2 teaspoons salt
1 1/2 teaspoons fresh ground black pepper
1 teaspoon fresh rosemary, very finely chopped
1/4 teaspoon oregano
1/4 teaspoon granulated garlic
1/4 teaspoon granulated onion
1/4 teaspoon paprika
1/4 teaspoon dried thyme
1/8 teaspoon cayenne pepper
1/8 teaspoon white pepper


Mix all the seasoning spices and set aside.

image

For the BBQ shrimp…
2 lbs. large wild-caught American shrimp, peeled and de-veined
1 stick butter (4 oz.)
1/2 cup beer
1/4 cup Worcestershire sauce
olive oil


For the rice…
1 cup rice (I like organic basmati)
2 1/4 cups water or seafood stock (see below)
1 teaspoon olive oil
1/2 teaspoon Tony Chachere’s Original Creole Seasoning

image

Cook the rice following the directions on the package. I like using stock instead of water when I cook my rice, so after peeling all the shrimp, I toss the shells in a saucepan full of water and I boil the heck out of it, strain it, and use that stock to cook the rice. I add the olive oil and the Tony Chachere’s (available online or at your favorite food store) to the stock before cooking.


To cook the shrimp, I heat a little olive oil in a large skillet over moderate heat. Then I add the shrimp, and sear them on one side (about 30 seconds) and then flip them over to sear on the other side (another 30 seconds.) I’m not trying to cook them all the way through, just get them a bit caramelized. Then I remove the shrimp from the skillet and set them aside.

(I serve the BBQ Shrimp over the rice with broccoli. If you want to use broccoli, add a little butter and olive oil to the same pan you seared the shrimp in. Cook until the broccoli is nicely caramelized, then remove from the pan and set aside.)

In the same skillet, I heat the butter until the foam subsides. Then I add the beer, Worcestershire sauce, and 2 teaspoons of the seasoning mix. I mix well, then add the shrimp and broccoli back in the pan, simmering for about 5 minutes, stirring occasionally.