Greek cuisine is some of the most delicious food I’ve ever eaten. It rivals Italian and French cuisine, yet has nowhere near the fan base. It’s the same with Greek spirits. The island of Santorini offers many wonderful choices, and it would be a sin not to taste them all!

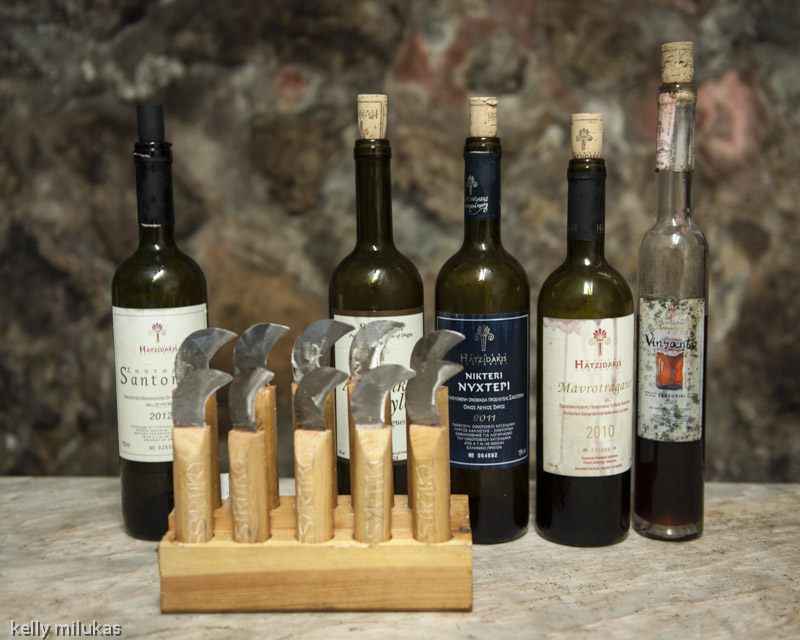
The island of Santorini is magical. But just as wonderful as the white buildings stacked on the cliffsides of this island are the people, and the native food and drink they offer. One such place is the Hatzidakis winery in the town of Pirgos.

They don’t have a fancy tasting room. They don’t do tours. They don’t have an amazing view of the water or the island. They don’t even hold regular visiting hours. They simply have the best wine on the island.

And that’s exactly why you need to go. Haridimos “George” Hatzidakis is all about his grapes. Ask anyone on Santorini what the best wine is, and you will get “Hatzidakis” as the answer every time.

Sure, there are huge wineries with tasting rooms that overlook the water. That’s where the tour buses take the cattle that arrive in Fira on cruise ships. Why would you want to hang with them?
Hatzidakis wine is about the soil, the grapes, the climate. It’s also about the passion of the handful people who work hard to make it.

You can’t find Hatzidakis in the United states (unless you look in my wine cellar, because we bring home as much as we can!!) Much of it is scooped up and exported to France…and much to our happy surprise, we’ve had a bottle of the Hatzidakis Assyrtyko in Paris at Le Baratin.

But for the most part, you’ll have to go to Santorini to experience the magic of this incredible wine. And that’s not a bad thing. Because the wine is much like the people of Santorini: beautiful and worth every bit of travel hassles to get there.
Aside from wine in Santorini, our most recent visit a few years ago introduced us to a local drink called Raki. Kind of like grappa on steroids, it’s the national drink of Turkey, popular here as well, and often served as a digestif before dinner. It’s a drink that can definitely get you in trouble.

Also new (to us) in Santorini was Red Donkey, a locally brewed beer. It was a welcome treat on those very hot and dry summer days on this beautiful island. Unfiltered and delicious.

As for local foods, nothing is better than a salad featuring the sharp tang of Santorini tomatoes. Much like the grapes of this island, the tomatoes grow in volcanic soil. Rain is scarce, and so the tomatoes, like the grapes, stay small but intense, bursting with flavor.


Capers and caper berries, stuffed into empty plastic water bottles, are sold on the side of the road by local farmers.

Perhaps the most unlikely food item we have to bring home from Santorini is what they call “fava,” but it’s not the bean we usually associate with that name. Originally, broad beans were used in this dish, but quickly it changed to a type of yellow shelled lentil that is much smaller and flavorful than its American counterpart. The lentil is smaller and the art of turning this simple gem into a sublime porridge is worth learning.
As common in Santorini as pasta is in Italy, grains of fava have been found in archaeological sites in the ancient city of Akrotiri (on the southern side of Santorini) dating as far back as 3500 years ago. Every taverna on the island offers their own version of fava, and though the differences are subtle, they can be significant.

Proud of his fava.
Most recipes start with the dried lentils, which are washed thoroughly. They are added to a pot of fresh water and then boiled until the water reduces and the lentils slowly absorb the liquid and soften into a porridge. Often chopped onion is added to the pot of water in the very beginning, so that it completely dissolves and flavors the fava. Some recipes call for a subtle mixture of local dried herbs, similar to oregano and thyme, to be wrapped in cheesecloth and added to the pot to infuse flavor.
Like making a great Italian tomato sauce, cooking fava is a labor love. It requires low heat and constant stirring to make it perfectly smooth. Often it is pureed in a blender at the end.
When the fava is ready to serve, the toppings can vary. Thin slices of red onion and a liberal drizzle of Greek olive oil are common. Sometimes it is topped with locally harvested and brined caper berries or caper berry leaves, or a few kalamata olives.
On our recent trip to Santorini, our most memorable fava dishes were a simple, rustic version with onion, capers, olive oil and a side of lemon at Dimitris in Amoudi, and a light-as-a-cloud creamy fava topped with caper berry leaves and olive oil at Roka in Oia.

The fava at Dimitri’s, on the water in Ammoudi.
We bought our fava from several people, including this beautiful ageless woman, who remembered us from our previous visit.
I have no doubt that she’ll still be here on this magical island on our next visit as well!