Archive for the ‘frying’ Category

It’s National Bacon Day!

Let’s face it: there are few foods as magical as bacon. Add bacon to just about any dish you’re preparing, and it elevates it to incredible new heights of flavor. The BLT is possibly the greatest food combination ever invented: just a few simple, fresh ingredients, when placed together, transforming into one of the greatest sandwiches on planet Earth.

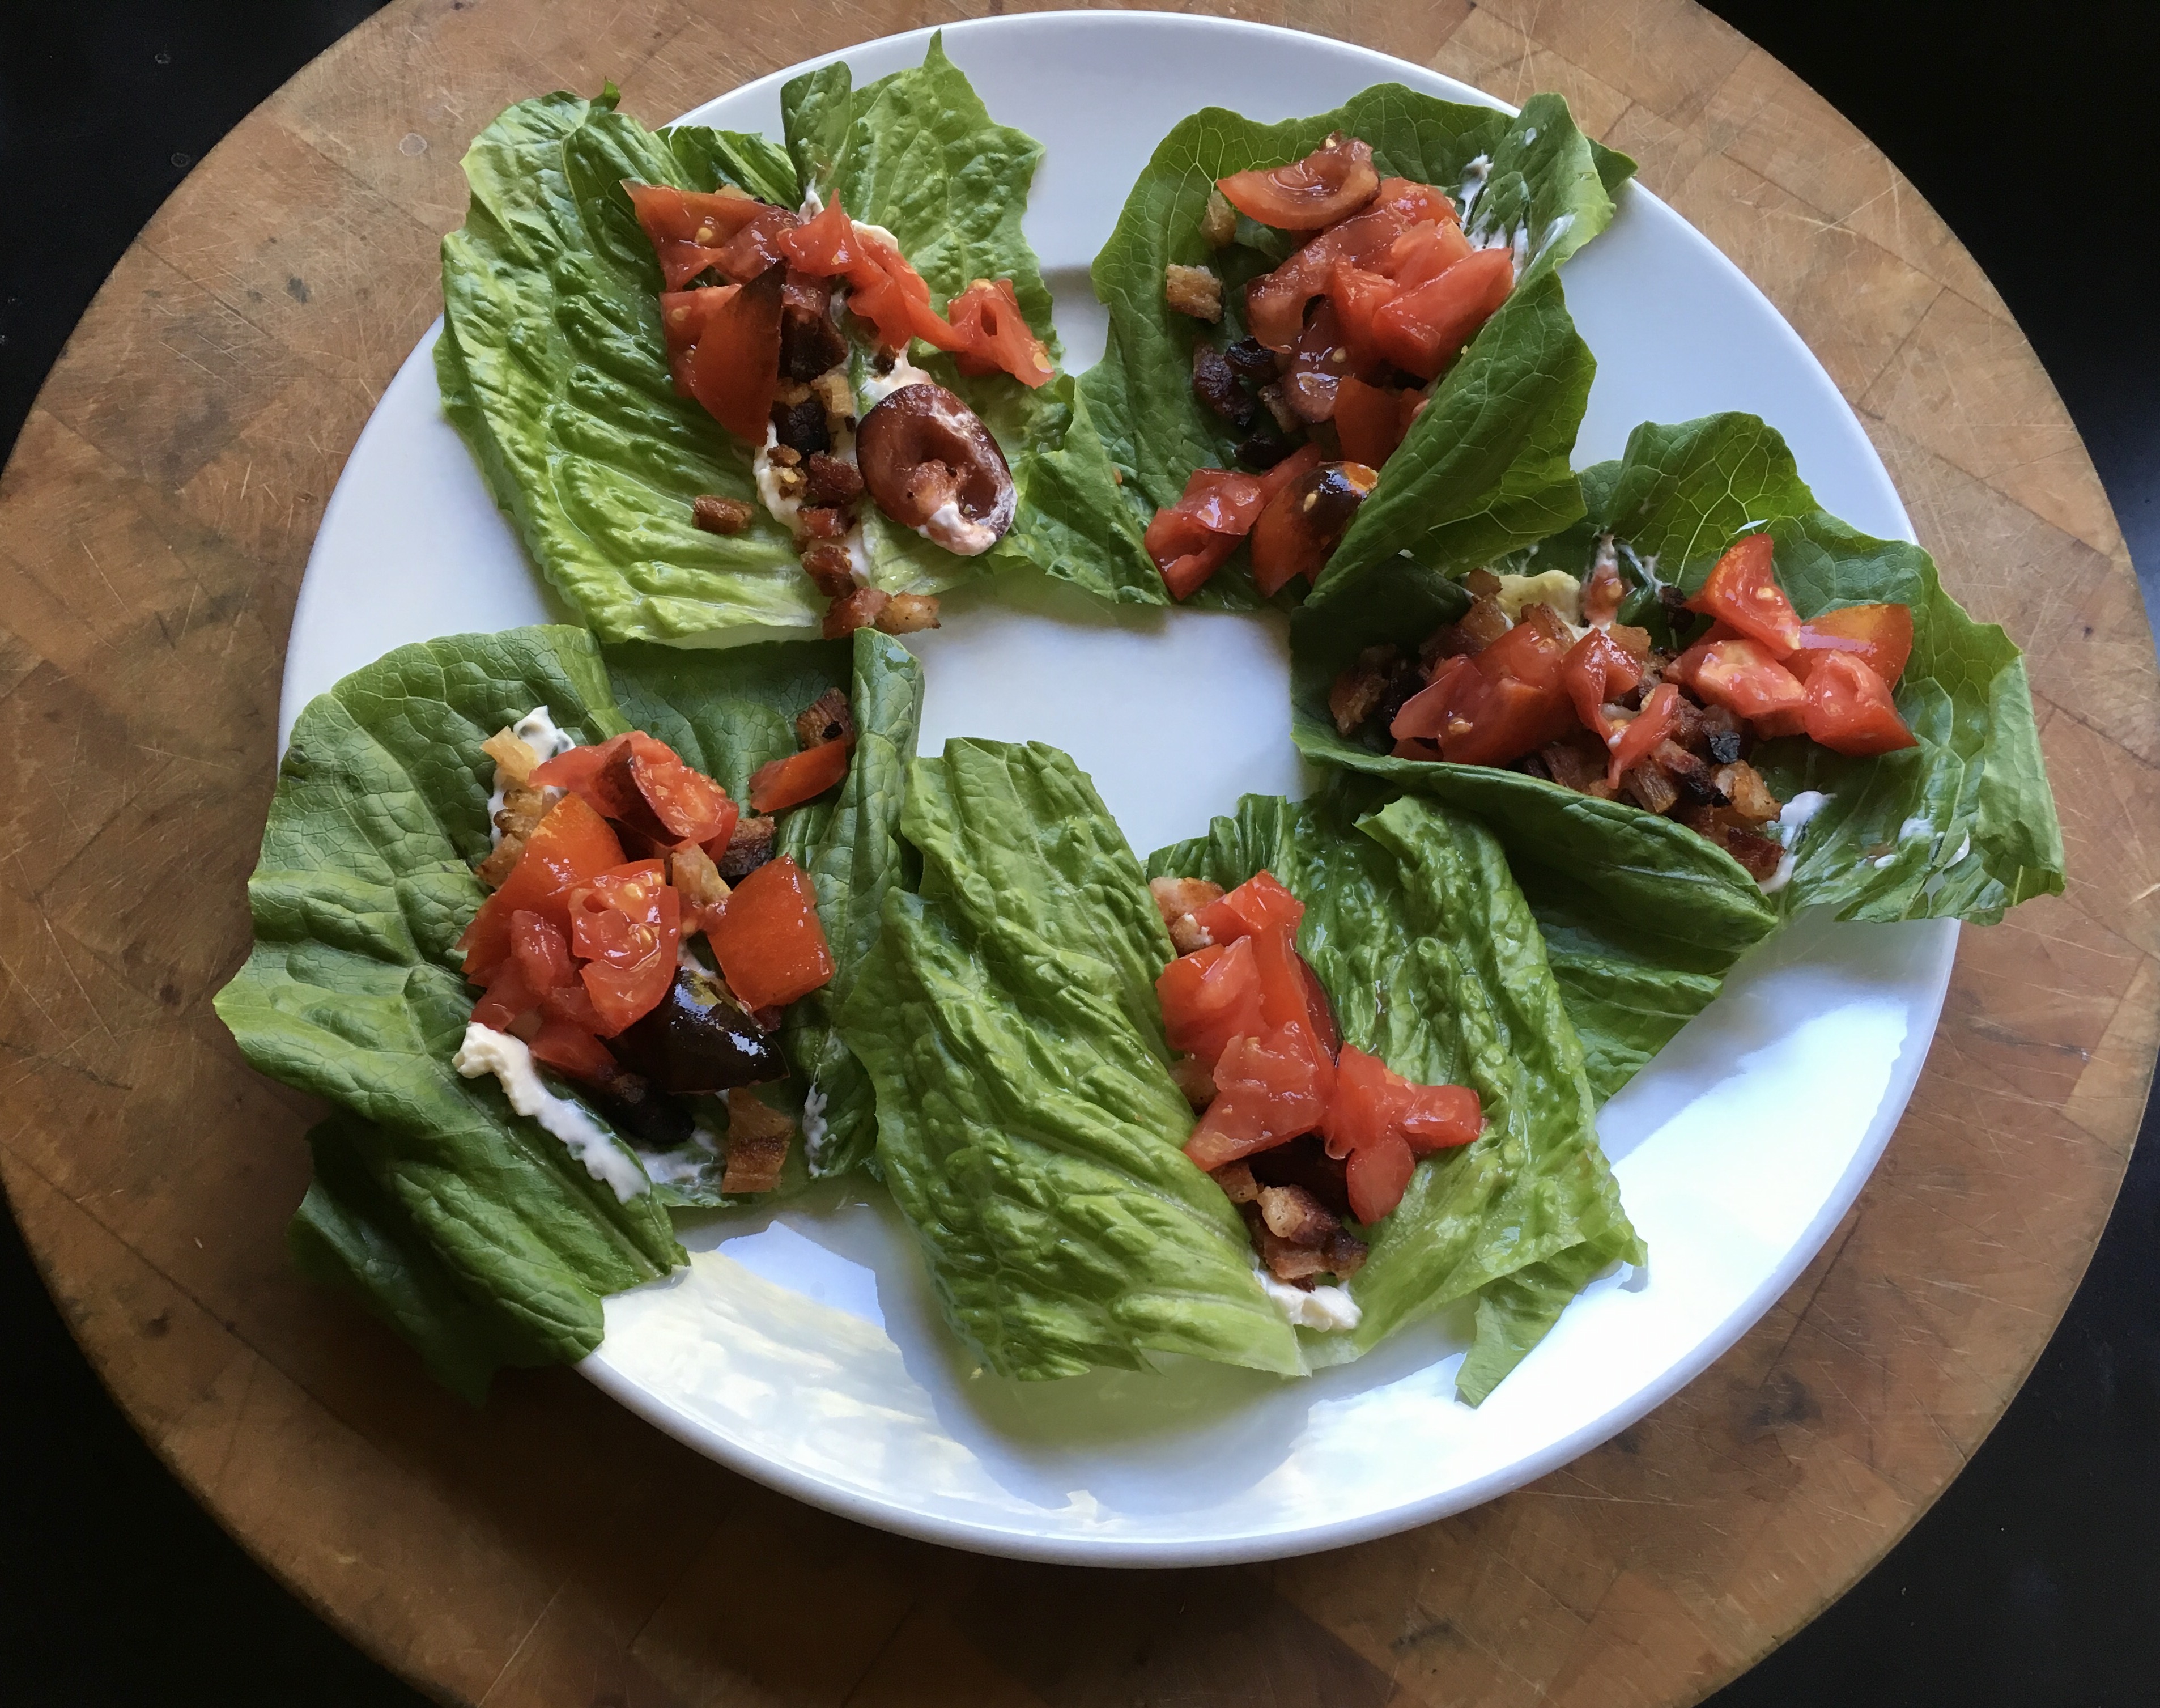
BLT wraps: home-cured and smoked bacon, local farmstead romaine, home garden tomatoes, always Hellman’s mayo.

If I’m buying bacon, I go on-line to Burger’s Smokehouse, a family run business in Missouri that has made great bacon for decades. The prices are good, and they include shipping. (www.smokehouse.com) I buy in quantity and freeze what I don’t need right away. My favorite is the thick-sliced country bacon “steaks.”

But nothings beats making your own.

Bacon comes from the pork belly, and they’re easy to find in any good butcher shop. But to get something a notch above, I’ll buy a heritage breed, like Berkshire pork, from Heritage Pork International. (www.heritagepork.com)  I follow the simple curing techniques outlined in “Charcuterie,” a great book written by Michael Ruhlman and Brian Polcyn.

To cure bacon, all you really need is salt and sugar, and what they in the curing biz call “pink salt,” which is not to be confused with salt that happens to be pink, like Himalayan salt you would find in a gourmet store. Pink salt is bright pink to let you know that it’s a special salt that should only be used in small quantities for curing. The reason is: nitrites. Nitrites delay the spoilage of the meat, and help keep the flavors of spices and smoke. They also keep the meat nice and pink instead of an unappetizing gray. That’s good. However, nitrites can break down into nitrosamines, which have been known to cause cancer in lab animals. But let’s face it: you would need to eat a ton of cured meat to really worry about this. (I buy uncured deli meats and hot dogs at the supermarket, because processed meats are a different story. But since I know exactly what goes into my own bacon, I’m not worried about the level of nitrites.)

To make the basic dry cure:

1/2 lb. kosher salt (I use Diamond Crystal Kosher salt)
1/2 cup light brown sugar or turbinado sugar
1 oz. pink curing salt

Mix the ingredients well. An important note: all salts do not all weigh the same, so go by the weight and not a cup measurement. (Morton’s Kosher salt, for example, is heavier than Diamond Crystal.) I keep this basic dry cure stored in my pantry, ready to use when I need it.

When it’s time to be makin’ the bacon, I combine this dry cure with other ingredients to make my bacon rub.

My bacon rub:

1/2 cup basic dry cure
1/2 cup brown sugar or turbinado sugar
1 tablespoon fresh cracked black pepper
1 tablespoon granulated garlic
1 tablespoon granulated onion

Mix these ingredients well (yes, there’s quite a bit of sugar there, but I like my bacon a little sweet!) Rub it generously all over the pork belly.

I have a large plastic container with a lid that fits one slab of pork belly perfectly. I place the belly inside it, put the lid on, and place the container in the fridge. The pork belly stays there for at least a couple of weeks, maybe three. I flip the belly every few days. You’ll see that the salt will draw moisture out of the meat and form a gooey brine. This brine will continue to cure your pork belly, so leave it in there. Just flip it, put the lid back on the container, and back in the fridge.

In two or three weeks, you’ll be able to tell the pork belly has cured because it feels firm. Wash the brine off the meat well with cold water, and pat it dry with paper towels. Place the belly in the fridge for an hour or so and it will develop a tackiness to the touch. This is a thin layer of proteins known as a pelicle, and it helps the smoke stick to the meat.

Now it’s time to cook. You can simply cook the pork belly (without smoking it) at 200 degrees for about 2 hours, until the internal temperature reaches 160 degrees. But this isn’t bacon…it’s pancetta.

I place the pork belly in my digital smoker, which allows me to set an exact temperature. I smoke it at 250 degrees for 2 hours, using hickory chips. Now it’s bacon.

Bellies in the smoker

Bellies in the smoker.

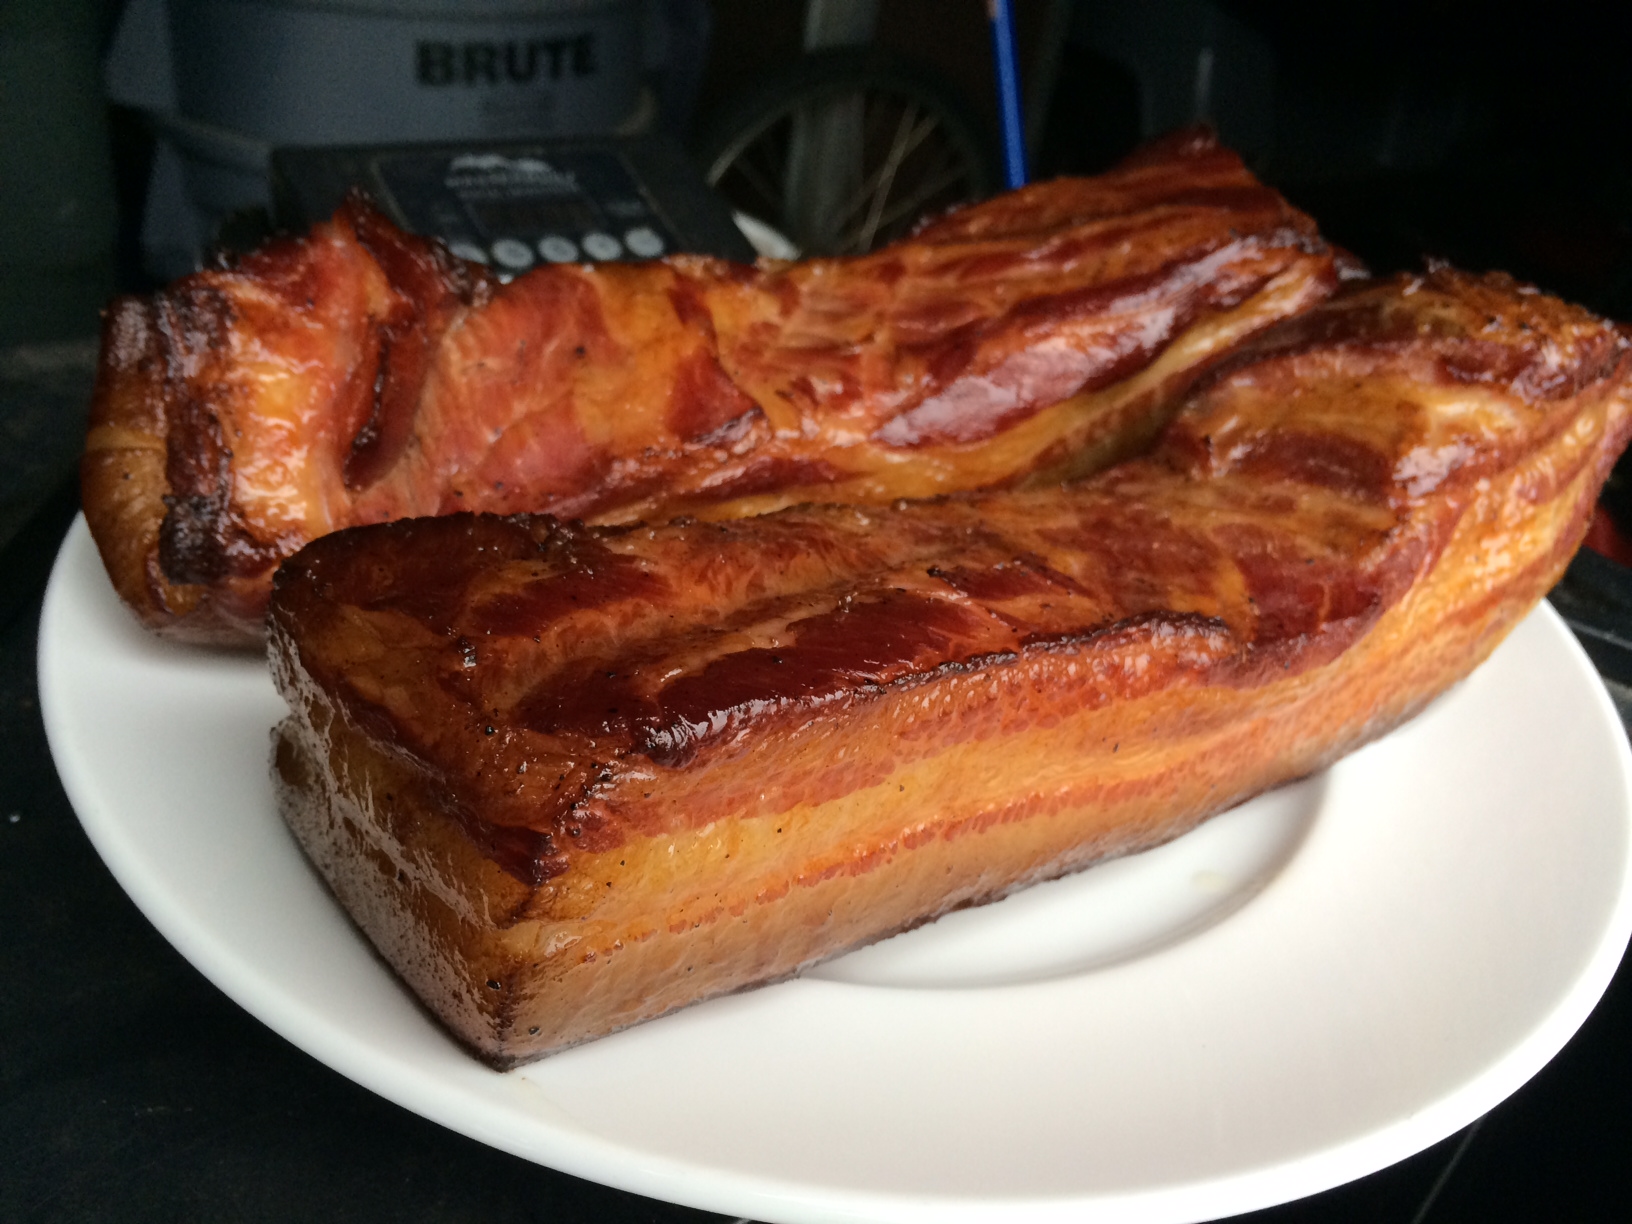
Smoked bacon

Beautiful bacon!

That’s it. You have achieved bacon!

The reward is so worth the effort. Just remember that you still need to slice the bacon and fry it. Don’t eat it straight out of the smoker. That first slice you cut off your bacon and toss in a pan to lightly fry for a few moments will be the best bite you’ve ever had in your life!
And if you’re making one slab of bacon, why not make it three or four? It freezes well. And…you will eat it. You know you will!

Frying in the pan!

Frying in the pan!

Good news if you’re on a gluten-free diet. These fritters can be made GF! And they’re delicious.

I have both recipes–gluten-free and the original–below!

They key ingredient in making a good fritter batter is beer. But until recently, there weren’t many gluten-free beers to choose from…and the ones that were out there tasted like crap. All that has changed.

Now you can pretty much find a gluten-free craft beer in every state, and there are several regional gluten-free beers as well. Easy enough to find: just go to a good beer store and ask. They almost always carry a couple of brands.

Gluten-free beers can be divided into 2 types: truly gluten-free: brewed with gluten-free ingredients and safe for Celiacs to drink…and gluten-reduced: beers that are brewed with ingredients containing gluten, then had an enzyme added to reduce  the gluten. These are fine for those that have an intolerance to gluten, but are not Celiac. Read the labels!


The beer that I used for my recipe is a beer that they say  is “crafted to remove gluten,” meaning there’s still a small amount left in there.

Ultimately, if gluten is not an issue for you, follow the recipe at the bottom of this page. It’s my original, and not only uses a tasty lager full of gluten, but also a special fritter flour, which can be found in many stores.

However, if you have to “live the gluten-free live,” and you’ve told yourself you can never have another fritter, I have good news for you: you can…and they’re delicious! This is a large batch, so feel free to reduce it if needed.


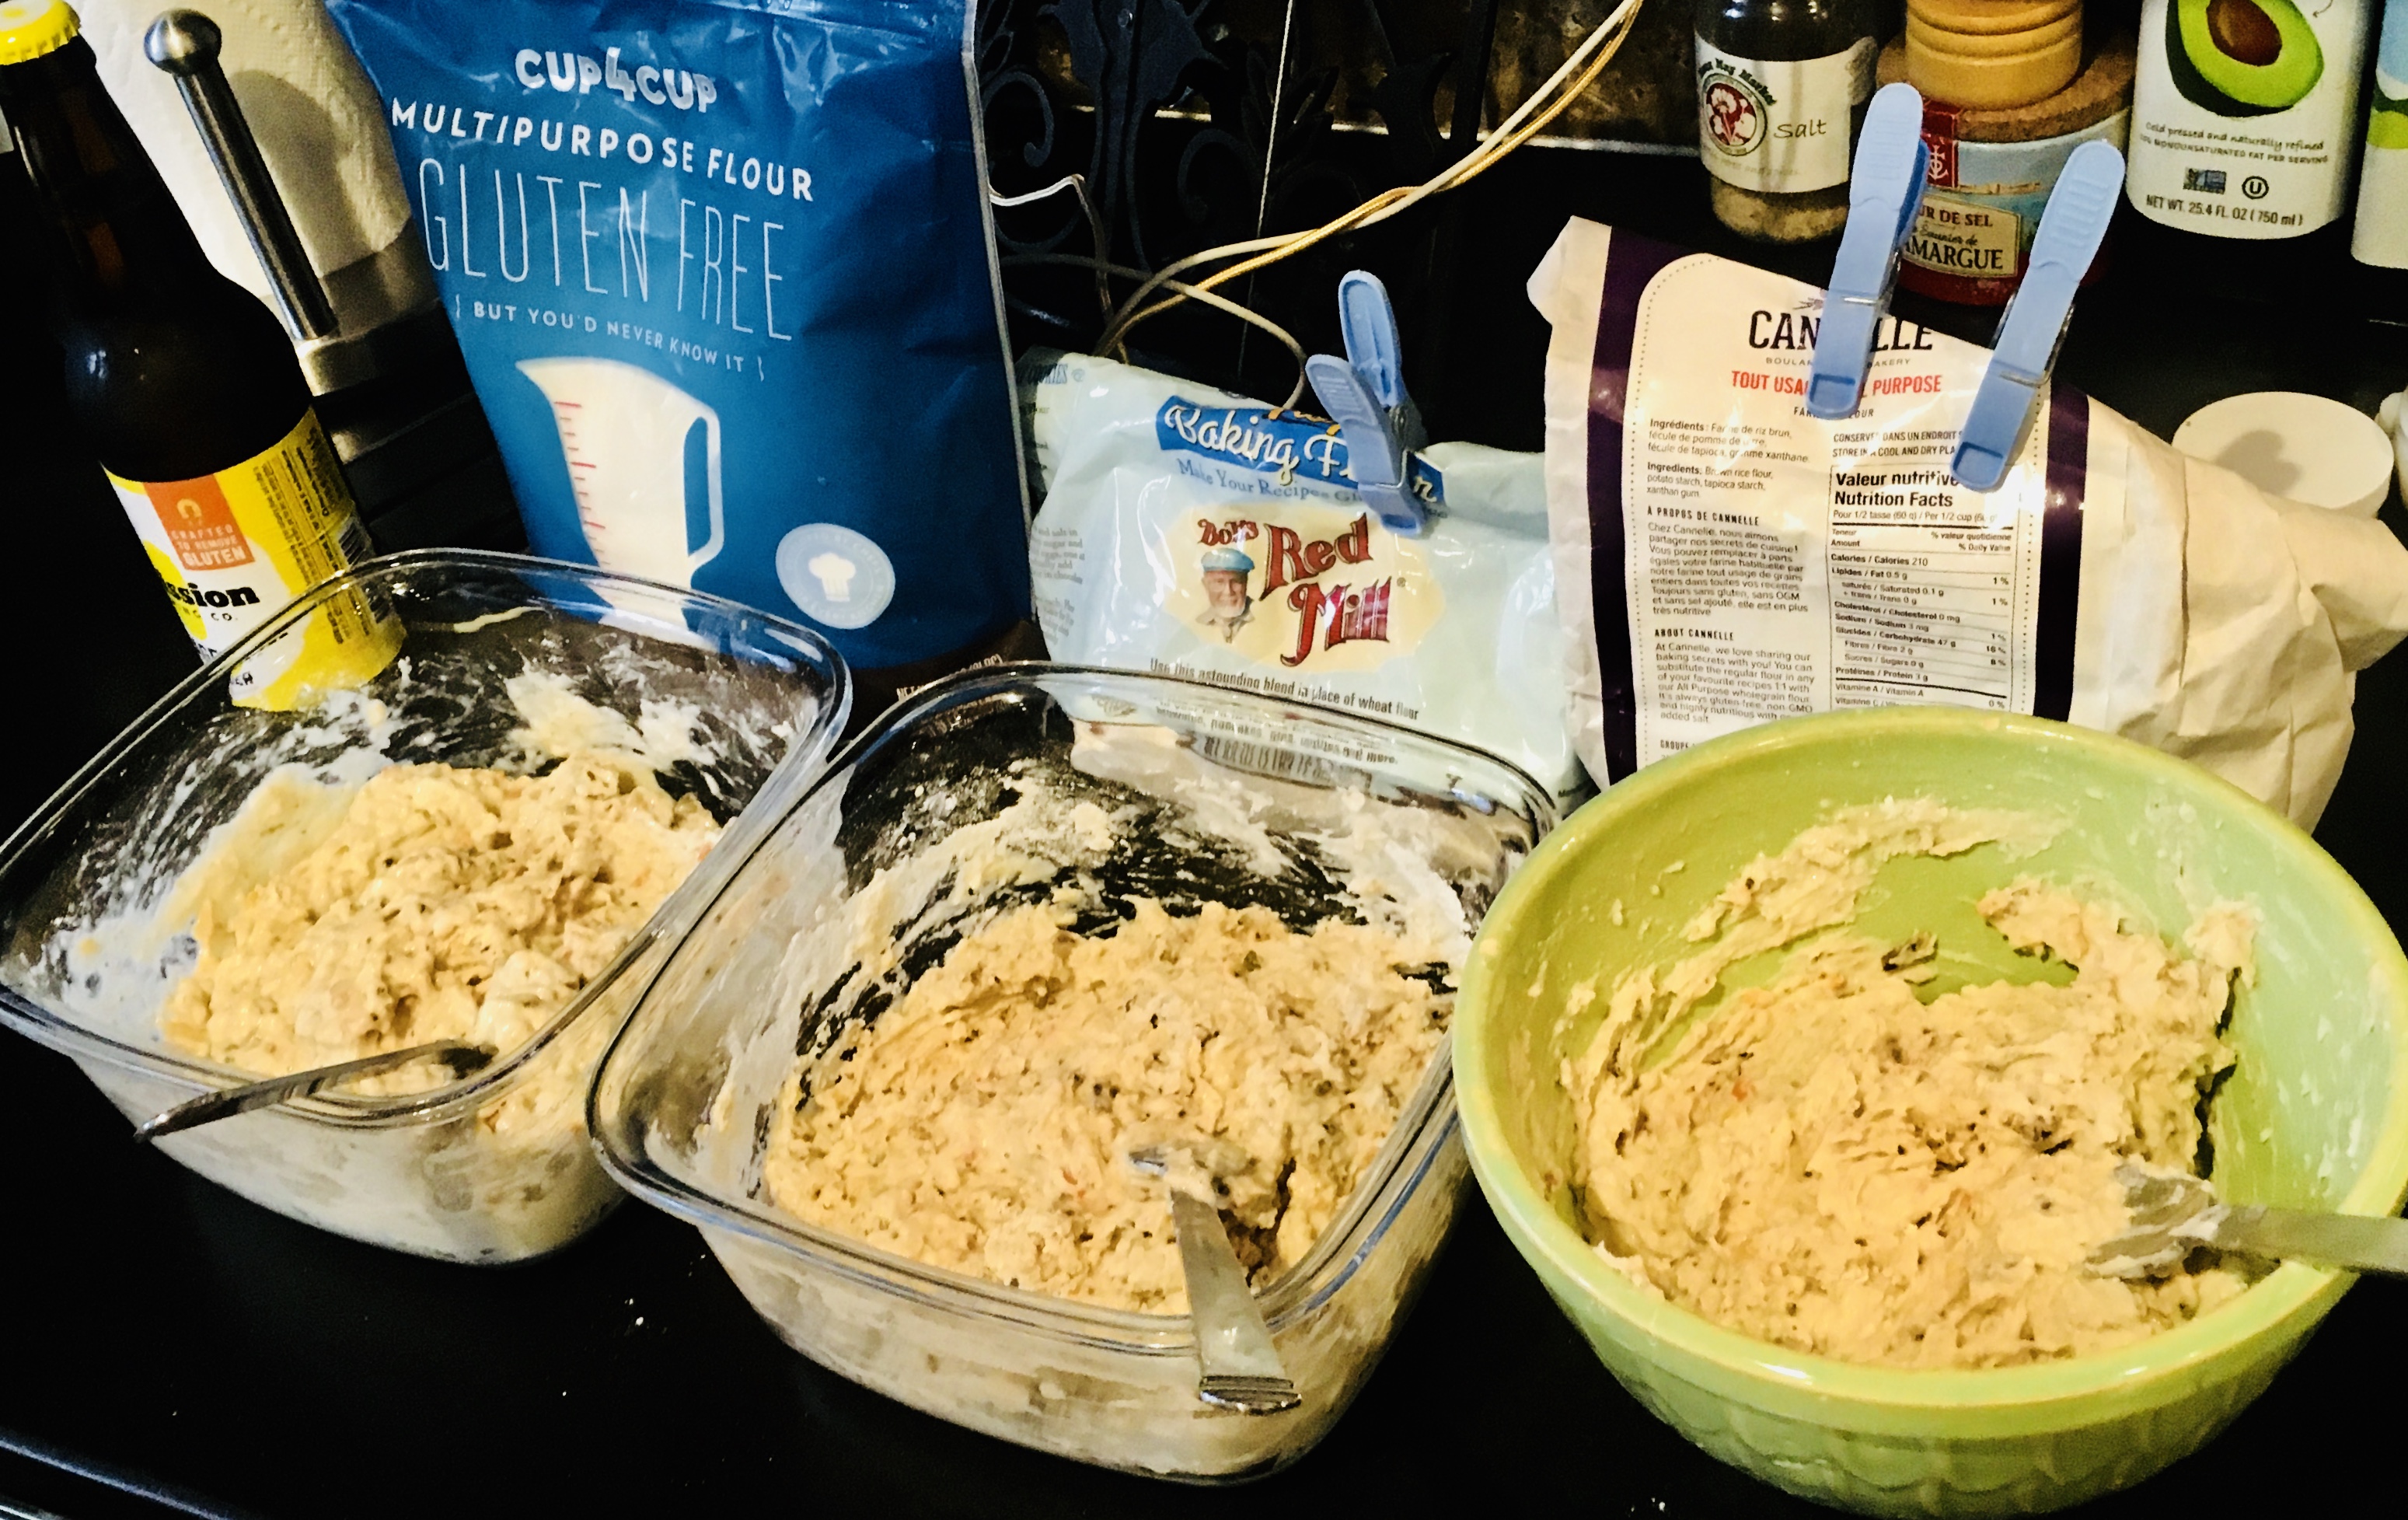
In making this recipe, I tested 3 types of gluten-free flour: Cup4Cup all-purpose flour, Bob’s Red Mill GF Baking Flour, and a Canadian brand (not available here yet.) Cup4Cup (far left) was the clear winner for taste and texture of the fritter.


1 lb. all-purpose gluten-free flour (I like Cup4Cup)
2 lbs. frozen or fresh mussels
1/2 cup (or more) gluten-reduced lager beer (I used Omission)
oil for frying (I stay away from canola, but use what you like)


Pour an inch of water in the bottom of a pot, and place a strainer on top. Pour the mussels, fresh or frozen, onto the strainer and cover the pot. Set the heat on high and steam the mussels until they’re cooked, about 5 minutes. If you’re using fresh mussels, throw out any of the ones that didn’t open. Frozen mussel meats (without the shell) are also available in many areas. They work with this method, too.


Steamed New Zealand green-lipped mussels. Available frozen in many stores. Get the plain ones, not the ones that already come with sauce.


Remove the meats from the shells, and toss them in a food processor. Give them a quick chop…not too fine, because you want to see and taste them in the fritter.

Save the “mussel juice,” the water in the bottom of the pot. It’s got lots of mussel flavor.

Place the flour in a large bowl. Add the chopped mussels. Add a 1/2 cup of the mussel juice and a 1/2 cup of the beer. Mix thoroughly, using a fork or your hands, until you get a batter that’s a bit gooey, but not really wet. You might need to keep adding small amount of broth, beer or flour to get just the right consistency. Once you’ve done that, let the batter rest for 10 or 15 minutes. Keep it at room temperature, and do not stir again! If you need to wait a while before frying, cover the bowl with a wet towel.

In a heavy pan or a fryer, heat the oil to 350 degrees.


Once the oil is hot, take small meatball-sized globs in your hands and gently drop them into the oil. Don’t fry too many at once or the oil temperature will drop quickly. Fry them until they’re golden brown and cooked all the way through. Drain the fritters on paper towels, and season them immediately with salt and a little pepper.

The dipping sauce recipe I have listed at the bottom is not gluten-free. But most tartare-type sauces usually are, and are equally delicious.

Of course, you can make fritters with anything, from mussels to shrimp to lobster!


You’d never know they were gluten-free!


Here’s the original recipe, full of glorious gluten!

It was a fall afternoon in Newport, Rhode Island, at the now-defunct Newport Yachting Center’s annual Oyster Festival. We’re gorging on freshly shucked oysters and clams, boiled shrimp, and…what have we here? I never heard of a mussel fritter before, but once I took a bite, there was no turning back.

They couldn’t be easier to make, but it is crucial to have the right fritter batter. And that starts with a Rhode Island product called Drum Rock fritter mix. If you live in New England, you can find it in just about any seafood department at Whole Foods. If you live further away, you can check out their website (www.drumrockproducts.com) or try your luck with a local brand of fritter mix.


fritter ingredients


If you’re using fresh mussels, be sure to clean them well and remove the beards. Steam them in a pot over a small amount of water. As they open, they will release their flavorful juices and you want to save every drop of that broth for the fritters. Here in New England, frozen mussel meats are available in some seafood stores. All you need to do is thaw them, steam them saving the broth, and you’re ready to go.

For the fritters:
1 lb. fritter mix
2 cups cooked mussel meats
1/2 cup mussel broth (saved from steaming mussels)
1/4 to 1/2 cup good quality beer (I use Sam Adams Boston Lager)
Oil for frying


Steam the mussel meats until they’re just cooked. Remove the mussel meats, and reserve 1/2 cup of the broth. Pulse the mussel meats in a food processor, but leave ’em chunky…or chop by hand.

Put the fritter mix in a large bowl. Add the mussel meats, mussel broth, and beer. Stir gently until just mixed. Let it sit for 10 to 15 minutes and do not stir again. (If you’ve got guests coming, you can prepare up to this part ahead of time, covering the bowl with a wet towel, and leaving it at room temperature.)

Using a thermometer, heat the oil in a deep pan to 350 degrees, and using a small spoon or scoop, drop the fritters in the hot oil, turning gently, cooking 3 to 4 minutes until golden.

Drain them on paper towels, and season with salt and pepper immediately. Serve right away!


IMG_3043


An easy, delicious dipping sauce:
1 cup mayonnaise
1/4 cup Ponzu sauce

The perfect dipping sauce for these mussel fritters is made from two ingredients: mayo and Ponzu sauce, a citrus-based soy sauce. Combine both ingredients in a bowl. Keep it in the fridge until you’re ready to use it.

Chourico is as important to the Portuguese as bacon is to us Lithuanians. Here in Southern New England, they pronounce it “sha-rees,” not “chaw-reezo,” like you hear on TV!

I was joking with a friend the other day that if I won the lottery, I could buy a lifetime supply of chourico at my favorite store: Mello’s, in Fall River, Mass. His response was: “Is there such a thing as a lifetime supply of chourico?!”

Good point!

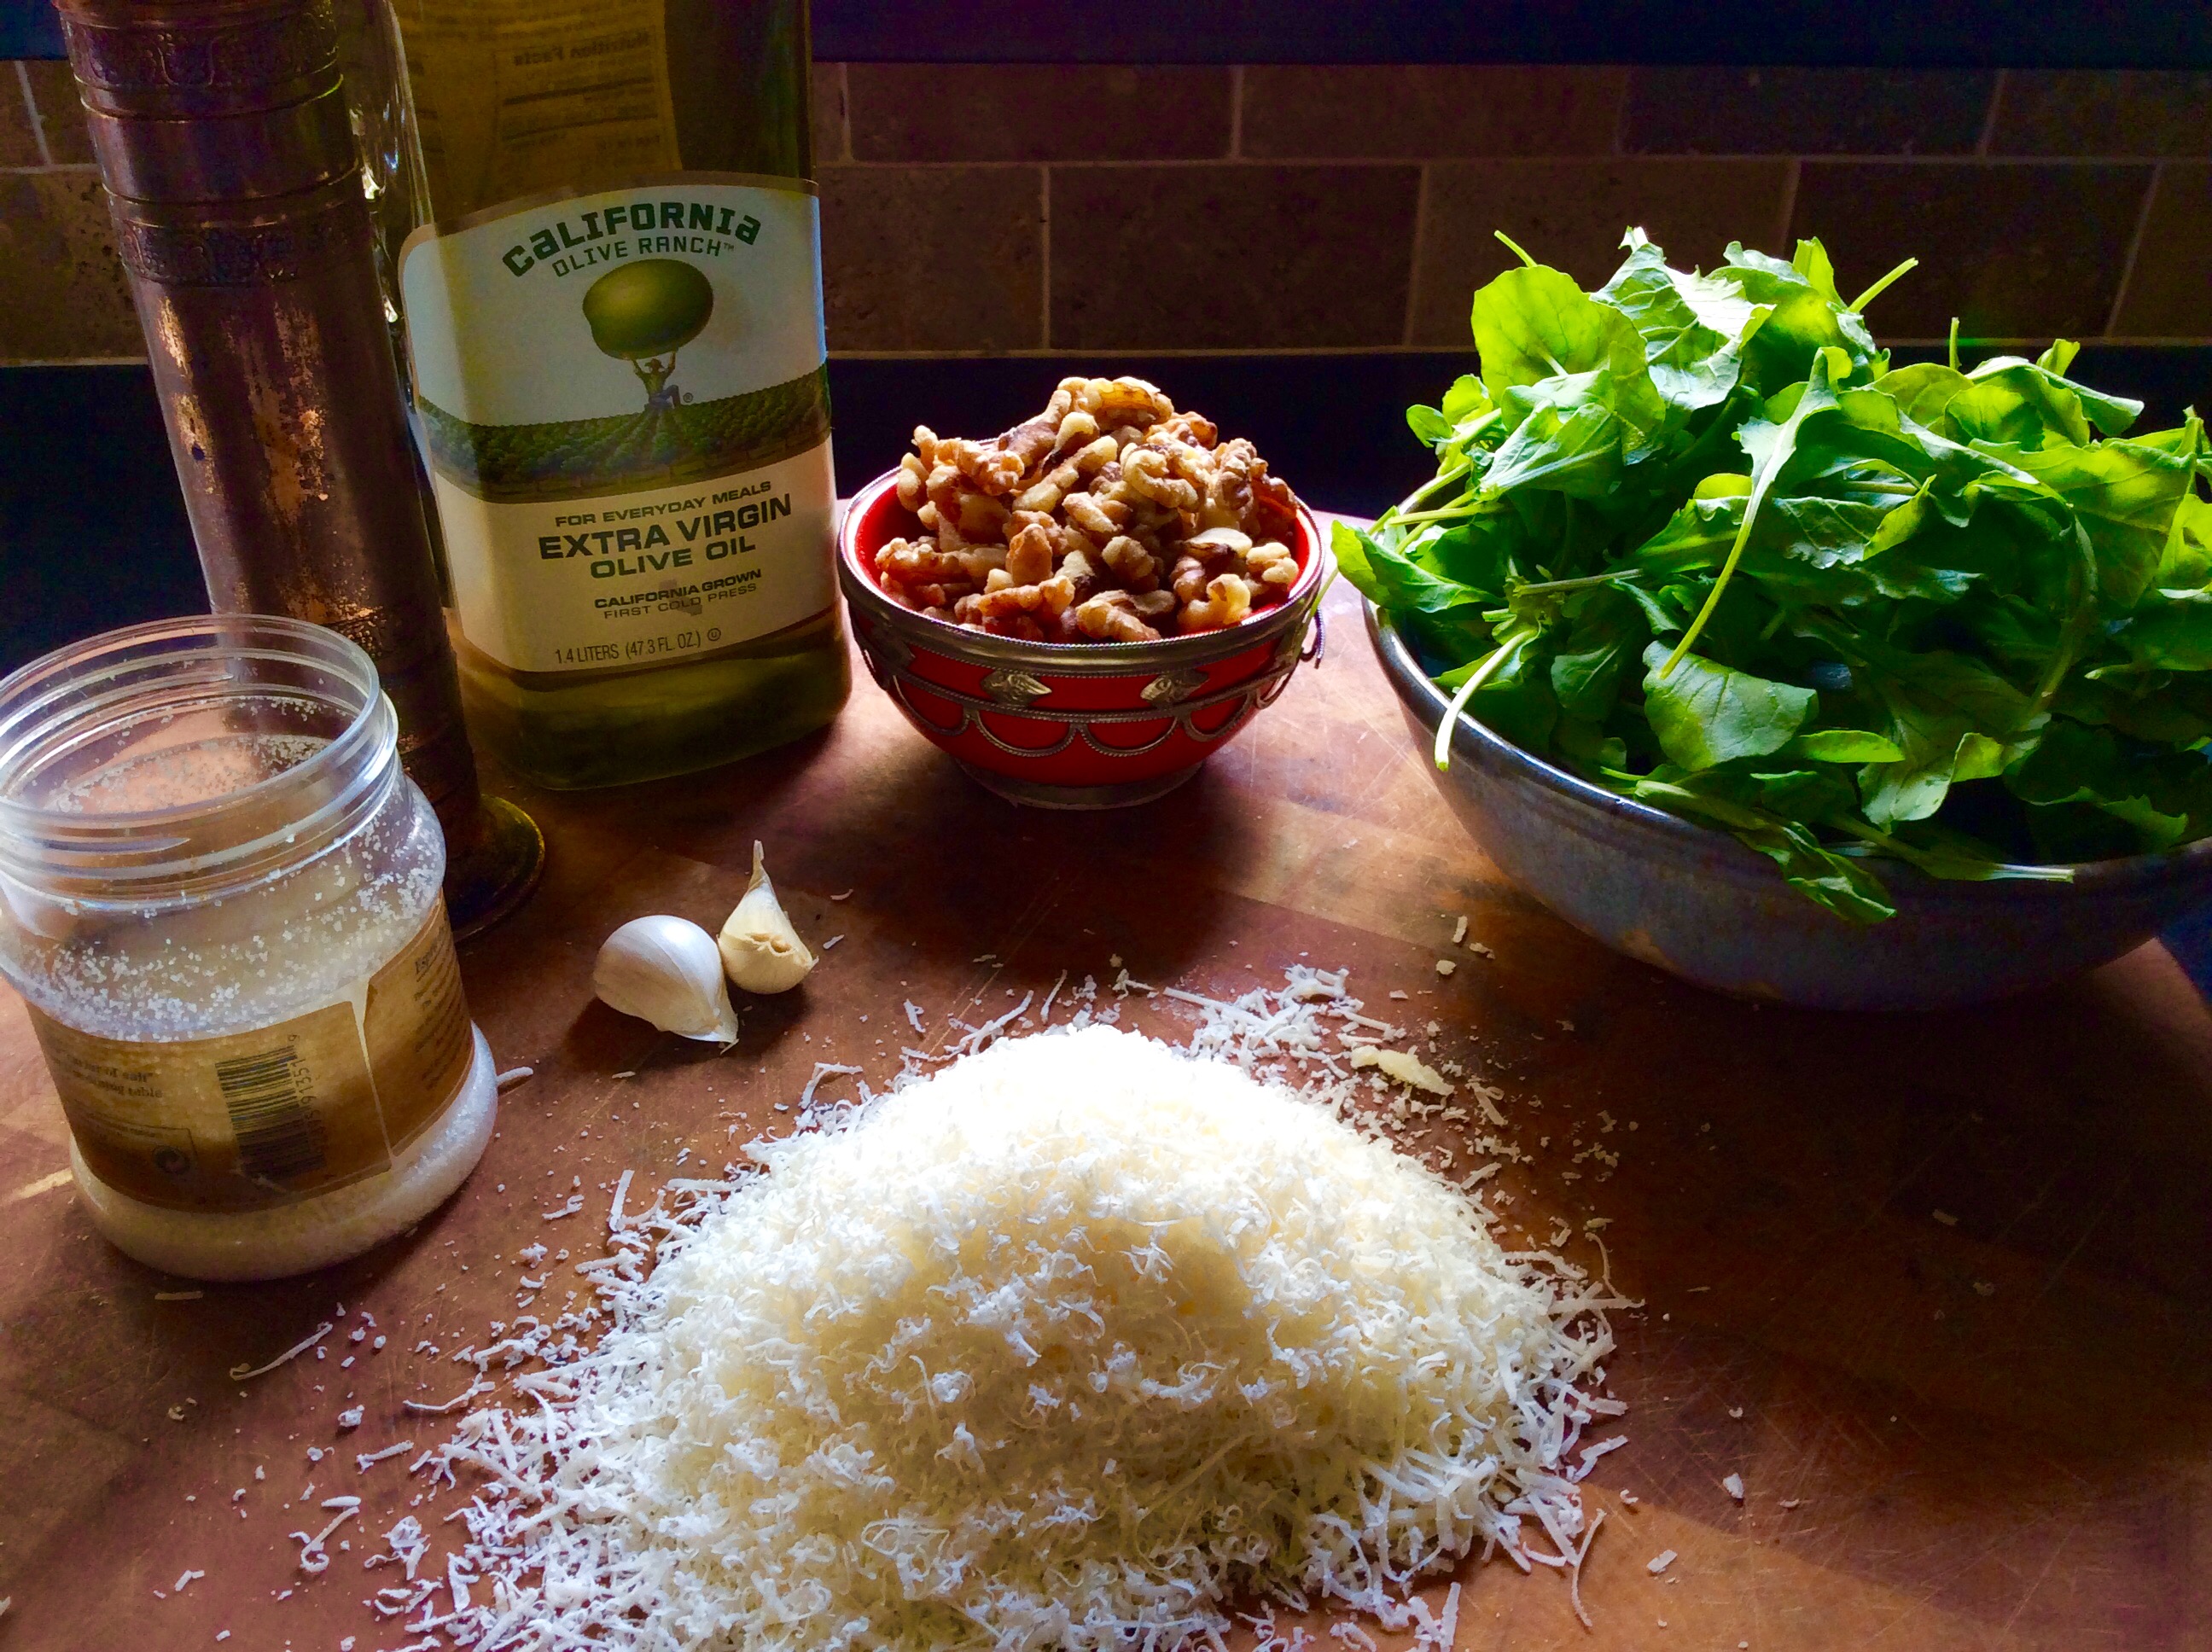
If you’ve had really great chourico, you’re always looking for new ways to include it in your cooking. Inspired by chef Chuck Hughe’s recipe, this is a great chourico appetizer that’s really easy to make. Whip up the arugula pesto ahead of time and keep it in the fridge. Then when guests come, just slice the chourico, sauté it in a pan until brown, and serve.


fullsizerender

3 cups fresh baby arugula
1/2 cup walnuts
1/2 cup olive oil
1 clove garlic
1 teaspoon salt
1/4 teaspoon pepper
1/2 cup + one tablespoon grated Parmigiano Reggiano
2 lbs. chourico, sliced into 1/2″ pieces

Combine the arugula, walnuts, olive oil, garlic, salt, pepper and the 1/2 cup of cheese in a food processor or blender and blend until smooth. Set the remaining tablespoon of cheese aside for garnishing later.


fullsizerender-1

Remove the casing from the chourico and slice it into 1/2″ thick pieces. Sauté the chourico slices in a pan until both sides are caramelized and golden.

Place the chourico on a plate, topping with some of the pesto. Sprinkle a touch of the grated cheese to garnish. Serve immediately, while the chourico is still hot!


fullsizerender-3

October is National Pork Month, and we still have a few days left…

Pork chops were a favorite of mine growing up, but my Mom cooked them only one way: breaded and fried in a pan full of oil. They were good, but they were greasy, and my Mom was not big on seasonings. And she cooked the hell out of it. It was time to improve on the original.

Using the best quality pork I can get, like heritage Berkshire pork, makes a real difference in flavor. It also matters to me that the animals are humanely treated while they’re on the farm. No factory-farmed meats.


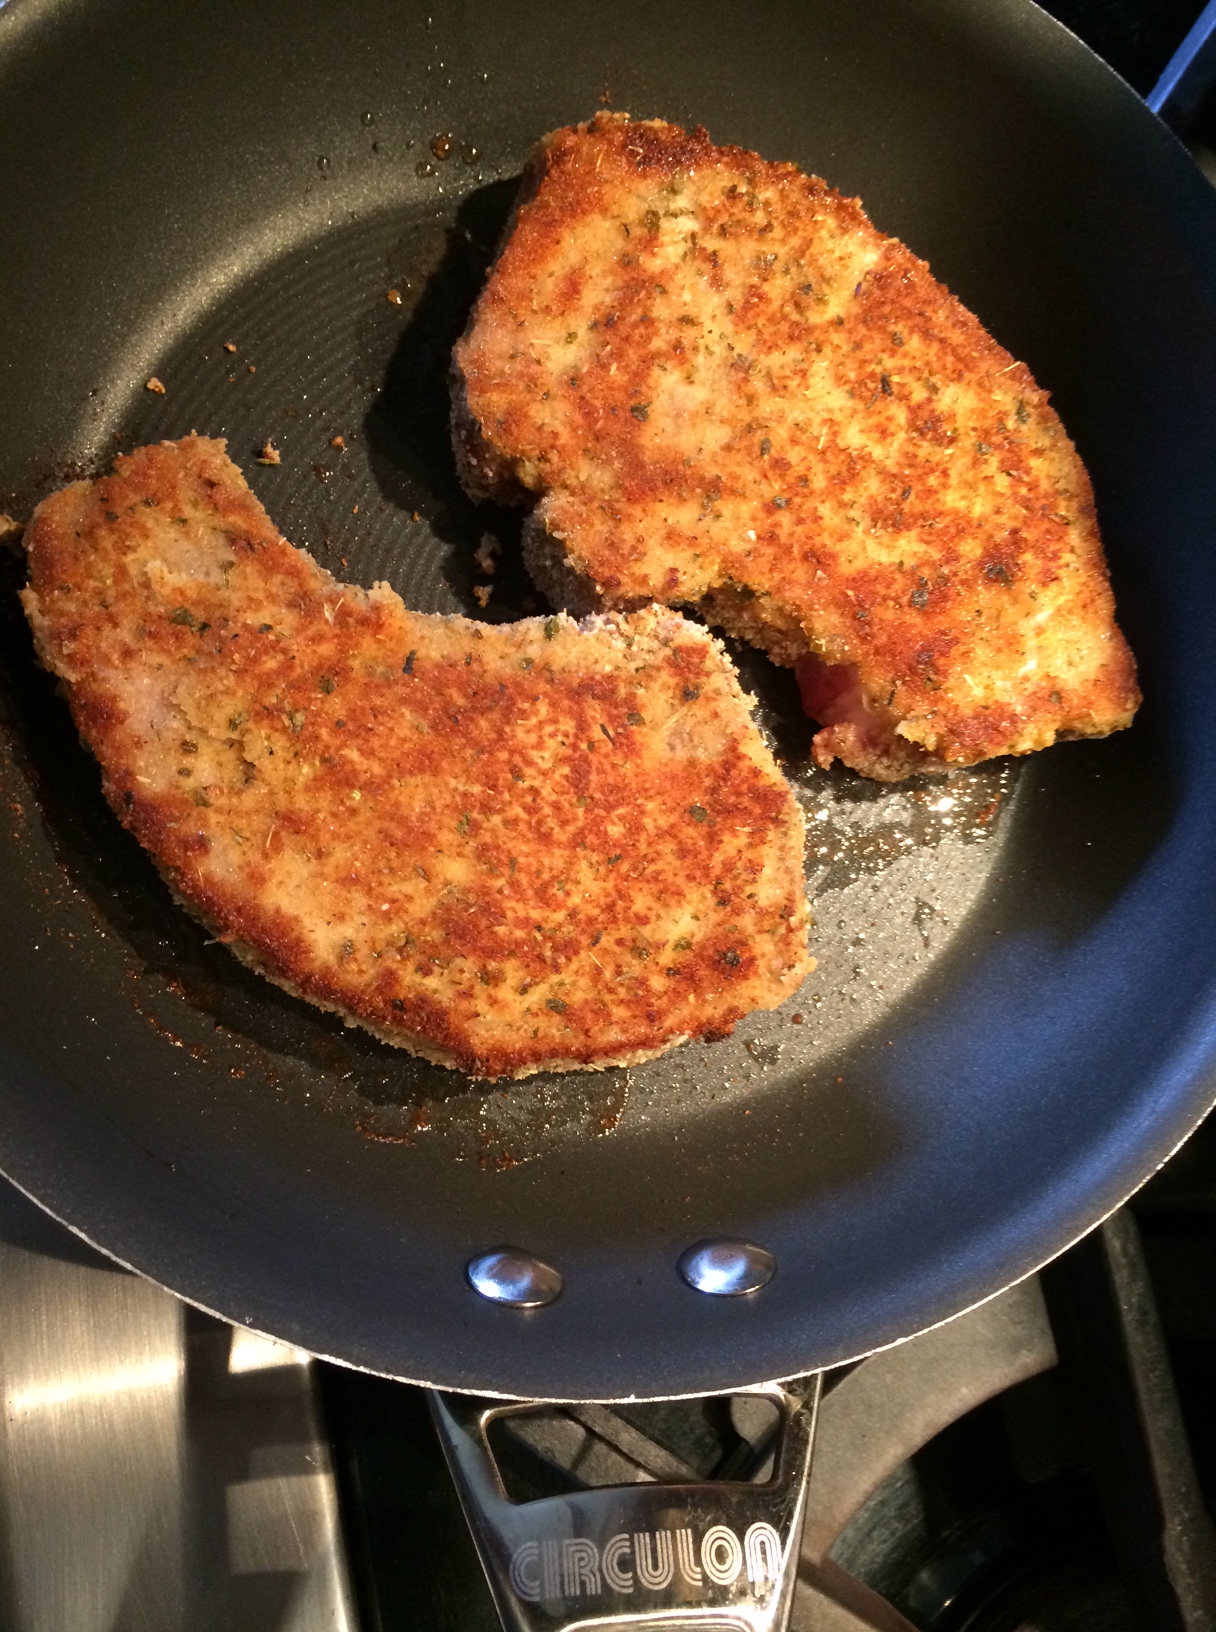
chop 1


2 Berkshire pork chops
1 egg
1/2 cup plain bread crumbs (gluten-free works, too)
1 teaspoon salt
1/4 teaspoon pepper
1 teaspoon dried oregano
1 teaspoon dried parsley
1/2 teaspoon granulated garlic
1/2 teaspoon granulated onion
olive oil


Pre-heat the oven to 350 degrees.

Set up 2 bowls. In one, crack and scramble the egg. In the other, combine the bread crumbs, salt, pepper, oregano, parsley, granulated garlic and granulated onion.

Place an oven-proof pan on medium-high heat and add a little olive oil. Once the oil is hot, coat the pork chops in the egg wash and then coat them with the bread crumb mixture. Place the chops in the hot pan to brown and sear on one side. After a few minutes, flip the chops over in the pan and place the pan in the oven to finish cooking.


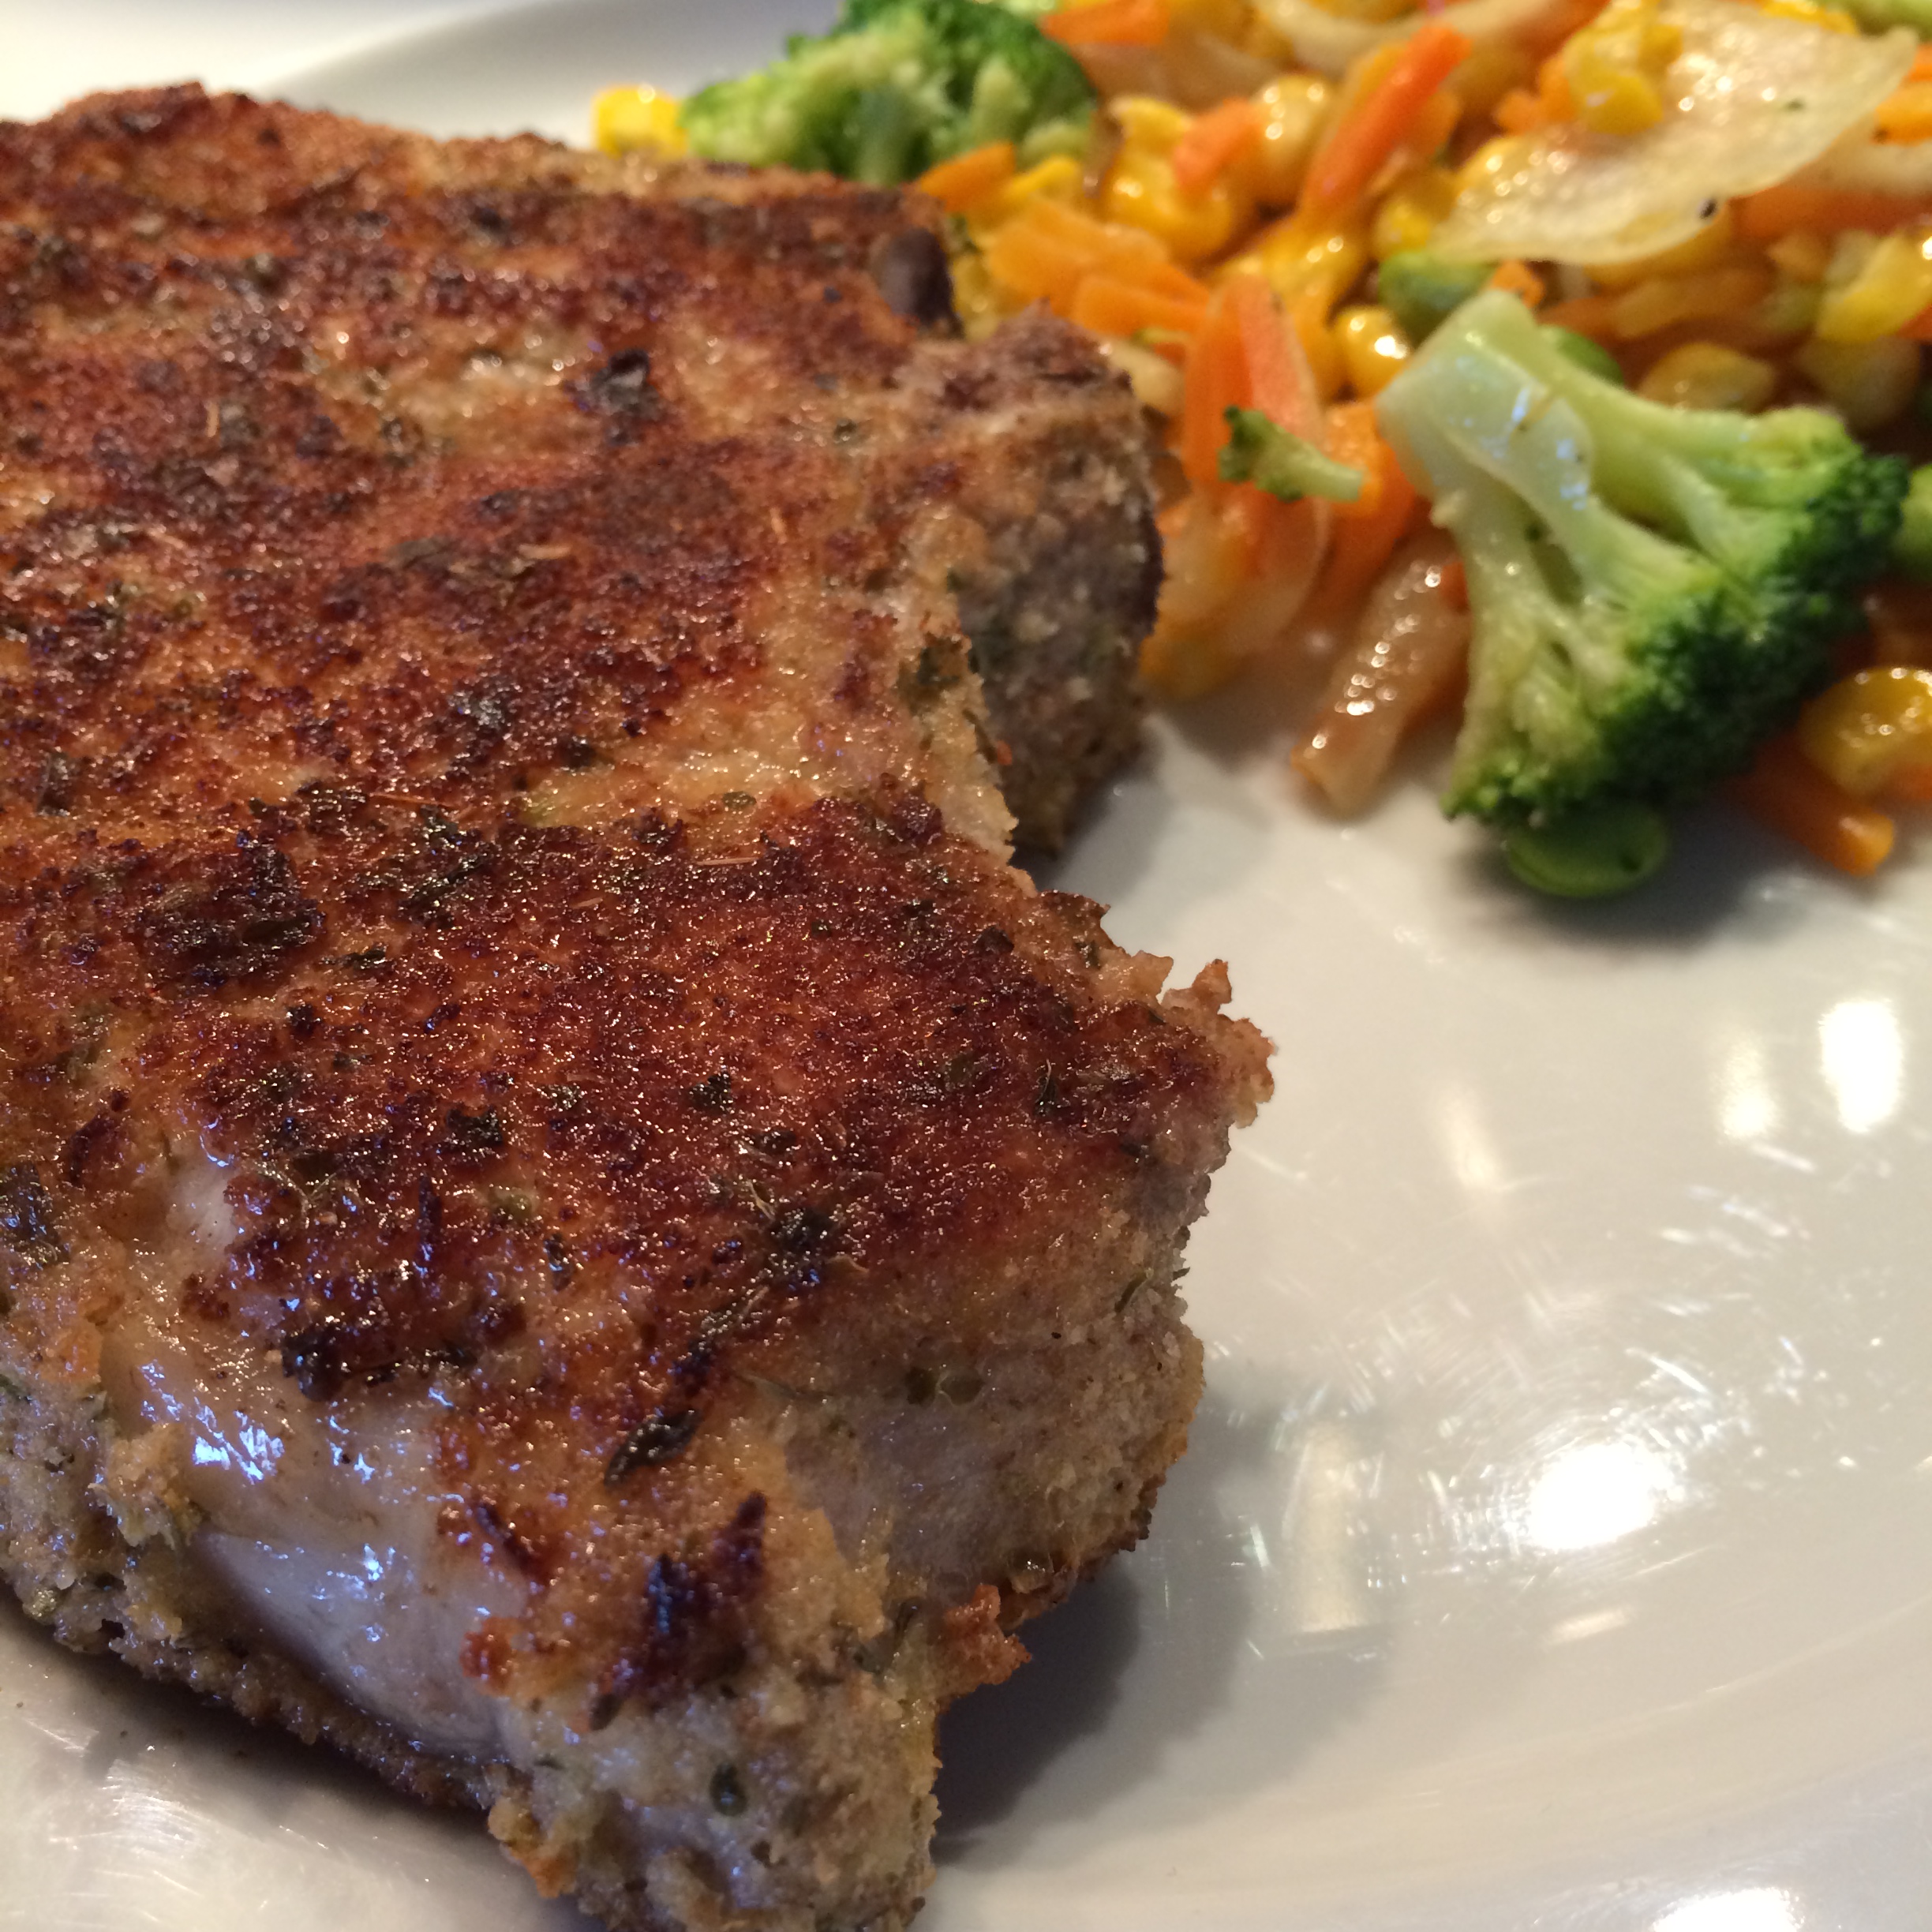
chop 2

Remember, good pork does not need to be cooked to death! A light pink to the meat is OK. You want to cook the meat to about 145 degrees, letting it rest for at least 3 minutes before serving.


After making a batch of this for my daughter this week, I got a bunch of requests for the recipe. So here we go!

Chicken parmigiana, much like pizza, is a bit more difficult to make than you might think. Sure, there’s plenty of crappy chicken parm out there, made with processed frozen chicken cutlets, bad sauce and cheap cheese. But to make a really fantastic, mind-blowing chicken parm, that takes a little practice!

The key to this recipe is simple: don’t skimp on the quality ingredients. And my recipe makes a lot. Trust me: you will want leftovers.

The recipes for my Italian bread crumbs and my “Don’t Call It Gravy” tomato sauce are at the bottom.


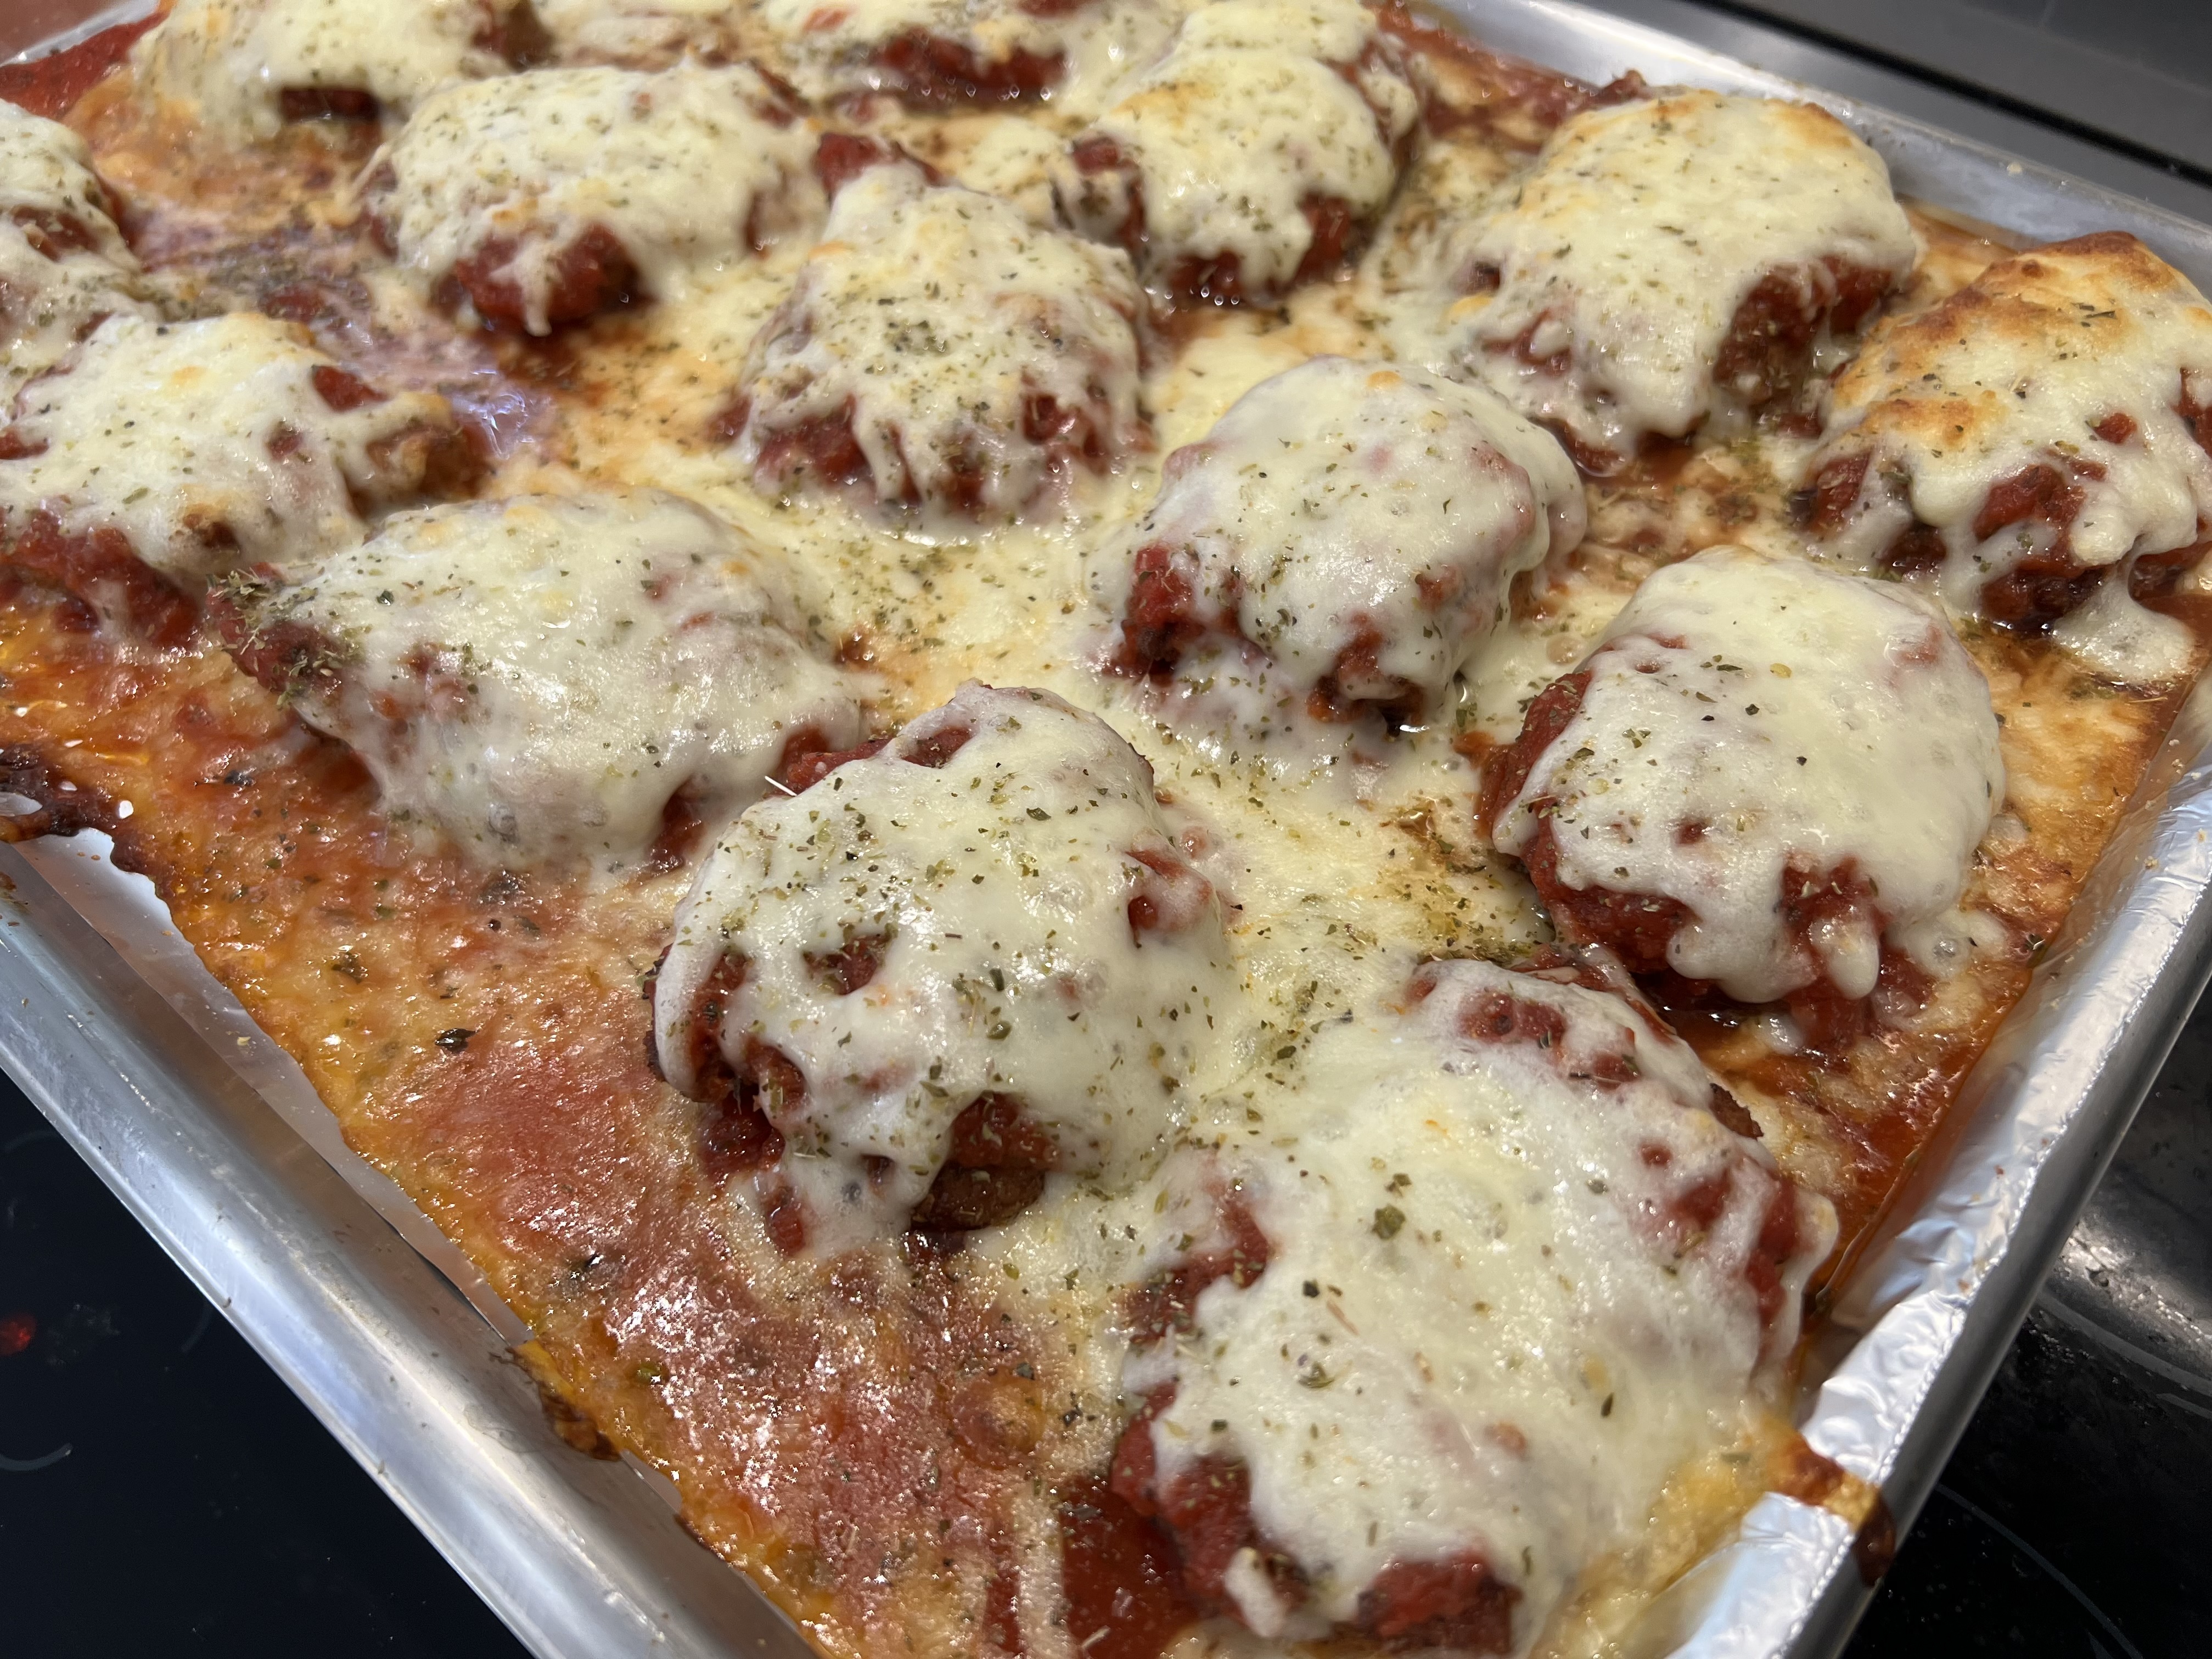
Gooey, cheesy, orgasmic.

Gooey, cheesy, orgasmic.


6 Chicken breasts, the best quality you can get your hands on
Italian bread crumb seasoning (see recipe below)
3 eggs
vegetable oil for frying
“Don’t Call It Gravy” tomato sauce (see recipe below)
Fresh mozzarella cheese
oregano

Thaw the chicken breasts. Lay them flat on a cutting board, and you’ll see where the chicken tender is on the side of the breast. Cut the tender off and set aside, leaving the breast which is thinner at one end and thicker at the other. Slice the breast in half lengthwise at the thicker end, keeping the knife level, so that you wind up with 2 pieces of breast meat that are the same thickness, but one will be a longer piece (the bottom) and one about half its size (the top part you sliced off.) Do this with all the breasts.

By slicing the breasts lengthwise into evenly thick pieces, it will take the same amount of time for them to cook. (I prefer not to pound the hell out of the chicken breasts until they’re flat as a pancake.)

Pour the vegetable oil into a large frying pan. (I like to use corn oil or grapeseed oil.) Next to the pan, set up two bowls: one with my Italian bread crumb seasoning (recipe below) and in the other: crack the eggs and whisk them.

Now it’s your standard breading procedure: chicken meat in the egg, then in the breadcrumbs, coating well. Shake off the excess and place carefully in the pan of olive oil when the oil comes to temperature (about 350) for frying.

Fry the chicken in the oil until it’s golden brown. You want it cooked all the way through, but not overcooked. Place the fried chicken pieces on a wire rack to drain the oil. Do this with all the chicken. The fried chicken at this point is delicious all by itself: chop it and use it in a salad, or make a chicken sandwich. (By the way, if there’s breading left over, use it on the chicken tenders you cut off, and fry them up. My daughter gets these instead of store-bought chicken tenders, and she loves them.)

Cover a baking sheet with aluminum foil. Ladle out enough sauce (recipe below) to create a thin layer on the bottom of the baking sheet. Place the fried chicken breasts on top of the sauce. Cover the breasts with more sauce, then place shredded mozzarella on top. Sprinkle the top with a little oregano.


Place the baking sheet in a pre-heated 350 degree oven and bake until the cheese has melted and just starts to brown. Serve it with pasta.


MY “DON’T CALL IT GRAVY” TOMATO SAUCE

It’s not hard to make a good tomato sauce. But it takes a little work to make an amazing tomato sauce. Honed from a recipe handed down by a friend-of-a-friend’s Italian grandma, it is one very important part in two of my favorite Italian comfort food recipes: my meatballs…and my chicken parmigiana recipe.


1 medium onion, finely chopped
2 cloves garlic, finely chopped
1/2 cup extra virgin olive oil
10 cups ground and peeled tomatoes…or 3 cans (28 oz.) tomatoes (real San Marzanos preferred)
2 teaspoons each: dried oregano, basil and parsley
3/4 teaspoon each anise seed and fennel seed
1 1/2 teaspoons salt
1/2 teaspoon black pepper
2 bay leaves
1 small can (6 oz.) tomato paste
1 teaspoon sugar, optional

Heat the olive oil in a large pot and add the onions. Cook until onions are translucent, then add the garlic. Stir for about 10 seconds.

Add the tomatoes and cook until the orange foam disappears, stirring frequently.

Add the oregano, basil, parsley, anise seed, fennel seed, salt, pepper, and bay leaves. Stir to combine. Add the tomato paste, stirring well. Let the sauce just come to a boil (which helps the paste thicken the sauce), then reduce it to a simmer, and cook uncovered for at least an hour, stirring constantly, until the sauce reaches the consistency you like.


MY ITALIAN BREAD CRUMB SEASONING

This is the one part of the recipe (other than the optional pasta) that keeps this dish from being gluten-free. So I use gluten-free breadcrumbs, even if I don’t need to. I buy a loaf of Udi’s frozen gluten-free bread, toast the slices, and them put them in a food processor. I dare you to tell the difference between these and breadcrumbs with gluten!


1 Udi’s loaf, toasted and ground into breadcrumbs
2 teaspoons dried parsley
1 teaspoon dried oregano
1 teaspoon dried basil
1 teaspoon salt
1/2 teaspoon granulated garlic
1/2 teaspoon granulated onion
1/4 teaspoon black pepper


Combine all the ingredients well.

GREAT ONION RINGS AT HOME

Posted: August 10, 2023 in Food, frying, Recipes
Tags: , , ,
If you look online, there are a  million ways to make onion rings. So, in doing my research, my first step was to decide how I wanted them. Did I want a big, thick batter? Or something extremely light? Or something somewhere in the middle?
I’m not a fan of onion rings that have more batter than onion. After looking through dozens of recipes, I finally came up with one on my own that really satisfied my craving for onion and also a craving for a great crunch.
The set-up requires four trays, and lots of messy dunking before it goes into the oil. But it’s all worth it in the end!
I have a deep fryer, but the basket in it is small, so I can’t fry as many onion rings at one time as I’d like. So using a larger pan with a shallow pool of oil was the answer: it allowed for more onion rings to be fried in a single batch.
Onions, sliced about 1/4″ wide (I like using Vidalias)


In the first pan..
2 raw eggs, scrambled
In the second pan…
1 cup self-rising flour
In the third pan…
2 more raw eggs, scrambled
In the fourth pan…
2 cups fine breadcrumbs
1 teaspoon salt
1 teaspoon granulated onion
1 teaspoon granulated garlic
pinch of dried oregano (optional)
I like to fry with peanut oil or grapeseed oil, so I pour an inch or two into a large pan and heat it to 340°, using a thermometer.
I peel the onions and cut them into quarter-inch wide slices, breaking them up into rings. (If a couple of rings of onion stick together to form a thicker ring, I don’t have a problem with that!)
Once that’s done, the procedure is really simple: dunk the onion rings in the first pan with the egg, coating them well. Then dunk them into the second tray with the self-rising flour, shaking off any excess. Then dunk them into the third tray with the egg, making sure it’s completely coated. And finally, dunk them into the fourth tray with the seasoned breadcrumbs, again, shaking off any excess.
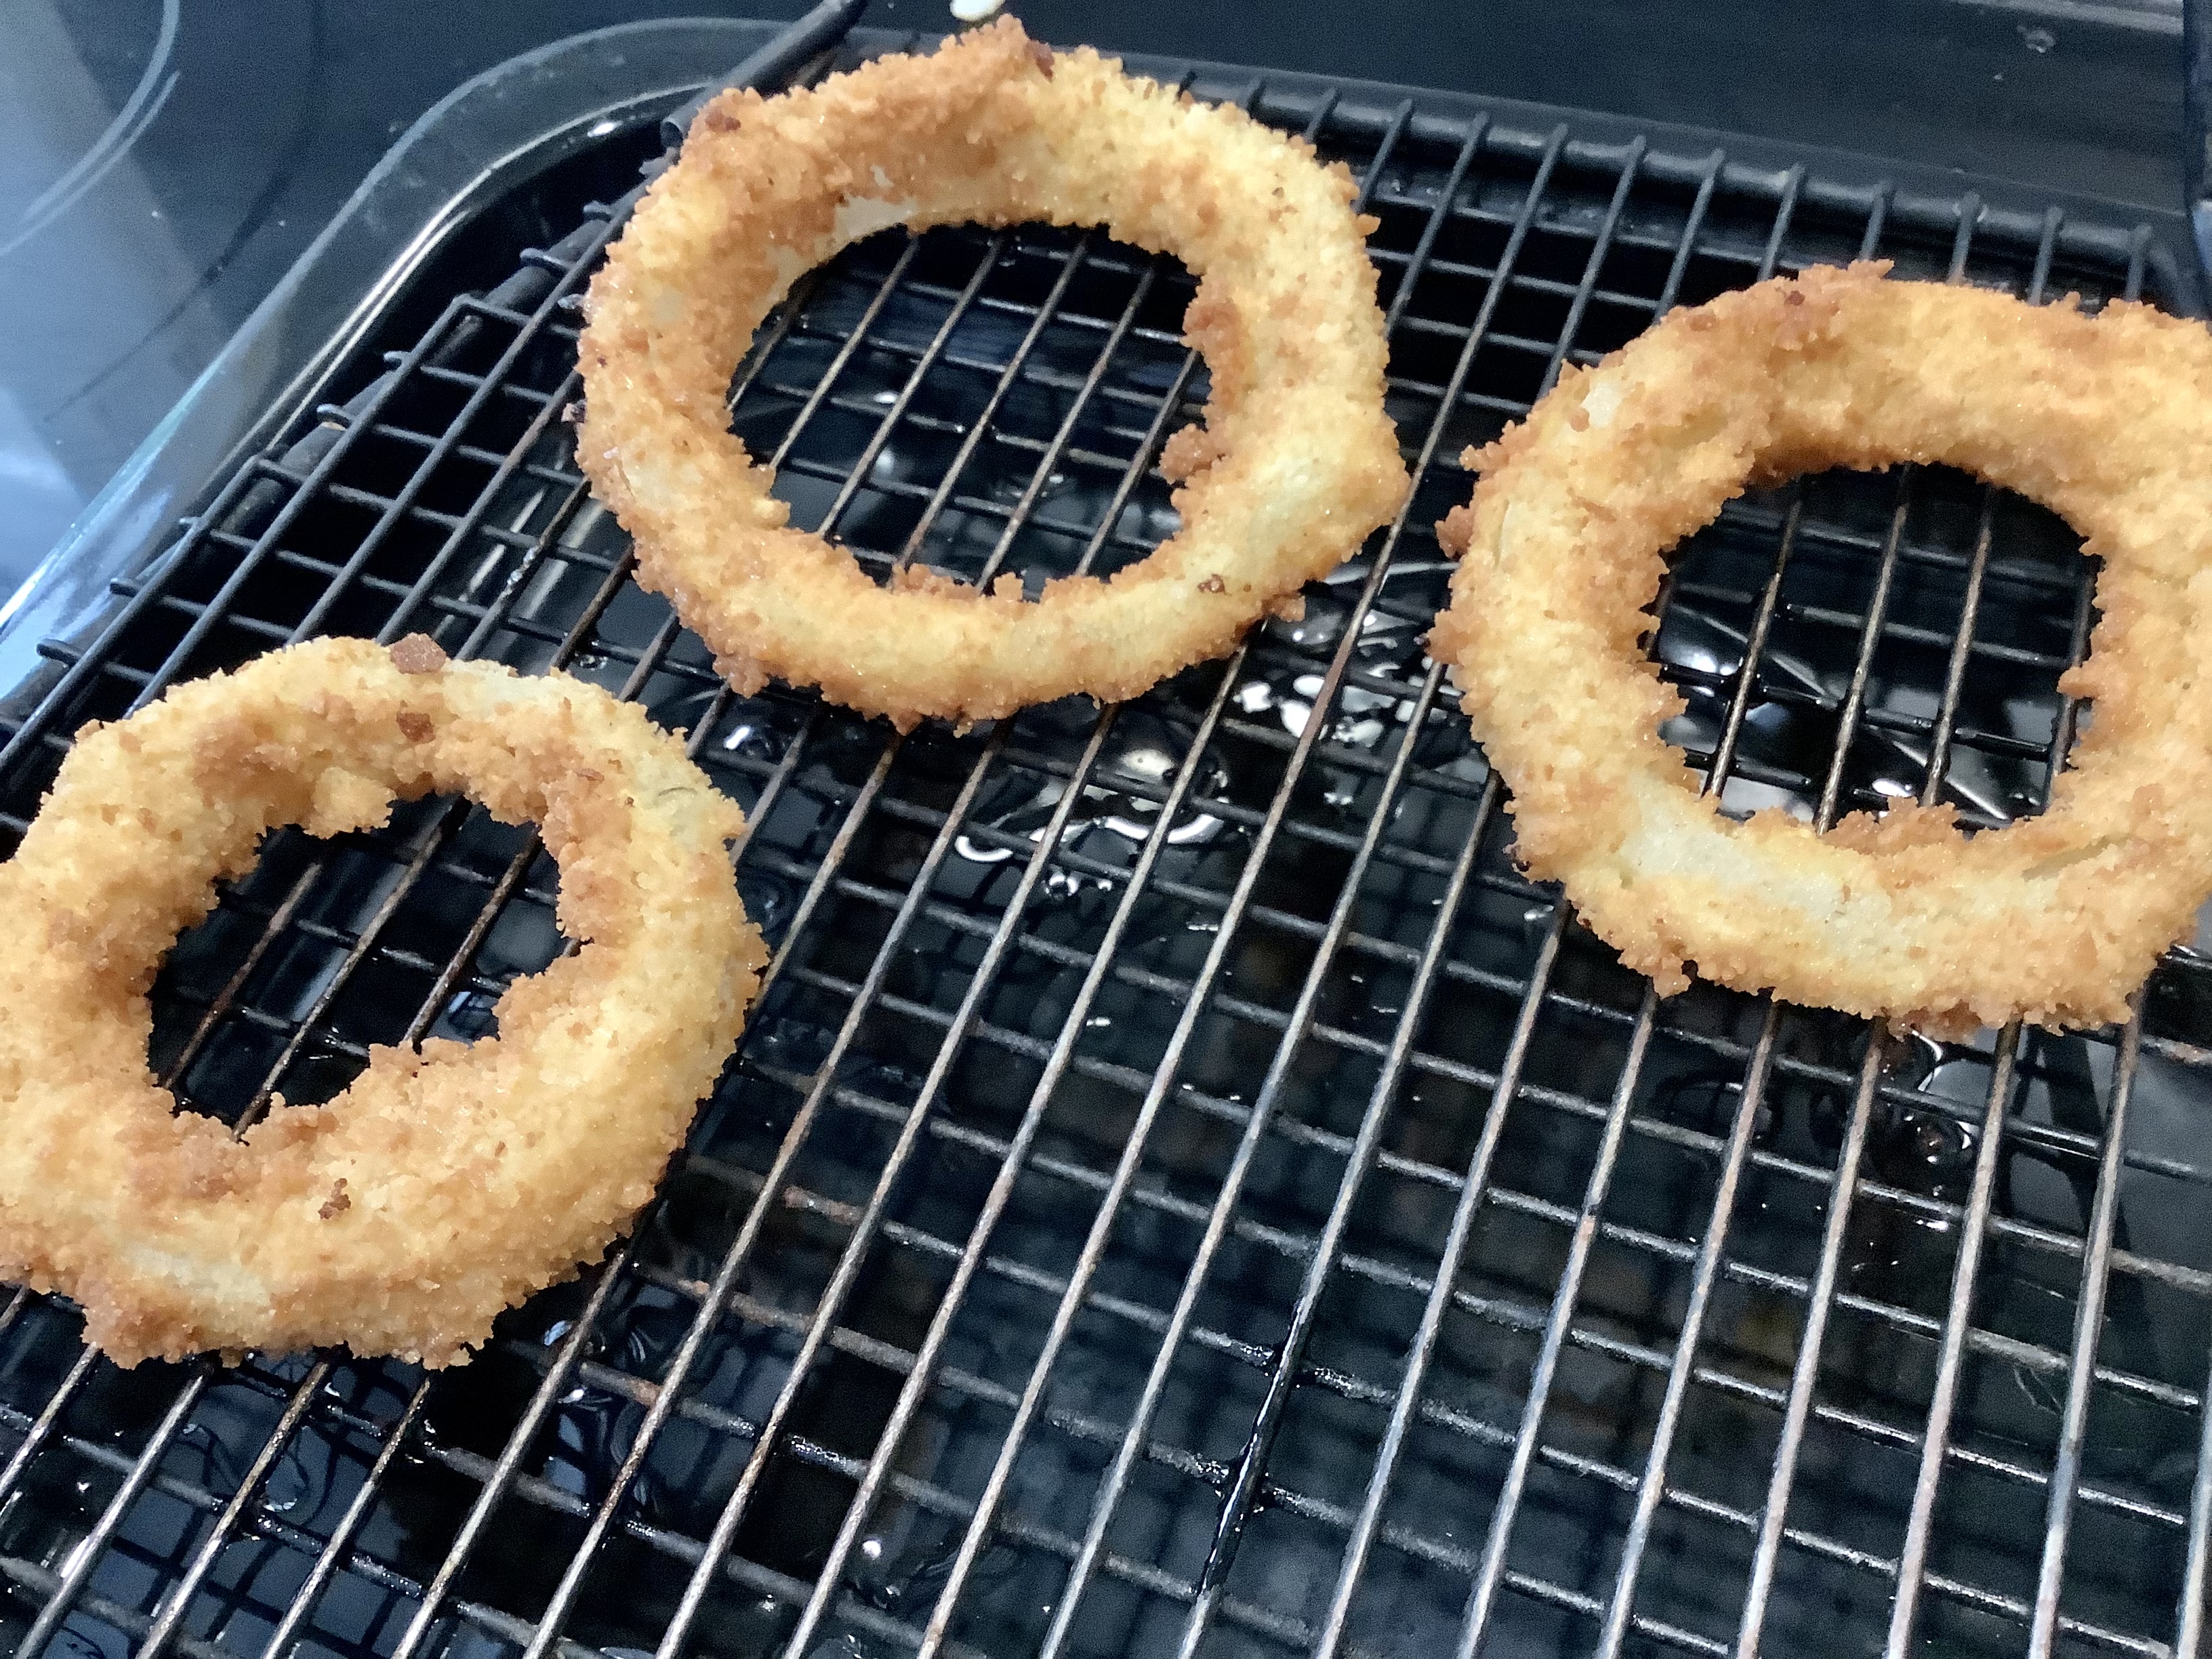
Drop the onion rings into the hot oil and be sure to flip them so they cook on both sides. Cook until they’re golden brown. Place them on a sheet pan with a metal rack to cool.

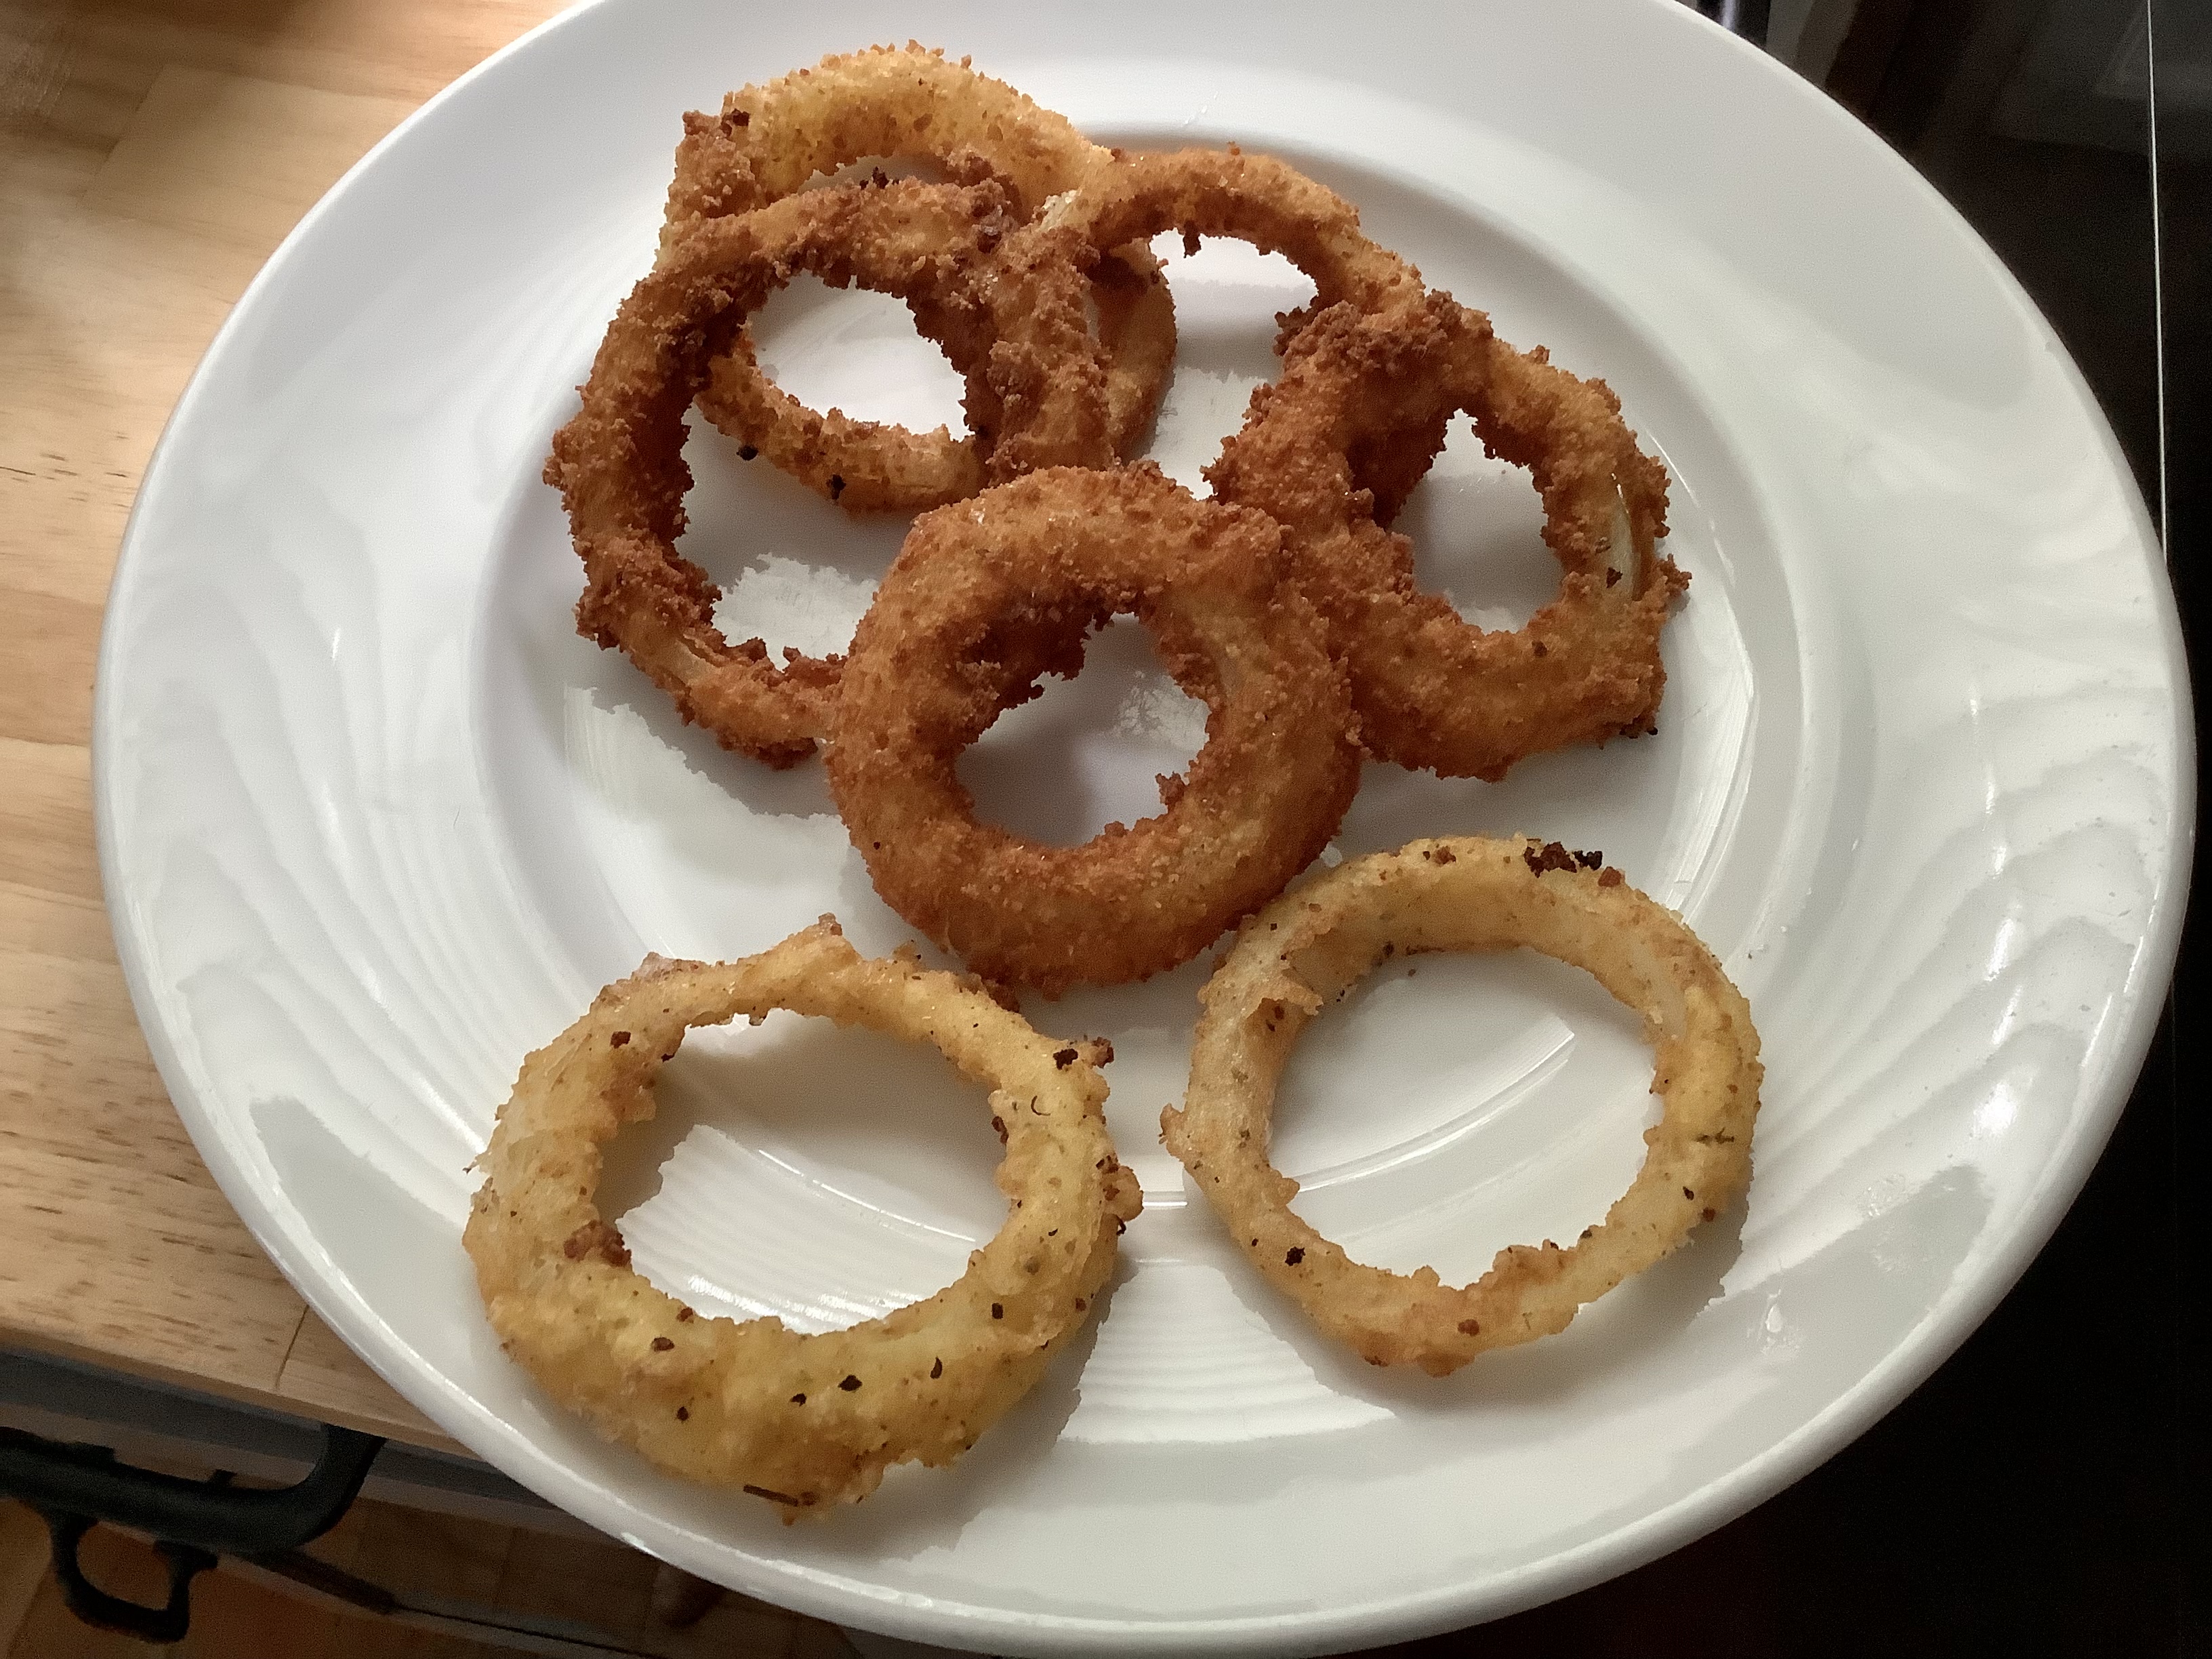
I experimented with three variations. The top brown ones follow my recipe. The ring on the bottom right is dipped in egg and the flour mix only. The ring on the bottom left is dipped in egg, then the flour mix, back to the egg, and the flour mix again. The breadcrumb procedure is still my favorite way to go. Great crunch!

Despite the large Italian community we have here in southern New England, there’s no exceptional pizza to speak of. I suppose you could say “them’s fightin’ words!” but if it’s here, I haven’t found it yet. (Fellini Pizza is about the best in Providence.)

So where is the excellent pizza? New York City, of course. OK…maybe I’m prejudiced because I’m a Brooklyn boy, and worked in a variety of pizzerias in my younger days, but there’s no doubt in my mind that if you want the best pizza–or bagel, for that matter–you’ve got to go to the Big Apple. (Even “Frank Pepe’s” in New Haven, CT is a mere stop on the way to the real deal.)

Pizza in the Big Apple can be confusing, as there are many different varieties to choose from. Brick oven pizzas abound, but there are pizza lovers who won’t settle for anything less than an old-fashioned pizza baked in a coal-fired oven. The extremely high heat of a coal-fired oven cooks the pizza in just a minute, and imparts a crusty, charred flavor you can’t get any other way. There are only about a dozen coal-fired pizzerias left in New York City, and many of them have been around for a hundred years or more, so it’s definitely a matter of making a special trip to enjoy this style of pizza. (Providence now has its own coal-fired pizza, but it just can’t compare.)

There’s plenty of good, basic pizza in New York City, too: the traditional thin, round Neopolitan pie, and the thicker, square Sicilian pie, baked in that Blodgett pizza oven we all knew in our early pizza-making days.

Many years ago, when I heard through the pizza lovers’ grapevine that a “new” pizza was out there, one that was gaining a cult following, I needed to know about it. And more importantly, I needed to taste it!

It’s called Pizza Montanara, and there’s still only a few pizzerias in New York City that serve it. The one I go to without fail is PizzArte, on West 55th, and I have to say it’s the ultimate pizza.


Pizza Montanara, sitting next to me in the car, just waiting to be devoured.


What makes Pizza Montanara so spectacular, quite simply, is that the dough is fried in oil for 30 seconds, flipped and fried another 30 seconds, before they put the sauce and cheese on it, and then they cook it in a wood burning oven. It is not greasy. The frying process puffs the dough up and creates a beautiful pillow-like softness that I’ve never experienced in a pizza before. Imagine a pizza cloud and you’ve got Pizza Montanara.

Where to get Pizza Montanara.


I’ve made Pizza Montanara at home, with limited success. I poured a few inches of olive oil in a large cast iron skillet, stretched my dough into a small pie, and gently floated it into the pan. Using a spatula and tongs, I was able to flip the fried dough over after about 30 seconds, then removed it from the pan after another 30 seconds. It was golden and puffy. I quickly sauced and cheesed it and in the oven it went. But it’s a messy process that doesn’t always come out just right. I need more practice!


Frying the pizza dough. I use olive oil for better flavor, but I have to watch the temperature, because the smoking point is low (about 375 for extra virgin olive oil) and burnt oil is not what anybody wants!


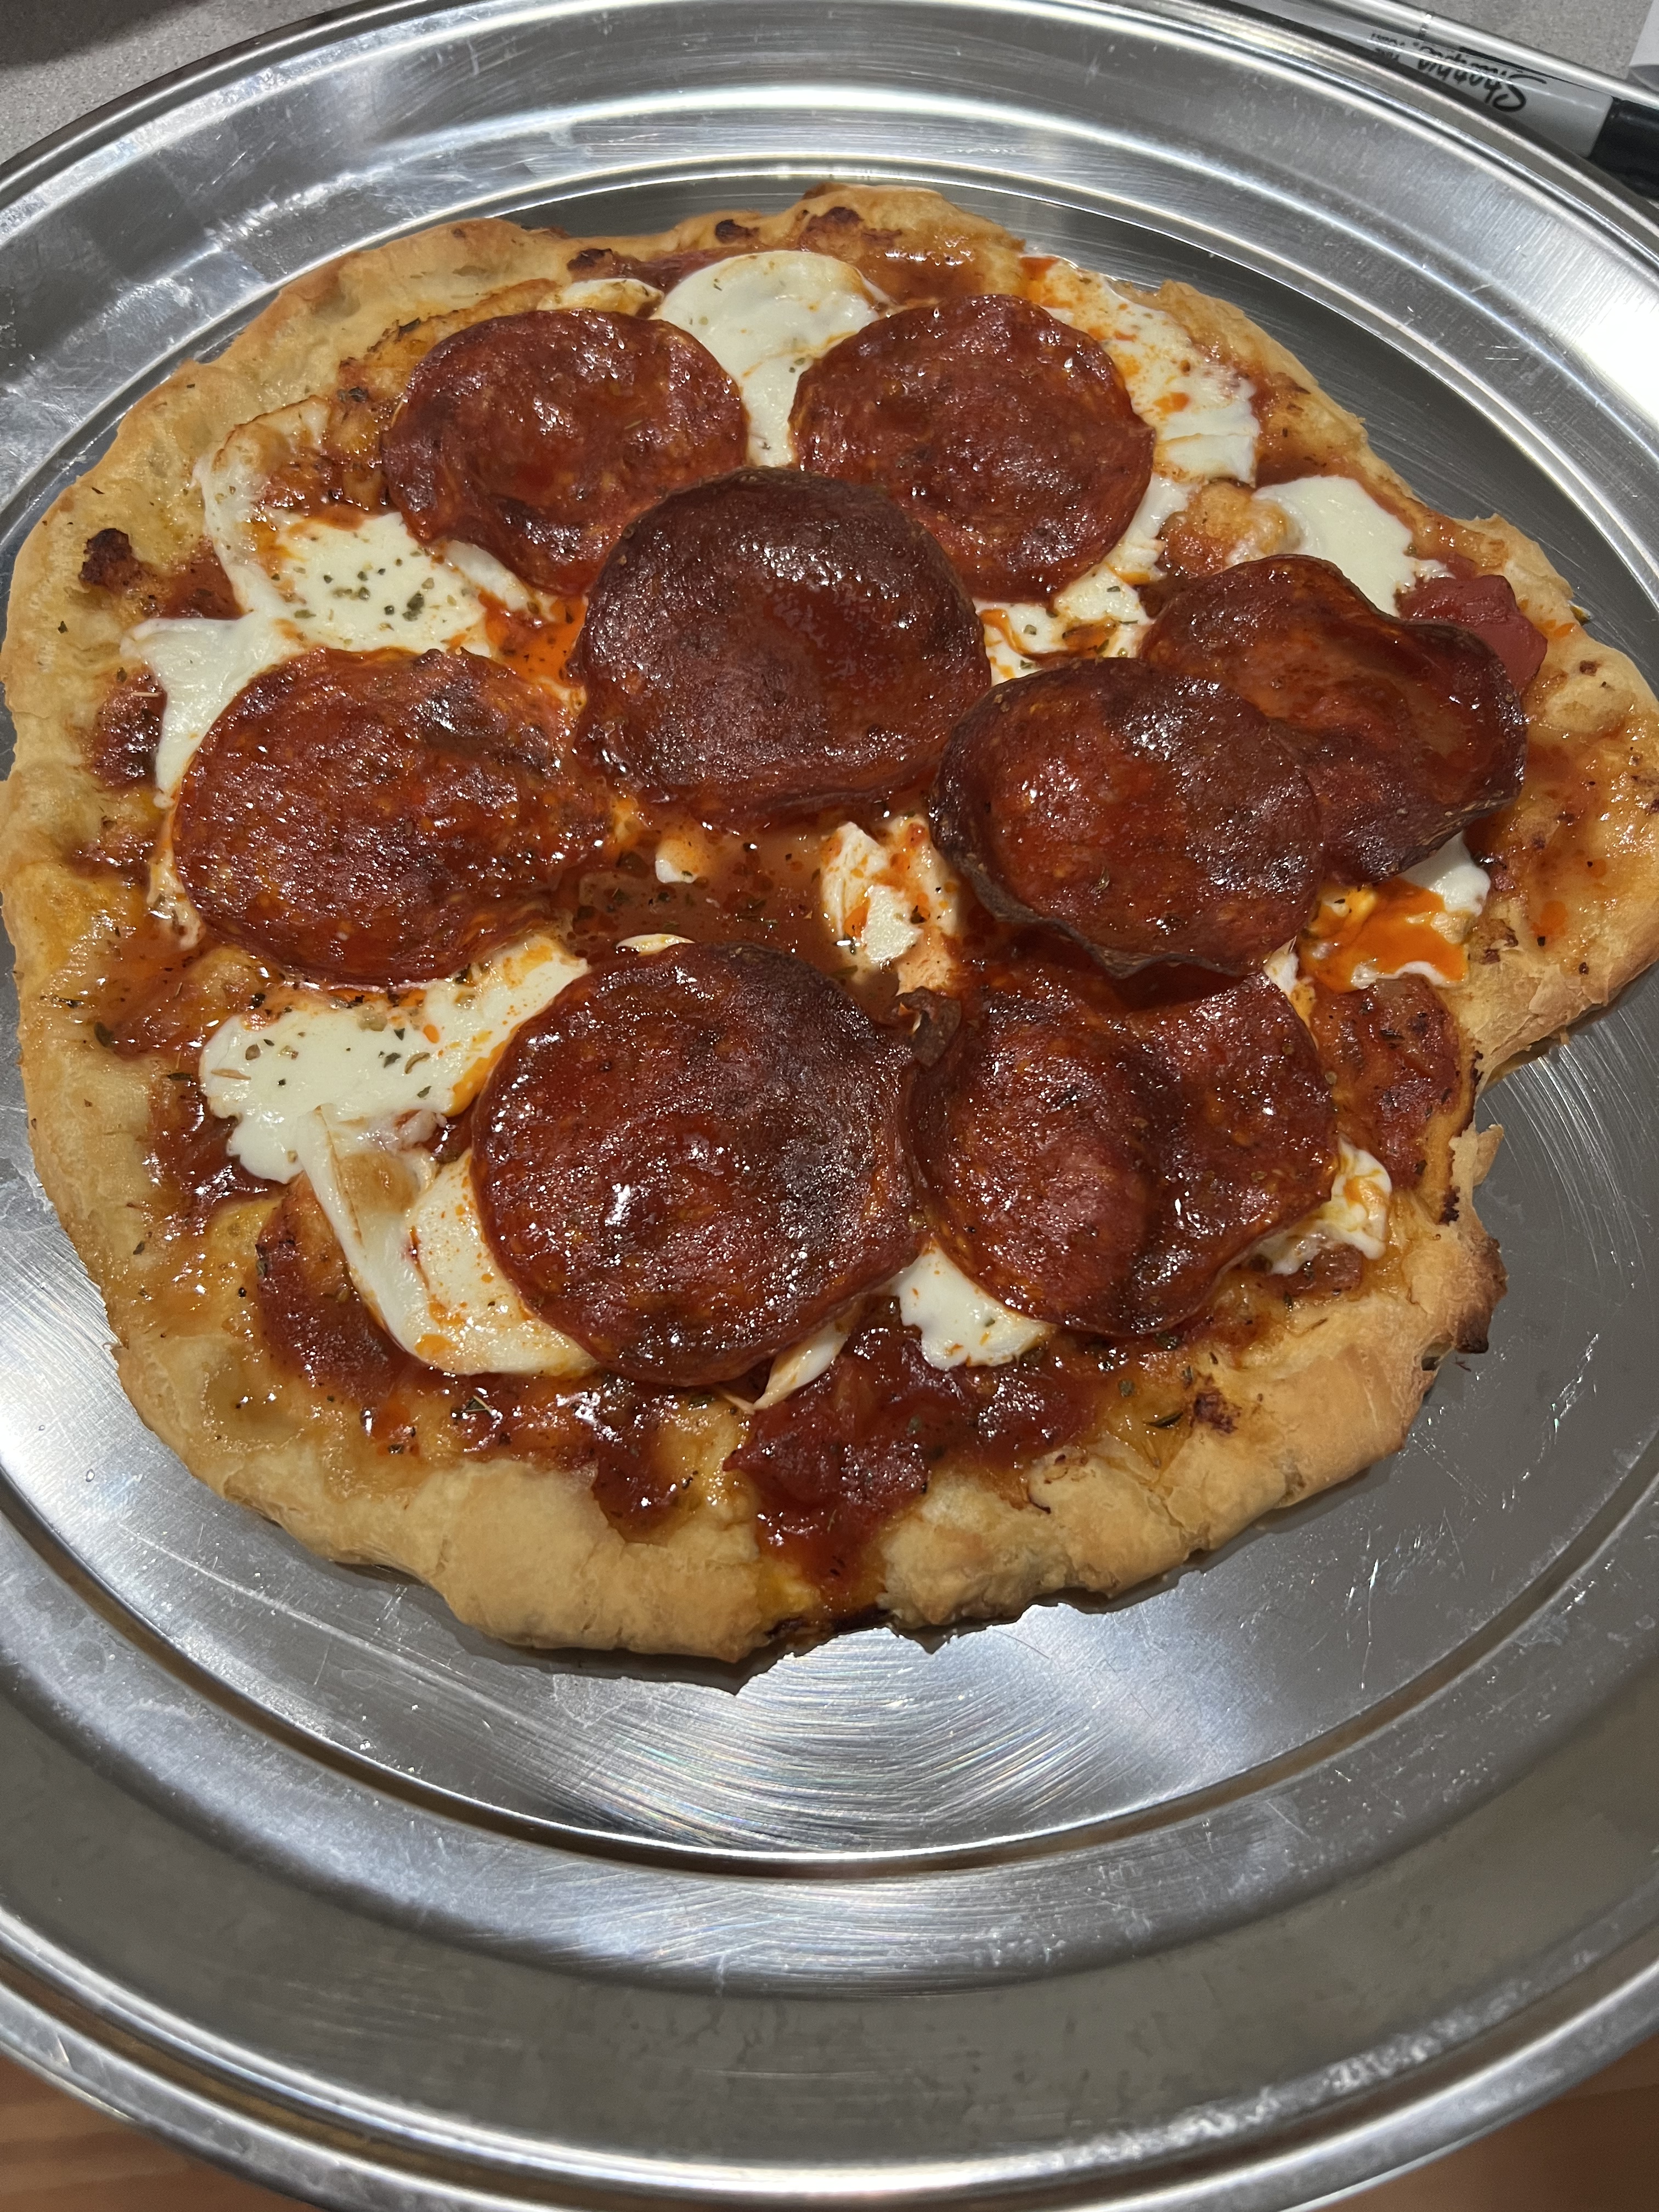
A homemade Pizza Montanara, with buffalo mozzarella and pepperoni.


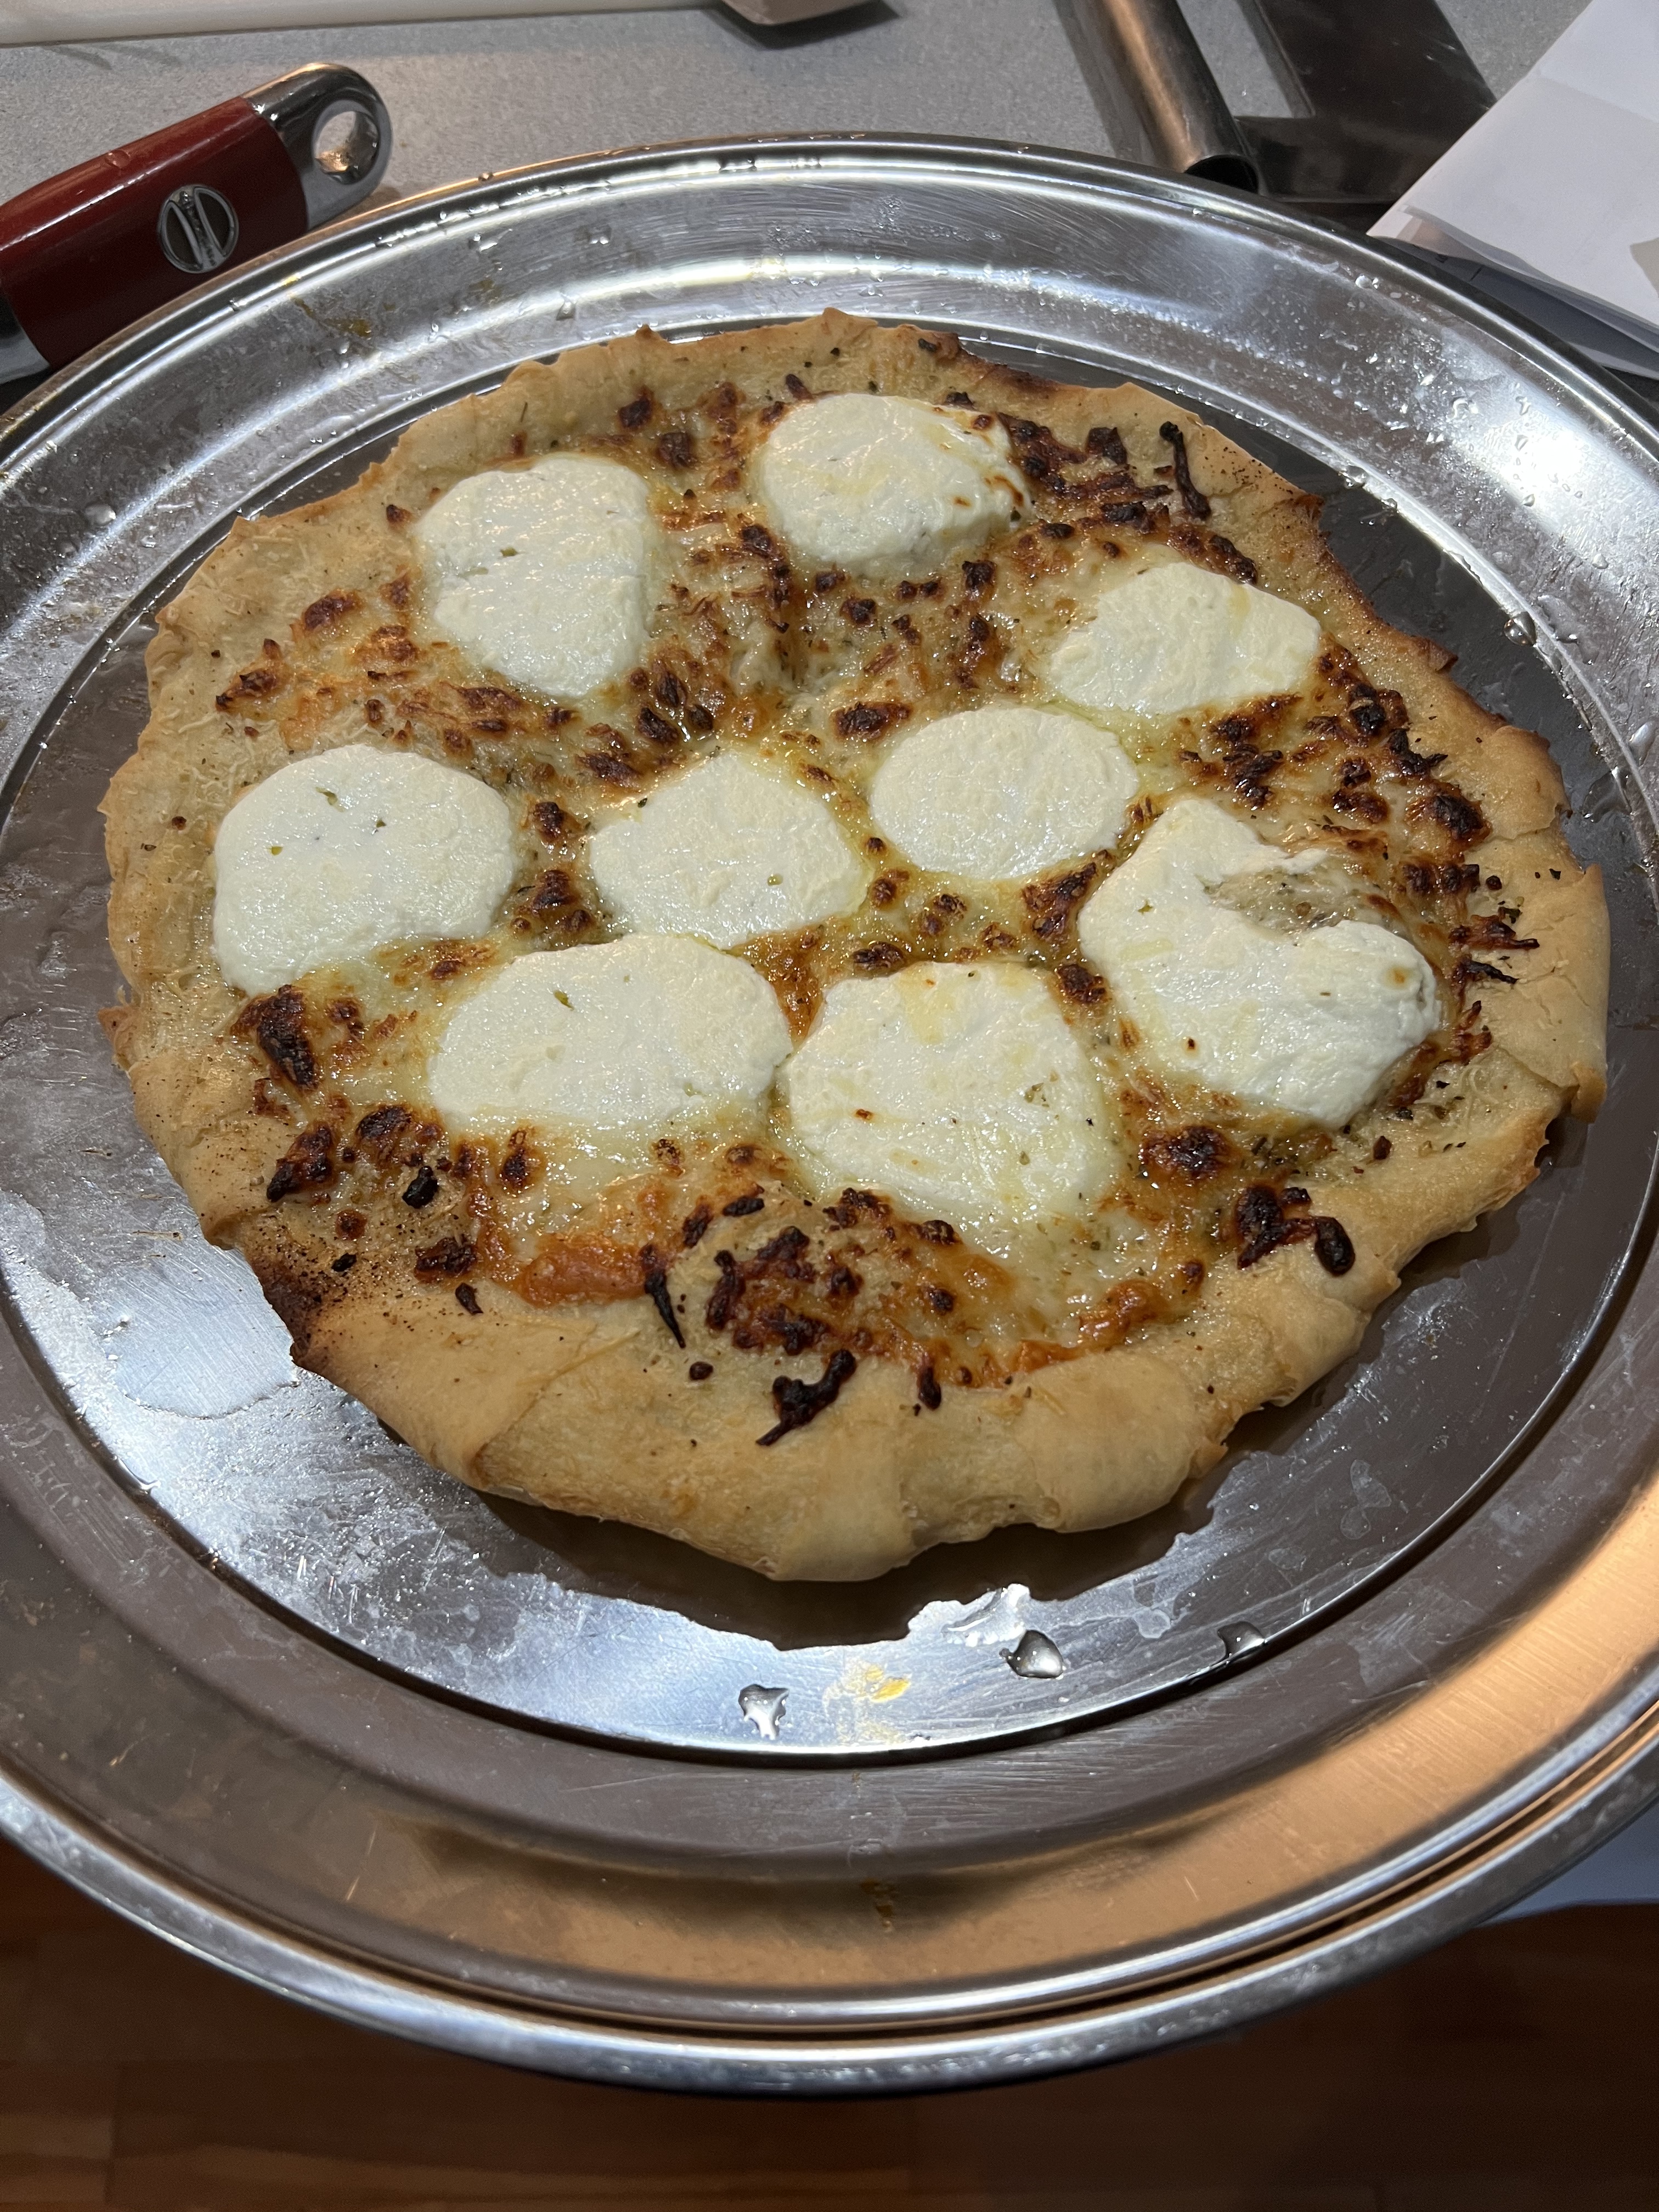
A four-cheese Montanara, with mozzarella, sharp Provolone, Parmiggiano Reggiano, and ricotta…and lots of garlic!


Every time I post a photo of Pizza Montanara on Facebook or Instagram, my friends don’t believe that this could possibly be a life-changing pizza experience. It is. After a trip to Manhattan, we’ll devour 3 pizzas on the ride home. Nothing makes New York traffic easier to bear than a Pizza Montanara in the seat next to you!

Pizza Arte also makes one helluva gluten-free pizza.


I never use ground turkey, because I think it’s nasty and flavorless. But ground chicken has a richer flavor, and doesn’t seem to dry out as quickly. adding avocado to the mix gives each bite of this burger a creamy, fatty richness the ground chicken needs.  Chicken and ABC (Avocado, Bacon and Cheese) is a winning combination. My sauce puts it over the top.

I cut the avocado in small cubes. I don’t make guacamole out of it. When the burger cooks, it melts into the meat, giving it that luscious fattiness I’m looking for. The egg and the breadcrumbs bind it all together.


chicken2

 
1 lb. ground chicken
1/4 cup breadcrumbs
1 ripe avocado, sliced into small cubes
1/2 teaspoon salt
1/4 teaspoon black pepper
pinch granulated garlic
1 raw egg
slices of bacon, cooked 
Sauce (recipe below)


chicken1


Combine the chicken, breadcrumbs, chopped avocado, salt and pepper, garlic, and egg in a bowl and mix them thoroughly but carefully so that you don’t squash the cubes of avocado.

Get a sheet pan covered in non-stick foil. Using a 1/2 cup measuring scoop, spoon out the burger meat onto the sheet pan, then gently press down on it with your hand to form patties. Place the sheet pan in the freezer for the burgers to firm up a bit. (The chicken is a little gooey, and likes to stick to your fingers, but a little oil on your fingertips prevents that.)


Firming up the burgers in the freezer. The little meatball in the middle is a leftover…and a nice extra bite for the chef to enjoy!


Pre-heat the oven to 350 degrees.

Heat a little avocado oil (or bacon fat!) in an oven-proof pan, and place the burger patties in it when it’s hot. Let the burgers sear on one side, then flip them. (Make sure they sear well, or they’ll fall apart when you try to flip them.) Add the cheese and place the pan in the oven to finish cooking and melt the cheese. Remember: it’s chicken…so you don’t want to undercook your burgers!

When they’re ready to serve, place the patties on a bun, add a couple of slices of bacon and slather with this sauce.

1/2 cup mayonnaise
1 tablespoon ketchup
1 tablespoon yellow mustard
1 tablespoon dill pickle relish
1/4 teaspoon garlic powder
1/4 teaspoon paprika
Pinch cayenne pepper

Combine all the ingredients in a bowl. Mix well. Refrigerate covered for a few hours to blend the flavors.


It’s been over a year since I posted this. Inspired by a recent conversation I had with a friend, I decided to share it again…

It’s never a healthy option to eat fast food. Michael Pollan said it best: “It’s not food if it arrived through the window of your car.”

A few years ago, a guy who claimed to be the nephew of Colonel Sanders revealed the 11 secret herbs and spices that made KFC‘s original recipe chicken a worldwide success. He said he worked for his uncle for many years and had to make huge batches of the seasoning mix.

For me, KFC is like crack. Although I’m a big proponent of grass-fed this and pastured that, my kryptonite is KFC‘s original recipe chicken. There’s a KFC right next door to a local Home Depot in my area and my car literally drives itself to the pick-up window…I can’t help it. I justify the consumption of this heavenly grease by asking for no sides–no biscuit, no nothing. I get one breast and one thigh, and I drive off, steering my car with my knees as I indulge in my dirty secret, the hot grease dripping down my chin, a roll of paper towels at my side.

Making the KFC chicken recipe at home means I do have some control over product quality. I can use pastured or organic chicken. I can use clean oil. I don’t have the fancy pressure fryer they use at KFC, but I can use the healthier option of oven-frying. That means I fry my chicken in oil until golden brown, then finish the cooking process in the oven.

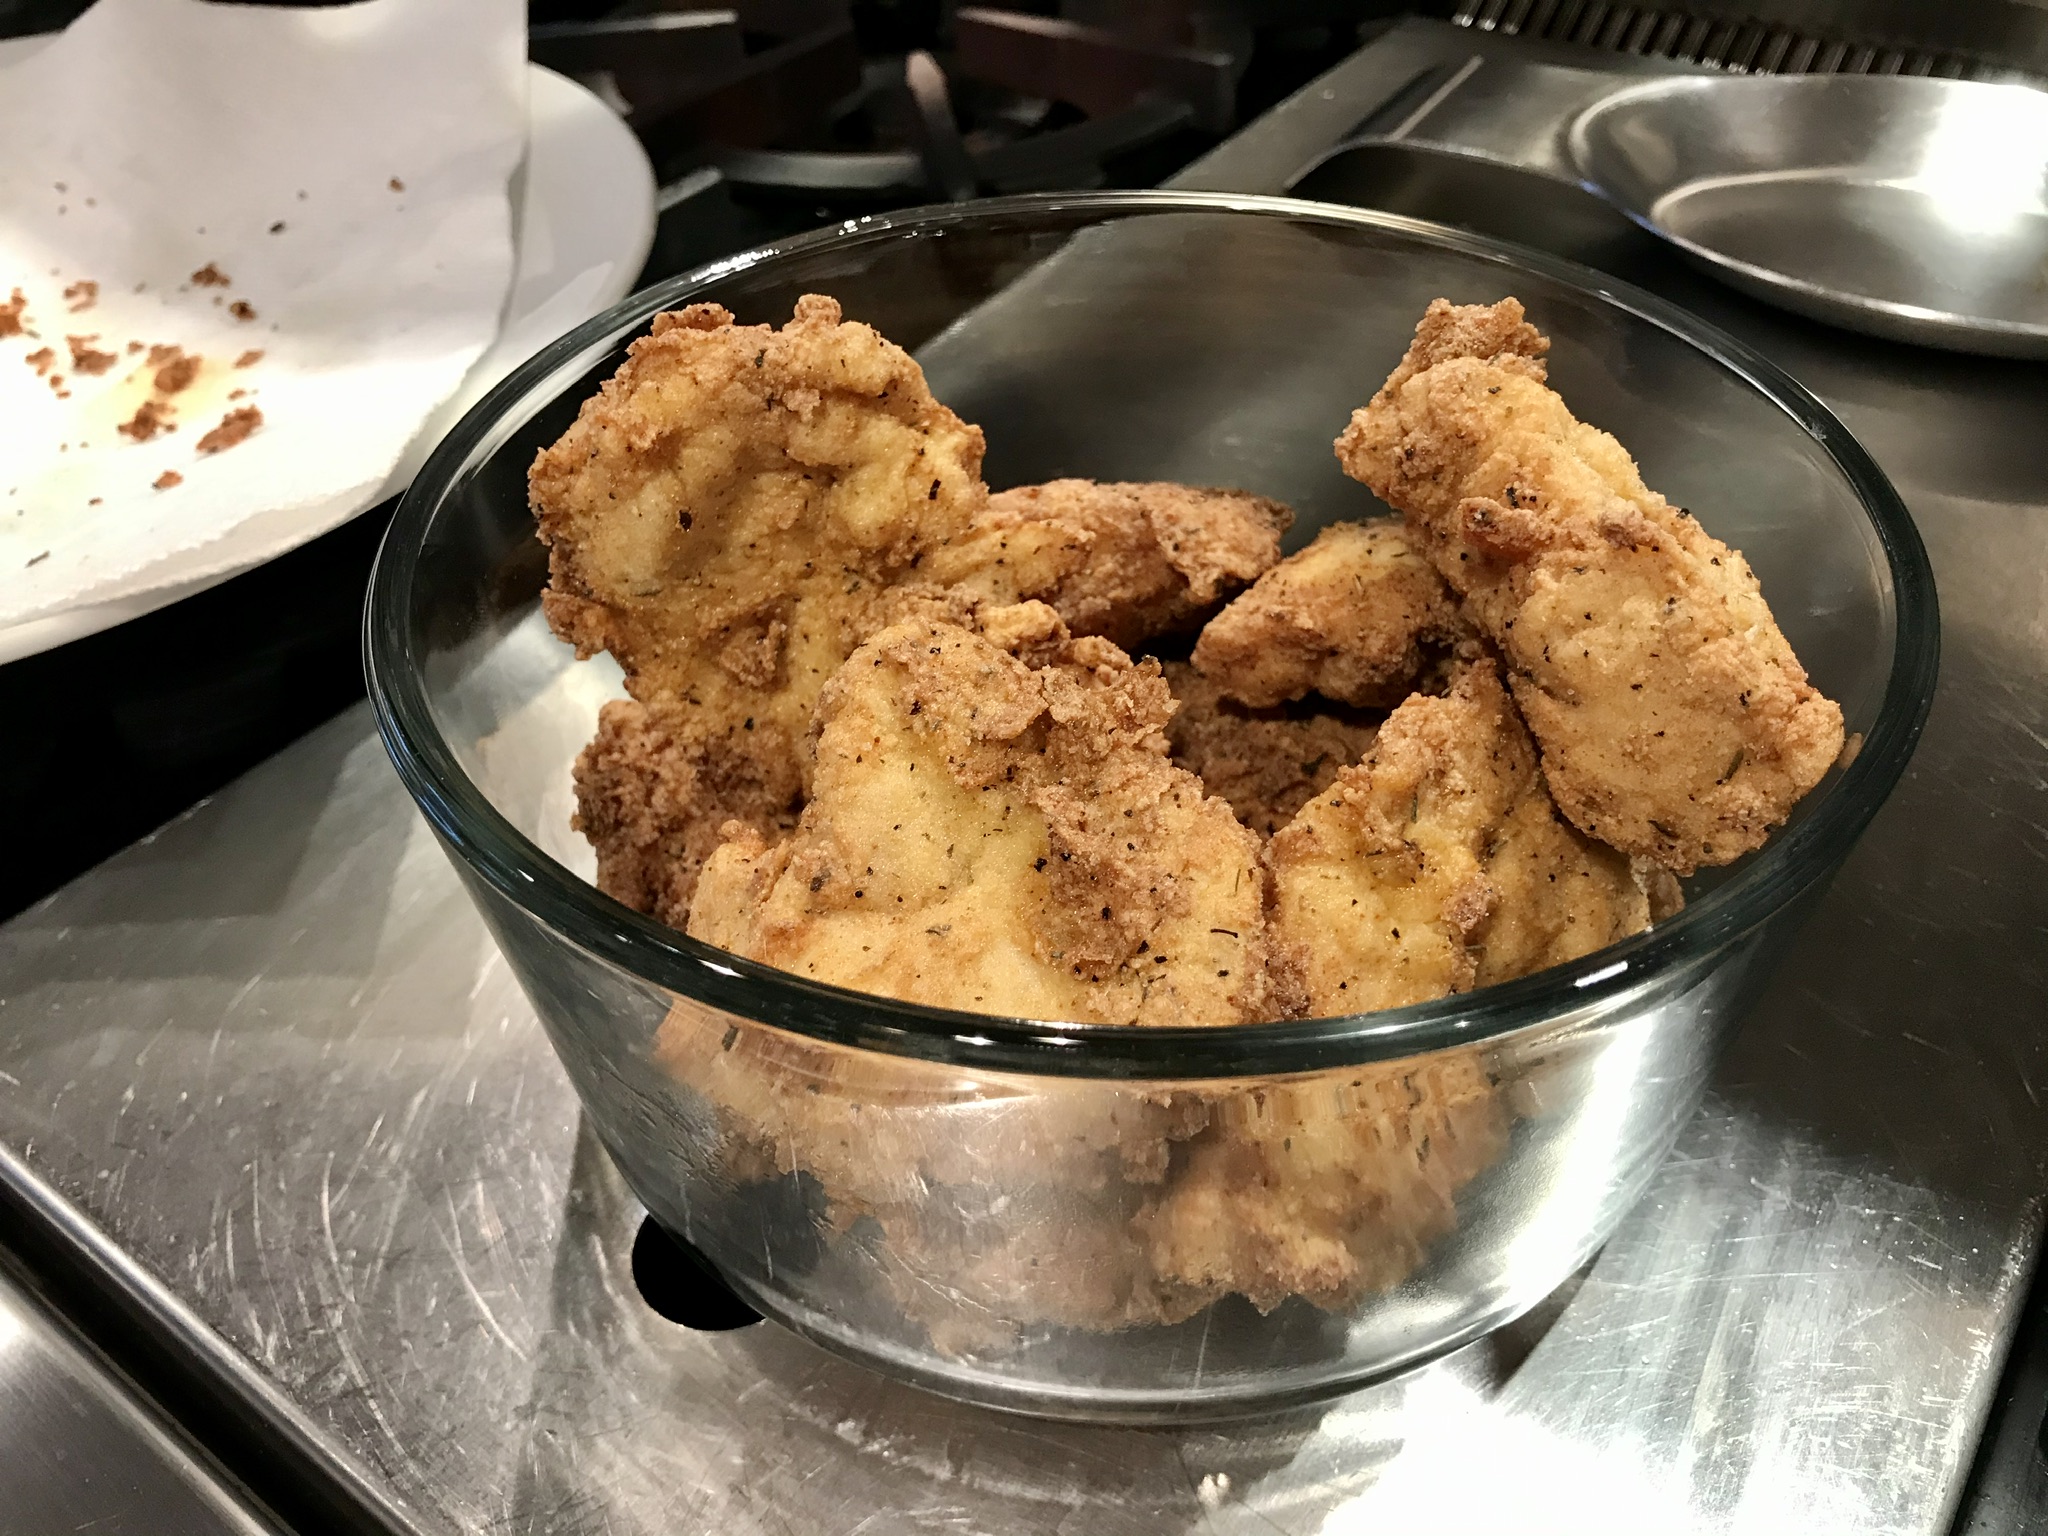
I have to say, the recipe really works! Maybe if I placed the real KFC side-by-side with my home-made chicken, I’d notice a big difference. But my brain said it was pretty damn close and absolutely delicious! If I could change one thing, I would use smaller chicken pieces next time. I used large pieces and the meat-to-breading ratio was off. Though it was mighty tasty, I was craving more breading per bite.

The recipe calls for all-purpose flour, but if you follow a gluten-free lifestyle, using Cup4Cup GF flour works just as well.

2 cups all-purpose flour
3 tablespoons paprika
1 tablespoon celery salt
1 tablespoon dried mustard
1 tablespoon garlic salt
1 tablespoon ground ginger
2 teaspoons black pepper
1/2 teaspoon white pepper
1 1/2 teaspoons thyme
1 1/2 teaspoons basil
1 1/2 teaspoons oregano
1 teaspoon salt
1 cup milk
1 egg
5 lbs. chicken pieces…your choice
oil, for frying

Combine the flour and the “11 herbs and spices” in a bowl. Mix well.

In another bowl, whisk together the milk and the egg. Add the chicken pieces to this bowl and let the chicken soak in it for 10 minutes.

Pre-heat the oven to 350 degrees.

Pour a couple of inches of the oil into a pan with high sides and heat it to 340 degrees, using a thermometer. Don’t fill it with too much oil, because oil expands when hot and it could spill over.

Take the chicken pieces out of the milk and egg mixture and coat them with the seasoning mix one at a time, making sure you coat them well. Carefully place the chicken in the hot oil. Don’t overcrowd the pan…work in small batches. Too much chicken could cause the oil to spill over the top.

Fry the chicken pieces just until golden…no need to cook them all the way through. Place the pieces on a baking sheet lined with non-stick aluminum foil. When all the chicken has been fried, place the baking sheet in the oven and cook until the chicken pieces reach an internal temperature of at least 160 degrees.

Make a lot! Leftovers are great, and they re-heat really well in the oven! (Don’t use a microwave…the oven is best.)
Chicken parmigiana, much like pizza, is a bit more difficult to make than you might think. Sure, there’s plenty of crappy chicken parm out there, made with processed frozen chicken cutlets, bad sauce and cheap cheese. But to make a really fantastic, mind-blowing chicken parm, that takes some practice!

The key to this recipe is simple: don’t skimp on the quality ingredients. And my recipe makes a lot. Trust me: you will want leftovers.

The recipes for my Italian bread crumbs and my “Don’t Call It Gravy” tomato sauce are at the bottom.


Gooey, cheesy, orgasmic.

Gooey, cheesy, orgasmic.


6 Chicken breasts, the best quality you can get your hands on
Italian bread crumb seasoning (see recipe below)
3 eggs
olive oil for frying
“Don’t Call It Gravy” tomato sauce (see recipe below)
Fresh mozzarella cheese
oregano

Thaw the chicken breasts. Lay them flat on a cutting board, and you’ll see where the chicken tender is on the side of the breast. Cut the tender off and set aside, leaving the breast which is thinner at one end and thicker at the other. Slice the breast in half lengthwise at the thicker end, keeping the knife level, so that you wind up with 2 pieces of breast meat that are the same thickness, but one will be a longer piece (the bottom) and one about half its size (the top part you sliced off.) Do this with all the breasts.

By slicing the breasts lengthwise into evenly thick pieces, it will take the same amount of time for them to cook. (I prefer not to pound the hell out of the chicken breasts until they’re flat as a pancake.)

Pour the olive oil into a large frying pan. Next to the pan, set up two bowls: one with my Italian bread crumb seasoning and in the other: crack the eggs and whisk them.

Now it’s your standard breading procedure: chicken meat in the egg, then in the breadcrumbs, coating well. Shake off the excess and place carefully in the pan of olive oil when the oil comes to temperature for frying.

Fry the chicken in the oil until it’s golden brown. You want it cooked all the way through, but not overcooked. Place the fried chicken pieces on paper towels to absorb the excess oil. Do this with all the chicken. The fried chicken at this point is delicious all by itself: chop it and use it in a salad, or make a chicken sandwich. (By the way, if there’s breading left over, use it on the chicken tenders you cut off. My daughter gets these instead of store-bought chicken tenders, and she loves them.)

Cover a baking sheet with aluminum foil. Ladle out enough sauce to create a thin layer of sauce on the bottom of the sheet. Place the fried chicken breasts on top of the sauce. Cover the breasts with more sauce, then place pieces of sliced fresh mozzarella on top. Sprinkle the top with a little oregano.

Place the baking sheet in a pre-heated 350 degree oven and bake until the cheese has melted and just starts to brown. Serve it with pasta.


MY “DON’T CALL IT GRAVY” TOMATO SAUCE

It’s not hard to make a good tomato sauce. But it takes a little work to make an amazing tomato sauce. Honed from a recipe handed down by a friend-of-a-friend’s Italian grandma, it is one very important part in two of my favorite Italian comfort food recipes: my meatballs…and my chicken parmigiana recipe.


1 medium onion, finely chopped
2 cloves garlic, finely chopped
1/2 cup extra virgin olive oil
10 cups ground and peeled tomatoes…or 3 cans (28 oz) tomatoes (real San Marzanos preferred)
2 teaspoons each: dried oregano, basil and parsley
3/4 teaspoon each anise seed and fennel seed
1 1/2 teaspoons salt
1/2 teaspoon black pepper
2 bay leaves
1 small can (6 oz) tomato paste
1 teaspoon sugar, optional

Heat the olive oil in a large pot and add the onions. Cook until onions are translucent, then add the garlic. Stir for about 10 seconds.

Add the tomatoes and cook until the orange foam disappears, stirring frequently.

Add the oregano, basil, parsley, anise seed, fennel seed, salt, pepper, and bay leaves. Stir to combine. Add the tomato paste, stirring well. Let the sauce just come to a boil (which helps the paste thicken the sauce), then reduce it to a simmer, and cook uncovered for at least an hour, stirring constantly, until the sauce reaches the consistency you like.


MY ITALIAN BREAD CRUMB SEASONING

This is the one part of the recipe (other than the optional pasta) that keeps this dish from being gluten-free. So I use gluten-free breadcrumbs, even if I don’t need to. I buy a loaf of Udi’s frozen gluten-free bread, toast the slices, and them put them in a food processor. I dare you to tell the difference between these and breadcrumbs with gluten!


1 Udi’s loaf, toasted and ground into breadcrumbs
2 teaspoons dried parsley
1 teaspoon dried oregano
1 teaspoon dried basil
1 teaspoon salt
1/2 teaspoon granulated garlic
1/2 teaspoon granulated onion
1/4 teaspoon black pepper


Combine all the ingredients well.