Archive for the ‘frying’ Category

I love avocado, and using it in this chicken burger recipe gives each bite a creamy, fatty richness the chicken needs.  It’s a simple burger, with just a handful of ingredients, but it’s really full of flavor.

If you want to go lo-carb, you can skip the breadcrumbs (and the bun for that matter.) If you’re going gluten-free, simply use GF breadcrumbs and buns and you’re all set to go.

If you don’t like avocado, leave it out. There’s still plenty of flavor.

Wanna add cheese? Go for it.

The bacon is optional, but what burger isn’t better with bacon?

The one thing I wouldn’t substitute is ground turkey for the chicken. To me, ground turkey is the cardboard of the meat world. It’s just nasty, and I won’t eat it.

chicken2

1 lb. ground chicken
1/4 cup breadcrumbs
1 ripe avocado, sliced into small cubes
1/2 teaspoon salt
1/4 teaspoon black pepper
pinch granulated garlic
slices of bacon, cooked
Sauce (recipe below)

chicken1

Combine the chicken, breadcrumbs, chopped avocado, salt and pepper, and garlic in a bowl and mix them thoroughly but carefully so that you don’t squash the cubes of avocado. I like to put the meat in the freezer for about 10 minutes to firm it up a bit.

Form the meat into burger patties. It will be a bit sticky, but just make sure you get the avocado evenly distributed. (I find that using gloves and lightly spraying my hand with avocado oil helps me make the patties without sticking.) Chill the patties again in the freezer for about 10 minutes to firm them up some more before cooking.

Pre-heat the oven to 350 degrees.

Heat a little avocado oil (or bacon fat!) in an oven-proof pan, and place the burgers in it when it’s hot. Let the burgers sear on one side, then flip them. (Make sure they sear well, or they’ll fall apart when you try to flip them.) Place the pan in the oven to finish cooking. It’s chicken…so you don’t want to undercook your burgers!

When they’re ready to serve, place the patties on a bun and with a slice of or 2 of bacon and slather with this burger sauce…

1/2 cup mayonnaise
1 tablespoon ketchup
1 tablespoon yellow mustard
1 tablespoon dill pickle relish
1/4 teaspoon garlic powder
1/4 teaspoon paprika
Pinch cayenne pepper

Combine all the ingredients in a bowl. Mix well. Refrigerate covered for a few hours to blend the flavors.


There’s no problem with your bird, she said to me
Just go low and slow to cook it perfectly
A few choice seasonings end up deliciously
There must be 50 ways to roast your chicken…
There’s nothing better than a whole roasted chicken. Simply season it, pop it in the oven and go low and slow. No maintenance, and you’ve got a great bird in a couple of hours. 
Once you go with humanely raised pastured chicken, you’ll never go back to supermarket chicken again. The flavor is fantastic, and you’ll devour it right down to the bones, which you can use to make the best home-made chicken stock or soup you’ve ever had. Nothing goes to waste.
I roast at least one chicken every week, so to change it up, I’ve come up with many different rubs and sauces over the years. All of the rubs are sugar and gluten-free preparations. 
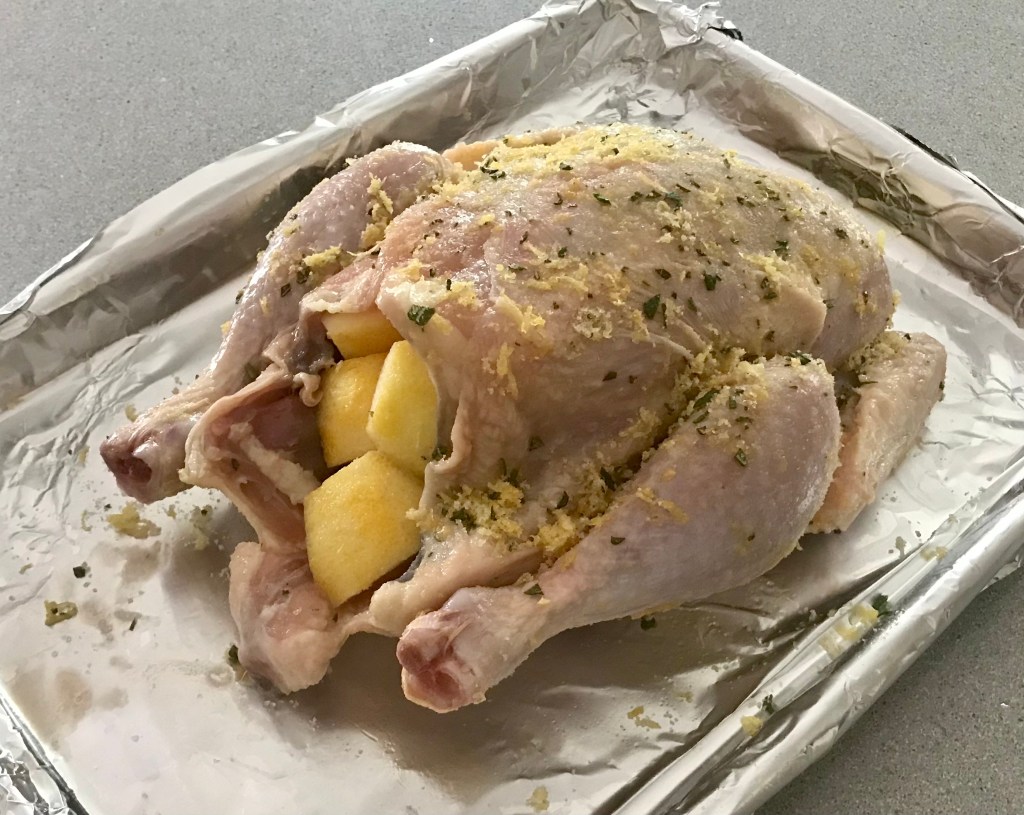
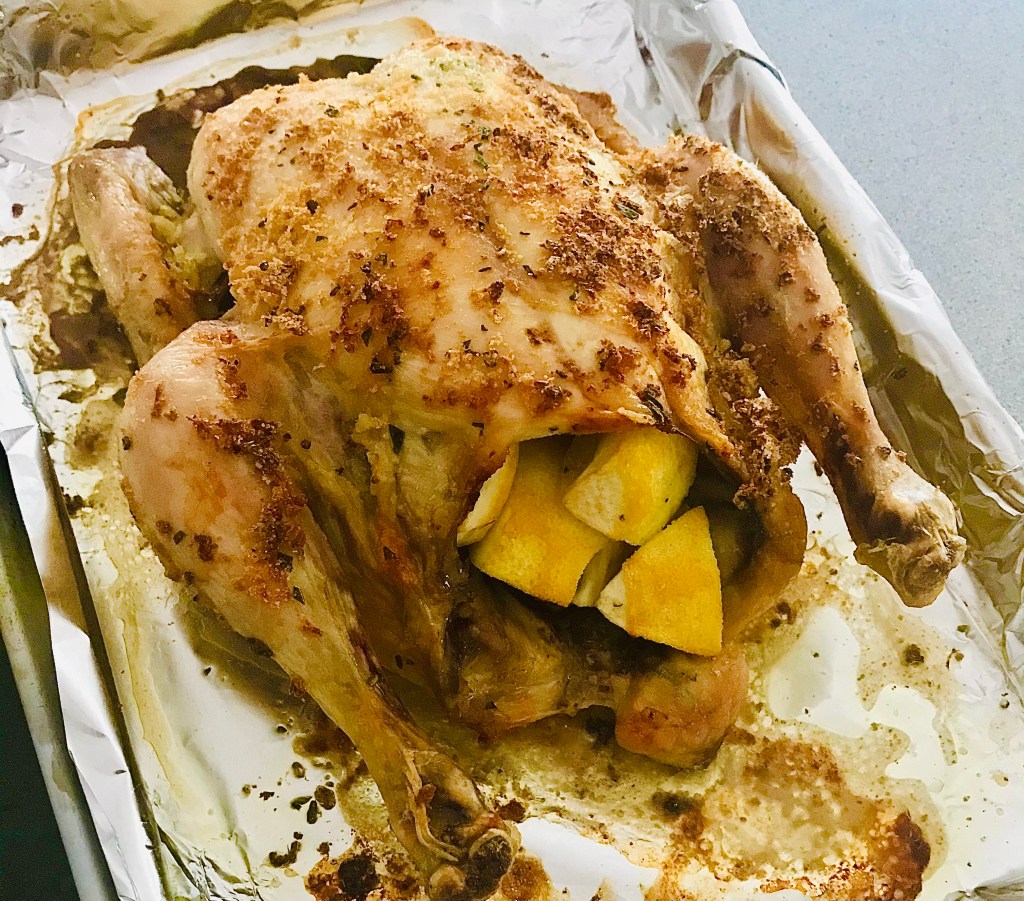
Chicken with Rosemary and Lemon
This image has an empty alt attribute; its file name is 4e73e740-e6a1-492e-ab13-a58dc33e4a8b.jpeg
The lemon serves double-duty in this dish. You use the zest to season the outside skin, then you place the remaining cut up pieces inside the carcass to flavor from the inside out.
1 tablespoon finely chopped fresh rosemary
1 teaspoon granulated garlic
2 teaspoons salt
zest from 2 lemons, using a micro plane zester, the leftover lemons quartered
1/2 teaspoon black pepper
This image has an empty alt attribute; its file name is b9ca141d-4a3f-4499-b552-3579d061fc80.jpeg
In a bowl, combine the rosemary, garlic, salt, lemon zest, and pepper. 
Thaw a bird, remove the giblets, and rub it all over with olive oil. Shove the quartered lemon pieces into the carcass of the bird. Season the bird inside and out with the rosemary seasoning mix.
Place the bird on a pan lined with non-stick aluminum foil in a pre-heated 450-degree oven. Cook for 10 minutes at this temperature, then reduce to 275 degrees and cook low and slow until done.
Tarragon Chicken
I love the taste of chicken seasoned with tarragon. Careful with this, or you will accidentally devour your fingers!
1 tablespoon dried tarragon, crumbled into a powder
1 teaspoon garlic salt
1 teaspoon salt
1/2 teaspoon black pepper
olive oil
In a bowl, combine the tarragon, garlic salt, salt and pepper.
Thaw a bird, remove the giblets, and rub it all over with olive oil. Season the bird inside and out with the seasoning mix.
Place the bird on a pan lined with non-stick aluminum foil in a pre-heated 450-degree oven. Cook for 10 minutes at this temperature, then reduce to 275 degrees and cook low and slow until done.
Italian Chicken
FullSizeRender
The darker color of the bird comes from rubbing it first with balsamic vinegar, then olive oil, before coating it with Italian seasonings. Don’t use the fancy, expensive balsamic. The bottles that go for about 9 bucks in the supermarket work well for this recipe.
Balsamic vinegar
Olive oil
1 tablespoon salt
1 tablespoon parsley
1 teaspoon oregano
1 teaspoon pepper
1 teaspoon granulated onion
1/2 teaspoon granulated garlic
Thaw a bird, remove the giblets, and rub it all over with the balsamic vinegar. Then rub it all over with the olive oil. Season the bird inside and out with the seasoning mix.
Place the bird on a pan lined with non-stick aluminum foil in a pre-heated 450-degree oven. Cook for 10 minutes at this temperature, then reduce to 275 degrees and cook low and slow until done.
My Grandma’s Chicken
My grandmother would cook chicken thighs low and slow all Saturday morning, knowing that I was coming over for lunch after Lithuanian school. The meat just fell off the bone, and I couldn’t stop eating it. This recipe is so simple and works just as well for a whole bird. Every time I make this, I think about those days at my grandmother’s house.
Lawry’s Seasoned salt
Olive oil
Thaw a bird, remove the giblets, and rub it all over with olive oil. Season the bird inside and out with the Lawry’s Seasoned salt.
Place the bird on a pan lined with non-stick aluminum foil in a pre-heated 450-degree oven. Cook for 10 minutes at this temperature, then reduce to 275 degrees and cook until done.
If you’re using chicken thighs, like my grandmother did, make sure they have the skin on and the bone in.

I’m not a big beer drinker, but I do like to cook with it. One of my favorite things in the world is beer-battered fish. And it doesn’t have to be greasy if you do it right. (Scroll down to the bottom to see how to make this gluten-free!)

When you fry at home, you can do things the right way: start with clean oil, heat it to the right temperature, and then throw it out when it’s done. When you go to a fast-food place, that oil has been sitting there all day (if not all week)…it’s been used hundreds of times…it absorbs the flavors of whatever was fried before your food got dropped in there…and quite frankly, it’s beat up.

What got me started with this whole beer-batter-at-home process was stumbling upon some amazing fresh local cod at my neighborhood seafood store: Bridgeport Seafood in Tiverton, Rhode Island. My buddy, Dave, said that the cod came from just off Sakonnet Point that day. Good enough for me!

I use a high smoke point oil like grapeseed oil and, using a thermometer, heat it to 350 degrees. I always watch the temp of my oil…it can get too hot very quickly…and by the same token, the temp can drop quickly if I throw in a whole bunch of fish into the pot all at once. Using one of those deep fryers made for home use is also a good way of cooking and controlling temperature. If I’m using a pot to fry, I’m careful not to put too much oil in my pot (halfway up is fine) or it could spill over, since oil expands as it gets hotter.

Here’s all you need for great beer batter:

1 1/2 cups all-purpose flour (I use King Arthur)
12 oz. bottle of beer (Sam Adams Boston Lager works for me)
1 teaspoon salt

Combine all the ingredients in a bowl and beat until smooth. Cover loosely with plastic wrap and place in the fridge for 3 hours.

Cut your fish into pieces that aren’t too big and will fit in your pot easily. The thickness of the fish may vary and so may the cooking times of each piece. When the oil reaches 350, simply dip the fish into the batter and let as much batter drip off as you like before you carefully place the fish into the oil. Fry until golden brown.


beer batter


What good is fried fish without tartare sauce, right? Don’t tell me you’re using the stuff in a jar after frying the fish yourself!

1/2 cup mayo
Dash of Worcestershire sauce
Dash of Frank’s Red Hot cayenne sauce
Grinding of black pepper
1 tablespoon finely chopped capers
1 teaspoon lemon zest, using micro plane zester

Combine all the ingredients in a bowl, cover with plastic and refrigerate for an hour before using.


To make beer-batter gluten-free, simply substitute GF flour for the all-purpose flour. (I like Cup4Cup.) And now, you can get gluten-free beer as well. Use it instead of regular beer, and you’ve got a beer batter that’s gluten-free!

When I was a kid, no visit to a Chinese restaurant was complete without an order of those sweet, greasy and radioactive red spare ribs. They came in that foil-lined bag that barely kept them warm until my dad got us home to devour them along with the other classics: fried dumplings, and won ton soup with fried won tons on the side. I still see those ribs on menus even today, and despite my cravings, I just don’t eat fire-engine-red-dyed food anymore.

Imagine my excitement when I saw a recipe for those classic spare ribs in a food magazine. I figured I’d just make them without the food coloring. It totally worked.

I don’t think I’ve ever made a recipe exactly as written, and this was no exception. For one thing, it called for dry sherry. I didn’t have it so, I used dry marsala wine. I didn’t even have the pork ribs, so I substituted a beautiful slab of grass-fed beef flap. It was awesome. But using pork ribs and dry sherry in the same quantities you see here will totally work.

1/3 cup hoisin sauce
1/4 cup soy sauce
3 tablespoons dry marsala wine
2 cloves garlic, finely chopped or through a press
2 tablespoons sugar
1/2 teaspoon Chinese five spice powder
2 lbs. beef flap (skirt steak or hanger steak works, too)


To make the marinade, combine the hoisin sauce, soy sauce, marsala, garlic, sugar and Chinese five spice in a bowl. Mix well.

Trim the excess fat and silver skin off the beef flap, and if it’s thick, slice it lengthwise to make a thinner piece of meat about 1/4″ to 1/2″ thick.

Place the meat in the marinade, making sure it gets well coated on all sides. Marinate the meat at room temperature for about 30 minutes. If you have a thicker cut of meat, you can marinate it longer.

Drain and discard the marinade.

Heat a cast iron pan and add a little lard or oil. Place the beef flap pieces in the pan, searing well on one side before flipping over to the other. If the meat is thin, you can cook it to a medium-rare right there on the stove top. You might need to finish the beef in a 350-degree oven if you’re using a thicker cut.


To make the Chinese ribs with this marinade: simply place the ribs and the marinade in a Ziploc bag at room temperature for 30 minutes. Pre-heat the oven to 350 degrees, and place the ribs on a baking sheet with a wire rack on top. Save the marinade…and baste the ribs with it every 30 minutes, turning the ribs over as you do so. Cook until the ribs are done, about 2 hours.


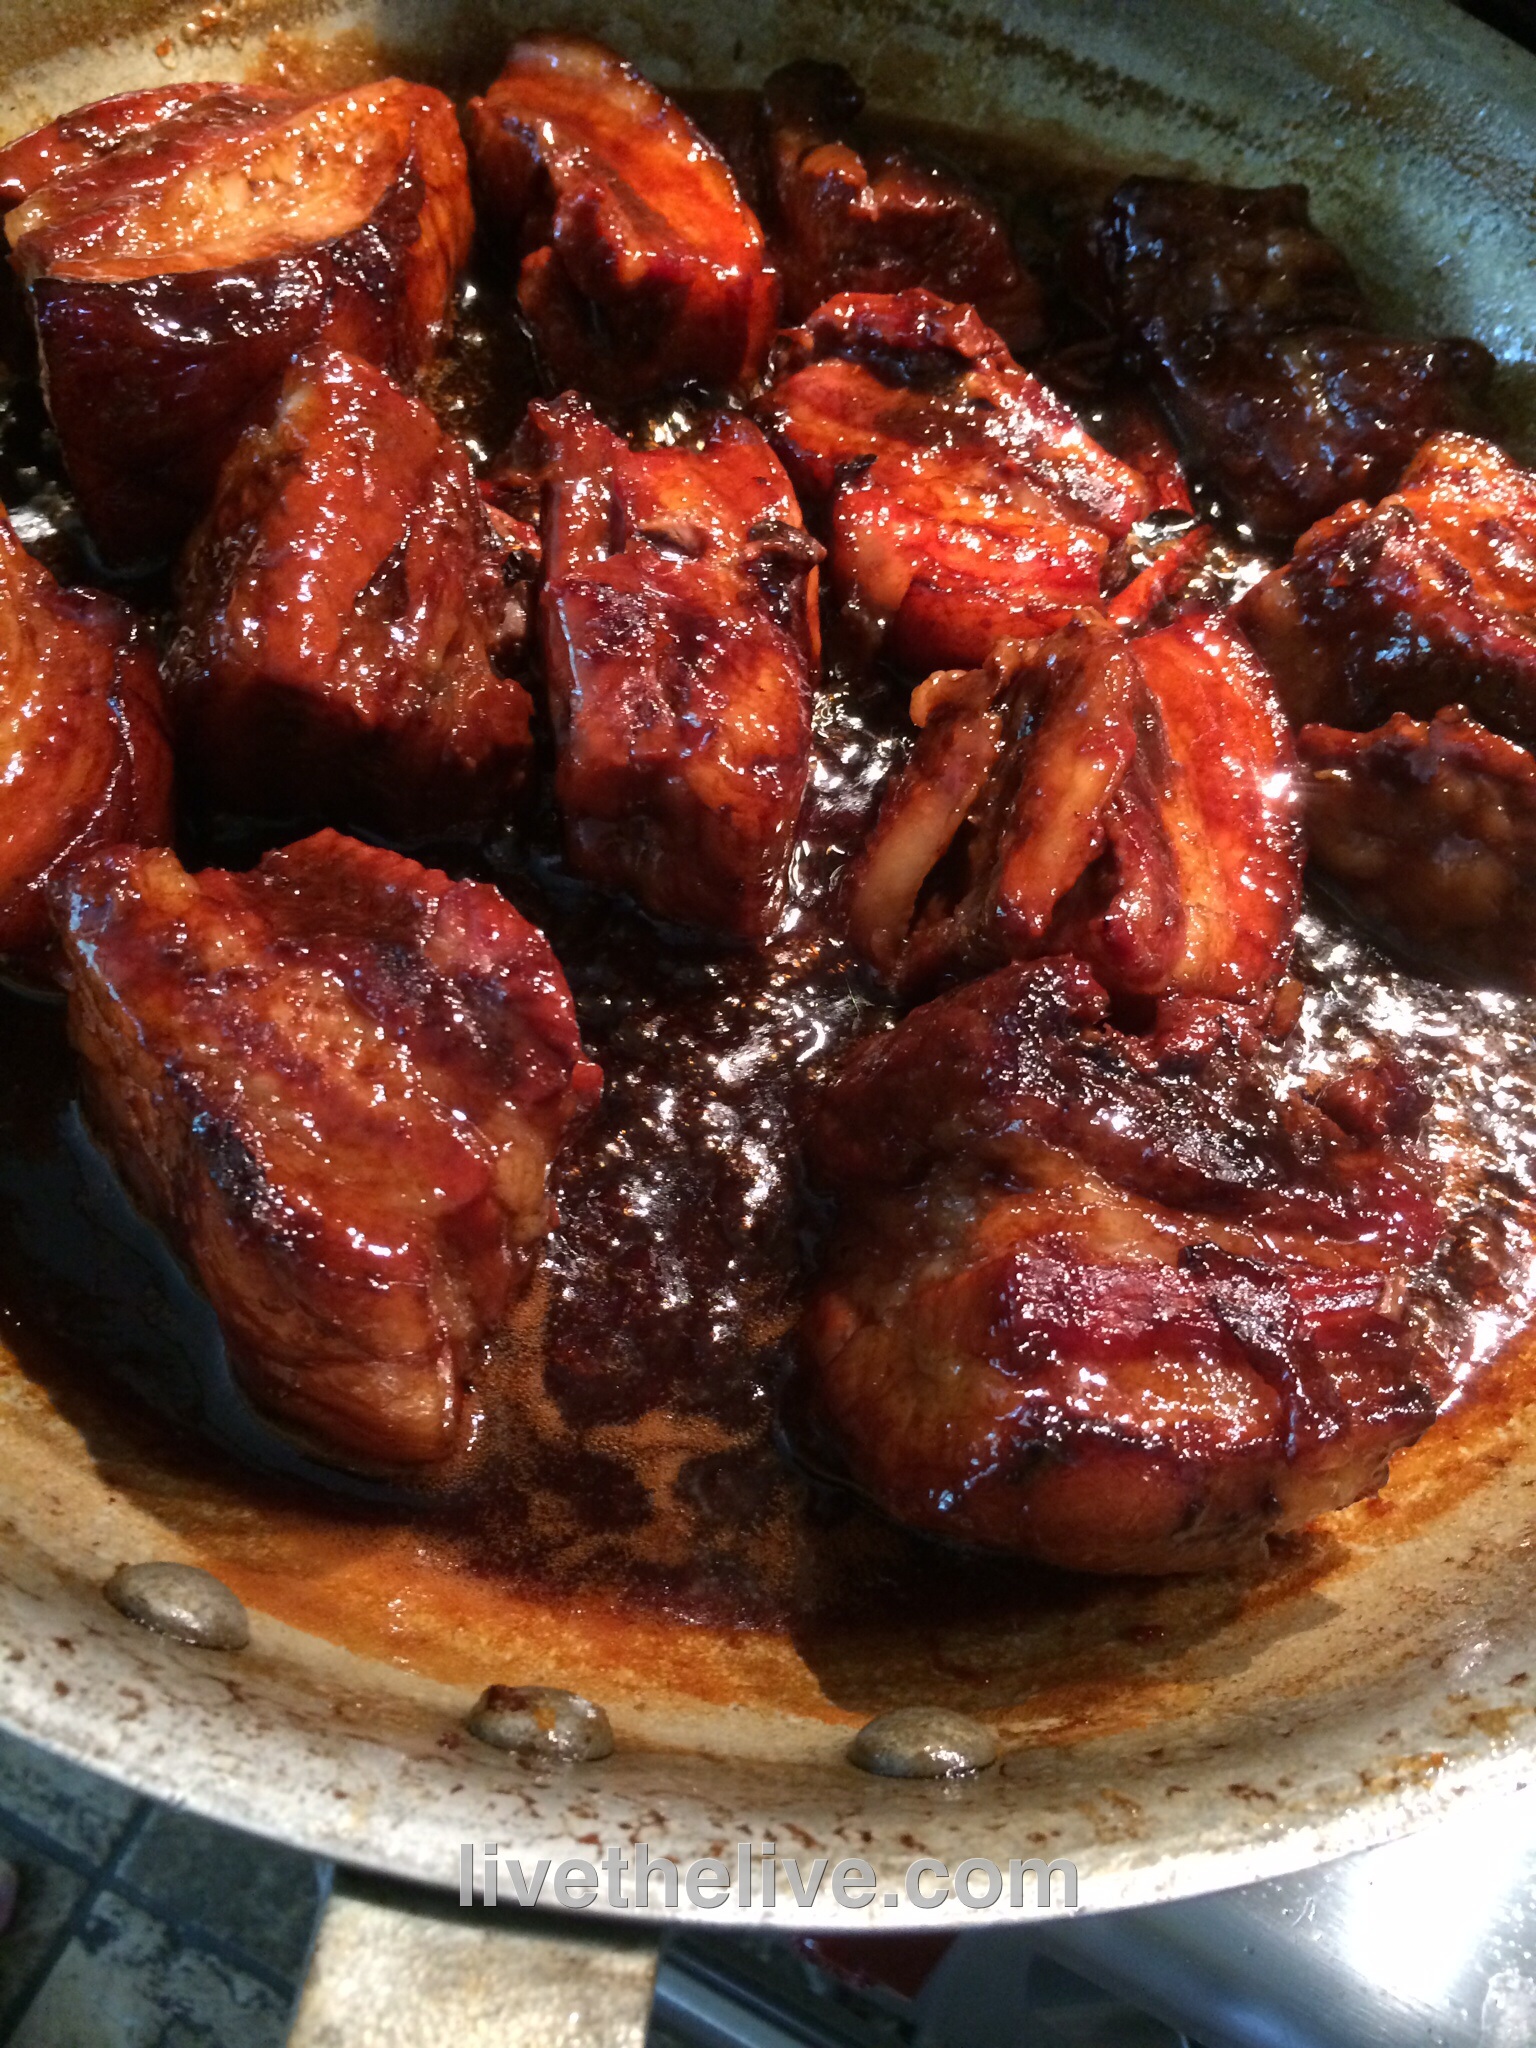
Sometimes the happiest of cooking accidents happen with bacon. My original plan was to make Chinese-style honey ribs for dinner. But instead of pulling a nice rack of ribs out of the freezer, I accidentally took out a slab of pork belly. I only realized my mistake after I thawed it, so I decided to use it! The results were pretty damn tasty.

I like maple syrup instead of honey, but use what you like!

image

Marinade:
¾ cup light soy sauce
6 Tablespoons hoisin sauce
5 lbs. pork belly
Zest and juice of 1 lemon
2 whole star anise
2 cinnamon sticks (3”)
1/2 cup honey or maple syrup
4 cups chicken broth (preferably homemade)
image
Pre-heat the oven to 350 degrees.
Mix the marinade ingredients. Set them aside.
Cut the pork belly into pieces that are about 2 inches square. Place them in a large pot. Cover them with water and bring the pot to a boil. Boil it for 5 minutes. Drain the water.
Place the warm pork belly pieces on a sheet pan lined with non-stick aluminum foil. Coat them with the marinade. Let them sit for 10 minutes.
Bake the pork belly pieces on the sheet pan in the oven for 30 minutes.
While the pork belly is baking, start the sauce in a large non-stick pan or pot: combine the lemon zest and juice, star anise, cinnamon sticks, maple syrup or honey, and chicken broth. Bring it to a boil, then reduce it to a simmer.
When the pork belly pieces have finished baking, add them to the sauce pot, lowering the heat to a simmer. Simmer (covered) for about 15 minutes or until meat is tender.
Turn the heat back on high, uncover the pot and cook until the sauce has reduced to a glaze that coats the meat. Reduce the heat as the sauce thickens to avoid the sugars in the syrup or honey from burning. When the pieces are sticky and gooey, they are ready!
Devour them just like that!
If you have leftovers, let the pork belly cool, then slice the pieces it to your desired thickness and fry them like regular bacon. They’re great with eggs!
image

This is a real comfort food we discovered on a trip to Spain in 2014. Croquettes are the Spanish equivalent of chicken nuggets: they’re found on every kids’ menu…and my daughter ordered them just about everywhere we went! So it’s no surprise that I “got the order” to make a batch of croquettes once we got home…and I’ve been making them ever since.

You can make these days ahead of time and then freeze them, re-heating them whenever you have guests. These are way better than your average snacks when your favorite game is on!


image


I found a great recipe for croquettes in Saveur magazine, and decided to try it out. I was a bit clumsy at making them at first–they do need a bit of finesse–but by the end of the batch, I got the hang of it. And to make them gluten-free, I simply substituted GF flour and breadcrumbs for the all-purpose flour and Panko. (The best tasting GF breadcrumbs are the ones you make yourself. Buy a loaf of frozen gluten-free bread, like Udi’s, and toast it in your toaster oven. Crumble the slices into a food processor, processing them until the breadcrumbs are the size you like.)


image


2 lbs. raw potatoes, peeled and cut into 1″ cubes
4 tablespoons unsalted butter
1 onion, minced
1/4 to 1/2 cup heavy cream
6 oz. cheddar cheese, grated
6 oz. ham, finely chopped
salt and pepper
1 cup all-purpose flour (or gluten-free flour like Cup4Cup)
2 eggs
2 cups Panko breadcrumbs (or gluten-free breadcrumbs)
avocado oil for frying


image


Peel the potatoes, cutting them into 1″ cubes. Boil them in salted water until tender. Drain them and set them aside.

Melt the butter in the same pot the potatoes were in, then add the onions and sauté them until they’re translucent. Put the potatoes back in the pot and add 1/4 cup of the heavy cream. Mash the potatoes with a potato masher until smooth. Add more cream, if needed, but be careful not to make it mushy.

Add the cheese and mix until it has melted in. Add the ham and mix again. Season with salt and pepper.

Pour the contents of the pot into a metal bowl and place it in the freezer to cool, stirring every 10 minutes until the mashed potato mix is cold, but not frozen.

Line up three bowls: all-purpose flour (or GF flour) in the first bowl, eggs (scrambled) in the second bowl, Panko (or GF breadcrumbs) in the third.

Remove the mashed potato mix from the freezer, and with floured hands, grab enough to gently roll a small meatball in your hands. (I’ve found that starting with a round shape makes it easier to work with.)

Roll the ball in the flour, then the egg, then drop in the Panko and roll again. With the ball in your hand, gently squeeze into a tubular (or small football) shape, and then place it on a sheet pan lined with non-stick aluminum foil. Continue with the rest of the potato mixture. (You may need to add another scrambled egg or two if you run out.)

Once you’ve rolled all the croquettes, place the sheet pan in the freezer for 20 minutes to firm up.

Heat a pan with 2″ of oil to 350 degrees. Remove the croquettes from the freezer, and working in small batches, fry them until golden brown. Place them on paper towels, and quickly season lightly with salt while hot.


image


The croquettes freeze really well, so this batch goes a long way. Once they’ve been fried, let them cool completely to room temp. Place them in freezer bags and store them in the freezer. When it’s time to cook them, let them thaw for about 15 minutes, then place them in a pre-heated 325 degree oven and cook for 15 minutes.


This is the most amazing fish sandwich I ever made.


There’s no other way to describe this sandwich, something that shouldn’t work in some ways and yet is absolutely perfectly crunchy and delicious. It starts with the cole slaw, ideally made a day in advance…

1 medium cabbage, sliced thinly
2 medium carrots, peeled, and finely chopped
1/2 cup mayonnaise
1 tablespoon Kosher dill pickle juice
1 teaspoon celery seed (not salt)

You can use a machine, but I like to finely slice my cabbage with a chef’s knife, cutting as thin as possible. Place the chopped cabbage in a large bowl.

For the carrots, peel them to remove the outer skin, and throw that away. Continue to peel the carrots into paper-thin slivers until there’s no carrots left. Finely chop those slivers and add them to the cabbage.

Add the mayonnaise, pickle juice, and celery seed, mixing thoroughly. Keep it in the fridge, covered with plastic, until ready to use.  The next day, before using, taste it and decide whether you want more mayo or pickle juice, salt or pepper. Mix it well before using.

Like a classic pulled pork sandwich, the slaw will go inside! But it needs a sauce to tie it all together. Make this a day ahead as well.

1/2 cup ketchup
1/2 cup mayonnaise
1 tablespoon dill pickle relish
1/4 teaspoon Tony Cacherre’s Original Creole Seasoning (optional)
1/4 teaspoon salt (skip if using Creole seasoning)
1/8 teaspoon pepper (skip if using Creole seasoning)

Tony Cacherre’s Original Creole Seasoning is a personal favorite, and it works well in this sandwich. You can find it in many stores, and online. But if you don’t have it handy, salt and pepper do the job.

Combine all the ingredients in a bowl, mixing well. Keep it in the fridge, covered, until ready to use.


Cod or other white fish, preferably fresh, cut into sandwich-sized pieces (about 4″ square)
1 cup all-purpose flour (or Cup4Cup gluten-free flour, see below)
1 teaspoon celery seed (not salt)
1 teaspoon salt
1/2 teaspoon black pepper
1/8 teaspoon cayenne (optional)
2 eggs
1 cup corn flakes, crumbled (or Corn Chex for gluten-free, see below)
avocado oil or other oil for frying

I had some grouper the last time I made this sandwich, and the results were fantastic. I suggest you use whatever white fish is your favorite.

Cut the fish into pieces that will fit the bread you’re using, and make sure the filets are the same thickness. Don’t make them thicker than 1/2″ or they’ll stay raw in the middle when you fry them. Set them aside.

In a bowl, combine the flour, celery seed, salt and pepper and cayenne (if you’re using it). Mix well.

In another bowl, crack the eggs and scramble them.

Put the corn flakes (or Corn Chex) in a plastic bag, squeezing the air out of it. Crush them into oatmeal-sized pieces, then pour them into a third bowl.

Heat a heavy pan with a couple of inches of oil. One by one, take the fish pieces and dredge them in the flour mixture, then into the egg, and then into the corn flakes, pressing into the corn flakes to make sure they stick to the fish.

When the oil in the pan is hot enough, fry the fish pieces on both sides, until cooked through and golden brown. Place them on paper towels to drain.


Pepperidge Farm Marble Swirl Rye Bread (or gluten-free bread)
Swiss cheese, sliced
Melted butter

Pre-heat an oven to 350 degrees.

To assemble the sandwiches, take a slice of the rye bread and spread some of the sauce on it. Place a piece of the fried fish on top, then cover it with some of the cole slaw. Place a few thin slices of Swiss cheese on top of the cole slaw. Take another slice of rye, slather it with the sauce, and place it on top of the slaw, sauce-side down.

Brush the top of the sandwich with the melted butter, and place the sandwich on a sheet pan. Do the same with the rest of the sandwiches.

Place the sandwiches in the oven and bake them until the cheese melts. Cut the sandwiches in half and serve.


The gluten-free sandwich in the front.


What I changed to make this sandwich gluten-free…


My go-to all-purpose gluten-free flour is Cup4Cup. It works really well in any dish that requires all-purpose flour.


Not all corn flakes are gluten-free, and the ones that are can be hard to find. I found that Corn Chex cereal is a good substitute. It’s gluten-free, and has a nice crunch.


The Pepperidge Farm Marble Swirl Rye Bread is the ideal bread to use for this sandwich. But I made a pretty darn tasty gluten-free version using this Schar bread, found in many supermarkets.


It’s been over a year since I posted this. Inspired by a recent conversation I had with a friend, I decided to share it again…

It’s never a healthy option to eat fast food. Michael Pollan said it best: “It’s not food if it arrived through the window of your car.”

A few years ago, a guy who claimed to be the nephew of Colonel Sanders, revealed the 11 secret herbs and spices that made KFC‘s original recipe chicken a worldwide success. He said he worked for his uncle for many years and had to make huge batches of the seasoning mix.

For me, KFC is like crack. Although I’m a big proponent of grass-fed this and pastured that, my kryptonite is KFC‘s original recipe chicken. There’s a KFC right next door to a local Home Depot in my area and my car literally drives itself to the pick-up window…I can’t help it. I justify the consumption of this heavenly grease by asking for no sides–no biscuit, no nothing. I get one breast and one thigh, and I drive off, steering my car with my knees as I indulge in my dirty secret, the hot grease dripping down my chin, a roll of paper towels at my side.

Making the KFC chicken recipe at home means I do have some control over product quality. I can use pastured or organic chicken. I can use clean oil. I don’t have the fancy pressure fryer they use at KFC, but I can use the healthier option of oven-frying. That means I fry my chicken in oil until golden brown, then finish the cooking process in the oven.

I have to say, the recipe really works! Maybe if I placed the real KFC side-by-side with my home-made chicken, I’d notice a big difference. But my brain said it was pretty damn close and absolutely delicious! If I could change one thing, I would use smaller chicken pieces next time. I used large pieces and the meat-to-breading ratio was off. Though it was mighty tasty, I was craving more breading per bite.

The recipe calls for all-purpose flour, but if you follow a gluten-free lifestyle, using Cup4Cup GF flour works just as well.

2 cups all-purpose flour
3 tablespoons paprika
1 tablespoon celery salt
1 tablespoon dried mustard
1 tablespoon garlic salt
1 tablespoon ground ginger
2 teaspoons black pepper
1/2 teaspoon white pepper
1 1/2 teaspoons thyme
1 1/2 teaspoons basil
1 1/2 teaspoons oregano
1 teaspoon salt
1 cup milk
1 egg
5 lbs. chicken pieces…your choice
oil, for frying

Combine the flour and the “11 herbs and spices” in a bowl. Mix well.

In another bowl, whisk together the milk and the egg. Add the chicken pieces to this bowl and let the chicken soak in it for 10 minutes.

Pre-heat the oven to 350 degrees.

Pour a couple of inches of the oil into a pan with high sides and heat it to 340 degrees, using a thermometer. Don’t fill it with too much oil, because oil expands when hot and it could spill over.

Take the chicken pieces out of the milk and egg mixture and coat them with the seasoning mix one at a time, making sure you coat them well. Carefully place the chicken in the hot oil. Don’t overcrowd the pan…work in small batches. Too much chicken could cause the oil to spill over the top.

Fry the chicken pieces just until golden…no need to cook them all the way through. Place the pieces on a baking sheet lined with non-stick aluminum foil. When all the chicken has been fried, place the baking sheet in the oven and cook until the chicken pieces reach an internal temperature of at least 160 degrees.

Make a lot! Leftovers are great, and they re-heat really well in the oven! (Don’t use a microwave…the oven is best.)

What can I say? I was craving both dishes, so I combined them. I figured: if I love each one of them, I’d be crazy over both together!


image


Pasta
1/4 lb. bacon, finely chopped
1 onion, finely chopped
18 small clams, washed and purged*
1 teaspoon fresh oregano, finely chopped
1/4 cup white wine
Good quality olive oil
6 large garlic cloves, finely chopped
1/4 cup fresh parsley, finely chopped


In a large pot, salt some water and bring it to a boil. Cook the pasta until al dente.

In the bottom of another large pot on medium-high heat, fry the bacon until it’s crisp. Add the onions and sauté them until they’re translucent. Add the clams, oregano and wine, and cover the pot with a lid. Reduce the heat to medium. The clams are cooked when they open. Discard any unopened clams.

In a frying pan, heat the olive oil to medium. Add the chopped garlic and fry it until just crispy. Toss in the parsley and stir it to combine.

Place the pasta in a bowl or plate. Pour the clams and juice over the pasta. Pour the fried garlic and oil all over the clams.


*Purging clams: Clams can be pretty sandy and gritty, so it’s important not only to scrub the outside of the shell, but to purge them as well. Clams should be stored in a bowl in the fridge with a wet dish towel over them, never in water. Once you’re ready to use them, fill a bowl with water and add salt (think salty like ocean water) and a tablespoon of corn meal. Mix this around, then add the clams and let them sit in this solution in the fridge for a couple of hours. The clams will purge (clean themselves) out. Discard the liquid and rinse the clams before cooking.

Fat Tuesday is coming up! This is a great recipe to cook up if you’ve got friends coming over for the Super Bowl. Let’s do some Cajun-style cookin’! Poo-yah! I garonteee!

I lived in Mobile, Alabama, back in the late 80’s, and if you asked the locals, they’d quickly tell you that Mardi Gras originated in Mobile, not New Orleans.

Joe Caine paraded through the streets of Mobile dressed in a Native American costume in 1868, and is credited for our current way of observing the Mardi Gras celebration. Of course, it’s hard not to think of New Orleans when you hear the phrase “Mardi Gras,” and I spent many a weekend on the streets and bars of the Crescent City back in the mid-80’s…actually was part of a Mardi Gras parade one year.

It was then that I fell in love with Cajun food, and needed to learn how to cook it. I bought cookbooks by two of the greats: Justin Wilson and Paul Prudhomme. I learned about layers of seasoning, and often I’d use those ideas in my own dishes.

When I moved to Rhode Island in 1990, I had yearly Mardi Gras parties at my house, and I cooked massive batches of these Cajun chicken breasts, using a spice mix I honed from my cooking experiments.

Double-dipping in the seasoned flour is a messy step, but it makes them extra crunchy and flavorful.

You can make this recipe gluten-free, simply by using a GF flour instead of the all-purpose flour.


fullsizerender-8

1 cup all-purpose flour
1 tablespoon salt
1 1/2 teaspoons sweet paprika
1 teaspoon granulated onion
1 teaspoon granulated garlic
1 teaspoon basil
1/2 teaspoon black pepper
1/2 teaspoon dried thyme
1/4 teaspoon white pepper
1/4 teaspoon cayenne pepper
2 pounds boneless, skinless chicken breast
4 eggs
oil for frying (I like using a high smoke point oil like avocado or grape seed)

Cut the chicken breasts into manageable pieces, about 3″ square. If they’re too thick, slice them horizontally to make two thinner breasts. You want them about 1/4″ thick. A piece of chicken that’s too thick won’t cook all the way through. Plus, you want more crunchy crust per bite…trust me!

Combine the flour, salt, paprika, onion, garlic, basil, black pepper, thyme, white pepper, and cayenne in a bowl. Mix well.

Separate the 4 eggs, scrambling 2 eggs in each of 2 separate bowls. This keeps the first bowl “clean” and not gummed up with flour. You’ll see what I mean once you start, because it’s a bit messy. So, crack 2 eggs in the first bowl and the other 2 eggs in the second bowl. Scramble them up and put the bowls on either side of the seasoned flour bowl.

Pre-heat a pan of oil or a fryer to 350 degrees.

Dip the chicken in the first egg bowl and then the seasoned flour mixture. Shake off the excess flour and dip the chicken in the second egg bowl, making sure the flour is covered by egg. Then dip the chicken back into the flour for a second coat. I like to bread all of my chicken pieces before I start frying them so that I can get my hands clean for the next step.

Carefully place the chicken in the pan. Don’t overcrowd the pan. Work in batches. Fry the chicken until it’s cooked all the way through and golden brown. Drain on a wire rack or paper towels.


Nothing like a hot, fresh batch!


If you need to feed a crowd, just double or triple the recipe. I used to make a 10x batch for my Mardi Gras parties!


These are addictive!