Ever since I had char-grilled oysters in New Orleans, I’ve been obsessed. I’ve made them at least once a month since I’ve been back. But the other day, I went to my local seafood store and I saw some beautiful clams, and I thought: Why not try those on the grill?
I had some friends over a couple of days ago, and I made my Oysters Rock-a-Fellow recipe for them, and I had some leftover gooey cheesy stuffing that goes on top of the oyster. I thought: Why not use it on the clams and then put them on the grill?
A hybrid recipe of two previous recipes, and it really worked!
The first step is to make the gooey cheesy stuffing mix ahead of time.
1/4 cup unsalted butter 1 small onion, finely chopped 1 garlic clove, finely chopped 1/4 cup low-fat milk salt and pepper 3 cups (tightly packed) fresh arugula, finely chopped, about a 5 oz. container 6 oz. mild cheddar cheese (the white one), grated 6 oz. mozzarella, grated Fine bread crumbs (Using GF breadcrumbs will keep this dish gluten-free)
Melt the butter in a pan and add the onion and garlic. Sauté until translucent, then add the milk, salt and pepper, and the arugula. Sauté for a few minutes, stirring, so that all of the arugula wilts down. Slowly add the cheddar until it all melts, then add the mozzarella, stirring slowly, until you have one big gooey mass of goodness in the pan.
Pour the gooey cheese mix into a shallow pan and place it in the fridge for a few hours. It will firm up and you will be able to cut it easily into cubes that you will then place on top of the clams.
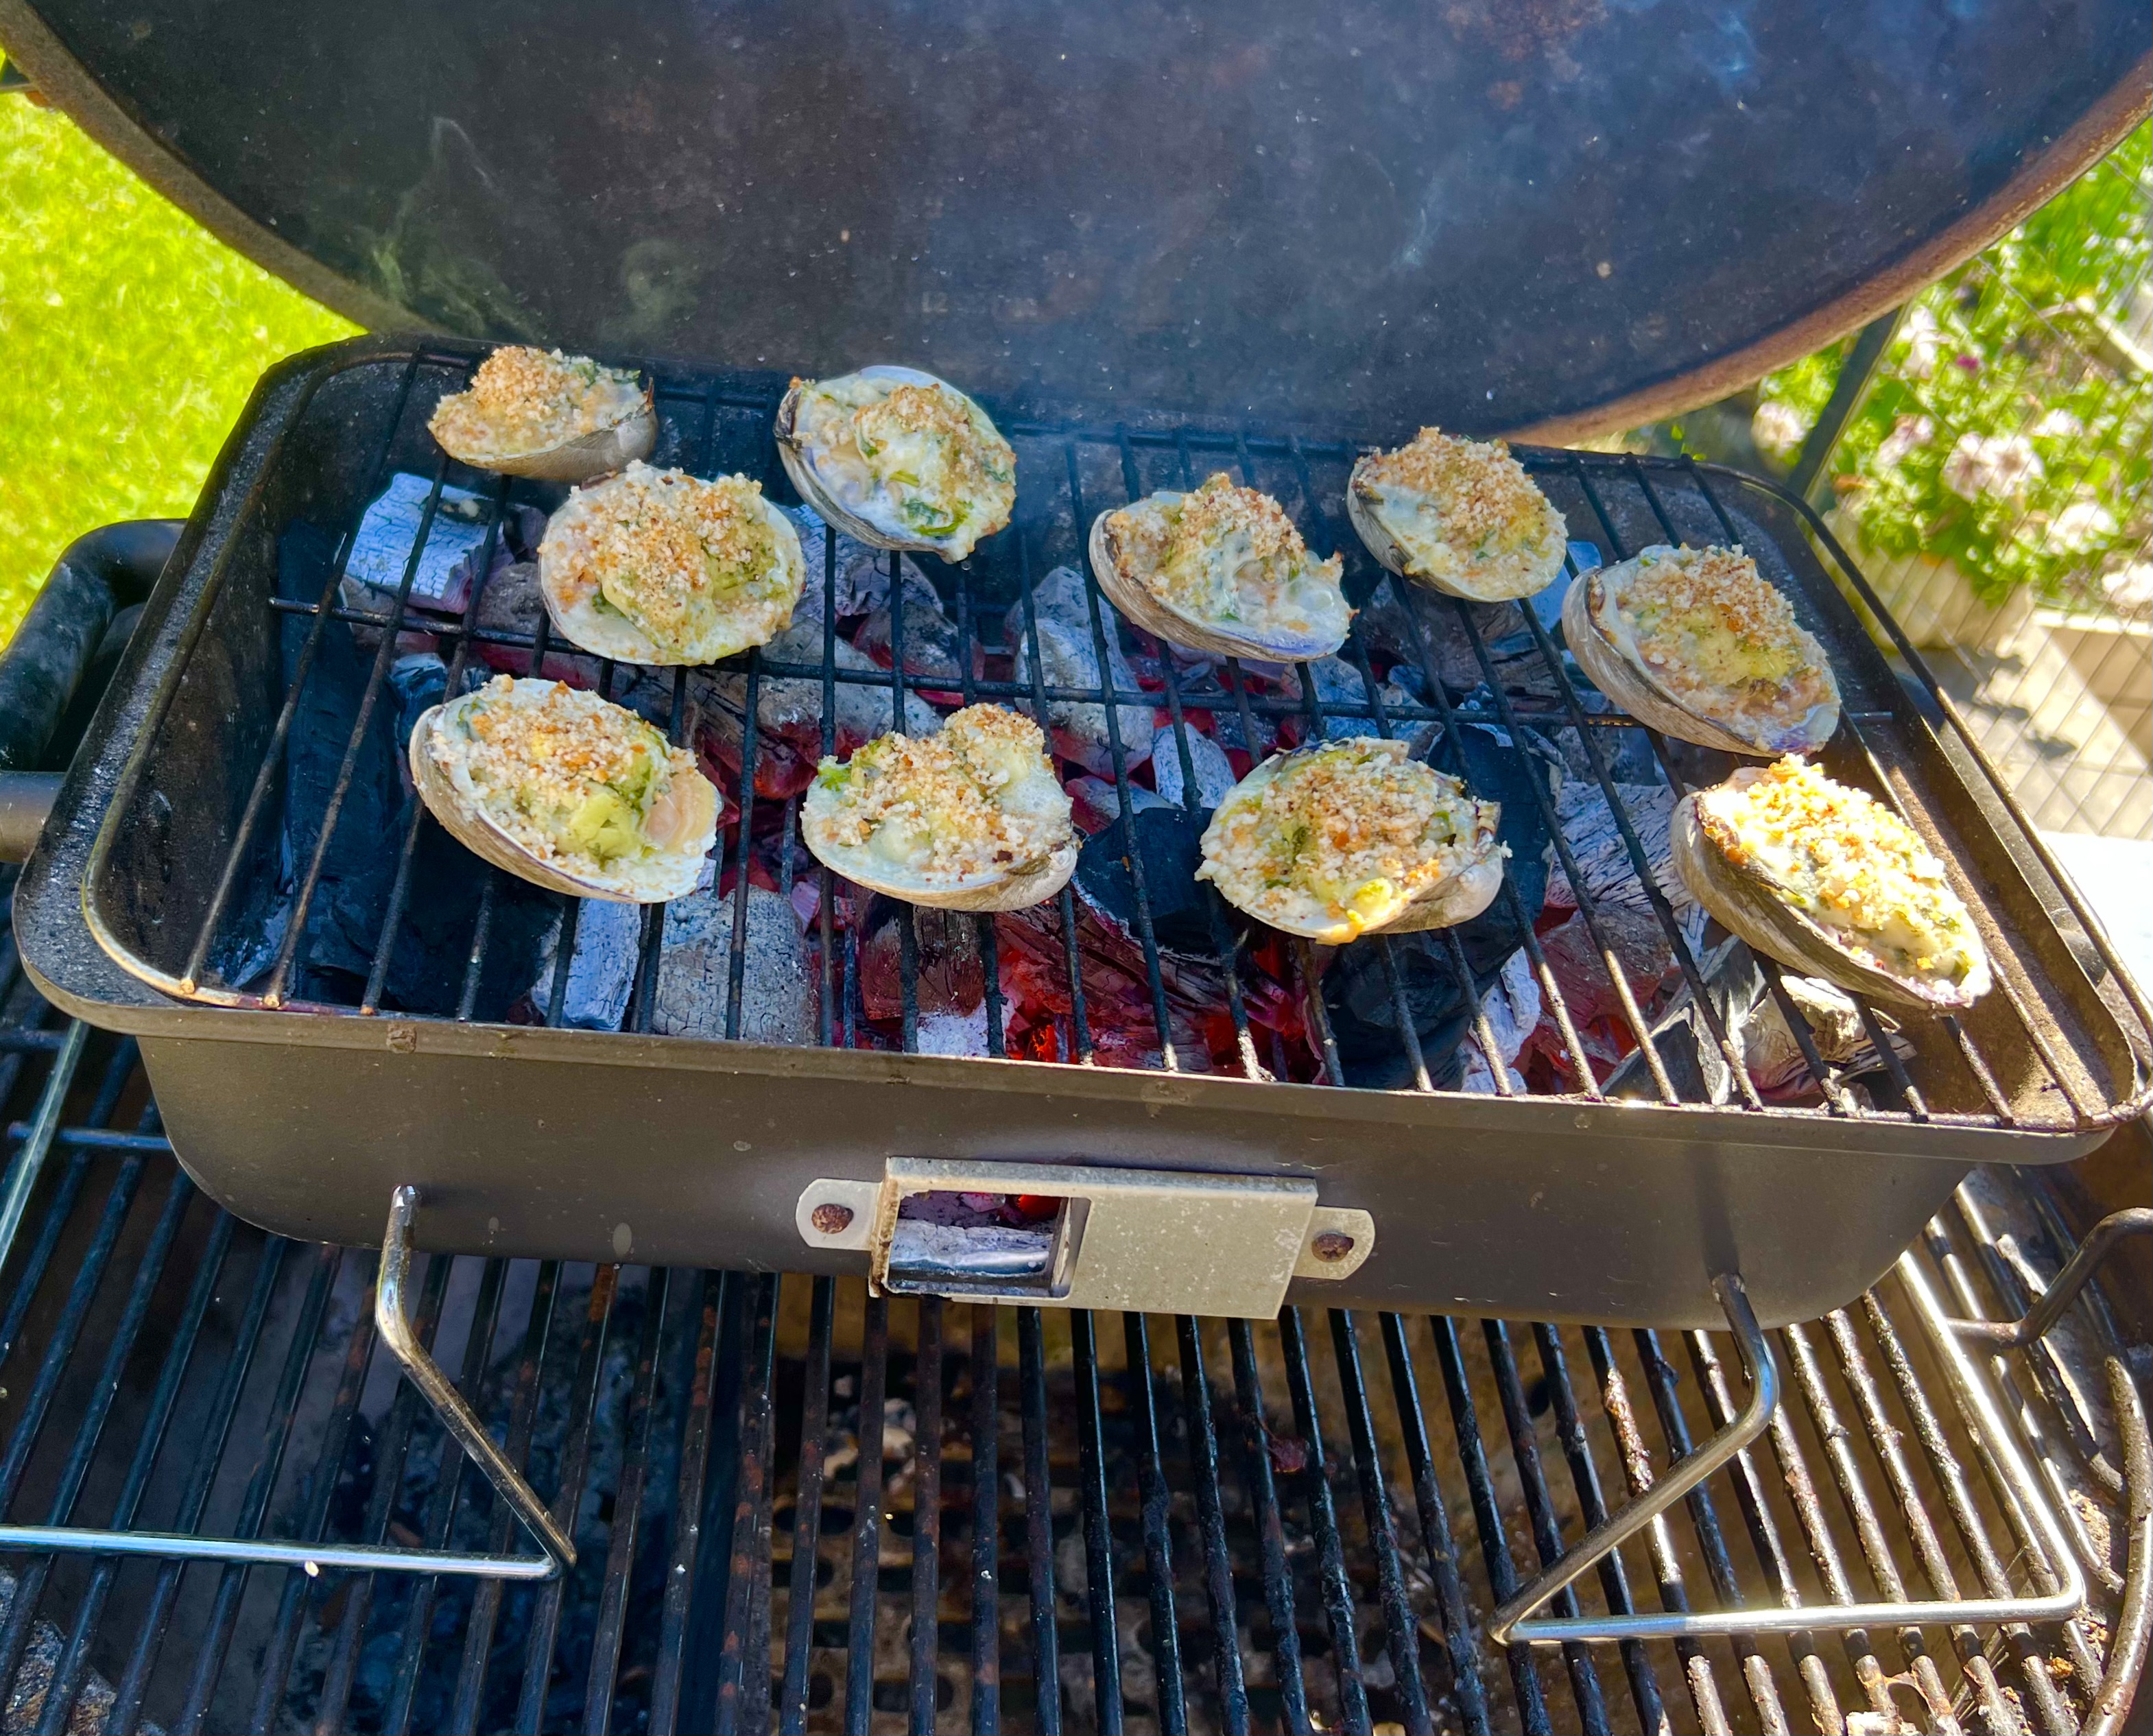
Once the cheese mixture has firmed up, and it’s time to cook, start a hardwood charcoal fire in your grill.
Open the clams and put them on a tray, topping each clam with a cube of the firm cheese and arugula stuffing mix.
Sprinkle the breadcrumbs on top of each clam.
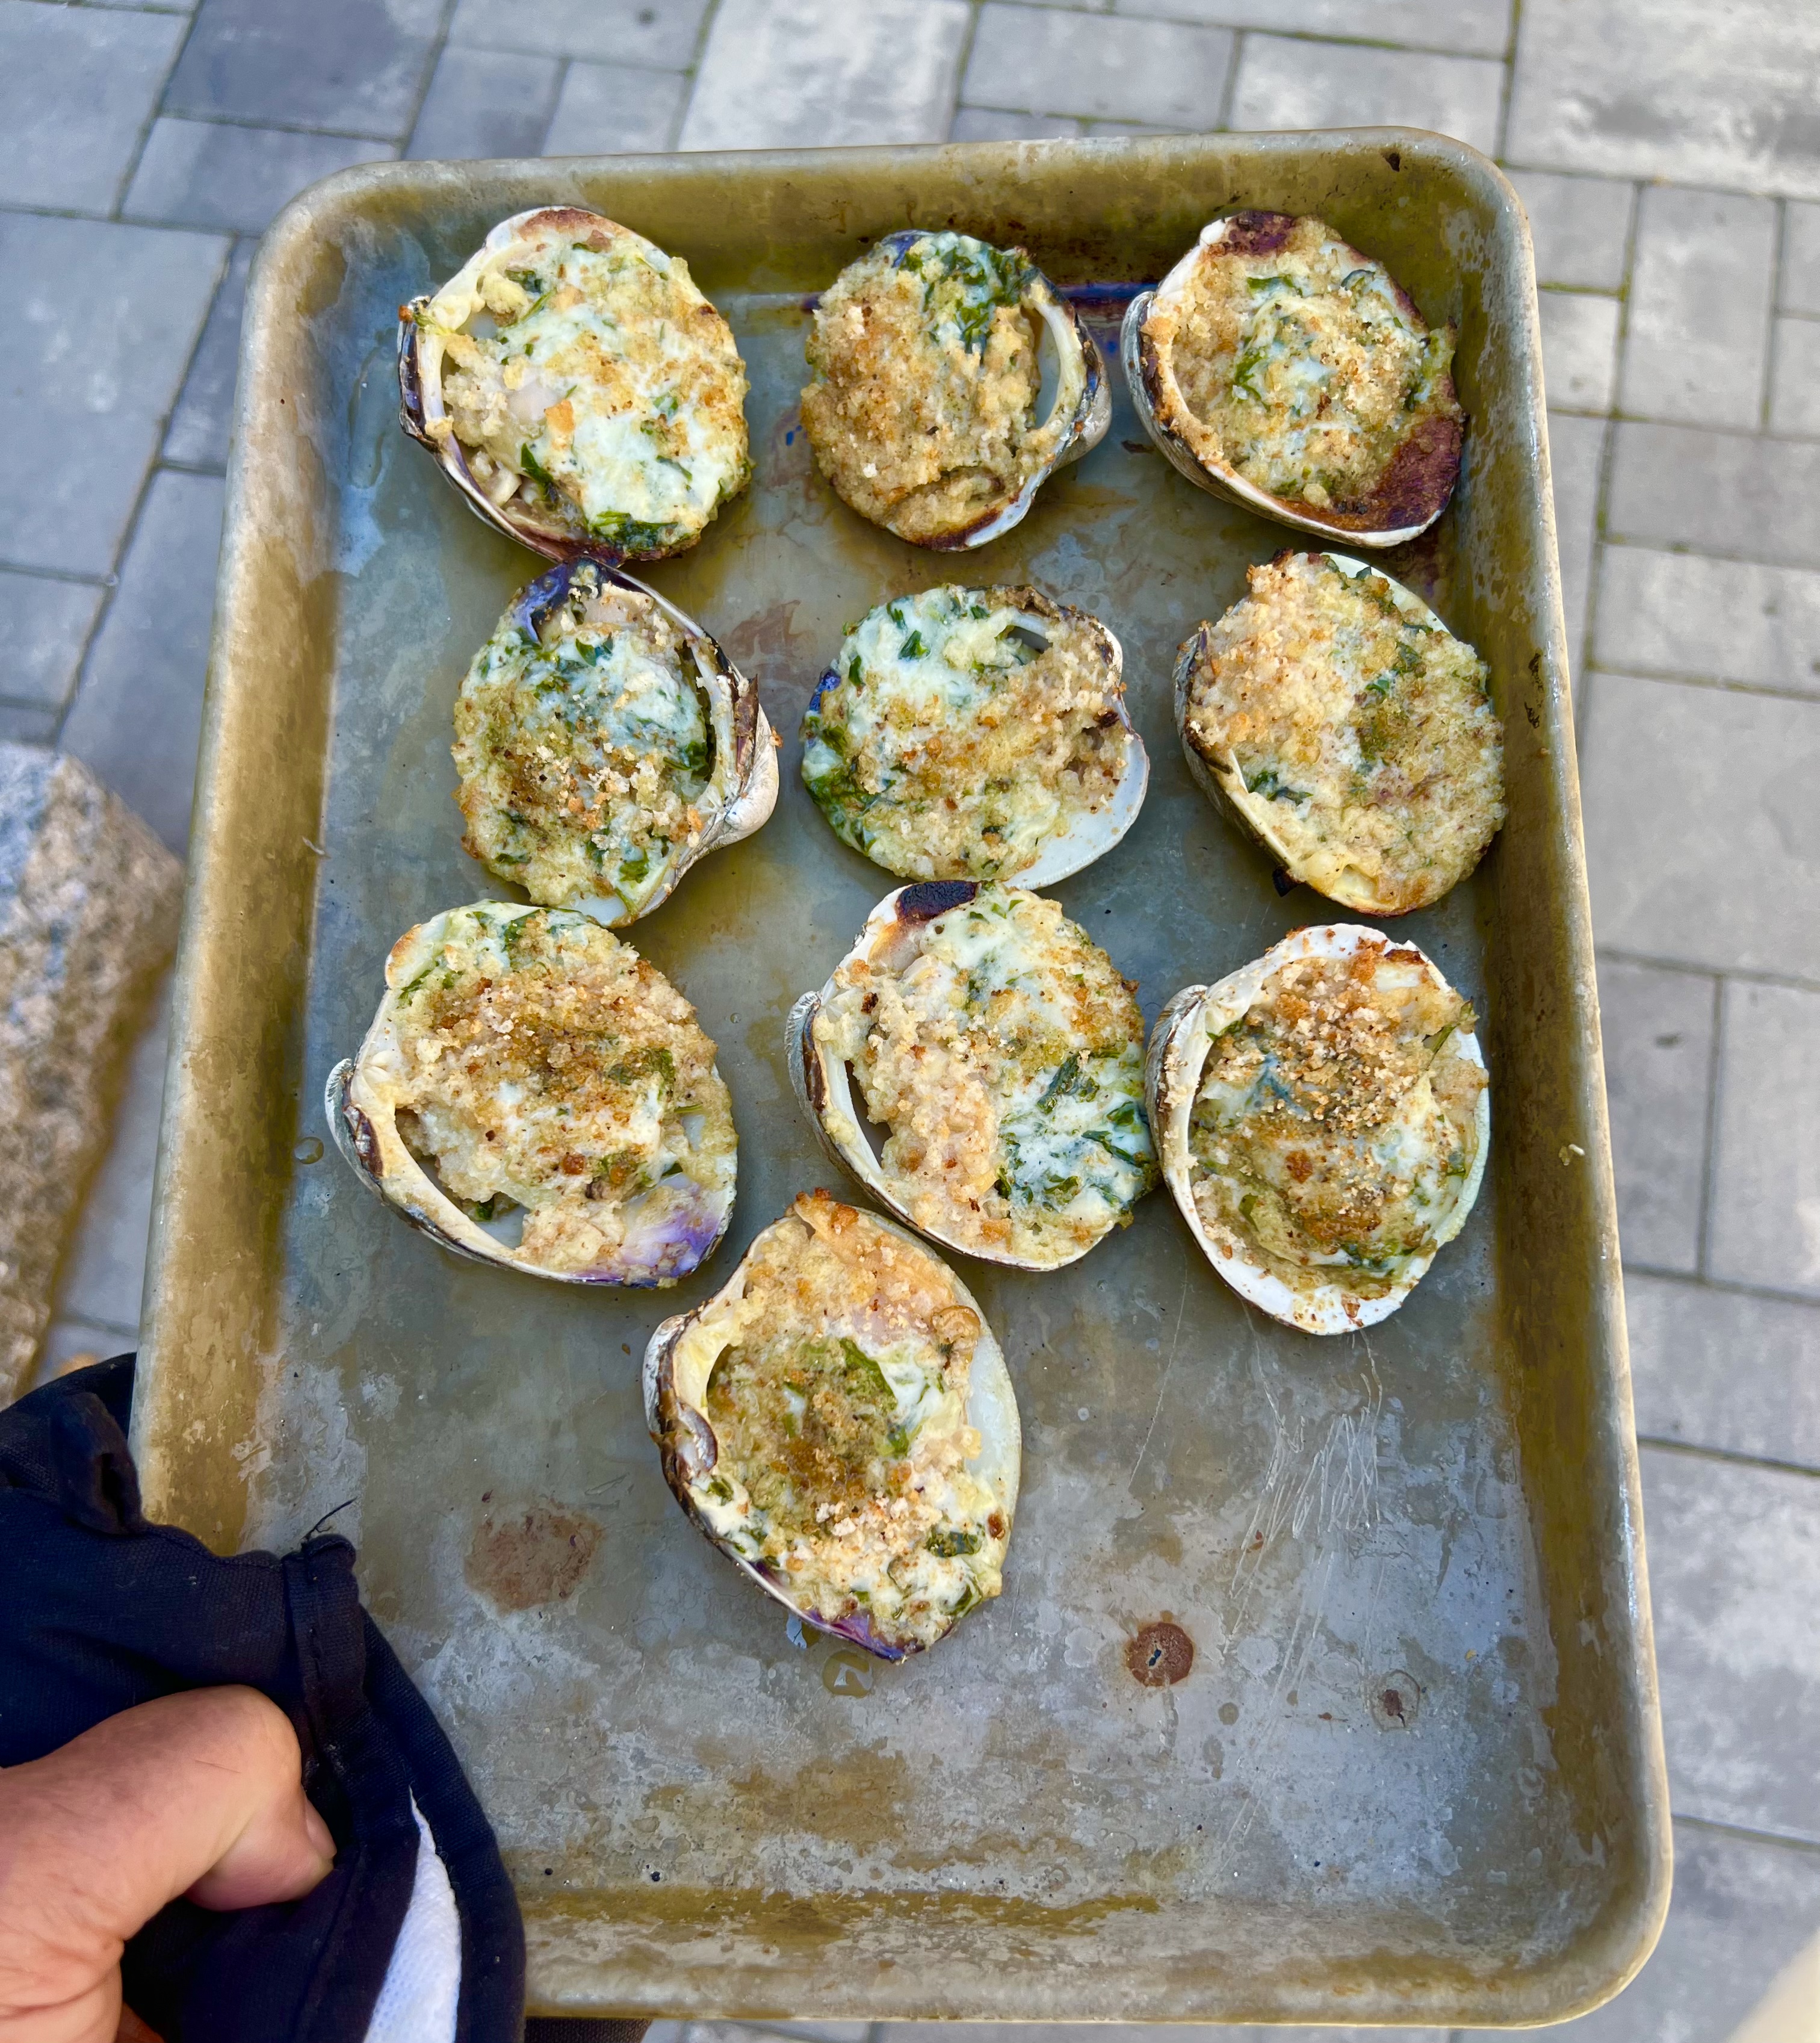
When your charcoal grill fire is hot, place the clams on the grill and cook until the cheesy topping melts and the clams have a nice char to them.
They will be lava hot when they come off the grill, so give them a few minutes before eating!
It’s that time of year when friends are coming over, and you want to make one drink you can serve everyone, rather than playing bartender all night. This one hits the spot.
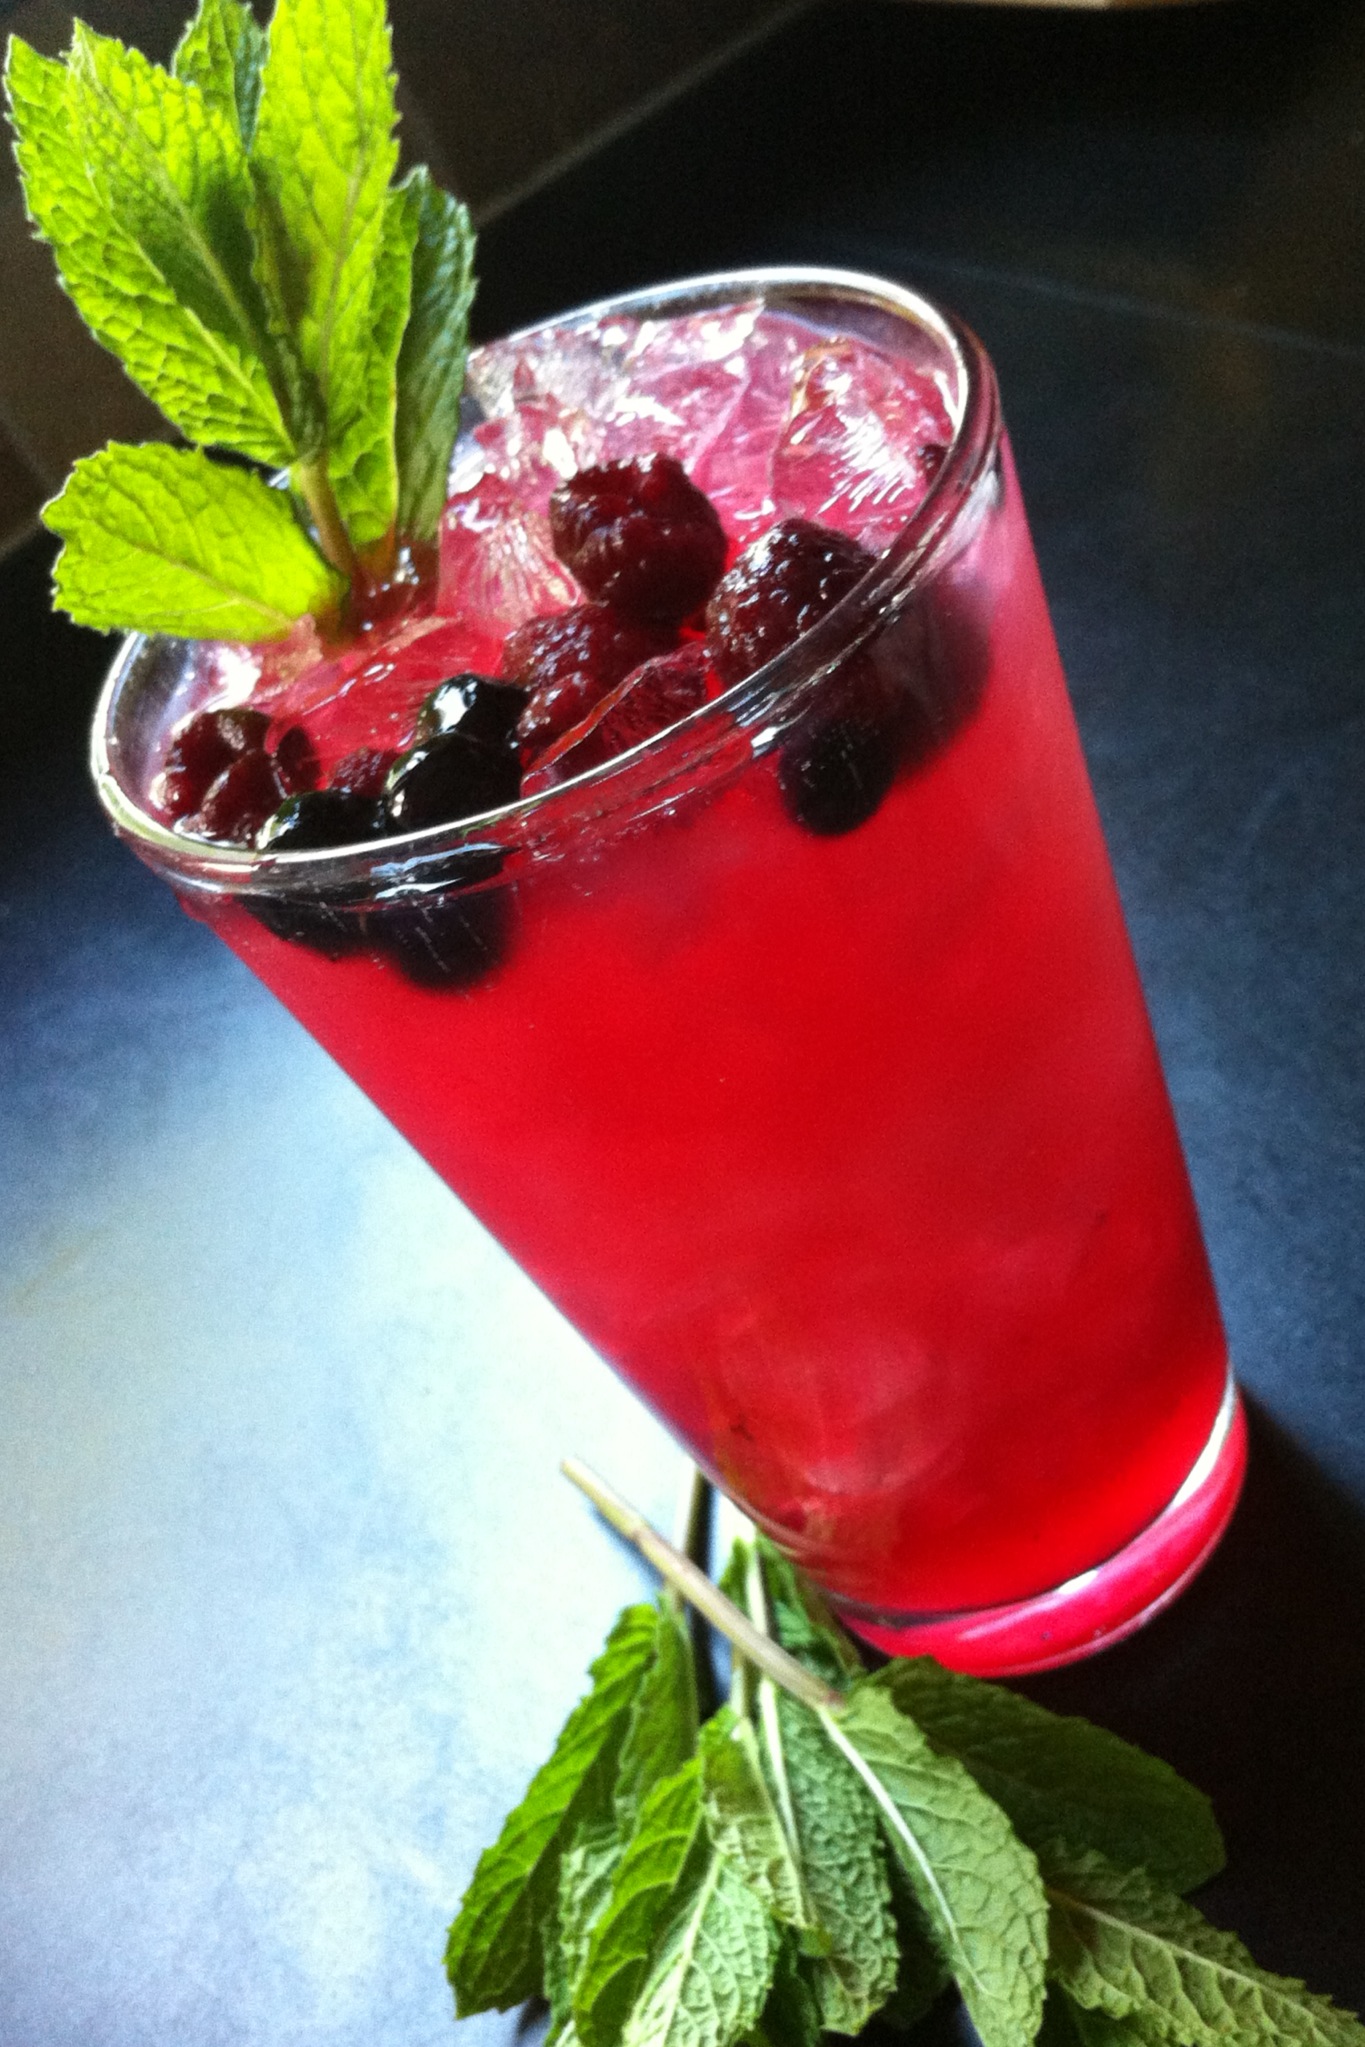
There’s only one thing better than a freshly made mojito…and that’s a pitcher of freshly made mojitos! Organic raspberries and blueberries are in the markets right now, and my mint plants are taking over the yard! All the ingredients for a great mojito!
Very often, I’ll use raspberries or blueberries alone, but mojitos are even better when you combine them! I stock up on organic berries, rinsing them and placing them in plastic bags that go in the freezer until I’m ready to make my mojitos. I always go organic with berries. Pesticides should never be a cocktail ingredient! Pay a little extra and get the good stuff…it makes a difference!
Once you make mojitos by the pitcher, you’ll never have them any other way. (Even if you’re drinking alone!)
Make ahead of time…
1 1/2 cups fresh squeezed lime juice (don’t use the bottled stuff!)
1 1/3 cups turbinado sugar (Sugar in the Raw is a common brand)
Mix both ingredients together, letting it stand at room temperature for a few minutes. I like to combine them in a Mason jar, then shake really hard until the sugar has dissolved. I keep it in the fridge, and it’s good for up to 3 weeks…ready to use any time. Shake it well again before using.
For the Mojitos…
1 cup sugar/lime mixture
1 cup mint leaves, packed
1/2 pint blueberries (fresh or frozen)
1/2 pint raspberries (fresh or frozen)
3 or 4 cups white rum (I use Don Q Cristal rum)
3 or 4 cups seltzer (or club soda)
Combine the mint leaves and 1/2 cup of the sugar/lime mixture in bottom of a pitcher. Muddle the mint up very well to release mint oils.
Add the remaining sugar/lime mixture, rum and berries. Mix well. Just before serving, add the club soda and ice. Stir. Pour into tall glasses.
Or…for drinks one at a time, I put in a shot (1 oz.) of the sugar/lime mixture into a tall glass. I throw in about 8 mint leaves and muddle them for a minute. Then I add 2 shots of rum, and a few berries. I add ice, and I top it with the seltzer, stirring well. I garnish with a mint leaf.
Fourth of July weekend means it’s time to do some serious barbecue!
When I smoke my brisket low-and-slow in my smoker, I use a coffee steak rub that I developed a couple of years ago. It gives a deep, rich crust to the meat that is just fantastic.
Low and slow is the way to go! Deliciously smokey and juicy.
Depending on the size of the brisket, you might need to double the recipe. This is for a brisket that weighs about 9 pounds.
3 tablespoons brown sugar
1 tablespoon Kosher salt
1 tablespoon ground coffee (use your favorite)
1 teaspoon granulated garlic
1 teaspoon granulated onion
1 teaspoon unsweetened cocoa powder
If the brisket is frozen, I like to thaw it a couple of days ahead of cooking it, rubbing it down with the coffee rub, and placing it in the fridge for about 24 hours to rest. I bring it out about an hour before smoking, to let the meat come back to room temperature, and then I place it in the smoker for about 12 hours at 225 degrees, smoking it with hickory wood.
When it’s done, I remove it from the smoker, and wrap in foil and let it rest at least 30 minutes before slicing. If I’m not serving it right away, I place the wrapped brisket in the oven at the lowest setting, about 150 degrees, just to keep it warm.
When I’m ready to serve, I always slice the brisket on the bias, against the grain of the meat.
I find little or no difference between the stove in my kitchen and an outdoor gas grill…so I don’t own one. I can make a perfectly delicious steak by searing it in a cast iron pan on the stovetop, then finishing it in a hot oven. So, for me, if the real reason for outdoor grilling is flavor, nothing can replace a hardwood charcoal grill.
Besides the quality and source of my beef, wood and smoke are what make the difference between a good steak and a great steak.
I know the #1 argument for going with gas over hardwood charcoal is time. “It takes too long to start a charcoal grill.” That’s completely untrue. It takes no more time to light a charcoal fire than it does to start up a gas grill.
Of course, it starts with the grill itself. The classic Weber is still an awesome choice. For larger cooking needs, I also have a Primo ceramic grill.
Then I get a bag of hardwood charcoal. I’m not talking charcoal briquets, like Kingsford, that have a ton of additives in them. And I’m definitely not talking about Match Light. I’m talking pure hardwood charcoal, easily found in supermarkets and home stores.
Next, a charcoal chimney. It’s a metal tube with a handle and a grate at the bottom. I crumble a couple of sheets of newspaper into the bottom, pour charcoal into the top, light it, and I have hot coals in 10 minutes without lighter fluid.
And I NEVER use lighter fluid! Why spend good money on a great steak only to make it taste like gasoline?
The variety of wood chips available for smoking is another flavor factor when it comes to grilling with charcoal. My personal favorite is hickory, especially when I’m cooking pork or chicken. But apple, cherry, oak, mesquite: they all impart their own unique flavors. And they’re all available in most home stores where you find all the other barbecue gear.
Although I have an electric smoker for those low-and-slow jobs, like a big ol’ brisket or pork shoulder, I don’t need it when grilling a steak. I simply soak some wood chips in water for about a 1/2 hour before grilling (I’ve found that hot water speeds the process up), drain the water, and then sprinkle the moist chips on the hot coals in my grill. I throw the meat on the grill, close the lid (opening the vents, of course) and off we go.
So now, in 10 minutes, I’ve got a grill that’s ready to cook a steak with…about the same time as gas.
If you say: “I don’t cook with charcoal because it’s so messy!” …I honestly don’t know if you and I can be friends.
Because I’m using a small amount of hardwood charcoal for the average dinner, I don’t have to clean out my grill every time I use it. After a while, yes, some ashes pile up in the bottom of my grill and I have to dump them. But because they’re pure wood ashes, I can dump mine into my strawberry or raspberry patch. They love the stuff.
You still have to clean a gas grill after a while, and it always runs out of propane halfway through cooking when you have guests over for dinner. So where’s the convenience in that?
Charcoal grills give you everything you could ask for: low maintenance, ease of use–no propane tanks, valves and igniters–real wood flavor, not lava rocks, and the thrill of cooking meat over a real fire, bonding with the caveman in you. Grab a beer–or even better: a bourbon on the rocks–and start grilling!
Back from a trip to Poland and Lithuania with my daughter, where I literally ate my weight in herring.
I know a lot of folks aren’t as crazy about herring as I am. But I was raised in a Lithuanian home, and it was everywhere. Growing up on Long Island, outside of New York City, there were dozens of great Jewish delis that served herring in white cream sauce, one of my favorite ways to enjoy it.
These days, I don’t need to go home for it when the craving hits me. Instead, I go to my herring hack.
I buy a jar of Blue Hill Bay herring in wine sauce, available at Whole Foods. Blue Hill Bay is distributed by what I consider the best salmon/herring/smoked fish company in the country: Brooklyn’s own AcmeSmoked Fish.
I grab a couple of sweet onions, like Vidalias, and I peel them and slice them as thinly as possible.
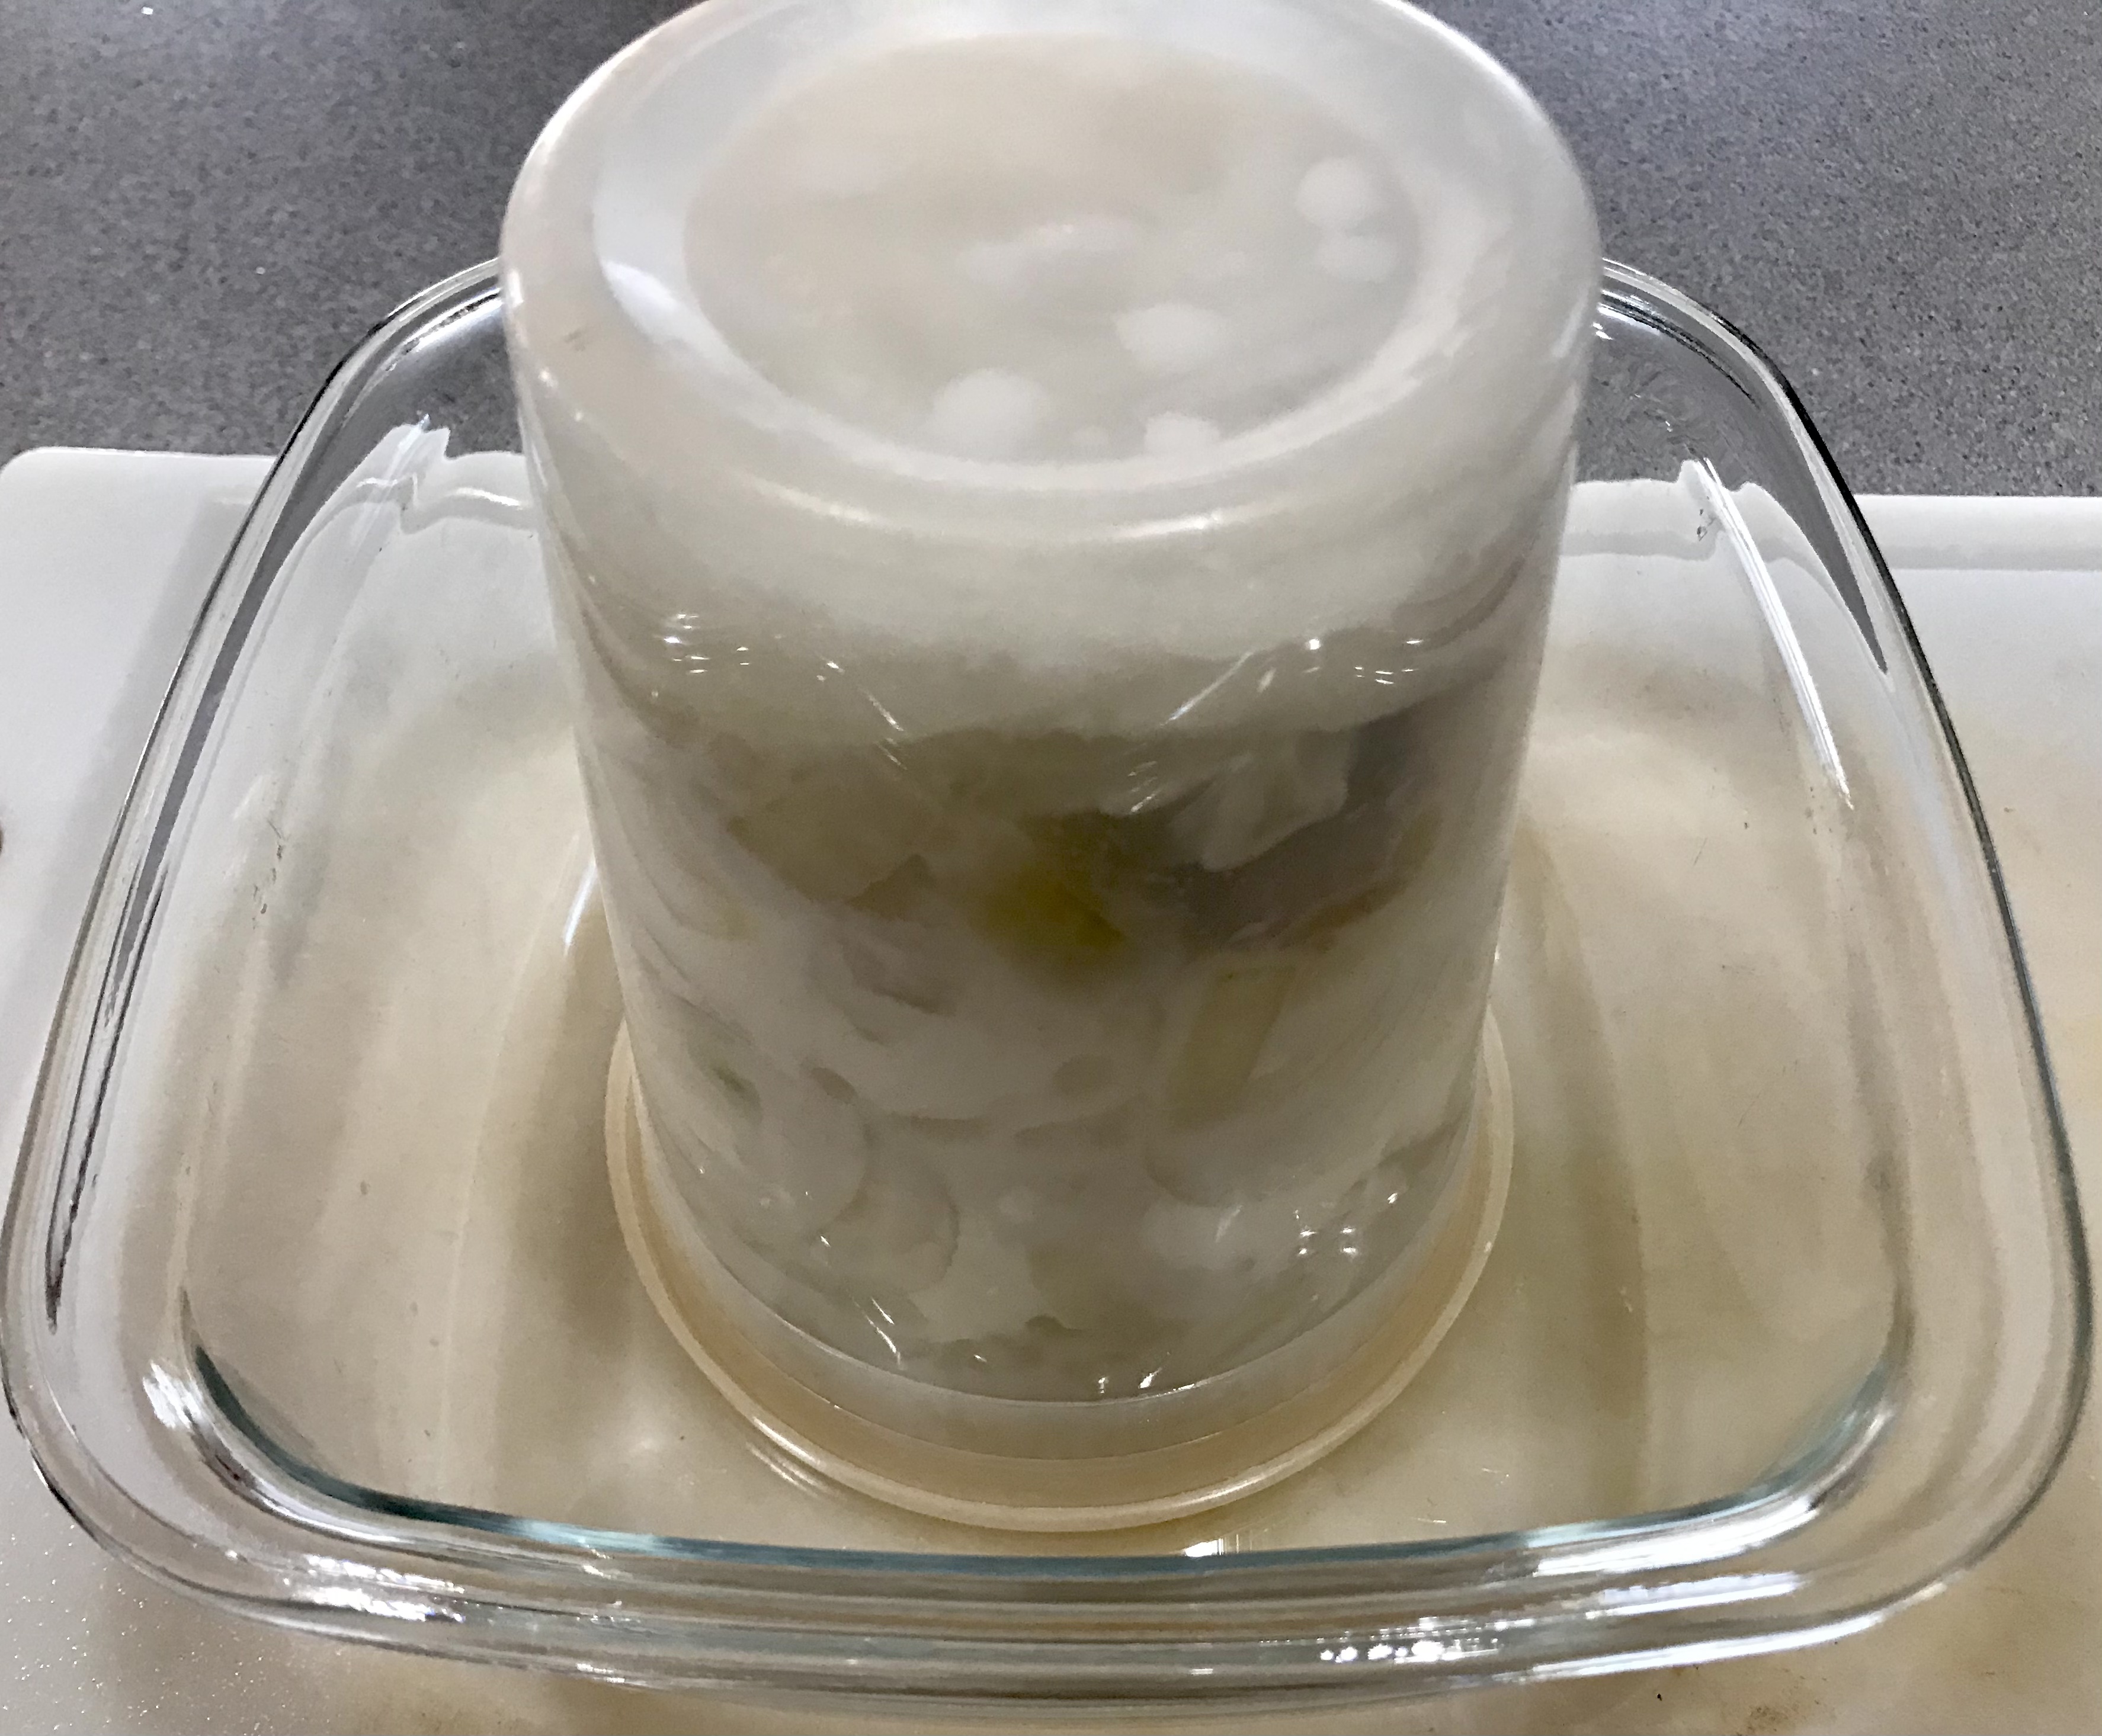
I take a quart-sized container with a lid, and I line the bottom with some of the onions. I then pour some of the contents of the jar of herring into the container. I then take a couple of spoonfuls of sour cream (gotta be Breakstone’s–I’m a New Yorker) and place it on top. Then I keep working in layers: onions, herring, sour cream…until it’s all gone and jammed into the container.
I place the lid on the container and shake it vigorously to combine the ingredients. Then I place it upside-down in a dish (in case of spills) and put it in the fridge.
A few hours later, I’ll turn the container right side-up and let it sit in the fridge some more.
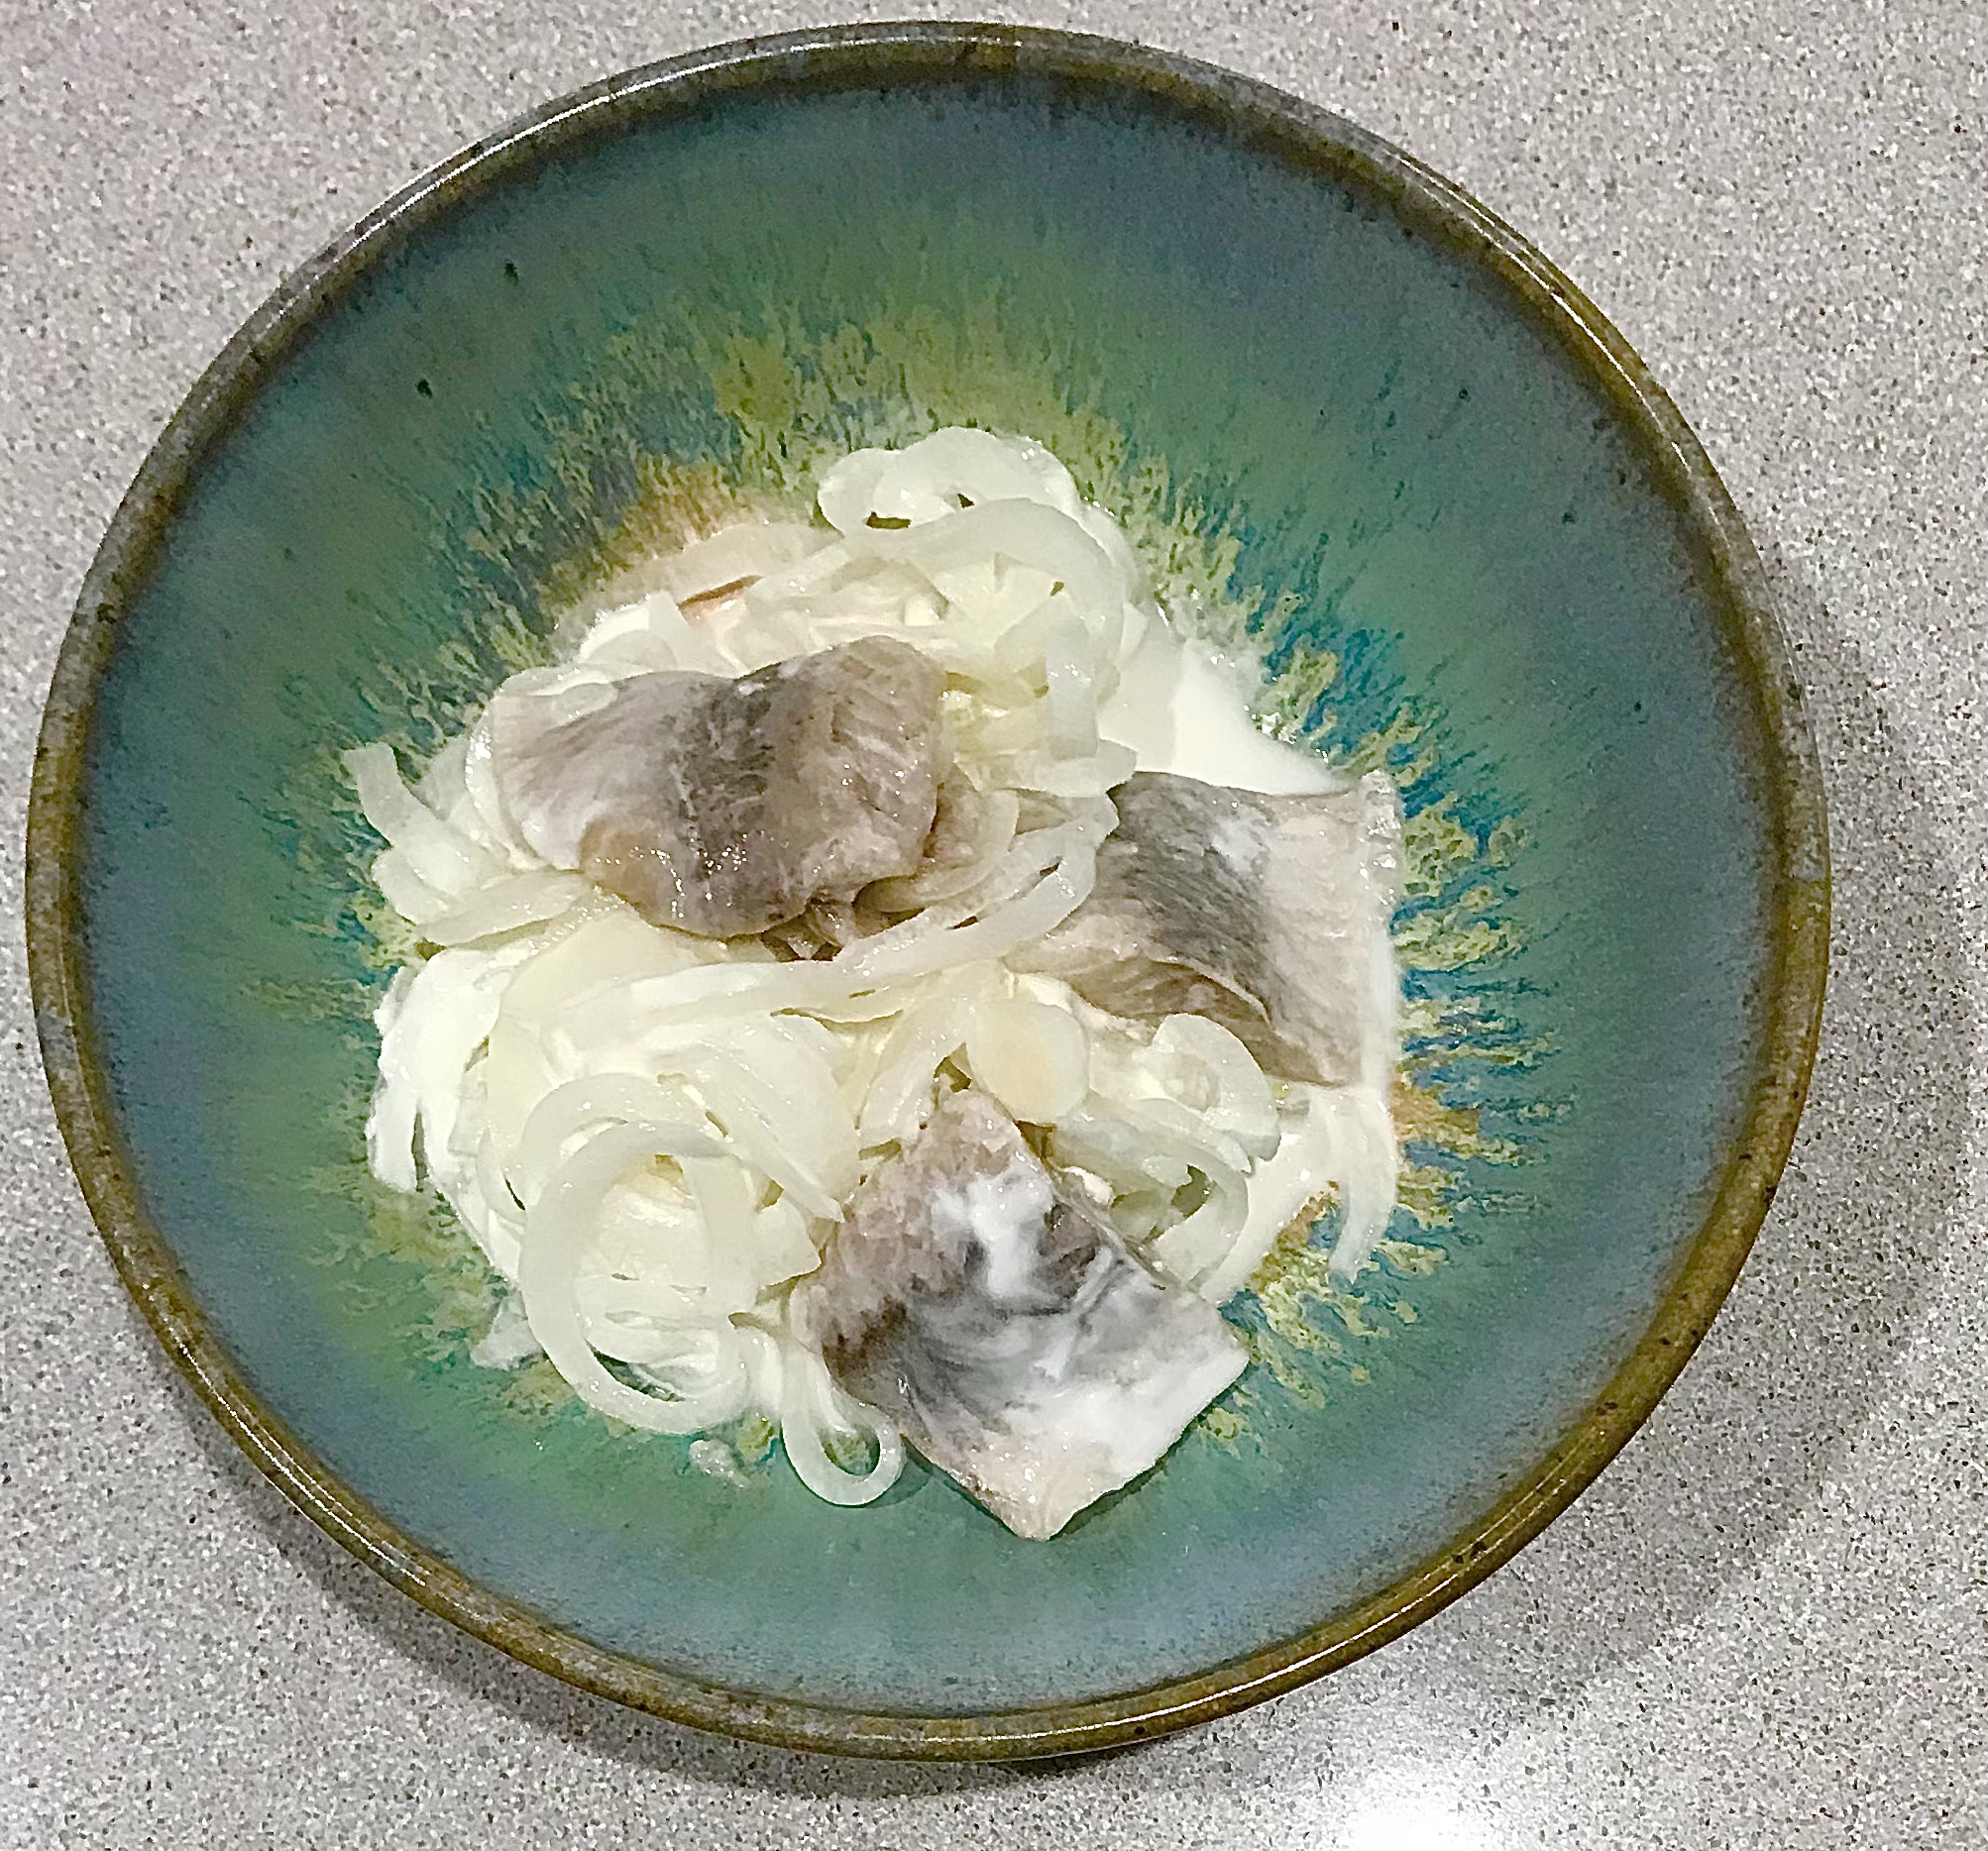
The wine sauce will blend with the sour cream to make a delicious cream sauce, and the onions will slowly break down and soften.
Of course, you can combine everything in a large bowl and then move it to a container, but it gets messy. My layering method avoids the need for clean-up.
After a few hours–if I can wait that long–it’s time to eat! A slab of bread is always good on the side.
I have to say my herring hack is good. Maybe not New York Jewish deli good. But good enough to satisfy my craving!
I was away on a fantastic trip to Poland and Lithuania with my daughter for a couple of weeks, and I’ll be posting some of our food finds soon. Meanwhile, enjoy this summer favorite.
If you’re trying to think of something new and interesting to bring to the July 4th celebration, this is it. It was a huge hit when I brought it to a neighborhood party a while ago.
Imagine the best of a deviled egg and a BBQ chicken sandwich, and you’ve got this appetizer that rocks in more ways than one….and you can make it ahead of time.
I boil the eggs and make the cole slaw the day before, then keep them in the fridge. Even the chicken can be cooked the day before and then warmed through before assembling right before you need it. Be sure to make a lot of them…they’ll go faster than the hard-boiled eggs in “Cool Hand Luke!”
This recipe is gluten-free, as long as you use GF soy sauce.
For the chicken and BBQ sauce:
3 cups ketchup
1 tablespoon apple cider vinegar
2 tablespoons soy sauce
1 teaspoon hot sauce (I use Frank’s Red Hot)
1/4 cup + 2 tablespoons brown sugar
1 lb. boneless skinless chicken breasts
6 hard-boiled eggs
1/4 cup mayonnaise
1 tablespoon mustard (I use Gulden’s)
Pre-heat the oven to 250 degrees.
Combine the ketchup, apple cider vinegar, soy sauce, hot sauce, and brown sugar in a oven-proof pot with a lid. Mix well, then add the chicken breasts, making sure they’re immersed in the sauce. Cook low and slow in the oven for about 2 hours.
When the chicken is cooked through, shred the meat with 2 forks. Set it aside, but keep it warm.
Combine all the cole slaw ingredients in a bowl, mixing well, and place them in the fridge.
For perfectly hard-boiled eggs, place the eggs in a pot of cold water, and turn the heat on high. Just before the water starts to boil, put a lid on the pot and turn the heat off. Let the eggs sit in the hot water for 15 minutes. Once cooked, keep the eggs in the fridge.
Slice the eggs in half and place the yolks in a bowl with the mayonnaise and mustard. Mix well and keep in the fridge.
To assemble, take a teaspoon of the mayo/mustard/yolk mixture and place it in the cavity of one of the egg halves. Place another teaspoon of the shredded chicken on top (I like it warm, to counter the cold of the mayo and cole slaw), drizzling a little of the BBQ sauce that you cooked the chicken with on the meat. Then place a teaspoon of the cole slaw on top of the chicken.
I came up with this crunchy appetizer years ago, when I needed a tasty bite for one of our summer parties. I wanted something fresh that highlighted the veggies of the season, so when I spotted these baby bell peppers in the supermarket, I got the idea.
Baby bell peppers
6 ears fresh corn, removed from the cob…or organic frozen corn
1/2 Vidalia onion, peeled, quartered, grilled, chopped
1 cup mayonnaise
1 teaspoon hot pepper sauce (I use Frank’s Red Hot)
6 oz. feta cheese or Queso Fresco, crumbled
Juice of 1 lime
Pinch of white pepper
1 tablespoon fresh parsley, finely chopped
Cut the corn kernels from the ears, and sauté them very briefly in a little olive oil. Place them in a bowl and let them cool.
Peel and quarter the Vidalia onion, and throw it on a hot grill with a little olive oil to get some nice grill marks on it, leaving the onion still crispy, not soft. If you’re cooking indoors, throw the quartered onion in a hot pan with a little olive oil, and cook it until you get some brown marks on it. Remove it, let cool, then place it in a food processor and pulse it until the onion is chopped into small bits, just smaller than the corn kernels. Add the onions to the corn.
In a separate small bowl, combine the mayonnaise and the Frank’s Red Hot. Pour in the crumbled cheese and mix well. Pour this into the corn and onion bowl and mix well.
Add the lime juice, white pepper and parsley to the bowl and mix well again.
Cut the baby bell peppers in half lengthwise, and remove the seeds and membrane. Stuff the peppers with the corn mixture and garnish with cilantro or parsley.
If you’re preparing this ahead of time, refrigerate the stuffed peppers until you’re ready to eat, but allow some time for them to warm up to a cool, not cold, temperature.
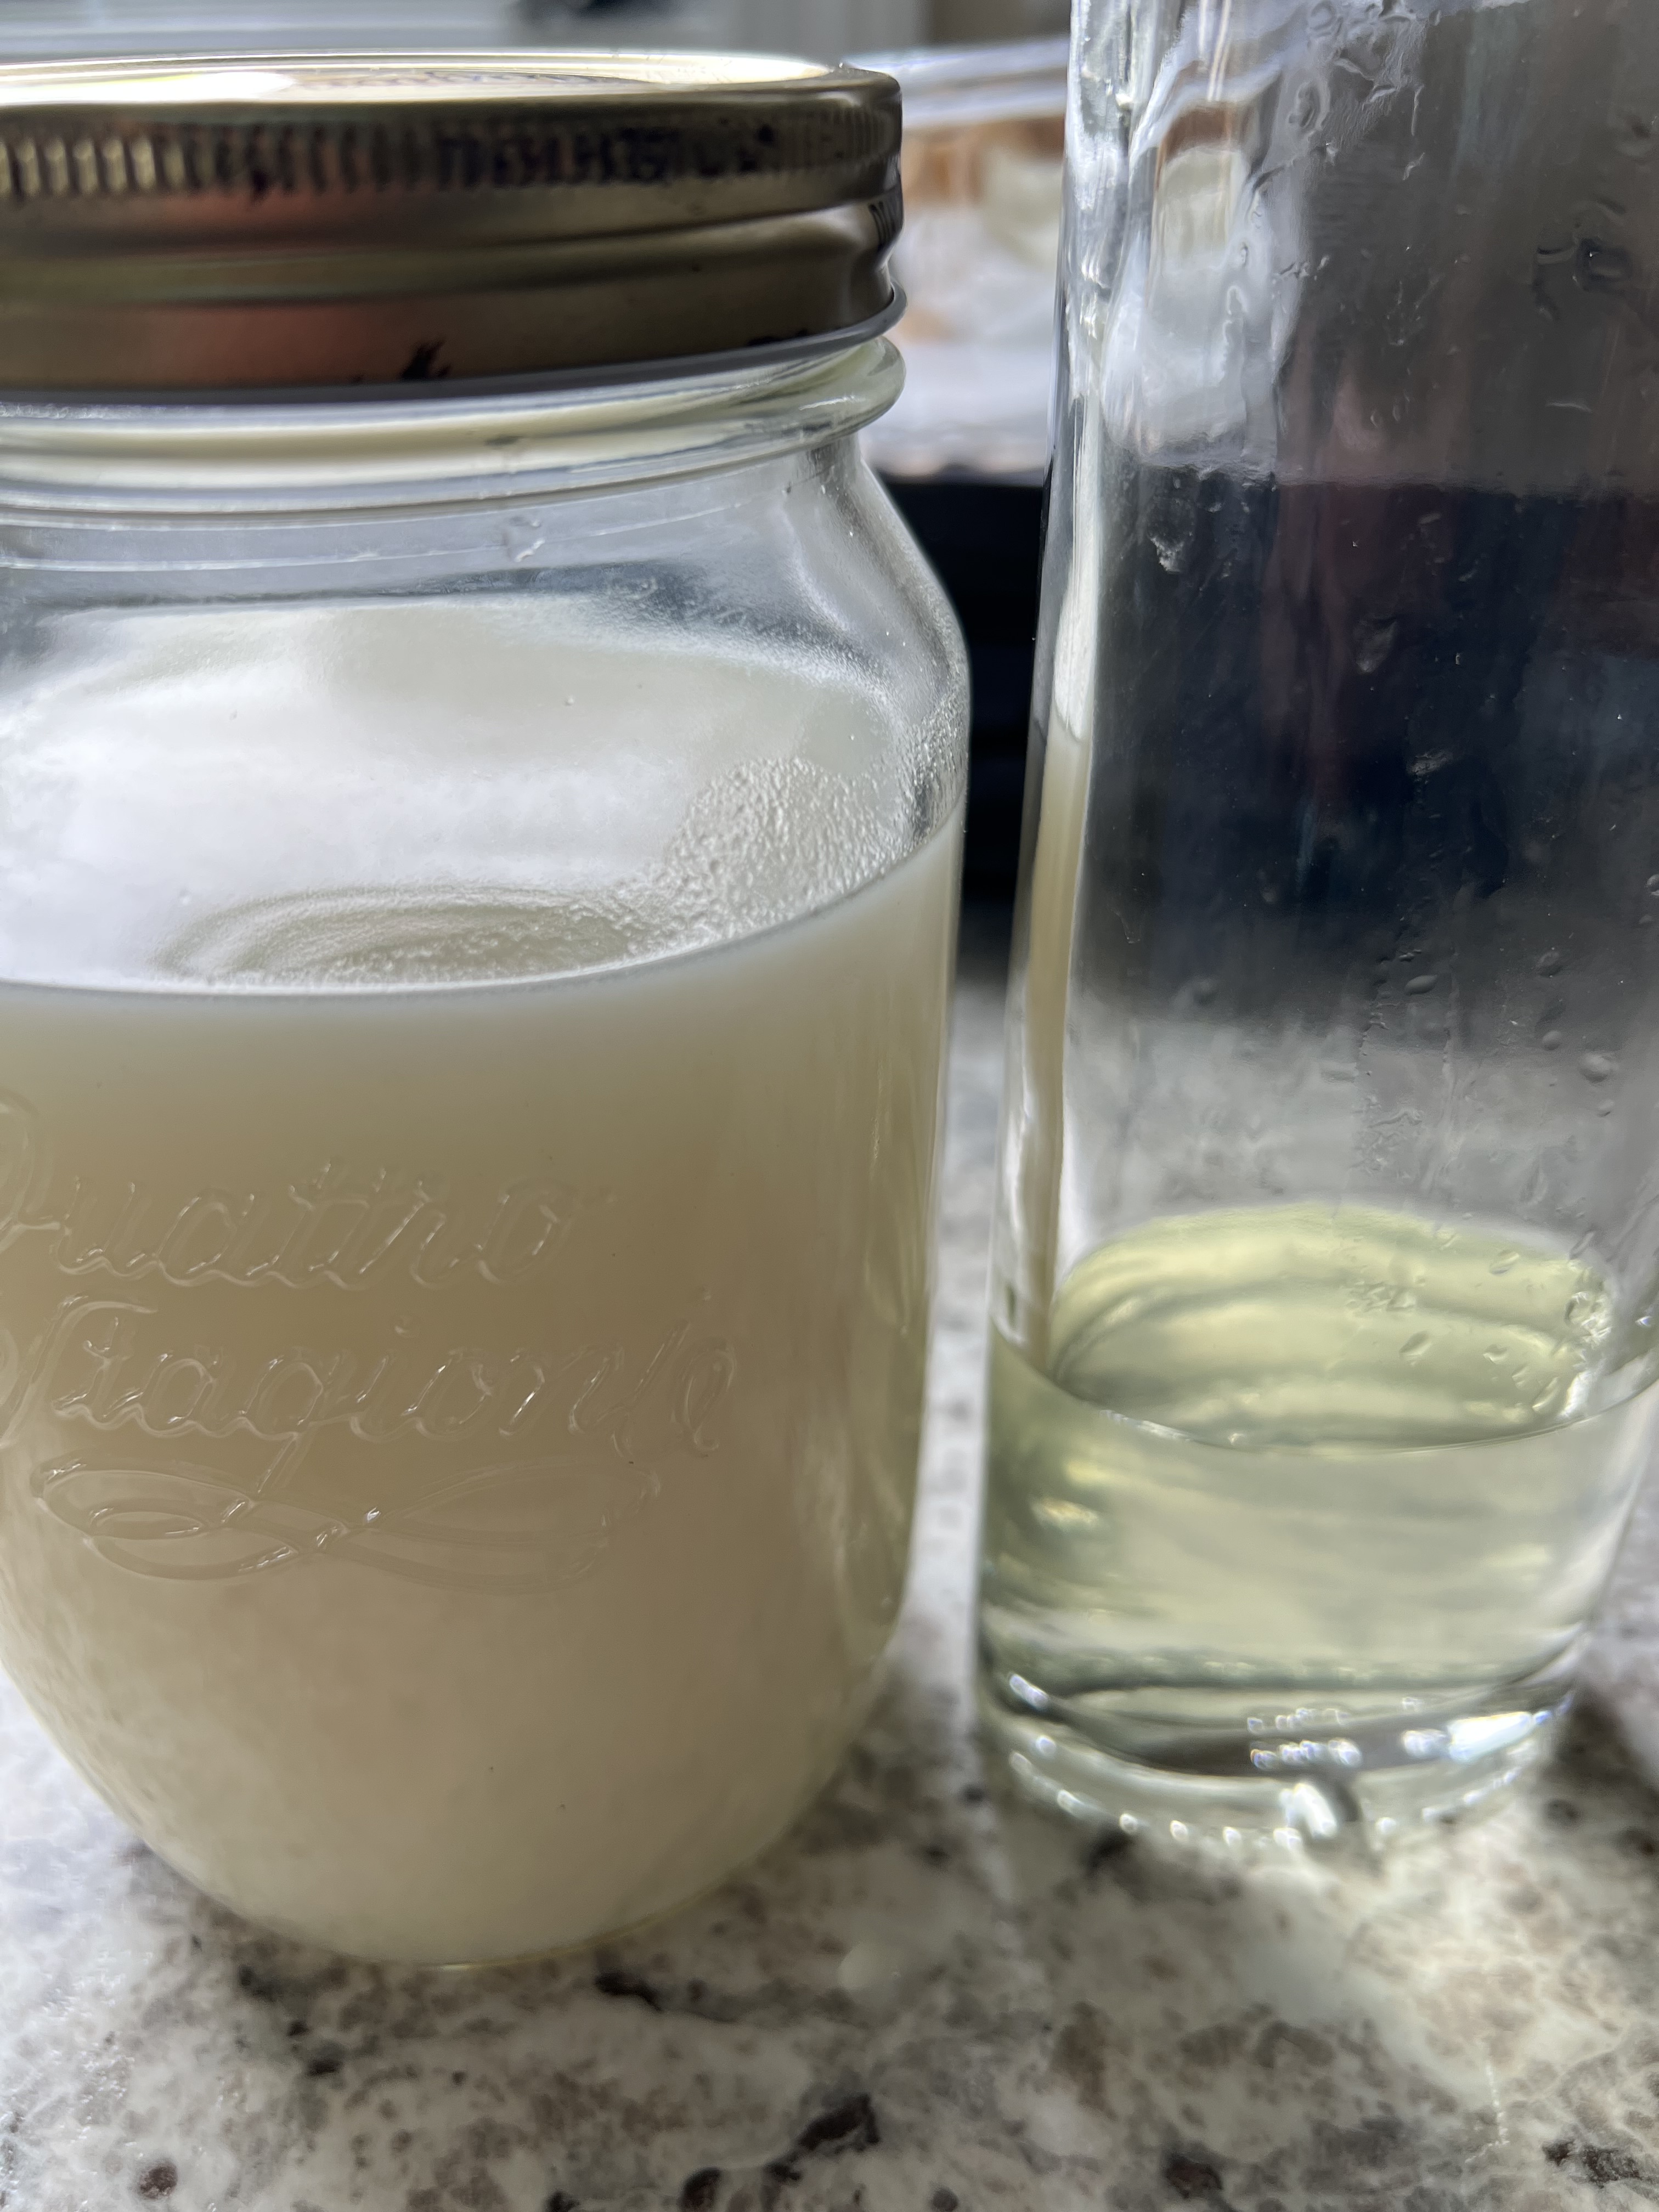
I call this a milk liqueur, because I remember my Mom made it when I was younger, and she called it “pieninis likeris” (milk liqueur) in Lithuanian. But a good friend of mine, knowledgable in all things alcohol, said that it’s not much different than a “milk punch,” something that was common in New Orleans.
The milk liqueur recipe I based mine on was not my Mom’s…she never showed me how to make it. I found it listed under Portuguese recipes, so it looks like this thing is pretty common among many nationalities. And why not? It’s delicious!
If you’ve ever made ricotta cheese at home, there are some similarities. With ricotta, you add vinegar or lemon juice to milk to make it curdle and then separate the curds from the whey. It’s a similar process for this liqueur.
My twist to the recipe is to add a vanilla bean to the mix, because, how can it possibly hurt?
My preferred vodka for all liqueur recipes is one that is as flavorless, as neutral, as possible. And for me, that’s Absolut. I use 80-proof Absolut for this recipe. (I use 100-proof Absolut for my limoncello.)
I used whole milk for this recipe, and if you can, avoid using ultra-pasteurized milk. (That’s harder to do than it sounds!) I don’t mean raw milk…I haven’t used that, and can’t vouch for the results. But I did find some “normally” pasteurized/homogenized whole milk from a local dairy, and that seemed to work fine.
1 liter 80-proof vodka 1 quart whole milk 4 cups sugar the juice and peel of 1 or more lemons, depending on their size and juiciness 1 whole vanilla bean
1 gallon glass jar with lid cheese cloth paper filters for coffee machines
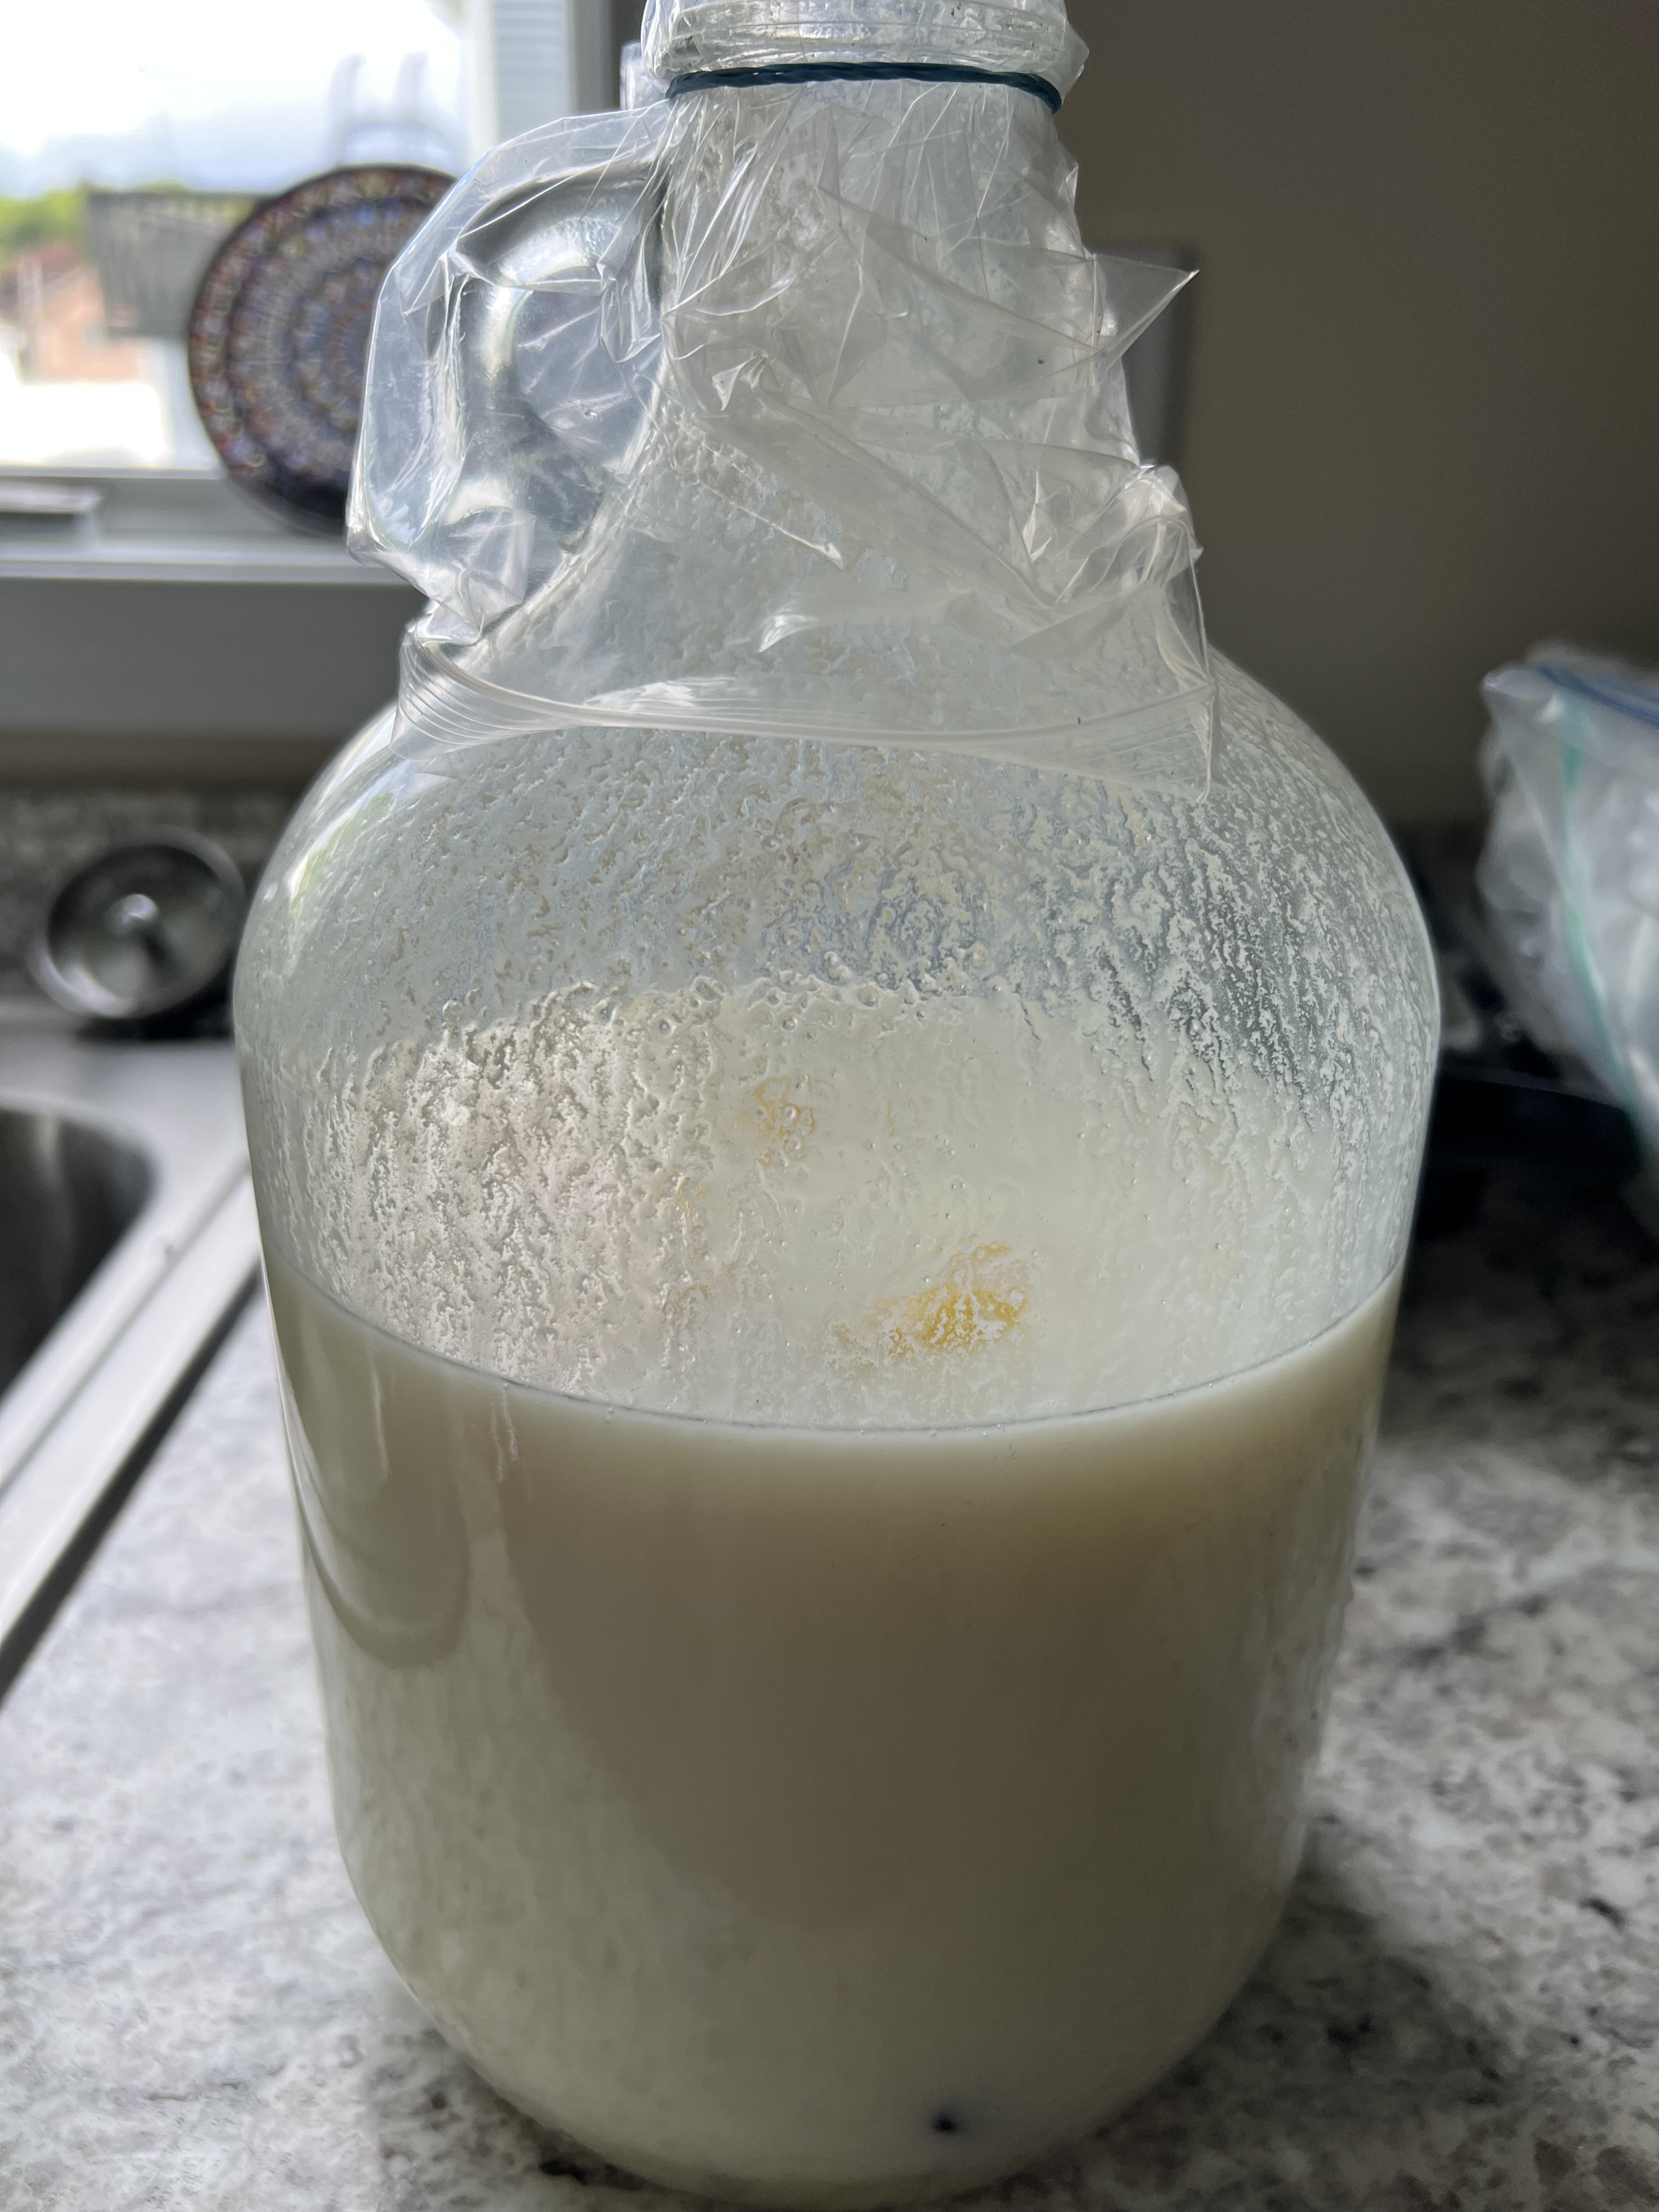
In a gallon-sized glass container with a tight-sealing lid, pour in the vodka and the milk. Add the sugar, and swish it all around to start dissolving it.
Using a vegetable peeler, carefully peel the outer yellow skin of the lemons, avoiding the bitter white pith underneath. Place them in the jar. Carefully squeeze the lemons, avoiding the seeds, and add the juice to the mix. Toss the used lemons into your compost.
Drop in the vanilla bean.
Seal the container, and swish it around, making sure everything gets mixed.
Place the container in a shady part of the kitchen, at room temperature but away from sun and heat, and swish it around once or twice every day. You’ll see the dairy start to separate from the rest of the liquid, but keep swishing it every day nonetheless.
After 10 days, the liqueur is ready!
I used a double layer of cheese cloth, placed in a sieve, and it did a good job of capturing most of the milk solids. I had to go through 4 cloths to get the job done, but at the end, I had a cloudy liquid that needed one more filtration process.
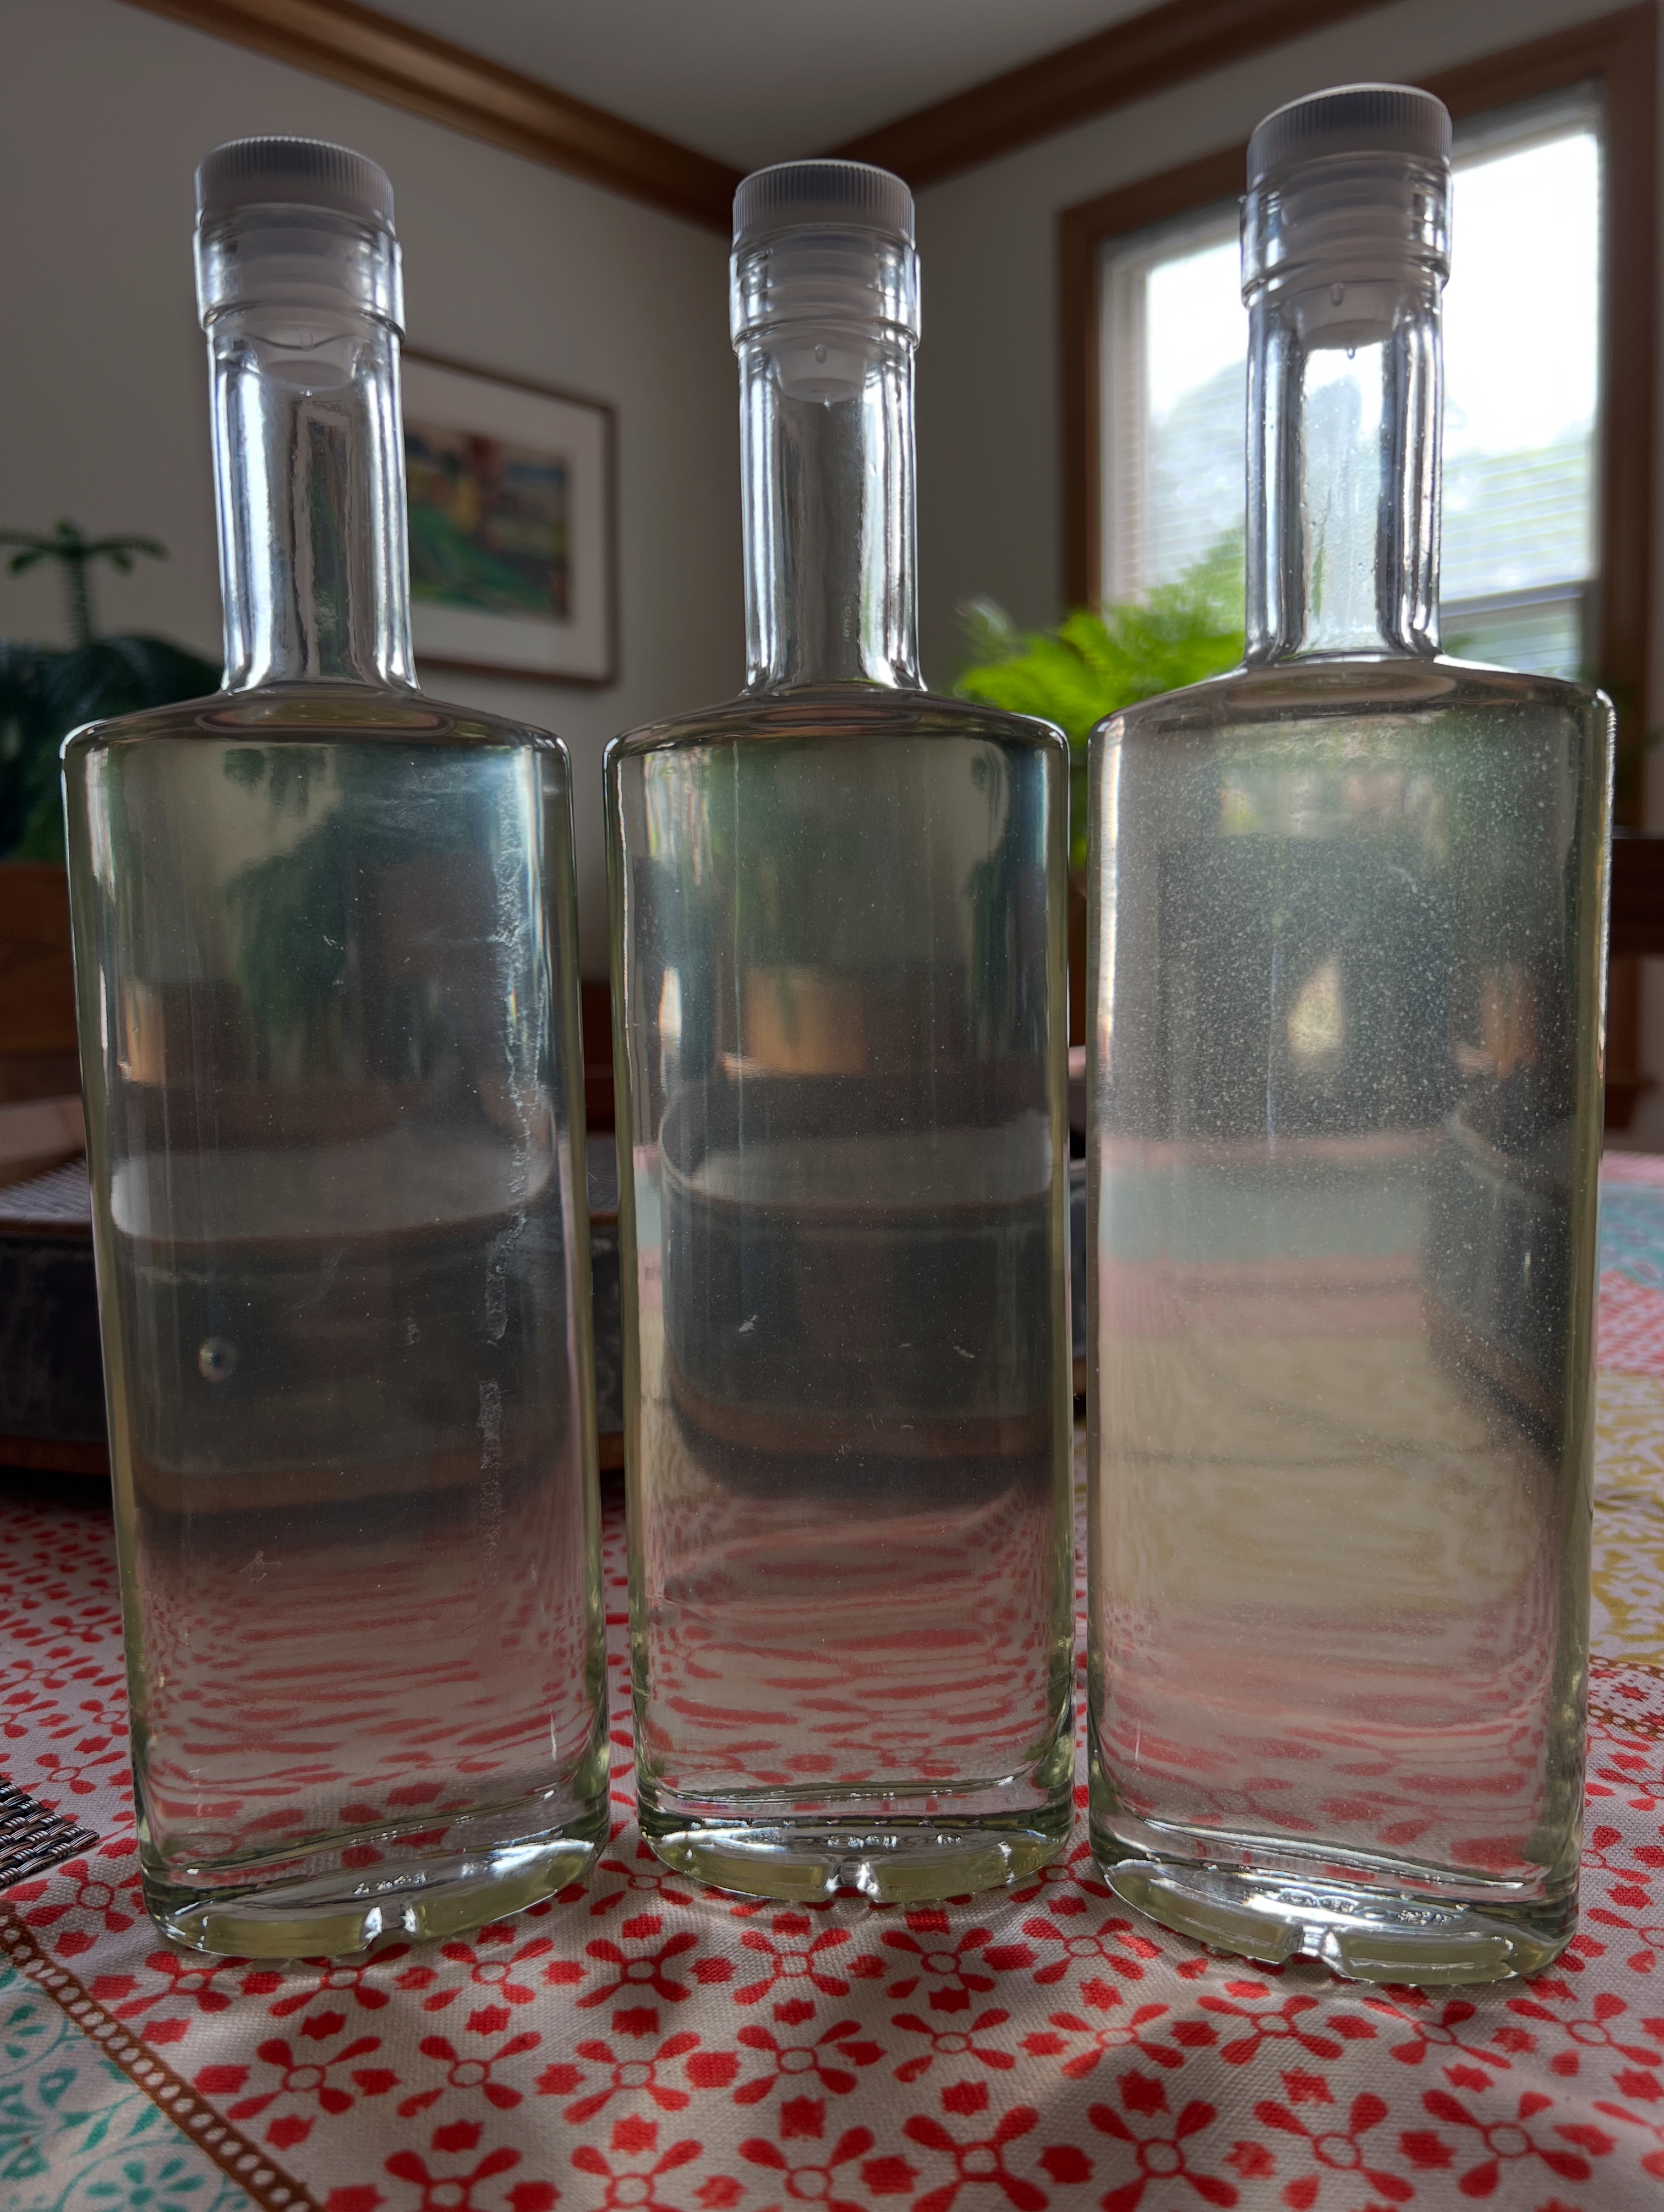
Like I do with my Lithuanian honey liqueur, Krupnikas, I placed a series of funnels with coffee filters over Mason jars and tall glasses, and poured the cloudy liquid through the filters, changing them as needed, as they did tend to clog up.
At the end, I had a relatively clear final product that was absolutely delicious, and maybe even better than the stuff my Mom made!
After making a batch of this for my daughter this week, I got a bunch of requests for the recipe. So here we go!
Chicken parmigiana, much like pizza, is a bit more difficult to make than you might think. Sure, there’s plenty of crappy chicken parm out there, made with processed frozen chicken cutlets, bad sauce and cheap cheese. But to make a really fantastic, mind-blowing chicken parm, that takes a little practice!
The key to this recipe is simple: don’t skimp on the quality ingredients. And my recipe makes a lot. Trust me: you will want leftovers.
The recipes for my Italian bread crumbs and my “Don’t Call It Gravy” tomato sauce are at the bottom.
Gooey, cheesy, orgasmic.
6 Chicken breasts, the best quality you can get your hands on Italian bread crumb seasoning (see recipe below) 3 eggs vegetable oil for frying “Don’t Call It Gravy” tomato sauce (see recipe below) Fresh mozzarella cheese oregano
Thaw the chicken breasts. Lay them flat on a cutting board, and you’ll see where the chicken tender is on the side of the breast. Cut the tender off and set aside, leaving the breast which is thinner at one end and thicker at the other. Slice the breast in half lengthwise at the thicker end, keeping the knife level, so that you wind up with 2 pieces of breast meat that are the same thickness, but one will be a longer piece (the bottom) and one about half its size (the top part you sliced off.) Do this with all the breasts.
By slicing the breasts lengthwise into evenly thick pieces, it will take the same amount of time for them to cook. (I prefer not to pound the hell out of the chicken breasts until they’re flat as a pancake.)
Pour the vegetable oil into a large frying pan. (I like to use corn oil or grapeseed oil.) Next to the pan, set up two bowls: one with my Italian bread crumb seasoning (recipe below) and in the other: crack the eggs and whisk them.
Now it’s your standard breading procedure: chicken meat in the egg, then in the breadcrumbs, coating well. Shake off the excess and place carefully in the pan of olive oil when the oil comes to temperature (about 350) for frying.
Fry the chicken in the oil until it’s golden brown. You want it cooked all the way through, but not overcooked. Place the fried chicken pieces on a wire rack to drain the oil. Do this with all the chicken. The fried chicken at this point is delicious all by itself: chop it and use it in a salad, or make a chicken sandwich. (By the way, if there’s breading left over, use it on the chicken tenders you cut off, and fry them up. My daughter gets these instead of store-bought chicken tenders, and she loves them.)
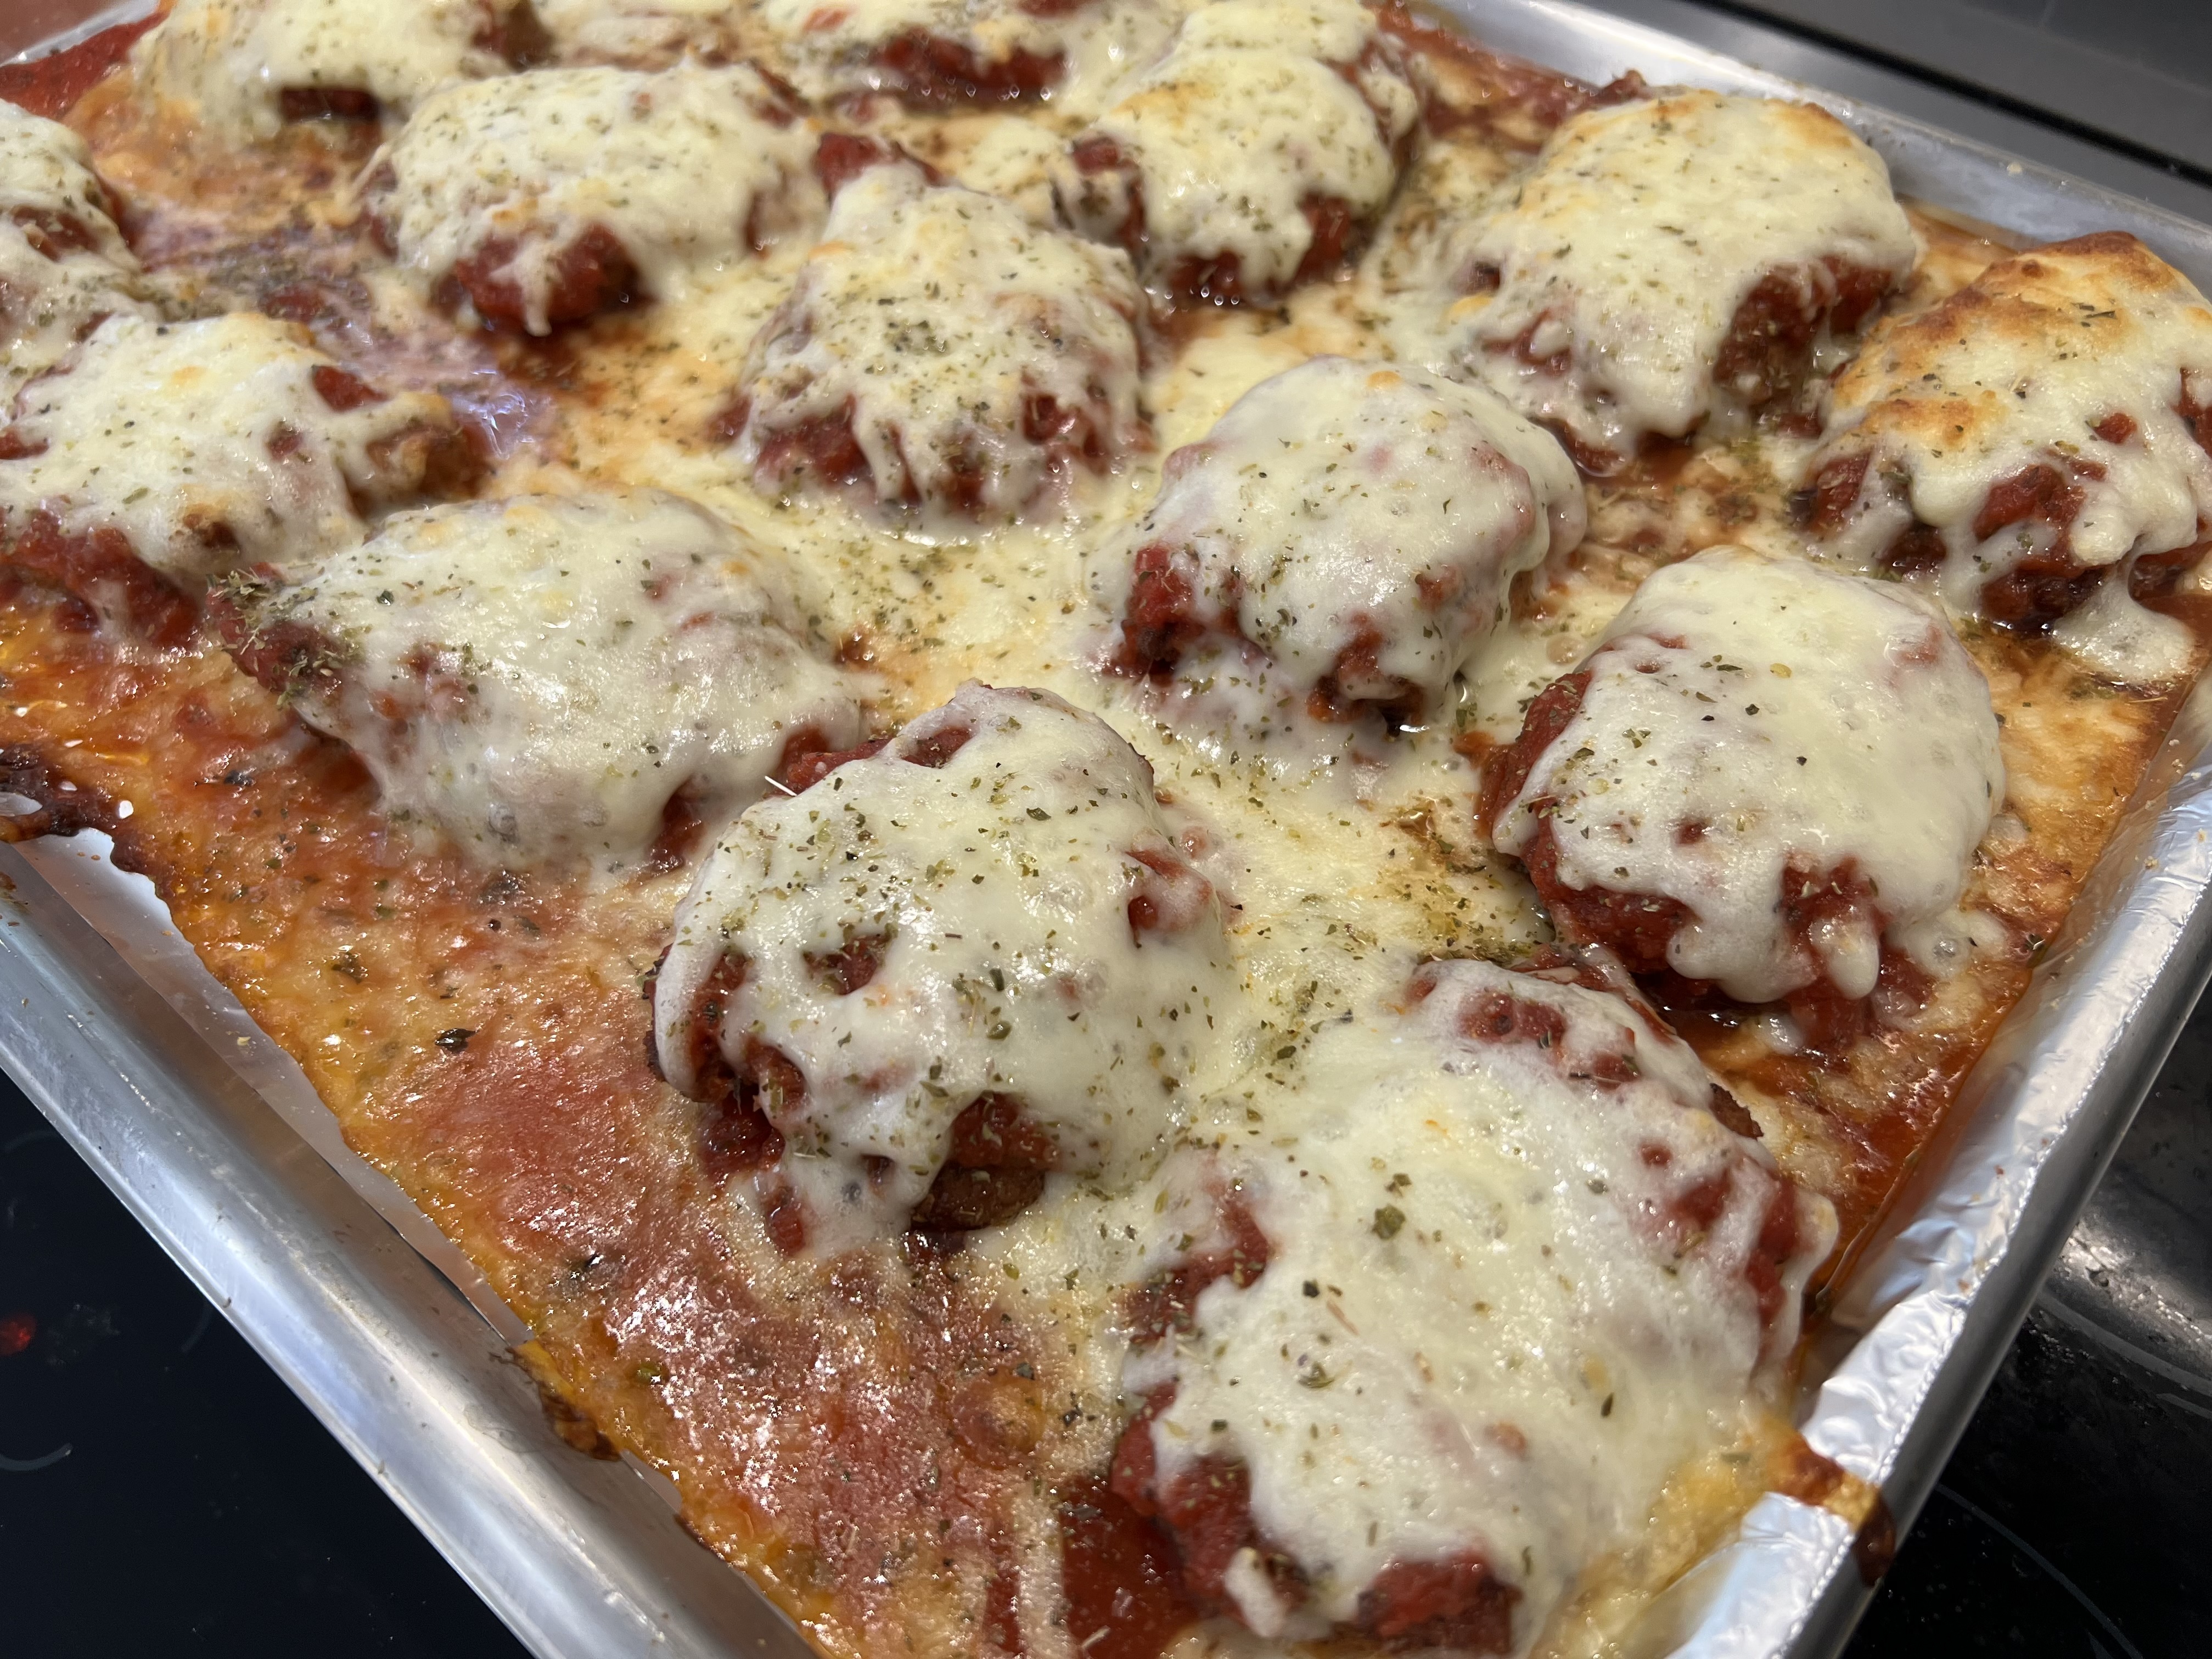
Cover a baking sheet with aluminum foil. Ladle out enough sauce (recipe below) to create a thin layer on the bottom of the baking sheet. Place the fried chicken breasts on top of the sauce. Cover the breasts with more sauce, then place shredded mozzarella on top. Sprinkle the top with a little oregano.
Place the baking sheet in a pre-heated 350 degree oven and bake until the cheese has melted and just starts to brown. Serve it with pasta.
MY “DON’T CALL IT GRAVY” TOMATO SAUCE
It’s not hard to make a good tomato sauce. But it takes a little work to make an amazing tomato sauce. Honed from a recipe handed down by a friend-of-a-friend’s Italian grandma, it is one very important part in two of my favorite Italian comfort food recipes: my meatballs…and my chicken parmigiana recipe.
1 medium onion, finely chopped 2 cloves garlic, finely chopped 1/2 cup extra virgin olive oil 10 cups ground and peeled tomatoes…or 3 cans (28 oz.) tomatoes (real San Marzanos preferred) 2 teaspoons each: dried oregano, basil and parsley 3/4 teaspoon each anise seed and fennel seed 1 1/2 teaspoons salt 1/2 teaspoon black pepper 2 bay leaves 1 small can (6 oz.) tomato paste 1 teaspoon sugar, optional
Heat the olive oil in a large pot and add the onions. Cook until onions are translucent, then add the garlic. Stir for about 10 seconds.
Add the tomatoes and cook until the orange foam disappears, stirring frequently.
Add the oregano, basil, parsley, anise seed, fennel seed, salt, pepper, and bay leaves. Stir to combine. Add the tomato paste, stirring well. Let the sauce just come to a boil (which helps the paste thicken the sauce), then reduce it to a simmer, and cook uncovered for at least an hour, stirring constantly, until the sauce reaches the consistency you like.
MY ITALIAN BREAD CRUMB SEASONING
This is the one part of the recipe (other than the optional pasta) that keeps this dish from being gluten-free. So I use gluten-free breadcrumbs, even if I don’t need to. I buy a loaf of Udi’s frozen gluten-free bread, toast the slices, and them put them in a food processor. I dare you to tell the difference between these and breadcrumbs with gluten!
1 Udi’s loaf, toasted and ground into breadcrumbs 2 teaspoons dried parsley 1 teaspoon dried oregano 1 teaspoon dried basil 1 teaspoon salt 1/2 teaspoon granulated garlic 1/2 teaspoon granulated onion 1/4 teaspoon black pepper
An easy way to marinate beef is to simply throw the meat in a bag and dump some Italian dressing into it. As simple as that sounds, it flavors the meat really nicely. But I’ve got a problem with anything that comes from a jar and was made in a factory, especially when it’s so easy to make my own Italian seasoning.
I recently bought some sirloin beef tips and after trimming the fat and silver skin (they always leave it on the meat), I cut it up into 1 inch cubes. I put the pieces in a glass container–a plastic bag would be fine–and then made my marinade. Combine the first set of ingredients to make the marinade.
1/4 cup decent quality balsamic vinegar–not the expensive stuff
1/4 cup avocado oil
1 teaspoon dried oregano
1 teaspoon dried parsley
1 teaspoon granulated garlic
1 teaspoon granulated onion
1 teaspoon salt
1/2 teaspoon pepper
2 lbs. sirloin beef tips, trimmed and cut into 1″ cubes
avocado oil
3 onions, sliced into rings
2 sweet bell peppers, sliced into thin strips
splash of white wine
Combine the marinade ingredients and pour them into the bag or container with the meat. Mix it around so that every bit of the meat gets coated with the marinade. Seal the container and place in the fridge overnight.
Next day, remove it from the fridge and let it come to room temperature before cooking.
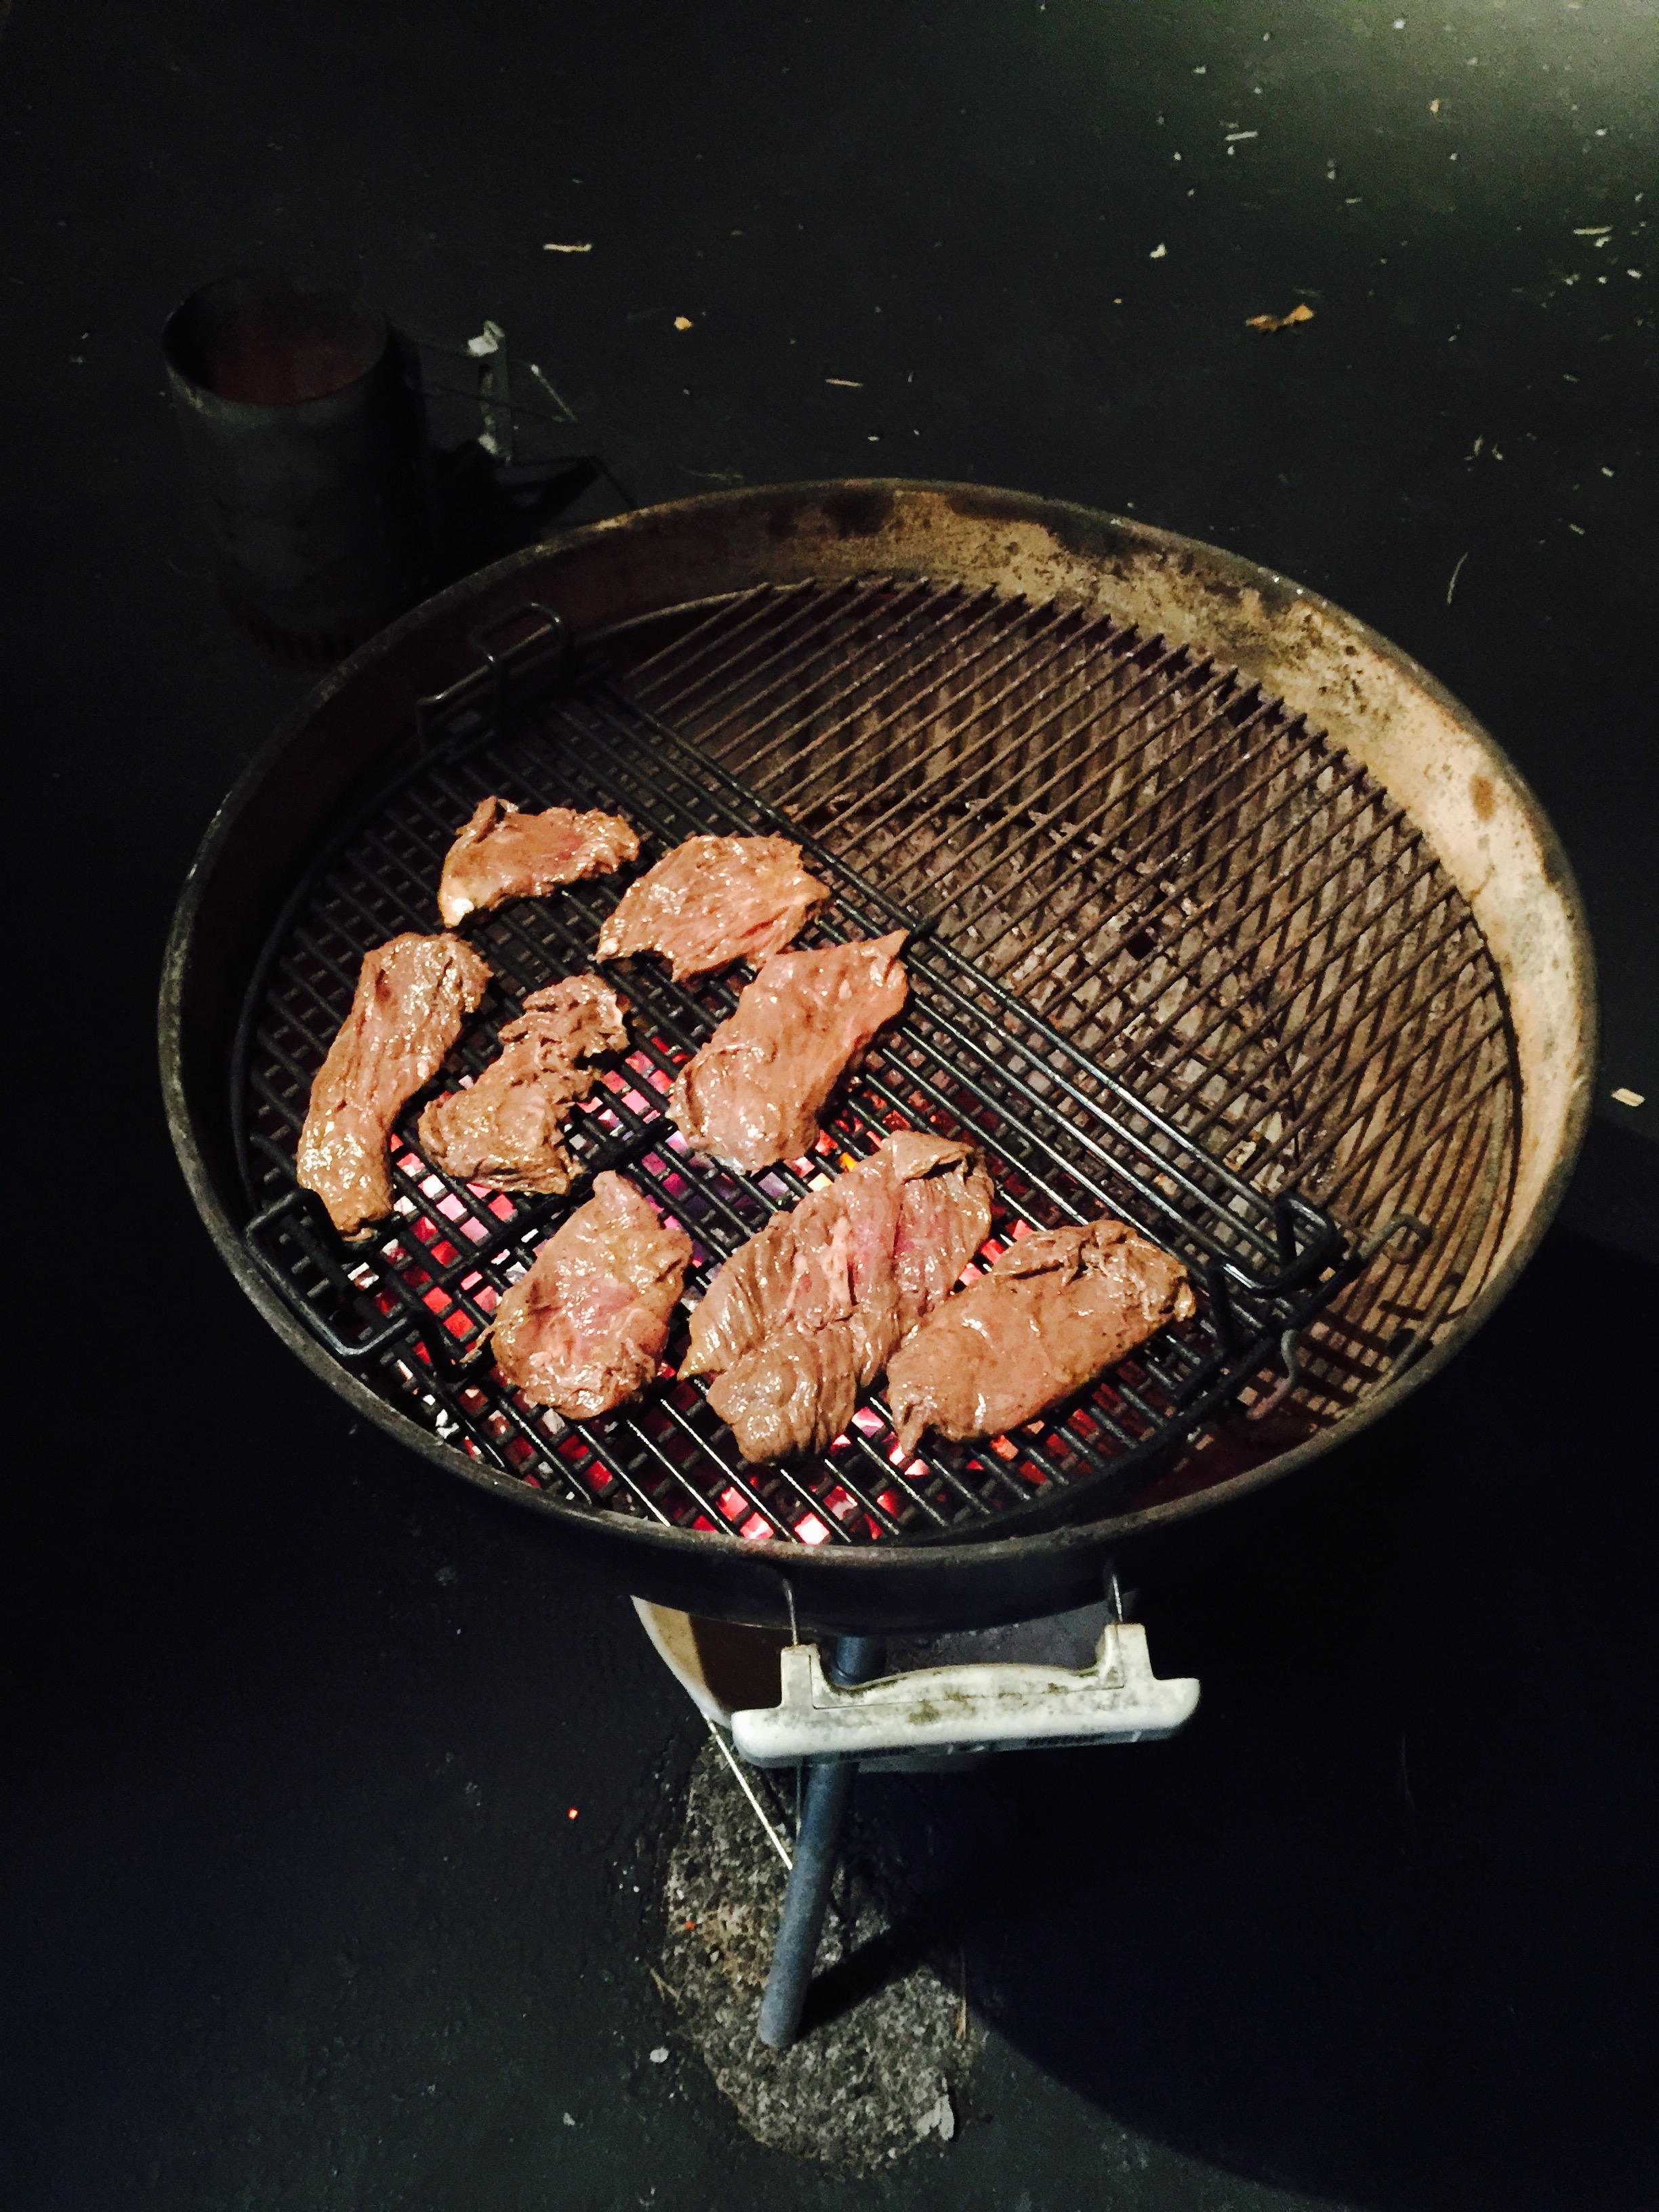
Marinated beef, ready to cook.
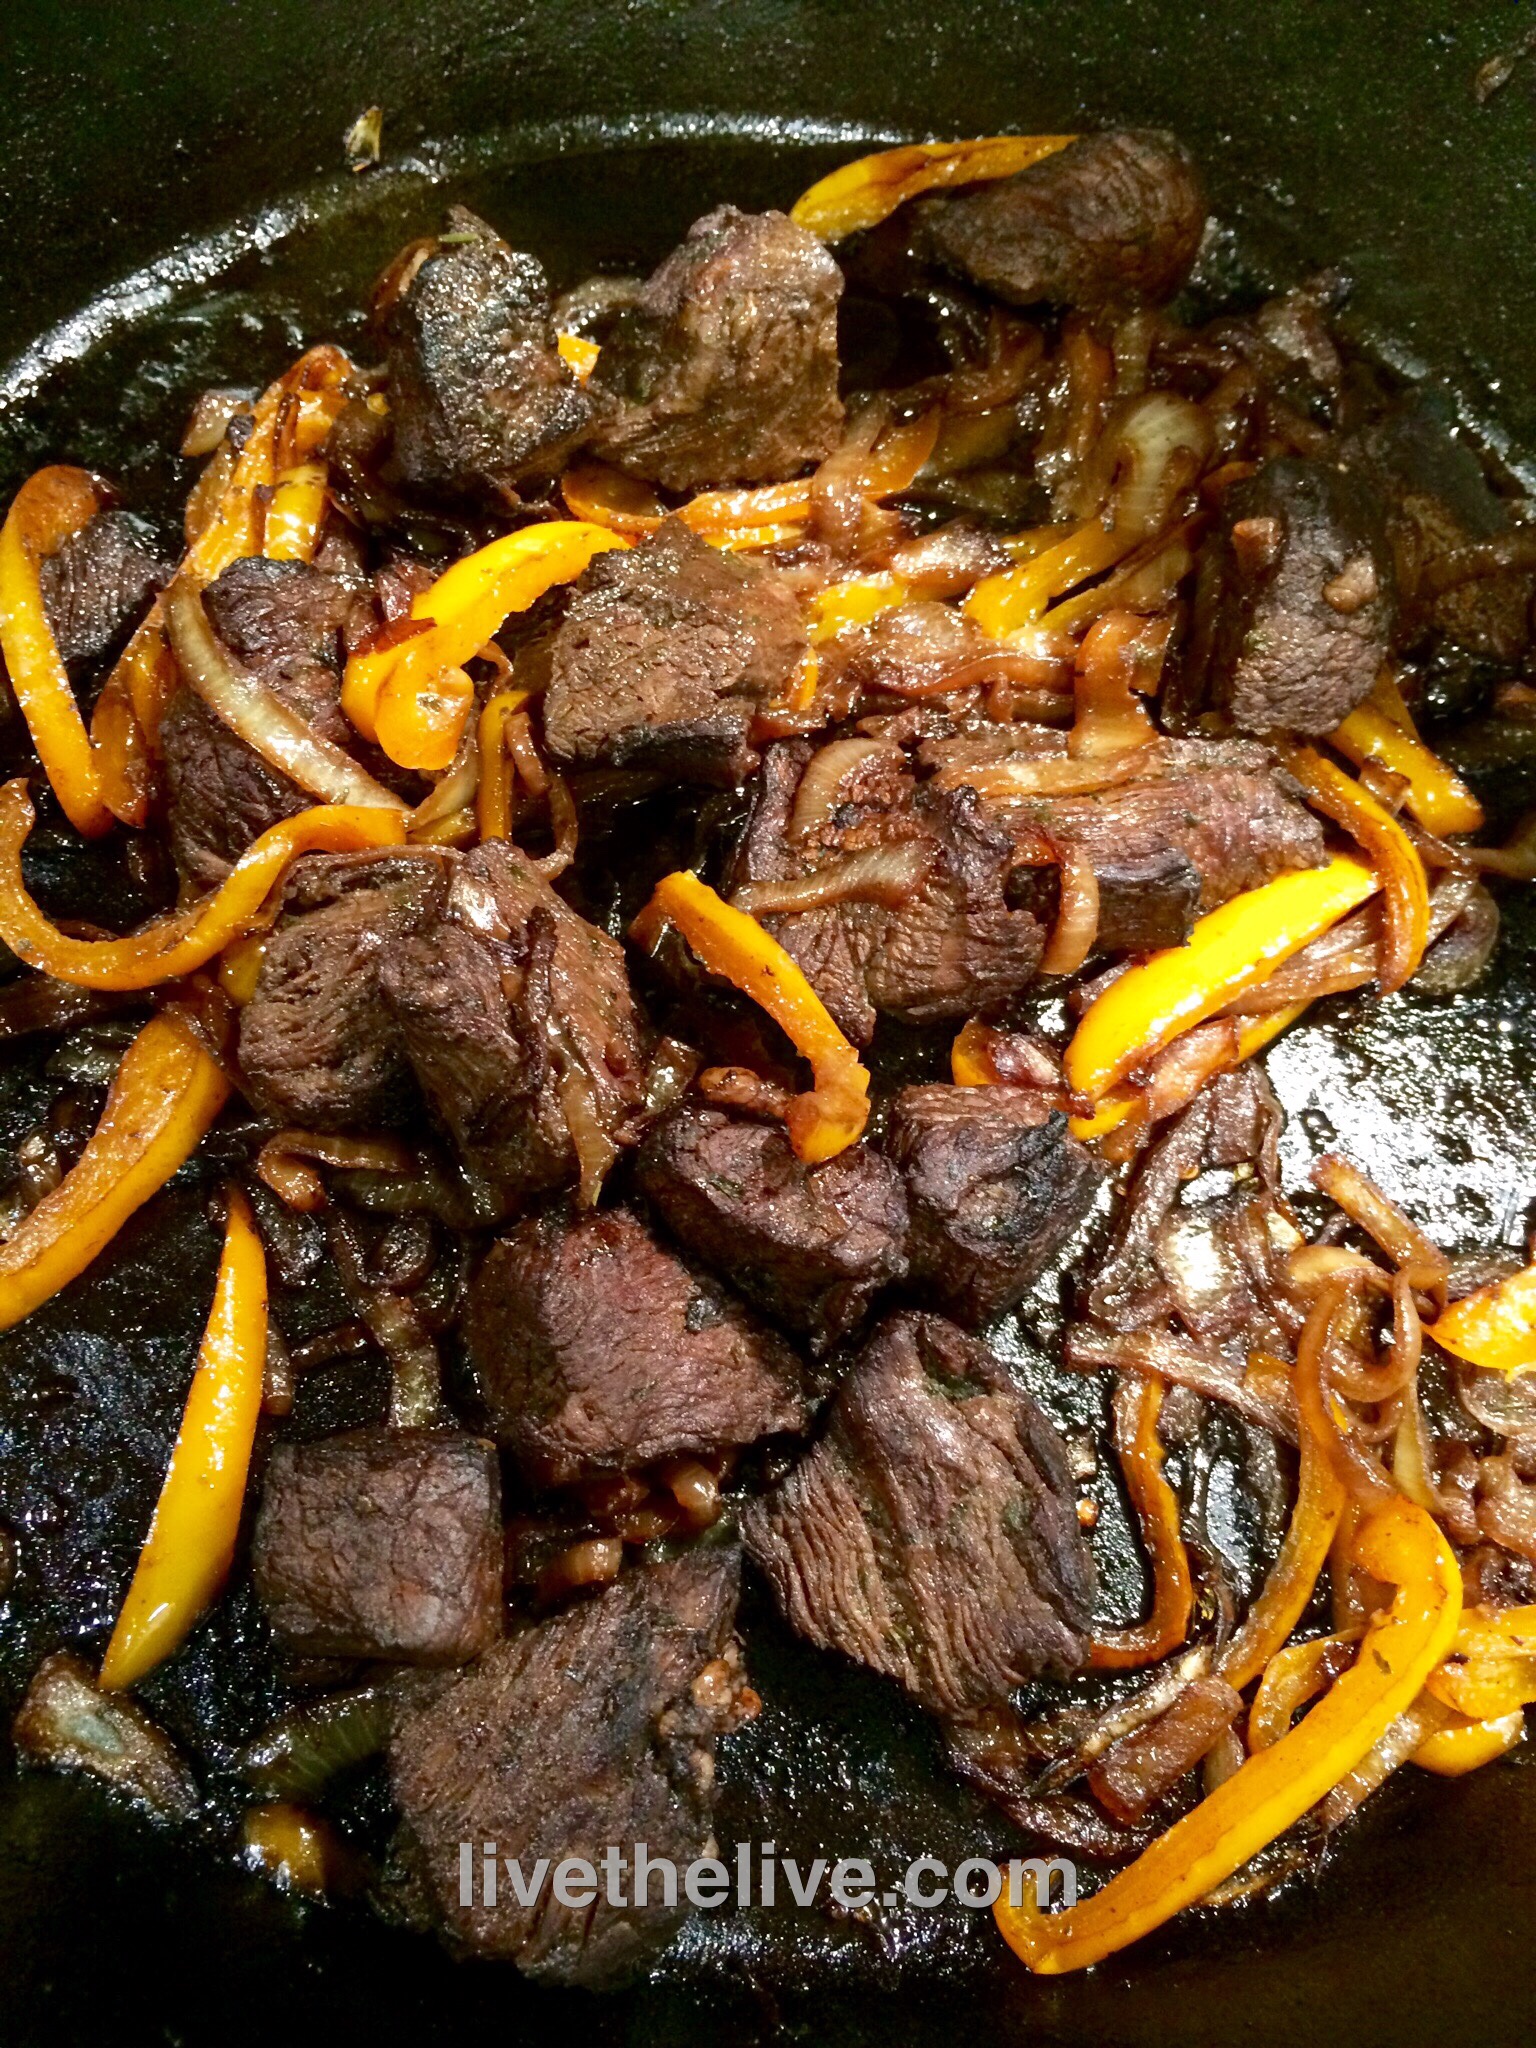
Heat a large cast-iron skillet until hot. You may not need to add oil, since the meat has marinated in it. Using tongs to shake off any marinade, place the beef tips in the skillet, and brown on all sides, constantly flipping them. Cook the meat until it is done: medium to medium rare. (Of course, a hardwood fire is great for cooking these, too.)
Remove the meat from the pan and put it in a bowl to the side. In the hot pan, toss in the sliced onions and peppers. Cook until the onions and peppers are caramelized, and splash a little white wine to de-glaze the pan if you like. (The alcohol cooks off.) If there’s any left over marinade in the bag or container, you can pour it into the pan at this time.
Return the beef to the pan, being sure to include all the juices that may have settled into the bottom of the bowl. Mix through until it’s all thoroughly heated and serve immediately.
I made a lot more…forgot to take the pic before devouring!