When I was a kid, no visit to a Chinese restaurant was complete without an order of those sweet, greasy and radioactive red spare ribs. They came in that foil-lined bag that barely kept them warm until my dad got us home to devour them along with the other classics: fried dumplings, and won ton soup with fried won tons on the side. I still see those ribs on menus even today, and despite my cravings, I just don’t eat fire-engine-red-dyed food anymore.

Imagine my excitement when I saw a recipe for those classic spare ribs in a food magazine. I figured I’d just make them without the food coloring. It totally worked.

I don’t think I’ve ever made a recipe exactly as written, and this was no exception. For one thing, it called for dry sherry. I didn’t have it so, I used dry marsala wine. I didn’t even have the pork ribs, so I substituted a beautiful slab of grass-fed beef flap. It was awesome.

1/3 cup hoisin sauce
1/4 cup soy sauce
3 tablespoons dry marsala wine
2 cloves garlic, finely chopped or through a press
2 tablespoons sugar
1/2 teaspoon Chinese five spice powder
2 lbs. beef flap (skirt steak or hanger steak works, too)


To make the marinade, combine the hoisin sauce, soy sauce, madeira, garlic, sugar and Chinese five spice in a bowl. Mix well.

Trim the excess fat and silver skin off the beef flap, and if it’s thick, slice it lengthwise to make a thinner piece of meat about 1/4″ to 1/2″ thick.

Place the meat in the marinade, making sure it gets well coated on all sides. Marinate the meat at room temperature for about 30 minutes. If you have a thicker cut of meat, you can marinate it longer.

Drain and discard the marinade.

Heat a cast iron pan and add a little lard or oil. Place the beef flap pieces in the pan, searing well on one side before flipping over to the other. If the meat is thin, you can cook it to a medium-rare right there on the stove top. You might need to finish the beef in a 350-degree oven if you’re using a thicker cut.


To make the Chinese ribs with this marinade: simply place the ribs and the marinade in a Ziploc bag at room temperature for 30 minutes. Pre-heat the oven to 350 degrees, and place the ribs on a baking sheet with a wire rack on top. Save the marinade…and baste the ribs with it every 30 minutes, turning the ribs over as you do so. Cook until the ribs are done, about 2 hours.


Before you can have great shrimp cocktail, you have to do 2 things: buy the right shrimp and cook the shrimp the right way. The right shrimp is nothing less than wild-caught American shrimp. If you’re buying shrimp from Asia, your supporting a system that uses slave labor, where the shrimp are fed chemical pellets and swim in feces. If it doesn’t say wild-caught American shrimp on the package or at your local seafood store, it’s crap. Give your store owner hell for selling it.

Cooking shrimp the right way is something I learned living in the South. My wonderful friends and neighbors taught me many things about food, and the right way to cook shrimp is near the top of the list.

Shrimp was never meant to be cooked to death. It doesn’t matter if you start with fresh shrimp, store-bought shrimp, or even frozen shrimp…the same rules apply: 1) Season your water. 2) Bring it to a boil, then reduce to a simmer and let it get happy for 20 minutes. 3) Drop in the shrimp and raise the heat. 4) Remove the shrimp AS SOON AS the water returns to a boil.

The seasoning for the water, commonly called shrimp boil, makes or breaks the flavor of your shrimp. For years, I used Zatarain’s Crawfish, Shrimp and Crab Boil in a bag. And it was good. But at some point, I realized I had to get serious and make my own boil.

2 quarts water
2 cloves garlic, smashed
1/2 lemon, squeezed, then drop the lemon in
1 small onion, peeled and quartered
4 bay leaves
1 tablespoon black peppercorns
1 tablespoon salt
1 tablespoon whole allspice
1 teaspoon cayenne pepper
1 teaspoon celery seed
1 teaspoon whole cloves
1 teaspoon brown mustard seed
1 teaspoon dry thyme
Placing the spices in one of these means you won't be picking them out later. Worth the investment!

Placing the spices in one of these means you won’t be picking them out later. Worth the investment!

Combine all the ingredients in a 4–6 quart pot. Bring it to a boil, then reduce to a simmer, put a lid on the pot, and let it simmer for at least 20 minutes.

After 20 minutes, remove the lid and pour in your shrimp. (I prefer unpeeled.) Stir well, bring the heat back up to high, and remove the shrimp AS SOON AS it returns to a boil! The shrimp are cooked! Done!

Strain the shrimp and place them in a bowl with crushed ice on the bottom. Add more crushed ice on top of the shrimp, and place the bowl in the fridge until you’re ready to serve.


Freshly shucked oysters and clams, or in this case, beautiful boiled wild-caught American shrimp, call for an equally amazing cocktail sauce…and this sauce kicks butt! And it features a key ingredient that you might not expect: vodka. The small amount of vodka in the mix keeps the cocktail sauce from freezing solid when stored in the freezer. Just scoop out what you need, let it thaw, and put the rest back in the freezer until next time.

image


2 cups ketchup
4 tablespoons prepared horseradish
1 tablespoon fresh lemon juice
1 teaspoon Worcestershire sauce
1/2 teaspoon Frank’s Red Hot, or other hot pepper sauce
5 grinds of fresh black pepper
1/4 teaspoon salt
1 teaspoon good quality vodka, like Tito’s

Combine all the ingredients. Store in a tight plastic container in the freezer.

We stumbled upon the Grange one Sunday while looking for a place to have brunch. After a rich dinner the night before at Persimmon in Providence, RI, we really didn’t want to go the route of eggs, sausages, and other heavy stuff. What a great surprise to find a vegetarian restaurant with a great atmosphere and surprisingly flavorful food!

fullsizerender-11

My kale Caesar salad was super-fresh and absolutely delicious. But the real winner was the “carrot pastrami” reuben sandwich. Served on French rye, it’s got the kraut, Swiss and Thousand Island…but carrots filling in for the pastrami…and you just don’t miss it! Full of flavor and texture, I don’t know what they do to the carrots, but it rocks! My wife had the roasted veggie bowl: delicious and big enough to take half of it home to enjoy again.

Reuben sandwich with "carrot pastrami."

Reuben sandwich with “carrot pastrami.”

They’ve got a full bar for those that crave a cocktail…though their house-made juices are fantastic.

fullsizerender-4

We will be back!

Here in New England, the best brand of chicken salad you can buy is called Willow Tree. It’s been here for over 50 years, and people crave it like crack. But I don’t like anything whose ingredients are a well-kept secret, so my task was to make something that was a reasonable Willow Tree facsimile. I got close…real close! As always, I use pastured chicken and organic veggies when possible. I found that boiling the chicken breasts in stock instead of water keeps the meat more flavorful.

image


1.5 lbs boneless skinless chicken breasts
4 pints salt-free chicken stock (I use home-made)
1/2 cup mayonnaise (I live on Hellman’s)
1/4 cup finely chopped celery
2 tablespoons finely chopped Vidalia onion
1 teaspoon light brown sugar
1/8 teaspoon granulated garlic
1/2 teaspoon salt
1/8 teaspoon black pepper


Heat the chicken stock in a large pot. Bring to a boil and add the chicken breasts. Bring to a boil again, then simmer uncovered for about 7 minutes. Turn the heat off, cover the pot with a lid, and let the breasts sit in the pot for 30 minutes. After 30 minutes, remove the breasts to a cutting board and allow them to cool. Save the chicken stock for another use, like soup. (See below.)

Meanwhile, in a large bowl, combine the mayonnaise, celery, onion, brown sugar, granulated garlic, salt and pepper. Mix thoroughly to combine.

When the chicken has cooled, shred the breast meat into bite-sized pieces and then transfer it into the bowl with the mayonnaise mixture. Mix thoroughly and chill before serving.

I love my chicken salad on a Martin’s Long Roll.


BONUS: I don’t waste the chicken stock left over in the pot. I chop some carrots, celery and onion and throw it in there. I reserve some of the chicken breast meat–just a bit–and throw it in there, too. I add a little salt and pepper, and a pinch of dried Bouquet Garni. I bring it to a boil, then reduce the heat to a simmer and cook until the veggies are al dente. Pasta or potatoes optional.

Makes an awesome chicken soup!


When I can’t get to Chinatown in Boston or New York, I cook my version of a recipe I discovered many years ago in “The Chinese Cookbook,” a wonderful source of information by former NY Times food critic Craig Claiborne and Virginia Lee. Whenever possible, I use a whole pasture-raised chicken.

This recipe can be made gluten-free by using GF hoisin and soy sauce, available in most supermarkets.


Cantonese chicken


1 whole chicken, about 6 lbs., or 2 smaller chickens (pictured)
1 tablespoon peanut oil
1 tablespoon soy sauce
6 tablespoons hoisin sauce
2 teaspoons sesame oil
4 teaspoons Chinese five spice powder
2 teaspoons granulated garlic
2 teaspoons salt
1/2 teaspoon black pepper


Remove all the giblets from chicken. Rub the soy sauce all over the chicken. Then rub the peanut oil all over the chicken.

Combine the Chinese five spice, garlic, salt and pepper in a bowl. Season the entire chicken, including inside the cavity, with this mixture.

Pre-heat the oven to 325 degrees. Place the chicken in a pan lined with aluminum foil (cleanup will be easier) and bake.

Meanwhile, combine the hoisin sauce and sesame oil in a small bowl. When the chicken is about 15 minutes away from being done, brush it with the hoisin/sesame oil mixture. Cook it another 15 minutes until the chicken has a nice dark glaze. Don’t let it burn!

Let it rest about 15 minutes before carving.


KONA BEEF RIBS

Posted: March 19, 2017 in beef, Food, Recipes
Tags: , , , , , ,

I’m usually a pork rib guy. But recently, I bought a nice slab of grass-fed beef ribs from one of my latest favorite suppliers of beef, Slanker’s Grass-Fed Beef. (www.texasgrassfedbeef.com) They sell grass-fed beef, pork, lamb, poultry, and more…with fair pricing and free shipping.

My coffee rub from an earlier blog has become my go-to way to cook a steak. So I figured, how bad could it be on beef ribs?

Any coffee will do for this rub…pick your favorite. But I had a stash of my personal favorite, Kona, at home, and used that.

ribs3


3 tablespoons brown sugar
1 tablespoon ground Kona coffee
1 tablespoon Kosher salt
1 teaspoon granulated garlic
1 teaspoon granulated onion
1 teaspoon unsweetened cocoa powder
5 lbs. grass-fed beef ribs
Let the rubbed ribs sit for 30 minutes.

Let the rubbed ribs sit for 30 minutes.


In a bowl, combine the brown sugar, coffee, salt, garlic, onion, and cocoa. Mix well.

Remove the skin on the underside of the ribs. I do this by sliding a knife under a corner of the skin, exposing just enough of a tab that I can grab onto. The meat can be slippery, so pulling the skin off with a folded piece of paper towel in your hands gives a better grip.

Cut the ribs into 2-rib portions. Place all the rib pieces on a baking sheet lined with aluminum foil.

Generously rub the coffee rub into all sides of the rib pieces, turning them meat-side-up, and let them sit on the baking sheet at room temperature for about a half hour, while you warm the oven up to 350 degrees.

Place the sheet pan of ribs in the oven and bake for 30 minutes.

Remove the ribs from the oven, and lower the heat to 250. Wrap the ribs in aluminum foil, 2 sections per packet, and place them back on the baking sheet. Place the baking sheet back in the oven and cook them for 4 more hours.

Remove the ribs from the oven and take them out of the foil, placing them back on the baking sheet and back into the 250-degree oven for 30 more minutes.

ribs2


LASAGNA, MY WAY

Posted: March 17, 2017 in Food, Italian, pasta, Recipes
Tags: , , , ,

As a teenager growing up on Long Island, I worked long hours at a local Italian restaurant called Pizza City East in Plainview. (The original Pizza City was in Ozone Park, Queens.) Though the pay sucked, I made some important friendships that have lasted to this day. I also learned many Italian cooking basics: how to open clams for red and white clam sauce, the secrets of great pizza dough, the art of a perfect espresso, and how to make massive quantities of baked ziti.

Although the basic ingredients of baked ziti are the same as lasagna, baked ziti is wetter, using more cheese and sauce. So when I started making lasagna, I followed this same path.

It was only recently that I decided to take the more classic Italian approach and make a “drier” lasagna. Once I did, I realized I had done it wrong all this time!

My lasagna consists of 2 sauces and 4 cheeses, using pasta that is boiled much firmer than al dente. I really don’t like the flavor or texture of no-boil pasta sheets, so I never use them.

This lasagna can be gluten-free (and just as delicious) when you use the alternatives listed in the recipe.
lasagna


Meat Sauce…
1 small onion, finely chopped
1 small carrot, finely chopped
1 lb. grass-fed ground beef
1 tablespoon dried parsley
2 teaspoons dried oregano
1 teaspoon dried basil
1 teaspoon salt
1/2 teaspoon black pepper
1 28-oz. can whole tomatoes
extra virgin olive oil for sautéing


Heat a tablespoon or 2 of olive oil in a large pan and sauté the onions until translucent. I finely chop the carrots by peeling them and then chopping up the peeled pieces, so that they almost melt into the sauce. Add the carrots and cook for 2 minutes. Add the beef and cook until it browns. Add the parsley, oregano, basil, salt and pepper and mix well.

Empty the can of tomatoes into a blender and blend until smooth. Add this to the pan and mix well.

Cook the meat sauce for about 10 minutes, then remove from the heat and set aside.


Bechamel sauce…
3 tablespoons butter
3 tablespoon all-purpose flour (I use Cup4Cup flour to make it gluten-free)
1/2 teaspoon salt
1/4 teaspoon black pepper
2 cups 2% milk


Bechamel is a basic white sauce. It adds a wonderful creaminess to lasagna.

Melt the butter in a saucepan under medium heat. Add the flour and whisk until you’ve combined the butter and flour and have a light roux.

Add the milk, and keep whisking, making sure you don’t get any lumps in the sauce. Season with the salt and pepper.

Keep whisking until the sauce thickens. Once it does, remove it from the heat and set it aside.


12 oz. lasagna pasta sheets (I use Garofalo GF pasta to keep things gluten-free)
4 slices provolone cheese (about 4 oz.)
ricotta cheese (about 4 oz.)
mozzarella cheese, thinly sliced (about 4 oz.)
2 tablespoons freshly grated Parmigiano Reggiano


Pre-heat the oven to 350 degrees.

Cook the lasagna sheets in a pot of salty boiling water until very firm…firmer than al dente. Drain the pasta and run cold water over it to stop the cooking process. The pasta will want to stick to itself, so work quickly.

Lay a thin layer of the meat sauce at the bottom of the lasagna pan, which will keep the lasagna from sticking. Then start your layers: a layer of pasta, a thin layer of the Béchamel sauce, the 4 slices of Provolone, a layer of pasta, a layer of the meat sauce, small teaspoon-sized dollops of the ricotta, another layer of pasta (press down occasionally to remove air bubbles), another thin layer of Béchamel, the Parmigiano Reggiano, more pasta, more meat sauce, etc….

Make it as thick as you like. I like to cover the final layer of pasta with the meat sauce and then finish the dish with the mozzarella, sprinkling a touch of oregano on top.

Place the lasagna pan in the oven and bake for 30 minutes, or until bubbly. Shut the oven off, but leave the pan in for another 10 minutes, then serve.

Basic lasagna on the left, gluten-free on the right. I couldn't find GF lasagna sheets, so I used bundles of spaghetti! It worked really well!

Basic lasagna on the left, gluten-free on the right. I couldn’t find GF lasagna sheets, so I used bundles of spaghetti! It worked really well!


Despite that corned beef is not an authentic Irish dish, it seems that everyone thinks they should eat it on St. Patrick’s Day. The phrase “corned beef” was actually coined by the British, and although the Irish were known for their corned beef throughout Europe in the 17th century, beef was far too expensive for the Irish themselves to eat and all of it was exported to other countries. Owning a cow in Ireland was a sign of wealth, and the Irish used theirs for dairy products, not beef.

The Irish ate pork, and a lot of it, because it was cheap to raise pigs, and they traditionally prepared something like Canadian bacon to celebrate St. Patrick’s Day in Ireland.

In the 1900’s, when the Irish came to America, both beef and salt were more affordable, and the Irish, who lived in poor, tight-knit communities, often next to Jewish communities, bought much of their beef from Kosher butchers. And so many of the Irish learned how to corn their beef using Jewish techniques, but added cabbage and potatoes to the mix.

It takes about 3 weeks to make corned beef. But now that you know it’s not Irish anyway, that’s OK! Doing it yourself is not difficult, and you get a better quality product than that nasty slab from the supermarket that’s full of chemicals and preservatives.

Corned beef has nothing to do with corn. ‘Corning’ is a technique for preserving raw meats for long periods by soaking it in salt brine. This method was used in England before the days of commercial refrigeration. Back then, the large salt kernels used in the brine were called “corns.”

Brining is a time-honored way of preserving and it prevents bacteria from growing. Both pastrami and corned beef are made by this method. Both start with a brisket of beef. Corned beef is then cooked–usually boiled–and served. Pastrami is made when the brined meat is rubbed with more spices and smoked to add extra flavor. So corned beef and pastrami are the same meat, just treated differently.

Saltpeter is an ingredient that has been used in brining beef for years. It adds the traditional red coloring to the corned beef and pastrami meat. But since saltpeter can also contain carcinogens, I leave it out. The meat may not be the usual bright red color, but the flavor and texture of the meat will not be affected.

Brining the beef brisket

Brining the beef brisket

Step one: corned beef…

beef brisket (about 8-10 pounds)
2 teaspoons paprika
1/4 cup warm water
3 cloves of minced garlic
2 tablespoons sugar
1 tablespoon mixed pickling spices
3/4 cup salt
2 quarts water

Place the brisket in a large container made of non-reactive material, like glass or plastic.

In the 1/4 cup of warm water, dissolve the sugar, minced cloves, paprika and pickling spices.

Dissolve the 3/4 cup of salt in the 2 quarts of water. Pour in the sugar/garlic/paprika/pickling spices mix and stir everything together. Pour the mixture over the meat in the container. Make sure the meat is totally beneath the surface of the liquid. (You may need to weigh it down to do this.) Cover the container.

Refrigerate the container and contents for 3 weeks, turning the meat once or twice per week. At the end of the third week, remove the container from the refrigerator and take out the meat. Soak the meat in several changes of fresh cold water over a period of 24 hours to remove the excess salt.

At this point, if you want corned beef, prepare and cook it using your favorite recipe. But I’m all about the pastrami!

Step two: making Pastrami…

pastrami


Brined and rinsed corned beef brisket from above recipe, patted dry with paper towels
1/4 cup Kosher salt
1/4 cup paprika
3 tablespoons coriander seeds
2 tablespoons black peppercorns
2 tablespoons yellow mustard seeds
1 tablespoon white peppercorns
3 tablespoons brown sugar
1 tablespoon granulated garlic

Combine the coriander seeds, black and white peppercorns and mustard seeds in a spice grinder and grind coarsely. Place in a bowl. Add the salt, paprika, brown sugar and granulated garlic. Mix well.

Rub the mix into the brisket well, covering all sides.

Heat your smoker to 225 degrees and smoke for several hours using a less intense wood, like oak. When the internal temperature of the meat has reached 165 degrees, it’s done. It isn’t necessary to smoke pastrami as long as you would a regular brisket because the long brining time makes the meat tender.

It is very important that absolutely everything that comes in contact with the meat is very clean. (This includes your hands.) Also, make very sure that every inch of the meat reaches the 165 degrees before it is removed from the smoker. The corned beef is now pastrami.

Despite working in a pretty decent food town (Providence, Rhode Island), and despite being just an hour away from another decent food town (Boston, Massachusetts), when we want to go to a place where we park our car once and can easily walk to dozens of great eateries and bars, where each place is more creative than the next, and where genuine friendliness and enthusiasm for what they’re doing shows in every dish, the answer is Portland, Maine.

My wife and I visit Portland at least once a year and it’s amazing to see how many new restaurants have opened since our last visit. Every time we think we’ve crossed a few off our list, a half-dozen new ones show up! Last year, we hit 10 restaurants in 48 hours. This last visit, it was a mere 6 restaurants in 48 hours. I guess we’re getting older…!

solo2

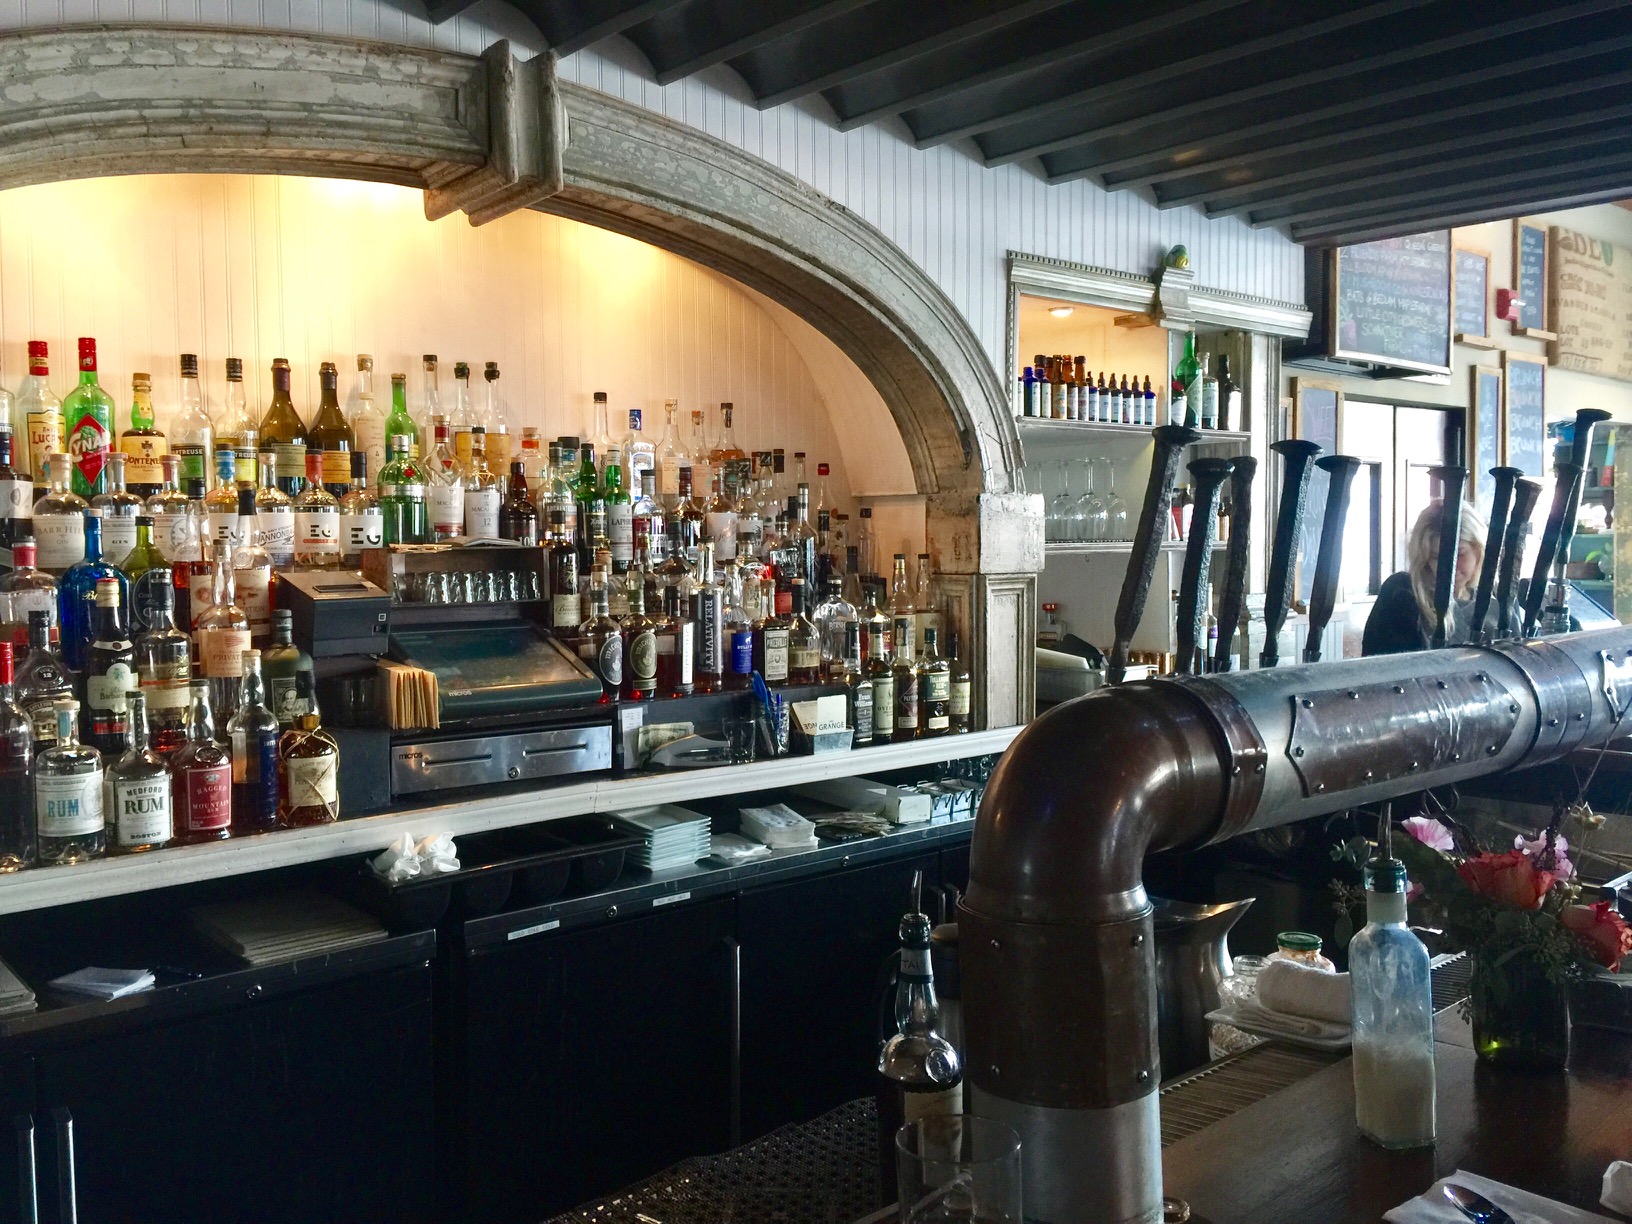
Our weekend started on a Friday afternoon with a quick bite at Solo Italiano, near the water on Commercial Street. We really enjoyed a light-as-air Carpaccio di Tonno: thinly sliced yellow fin tuna with stracciatella cream, herb oil, and crispy onions. And after we were told that the chef at Solo won the World Pesto Championship, we had to have the Mandilli di Seta al Vero Pesto Genovese: house made silk handkerchief pasta in a traditional Genovese basil pesto…amazing! Solo has some great house cocktails to choose from, too. Definitely worth a return visit.
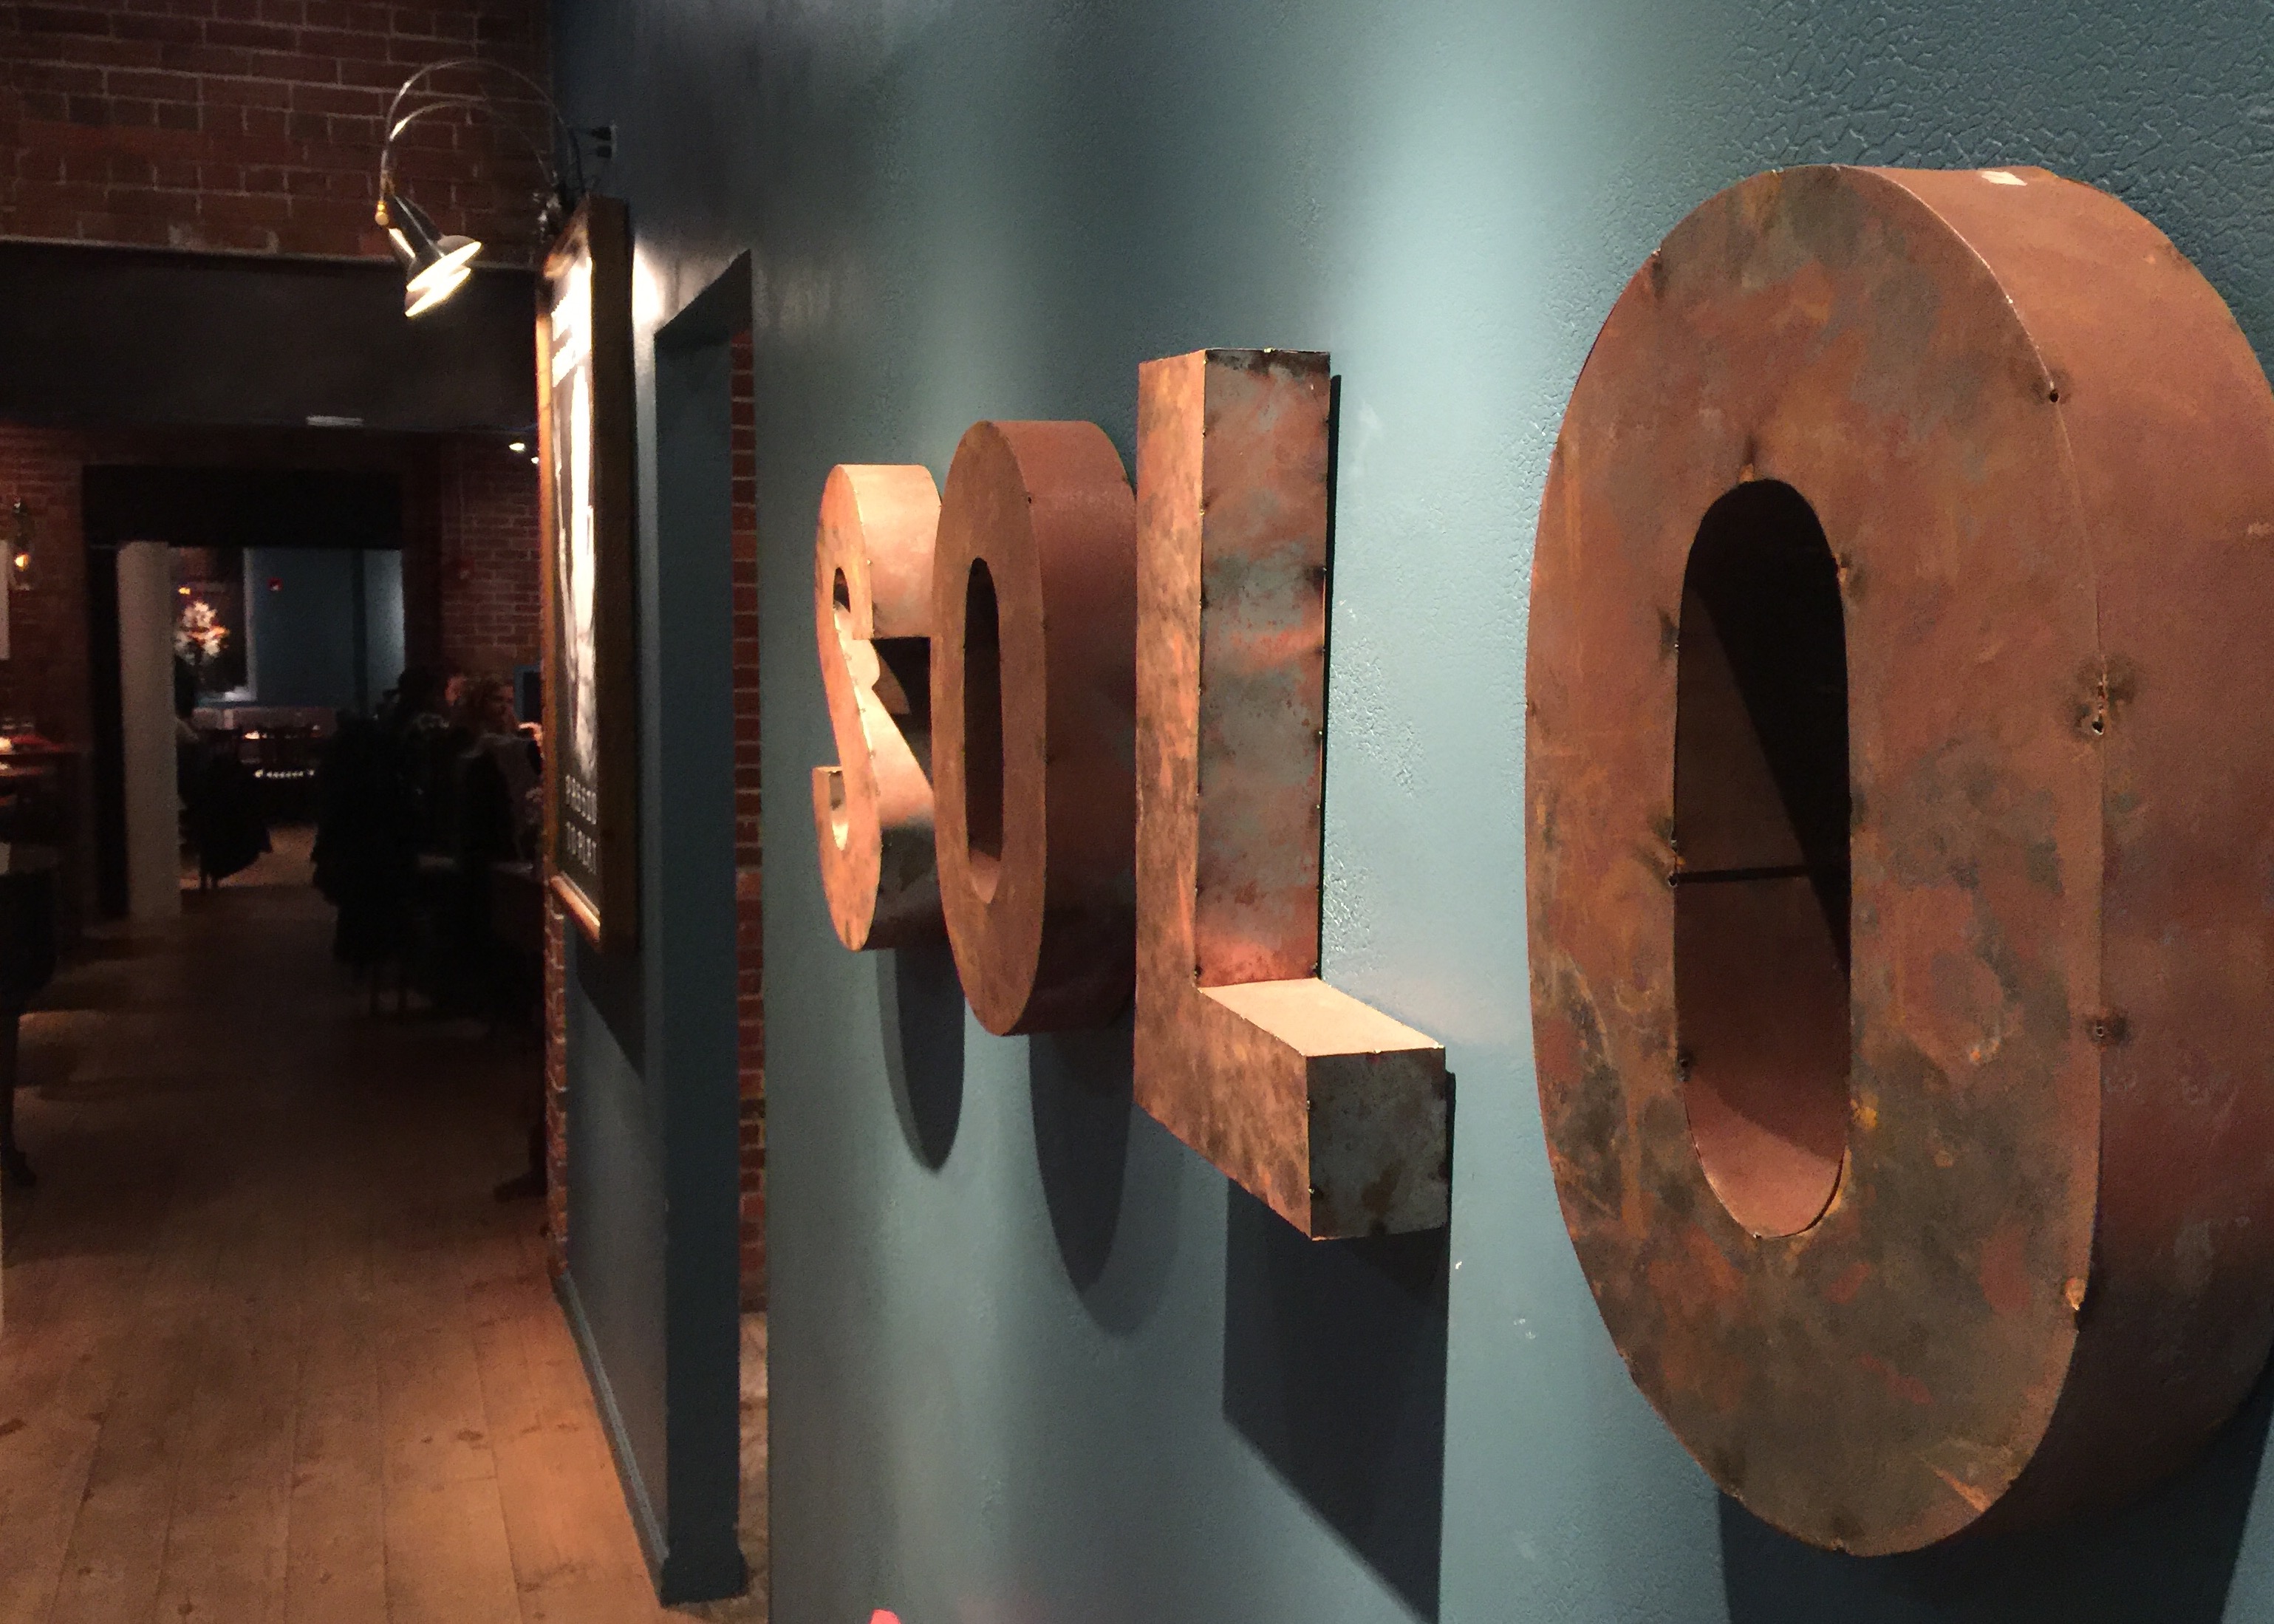
The bar at Solo.

The bar at Solo.

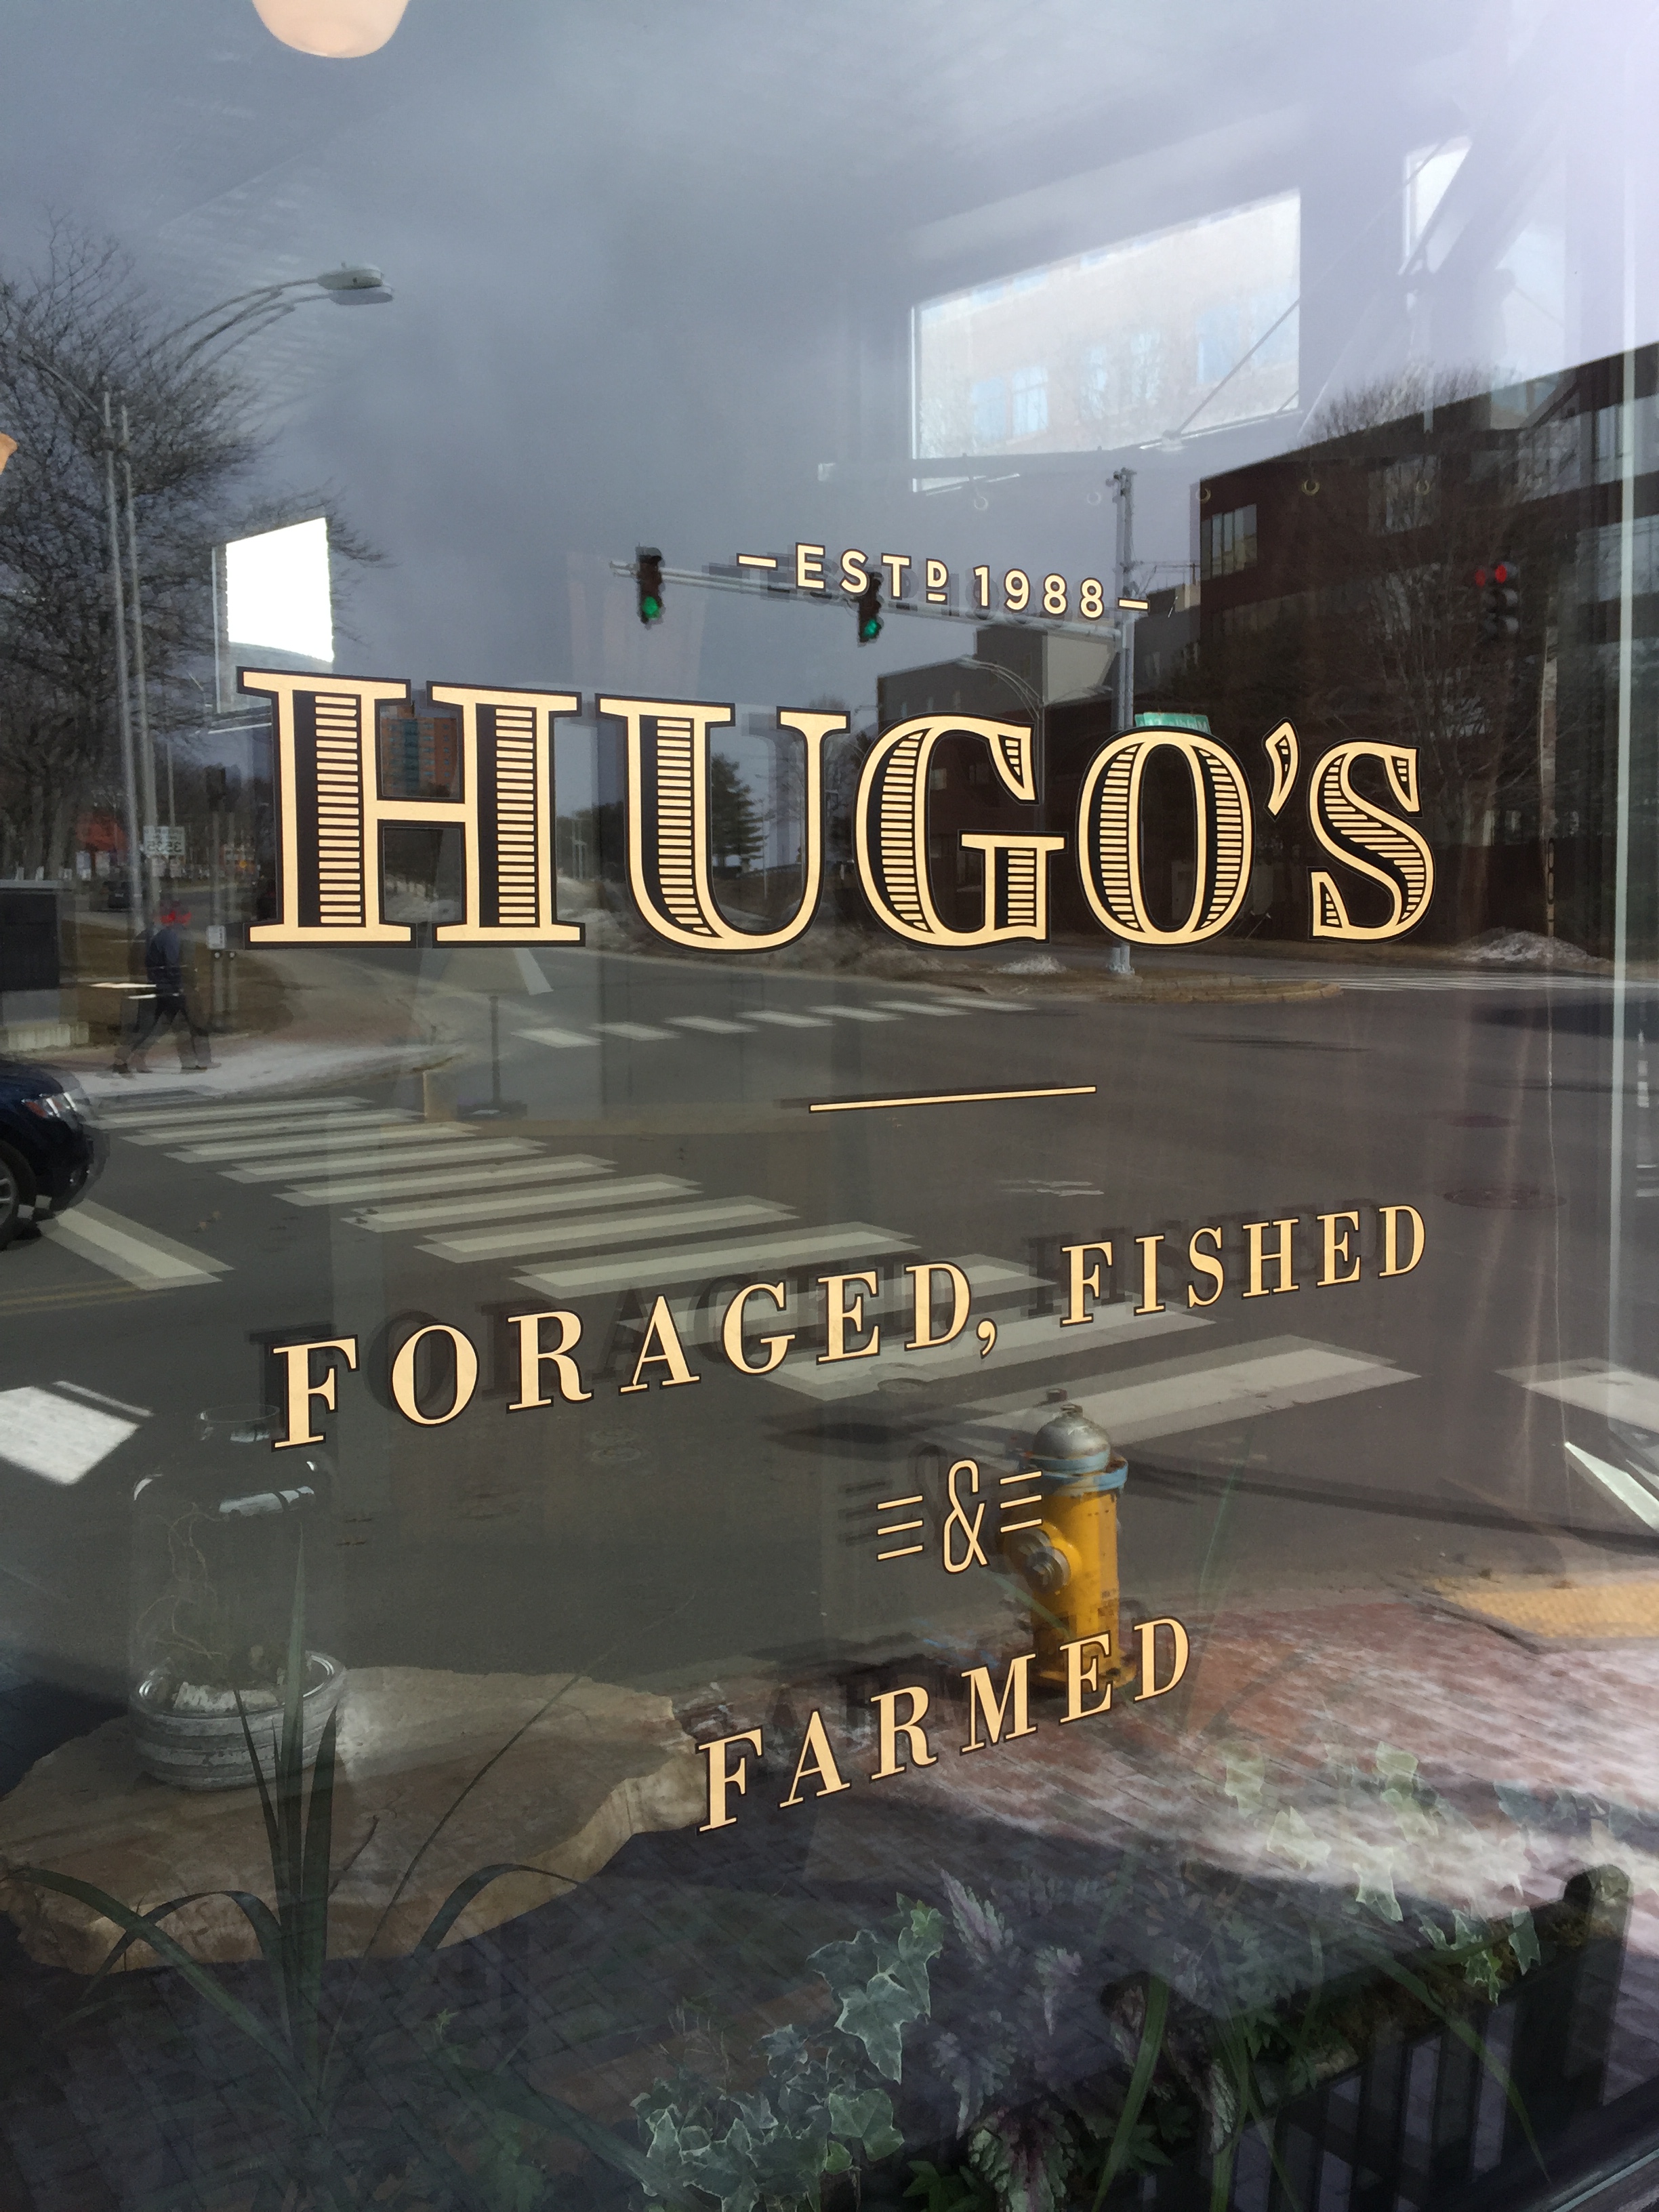
Our Friday evening dinner was at Hugo’s. Originally owned by chef Rob Evans, a three-time Food Network “Chopped” champion, Rob sold it a few years ago and now runs Duckfat, a small sandwich shop famous for its Belgian-style fries that are fried in duck fat. (Though it gets write-ups all the time, my experience at Duckfat was disappointing.)

hugosign


The folks that own the nationally acclaimed Eventide Oyster Bar now own Hugo’s (it’s next door) as well as The Honey Paw (next door on the other side.) For us, every visit to Portland must include this amazing restaurant trifecta on Middle Street, that, in fact, have connecting kitchens.

The connecting kitchens at Hugo's, Eventide, and the Honey Paw.

The connecting kitchens at Hugo’s, Eventide, and The Honey Paw.


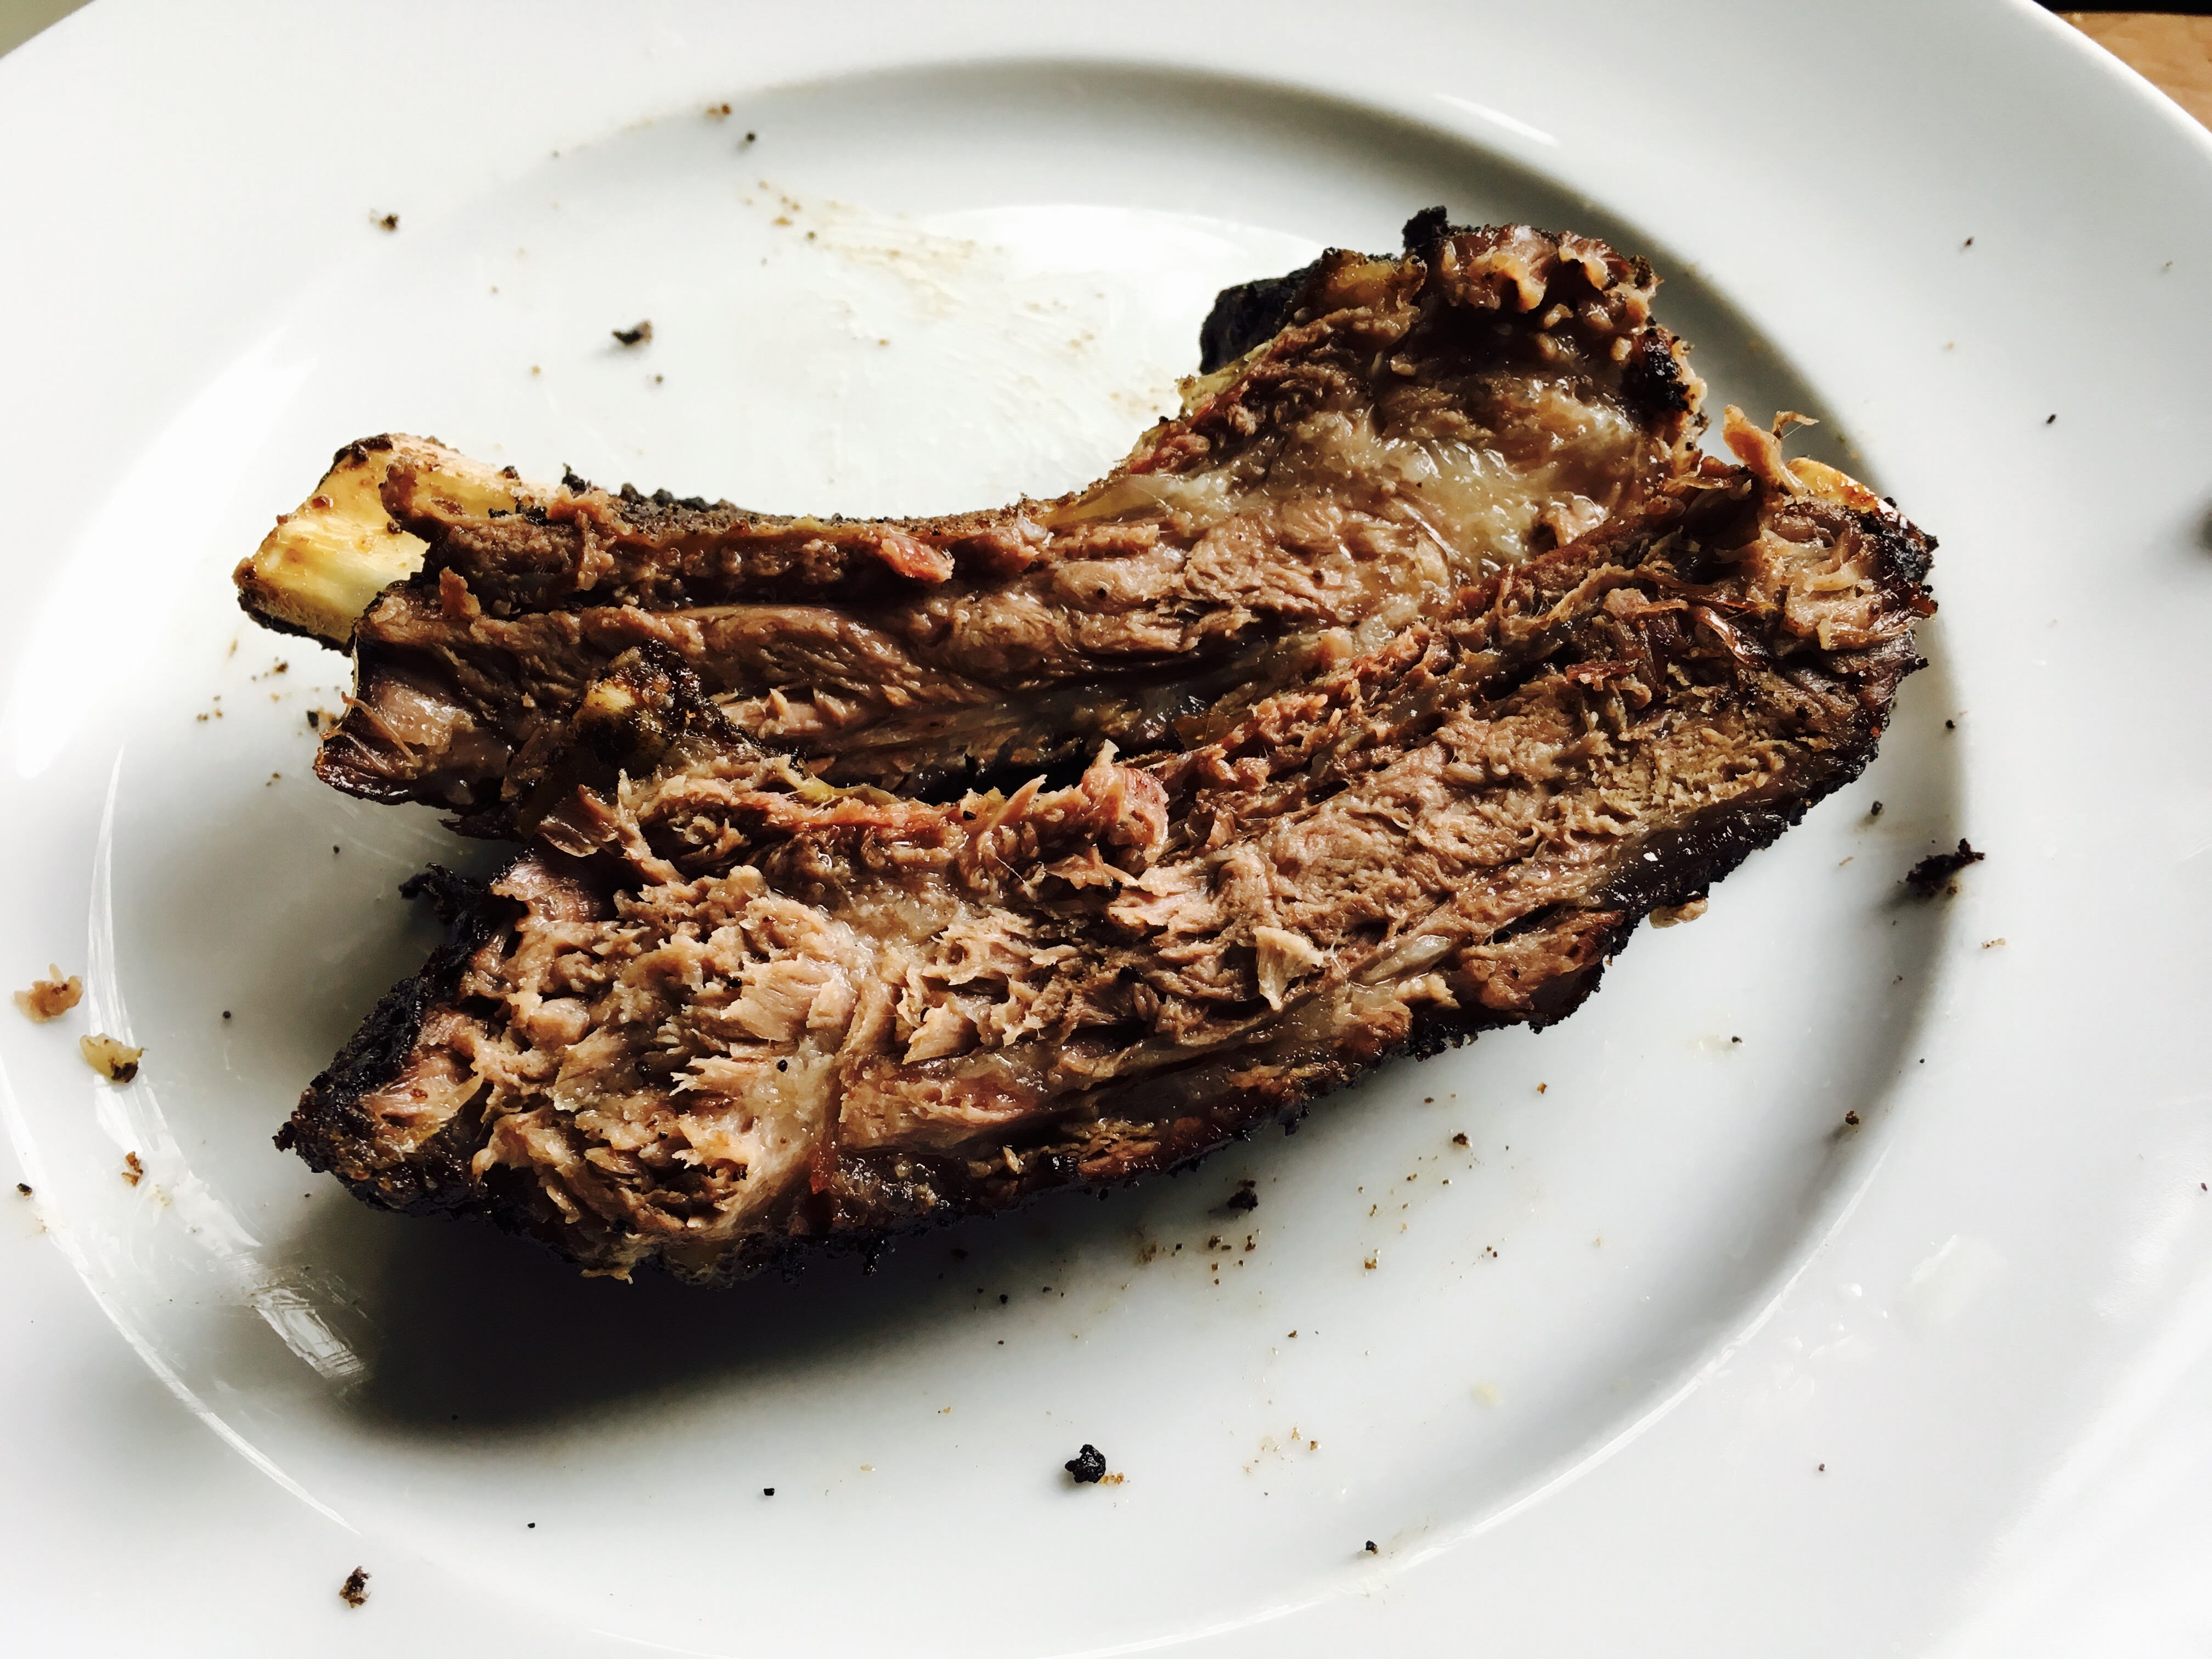
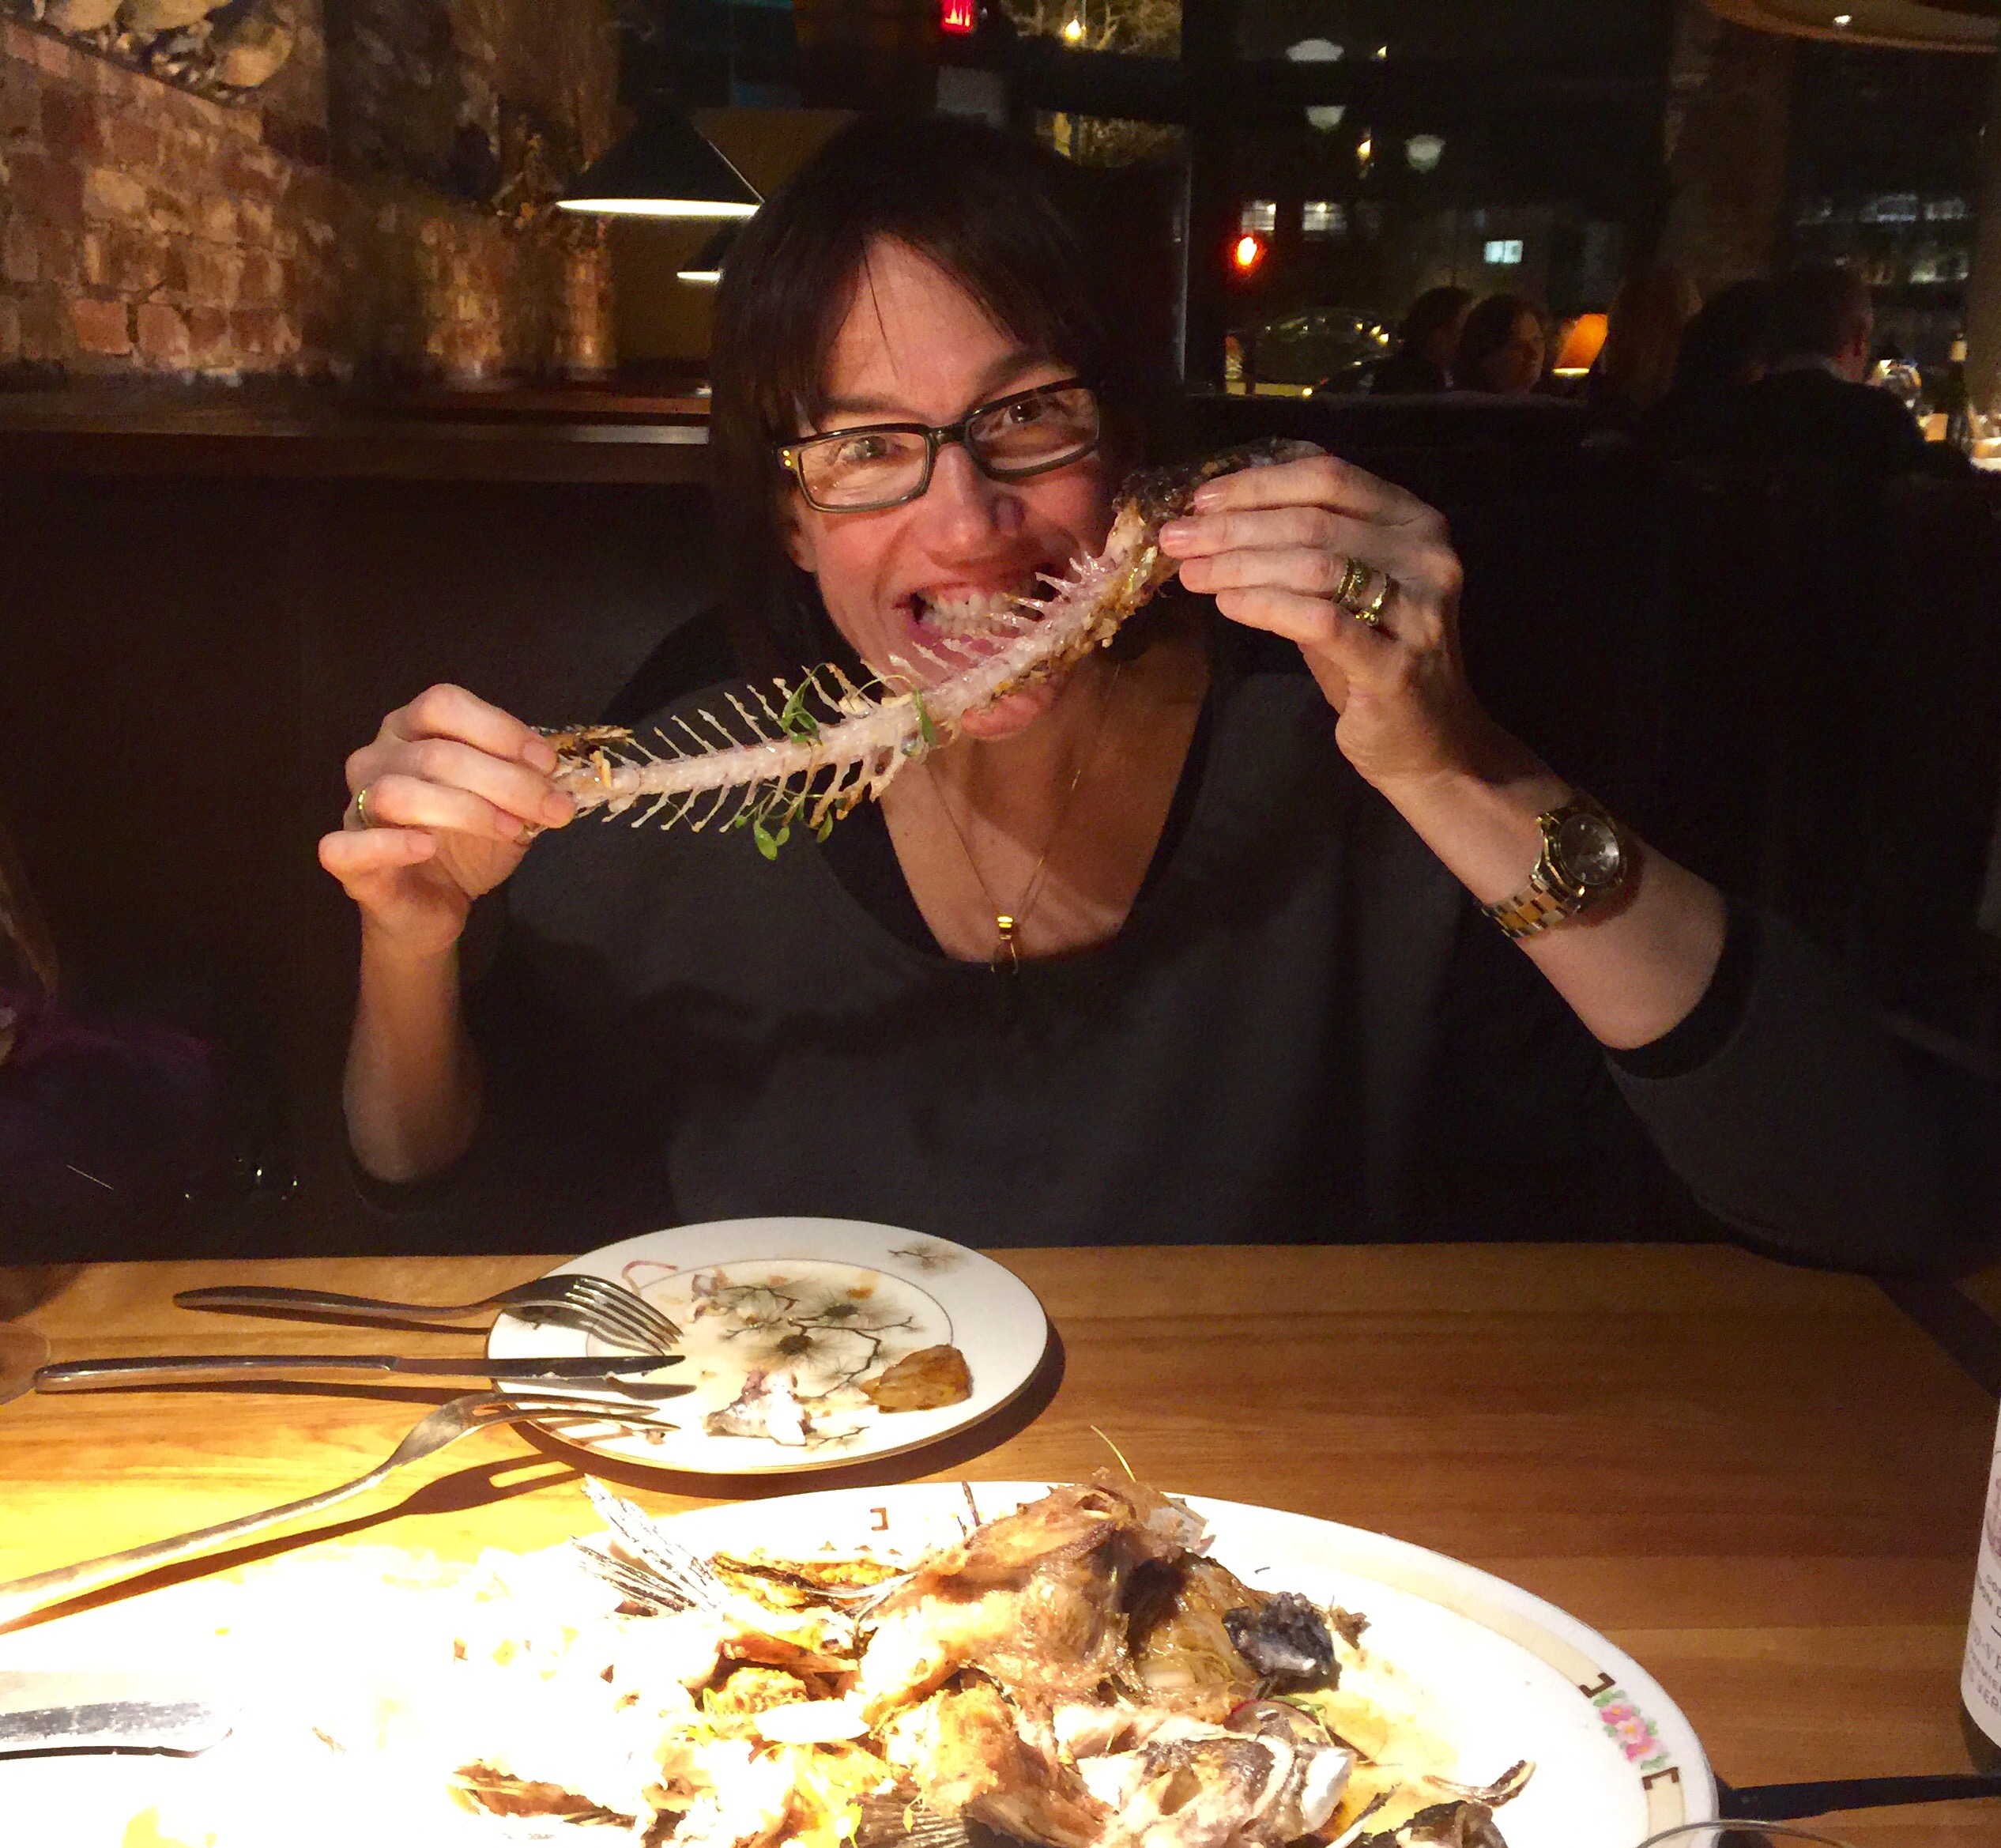
Hugo’s is fine dining at its creative best. Though we hadn’t been there in over a year, Brian, a manager and our wine guru, immediately remembered us and greeted us with a hug, showing us to our seats and treating us to a glass of bubbly. He guided us through the wine list and offered us a bottles that were simply out of this world. Though we’ve done the tasting menu in the past, we decided to go a la carte when a beautiful fried whole black bass, with roasted mushrooms, cabbage and hoisin vinaigrette, was calling our name. After a few wonderful appetizers that included peekytoe crab, reblochon (a local cheese), and lamb tartare, we were ready for the black bass. Even our server, Patrick, was impressed with how well we devoured that fish right down to the bone.

Fried black bass at Hugo's.

Fried black bass at Hugo’s.


Polishing off that amazing black bass!

Polishing off that amazing black bass!


Paul, the bartender at Hugo's.

Paul, the bartender at Hugo’s.


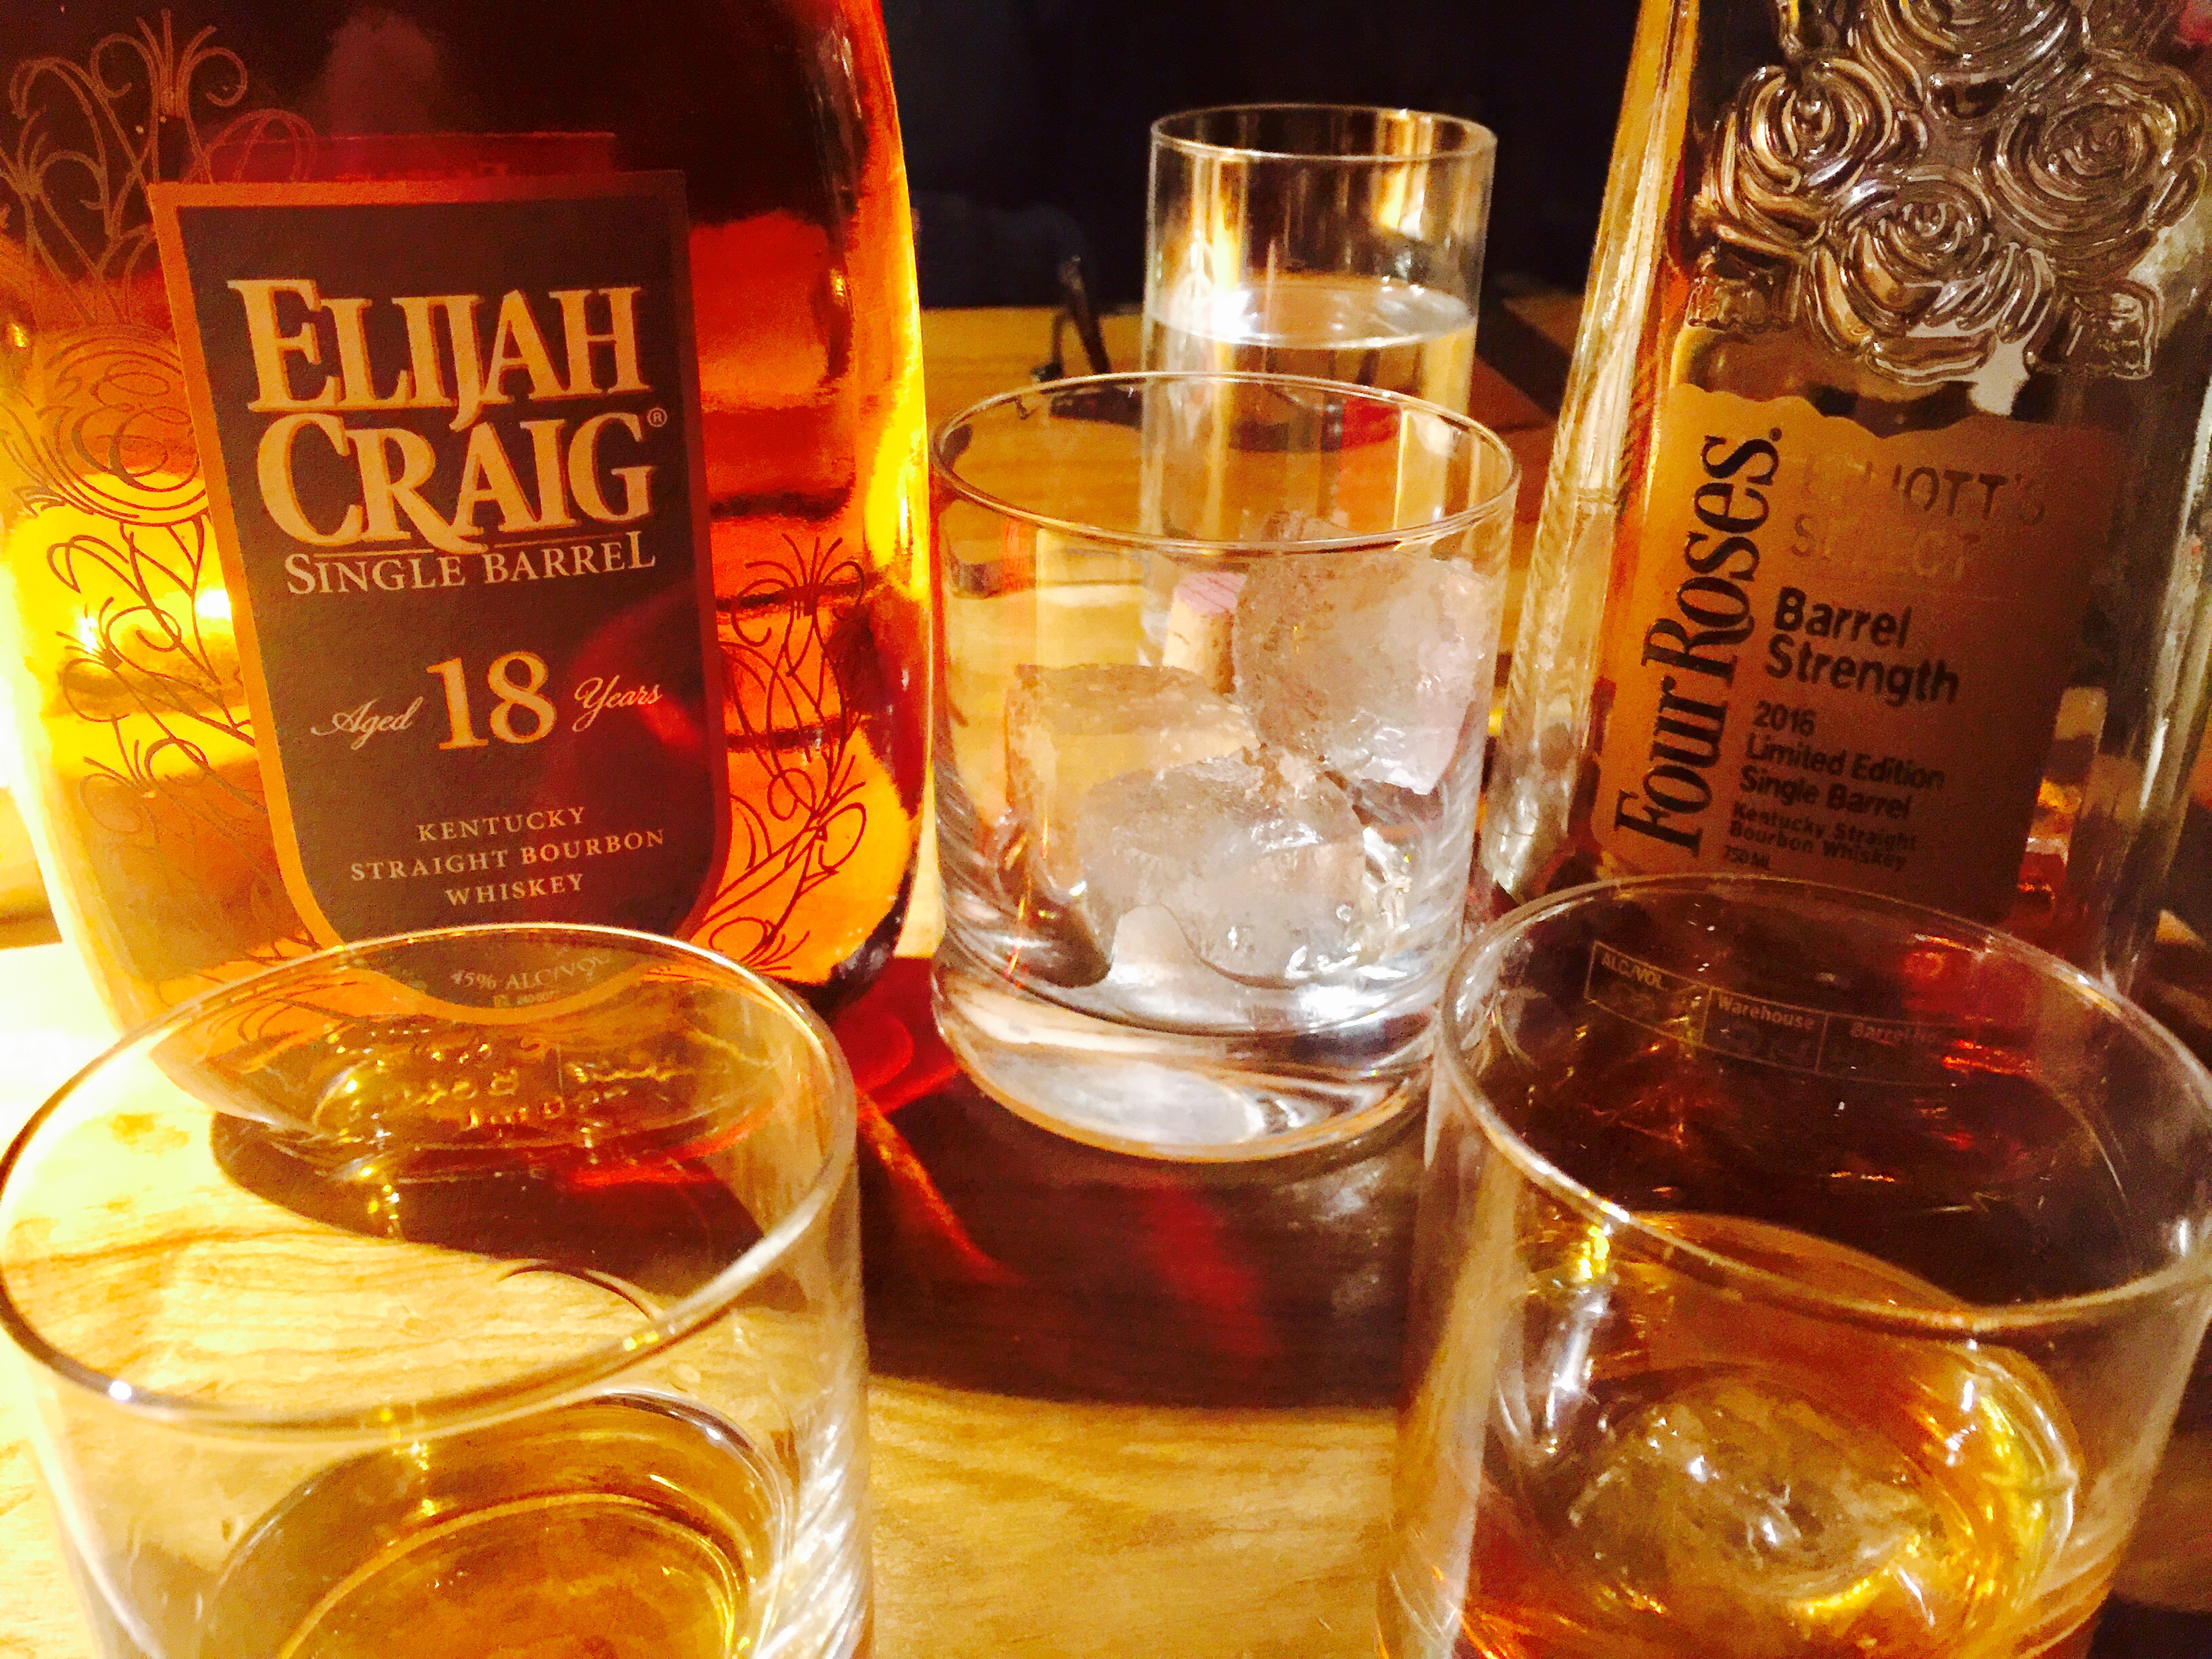
Dinner at Hugo’s wouldn’t be complete without a discussion about bourbons with bartender, Paul, and he let me sample a couple of special bottles he had behind the bar. A great way to end a wonderful dining experience on our first night in Portland.

Bourbon tastings.

Bourbon tastings.


The next day, Saturday, our food adventures began with lunch. Don’t get me wrong: there are some great breakfast choices in Portland, like the Porthole (featured on Food Network’s “Diners, Drive-Ins and Dives”) and Becky’s Diner. But when you’re in town to feast, you bypass the bacon and eggs.

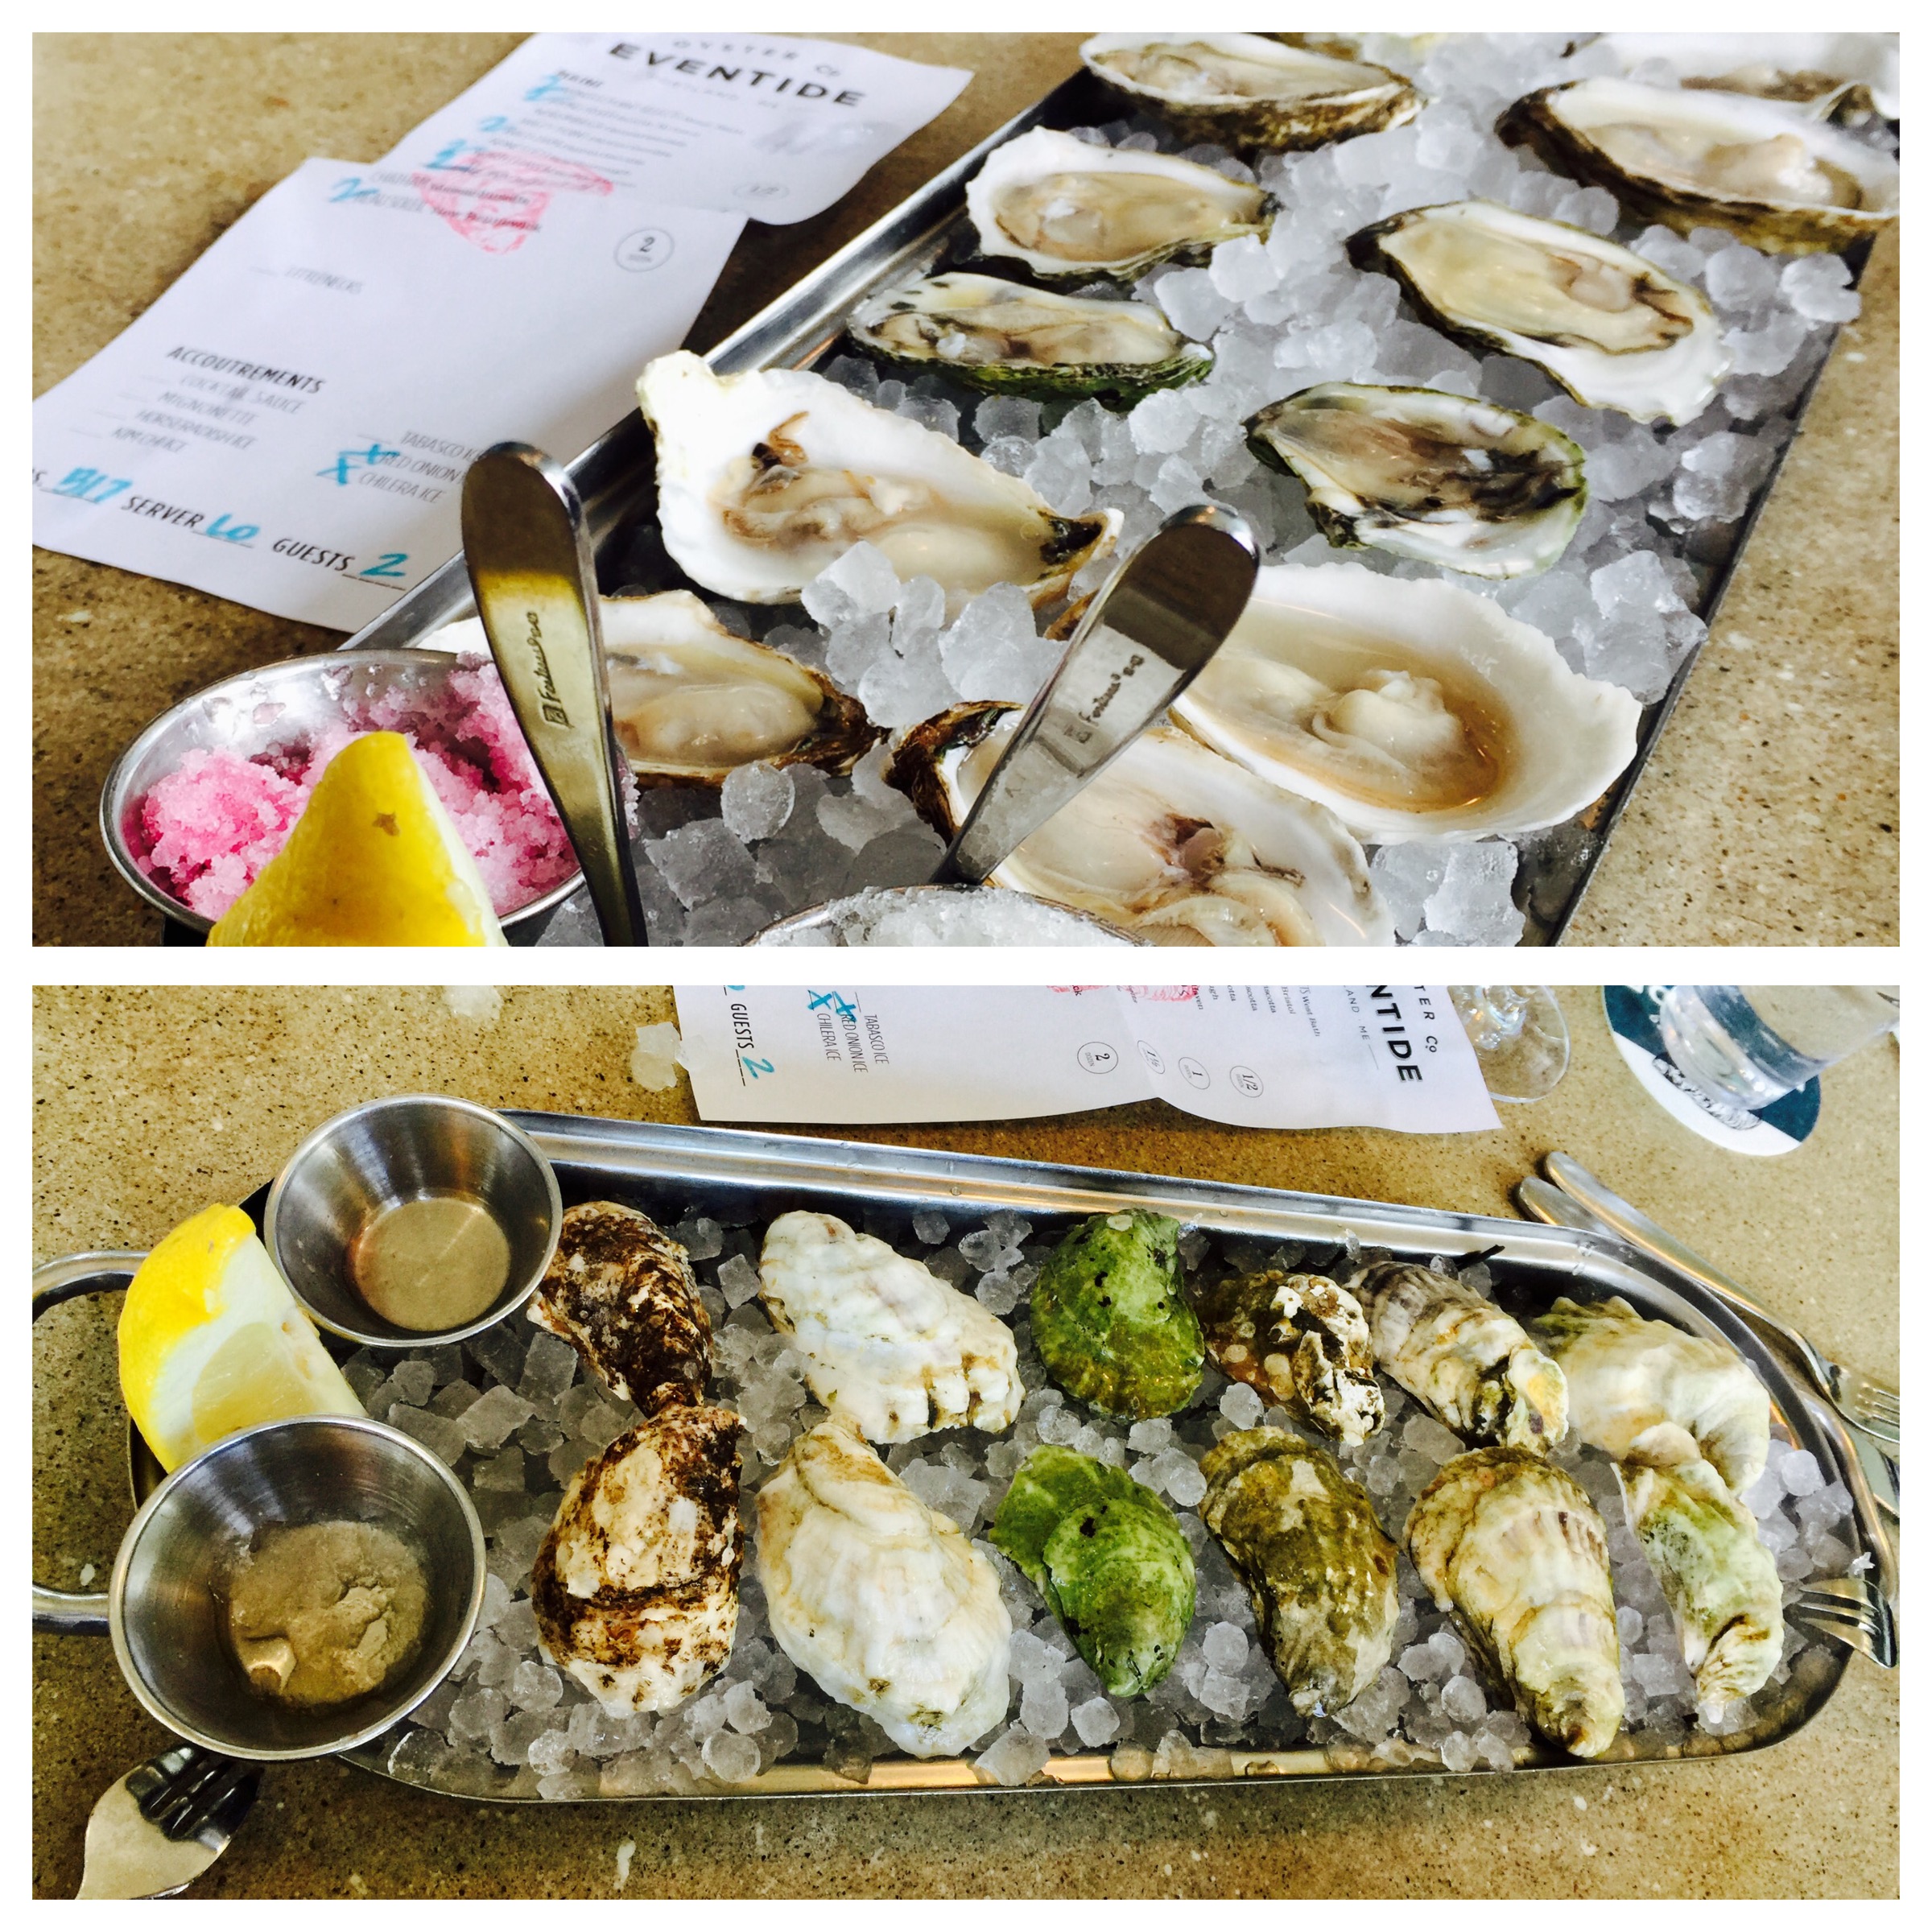
Lunch was at Eventide, which shows up on every “best oyster bar” list, and the reason is simple: a nice selection of fresh oysters, a great bar, and creative side dishes that change all the time.

Oysters at Eventide.


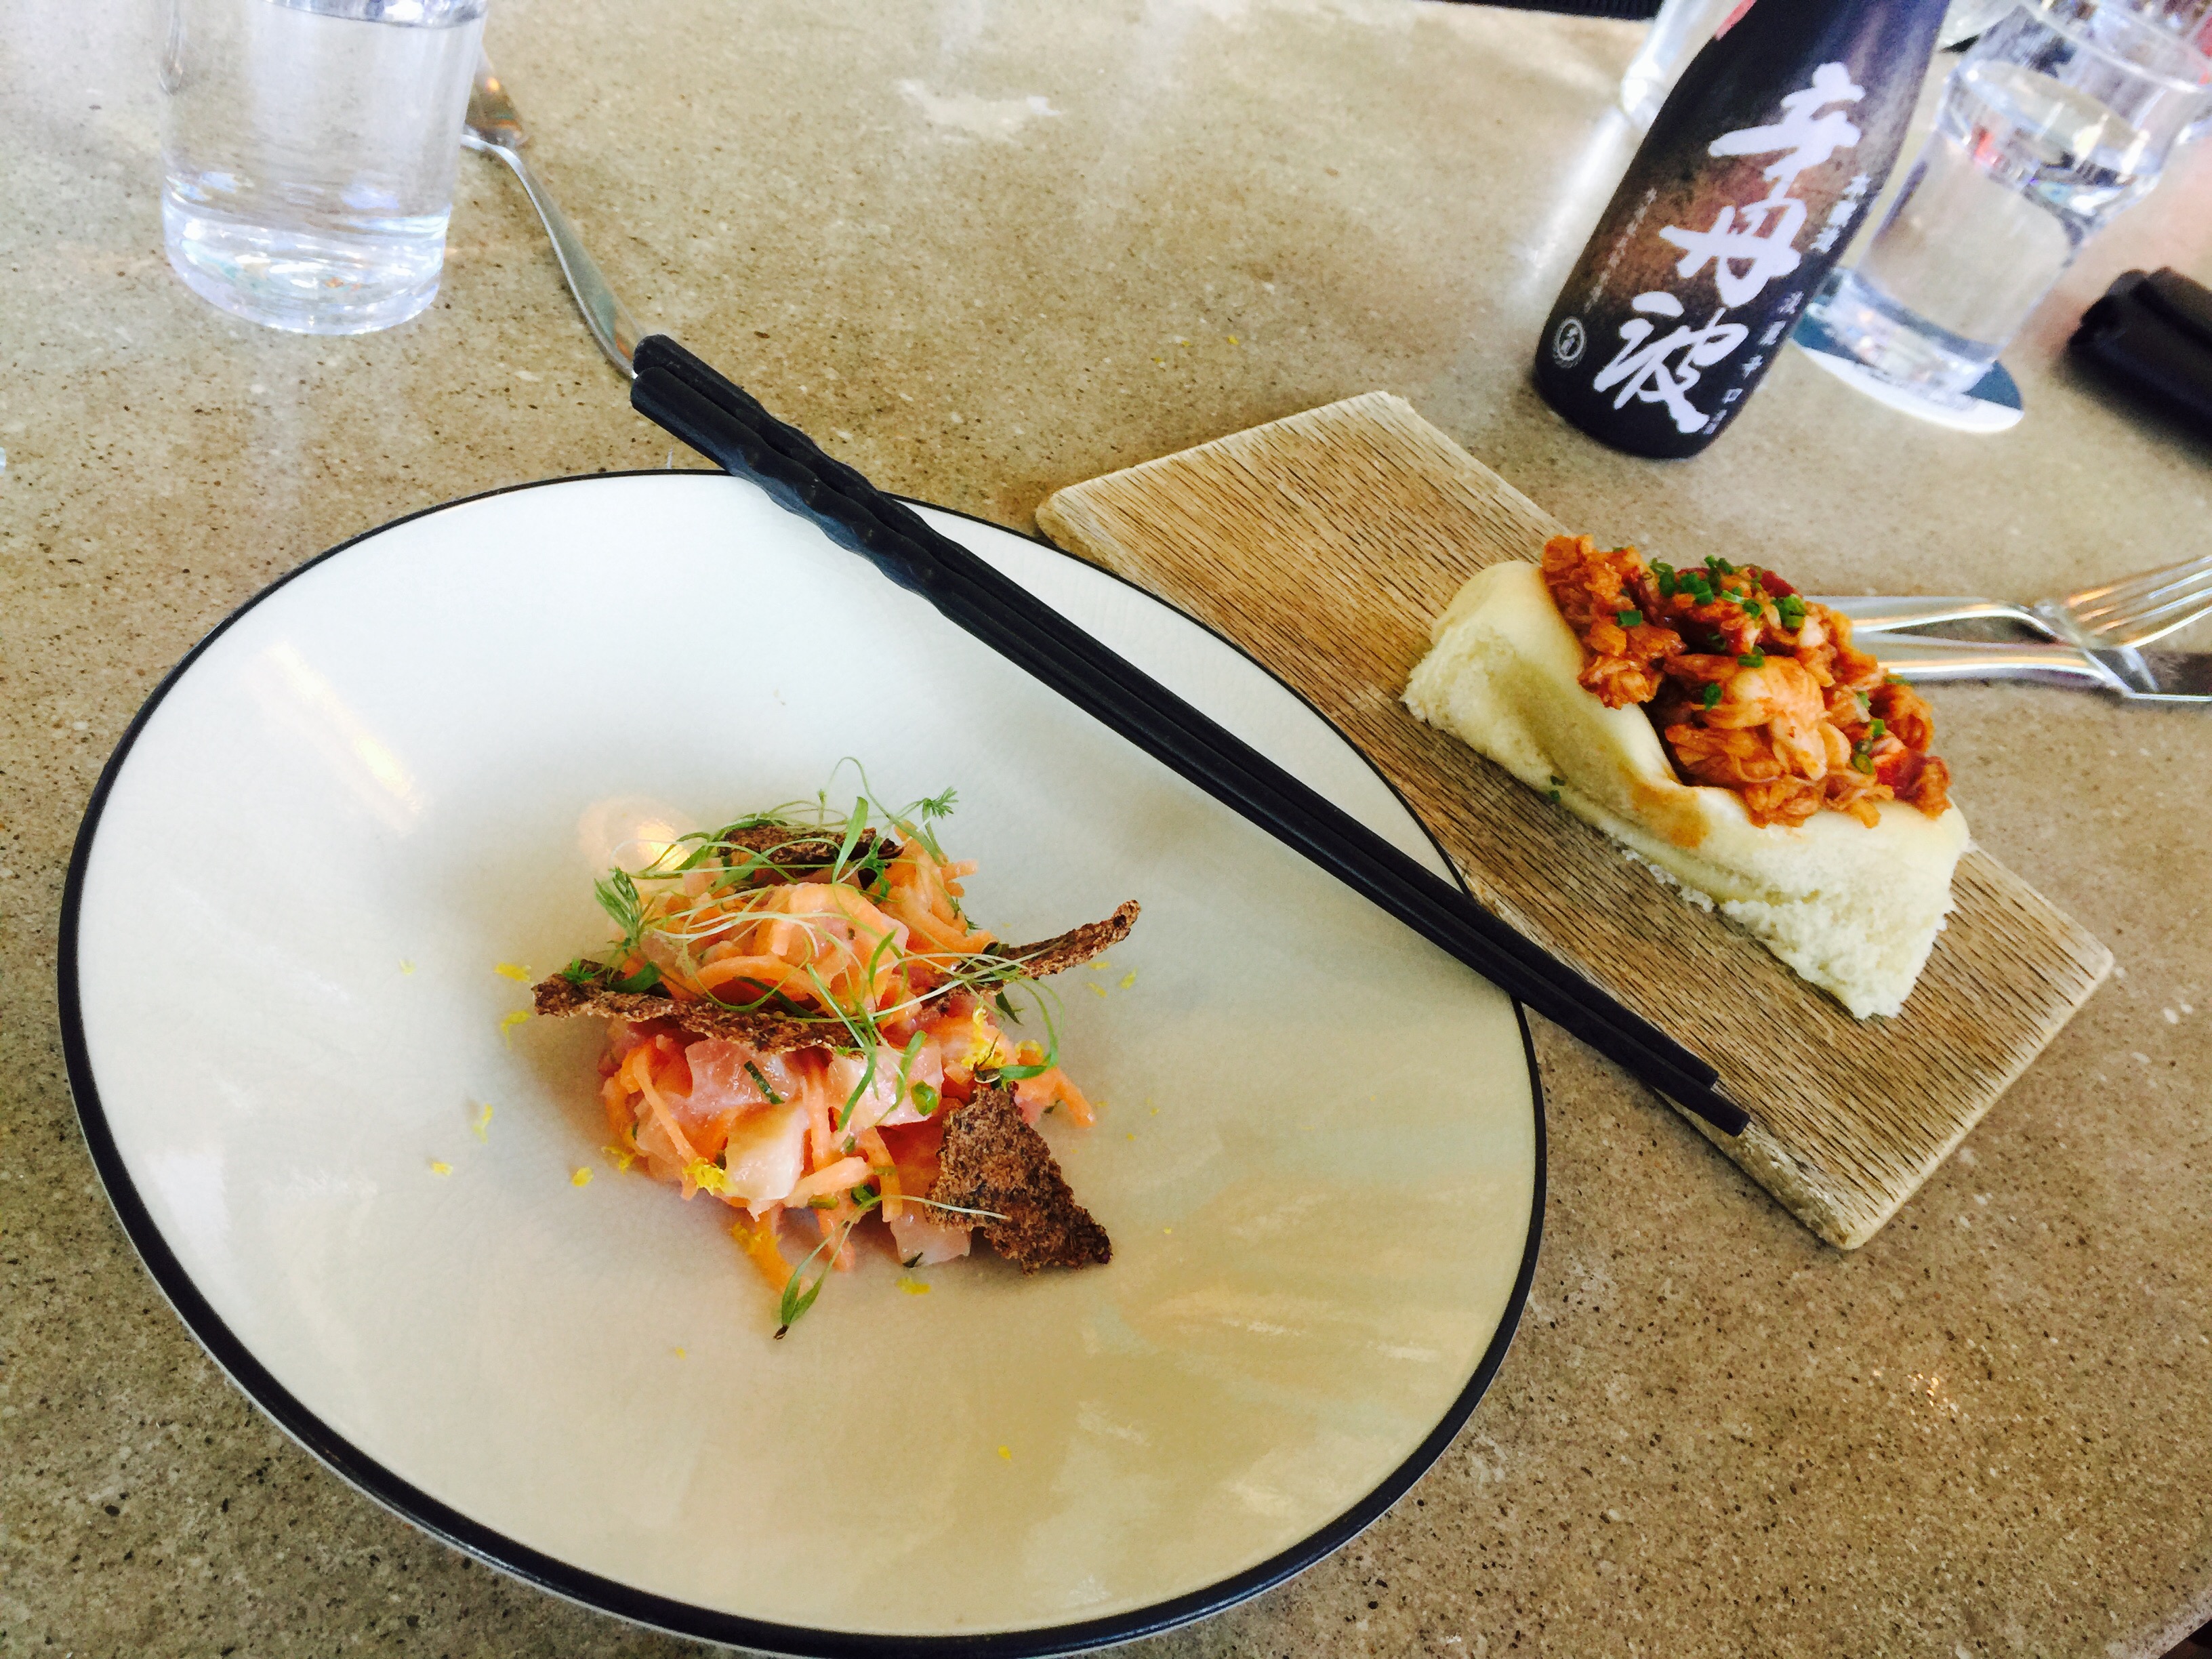
The Eventide brown butter lobster roll is elevated to new heights when it’s placed on an Asian-style steamed bun. Blackboard specials change every week, and always include what’s right off the boat: from fried squid to pickled lox. If you’re less adventurous, you can’t go wrong with the buttermilk fried chicken bun, the house pastrami bun or their impressive fish sandwich.

Pickled lox (left) and the lobster bun (right.)


If you go to Eventide during peak hours, you can expect a wait. The place isn’t huge and it’s wildly popular. Give them your name, tuck yourself into a corner with a drink, and wait, knowing that it will all be worth it!

Real women in Maine shuck oysters!


We skip the usual cocktail sauce when at Eventide. Our favorite accoutrements are the pickled red onion ice (great for an oyster shooter!) and the chilera ice.

Before…and after.


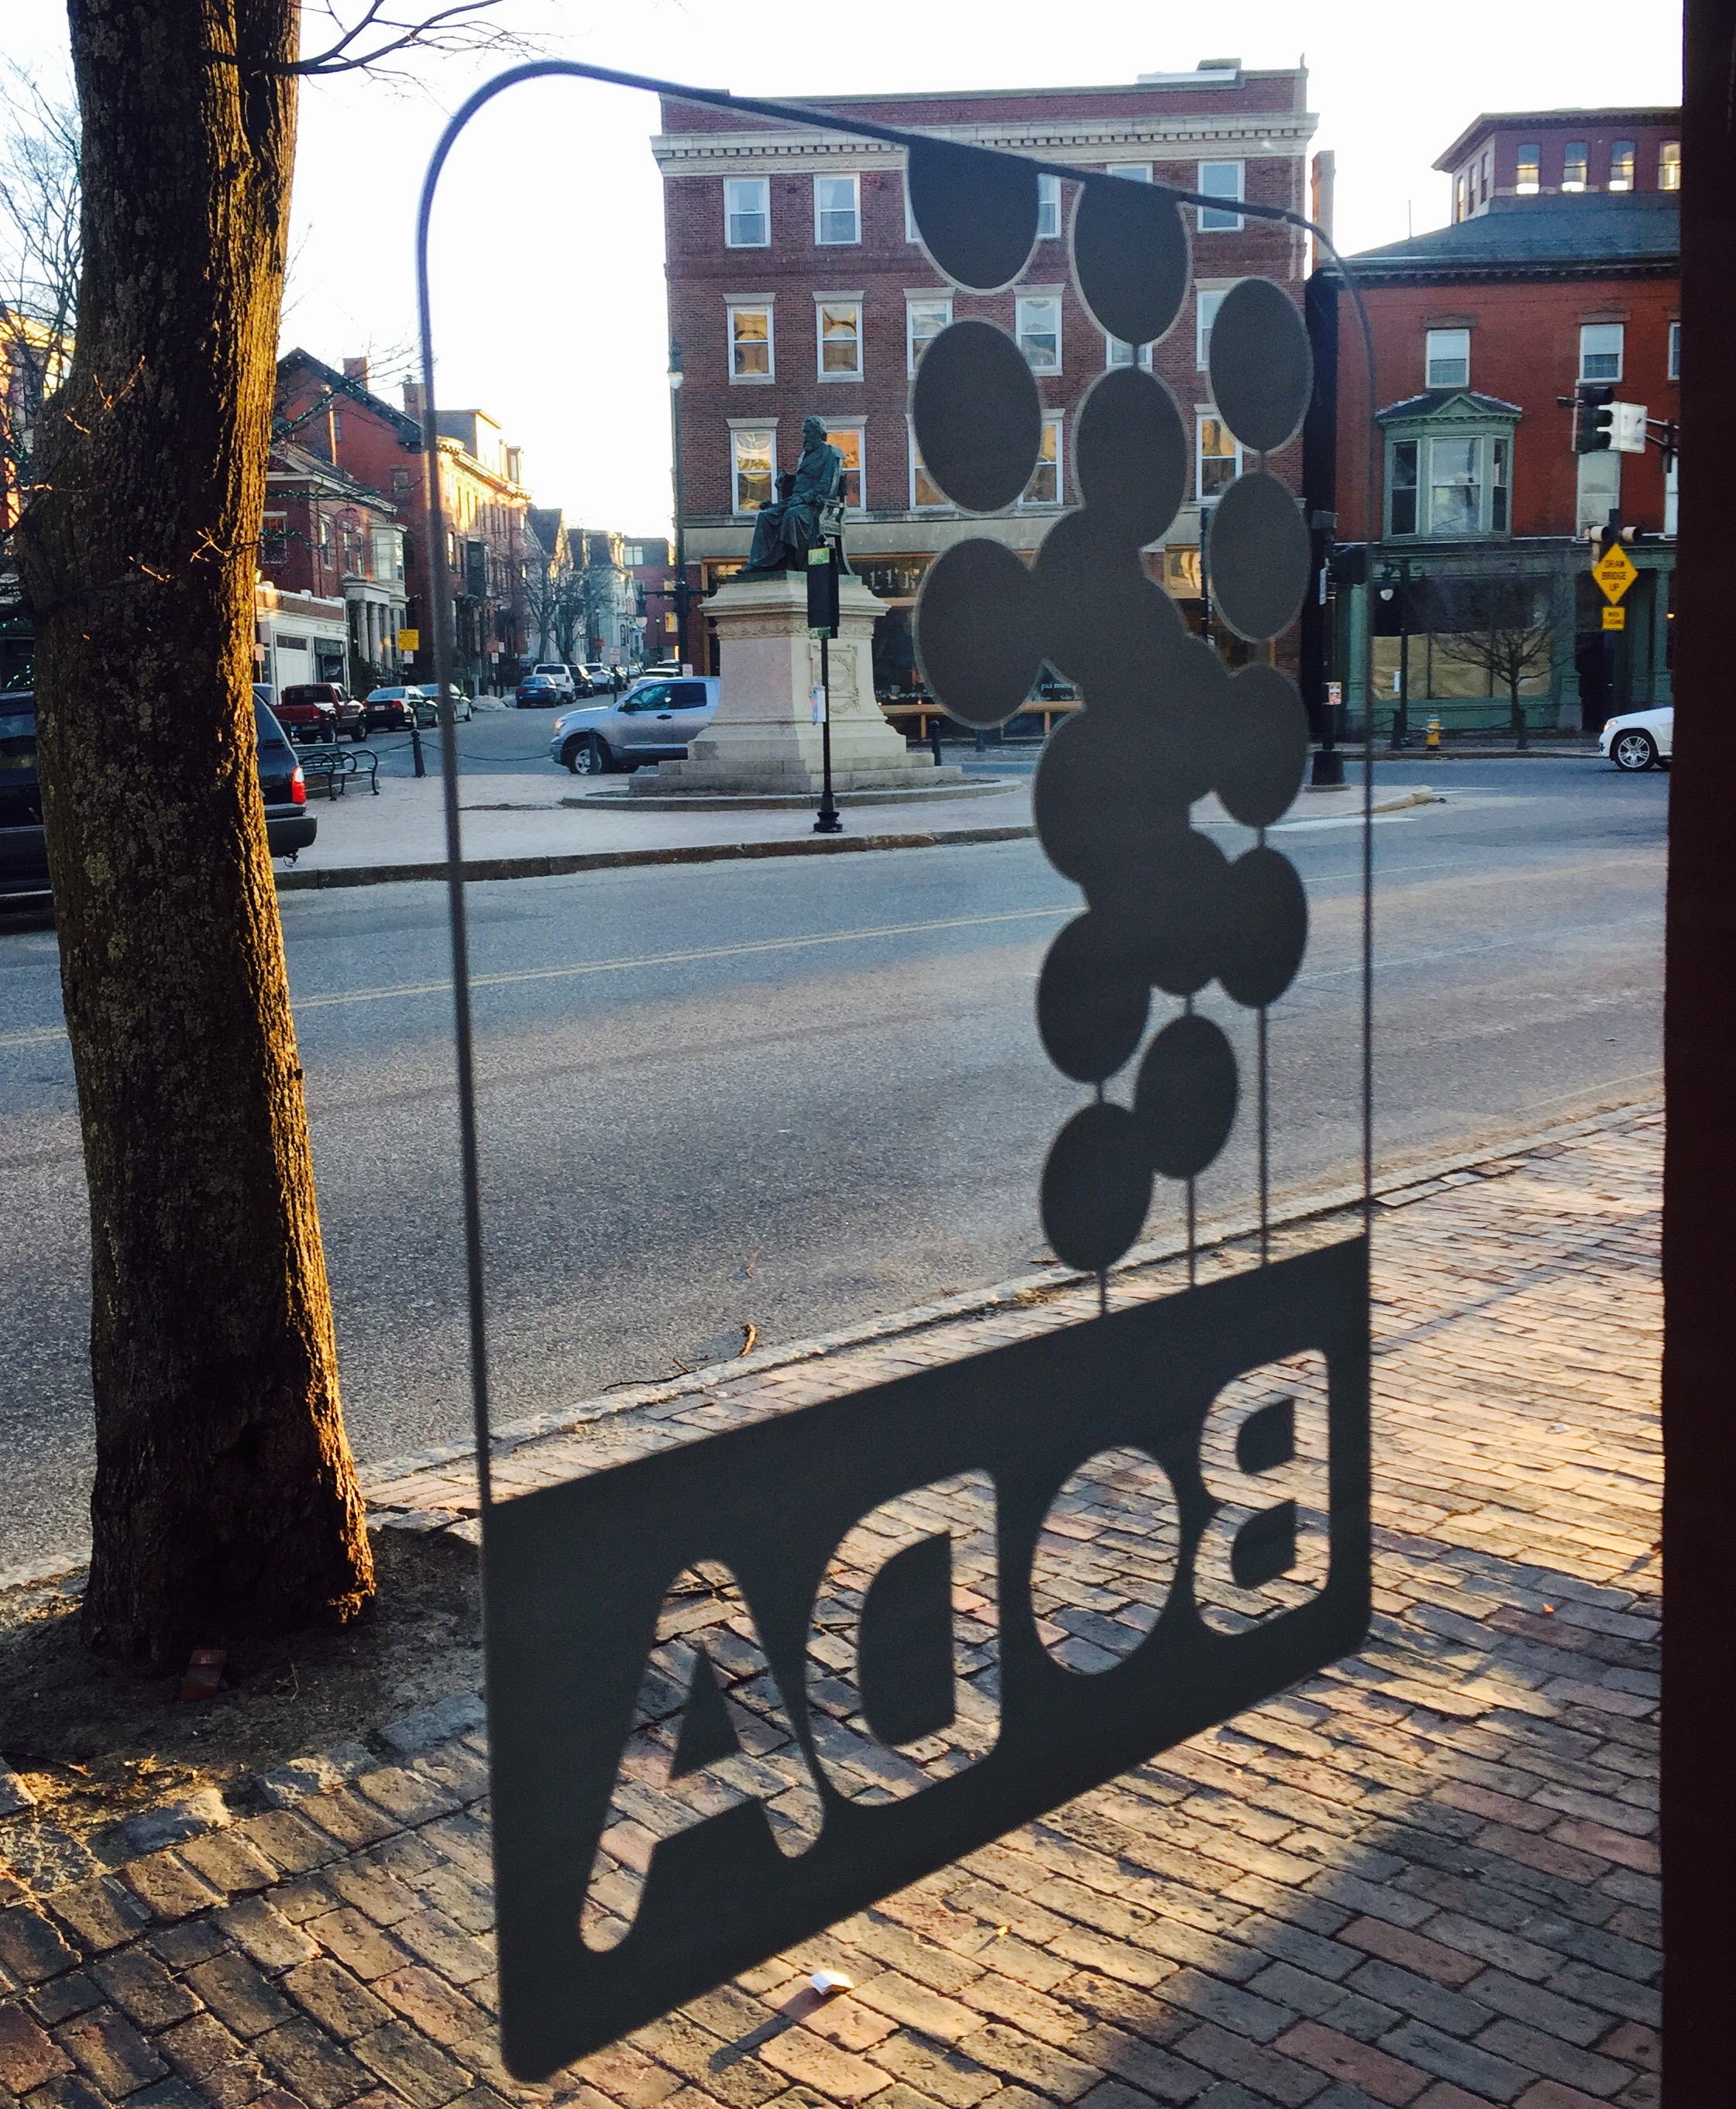
After our leisurely lunch, it was time to walk off a few calories. Heading down Fore Street, we tucked into several art galleries and shops, slowly making our way across the center of town to the newly redesigned Portland Art Museum. By the time we stepped out of the museum, it was time for more food. Just a few blocks, and we arrived at Boda.


Labeling themselves as a “Very Thai” kitchen and bar, Boda delivers. Though we only had a few apps, like the apple and shrimp salad and a plate of authentic pad thai, it earned two thumbs up. A plate of fried quail…not so much.

The bar at Boda offers the standards (like my Chopin martini) and some interesting Asian herb-infused cocktails. Definitely worth a return visit, especially when Boda is open until 12:45AM, serving tasty skewers for the bar crowd.

A short stop at our hotel, and it was time for our Saturday dinner. We headed to what many claim is the best sushi restaurant in Portland: Miyake. We soon discovered that the label “best sushi restaurant in Portland” didn’t necessarily set the standard very high.


Though we found a beautiful bottle of sake on the menu that we’ve had before, the food was a disappointment. Having had a few great sushi experiences in my life, I wanted this place to be among them. But after trying 2 different 4-course menus that featured tastings of salmon, tuna, uni, duck, and even Miyake’s own farm-raised mangalitsa pork–a rare heritage breed–which, though fatty, was very dry…it’s safe to say that we won’t be returning to Portland, Maine for its sushi.

The sake, at least, was amazing.

In a town with many creative restaurants, this one didn’t cut it. Some locals told us that Miyake used to be better when they were in a smaller space. The move to a larger space meant a beautiful room, but the food suffered.

Our weekend ended with Sunday brunch. If we wanted a more typical Sunday brunch, we would’ve gone to Five Fifty-Five, where we’ve enjoyed dishes like lobster eggs Benedict in the past. But when we heard that The Honey Paw was now serving brunch, there was no question where we needed to go!


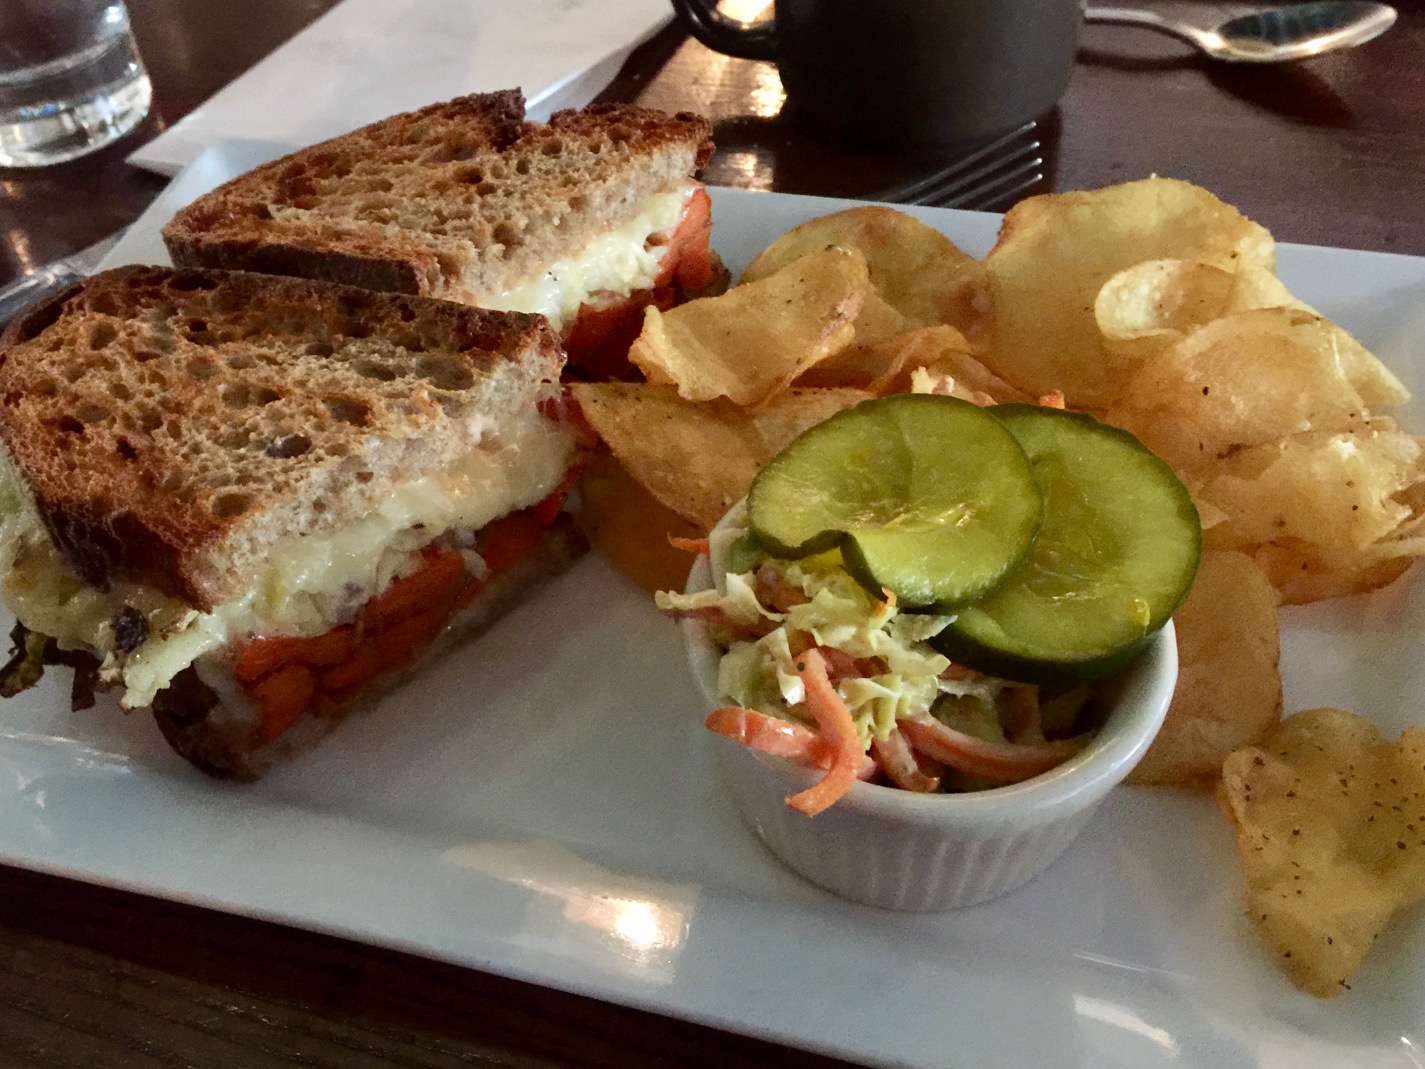
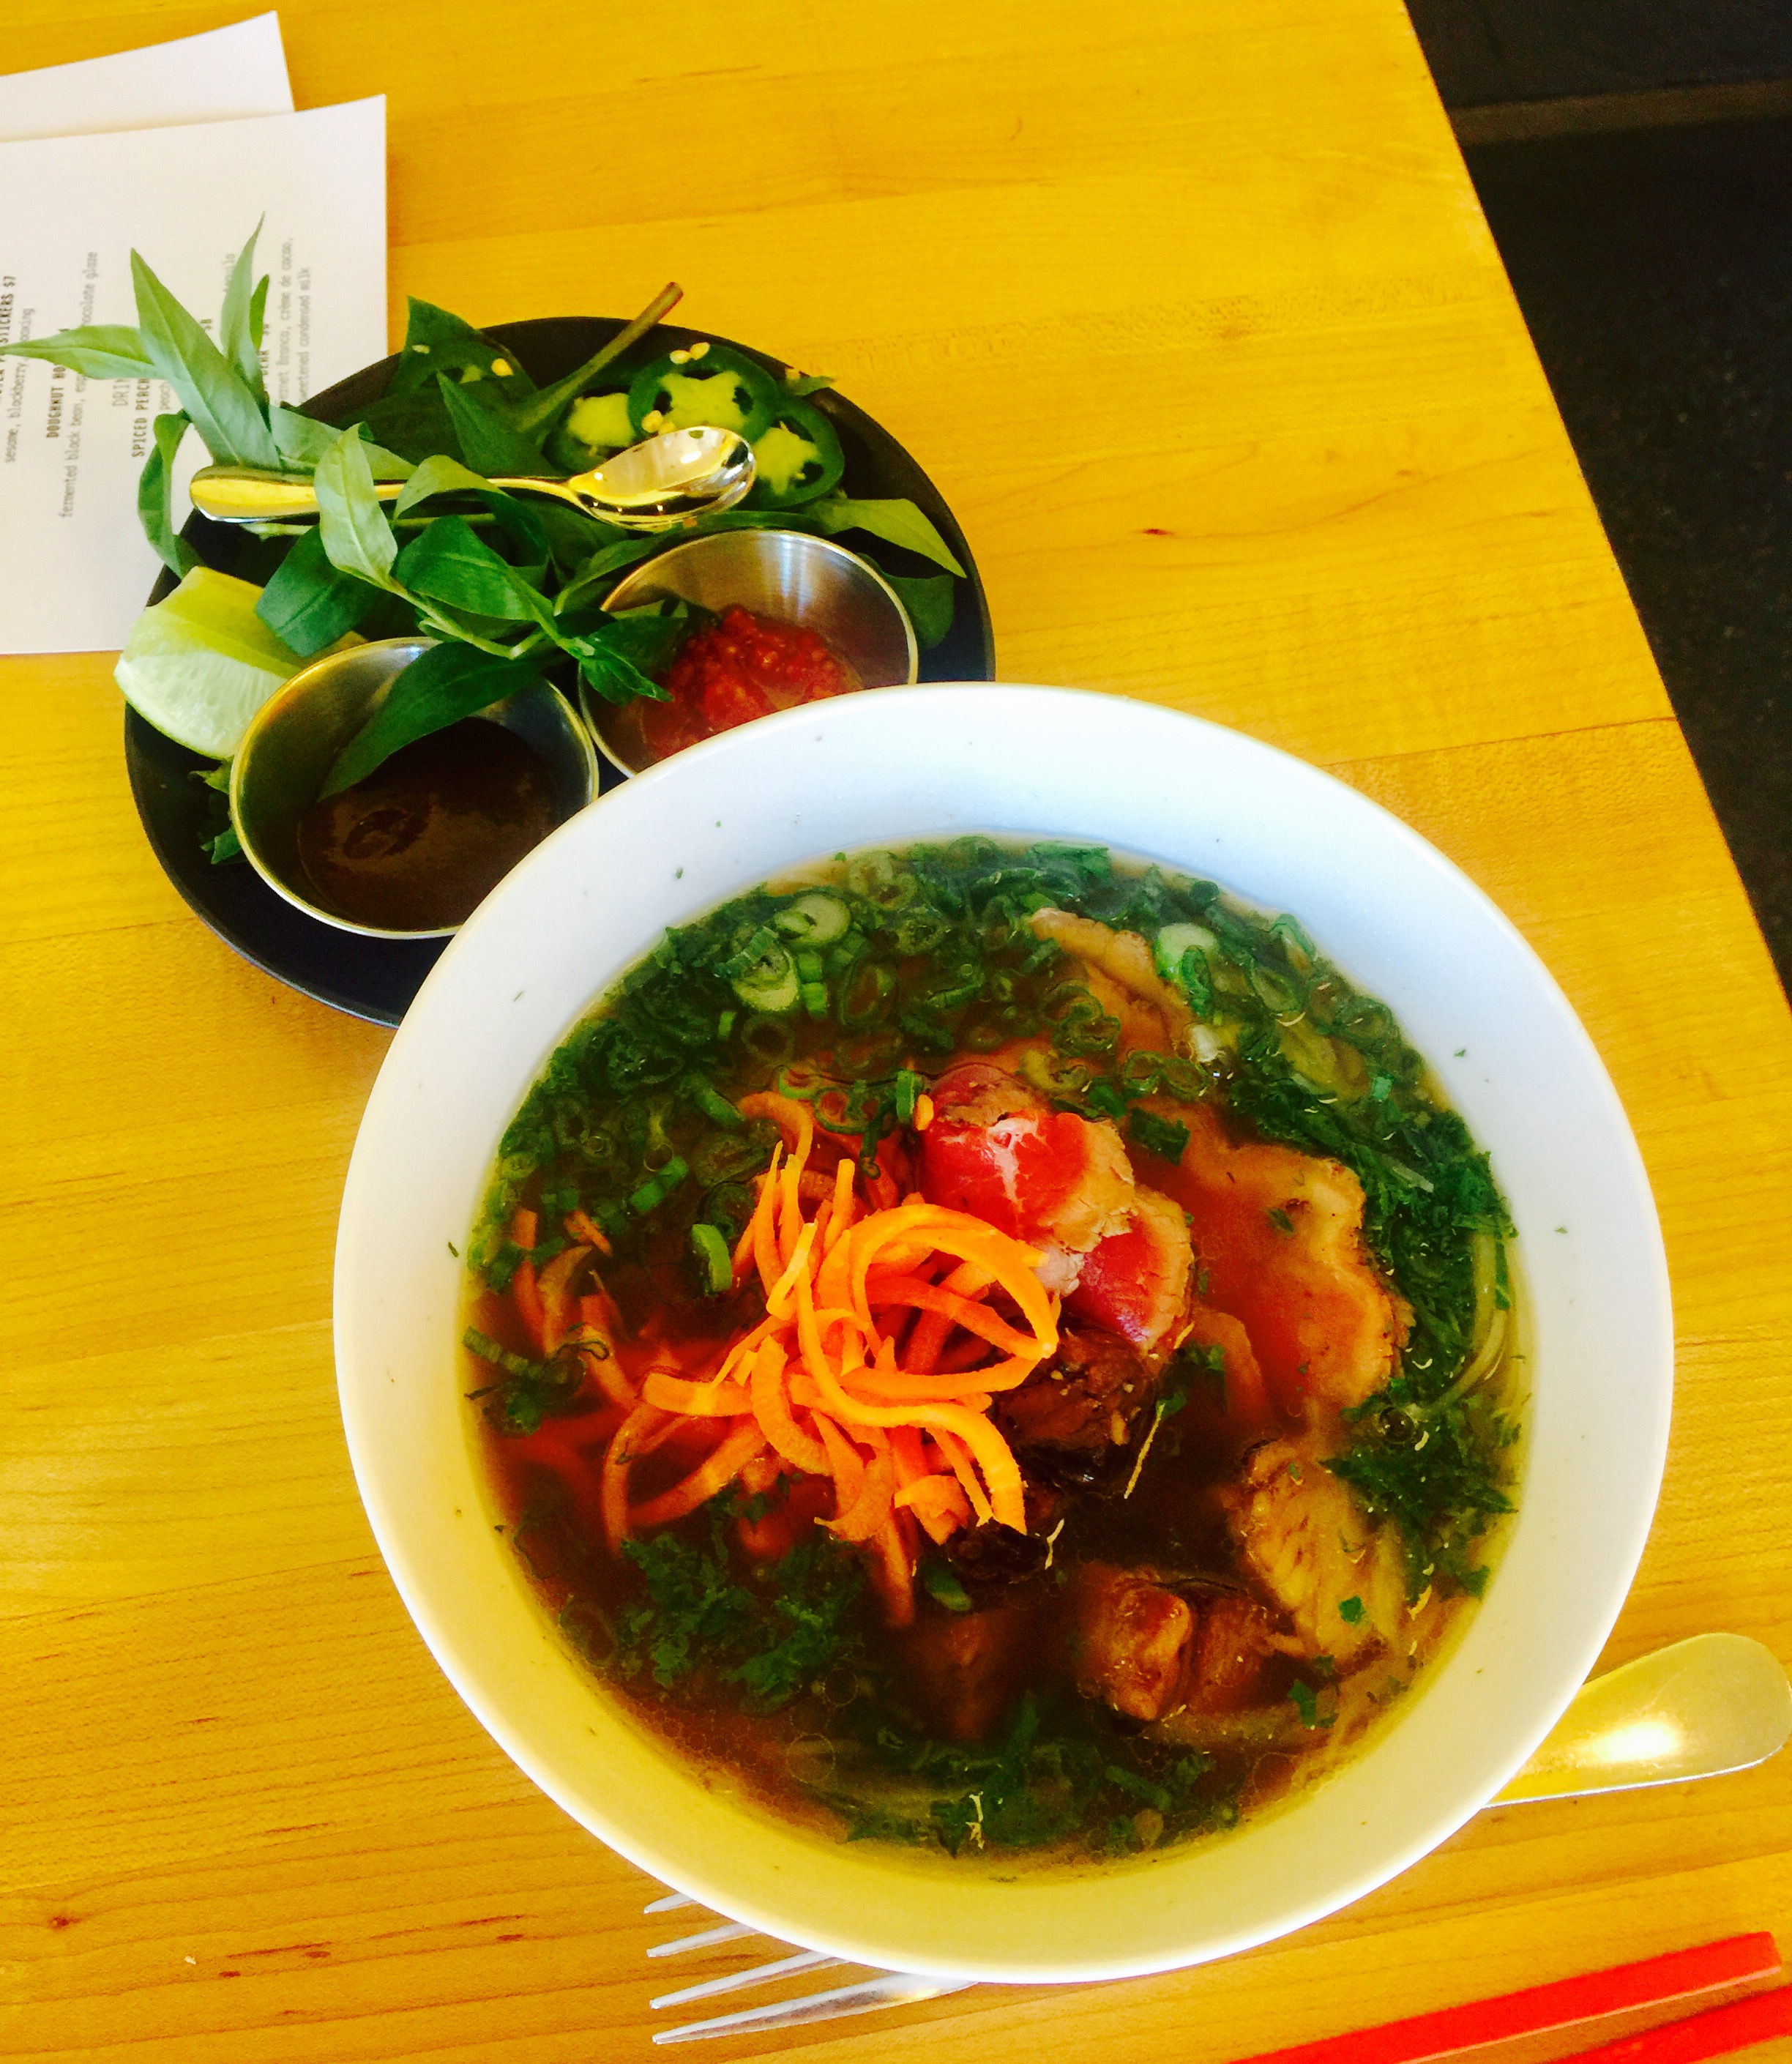
My kind of Sunday brunch: Asian fried ribs, pork and fried oyster pot stickers, a bowl of beef shank pho, and a breakfast sandwich with house made scrapple and egg on a kimchi croissant.

Beef shank pho.


The Honey Paw breakfast sandwich.


My wife took advantage of a full bar with creative cocktails. Unfortunately, I had a 3-hour drive home behind the wheel, so I had to refrain from the alcohol.

The bar at The Honey Paw.

While we dined at The Honey Paw, I ran next door to Eventide and ordered 2 of their buttermilk fried chicken sandwiches to go. Our 10-year-old daughter was not happy that we went to Portland without her this time, and we knew that bringing her favorite sandwiches home would help ease the blow.


We’ll be back to Portland this summer. Already counting the days. For other great places to dine in this town, use my search engine under “Portland.” And feel free to drop me a line with any questions about where to stay, eat, visit, etc…

Cheers!


Brining, the process of letting a hunk of protein soak in a salt solution for a few hours, is a great way to add flavor and moisture to any cut of meat. I brine these wings for 3 hours before using a sweet and spicy rub. I fry them in oil, then finish them off in the oven.


image

The brine…

1/2 cup Kosher salt
1 teaspoon whole black peppercorns
1 whole bay leaf
2 quarts water

Combine all the ingredients in a saucepan and heat until the sugar and salt dissolve. Remove the saucepan from the heat, and let it cool to room temperature.

1/2 cup all-purpose flour (I use Cup4Cup to keep it gluten-free)
1/2 cup light brown sugar
1/4 cup sweet paprika
1 teaspoon Kosher salt
1 tablespoon granulated onion
1 teaspoon black pepper
1 teaspoon dried thyme
1 teaspoon dry mustard
1 teaspoon grated ginger
1/2 teaspoon cayenne pepper

Combine all the ingredients in a bowl. Set aside.


3 lbs. chicken wings
2 eggs


Place the chicken pieces in a Ziploc bag and pour the cooled brine into the bag. Place the bag in a bowl to prevent leaks and place it in the fridge for 3 hours.
After 3 hours, remove the chicken from the brine, rinse it with cold water and dry it with paper towels. Discard the brine.

Pre-heat the oven to 325 degrees. Pre-heat the oil in a heavy pan at 325 degrees.

Scramble the eggs in a bowl. Set it next to the bowl with the spice mixture. Dip the chicken in the egg, then in the spice mixture, shaking off the excess. Place the pieces in the hot oil and fry them until golden. They don’t need to cook all the way through. Turn the chicken wings over to fry the other side, then place them on a sheet pan lined with non-stick aluminum foil. When all the chicken wings are fried and on the sheet pan, place them in the oven to finish cooking, about 30 minutes. Watch the chicken so that it doesn’t burn.