Archive for the ‘Carnivore!’ Category

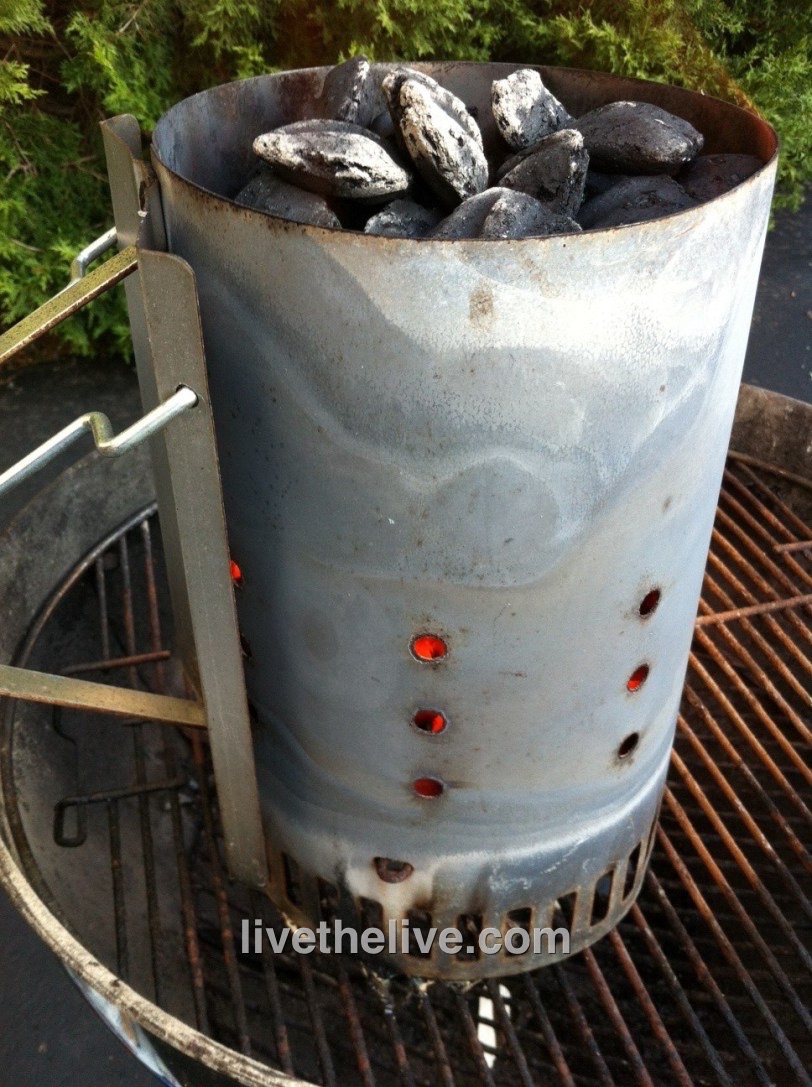
It’s Labor Day weekend, and it’s all about the grill! (Hardwood, that is…not gas.) You can make this recipe in the kitchen, but a wood fire brings it to the next level.

thai chicken LTL


3 lbs. chicken pieces (I used drumsticks for this recipe)

2/3 cup soy sauce
1/2 cup fresh cilantro
2 tablespoons canola or peanut oil
2 garlic cloves, roughly chopped
1/2 teaspoon white pepper
1/2 cup sugar
1/4 cup white vinegar
1 teaspoon red pepper flakes or crushed dried chiles
1 teaspoon salt

Marinade: Combine soy sauce, cilantro, canola oil, granulated garlic and white pepper in a food processor and let it run. Place chicken pieces in a Ziploc bag and pour half of the marinade in. Save the other half for basting later. Seal the bag and let the chicken marinate overnight, or at least a few hours, squishing the bag around so that all the chicken gets marinated.

Sauce: In a saucepan, combine sugar, white vinegar, pepper flakes and salt. Bring to a boil and make sure the sugar dissolves. Remove from heat and let it cool to room temperature.

After marinating overnight, discard the used marinade in the Ziploc bag. Place chicken pieces over a hot hardwood fire or bake in an oven at 350, basting them with the leftover marinade until fully cooked. If the coal fire gets too hot, move the chicken to a cooler part of the grill to prevent burning. If using the oven, switch to the broiler at the end to give the chicken a nice char.

Serve with the sweet pepper sauce drizzled on top.

The Saturday before Labor Day is traditionally considered to be International Bacon Day. So that makes it September 5th this year.

Let’s face it: there are few foods as magical as bacon. Add bacon to just about any dish you’re preparing, and it elevates it to incredible new heights of flavor. The BLT is possibly the greatest food combination ever invented: just a few simple, fresh ingredients, when placed together, transforming into one of the most amazing sandwiches on planet Earth.

I buy my bacon on-line from Burger’s Smokehouse, a family-run business in Missouri that not only sells some great bacon (get the thick-sliced country bacon—my favorite), but also smoked turkeys, ham and more.

But I also make my own.

Bacon comes from the pork belly. One of the places I buy pork bellies is from my friends at Fire Fly Farms in Stonington, CT (www.fireflyfarmsllc.com). I follow the simple curing techniques outlined in “Charcuterie,” a great book written by Michael Ruhlman and Brian Polcyn.

To cure bacon, all you really need is salt and sugar, and what they in the curing biz call “pink salt,” which is not to be confused with salt that happens to be pink, like Himalayan salt you would find in a gourmet store. Pink salt is bright pink—to let you know that this is special salt that should only be used in small quantities for curing. The reason for that is because it has nitrites. Nitrites delay the spoilage of the meat, and help keep the flavors of spices and smoke. They also keep the meat nice and pink instead of an unappetizing gray. That’s good. But nitrites can break down into nitrosamines, which have been known to cause cancer in lab animals. But let’s face it: you would need to eat a ton of cured meat to really worry about this.

To make the basic dry cure:

1/2 lb. kosher salt
1/2 cup light brown sugar
1 teaspoon coarsely ground black pepper
1 ounce (5 teaspoons) pink salt
optional ingredients: garlic, onion

Mix the ingredients well. An important note: all Kosher salts do not all weigh the same, so go by the weight and not a cup measurement.

Once you rub the pork belly with the basic dry cure, place it in a Ziploc bag, squeeze the air out of it, and seal it tightly. Place it in the fridge for a couple of weeks, flipping it over every few days to let gravity do its work. You’ll see that the salt will draw moisture out of the meat and form a brine. This brine will continue to cure your pork belly, so leave it in there.
Once the pork belly has been cured, wash the brine off the meat, pat it dry with paper towels. Now it’s time to cook. You can simply cook the pork belly at 200 degrees for about 2 hours, until the internal temperature reaches 160 degrees, or place the pork belly in a smoker, cooking it at 250 degrees for 1 hour, then adding hickory chips and smoking it at 250 degrees for another hour. I use my digital smoker to do this.


Bellies in the smoker

Bellies in the smoker.


Smoked bacon

Smoked bacon

That’s it. You have achieved bacon!

The reward is so worth the effort. That first slice you cut off your bacon and toss in a pan to lightly fry for a few moments will be the best bite you’ve ever had in your life!
And if you’re making one slab of bacon, why not make it three or four? It freezes well. And…you will eat it. You know you will!
Frying in the pan!

Frying in the pan!

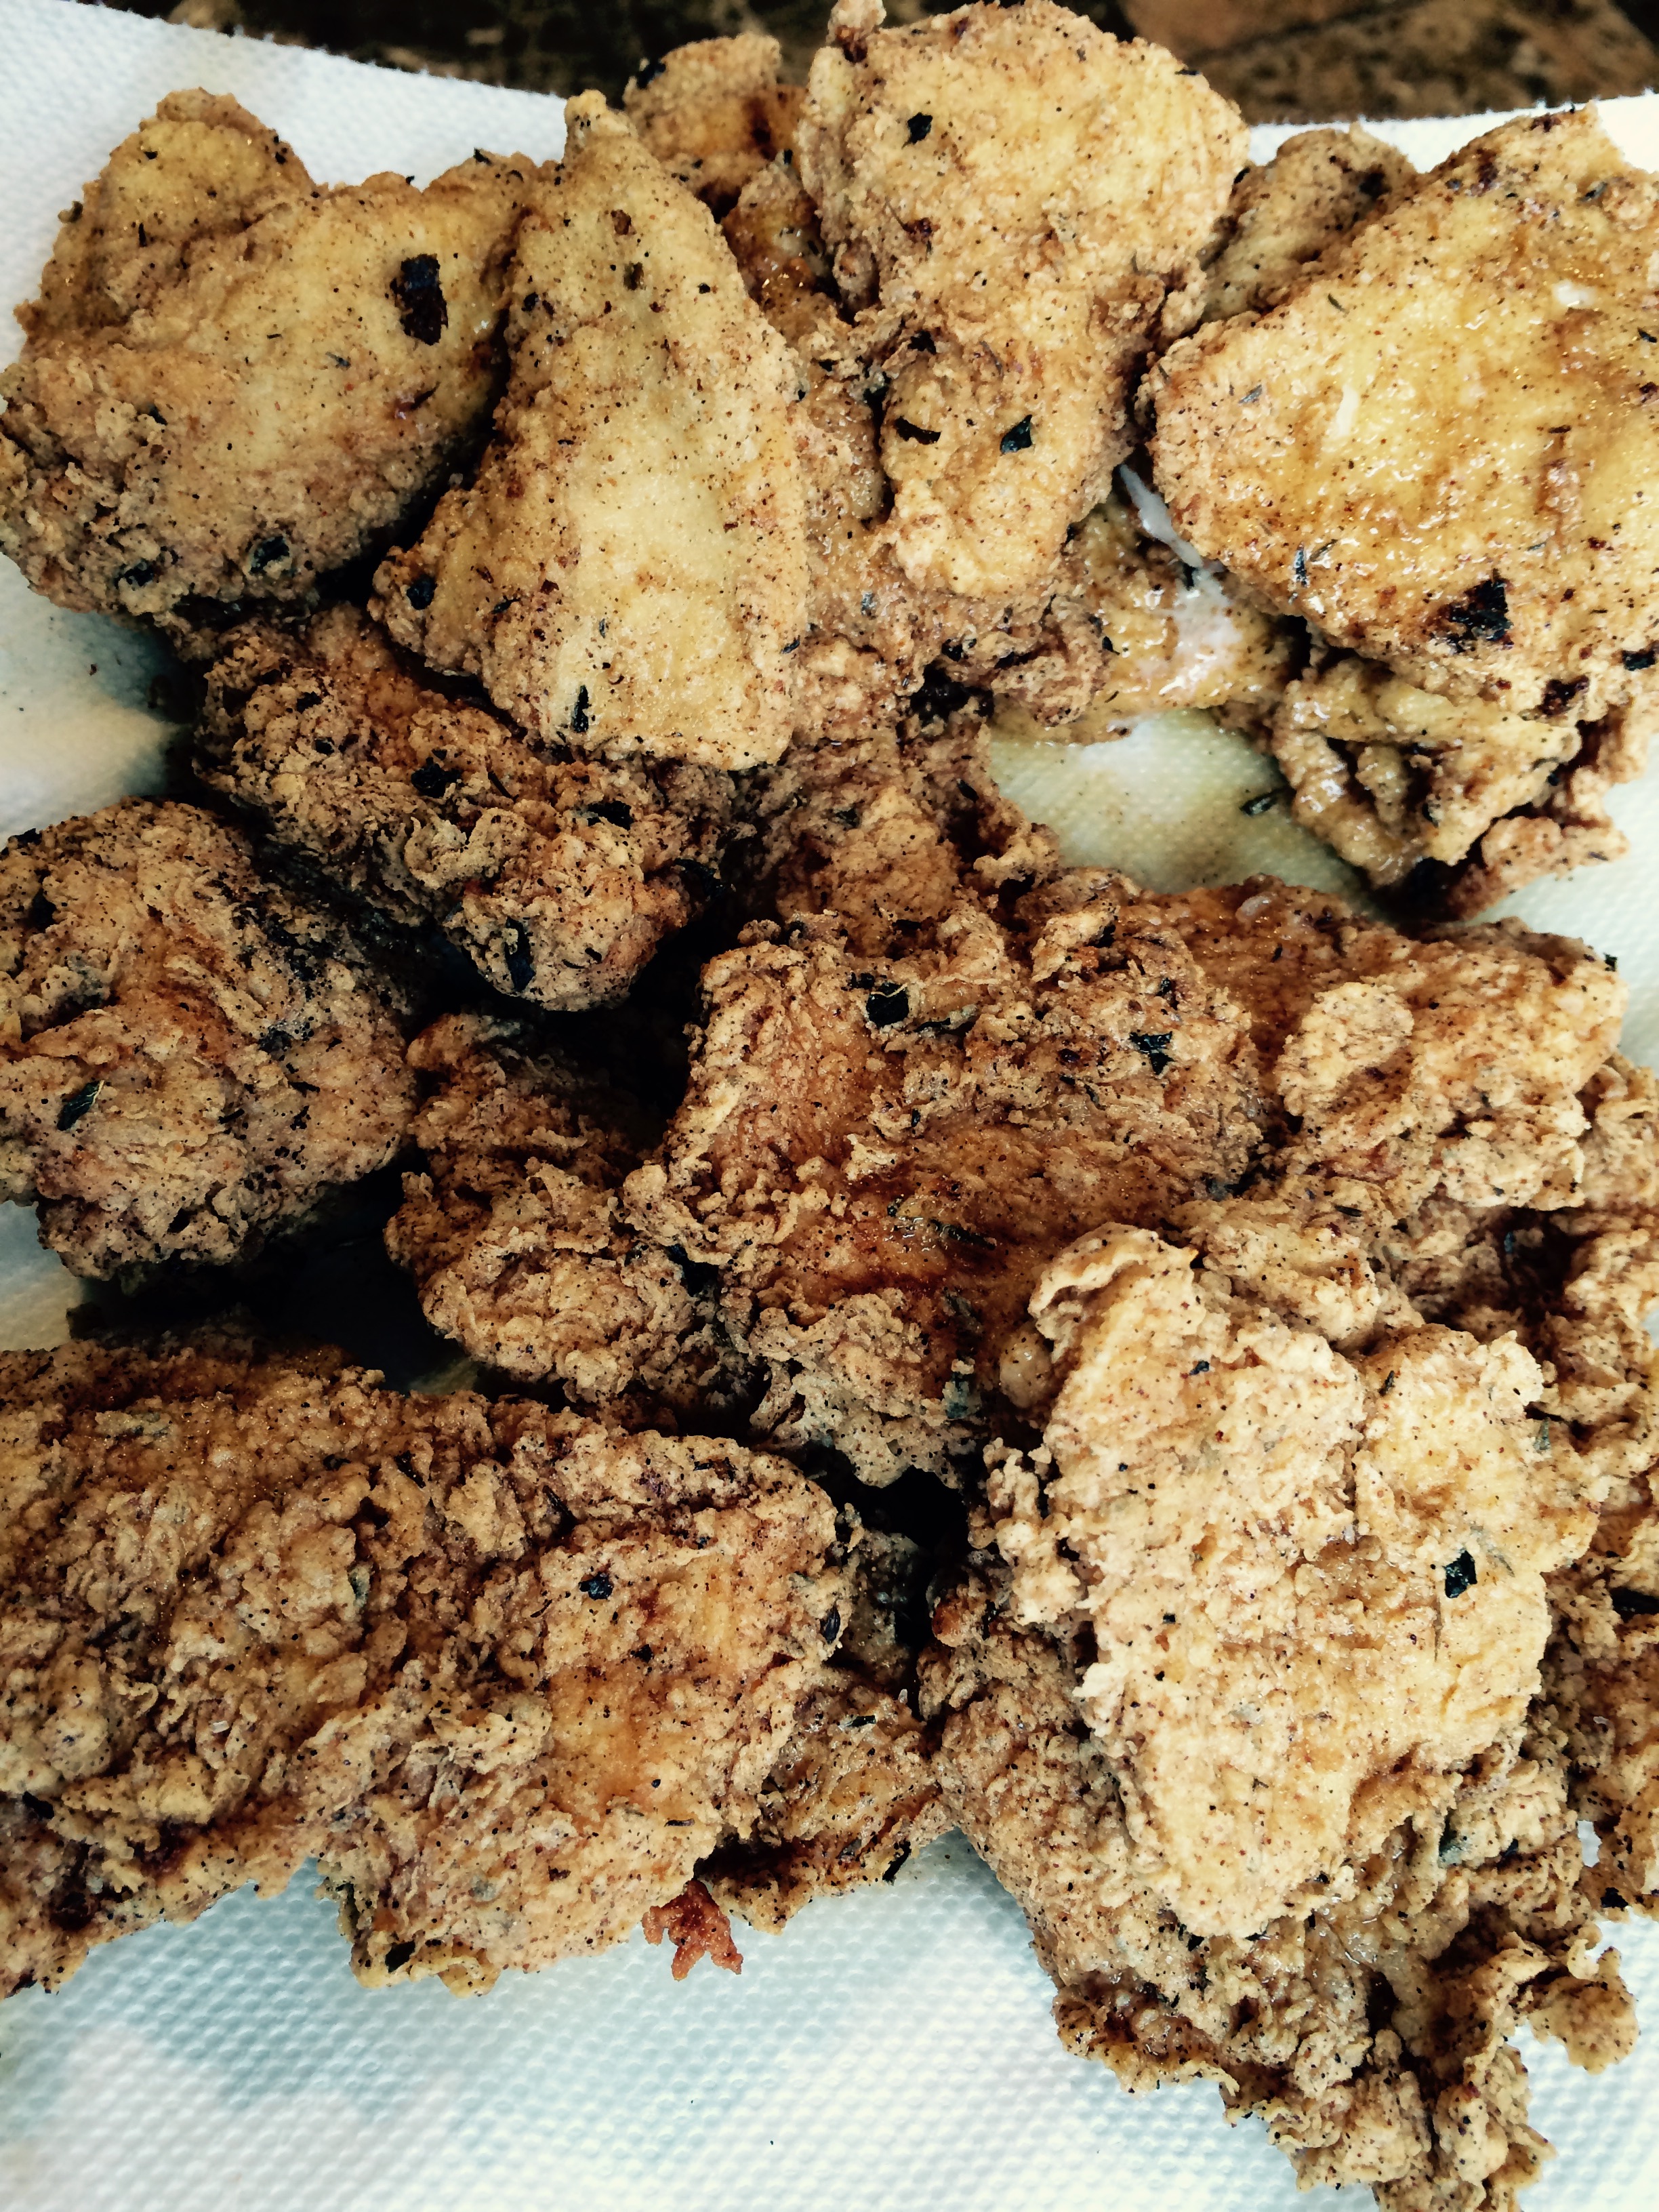
My blueberry buttermilk cornmeal pancakes are delicious (see my previous blog), but the recipe leaves some leftovers. So I froze the extra pancakes, not really knowing what I’d do with them later on.

Later in the week when I thawed a pack of chicken thighs, I decided to thaw some of the pancakes as well, planning to use them as a substitute for bread crumbs. Worked out pretty well…a crispy, flavorful piece of chicken. If you don’t make the pancakes, using store-bought cornbread will work just as well.

image

5 lbs. chicken thighs
8 oz. cornbread (or leftover pancakes)
1 teaspoon salt
1/2 teaspoon granulated garlic
1/2 teaspoon granulated onion
1/2 teaspoon tarragon
2 eggs
oil, for frying (I use avocado oil)


Break the cornbread (or pancakes) into smaller pieces and place them on a sheet pan in a 200-degree oven. Bake until they dry out but don’t burn, about 30 minutes. Let them cool to room temperature, then place them in a food processor and process until they resemble breadcrumbs. Place the breadcrumbs in a bowl.

Add the salt, garlic, onion and tarragon to the breadcrumbs and mix well.

In another bowl, crack and whisk the 2 eggs.

Pre-heat the oven to 350 degrees.

Heat a frying pan with 2 inches of oil to medium-high. Roll the thighs one at a time in the egg and then in the breadcrumb mixture. Press the breadcrumbs onto the chicken so they stick. Gently place the breaded thigh in the pan with the oil. Fry until golden on one side, then flip the thigh over and fry on the other side. When the thighs are golden and crisp, place them on a sheet pan covered with non-stick aluminum foil. Repeat with all the thighs.

Place the sheet pan with the thighs in the oven and bake until cooked through, about 35 minutes.

When I used to go to my favorite barbecue place and asked for a pulled pork sandwich, I didn’t realize just how much work went into making it. Now I make my own, and I have a whole lotta new respect for those barbecue folks…


pulled pork

First, I get the pork butt. I buy a heritage breed, like Berkshire (also known as Kurobuta), from a farm that humanely raises them. That’s better for the pig and also better for my family.

Going to a supermarket for pork is what many people do, and the names of the cuts of meat can be a bit confusing. Despite its name, pork butt is not from the back-end of the pig. It’s the shoulder. And the pork butt (or pork shoulder) picnic is a lower cut of the same area. These cuts can also go by: Boston shoulder roast, Boston butt, Boston roast, shoulder butt, and shoulder-blade roast. Whatever the name, these are all nicely marbled hunks of pork that usually weigh in anywhere from 6 to 8 lbs, and are easy to find. Bone-in is for purists…boneless if you’re not.

Once I’ve got my slab, I need to season it. I’ve found that a simple rub is the best way to go for the sauce I’m going to use later.

1/4 cup kosher salt
1/4 cup black pepper
1/4 cup paprika
¼ cup brown sugar
1 tablespoon granulated garlic
1 tablespoon onion powder

Place all the ingredients in a jar with a lid and shake it up to blend.

Once I’ve made the rub, I generously sprinkle it all over the pork, and rub it in really well. I have a digital smoker at home, which lets me cook and smoke my pork butt all in one place. I place it on a rack, put a drip tray underneath it to catch the grease, and set the smoker for 225 degrees. I cook the pork for about 6 hours, and then I add hickory chips to the smoker and smoke the butt for another 2 hours. The marbled fat in the pork butt slowly melts over time and the pork becomes incredibly tender and flavorful.

I remove the pork butt from the smoker and let it rest, covered with aluminum foil, for at least 20 minutes before pulling the meat apart with a couple of forks, shredding it into beautiful meaty bits.

While the pork is cooking and smoking, there’s plenty of time to make two other very important parts of this recipe: the sauce and the cole slaw.

saucey

2 cups ketchup
3/4 cup water
6 tablespoons cider vinegar
6 tablespoons white vinegar
6 tablespoons brown sugar
3 tablespoons Worcestershire sauce
1 tablespoon chili powder
2 teaspoons salt
2 teaspoons black pepper
1 1/2 teaspoons cumin

Mix all the ingredients in a saucepan and simmer until the flavors have blended, about 20 minutes. Remove from heat and cool to room temp. If you store it in an airtight container in the fridge, it’ll stay good for a few months.


COLE SLAW

My cole slaw recipe uses pickle juice. Just a splash from your favorite jar of pickles is all you need.

1 package of cole slaw veggies
splash of pickle juice
1/4 cup mayonnaise (more to taste)
teaspoon celery seed (not salt)
salt and pepper

There are no real specific measurements for cole slaw, because I’ve found that some people like it dry, others wet…some peppery, some not. Play around with it and make it your own. I prefer a more mayonnaise-y cole slaw, and usually err on the wet side.

In a bowl, combine all the ingredients. Cover with plastic wrap and chill. When ready to use, re-mix, and taste for seasoning before using.


OK…time to make that sandwich!

Drizzle the barbecue sauce on the pulled pork and mix well…trying not to over-sauce the pork! Take a nice amount of pork and place it on a freshly baked bun. Place the cole slaw right on top if you prefer the Carolina method, or on the side if not.

Whether you decide to go through all this trouble to make pulled pork or not, just remember that if you’re at a barbecue joint, someone else did. Whatever you pay for that pulled pork sandwich is a bargain!

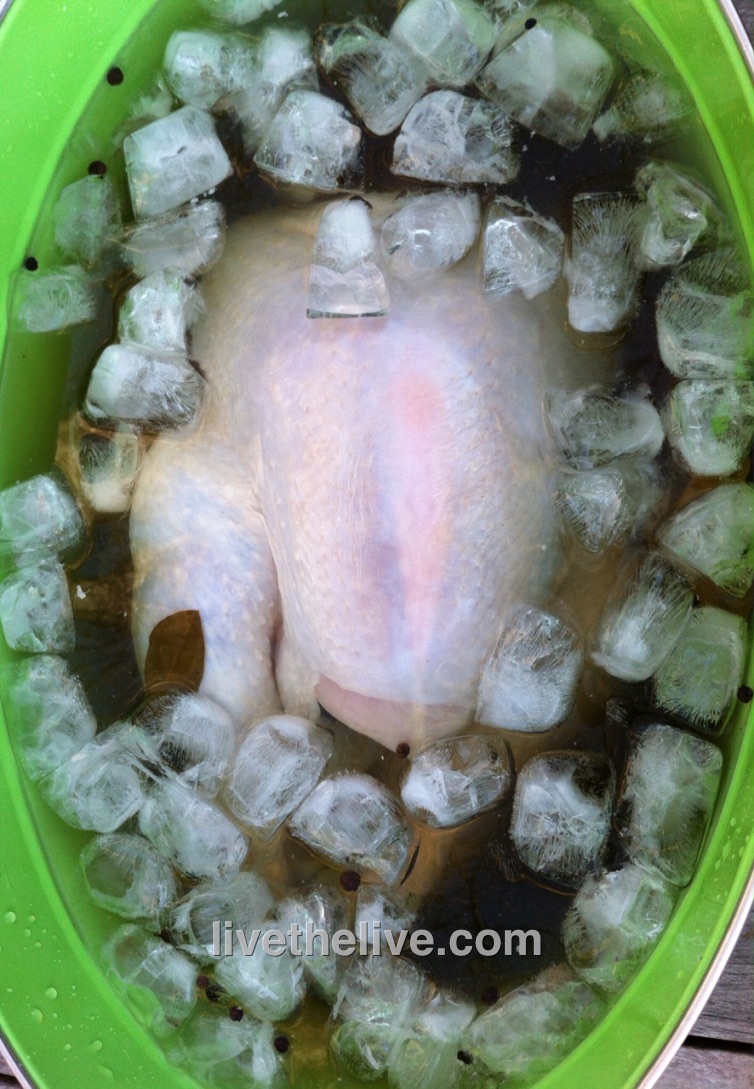
Brining, the process of letting a hunk of protein soak in a salt solution for a few hours, is a great way to add flavor and moisture to any cut of meat. I brine these wings for 3 hours before using a sweet and spicy rub. They can be grilled or roasted in the oven.

image

The brine…

1/2 cup Kosher salt
3 tablespoons light brown sugar
1 teaspoon whole black peppercorns
1 whole bay leaf
2 quarts water

Combine all ingredients in a saucepan and heat until the sugar and salt dissolve. Remove from heat, and let it cool to room temperature.

The rub…

1/4 cup light brown sugar
1/4 cup granulated sugar
1/4 cup sweet paprika
1 tablespoon Kosher salt
1 tablespoon granulated onion
2 teaspoons black pepper
1 teaspoon dried thyme
1 teaspoon dry mustard
1 teaspoon ground ginger
1 teaspoon cayenne pepper

Combine all ingredients in a bowl.

Place 3 lbs. of chicken wings in a Ziplock bag and pour the cooled brine into the bag. Place the bag in a bowl to prevent leaks and place in the fridge for 3 hours.
After 3 hours, remove the chicken from the brine and dry with paper towels. Discard the brine.
Place the chicken pieces in a large bowl and sprinkle with 1/3 cup of the rub, tossing to coat the chicken well. Place the bowl with the chicken in the fridge until ready to cook.
About 30 minutes before cooking, remove the bowl from the fridge and let the chicken come to room temperature.
Pre-heat the oven to 350 or light a grill.
Toss the chicken with some more of the rub, if you like, then place the pieces on a sheet pan lined with non-stick aluminum foil.
Bake at 350 for 30 minutes or until done. Lower oven temperature if it starts to burn.

If grilling, cook over medium heat, turning frequently to prevent burning. Cook until the wings are done.


And May is National Hamburger Month. How can you go wrong? First, a favorite burger recipe, then one for brisket.

The Inside-Out Burger: If I’m making bacon cheeseburgers to bring to a barbecue, even if it’s on my back deck, instead of bringing a package of bacon and a package of cheese and a stack of burgers, I put all the ingredients inside the patties themselves. As the burgers cook, the fat from the bacon and the gooey cheese melt and combine with the burger meat to make a really tasty and moist burger.

image

2 lbs. ground beef
1/2 cup sharp cheddar cheese, cut into 1/4″ cubes
1/2 lb. bacon, cooked crisp, cooled and crumbled
garlic salt
avocado oil or pork fat

In a bowl, combine the beef, the cheese and the bacon, mixing well so that all the ingredients are evenly incorporated. Form the beef into 1/4 lb. patties. Refrigerate them until you’re ready to cook to firm them up.

Heat a cast iron skillet and add a drop of oil or pork fat. Place the burgers in the hot skillet to sear and sprinkle with the garlic salt. When browned, flip the burgers and place the skillet in a 350-degree oven to finish cooking.

image


Brisketta: There’s a wonderful Italian roasted meat dish called Porchetta (por-ketta). The classic version consists of a pork belly that is seasoned and then wrapped around a pork loin. The meat is tied, then roasted slowly for hours, basted with wine and the meat juices until the pork is cooked and the outside skin is crackly and crispy. Then it’s sliced like a log and served as a sandwich or a main dish.

I decided to use the same method of cooking for beef brisket, and I called it “Brisketta.”

image

I flipped the brisket fat-side-down on my cutting board and carefully sliced it down the middle horizontally to make two large–even thinner–slabs of meat. The bottom half, with the fatty side of the brisket, would eventually be my outside layer. The top half would be my inside layer.

image

I took the top half and slathered some of my seasonings on it. Then I rolled it tightly into a log. I slathered more of my seasonings onto the bottom half of the brisket, then rolled it around the first log, so that the fattiest side of the brisket would now be on the outside of this large meat log. I tied the meat log up tightly with butchers’ twine and let it rest in my fridge overnight.

image

7 lbs. beef brisket
1 tablespoon fennel seed, toasted and cooled
5–3″ strips of bacon, cooked and cooled
2 tablespoons oregano
2 tablespoons parsley
2 teaspoons basil
2 tablespoons salt
1 teaspoon pepper
2 teaspoons granulated onion
1 teaspoon granulated garlic
Grated zest of 2 lemons
1/2 cup olive oil

Pour the fennel seed in a hot, dry pan on the stove. Toast the seeds until they release their aroma, but don’t let them burn. Set aside to cool.

Crumble the bacon strips and place in the bowl of a food processor. Add the cooled fennel seeds, oregano, parsley, basil, salt, pepper, onion, garlic, and lemon zest.

Run the food processor and slowly pour in the olive oil, until you have a paste much like pesto.

Slice the brisket in half horizontally. Save the piece with the fatty side for last, because this is the piece that will wrap around the others, with the fatty side out. Smear the rub on the first piece of brisket and roll it tightly into a log. Smear the rub on the second piece of brisket and wrap it around the first piece, making sure the fatty side is on the outside.

Once you’ve rolled both pieces into a single meat log, scored the fatty exterior with a knife and rub any leftover seasoning paste onto it. If you have none left, simply season with salt and pepper.

Tie the meat log tightly with butchers’ twine, tucking in all loose ends.

At this point, you can place the meat log in the fridge until ready to cook, remembering to remove it at least an hour before cooking so that it comes back to room temperature.

Pre-heat an oven or smoker at 250 degrees. Place the meat log directly on the grate, with a pan underneath to catch the dripping fat. Place a bowl of water in there as well, to keep the meat moist while it cooks. Cook for 4 1/2 hours, or until the interior temperature reaches 130 degrees. Let it rest an hour before slicing…if you can wait that long!

image


Sausage is something most home cooks don’t even try because of the amount of work it needs. You need to grind meat in perfect proportions. You need to keep everything on ice. You need to stuff the sausage meat into casings. It’s a big hassle, requiring some special equipment and a lot of time. And the clean-up is a pain.

Here’s an easy method I can slap together in minutes. I use ground pastured Berkshire pork for this, but any good quality ground pork will do.

FullSizeRender (1)

1 lb. ground pork
1 teaspoon salt
1/2 teaspoon pepper
1/4 teaspoon sage
1/4 teaspoon rosemary
1/4 teaspoon thyme
1 egg
avocado oil or pork fat


Combine all the ingredients in a bowl and mix well. Place the bowl in the fridge for at least 15 minutes to let the meat rest.

If you’re not sure of the seasonings, break a little piece of the sausage off and fry it in a pan to taste it. If you like what you have, fry away. If not, season the meat before making patties.

Heat a pan over medium-high heat and swirl a little oil or pork fat to coat. Form the sausage meat into 2-inch patties and place them in the pan, cooking them all the way through, about 4 minutes a side, until they’re golden brown on both sides.

There’s a wonderful Italian roasted meat dish called Porchetta (por-ketta). Though there are many ways to prepare it, the classic version consists of a pork belly that is seasoned and then wrapped around a pork loin. The meat is tied, then roasted slowly for hours, basted with wine and the meat juices until the pork is cooked and the outside skin is crackly and crispy. Then it’s sliced like a log and served as a sandwich or a main dish. It’s absolutely fantastic! (If you’re in New York City, go to the small restaurant called  Porchetta on the lower east side and taste this porky awesomeness the way it was meant to be.)

I recently purchased a beautiful hunk of grass-fed beef brisket from Pat’s Pastured, a wonderful farm here in Rhode Island.  I decided to watch the You Tube series “BBQ with Franklin” starring the lord of brisket himself, Aaron Franklin of Franklin’s Barbecue in Austin, Texas, to learn how to properly smoke it. What I learned was that the hunk of brisket Franklin was using was a bit smaller but much thicker (5 to 6 inches) and fattier than the really large but thin piece (about 1 1/2 inches) that I had purchased. If I was going to use Franklin’s method of smoking this thing, it would totally dry out.

Then I said to myself: “What if I cook it like Porchetta?” I searched through a dozen Porchetta recipes and used whatever herbs and spices I liked to make my own special seasoning for this slab of meat I now re-named “Brisketta.” For the most part, I used common ingredients in Italian cooking, but I added toasted fennel seeds, an ingredient in Porchetta, as a tip of the hat to that classic dish.

image

I flipped the brisket fat-side-down on my cutting board and carefully sliced it down the middle horizontally to make two large–even thinner–slabs of meat. The bottom half, with the fatty side of the brisket, would eventually be my outside layer. The top half would be my inside layer.

image

I took the top half and slathered some of my seasonings on it. Then I rolled it up into a log as tightly as I could. I slathered more of my seasonings onto the bottom half of the brisket, the rolled it around the first log as tightly as I could, so that the fattiest side of the brisket would now be on the outside of this large meat log. I seasoned the fatty side with any leftover seasonings I had.

Now, rather than having a piece of meat that was only 1 1/2″ thick, I had a meat log that was 6″ thick. Much easier to cook and control. I tied the meat log up tightly with butchers’ twine and let it rest in my fridge overnight.

image

The next day, I removed the meat log from the fridge and let it sit on the counter for an hour, so that it would come back up to room temperature. Meanwhile, I started my digital smoker (an electric one), setting the temperature at 250 degrees. I placed the meat log on a rack in my smoker, and a bowl of water on another rack to help keep it moist during the cooking process. I closed the smoker door, and then cooked it low and slow for about 4 1/2 hours. My smoker has a side chute that lets me drop wood chips inside, and I used slivers of oak to add some smoke. (I decided that a wood like hickory, though one of my favorites to use when smoking, would overpower the subtle seasonings I used.)

I removed the meat log from the pan and put it directly onto the grate before cooking.

I removed the meat log from the pan and put it directly onto the grate before cooking.


After 4 1/2 hours, I removed the Brisketta from the smoker and tented it with foil, letting it rest for an hour before slicing it.

image

7 lbs. beef brisket
1 tablespoon fennel seed, toasted and cooled
5–3″ strips of bacon, cooked and cooled
2 tablespoons oregano
2 tablespoons parsley
2 teaspoons basil
2 tablespoons salt
1 teaspoon pepper
2 teaspoons granulated onion
1 teaspoon granulated garlic
Grated zest of 2 lemons
1/2 cup olive oil

Pour the fennel seed in a hot, dry pan on the stove. Toast the seeds until they release their aroma, but don’t let them burn. Set aside to cool.

Crumble the bacon strips and place in the bowl of a food processor. Add the cooled fennel seeds, oregano, parsley, basil, salt, pepper, onion, garlic, and lemon zest.

Run the food processor and slowly pour in the olive oil, until you have a paste much like pesto.

Slice the brisket in half horizontally. Save the piece with the fatty side for last, because this is the piece that will wrap around the others, with the fatty side out. Smear the rub on the first piece of brisket and roll it tightly into a log. Smear the rub on the second piece of brisket and wrap it around the first piece, making sure the fatty side is on the outside.

Once you’ve rolled both pieces into a single meat log, scored the fatty exterior with a knife and rub any leftover seasoning paste onto it. If you have none left, simply season with salt and pepper.

Tie the meat log tightly with butchers’ twine, tucking in all loose ends.

At this point, you can place the meat log in the fridge until ready to cook, remembering to remove it at least an hour before cooking so that it comes back to room temperature.

Pre-heat an oven or smoker at 250 degrees. Place the meat log directly on the grate, with a pan underneath to catch the dripping fat. Place a bowl of water in there as well, to keep the meat moist while it cooks. Cook for 4 1/2 hours, or until the interior temperature reaches 130 degrees. Let it rest an hour before slicing…if you can wait that long!

Besides a ham, lamb is the classic Easter dish. And there’s no better way to prepare it than on the grill. Many people are turned off by lamb because somewhere in their past, they had a horribly cooked piece of meat that ruined it for the rest of their lives. Don’t be sheepish! Try lamb again!

If you think lamb is too “gamey,” buy American lamb over New Zealand or Australian lamb. Although the animals are mostly pasture-raised, most American lamb is larger and grain finished, which results in a milder flavor. Unfortunately, like with non grass-fed American beef, this also results in a larger, fattier animal, and a less healthy cut of meat.

I prefer 100% grass-fed lamb. You can find it from the US, but most often it comes from New Zealand. Having been to the country, I can tell you that the quality is unmatched and the grasslands in New Zealand are the most beautiful I’ve ever seen. New Zealand lamb is smaller and is slaughtered at a younger age than American lamb, making it very tender. In New Zealand, as well as many other countries, only an animal under 12 months of age and without incisors can be called “lamb.” No such labeling is required in the United States.

I love the baby lamb chops that look like miniature porterhouse steaks. You can find them in any supermarket. Here’s an easy recipe that I served at a party in my home for 40 people, many of whom claimed they didn’t like lamb or never had it before. By the end of dinner, the chops were gone!

lamb LTL


8 small lamb chops
½ cup olive oil
¼ cup balsamic vinegar
2 cloves garlic, through a garlic press
1 tablespoon fresh rosemary, chopped
1 tablespoon honey
2 teaspoons Dijon mustard
1 teaspoon dried oregano
Salt and pepper

Place the lamb meat in a plastic bag. In a bowl, combine all the ingredients for the marinade and pour over the lamb. Seal the bag and squish it around so that the marinade reaches every part of the chops. I leave it at room temp if marinating for a few hours…or in the fridge if overnight.

Before grilling, take the lamb out of the fridge and let it come back to room temperature.

Pre-heat your barbecue grill. Grill the lamb until it’s done. That means cooked no more than medium. Don’t cook it to death! If you can’t get to a grill, place the lamb chops in an oven-proof pan (cast iron is always best) and sear on all sides. Then place the pan in a 350-degree oven to cook all the way through.


There’s no problem with your bird, she said to me
Just go low and slow to cook it perfectly
A few choice seasonings end up deliciously
There must be 50 ways to roast your chicken…
There’s nothing better than a whole roasted chicken. Simply season it, pop it in the oven and go low and slow. No maintenance, and you’ve got a great bird in a couple of hours. And it works with any side dish.
Once you go with humanely raised pastured chicken, you’ll never go back to supermarket chicken again. The flavor is fantastic, and you’ll devour it right down to the bones, which you can then use to make the best home made chicken stock or soup you’ve ever had. Nothing goes to waste.
I roast at least one chicken every week, so to change it up, I’ve come up with many different rubs and sauces over the years. All of the rubs are sugar and gluten-free preparations. The sauces may have one or both.
Chicken with Rosemary and Lemon
 IMG_9146
The lemon serves double-duty in this dish. You use the zest to season the outside skin, then you place the remaining cut up pieces inside the carcass to flavor from the inside out.
1 tablespoon finely chopped fresh rosemary
1 teaspoon granulated garlic
2 teaspoons salt
zest from 2 lemons, using a micro plane zester, the leftover lemons quartered
1/2 teaspoon black pepper
In a bowl, combine the rosemary, garlic, salt, lemon zest, and pepper. 
Thaw a bird, remove the giblets, and rub it all over with olive oil. Shove the quartered lemon pieces into the carcass of the bird. Season the bird inside and out with the rosemary seasoning mix.
Place the bird on a pan lined with non-stick aluminum foil in a pre-heated 450-degree oven. Cook for 10 minutes at this temperature, then reduce to 275 degrees and cook low and slow until done.
Tarragon Chicken
I love the taste of chicken seasoned with tarragon. Careful with this, or you will accidentally devour your fingers!
1 tablespoon dried tarragon, crumbled into a powder
1 teaspoon garlic salt
1 teaspoon salt
1/2 teaspoon black pepper
olive oil
In a bowl, combine the tarragon, garlic salt, salt and pepper.
Thaw a bird, remove the giblets, and rub it all over with olive oil. Season the bird inside and out with the seasoning mix.
Place the bird on a pan lined with non-stick aluminum foil in a pre-heated 450-degree oven. Cook for 10 minutes at this temperature, then reduce to 275 degrees and cook low and slow until done.
Italian Chicken
FullSizeRender
The darker color of the bird comes from rubbing it first with balsamic vinegar, then olive oil, before coating it with Italian seasonings. Don’t use the fancy, expensive balsamic. The bottles that go for about 9 bucks in the supermarket work well for this recipe.
Balsamic vinegar
Olive oil
1 tablespoon salt
1 tablespoon parsley
1 teaspoon oregano
1 teaspoon pepper
1 teaspoon granulated onion
1/2 teaspoon granulated garlic
Thaw a bird, remove the giblets, and rub it all over with the balsamic vinegar. Then rub it all over with the olive oil. Season the bird inside and out with the seasoning mix.
Place the bird on a pan lined with non-stick aluminum foil in a pre-heated 450-degree oven. Cook for 10 minutes at this temperature, then reduce to 275 degrees and cook low and slow until done.
My Grandma’s Chicken
My grandmother would cook chicken thighs low and slow all Saturday morning, knowing that I was coming over for lunch after Lithuanian school. The meat just fell off the bone, and I couldn’t stop eating it. This recipe is so simple and works just as well for a whole bird. Every time I make this, I think about those days at my grandmother’s house.
Lawry’s Seasoned salt
Olive oil
Thaw a bird, remove the giblets, and rub it all over with olive oil. Season the bird inside and out with the Lawry’s Seasoned salt.
Place the bird on a pan lined with non-stick aluminum foil in a pre-heated 450-degree oven. Cook for 10 minutes at this temperature, then reduce to 275 degrees and cook until done.
If you’re using chicken thighs, like my grandmother did, make sure they have the skin on and the bone in.