Archive for the ‘Recipes’ Category

I’ve had Clams Casino in many different forms. Back when I worked in Italian restaurants in New York, we would make a breadcrumb mixture, press it onto a freshly opened whole clam, and then place a small piece of bacon on top before it went into the oven. It was good, but the clam often stuck to the shell, and many people didn’t want to gulp down a whole clam like that.


Oyster knife (left) and a clam knife (right.) Different tools for different jobs.
 

When it was time for me to make my own recipe, I decided that I would chop the clams and mix them into the breadcrumb mix, so that every bite was the same.

2 tablespoons olive oil
1/3 cup finely chopped Vidalia or other sweet onion (about a 1/2 an onion)
2 garlic cloves, squeezed through a garlic press
1/3 cup dry white wine
1/3 cup unflavored bread crumbs
1 tablespoon fresh Italian parsley, finely chopped
1/2 teaspoon dried oregano
Freshly cracked black pepper
2 dozen medium sized clams
1/3 lb. bacon, cut in small squares to fit the clam shells
Heat the olive oil in a pan over medium heat. Add the onions, and sauté them until they’re translucent. Add the garlic, and cook for 10 seconds. Add the wine and simmer for a minute. Add the bread crumbs, and stir the mixture until it becomes thicker, like a paste. Add the parsley and oregano. Season with pepper. (There’s going to be plenty of salt in the clam juice and bacon, so no salt is needed.)
The bread crumb mixture.
Remove the pan from the heat and let it cool.
It’s time to open the clams. If you know how to do that, open them over a sieve with a bowl underneath so that the clam meats and juices are captured. Discard any broken shells, but save the good ones.
If you struggle with opening clams, this method makes it a little easier: Bring a large pot of water to boil, and drop the clams into it, about 10 at a time, for 30 seconds. Don’t let them open! Remove the clams with a slotted spoon and place them in a bowl to cool. Continue doing this in small batches until all the clams have been in the water. You’ll find this makes opening the clams much easier. Then proceed as above.
Once you’ve shucked all the clams, let the clam juice sit for a bit, so that any grit settles to the bottom of the bowl. Then pour off the clean clam juice and add it to your bread crumb mixture. (Don’t worry if it looks soggy at this point.)
Looking a little soggy, but that’s OK.
I like to hand chop the clam meats instead of using a food processor. You want tasty clam chunks, not too big, but not mush. Add the clams to the the bread crumb mix.
At this point, if the clam mix looks very soggy, simply add a little more bread crumb to dry it out.
Preheat the oven to 350 degrees.
Line a large baking sheet with foil. Separate the clam shell halves and wash them, making sure you don’t have any shell fragments left in the clam shell.  Fill them with the clam mixture, mounding them slightly, and placing each one on the baking sheet.
Clams and bacon…delicious!
Cut the bacon in small squares to fit the clam shells. Place a small piece of raw bacon on the top of each clam.
Bake until the clams are just cooked through, the topping is golden, and the bacon is cooked, about 30 minutes.
This makes a great appetizer, but it’s hard to just eat a few!

Since it’s National Bourbon Day, let’s not just drink some bourbon…let’s cook with it!

This recipe uses a smoker. If you don’t have one, or just don’t want all the smoke, start with aper-heated oven at 250° and go from there.

image


5 lbs St Louis style pork ribs
Salt and pepper


1/4 cup honey
1/4 cup bourbon (use whatever you have on hand)
zest and juice of 1 lime
zest and juice of 1 lemon
zest and juice of 1 orange
2 tablespoons Hoisin sauce
1 tablespoon Dijon mustard (I use Maille)
1 tablespoon soy sauce
2 teaspoons Worcestershire sauce
1 teaspoon chili oil
image

Season the ribs well with salt and pepper and cook in a smoker for 3 hours at 250°, using hickory chips.

While the ribs are smoking, combine the sauce ingredients in a sauce pan, bringing it to a boil, then lowering to medium heat and reducing the sauce by half until it thickens. Stir often, being careful not to let the honey foam up and spill over the top.

Pre-heat the oven at 250°.

Remove the ribs from the smoker and place them on a sheet pan that is lined with aluminum foil, with enough foil to wrap around the ribs. Brush the ribs on all sides with the sauce, stacking no more than 2 sets of ribs on top of each other, and then wrap them with foil.

Cook the ribs in the foil for 2 more hours, until tender.


I came up with this crunchy appetizer years ago, when I needed a tasty bite for one of our summer parties. I wanted something fresh that highlighted the veggies of the season, so when I spotted these baby bell peppers in the supermarket, I got the idea. 


image

Baby bell peppers
6 ears fresh corn, removed from the cob…or organic frozen corn
1/2 Vidalia onion, peeled, quartered, grilled, chopped
1 cup mayonnaise
1 teaspoon hot pepper sauce (I use Frank’s Red Hot)
6 oz. feta cheese or Queso Fresco, crumbled
Juice of 1 lime
Pinch of white pepper
1 tablespoon fresh parsley, finely chopped


image

Cut the corn kernels from the ears, and sauté them very briefly in a little olive oil. Place them in a bowl and let them cool.

Peel and quarter the Vidalia onion, and throw it on a hot grill with a little olive oil to get some nice grill marks on it, leaving the onion still crispy, not soft. If you’re cooking indoors, throw the quartered onion in a hot pan with a little olive oil, and cook it until you get some brown marks on it. Remove it, let cool, then place it in a food processor and pulse it until the onion is chopped into small bits, just smaller than the corn kernels. Add the onions to the corn.

In a separate small bowl, combine the mayonnaise and the Frank’s Red Hot. Pour in the crumbled cheese and mix well. Pour this into the corn and onion bowl and mix well.

Add the lime juice, white pepper and parsley to the bowl and mix well again.

Cut the baby bell peppers in half lengthwise, and remove the seeds and membrane. Stuff the peppers with the corn mixture and garnish with cilantro or parsley.

If you’re preparing this ahead of time, refrigerate the stuffed peppers until you’re ready to eat, but allow some time for them to warm up to a cool, not cold, temperature.

This is a really delicious grilled steak full of wonderful Thai flavors. You do need to marinate it overnight, so keep that in mind. The overnight marinating is key to the intense and unbelievable flavor of the beef.

The original recipe called for skirt steak, but I didn’t have any in my freezer. I did have a fat ribeye, though, so once I thawed it, I sliced it lengthwise to get two large, thin steaks which would easily suck up the marinade I was going to make. And the ribeye was nicely marbled, so it stayed juicy and tender. Beef flap or flank steak are cuts is that would work well with this recipe.


image

1/4 cup toasted sesame oil
1/4 cup soy sauce
2 tablespoons grated ginger
2 tablespoons finely chopped garlic
2 tablespoons finely chopped cilantro
2 tablespoons chopped dry roasted unsalted peanuts
2 scallions, minced
1 tablespoon light brown sugar
1 tablespoon fresh squeezed lime juice
1 tablespoon chile oil
2 lbs. beef ribeye (or skirt steak or beef flap)
1/4 cup chicken stock (homemade is best)

In a bowl, whisk together the sesame oil, soy sauce, ginger, garlic, cilantro, peanuts, scallions, sugar, lime juice and chile oil. Transfer half of it to a shallow dish.

Add the steak to the dish and turn the meat to coat it well. Cover and refrigerate the beef overnight. Refrigerate the other half of the marinade in a separate container.

The next day, light a grill. While it’s warming up, get out a sauce pan and pour the chicken stock in along with the reserved marinade. Heat it to combine it well, but not letting it reach a boil. Remove it from the heat and let it come to room temperature. This will be the dipping sauce for the beef.

About 30 minutes before cooking, take the marinated steak out of the fridge and let it come to room temperature. Season it with salt and pepper, and grill it over high heat until it’s medium-rare, about 5 minutes.

If it’s too cold to light a grill, or if you just want to use the oven, heat a cast iron pan on the stovetop, add a few drops of avocado oil or pork fat, and sear the beef on both sides before placing it in a pre-heated 375° oven to finish cooking.

Devour the beef with the dipping sauce!

Roasted veggies on the side.

As I’ve mentioned previously, I love the Kona-crusted NY strip at the Capital Grille, so much so that it inspired me to make a coffee rub of my own. I’ve been using it on steaks and burgers for years. But recently, I used it on a slow-smoked pork shoulder for the first time, and it was fantastic!

I used a smaller pork shoulder, about 6 lbs., and smoked it for about 12 hours. Obviously, if you use a larger hunka meat, you’ll need more time. I prefer a bone-in shoulder over boneless. I think it gives greater flavor.

Rubbed and ready to smoke!

My coffee rub is easy to make, and I usually make a lot of it at once, since it stores well.

3 tablespoons brown sugar
1 tablespoon Kosher salt
1 tablespoon ground coffee (use your favorite)
1 teaspoon granulated garlic
1 teaspoon granulated onion
1 teaspoon unsweetened cocoa powder

I mix all the ingredients well, then rub generously on the pork shoulder before placing it a 250-degree smoker for about 12 hours. I use an electric smoker, which allows me to set the temperature and forget it, with the exception of occasionally adding hickory chips. I love just a hint of smokiness…I don’t want the rub to be overpowered by the smoke.

Perfectly smoked, with the bone easily sliding out of the shoulder.

The brown sugar in the coffee rub creates a beautiful crust on the meat, which goes really well with the pork and the barbecue sauce I make.

The barbecue sauce uses much-needed vinegar. It cuts through the rich fattiness of the pork, and is absolutely delicious.

2 cups ketchup
3/4 cup water
6 tablespoons cider vinegar
6 tablespoons white vinegar
6 tablespoons brown sugar
3 tablespoons Worcestershire sauce
1 tablespoon chili powder
2 teaspoons salt
2 teaspoons black pepper
1 1/2 teaspoons cumin

Mix all the ingredients in a saucepan and simmer until the flavors have blended, about 20 minutes. Remove from heat and cool to room temp. If you store it in an airtight container in the fridge, it’ll stay good for a few months.

A beautifully smoked pork shoulder, amazing barbecue sauce…what more do you need for an amazing pulled pork sandwich except a toasted brioche bun and perhaps some of my world-famous home fries on the side?

The home fries? That recipe is for another blog!

Out on the North Fork of Long Island, there’s a steak restaurant called the Elbow Room. It’s nothing fancy…old school cooking. But they’re famous for their steaks because of a super-secret marinade. Ages ago, I spotted a newspaper article that claimed they found out what that secret marinade was, and they published it. Whether this really is the official Elbow Room marinade or not, I have to say it’s pretty darn tasty and it makes for a delicious steak on the grill.


My biggest concern with the marinade was the salt factor, since it uses soy sauce. But the ribeye I had was almost an inch-and-a-half thick, which meant that it could sit in the marinade for a long time…my ribeye sat in it for 8 hours. If you choose to use a thinner cut of meat, you might need to reduce your marinating time.

The recipe uses a product called Gravy Master, available in most supermarkets. Look for it in the section where you find gravies and instant potatoes.


1 cup soy sauce
1/4 cup Gravy Master
2 large Vidalia onions
2 cloves of garlic
2 teaspoons celery seed
1/2 teaspoon black pepper


Combine the onions and garlic in a large food processor and purée. Add the remaining ingredients and run the processor until it’s smooth and sort of resembles root beer.


Marinate the beef in the marinade overnight, or for as long as possible. The thicker the cut of meat, the longer you can marinate it.

Looks delicious, but it hasn’t been cooked yet! Straight out of the marinade.


Light the grill. I prefer pure hardwood charcoal because that’s where the flavor is. If I’m just cooking one steak, I get my camping grill out. It lights quickly and easily, and it doesn’t waste a whole lotta charcoal.


Always use a charcoal chimney, never lighter fluid…unless you like the taste of petroleum products in your food.


Pure hardwood charcoal gives you a hot fire. I like to sear the beef really well on both sides, then move the steak to a cooler spot on the grill and close the cover. I’ll let the beef cook until it gets to a perfect medium-rare.


If you try this marinade on burgers–and it’s great on burgers–simply brush the burgers with the marinade as you place them on the grill. Go easy or you’ll get a very salty burger.


Marinated grilled ribeye with a side of fried rice…an easy combination of veggies and rice leftovers I had in the fridge with a dash of soy sauce.


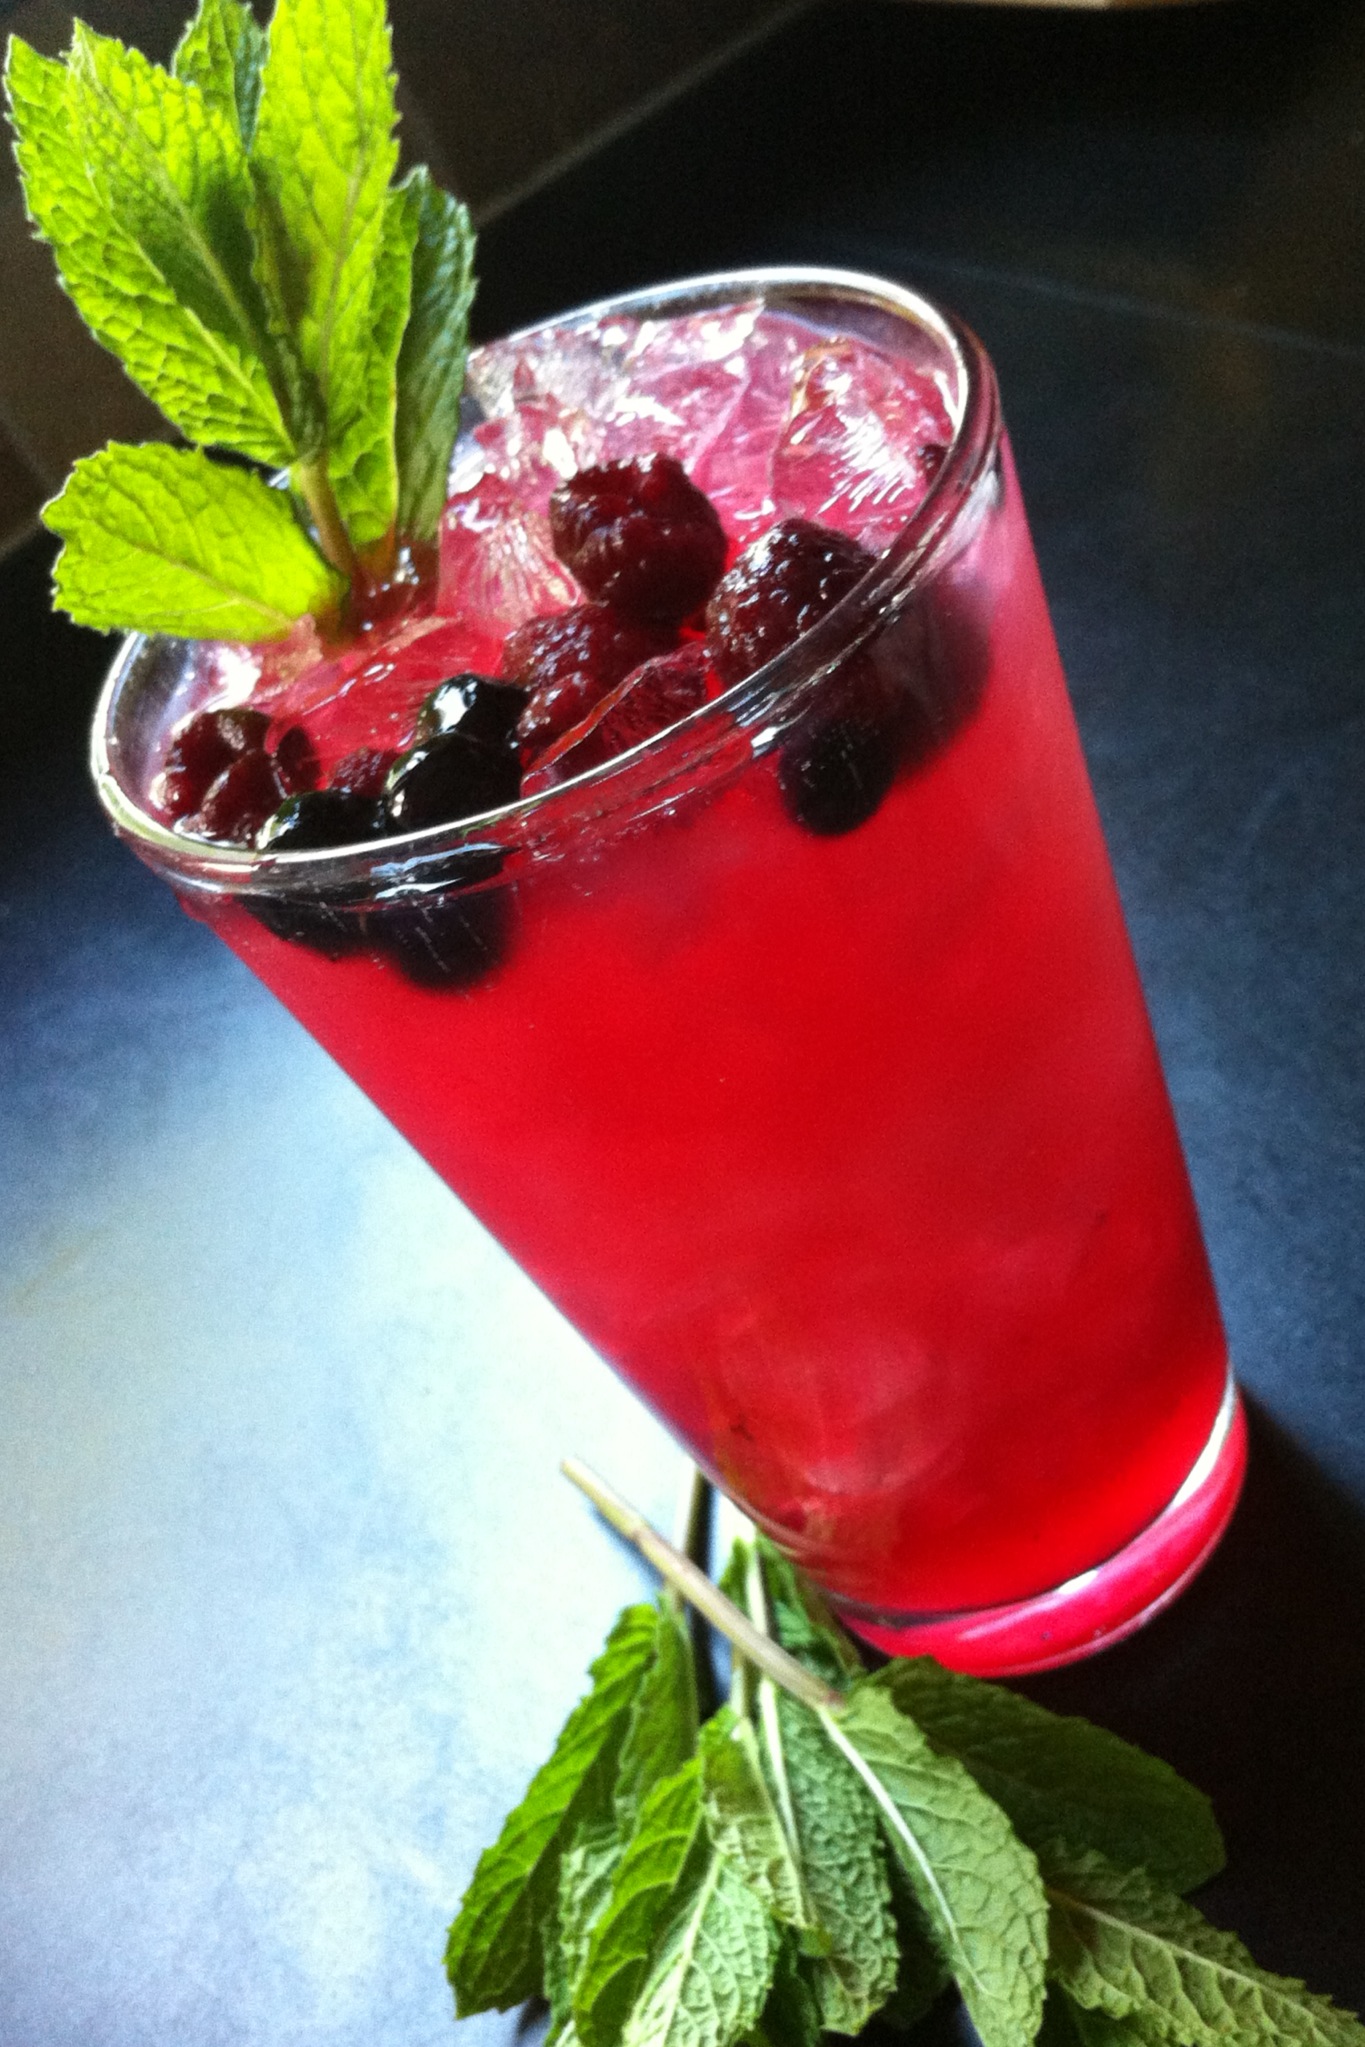
I love tequila. I love Pimm’s. And I love Dark & Stormies. I’m a lush. This cocktail has an interesting nod to all three. And it’s perfect for the warmer weather we’re finally getting here in New England.

tequila cup


3 oz. Patron silver tequila, or your favorite
1.5 oz. Pimm’s No. 1
Good squeeze of fresh lime juice
Chilled ginger beer
Ice cubes
Fresh mint
Cucumber slices (optional)

Combine the tequila, Pimm’s and lime juice in a highball glass filled with ice.
Place slices of cucumber in the glass, if desired.
Top it with your favorite ginger beer and stir gently.
Garnish with a mint sprig.

Grilling makes food taste great, but sometimes you don’t want to stand out there in a cloud of smoke while your friends are at the table, sipping wine and having a good time without you.

This is a great dish for those that want to pass on the grill for a day. It’s a delicious salad that you can serve warm or cool. You can make it the day before. Wrap it in plastic, and keep it in the fridge. Then, when your guests arrive, let it warm to room temperature. Taste for seasoning before serving. If you’re not a fan of quinoa, brown basmati rice works well, too. And use what’s fresh and in season. If you can’t find asparagus, some chopped and lightly sautéed squash works just as well.


FullSizeRender (8)


1 1/3 cup dry quinoa (or 1 cup basmati rice)
Chicken stock
Juice of 1 lemon
2 lbs. wild-caught American shrimp, peeled and de-veined (16 to 18 count)
1 cup of asparagus stalks, cut into 1″ lengths
1/2 cup minced scallions, green part only
1 cup chopped fresh dill
1 cup chopped fresh flat-leaf parsley
1 English cucumber, peeled, seeded and medium-diced
1/4 cup red onion, small diced
1/2 cup seeded and chopped tomatoes
3/4 lb. good feta cheese, crumbled
Extra virgin olive oil
Salt and pepper


Prepare the quinoa according to the package directions, using chicken stock instead of water. Once it’s cooked, place it in a large bowl. (1 1/3 cups dry quinoa should give you about 3 cups of cooked quinoa.)

Place the chopped asparagus on a sheet pan, drizzle with olive oil, and sprinkle with salt and pepper. Toss them to combine and spread them out in a single layer. Roast them for just a few minutes at 350 degrees. Set them aside to cool to room temperature. (You can also simply sauté the asparagus in a pan on the stove top with olive oil, salt and pepper.)

Place the shrimp on the same sheet pan, drizzle with olive oil, and sprinkle with salt and pepper. Toss them to combine and spread them out in a single layer. Roast for 5 to 6 minutes at 350 degrees, until the shrimp are cooked through. Turn them once while cooking. Don’t overcook them! (again…you can simply sauté the shrimp in a pan on the stove top with olive, salt and pepper.)

Add the shrimp to the quinoa, then add the asparagus, lemon juice, scallions, dill, parsley, cucumber, onion, tomatoes, 2 teaspoons salt, and 1 teaspoon pepper. Add the feta and stir carefully.

Set it all aside at room temperature for 1 hour to allow the flavors to blend…or, if you’re not serving soon, place the bowl in the fridge. Before serving, allow it to warm almost to room temperature. Taste it and season again, if needed, before serving.


I love avocado, and using it in this chicken burger recipe gives each bite a creamy, fatty richness the chicken needs.  It’s a simple burger, with just a handful of ingredients, but it’s really full of flavor.

If you want to go lo-carb, you can skip the breadcrumbs (and the bun for that matter.) If you’re going gluten-free, simply use GF breadcrumbs and buns and you’re all set to go.

If you don’t like avocado, leave it out. There’s still plenty of flavor.

Wanna add cheese? Go for it.

The bacon is optional, but what burger isn’t better with bacon?

The one thing I wouldn’t substitute is ground turkey for the chicken. To me, ground turkey is the cardboard of the meat world. It’s just nasty, and I won’t eat it.

chicken2

1 lb. ground chicken
1/4 cup breadcrumbs
1 ripe avocado, sliced into small cubes
1/2 teaspoon salt
1/4 teaspoon black pepper
pinch granulated garlic
slices of bacon, cooked
Sauce (recipe below)

chicken1

Combine the chicken, breadcrumbs, chopped avocado, salt and pepper, and garlic in a bowl and mix them thoroughly but carefully so that you don’t squash the cubes of avocado. I like to put the meat in the freezer for about 10 minutes to firm it up a bit.

Form the meat into burger patties. It will be a bit sticky, but just make sure you get the avocado evenly distributed. (I find that using gloves and lightly spraying my hand with avocado oil helps me make the patties without sticking.) Chill the patties again in the freezer for about 10 minutes to firm them up some more before cooking.

Pre-heat the oven to 350 degrees.

Heat a little avocado oil (or bacon fat!) in an oven-proof pan, and place the burgers in it when it’s hot. Let the burgers sear on one side, then flip them. (Make sure they sear well, or they’ll fall apart when you try to flip them.) Place the pan in the oven to finish cooking. It’s chicken…so you don’t want to undercook your burgers!

When they’re ready to serve, place the patties on a bun and with a slice of or 2 of bacon and slather with this burger sauce…

1/2 cup mayonnaise
1 tablespoon ketchup
1 tablespoon yellow mustard
1 tablespoon dill pickle relish
1/4 teaspoon garlic powder
1/4 teaspoon paprika
Pinch cayenne pepper

Combine all the ingredients in a bowl. Mix well. Refrigerate covered for a few hours to blend the flavors.

The 152nd running of the Kentucky Derby is this Saturday, May 2nd, and although I’m not a big horse racing fan, I am a huge fan of the official drink: the Mint Julep!

The Mint Julep is such a perfect, classic and historic bourbon drink, it seems silly to wait until Derby Day to have one. Of course, as any aficionado of spirits will tell you, there are as many right ways as wrong ways of making one.

The first step in my Mint Julep is making the simple syrup. Learning from one of my old radio buddies, my pal Rick O’B, I infuse mint into my simple syrup to take my cocktail to the next level. I use the standard ratio of 1 cup of clean, filtered water to 1 cup of sugar. I place the sugar and water in a saucepan and heat until just boiling. I’ve found that it needs to reach this stage for the sugar to really dissolve.

Waiting for the sugar to dissolve.

As soon as it starts to boil, I remove the saucepan from the heat, and throw in a handful of freshly picked mint leaves, stirring to make sure the mint gets in there, and then I leave the saucepan to cool to room temperature.


Once it’s at room temp, I strain the simple syrup into a squeeze bottle, and place it in the refrigerator to cool. It will keep for about a week.

An equally important ingredient for a perfect Mint Julep is the ice: specifically, crushed ice from clean, filtered water. Don’t even think of using tap water for any cocktail much less this one. Why ruin a good bottle of bourbon by going cheap on the ice? I make my own ice cubes, then put them in an untreated canvas ice bag and bash them with a mallet to the perfect crushed size. But if you don’t want to go through all the trouble, just buy a bag of good ice. Untreated canvas bags for crushing ice can be purchased online from bar supply companies for about $30. I got an untreated canvas tool bag (the exact same shape and size) at Home Depot for 3 bucks.


Da bag.


The next step is a little tougher: which bourbon to choose. The explosion of choices on the bourbon market has made it all but impossible for the average imbiber to know which bourbon is best for their tastes. If you’re a beginner, I suggest you go to a trusted bartender and explain that you’re new to the bourbon world, and could you have the tiniest of tastes and sniffs of what he’s got at his bar. Chances are, you’ll get a sampling of some of the better known brands: Maker’s Mark, Woodford Reserve, perhaps Buffalo Trace or Bulleit, and the standard Jim Beam. This is a very good start. (Also, hinting to your spouse and friends that “I’m trying new bourbons” around your birthday or Father’s Day inevitably gets you a few bottles as well!)

My go-to bourbon for Mint Juleps used to be Eagle Rare 10-year-old when it was around $32.99 a bottle. Now it can be as high $100! (Although the bourbon craze has calmed quite a bit recently, and prices are slowly going down.) My latest go-to bourbon is 1792 Small Batch. At $29, it’s almost unbelievable, like someone made a mistake in the stock room! Very tasty on its own and great for mixing. Others that work well and are around the same price range include Buffalo Trace, and Larceny. I’m actually not a fan of the official bourbon of the Derby: Woodford Reserve.

Finally, a Mint Julep needs a metal–not glass– Julep cup. Made of pewter, it frosts on the outside as you stir your drink, keeping your beverage ice-cold on even the hottest of days.


3 oz. bourbon
1 oz. mint-infused simple syrup
crushed ice
Julep cup
Fresh mint for garnish

Crush the ice and pack it into the Julep cup, even letting it dome slightly over the top. Don’t worry…the alcohol will melt it.

I like to add 1.5 ounces of bourbon, then the ounce of simple syrup, another 1.5 ounces of bourbon on top, and then a quick squirt of simple syrup to top it off. Break off a few mint leaves from the stem and push them into the ice. A beautiful layer of frost will form on the outside of the cup. Add more ice, if necessary, and garnish with a sprig of mint.


A nice selection of bourbons. This is an old photo: that Pappy Van Winkle is long gone…but I saved the bottle!


So much bourbon, so little time!