279 likes on the livethelive.com Facebook page. 4000+ tweets. And we just hit 900 followers on livethelive.com! Thanks for all the support and let’s get to 1000 next! Sign up to follow at livethelive.com, and you’ll get every blog post e-mailed to you!
Archive for the ‘Uncategorized’ Category
BEER MAKES THE BATTER BETTER
Posted: April 7, 2017 in Food, frying, seafood, UncategorizedTags: BATTER, BEER, FISH, frying, GF, gluten-free, seafood
April 7 is National Beer Day!
Now, I’m not a big beer drinker, but I do like to cook with it. One of my favorite things in the world is beer-battered fish. And it doesn’t have to be greasy if you do it right. (Scroll down to the bottom to see how to make this gluten-free!)
When you fry at home, you can do things the right way: start with clean oil, heat it to the right temperature, and then throw it out when it’s done. When you go to a fast-food place, that oil has been sitting there all day (if not all week)…it’s been used hundreds of times…it absorbs the flavors of whatever was fried before your food got dropped in there…and quite frankly, it’s beat up.
What got me started with this whole beer-batter-at-home process was stumbling upon some amazing fresh local cod at my neighborhood seafood store: Bridgeport Seafood in Tiverton, Rhode Island. My buddy, Dave, said that the cod came from just off Sakonnet Point that day. Good enough for me!
I use vegetable oil and, using a thermometer, heat it to 350 degrees. I always watch the temp of my oil…it can get too hot very quickly…and by the same token, the temp can drop quickly if I throw in a whole bunch of fish into the pot all at once. Using one of those deep fryers made for home use is also a good way of cooking and controlling temperature. I’m careful not to put too much oil in my pot (halfway up is fine) or it could spill over, since oil expands as it gets hotter.
Here’s all you need for great beer batter:
1 1/2 cups all-purpose flour (I use King Arthur)
12 oz. bottle of beer (Sam Adams Boston Lager works for me)
1 teaspoon salt
Combine all the ingredients in a bowl and beat until smooth. Cover loosely with plastic wrap and place in the fridge for 3 hours.
Cut your fish into pieces that aren’t too big and will fit in your pot easily. The thickness of the fish may vary and so may the cooking times of each piece. When the oil reaches 350, simply dip the fish into the batter and let as much batter drip off as you like before you carefully place the fish into the oil. Fry until golden brown.

What good is fried fish without tartare sauce, right? Don’t tell me you’re using the stuff in a jar after frying the fish yourself!
1/2 cup mayo
Dash of Worcestershire sauce
Dash of Frank’s Red Hot cayenne sauce
Grinding of black pepper
1 tablespoon finely chopped capers
1 teaspoon lemon zest, using micro plane zester
Combine all the ingredients in a bowl, cover with plastic and refrigerate for an hour before using.
To make beer-batter gluten-free, simply substitute GF flour for the all-purpose flour. (I like Cup4Cup.) And now, you can get gluten-free beer that tastes pretty damn good. Use it instead of regular beer, and you’ve got a beer batter that’s gluten-free!
PERFECT SHRIMP COCKTAIL, FROM BOIL TO SAUCE
Posted: March 31, 2017 in Food, Recipes, seafood, shrimp, UncategorizedTags: CLAMS, cocktail sauce, food, oysters, recipes, seafood, shrimp
Before you can have great shrimp cocktail, you have to do 2 things: buy the right shrimp and cook the shrimp the right way. The right shrimp is nothing less than wild-caught American shrimp. If you’re buying shrimp from Asia, your supporting a system that uses slave labor, where the shrimp are fed chemical pellets and swim in feces. If it doesn’t say wild-caught American shrimp on the package or at your local seafood store, it’s crap. Give your store owner hell for selling it.
Cooking shrimp the right way is something I learned living in the South. My wonderful friends and neighbors taught me many things about food, and the right way to cook shrimp is near the top of the list.
Shrimp was never meant to be cooked to death. It doesn’t matter if you start with fresh shrimp, store-bought shrimp, or even frozen shrimp…the same rules apply: 1) Season your water. 2) Bring it to a boil, then reduce to a simmer and let it get happy for 20 minutes. 3) Drop in the shrimp and raise the heat. 4) Remove the shrimp AS SOON AS the water returns to a boil.
The seasoning for the water, commonly called shrimp boil, makes or breaks the flavor of your shrimp. For years, I used Zatarain’s Crawfish, Shrimp and Crab Boil in a bag. And it was good. But at some point, I realized I had to get serious and make my own boil.
2 quarts water
2 cloves garlic, smashed
1/2 lemon, squeezed, then drop the lemon in
1 small onion, peeled and quartered
4 bay leaves
1 tablespoon black peppercorns
1 tablespoon salt
1 tablespoon whole allspice
1 teaspoon cayenne pepper
1 teaspoon celery seed
1 teaspoon whole cloves
1 teaspoon brown mustard seed
1 teaspoon dry thyme

Placing the spices in one of these means you won’t be picking them out later. Worth the investment!
Combine all the ingredients in a 4–6 quart pot. Bring it to a boil, then reduce to a simmer, put a lid on the pot, and let it simmer for at least 20 minutes.
After 20 minutes, remove the lid and pour in your shrimp. (I prefer unpeeled.) Stir well, bring the heat back up to high, and remove the shrimp AS SOON AS it returns to a boil! The shrimp are cooked! Done!
Strain the shrimp and place them in a bowl with crushed ice on the bottom. Add more crushed ice on top of the shrimp, and place the bowl in the fridge until you’re ready to serve.
Freshly shucked oysters and clams, or in this case, beautiful boiled wild-caught American shrimp, call for an equally amazing cocktail sauce…and this sauce kicks butt! And it features a key ingredient that you might not expect: vodka. The small amount of vodka in the mix keeps the cocktail sauce from freezing solid when stored in the freezer. Just scoop out what you need, let it thaw, and put the rest back in the freezer until next time.

2 cups ketchup
4 tablespoons prepared horseradish
1 tablespoon fresh lemon juice
1 teaspoon Worcestershire sauce
1/2 teaspoon Frank’s Red Hot, or other hot pepper sauce
5 grinds of fresh black pepper
1/4 teaspoon salt
1 teaspoon good quality vodka, like Tito’s
Combine all the ingredients. Store in a tight plastic container in the freezer.
CORNED BEEF AND PASTRAMI: TASTY, BUT NOT REALLY IRISH
Posted: March 14, 2017 in barbecue, beef, brining, Carnivore!, CHARCOAL, Food, Recipes, salt, smoking, UncategorizedTags: beef, corned beef, food, Irish, pastrami, recipes, salt, smoking, St. Patrick's Day
Despite that corned beef is not an authentic Irish dish, it seems that everyone thinks they should eat it on St. Patrick’s Day. The phrase “corned beef” was actually coined by the British, and although the Irish were known for their corned beef throughout Europe in the 17th century, beef was far too expensive for the Irish themselves to eat and all of it was exported to other countries. Owning a cow in Ireland was a sign of wealth, and the Irish used theirs for dairy products, not beef.
The Irish ate pork, and a lot of it, because it was cheap to raise pigs, and they traditionally prepared something like Canadian bacon to celebrate St. Patrick’s Day in Ireland.
In the 1900’s, when the Irish came to America, both beef and salt were more affordable, and the Irish, who lived in poor, tight-knit communities, often next to Jewish communities, bought much of their beef from Kosher butchers. And so many of the Irish learned how to corn their beef using Jewish techniques, but added cabbage and potatoes to the mix.
It takes about 3 weeks to make corned beef. But now that you know it’s not Irish anyway, that’s OK! Doing it yourself is not difficult, and you get a better quality product than that nasty slab from the supermarket that’s full of chemicals and preservatives.
Corned beef has nothing to do with corn. ‘Corning’ is a technique for preserving raw meats for long periods by soaking it in salt brine. This method was used in England before the days of commercial refrigeration. Back then, the large salt kernels used in the brine were called “corns.”
Brining is a time-honored way of preserving and it prevents bacteria from growing. Both pastrami and corned beef are made by this method. Both start with a brisket of beef. Corned beef is then cooked–usually boiled–and served. Pastrami is made when the brined meat is rubbed with more spices and smoked to add extra flavor. So corned beef and pastrami are the same meat, just treated differently.
Saltpeter is an ingredient that has been used in brining beef for years. It adds the traditional red coloring to the corned beef and pastrami meat. But since saltpeter can also contain carcinogens, I leave it out. The meat may not be the usual bright red color, but the flavor and texture of the meat will not be affected.

Brining the beef brisket
Step one: corned beef…
beef brisket (about 8-10 pounds)
2 teaspoons paprika
1/4 cup warm water
3 cloves of minced garlic
2 tablespoons sugar
1 tablespoon mixed pickling spices
3/4 cup salt
2 quarts water
Place the brisket in a large container made of non-reactive material, like glass or plastic.
In the 1/4 cup of warm water, dissolve the sugar, minced cloves, paprika and pickling spices.
Dissolve the 3/4 cup of salt in the 2 quarts of water. Pour in the sugar/garlic/paprika/pickling spices mix and stir everything together. Pour the mixture over the meat in the container. Make sure the meat is totally beneath the surface of the liquid. (You may need to weigh it down to do this.) Cover the container.
Refrigerate the container and contents for 3 weeks, turning the meat once or twice per week. At the end of the third week, remove the container from the refrigerator and take out the meat. Soak the meat in several changes of fresh cold water over a period of 24 hours to remove the excess salt.
At this point, if you want corned beef, prepare and cook it using your favorite recipe. But I’m all about the pastrami!
Step two: making Pastrami…

Brined and rinsed corned beef brisket from above recipe, patted dry with paper towels
1/4 cup Kosher salt
1/4 cup paprika
3 tablespoons coriander seeds
2 tablespoons black peppercorns
2 tablespoons yellow mustard seeds
1 tablespoon white peppercorns
3 tablespoons brown sugar
1 tablespoon granulated garlic
Combine the coriander seeds, black and white peppercorns and mustard seeds in a spice grinder and grind coarsely. Place in a bowl. Add the salt, paprika, brown sugar and granulated garlic. Mix well.
Rub the mix into the brisket well, covering all sides.
Heat your smoker to 225 degrees and smoke for several hours using a less intense wood, like oak. When the internal temperature of the meat has reached 165 degrees, it’s done. It isn’t necessary to smoke pastrami as long as you would a regular brisket because the long brining time makes the meat tender.
It is very important that absolutely everything that comes in contact with the meat is very clean. (This includes your hands.) Also, make very sure that every inch of the meat reaches the 165 degrees before it is removed from the smoker. The corned beef is now pastrami.
A RETURN TO PORTLAND, MAINE
Posted: March 11, 2017 in Cocktails, Drinks, Food, lobster, Maine, MARTINI, mixology, Portland, restaurants, seafood, travel, UncategorizedTags: food, Maine, Portland, restaurants, travel
Despite working in a pretty decent food town (Providence, Rhode Island), and despite being just an hour away from another decent food town (Boston, Massachusetts), when we want to go to a place where we park our car once and can easily walk to dozens of great eateries and bars, where each place is more creative than the next, and where genuine friendliness and enthusiasm for what they’re doing shows in every dish, the answer is Portland, Maine.
My wife and I visit Portland at least once a year and it’s amazing to see how many new restaurants have opened since our last visit. Every time we think we’ve crossed a few off our list, a half-dozen new ones show up! Last year, we hit 10 restaurants in 48 hours. This last visit, it was a mere 6 restaurants in 48 hours. I guess we’re getting older…!

Our weekend started on a Friday afternoon with a quick bite at Solo Italiano, near the water on Commercial Street. We really enjoyed a light-as-air Carpaccio di Tonno: thinly sliced yellow fin tuna with stracciatella cream, herb oil, and crispy onions. And after we were told that the chef at Solo won the World Pesto Championship, we had to have the Mandilli di Seta al Vero Pesto Genovese: house made silk handkerchief pasta in a traditional Genovese basil pesto…amazing! Solo has some great house cocktails to choose from, too. Definitely worth a return visit.

The bar at Solo.
Our Friday evening dinner was at Hugo’s. Originally owned by chef Rob Evans, a three-time Food Network “Chopped” champion, Rob sold it a few years ago and now runs Duckfat, a small sandwich shop famous for its Belgian-style fries that are fried in duck fat. (Though it gets write-ups all the time, my experience at Duckfat was disappointing.)
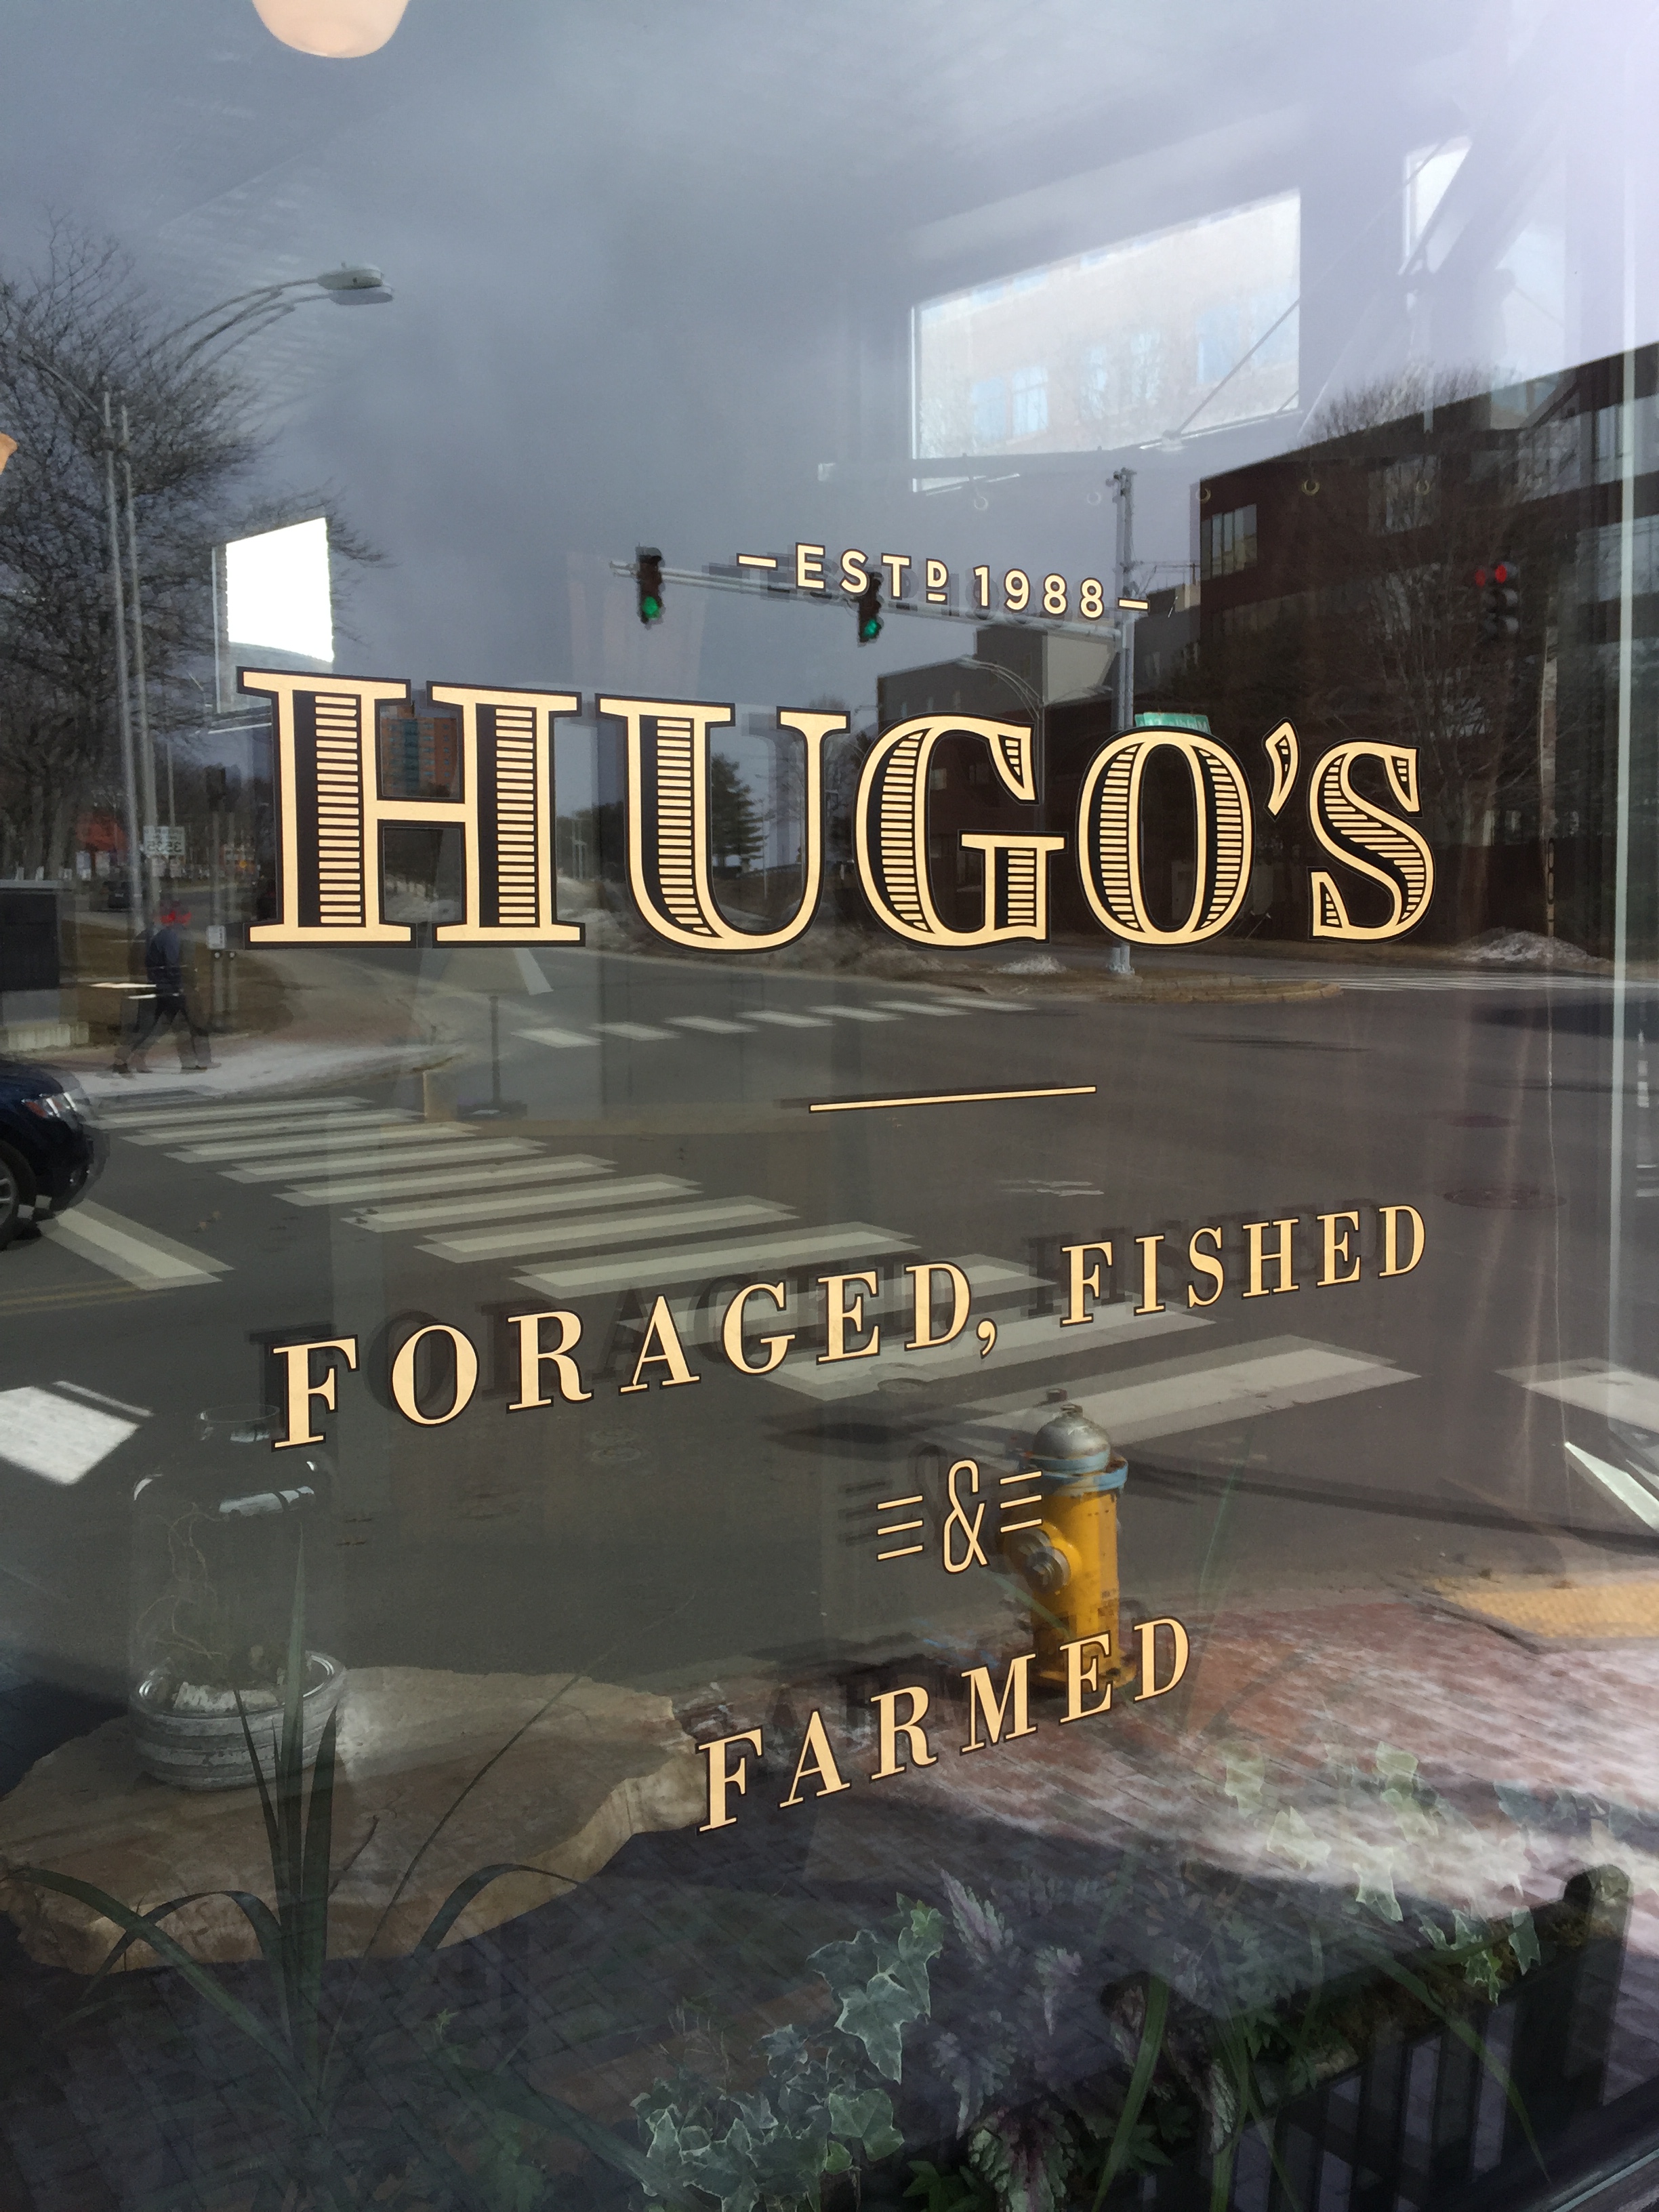
The folks that own the nationally acclaimed Eventide Oyster Bar now own Hugo’s (it’s next door) as well as The Honey Paw (next door on the other side.) For us, every visit to Portland must include this amazing restaurant trifecta on Middle Street, that, in fact, have connecting kitchens.

The connecting kitchens at Hugo’s, Eventide, and The Honey Paw.
Hugo’s is fine dining at its creative best. Though we hadn’t been there in over a year, Brian, a manager and our wine guru, immediately remembered us and greeted us with a hug, showing us to our seats and treating us to a glass of bubbly. He guided us through the wine list and offered us a bottles that were simply out of this world. Though we’ve done the tasting menu in the past, we decided to go a la carte when a beautiful fried whole black bass, with roasted mushrooms, cabbage and hoisin vinaigrette, was calling our name. After a few wonderful appetizers that included peekytoe crab, reblochon (a local cheese), and lamb tartare, we were ready for the black bass. Even our server, Patrick, was impressed with how well we devoured that fish right down to the bone.

Fried black bass at Hugo’s.
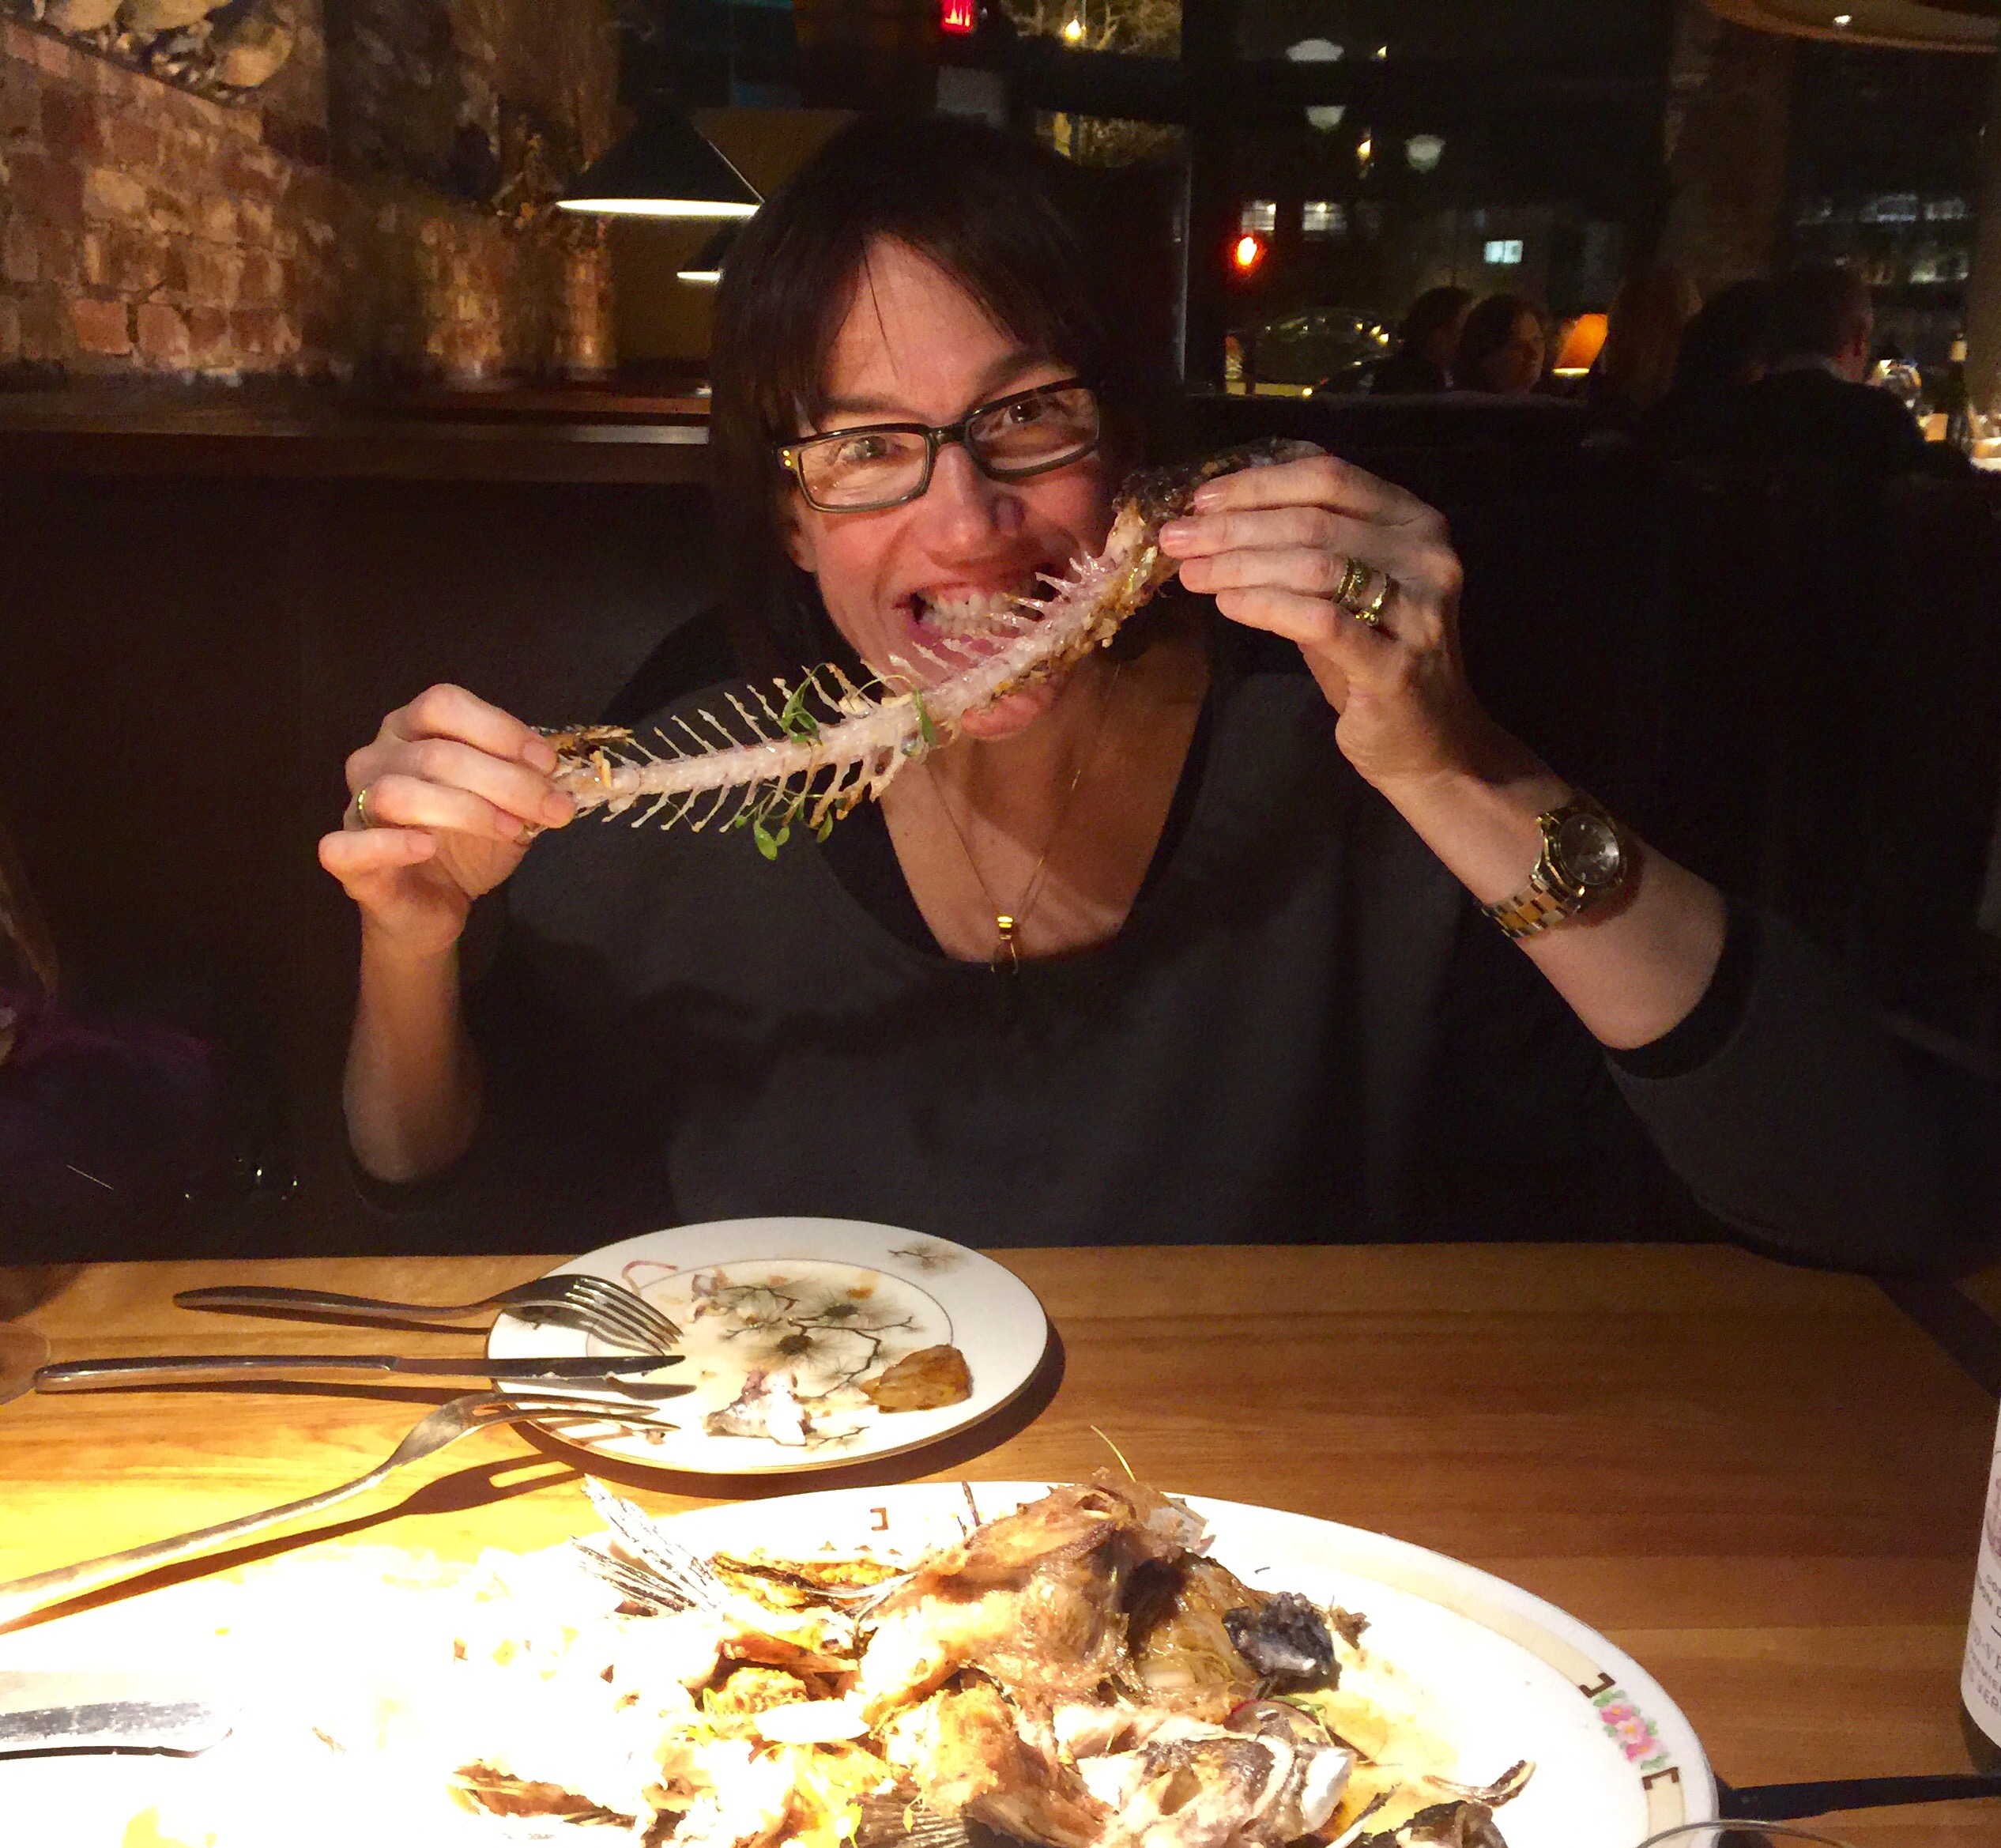
Polishing off that amazing black bass!

Paul, the bartender at Hugo’s.
Dinner at Hugo’s wouldn’t be complete without a discussion about bourbons with bartender, Paul, and he let me sample a couple of special bottles he had behind the bar. A great way to end a wonderful dining experience on our first night in Portland.

Bourbon tastings.
The next day, Saturday, our food adventures began with lunch. Don’t get me wrong: there are some great breakfast choices in Portland, like the Porthole (featured on Food Network’s “Diners, Drive-Ins and Dives”) and Becky’s Diner. But when you’re in town to feast, you bypass the bacon and eggs.
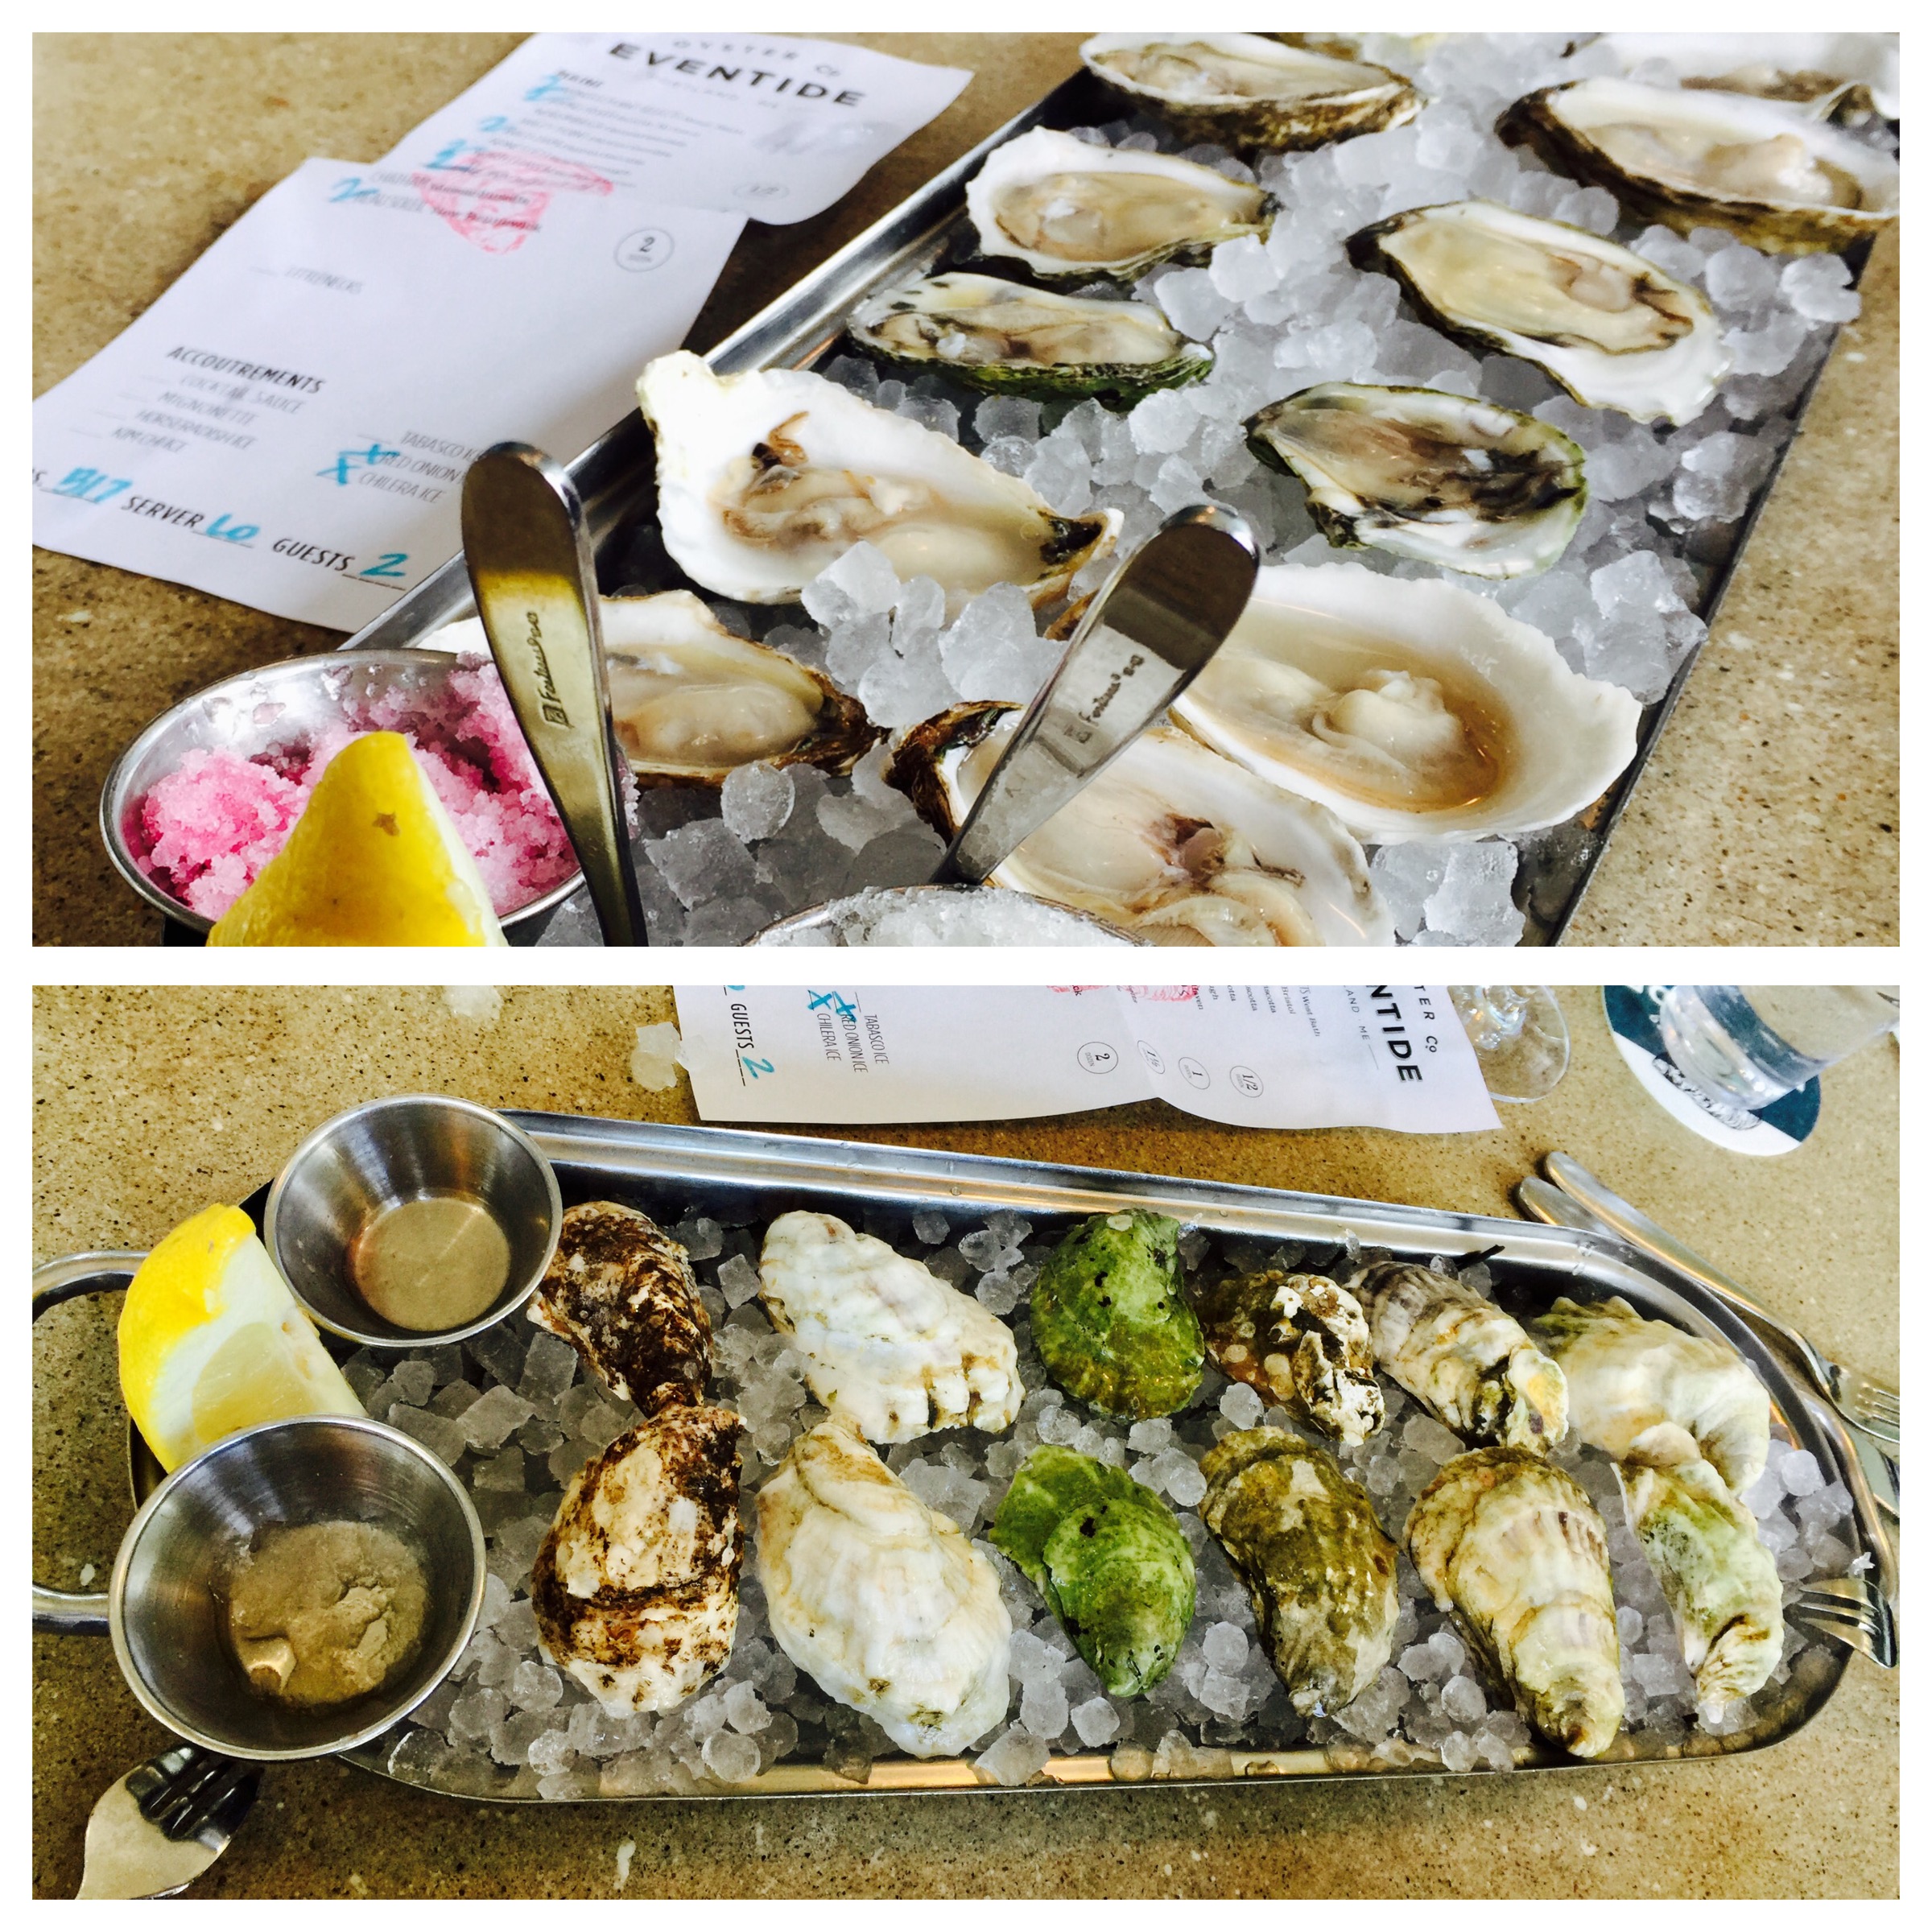
Lunch was at Eventide, which shows up on every “best oyster bar” list, and the reason is simple: a nice selection of fresh oysters, a great bar, and creative side dishes that change all the time.

Oysters at Eventide.
The Eventide brown butter lobster roll is elevated to new heights when it’s placed on an Asian-style steamed bun. Blackboard specials change every week, and always include what’s right off the boat: from fried squid to pickled lox. If you’re less adventurous, you can’t go wrong with the buttermilk fried chicken bun, the house pastrami bun or their impressive fish sandwich.
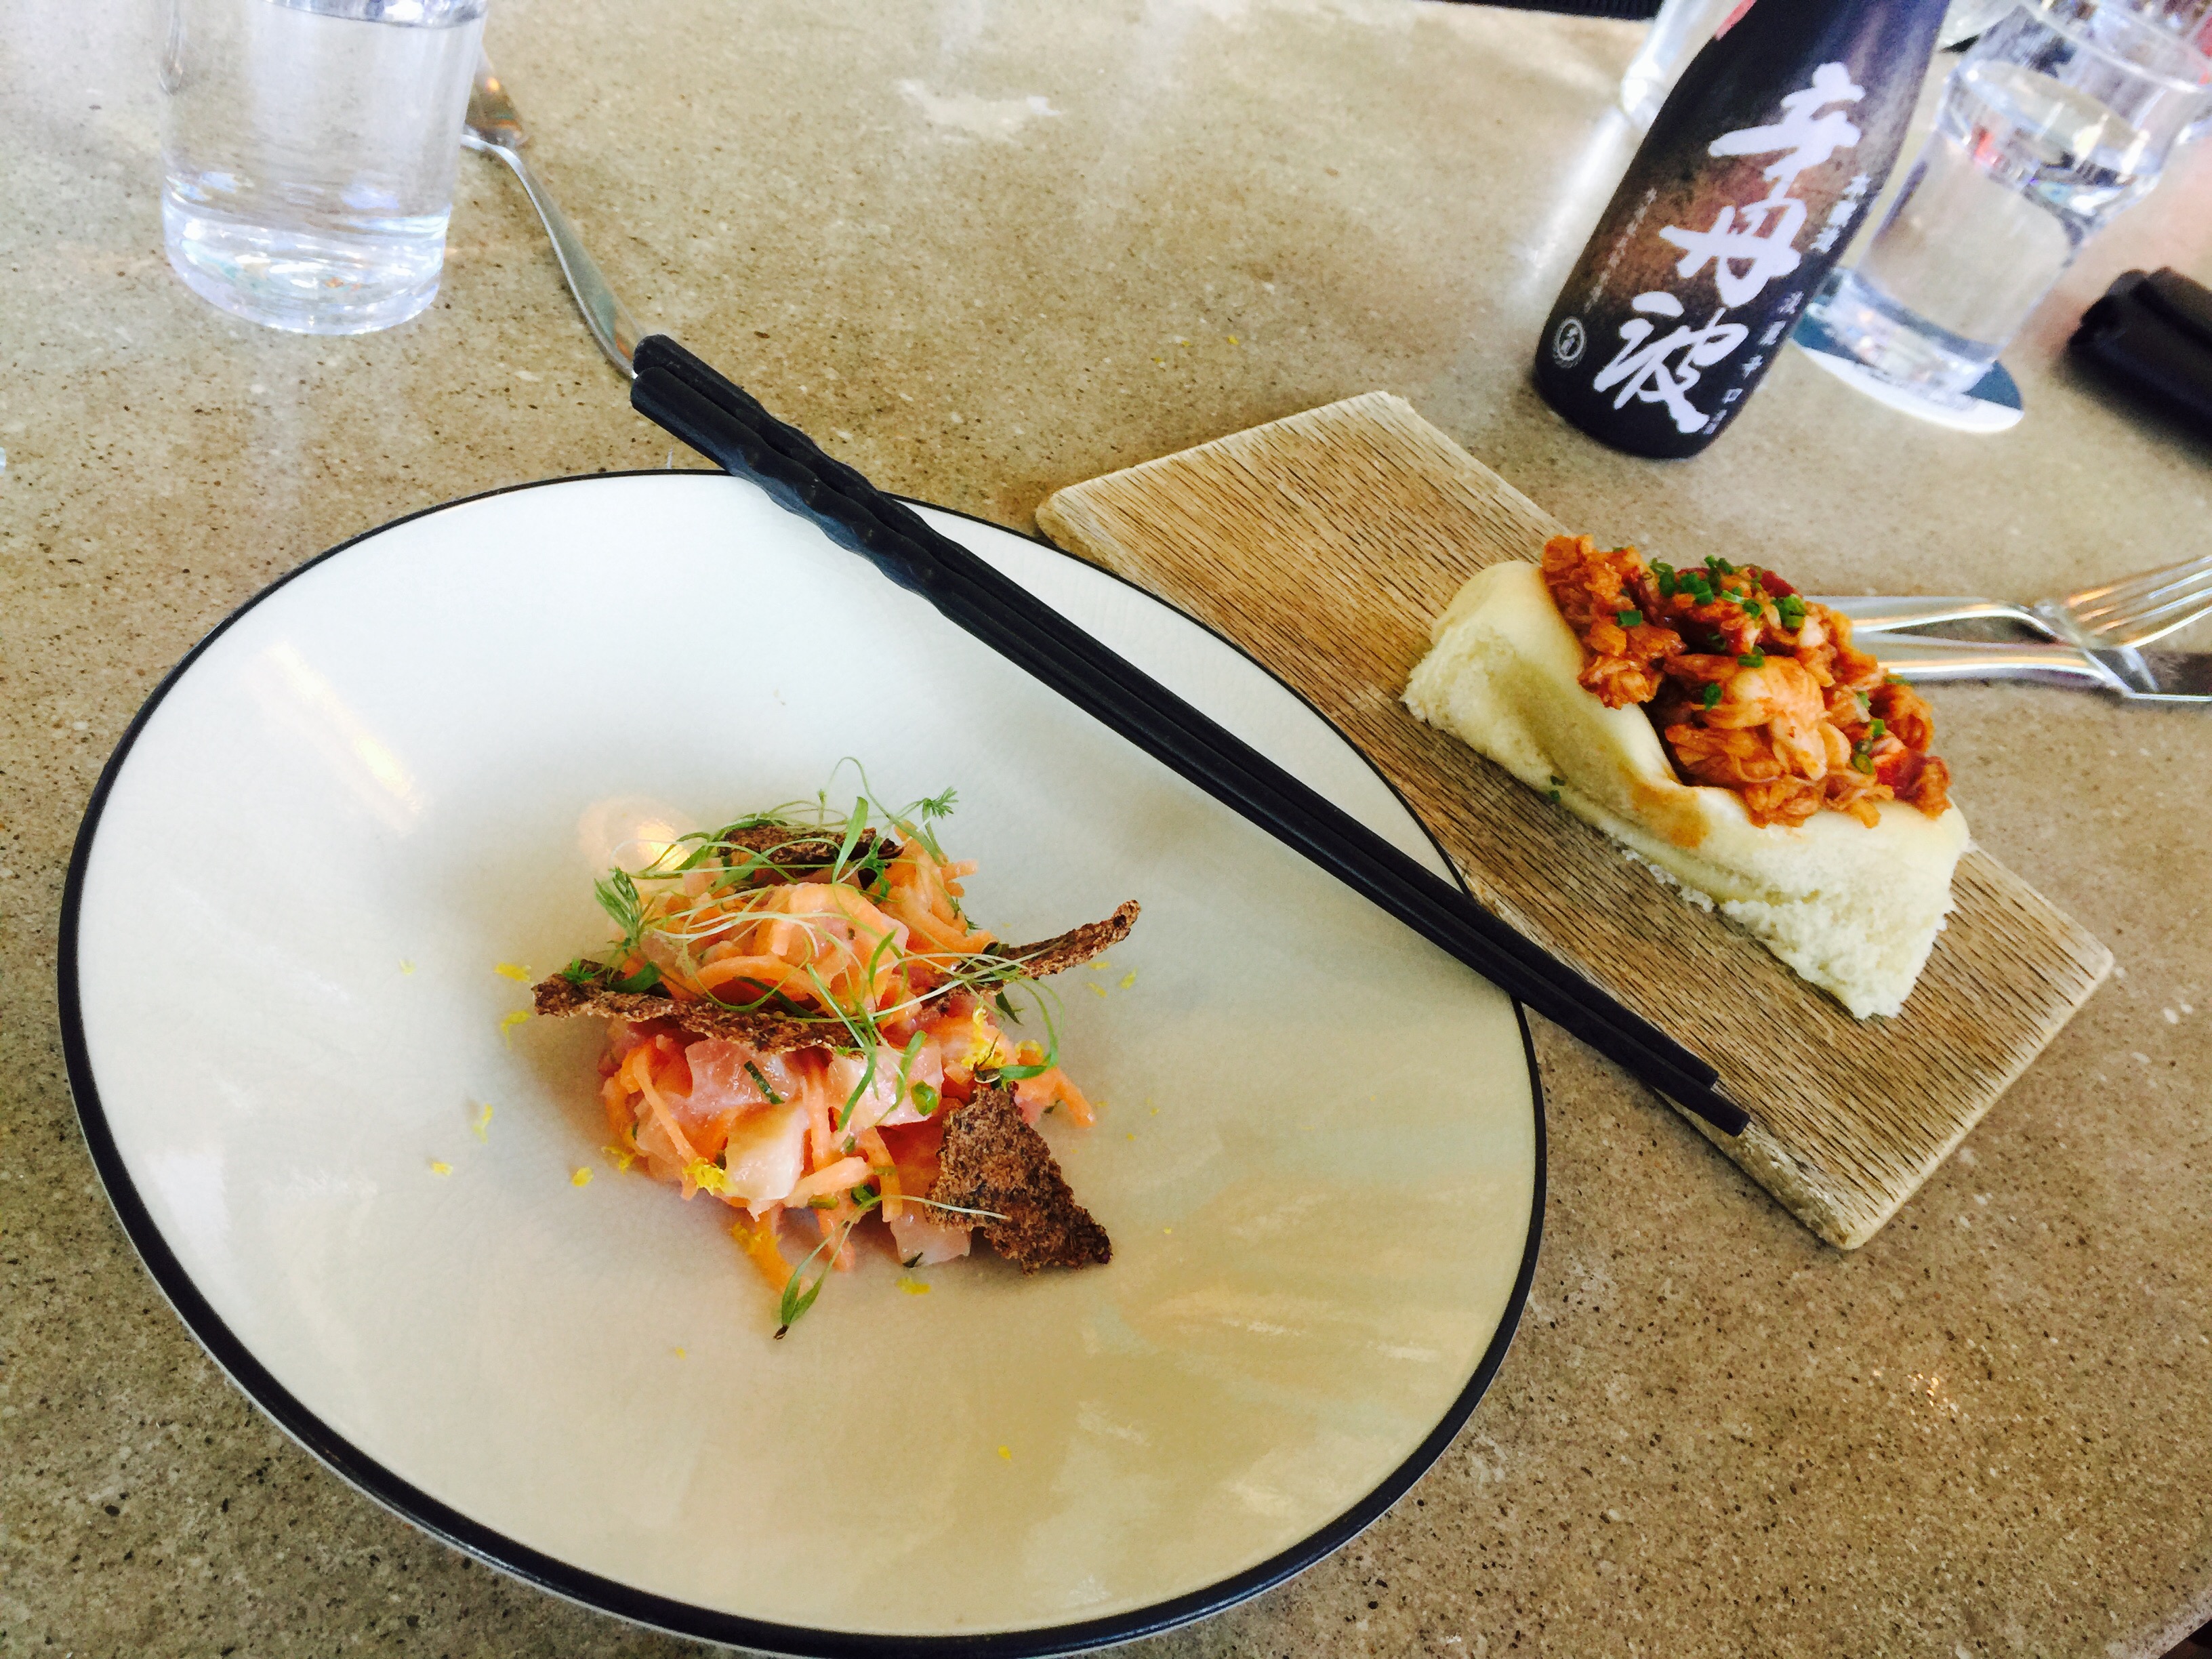
Pickled lox (left) and the lobster bun (right.)
If you go to Eventide during peak hours, you can expect a wait. The place isn’t huge and it’s wildly popular. Give them your name, tuck yourself into a corner with a drink, and wait, knowing that it will all be worth it!

Real women in Maine shuck oysters!
We skip the usual cocktail sauce when at Eventide. Our favorite accoutrements are the pickled red onion ice (great for an oyster shooter!) and the chilera ice.
Before…and after.
After our leisurely lunch, it was time to walk off a few calories. Heading down Fore Street, we tucked into several art galleries and shops, slowly making our way across the center of town to the newly redesigned Portland Art Museum. By the time we stepped out of the museum, it was time for more food. Just a few blocks, and we arrived at Boda.

Labeling themselves as a “Very Thai” kitchen and bar, Boda delivers. Though we only had a few apps, like the apple and shrimp salad and a plate of authentic pad thai, it earned two thumbs up. A plate of fried quail…not so much.

The bar at Boda offers the standards (like my Chopin martini) and some interesting Asian herb-infused cocktails. Definitely worth a return visit, especially when Boda is open until 12:45AM, serving tasty skewers for the bar crowd.
A short stop at our hotel, and it was time for our Saturday dinner. We headed to what many claim is the best sushi restaurant in Portland: Miyake. We soon discovered that the label “best sushi restaurant in Portland” didn’t necessarily set the standard very high.

Though we found a beautiful bottle of sake on the menu that we’ve had before, the food was a disappointment. Having had a few great sushi experiences in my life, I wanted this place to be among them. But after trying 2 different 4-course menus that featured tastings of salmon, tuna, uni, duck, and even Miyake’s own farm-raised mangalitsa pork–a rare heritage breed–which, though fatty, was very dry…it’s safe to say that we won’t be returning to Portland, Maine for its sushi.

The sake, at least, was amazing.
In a town with many creative restaurants, this one didn’t cut it. Some locals told us that Miyake used to be better when they were in a smaller space. The move to a larger space meant a beautiful room, but the food suffered.
Our weekend ended with Sunday brunch. If we wanted a more typical Sunday brunch, we would’ve gone to Five Fifty-Five, where we’ve enjoyed dishes like lobster eggs Benedict in the past. But when we heard that The Honey Paw was now serving brunch, there was no question where we needed to go!

My kind of Sunday brunch: Asian fried ribs, pork and fried oyster pot stickers, a bowl of beef shank pho, and a breakfast sandwich with house made scrapple and egg on a kimchi croissant.
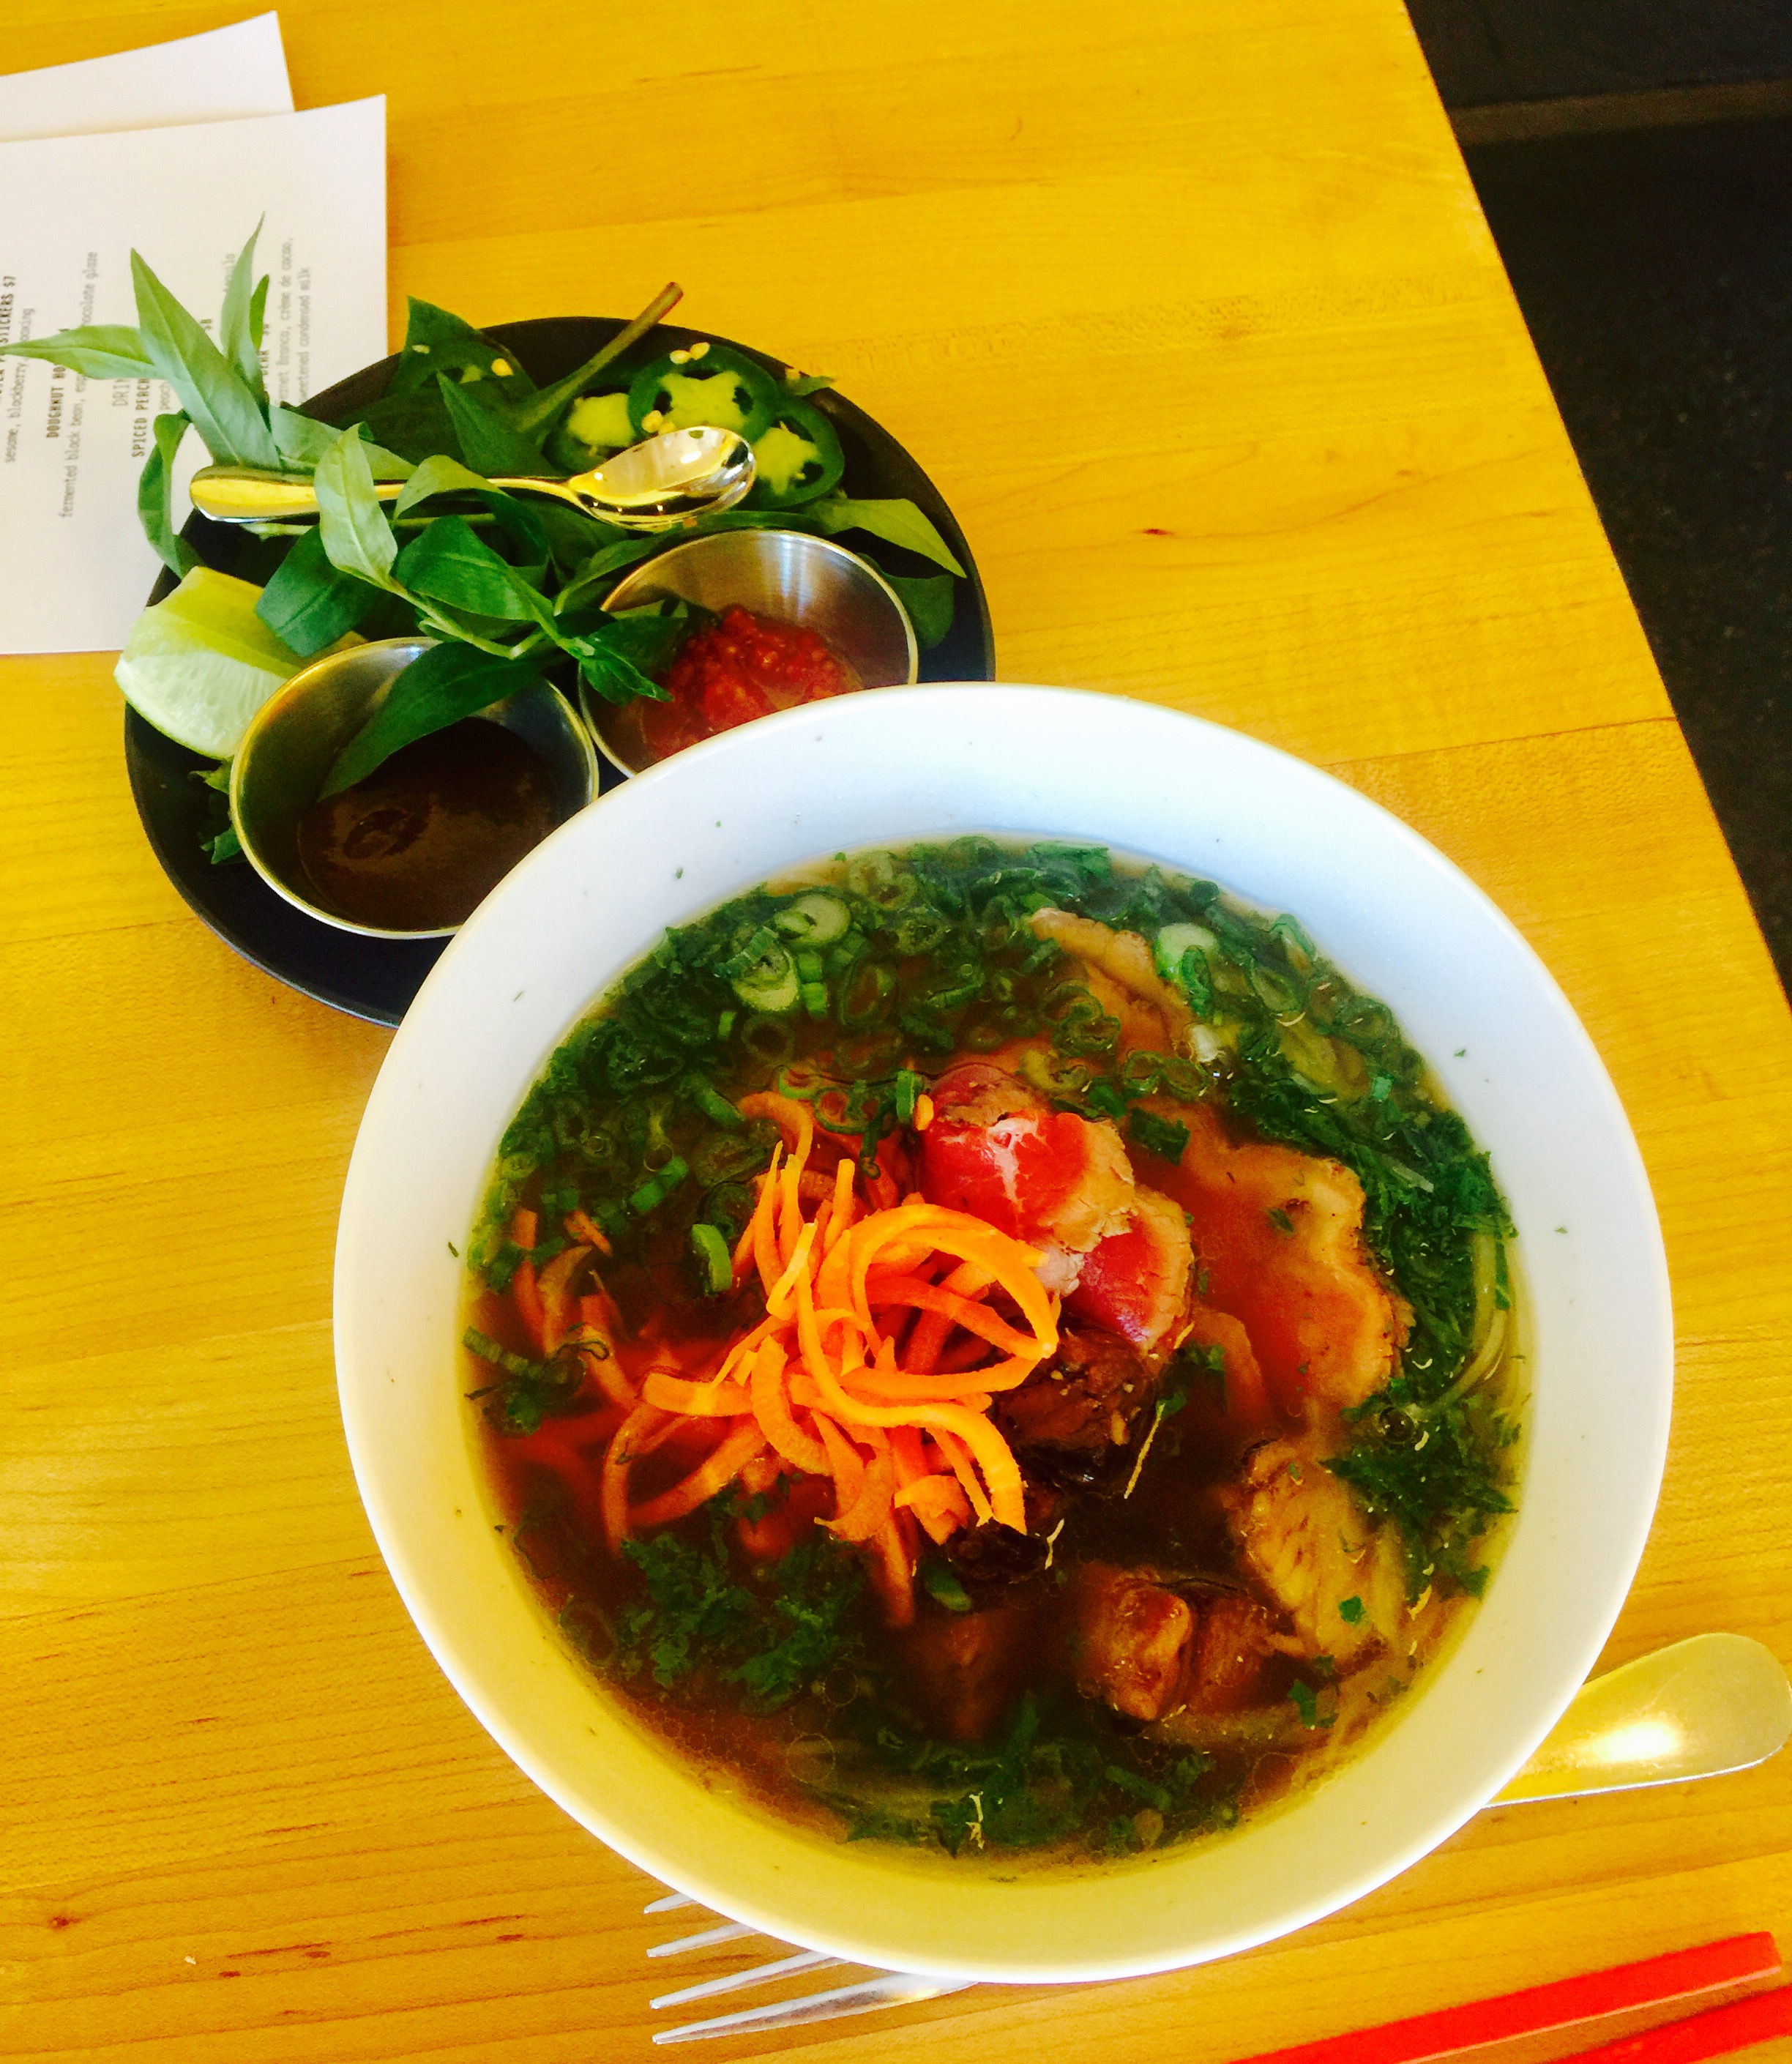
Beef shank pho.

The Honey Paw breakfast sandwich.
My wife took advantage of a full bar with creative cocktails. Unfortunately, I had a 3-hour drive home behind the wheel, so I had to refrain from the alcohol.

The bar at The Honey Paw.
While we dined at The Honey Paw, I ran next door to Eventide and ordered 2 of their buttermilk fried chicken sandwiches to go. Our 10-year-old daughter was not happy that we went to Portland without her this time, and we knew that bringing her favorite sandwiches home would help ease the blow.
We’ll be back to Portland this summer. Already counting the days. For other great places to dine in this town, use my search engine under “Portland.” And feel free to drop me a line with any questions about where to stay, eat, visit, etc…
Cheers!
VEAL MEATBALLS WITH PASTA AND PEAS
Posted: March 5, 2017 in Food, pasta, Recipes, UncategorizedTags: food, meatballs, pasta, peas, recipes, veal
I’m fortunate that I can buy my veal from a nearby farm where the animals are raised humanely. That makes for happier animals and incredibly flavorful meat…and no guilt about using it.
The subtle flavor of veal can get lost with heavy seasonings, so I keep it simple. The addition of veal bone broth amplifies the umami factor and keeps the meatballs from drying out.

1 lb. ground veal
1 cup toasted breadcrumbs
2 teaspoons parsley
1 teaspoon oregano
1/2 teaspoon basil
1 teaspoon salt
1/2 teaspoon black pepper
1/2 teaspoon granulated garlic
1/2 teaspoon granulated onion
1 egg
extra virgin olive oil
1 lb. pasta, cooked firmer than al dente
2 cups veal bone broth or stock
salt and pepper for seasoning
2 tablespoons half-and-half
2 tablespoons butter
1 cup of frozen organic peas
Make the meatballs: Combine the veal, breadcrumbs, parsley, oregano, basil, salt, pepper, garlic, onion and egg in a bowl, mixing the ingredients thoroughly. Don’t over-mix.
Pre-heat the oven to 350 degrees.
Heat a tablespoon of the olive oil in an oven-proof pan, and form the meatballs one by one, placing them in the pan. Brown the meatballs on all sides over medium heat. Place the pan in the oven to cook the meatballs for 10 more minutes.
In a saucepan, heat the veal bone broth. Once the meatballs have cooked in the oven, transfer them to the pot of veal bone broth and cover with a lid, keeping the heat on low. If the broth doesn’t cover the meatballs, turn them every once in a while to keep them moist on all sides. Cook the meatballs in the broth for about 30 minutes, then transfer them to a large sauté pan.
Turn the saucepan with the veal broth on high and reduce it to about 1/2 cup. Season it with salt and pepper.
In a large pot, cook the pasta to a bit firmer than al dente in well-salted water. Drain and set aside.
In the large sauce pan with the meatballs, add the butter and the half-and-half. Add the reduced veal broth, the pasta, and the peas.
Gently mix the ingredients in the pan until the peas have warmed through and the sauce clings to the pasta. Serve immediately.
THE SILHOUETTE
Posted: February 17, 2017 in Cocktails, drink recipes, Drinks, Food, mixology, Recipes, Rhode Island, Southern New England, UncategorizedTags: boulevardier, cocktails, drinks, food, Negroni, Providence Art Club, recipes
Once again this weekend, I’ll be at the annual Providence Art Club Founder’s Day celebration, raising a glass in their honor. The cool thing is that I got to decide what went in the glass!
First, some history…
The Providence Art Club is the third-oldest art club in the United States. The Philadelphia Sketch Club was founded in 1860. New York’s Salmagundi Club, founded in 1871, came next. But they were both founded by an all-male board. The Providence Art Club is the oldest art club in the nation that also included women. And that was back in 1880! That’s especially huge when you see what’s going on in the country even today.
Now through April 22, the Providence Art Club is featuring “Making Her Mark, the Women Artists of the Providence Art Club 1880,” an exposition featuring the works of the women artists that founded the art club over 130 years ago.

My wife is an artist member of the Providence Art Club. That’s how a zhlub like me got in! Several years ago, they asked me to come up with a cocktail for their first Founders Day celebration. One hundred glasses were raised to honor the founding fathers of the Providence Art Club. This year, we’re expecting up to 150 people to be there for the celebration.
Silhouettes of past art club members line the walls of the Providence Art Club, so my wife came up with the name of the cocktail: The Silhouette. I decided to base my cocktail on the Boulevardier, an awesome drink that substitutes bourbon for gin in the classic Negroni.

2 oz. Eagle Rare 10-year bourbon
1 oz. Antica Formula sweet vermouth
1/2 oz. Campari
2 shakes Regan’s orange bitters
In a cocktail shaker with ice, stir the ingredients and then strain into a rocks glass with one large ice cube.
Garnish with an orange twist.
Cheers!
THE DIFFERENCE BETWEEN WHISKEY AND WHISKY
Posted: January 13, 2017 in Cocktails, Drinks, Food, mixology, UncategorizedTags: booze, bourbon, liquor, whiskey, whisky
As a kid, I used to read the side of a cereal box as I ate my breakfast. Nowadays, I tend to read the back label from my booze bottle as I take a sip.
There seems to be a lot of confusion about the spelling of whiskey and/or whisky, but the use of the letter “e” (or the lack thereof) is not random. Here’s the best explanation I’ve found…

The spelling whisky (plural whiskies) is generally used for those distilled in Scotland , Wales , Canada , and Japan. Whiskey (with an e; plural whiskeys) is used for the spirits distilled in Ireland and in the United States. The BATF (Bureau of Alcohol, Tobacco and Firearms) in 1968 specified “whisky” as the official U.S. spelling, but allowed labeling as “whiskey” in deference to tradition. Most U.S. producers still use the “whiskey” spelling, though as you can see, Maker’s Mark chooses not to.
International law reserves the term “Scotch whisky” to those whiskies produced in Scotland. Scottish law specifies that the whisky must be aged for a minimum of three years, in oak casks. Whiskies produced in other countries in the Scotch style must use another name. Similar conventions exist for “Irish whiskey,” “Canadian whisky,” and “Bourbon whiskey.” In North America, as well as in Continental Europe, the abbreviated term “Scotch” is usually used for “Scotch Whisky.” In England, Scotland, and Wales, the term “whisky” almost always refers to “Scotch Whisky”, and the term “Scotch” is rarely used by itself.
And while we’re on the topic, what is bourbon?
Bourbon is a type of whiskey.
Today, ‘bourbon’ has a specific legal meaning that has little to do with its geographic origins. That definition, now federal law, has existed in its present form only since about the end of the 19th century. According to federal law, bourbon must be at least 51% corn, distilled at less than 160 proof, and aged for at least two years in new, charred oak barrels. (There are some other requirements, but those are the main ones.) Bourbon also must be made within the United States. In other words, a foreign product that meets all the other requirements still cannot be sold in the U.S. as bourbon.
Contrary to popular belief, there has never been a legal requirement that bourbon be made in Kentucky, which is why most Kentucky producers call their product “Kentucky Bourbon.”
Still confused? My advice is to sit back with your favorite glass of whisky, whiskey or bourbon…and just enjoy. Cheers!
PANCAKES MADE WITH FRESH RICOTTA
Posted: January 7, 2017 in breakfast, curds, Food, Iron Chefs, New York City, pancakes, Recipes, restaurants, UncategorizedTags: April Bloomfield, breakfast, food, pancakes, recipes, ricotta
These pancakes, based on a recipe from chef April Bloomfield (The Spotted Pig and The Breslin in NYC), are made from fresh homemade ricotta cheese. Light as air…and really delicious! I’ve made a few batches of fresh ricotta cheese in my day, but when the family has a craving for these pancakes at the last minute, a good-quality store-bought ricotta cheese will do.
1 1/2 cups all-purpose flour (I use Cup4Cup GF flour if I want to make these gluten-free)
1/4 cup yellow cornmeal
2 tablespoons sugar
1/2 teaspoon salt
1/2 teaspoon baking powder
1/2 teaspoon baking soda
2 cups milk
2 large eggs, separated
1/2 cup fresh ricotta
In a large bowl, combine the flour, cornmeal, sugar, salt, baking powder and baking soda. In another large bowl, whisk together the milk, ricotta, and egg yolks. Fold the wet ingredients into the dry ingredients.
In a large stainless steel bowl, whisk the egg whites until they are stiff, but not dry. Fold gently into the batter.
Spray a non-stick griddle with a little cooking spray and drop about 1/4 cup of batter per pancake. Cook over medium heat for about 2 minutes per side, until golden and fluffy.

ASIAN BACON
Posted: December 30, 2016 in bacon, Carnivore!, Food, frying, pork, Recipes, UncategorizedTags: Asian, bacon, carnivore, chinese, food, pork, recipes
December 30 is National Bacon Day!
Sometimes the happiest of cooking accidents happen with bacon. My original plan was to make Chinese-style honey ribs for dinner. But instead of pulling a nice rack of ribs out of the freezer, I accidentally took out a slab of pork belly. I only realized my mistake when I thawed it and started cooking it, so I decided to continue the process with the pork belly instead. The results were pretty damn tasty.

Marinade:
¾ cup light soy sauce
6 Tablespoons hoisin sauce
5 lbs. pork belly
Zest and juice of 1 lemon
2 whole star anise
2 cinnamon sticks (3”)
1/2 cup honey
4 cups chicken broth
Mix the marinade ingredients. Set aside.
Cut the pork belly into pieces that are about 3 inches square. Place them in a large pot. Cover therm with water and bring to a boil. Boil for 5 minutes. Drain.
Place the pork belly pieces on a sheet pan lined with non-stick aluminum foil. Coat them with marinade. Let them sit for 10 minutes.
Pre-heat the oven to 350 degrees. Bake the pork belly pieces on the sheet pan for 30 minutes.
While the pork belly is baking, start the sauce in a large non-stick pan or pot: combine the lemon zest and juice, star anise, cinnamon sticks, honey and chicken broth. Bring it to a boil, then reduce to a simmer.
When the pork belly pieces have finished baking, add them to the sauce pot and simmer (covered) for at least 15 minutes or until meat is tender.
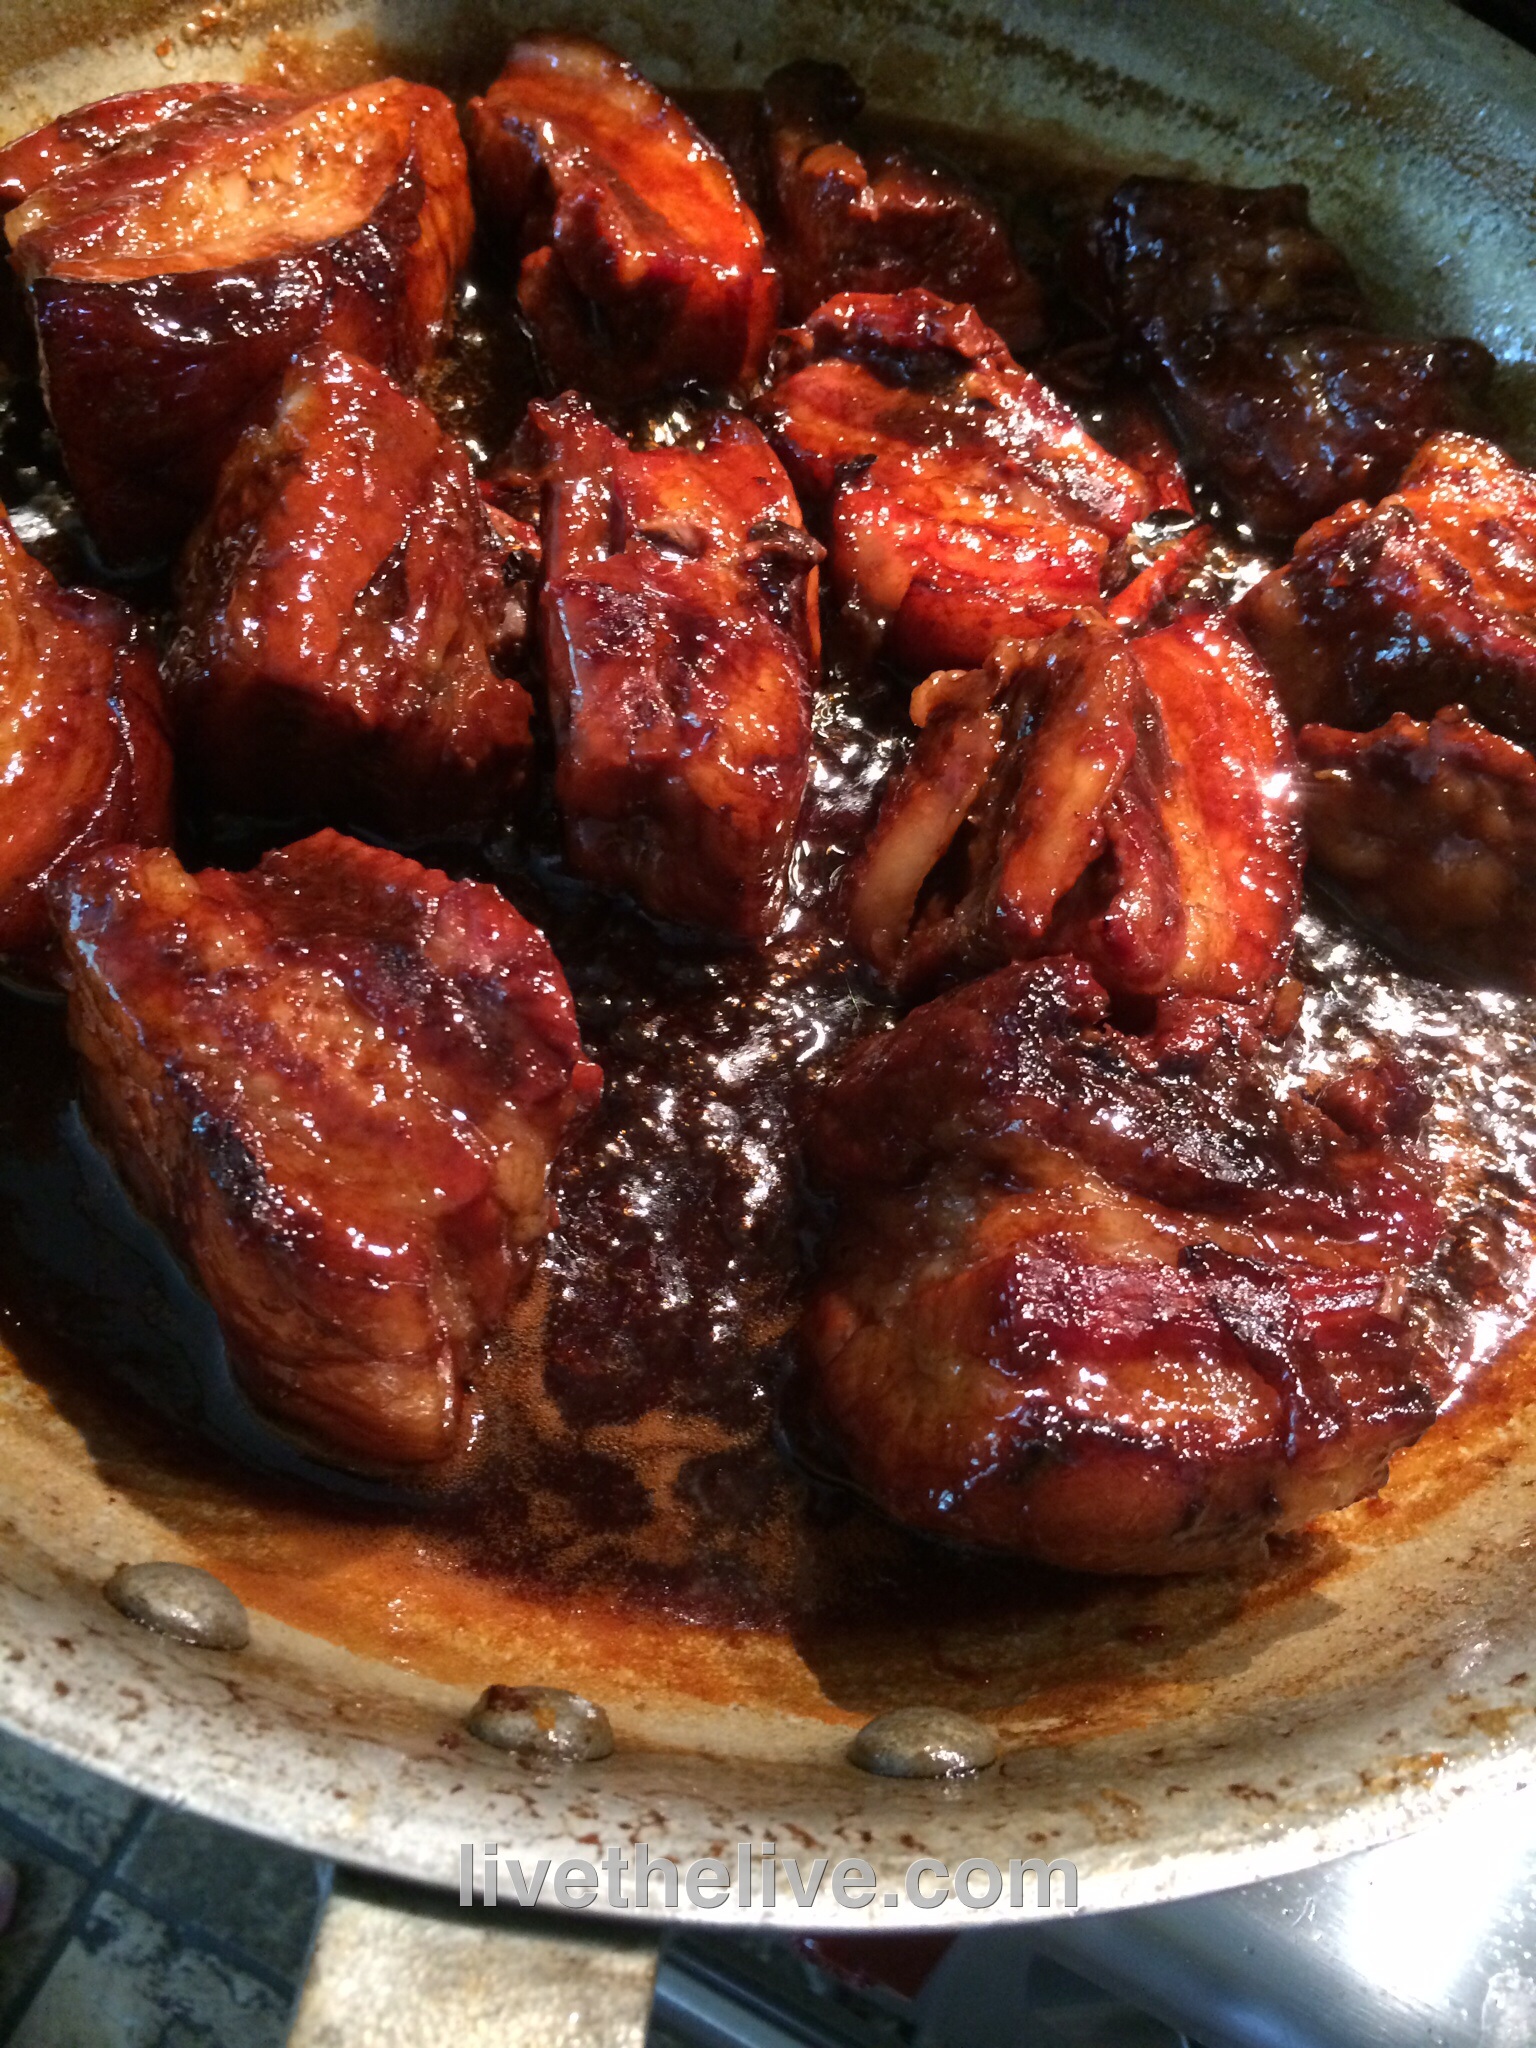
Turn heat on high, uncover pot and cook until the sauce is reduced to a glaze that coats the ribs. Reduce the heat as the sauce thickens to avoid the sugars in the honey from burning. When the pieces are sticky and gooey, they are ready!
Let a piece of pork belly cool…then slice to desired thickness and fry like regular bacon. Makes an amazing omelet!

