Now’s the time to head to your local farm stand and pick up a bag of gorgeous plum tomatoes, before the season is gone! And this is what you do with them…
These are not sun-dried tomatoes. They’re better, because fresh plum tomatoes are still moist after roasting, with a bit of that magic tomato liquid in every cup! A great, simple platter to offer at parties.
Tomatoes before.
12 to 18 halved, seeded plum tomatoes
1/4 cup extra virgin olive oil
2 tablespoons organic cane sugar
Freshly ground pepper
Fleur de Sel or sea salt
Pre-heat the oven to 250.
Line a baking sheet with foil and rub it lightly with olive oil.
Arrange halved and seeded tomatoes on it in a single layer, cut side up. Drizzle evenly with 1/4 cup olive oil, sprinkle with 2 tablespoons sugar, and season with pepper to taste.
Bake the tomatoes until they are still juicy but slightly wrinkled, about 3 hours. Transfer them to a platter and let them cool slightly.
Just before serving, sprinkle the tomatoes with Fleur de Sel, and garnish if you like, with chopped parsley leaves, mint leaves, or basil. (Bacon bits sound pretty good, too!)
Sometimes the happiest of cooking accidents happen with bacon. My original plan was to make Chinese-style honey ribs for dinner. But instead of pulling a nice rack of ribs out of the freezer, I accidentally took out a slab of pork belly. I only realized my mistake after I thawed it, so I decided to use it! The results were pretty damn tasty.
I like maple syrup instead of honey, but use what you like!
Marinade:
¾ cup light soy sauce 6 Tablespoons hoisin sauce
5 lbs. pork belly
Zest and juice of 1 lemon
2 whole star anise
2 cinnamon sticks (3”)
1/2 cup honey or maple syrup
4 cups chicken broth (preferably homemade)
Pre-heat the oven to 350 degrees.
Mix the marinade ingredients. Set them aside.
Cut the pork belly into pieces that are about 2 inches square. Place them in a large pot. Cover them with water and bring the pot to a boil. Boil it for 5 minutes. Drain the water.
Place the warm pork belly pieces on a sheet pan lined with non-stick aluminum foil. Coat them with the marinade. Let them sit for 10 minutes.
Bake the pork belly pieces on the sheet pan in the oven for 30 minutes.
While the pork belly is baking, start the sauce in a large non-stick pan or pot: combine the lemon zest and juice, star anise, cinnamon sticks, maple syrup or honey, and chicken broth. Bring it to a boil, then reduce it to a simmer.
When the pork belly pieces have finished baking, add them to the sauce pot, lowering the heat to a simmer. Simmer (covered) for about 15 minutes or until meat is tender.
Turn the heat back on high, uncover the pot and cook until the sauce has reduced to a glaze that coats the meat. Reduce the heat as the sauce thickens to avoid the sugars in the syrup or honey from burning. When the pieces are sticky and gooey, they are ready!
Devour them just like that!
If you have leftovers, let the pork belly cool, then slice the pieces it to your desired thickness and fry them like regular bacon. They’re great with eggs!
Before our daughter was born, my wife and I traveled the world. We got engaged in Paris. We honeymooned in Thailand. We swam with dolphins in Moorea. We rode camels along the Mediterranean in Morocco. So when our daughter was born, many of our friends thought our traveling days would be over.
At the Kaikoura Lavender Farm, South Island, New Zealand
One of the biggest sources of inspiration for me, personally, was a moment on our honeymoon in Thailand. We left our luxurious resort on Koh Samui to spend a few days on a remote island called Koh Nang Yuan, a destination for adventurers and serious scuba divers.
While waiting for our ferry to arrive, a bunch of us were packed like sardines in a small area. Around the corner came a young man, carrying 2 very large duffel bags–clearly a scuba diver with all his gear. But a moment later, his wife appeared from around the corner, and she was pushing a baby in a stroller. She whispered something to her husband, and he unzipped one of the large duffel bags to reveal a huge stash of diapers! He pulled one out, handed it to his wife, and she headed toward the restroom.
In that moment I realized: you can travel with a kid…and you can still have the adventure of a lifetime! It changed my attitude toward travel forever.
Snorkeling in St. John, USVI
It’s understood that not everyone can do this. Traveling is expensive. We gladly trade material things (that fancy SUV will have to wait) so that we can share some amazing memories.
In the crown of the Statue of Liberty, NYC
By the age of 12, my daughter had traveled to France, Italy, Spain, Greece, Lithuania, England, New Zealand, Iceland, Canada and the Caribbean. She’s now 18 and off to college this fall, but she got to go to Egypt with her mom this year, and Poland and Lithuania with me this summer. She also added Ireland to her list last summer. Recent travels were mostly in the US, as we looked at colleges in Washington DC, Pittsburgh and Chicago.
London, England…
…and more recently in London, England. (Tea time at the Ritz.)
The first time our daughter’s feet touched salt water, it was as an infant in the Adriatic Sea in Puglia, Italy. The first time she had a steak, it was steak frites in Paris.
Mercado de San Miguel in Madrid, Spain
Though she didn’t always realize it, her travels gave her an incredible education. The people she met, the foods she (sometimes) ate, the places she saw that her friends would only read about. It has made her wise in ways we never could have expected.
A mountain top view of San Sebastian, Spain
Swimming with stingrays at Stingray City in the Cayman Islands
To see the world through our daughter’s eyes has been a real joy, especially now when I can share my love for music with her.
Hard Rock Cafe, Paris (She’s been to over a dozen Hard Rocks.)
Hot dogs in Reykjavik, Iceland
We have friends that tell us they can’t afford to travel the way we do. Then they blow thousands on a Disney vacation or cruise.
Everyone needs to make that choice on their own, but we decided a long time ago that we’d skip places like Disney World for the real world.
Sharing an artsy moment with Mom in Santorini, Greece
…and a silly moment with Dad in Vilnius, Lithuania (many years ago!)
Even local trips can make a tremendous difference in a child’s life.
Block Island, RI
Fishing off the coast of Cape Cod, Massachusetts.
Camping in the Berkshires, Massachusetts.
Rafting on the Kennebec River in The Forks, Maine
Athens, Greece
A walk across Abbey Road.
It’s always a party in New Orleans!
Never underestimate the power of travel! It’s not just great for the kid…it’s great for the whole family!
I live just down the road from Fall River, Massachusetts, and New Bedford, Massachusetts, two thriving proud Portuguese communities. In middle school, my daughter had to take mandatory Portuguese language classes. We’ve got dozens of authentic Portuguese restaurants in the area, and even a well-stocked supermarket with its own bacalhau (salt cod) room: Portugalia Marketplace, in Fall River.
So when I first posted my recipe of Portuguese kale soup, I was told by many Portuguese friends that my soup wasn’t authentic so I couldn’t call it that. Fair enough. After all, my soup has far less carbs (no potatoes or pasta), fewer spices, and it uses homemade stock instead of water. It may not be Portuguese, but it’s full of flavor.
My semi-Portuguese kale soup.
4 cups home-made chicken or beef stock 4 cups water 1 cup lentils, rinsed in cold water 1 onion, finely chopped 1 carrot, finely chopped 2 stalks celery, finely chopped 1 clove garlic, through a press 1 lb. Portuguese chourico, peeled and chopped into small cubes 1 large bunch organic kale salt and pepper
Add the stock and water to a large pot. Heat until boiling. Add the lentils.
In a saucepan with a little olive oil or bacon fat, sauté the onions, carrots, celery, and garlic for a few minutes. Add the chopped chourico and sauté a few minutes more. Add the contents of the sauté pan to the pot.
Wash and de-stem the kale, tearing the leaves into smaller pieces. Add the leaves to the pot and stir. The stems go in your compost pile. (You can also use them in a juicer.) Kale is always on the “dirty dozen” list of vegetables with large amounts of pesticides, so I always buy organic.
Cook the soup until the lentils are al dente. Taste and season for salt and pepper before serving.
Simple and delicious, especially with fall on the way.
I recently rediscovered a story I wrote a couple of years ago, after my trip to New Zealand. I had hopes of getting it published somewhere, with no luck. So, what the heck…I’ll reprint it here, adding a few photos to help with the story.
A Guy Walks Into a (New Zealand) Bar…
I recently returned from a two-week trip to New Zealand, touring the northern half of the South Island, clocking over a thousand miles by car and train.
My journey started and ended in Nelson, the oldest city on the South Island. It was a great home base to explore the famous Abel Tasman National Park, ending each day with dinner and drinks.
One of my favorite stops was the Urban Eatery and Oyster Bar in Nelson, where fresh, creative seafood filled the menu. I walked in and noticed there were no seats at the bar, my spot of choice when I’m traveling solo. I had made a reservation, but I saw a bar stool in the corner and pulled it up to the bar, much to the surprise of the bartender and manager.
The manager explained that no one usually sits at the bar in New Zealand, opting for small tables, but it being obvious that I was an American, if I chose to do so, I was more than welcome to. I did get some interesting glances as I pulled my barstool up.
Bar view.
The bartender, a lovely young woman who perhaps wasn’t used to having someone to talk to in her workspace, asked me what I wanted to drink. I was craving for a vodka martini, very dry, expecting what I got at most American restaurants: 3 to 4 ounces of vodka, chilled, in a martini glass with olives. But instead, she hesitated.
She explained: “Here in New Zealand, if you order a ‘double,’ you get 30 mls.” (I quickly Googled it to find it was only 1 ounce.) “But, legally, I can pour an extra 30 mls into a shot glass that you can then pour into your glass yourself.”
Doing quick ounces-to-mls math in my head, I explained that a martini in the States can be almost 4 ounces, or 120 mls, and I could see her eyes widen in disbelief. “That’s irresponsible!” she gasped.
I laughed as I told her that two of those monstrous drinks were commonly referred to as a “businessman’s lunch” in the States, and she shook her head as she poured my first ounce in a rocks glass and then poured my side shot. (There were no martini glasses in sight.)
I poured my extra ounce into my glass and it still looked really low. “I’m guessing not too many people order martinis,” I said. “What do you usually fill the rest of the glass with?”
“Tonic, olive brine if it’s dirty, something like that.”
Ordering beer in New Zealand was simpler. It was served mostly in pints. Wine glasses, however, had a clearly marked line on each glass, a regulation set nationally. No “nice pours” the bartender would sometimes give you at the end of the bottle.
Clos Henri Vineyard, Marlborough
They allowed me to order as many drinks as I wanted, as long as I wasn’t inebriated, but it felt a little embarrassing to have to order so many drinks.
Down the street in Nelson, I visited Kismet, a very well-stocked cocktail bar, though their choice of vodka was small due to its limited popularity. The drink of choice is gin, and there are a good number of distilleries in New Zealand, many in Marlborough wine country, that produce delicious floral, herbaceous gins. My own experience with gin was limited to a whatever-and-tonic, but here…gin was something special.
Kismet in Nelson. Great bar!
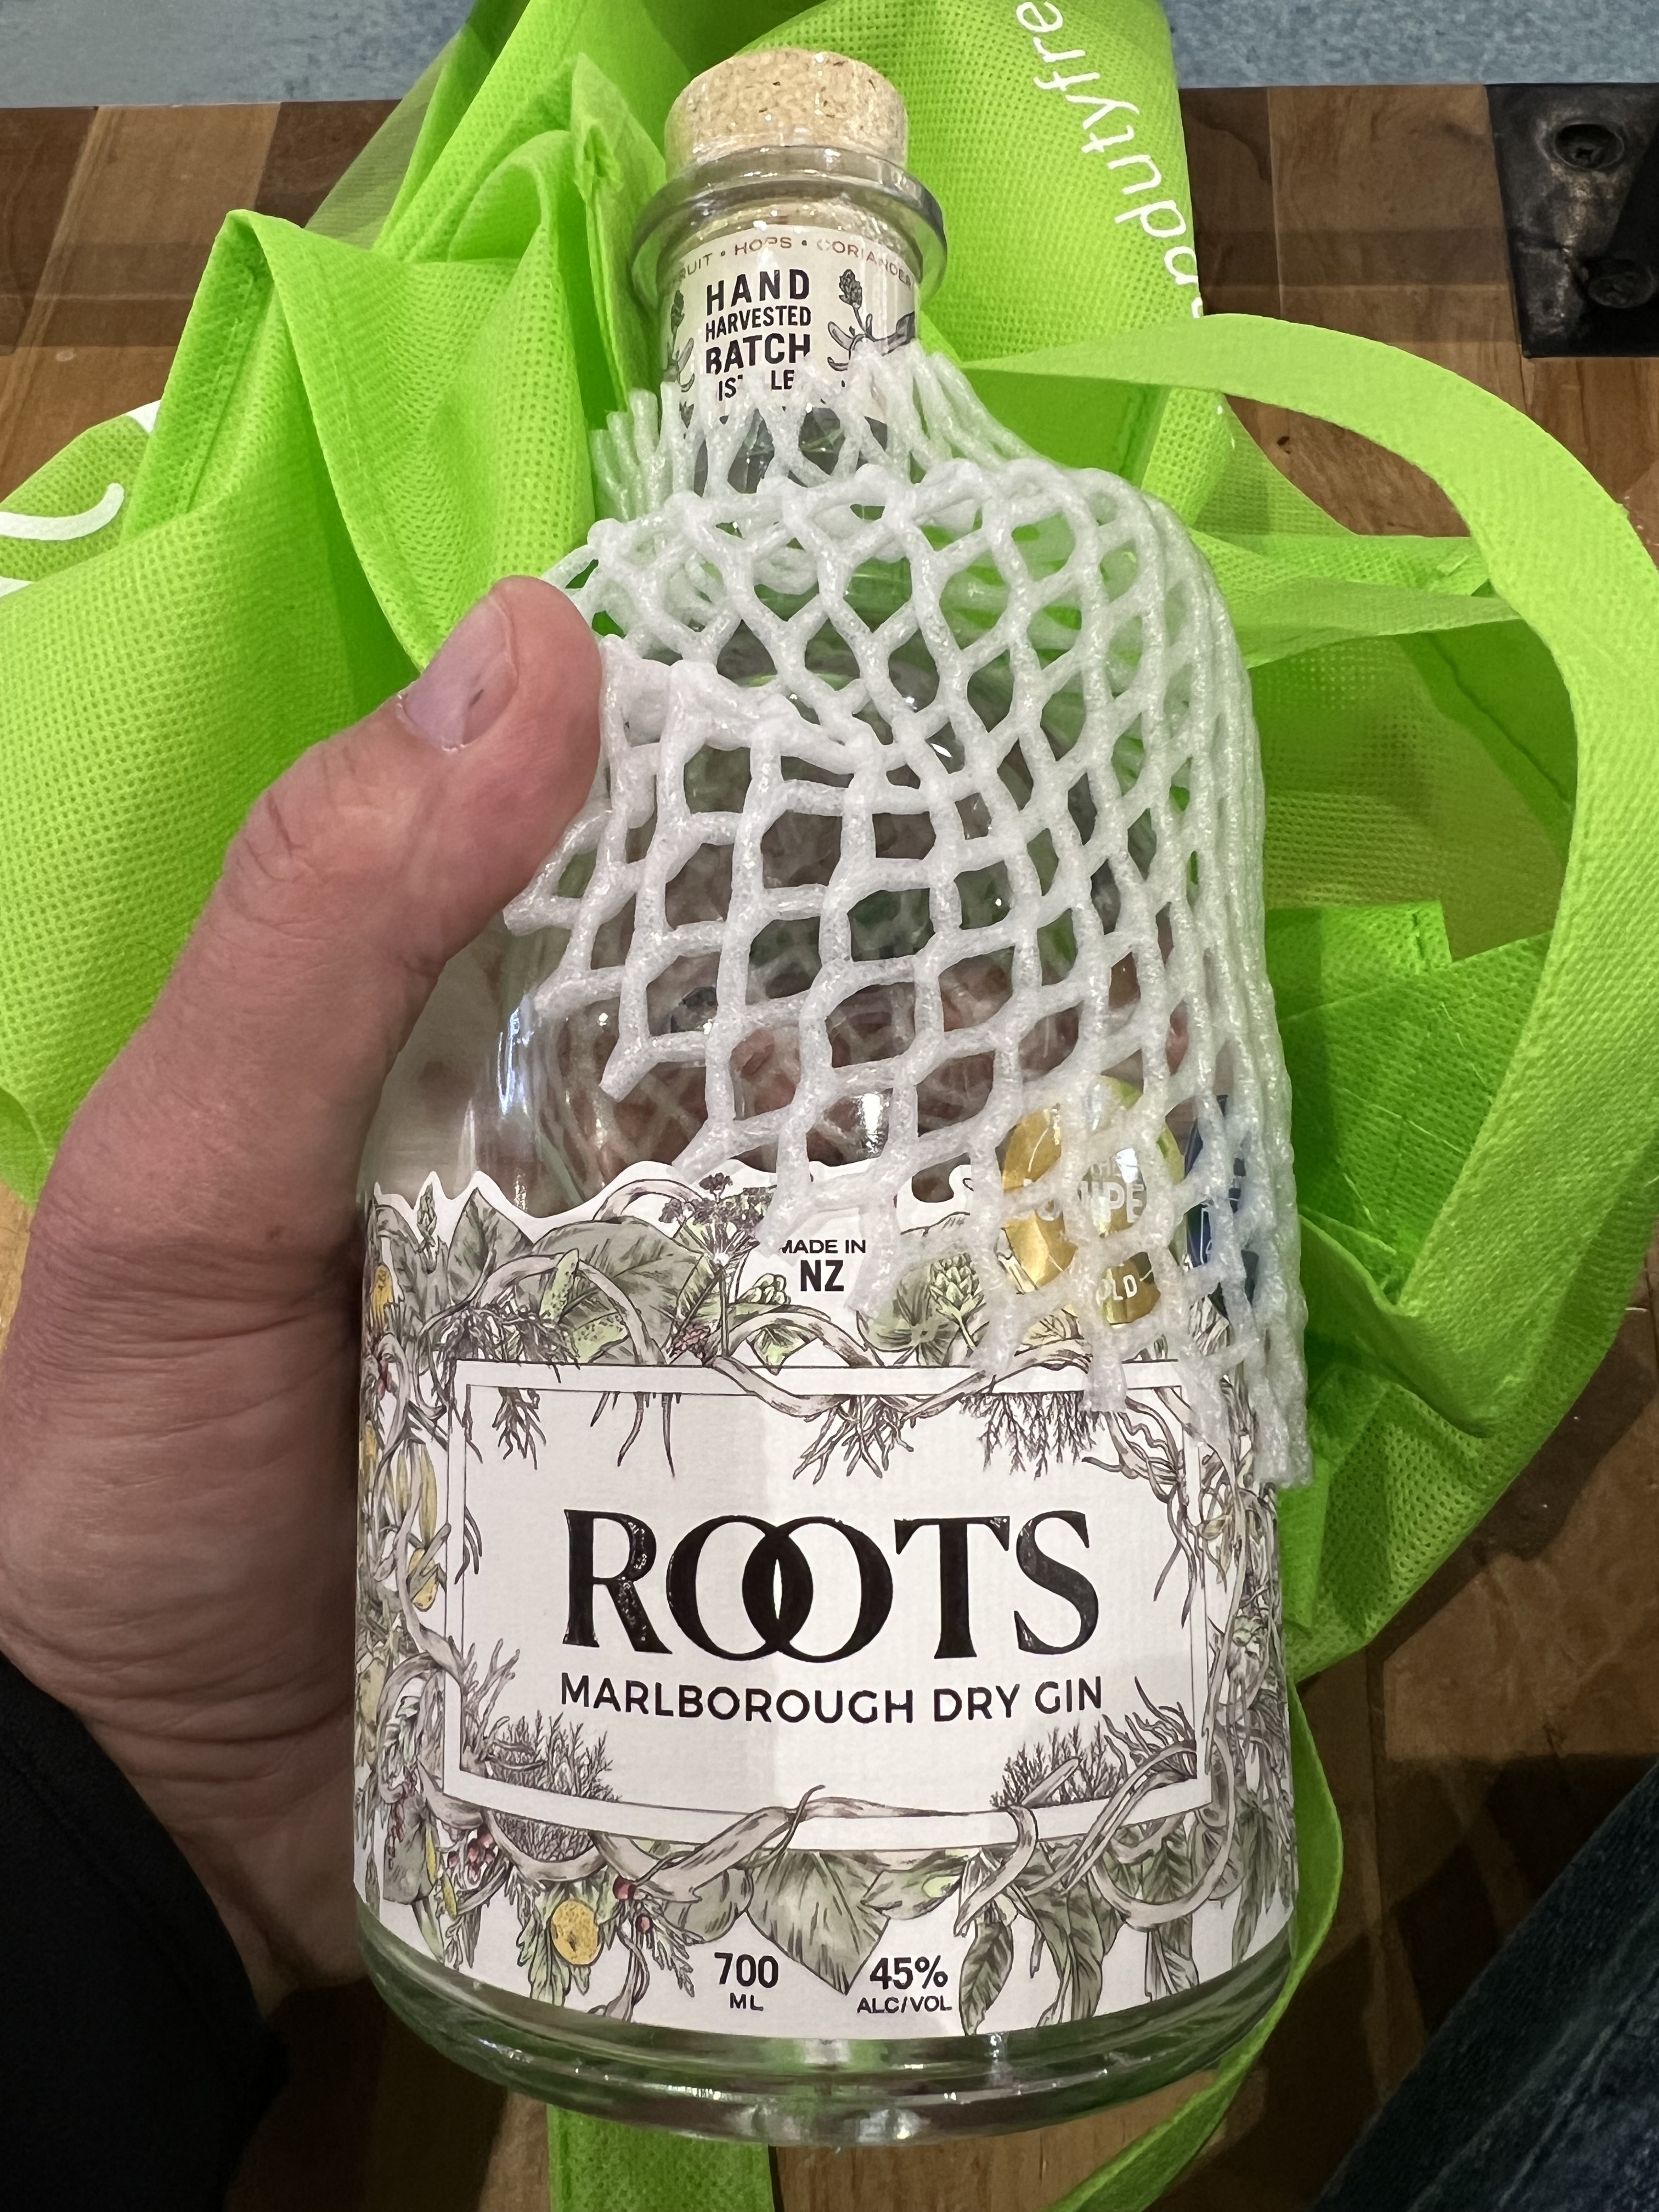
I tried a couple of brands: Victor, with powerful floral notes that reminded me of Hendrick’s on steroids, and Roots, another Marlborough product. The Roots bottle was labeled “Navy strength,” registering at 54.5%, and I soon realized that if I ordered a “double-double,” as I came to call it, I’d get more alcohol in my drink with gin. I was sold.
(“Navy strength” refers to a time when gin was stored on Navy ships in wooden barrels next to the gun powder, and if there was an accidental gin spill, it had to have enough alcohol in it to still allow the gin-soaked gunpowder to ignite. Hence: “Navy strength.”)
A Roots double-double with just a splash of New Zealand’s own craft-made East Imperial tonic, and I was a happy man.
Wherever I went in New Zealand after that, my use of the phrase “double-double,” with a little smile, made the bartender understand I was here for the alcohol, and not for the filler. I couldn’t be more obviously American if I wore a red-white-and-blue bandana on my head.
A double-double of vodka (they all seem to serve only Finlandia, despite a couple of New Zealand brands I’ve had in the States) with olives at Bamboo Tiger in Blenheim. A double-double of bourbon in my Manhattan at Amazonita in Christchurch. A double-double of Mt. Gay with a splash of Coke at Oxley’s Bar & Kitchen in Picton. I got the hang of this!
Oxley’s Bar & Kitchen
Many wineries in New Zealand have wonderful restaurants, and sadly my attempt at humor by ordering a double-double of wine didn’t go over too well. But, I was able to enjoy more than one filled-to-the-line glass of Chardonnay at Black Estate Winery in Canterbury or Sauvignon Blanc at Saint Clair Family Estate Vineyard Kitchen in Marlborough.
Black Estate, outside of ChristchurchSaint Clair Family Estate Vineyard Kitchen, BlenheimGin tasting in Marlborough
Back on my homeward bound 17 1/2-hour non-stop from Auckland to JFK, I asked for a double-double of vodka on the rocks, and got it, along with a look from the flight attendant like I was some kind of lush. I wonder if her attitude would change when we crossed into US airspace…
What do you do when the hot weather kicks in and the cucumbers start taking over your garden? Make soup!
The original cucumber soup recipe comes from Ikies Traditional Houses, a wonderful hotel in the beautiful town of Oia in Santorini, Greece. After a long, hot day of exploring the island, we would settle down to a refreshing bowl of cucumber soup. They were nice enough to share the recipe with us, and a few tweaks later, it’s my definition of perfect.
3 English cucumbers or 5 regular cucumbers, peeled, seeded and roughly chopped
1 clove garlic, crushed
1 cup vegetable stock, preferably home-made
4 cups plain Greek yogurt
1/2 cup fresh mint leaves
Juice of 1 lemon
Sea salt and pepper
Peel, seed and chop the cucumbers and place them in a blender with the garlic, stock, 2 cups of the yogurt, mint leaves, lemon juice, 2 teaspoons of sea salt, and a grating of fresh black pepper.
Turn on the blender and mix well. Stop the blender and then add remaining 2 cups of yogurt and mix it by hand.
Pour the cucumber soup in bowls. Garnish with diced cucumber or radish.
To make the vegetable stock: rough-chop a few carrots, a few stalks of celery, and an onion, and put them in a pot with 4 cups of water. Boil until the liquid has reduced by half. Strain the veggies before using the stock. You can also roast the veggies on a sheet pan in a hot oven for a bit before adding them to the water for a more robust flavor.
Pork is magical. And though I’ve loved pork chops and store-bought bacon all my life, it’s only been in the last decade that I’ve learned to appreciate other cuts of pork and how they’re prepared. Guanciale is one of those meats, and it’s a key ingredient to a classic Italian dish: pasta carbonara.
In the beginning, I could only find huge jowls that required cutting and weighing to mix with the right amount of cure.
Looking at carbonara recipes online, many said the same thing: “Though a genuine carbonara uses a cured cut of pork called guanciale, it’s hard to find. So use pancetta or bacon.” Although both pancetta and bacon meats are delicious (both come from the belly of the pig…bacon is smoked, pancetta is not) the flavor and texture is not the same as a pork cheek, or jowl…and that’s what guanciale is made from.
Many years ago, my search for guanciale started with a local restaurant, the Back Eddy in Westport, Massachusetts. Being a buddy of the owner (and bribing him with alcohol), I asked if he’d order me some jowls. He did, and that worked well for a while. But I didn’t want to keep bothering him every time I wanted more, so I eventually found my own source on line that supplied me with massive jowls weighing many pounds each, as in the photo above. They were good, but a pain to work with. Eventually, that company went out of business.
I now shop for jowls online at http://www.heritagefoods.com. They sell a variety of pork products made from heritage breeds like Berkshire, also called kurobuta. It’s delicious with wonderful fat that’s healthy and full of flavor.
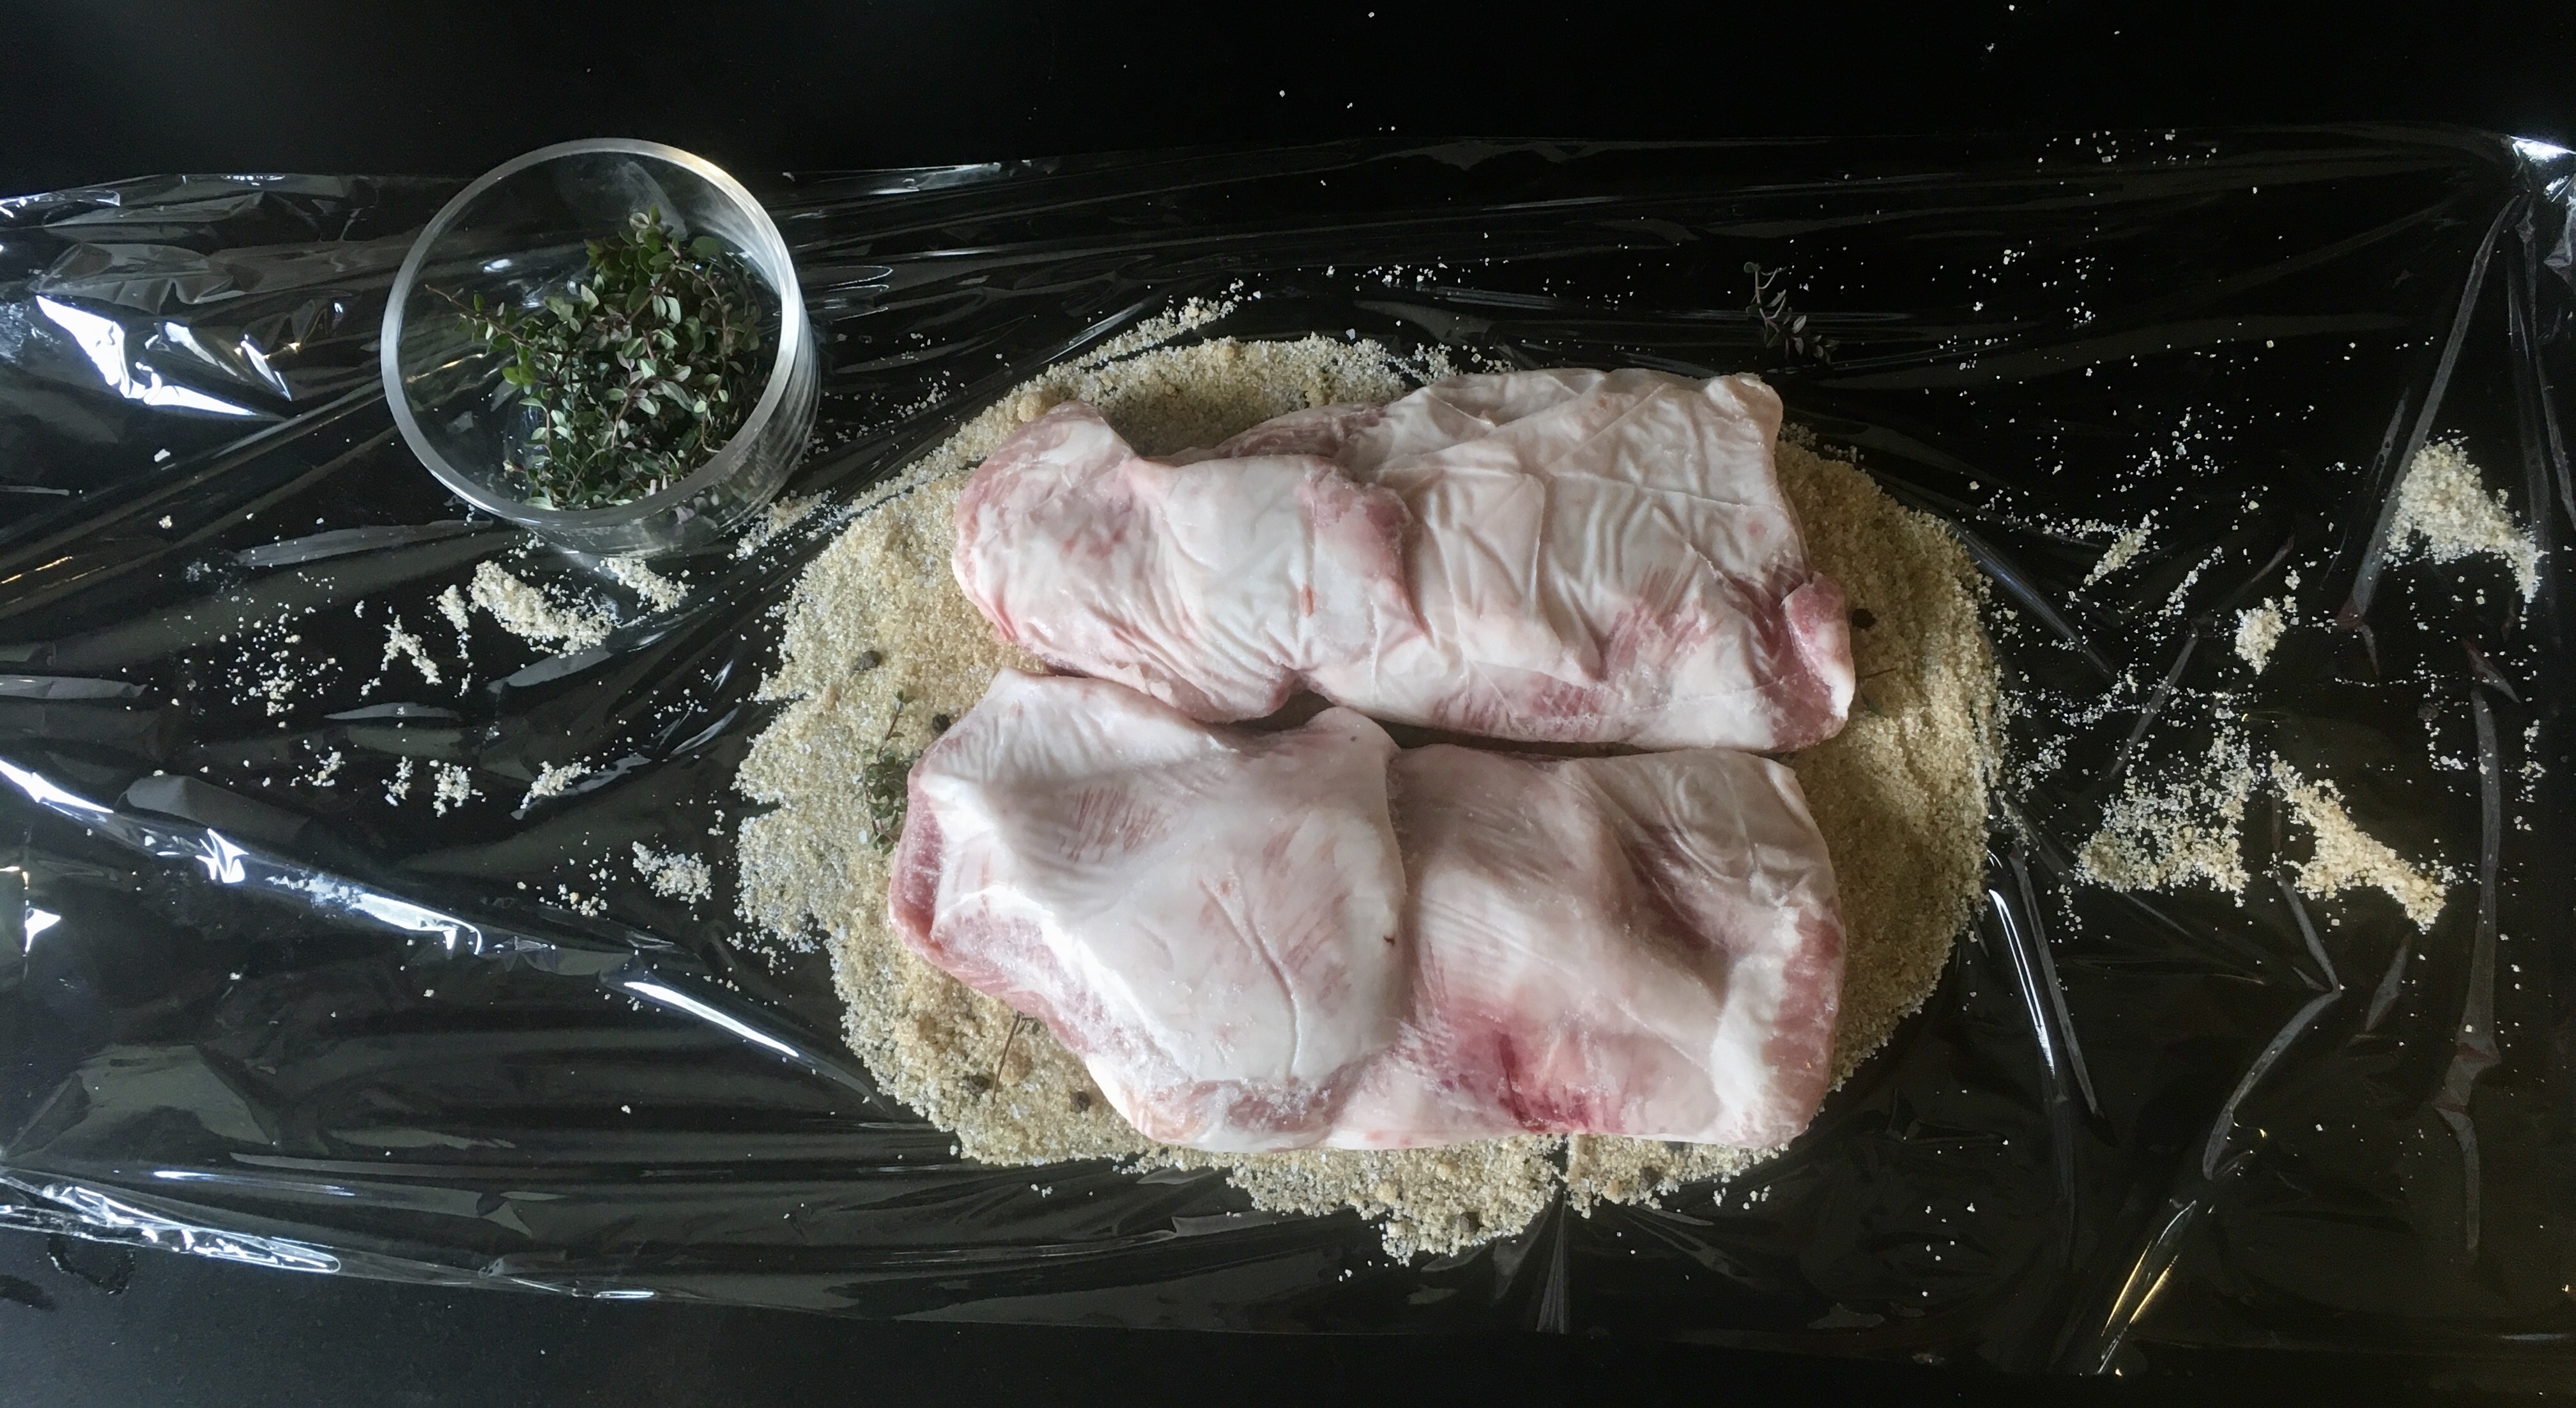
Berkshire pork jowls with fresh thyme from the garden and the dry cure mix.
My curing process is simple: sugar, salt, peppercorns, and fresh thyme. I cure the jowls for about 3 weeks. I rinse them once they’ve cured, and pat them dry. They still need to cook, but they’re ready to use for carbonara, ragu bolognese, topping a pizza, or any other delicious recipe that comes my way…and they freeze really well.
Once I made my first batch, there was no turning back!
2 lbs. raw pork jowls
1/2 cup basic dry cure mix (recipe below)
1/2 cup brown sugar
1 teaspoon whole black peppercorns
a handful of fresh thyme sprigs
Combine the basic dry cure mix, brown sugar, and peppercorns in a bowl. We’ll call this the rub.
On a large work surface, lay down several sheets of plastic wrap, overlapping each other to keep the rub from leaking through to the counter underneath. Sprinkle half of the rub onto the plastic wrap in an area where the jowls will lay. Scatter a half-dozen thyme sprigs on top of the rub. Lay the pieces of pork jowl on top of the rub and the thyme.
I place the rub and sprigs of thyme on a long sheet of plastic wrap.
The pork jowls go on top.
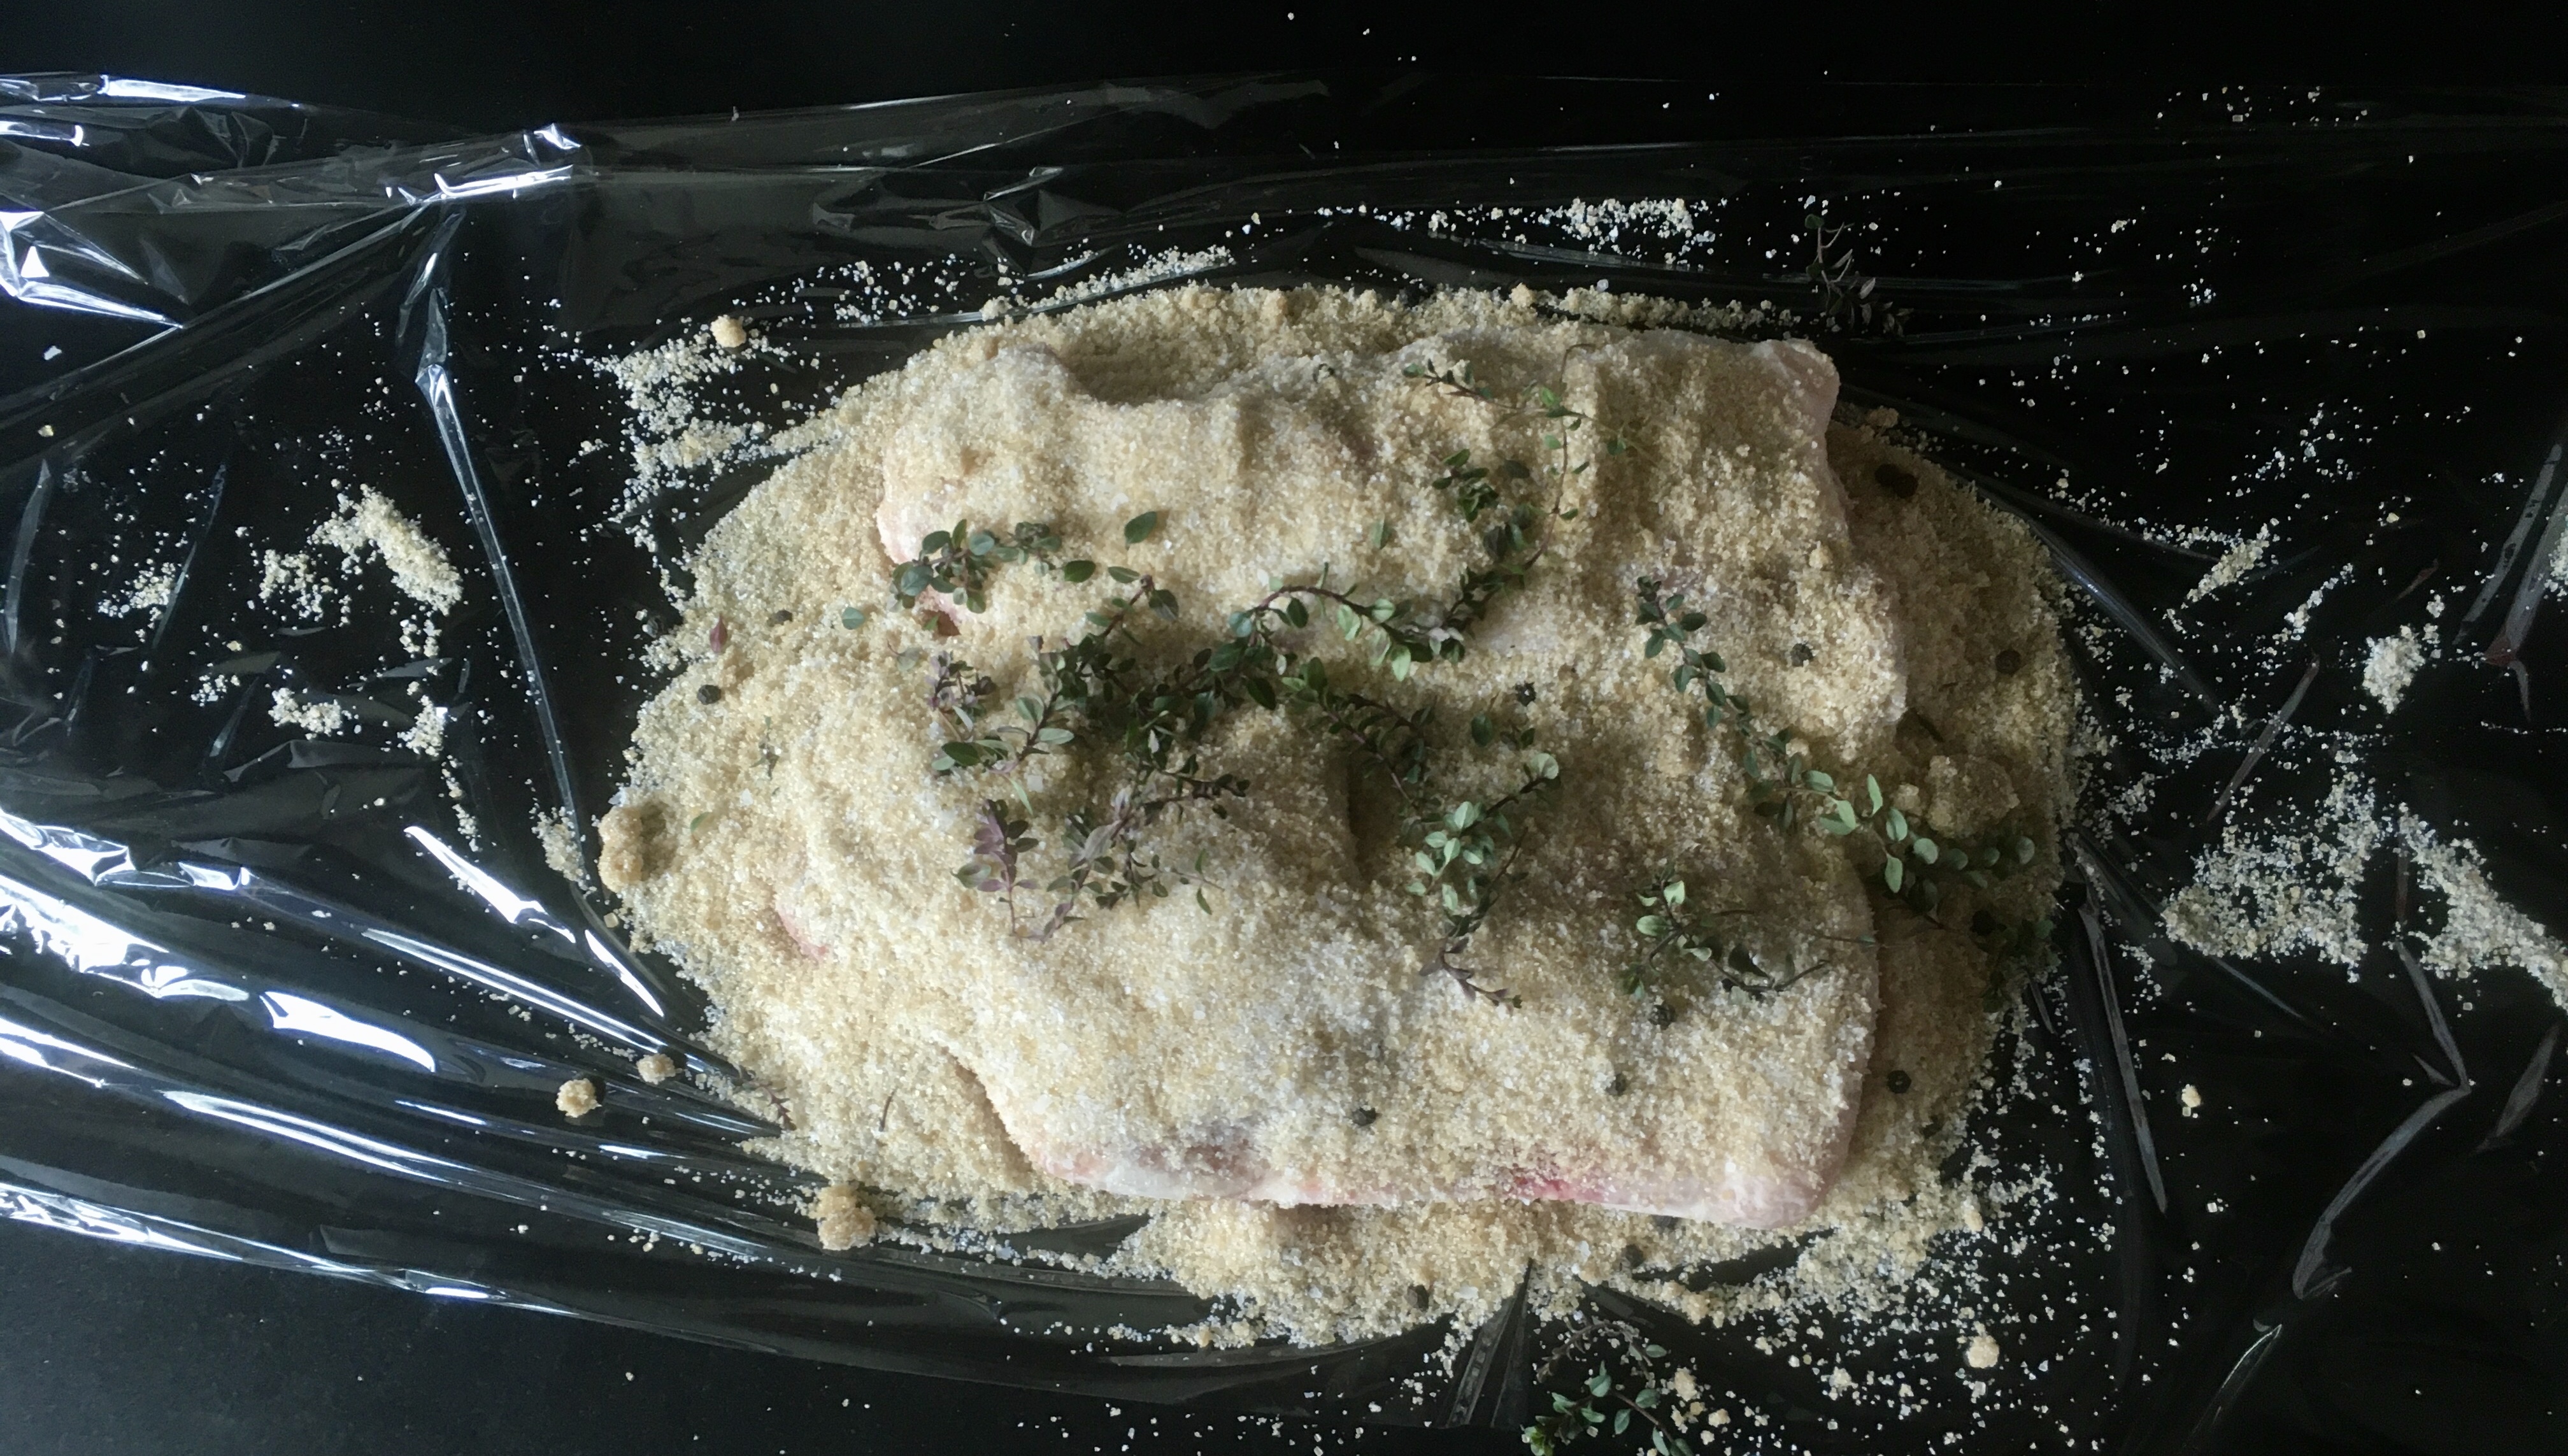
Then top the jowls with the rest of the rub, covering them evenly, and top with more thyme sprigs.
Press down on the jowls to really get the rub to stick.
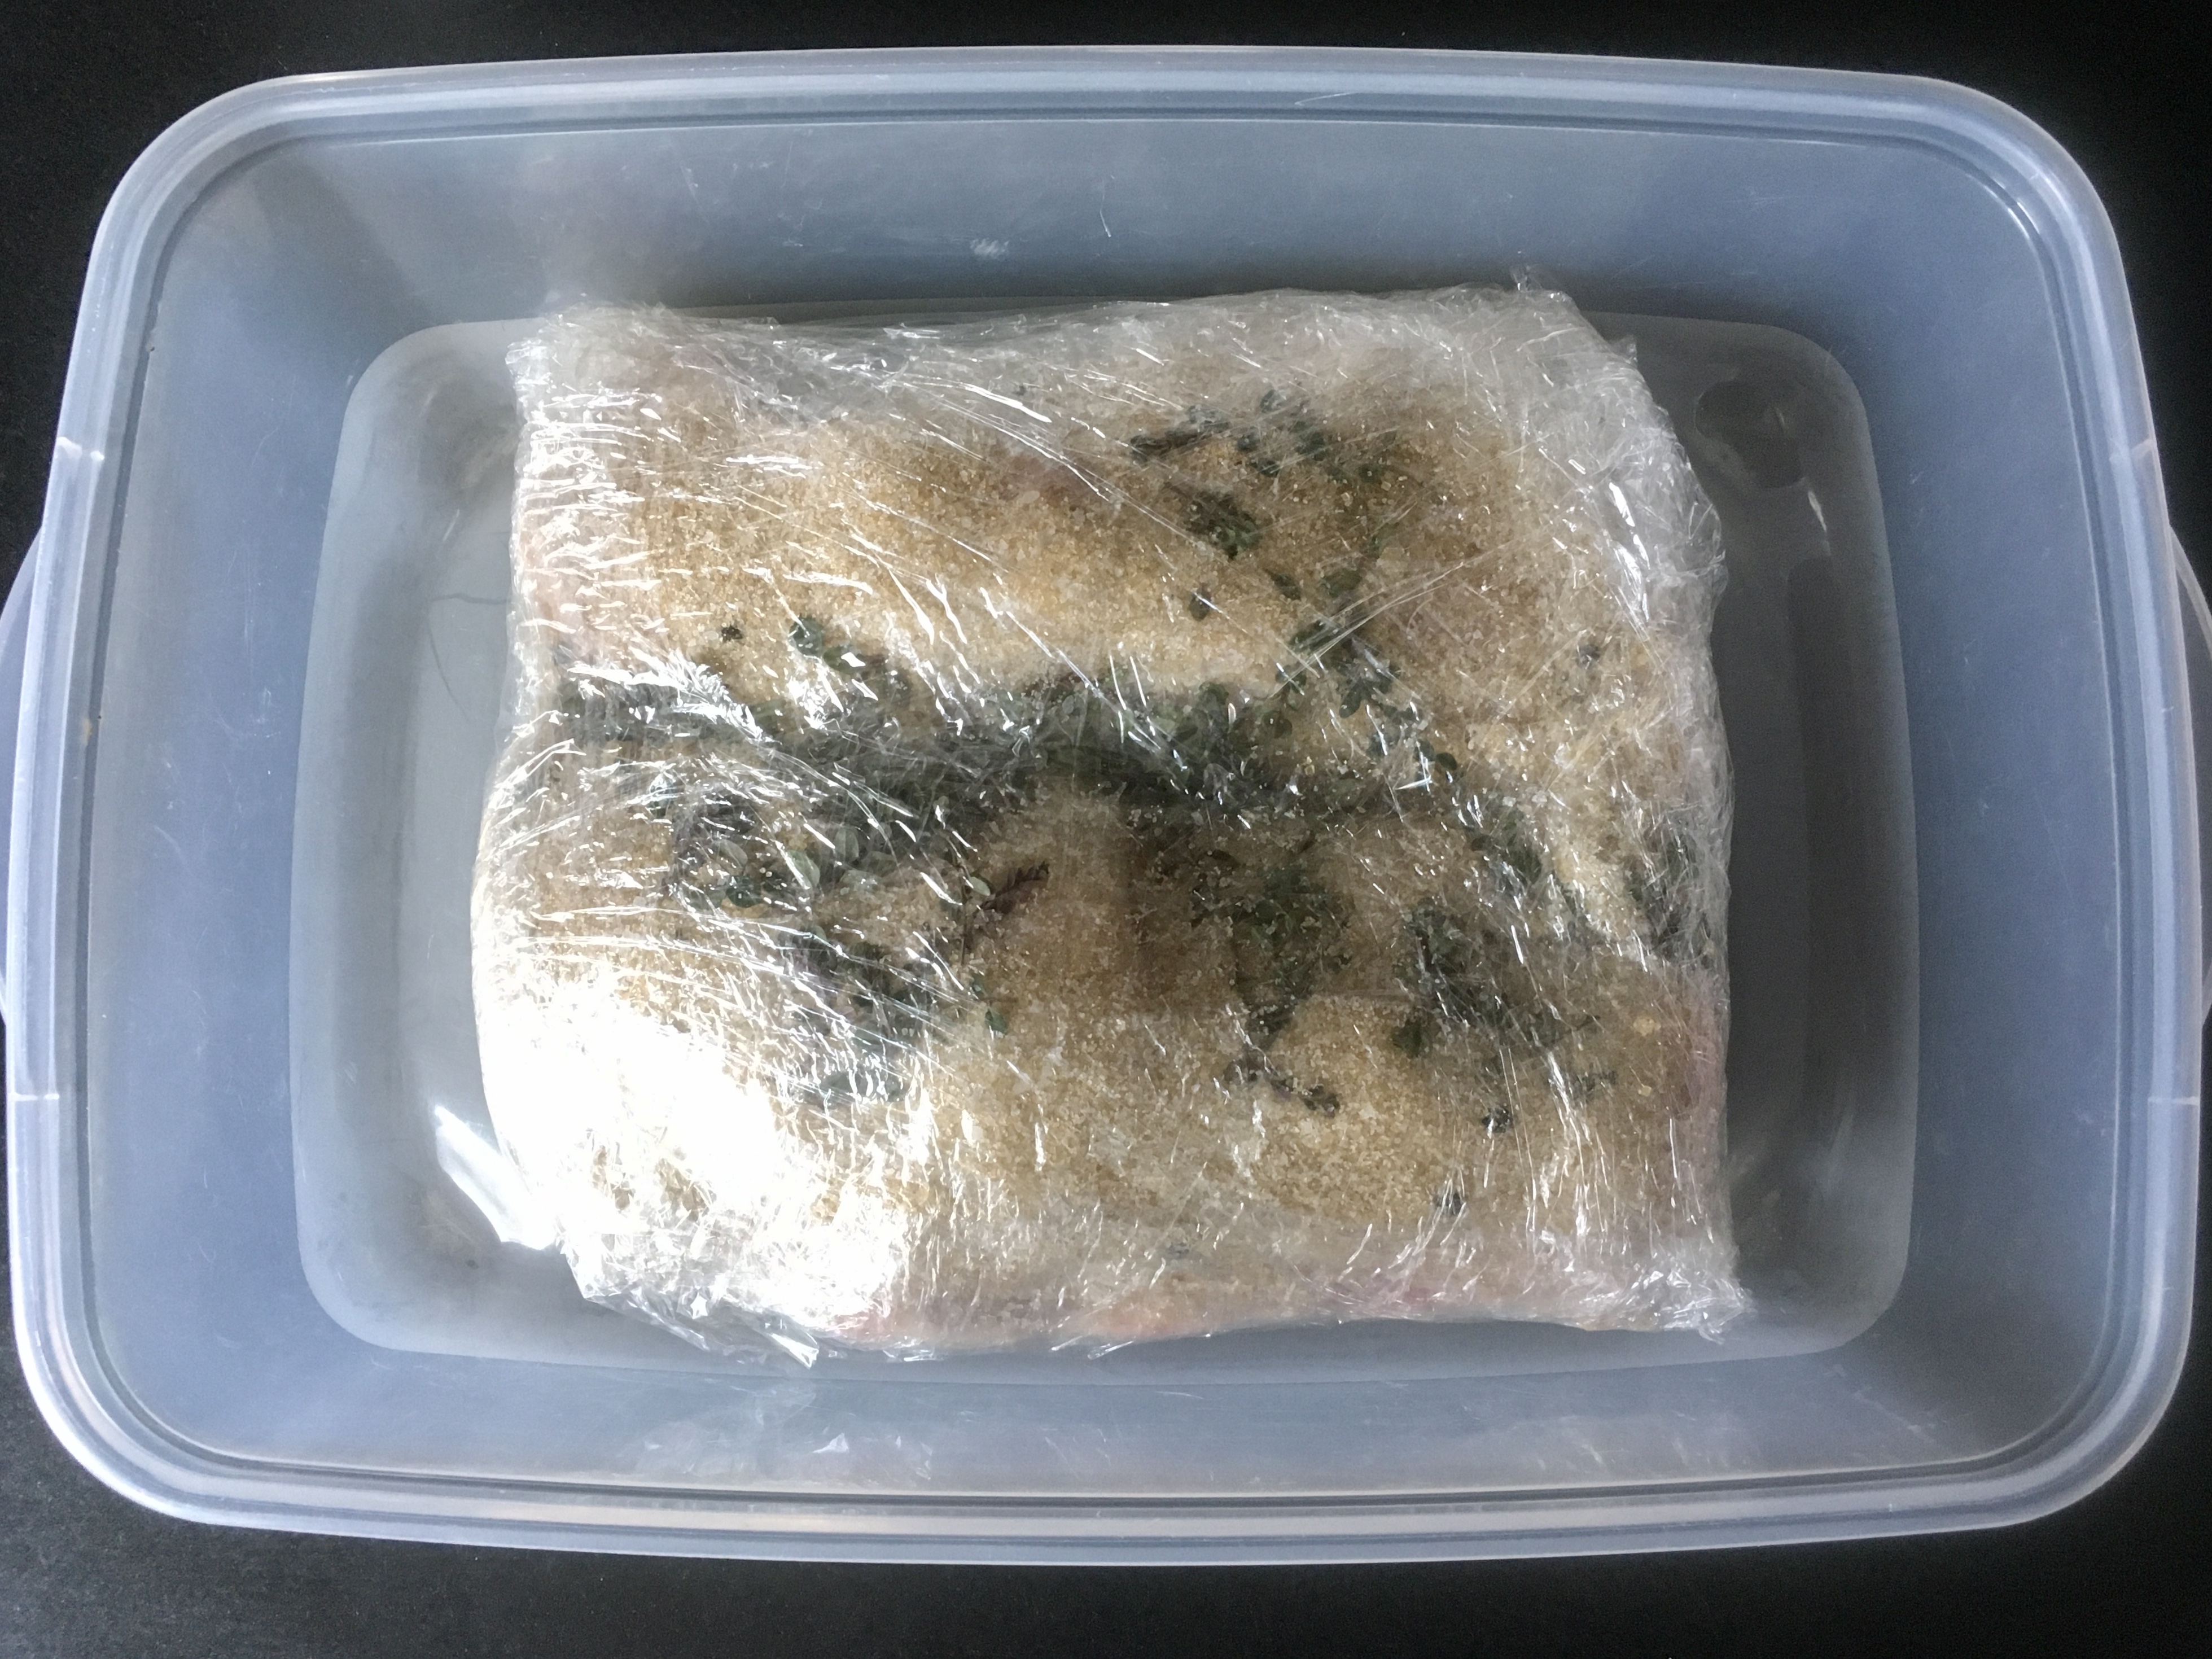
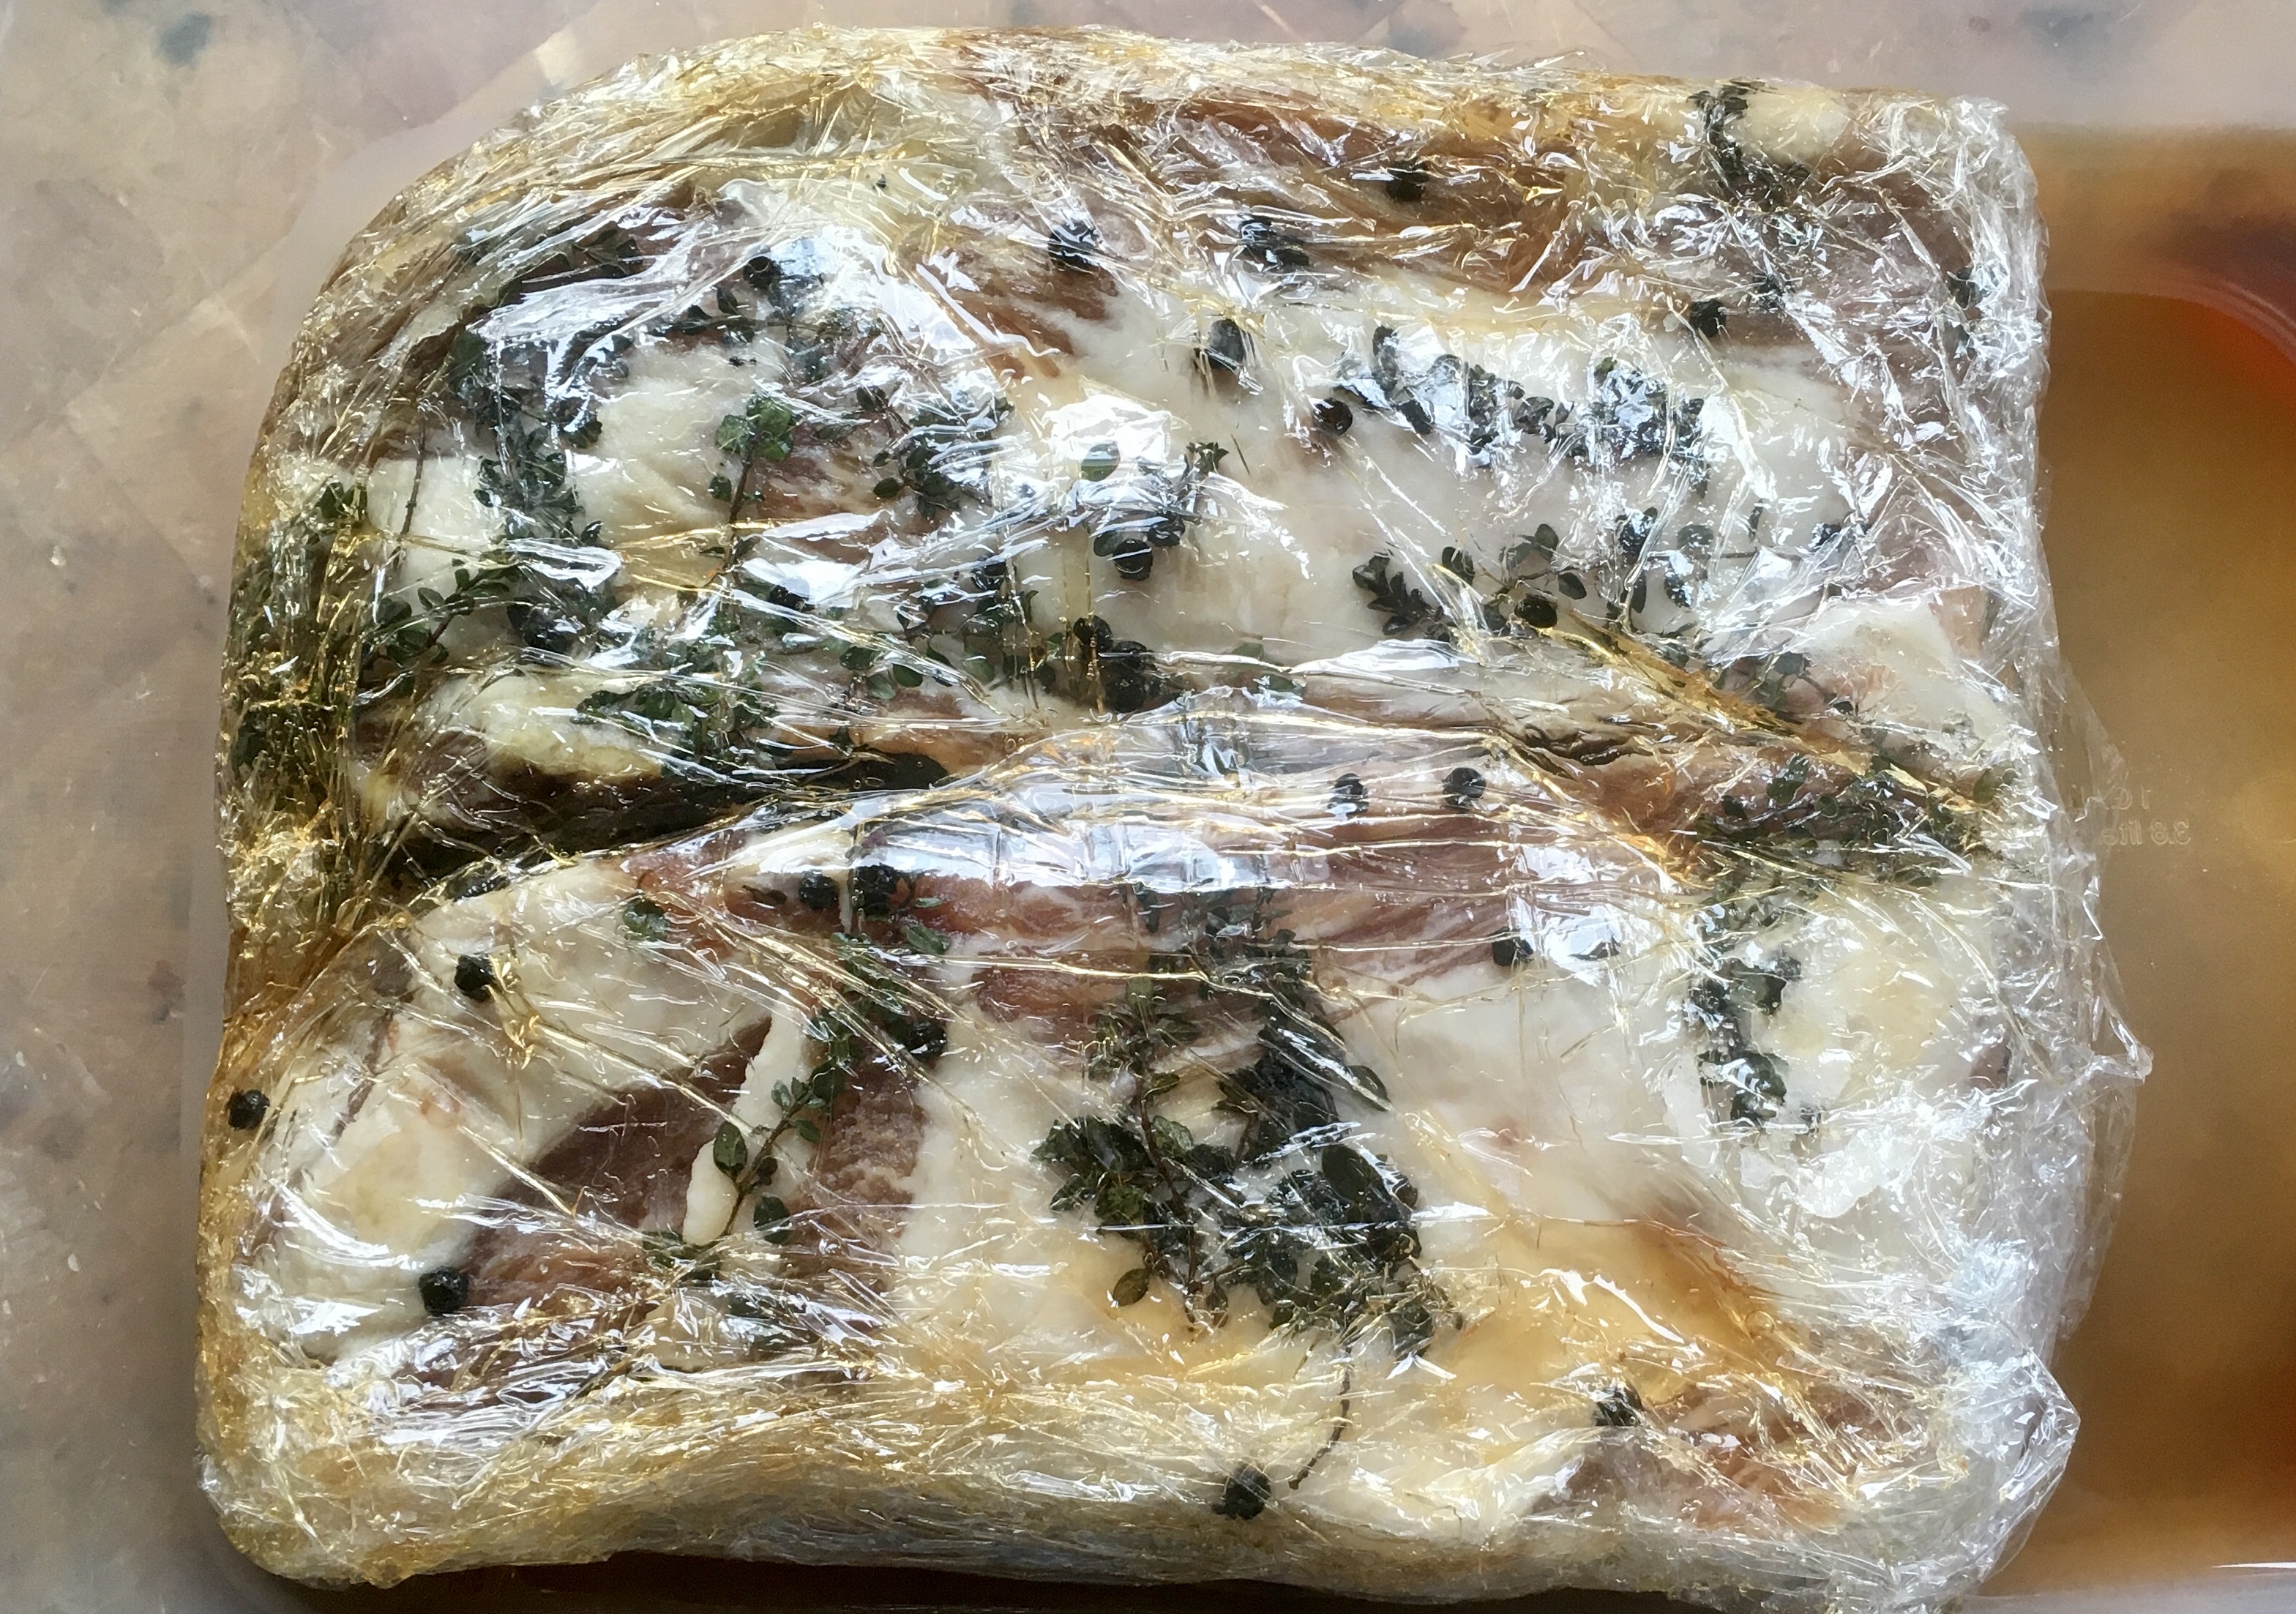
Fold the plastic wrap over the jowls as tightly as you can, pressing the rub into the meat. If the wrap is loose, use more wrap to really tighten it up. Then place the entire pork-wrapped package in a container that will hold the liquid that will ooze out during the curing process.
Into a container with a lid and into the fridge.
Place the container in the fridge to cure for 3 weeks.
Every couple of days, flip the plastic wrap package over, so that the top is now the bottom. Then return it to the fridge. You want the rub to get at every part of the pork. Don’t pour off any liquid that forms…it gets kind of gooey, but it will help the curing process.
3 weeks later, it has transformed…
In about 3 weeks, the pork jowls will feel firmer. This is a sign they’ve been properly cured. Remove them from the plastic wrap, rinse them thoroughly under cold clean water, then pat them dry with paper towels.
They’re perfect…they just need a rinse.
Cured, rinsed and patted dry. Cut the guanciale into smaller pieces before freezing. A little goes a long way!
At this point, cut the guanciale into smaller pieces, wrapping each well and placing them in freezer bags. They will keep in the freezer for a long time.
Many guanciale recipes tell you to hang the meat in the fridge for at least a week after curing, but I haven’t really found the need to do that if I’m keeping them frozen. The drying process keeps the meat from getting moldy, but that’s only if you keep it at room temperature, which I don’t.
Always slice off a little to fry up a test batch! It’s all about quality control!
The Basic Dry Cure Mix
This basic dry cure mix is extremely simple, and you can cure many meats with it. But it does require a special ingredient: pink salt. This is not pink Himalayan salt. This is a very special curing salt that must be used in small amounts. (You can easily find it online.) It contains nitrites which will help preserve the meat and give it a good color. Many people get bent out of shape over nitrites these days, so you need to decide whether you want to use pink salt or not. I do, because I don’t eat pounds of guanciale like a lab rat. If you don’t use it, the meat will turn a bit gray–nothing wrong with it, just not an appealing color.
1 1/2 cups Diamond CrystalKosher Salt*
1/2 cup organic turbinado sugar
5 teaspoons pink curing salt
Combine these ingredients and mix well. Store the basic dry cure mix in a tightly sealed plastic bag in your pantry.
*An important note: the reason I give the brand name for the salt is because all Kosher salt does not weigh the same! A cup-and-a-half of MortonKosher Salt, for example, weighs more and will throw off the recipe.
The definition of a consomme is: “a clear soup made with concentrated stock.” I might add “mind-blowing” to that sentence, especially with this recipe. The key to success– and this is crucial–is to use absolutely garden-fresh, in-season ingredients. If you try this with greenhouse or supermarket tomatoes, you’re just wasting your time.
4 1/2 lbs. of fresh garden tomatoes (my favorite is the heirloom: Brandywine)
1 large bunch of fresh basil, leaves and stems
1 2-inch piece of fresh horseradish, peeled
1 clove of garlic, peeled
1 tablespoon white wine vinegar (I use Alessi)
2 oz. vodka (I use Tito’s)
sea salt and pepper
Remove the core of the tomatoes, but leave everything else, including seeds and skin.
Put all the tomatoes, basil, horseradish, garlic, vinegar and vodka in a blender or food processor. You might need to do this in batches if your equipment can’t handle it all.
Process until you get a kind of slush.
Line a mixing bowl with a double layer of cheesecloth and pour the tomato slush mixture into it. Gather up the corners of the cheesecloth carefully, and tie them securely so you can lift the bundle up by the knot. Hang the bundle from a hook over a clean bowl in the fridge so that it catches the liquid that drips out, and leave the whole thing in there overnight. The liquid that drips out will be clear.
Cheesecloth bundle dripping overnight in the fridge.
To serve, chill bowls (or in this case: the sipping glasses) in the fridge. When you’re ready to serve, ladle out the consomme and garnish each with a tiny basil leaf. A drop of excellent quality olive oil is optional.
Synthetic cheesecloth apparatus. The real thing works better.
I tried using a synthetic cheesecloth for this recipe, and I found that it doesn’t filter out enough of the solids to make a clear consomme. You could use it along with real cheesecloth, just to use the stand, or just hang it all in real cheesecloth, as described in this recipe.
I grill year-round. I’ll stand in 3 feet of snow to get smoked ribs just right, if I have to. Through years of tireless experimentation, I’ve come up with a barbecue sauce that I can be proud of. I prefer a slightly sweet and tangy barbecue sauce, and it works really well with pork or chicken.
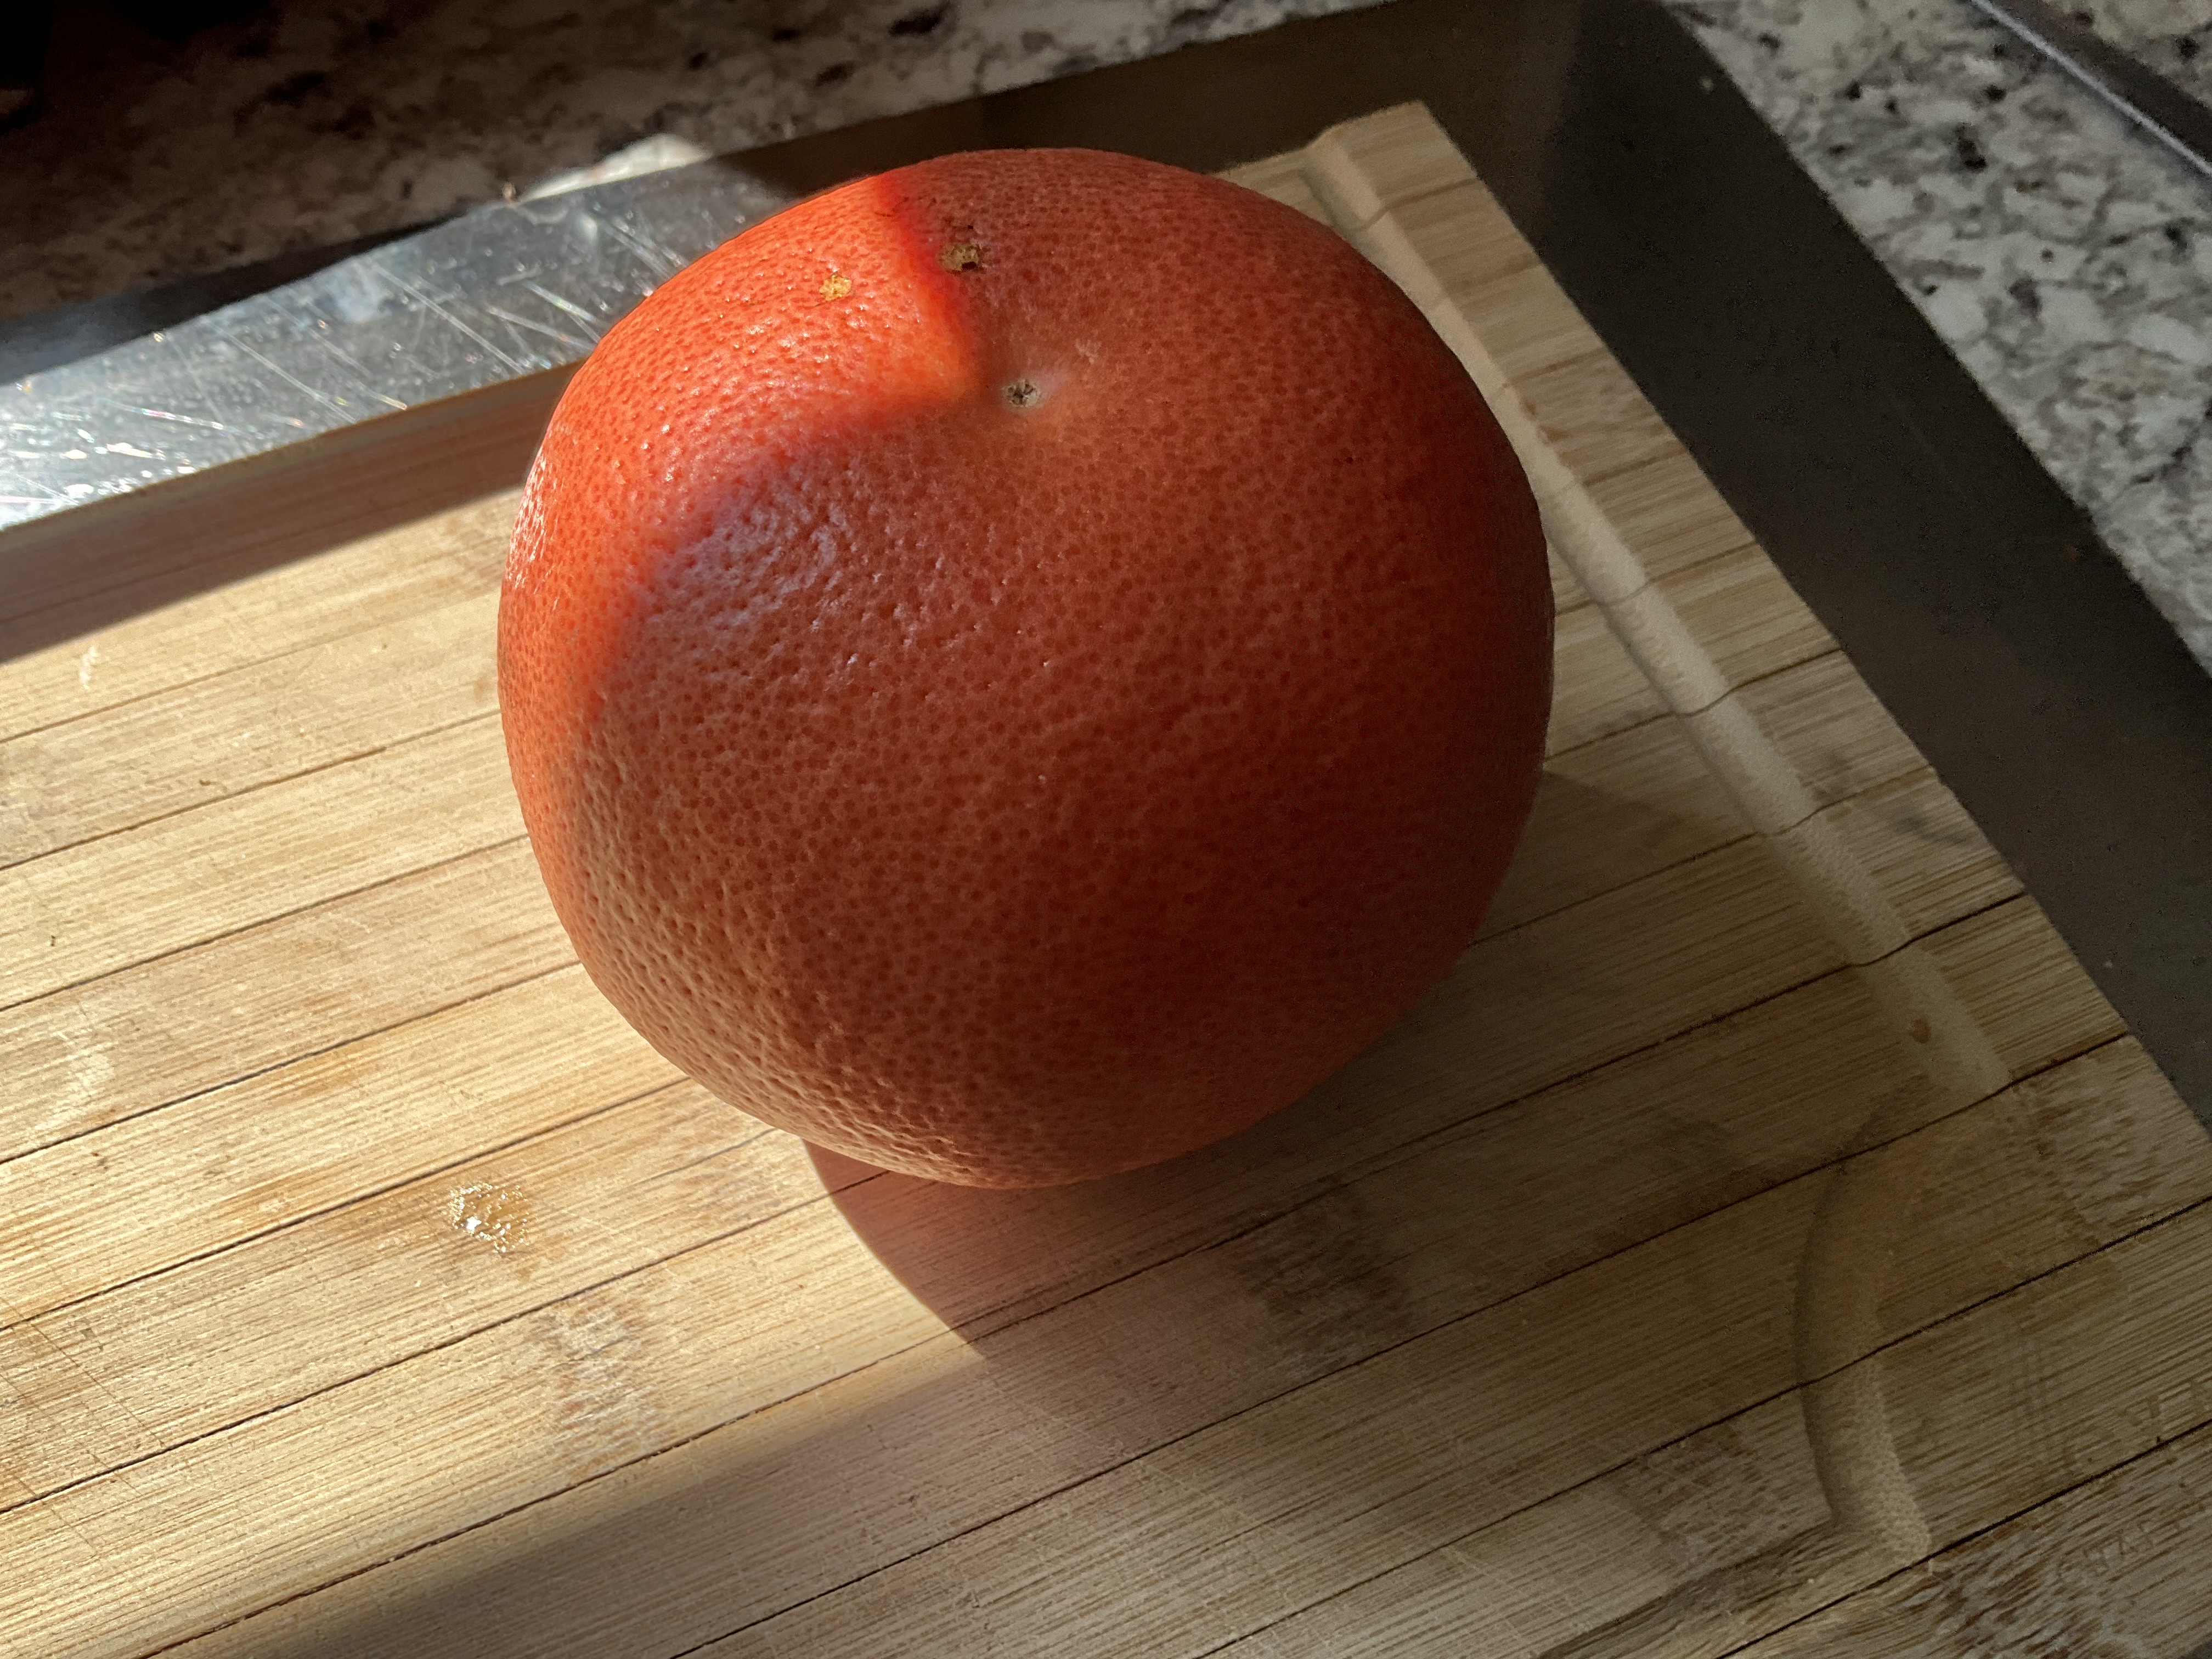
What makes this sauce special is the citrus. I originally used lemon juice for this recipe and it was good. Lime juice was better. Adding lime zest: even better than that. I tried orange juice and zest, even Meyer lemon. But the Big Daddy of ’em all was grapefruit. I was craving my barbecue sauce one day and only had a grapefruit in the fridge. I thought: how bad could this be? Turned out to be the perfect foil to the sweetness of the brown sugar and ketchup.
Try this sauce on your next rack of ribs, batch of chicken wings, or even a whole bird. Cook the meat almost all the way through, brushing the sauce on for the last 20 minutes so that the sugars don’t burn. Then just try to stop eating it!
GRAPEFRUIT BARBECUE SAUCE
1 cup ketchup
1/2 cup firmly packed brown sugar
Juice and zest of 1 grapefruit
3 tablespoons unsalted butter
1 teaspoon granulated onion
1 teaspoon cayenne pepper sauce, like Frank’s Red Hot
1 teaspoon Worcestershire sauce
1 teaspoon granulated garlic
1/4 teaspoon black pepper
(no salt)
Combine all the ingredients in a sauce pan. Bring it to a boil and then simmer for about 20 minutes on low, until it’s slightly thickened.
It’s almost impossible to imagine that there would be any leftovers, but the last time I made a batch of boneless skinless barbecued chicken thighs with the sauce, we had a little bit left over. So we decided to make a barbecued chicken pizza with it the next day.
Fresh pizza dough, some of the barbecue sauce, a combination of sharp cheddar and mozzarella cheeses, and of course, the barbecued chicken thighs.
It’s interesting that an Eastern European country that is as far north as Newfoundland has one of the most refreshing cold summer soups of any country in Europe. It’s a cold beet soup called Šaltibarščiai (pronounced shul-tih barsh-chay) and it’s classic Lithuanian cooking at its best.
No summer was complete without my Mom’s Šaltibarščiai on the table, and my Dad always insisted on eating it with boiled potatoes on the side. Now residing in an assisted living facility, my Mom has not had this soup in many years, so I made her a batch when she came to visit recently.
There are many different variations of this soup. For example, many Lithuanians today use keffir instead of buttermilk. My Mom insists this is a Russian influence and therefore not a good thing. I just think buttermilk tastes better.
1 quart buttermilk
4 hard-boiled eggs, peeled and chopped
3 cucumbers, peeled, seeded and chopped
8 beets, cooked, peeled and chopped
1 tablespoon finely chopped fresh dill
1 scallion, finely chopped, greens only
salt
a pile of boiled potatoes (optional)
Pour the buttermilk into a large bowl. If it’s very thick, you can dilute it a bit with fresh water.
Peel and chop the eggs and toss them in the bowl. Peel, seed and chop the cukes…then into the bowl.
I love LoveBeets, hermetically sealed cooked and peeled beets, ready to use, available in most supermarkets. (In the old days, my Mom would simply use canned beets.) I open a couple of packs of Love Beets, pouring the beet juice into the bowl. I chop the beets and add them as well.
Grab some dill and chop it finely. Add it to the bowl. Finely chop the greens of one or two scallions and sprinkle some salt on them. Rub the salt into the scallions, mashing them a bit, softening them. Then add the to the bowl.
Stir everything together, put a lid on the bowl, and let it chill in the fridge for a few hours.
Remove from fridge, stir, and season with more salt if needed. Serve with boiled potatoes, if you like.