Posts Tagged ‘chicken’

Through years of tireless experimentation, I’ve come up with a barbecue sauce that I feel is the best I’ve ever made. Granted, everybody has their favorites, but this one kicks butt. I prefer a slightly sweet and tangy barbecue sauce,  so unless I’m making a classic pulled pork sandwich, I usually avoid vinegar-based sauces.

What makes this sauce special is the citrus. I originally used lemon juice for this recipe and it was good. Lime juice with lime zest was better. I also tried oranges, tangerines, even Meyer lemons. But my breakthrough happened on a day when I was craving barbecued chicken and all I had in my fridge was a grapefruit. I thought: how bad could it be? Turned out to be the perfect foil to the sweetness of the brown sugar and ketchup.

My favorite chicken pieces are the leg quarters: thigh and drumstick all in one. Chicken breasts, even on pastured birds, are pretty flavorless and dry, so I pass on them for the darker meat that’s juicy and fatty. (Honestly, I find it hard to trust anyone that won’t eat meat off a bone.)

Cooking chicken in the oven before putting it on the grill has several advantages. I don’t have to stand over the grill, constantly worrying about the meat burning or the fire going out. I can simply set a timer when I need to brush on the barbecue sauce or remove the chicken pieces. And the chicken cooks evenly…one piece won’t be burned while another piece is undercooked. Cooking them low and slow in the oven keeps the chicken juicy and tender. And I’m assured that my chicken is thoroughly cooked…no worries about salmonella.

I pre-heat the oven to 350 just to get it nice and hot. I line a sheet pan with non-stick aluminum foil, placing the chicken pieces on it. I rub each piece with a little olive oil, and season them lightly with Lawry’s Seasoned Salt. The chicken goes into the oven and I immediately lower the temperature to 200 degrees.

While the chicken is cooking, I combine all the barbecue sauce ingredients in a sauce pan, bring it to a boil, then reduce it to a simmer, letting it cook for about 20 minutes, until it has thickened. Then I turn the heat off and set the pan aside.

I’ll bake the chicken for about an hour, taking the sheet pan out of the oven to brush the barbecue sauce on the pieces before returning to the oven again, now bringing the temperature up to 300 degrees. (Because there’s sugar in the barbecue sauce, I don’t want to crank the heat or it will burn.)

Taking the chicken out of the oven and brushing it with sauce.


In 30 minutes, I take the sheet pan out a second time, and brush the sauce on the chicken pieces again…then back in the 300-degree oven for another 30 minutes.

Once the chicken’s back in the oven, it’s time to start the grill. For projects like this, I like to use a small grill I bought for our family camping trips. It’s like a mini-Weber, and it grills enough food for 4 people easily, without wasting charcoal like a larger grill would.

These small grills are just 20 bucks, and they save you a ton of otherwise wasted, unused charcoal.


I use a smaller charcoal chimney for this project, and I use charcoal briquets, not hardwood, because I want an even fire. The coals are ashed over in just 10 minutes.

Out of the oven and onto the fire! The grill grate was nasty and rusty, so I just grabbed a clean one I had handy and popped it right on top. (I hate scrubbing grills!)


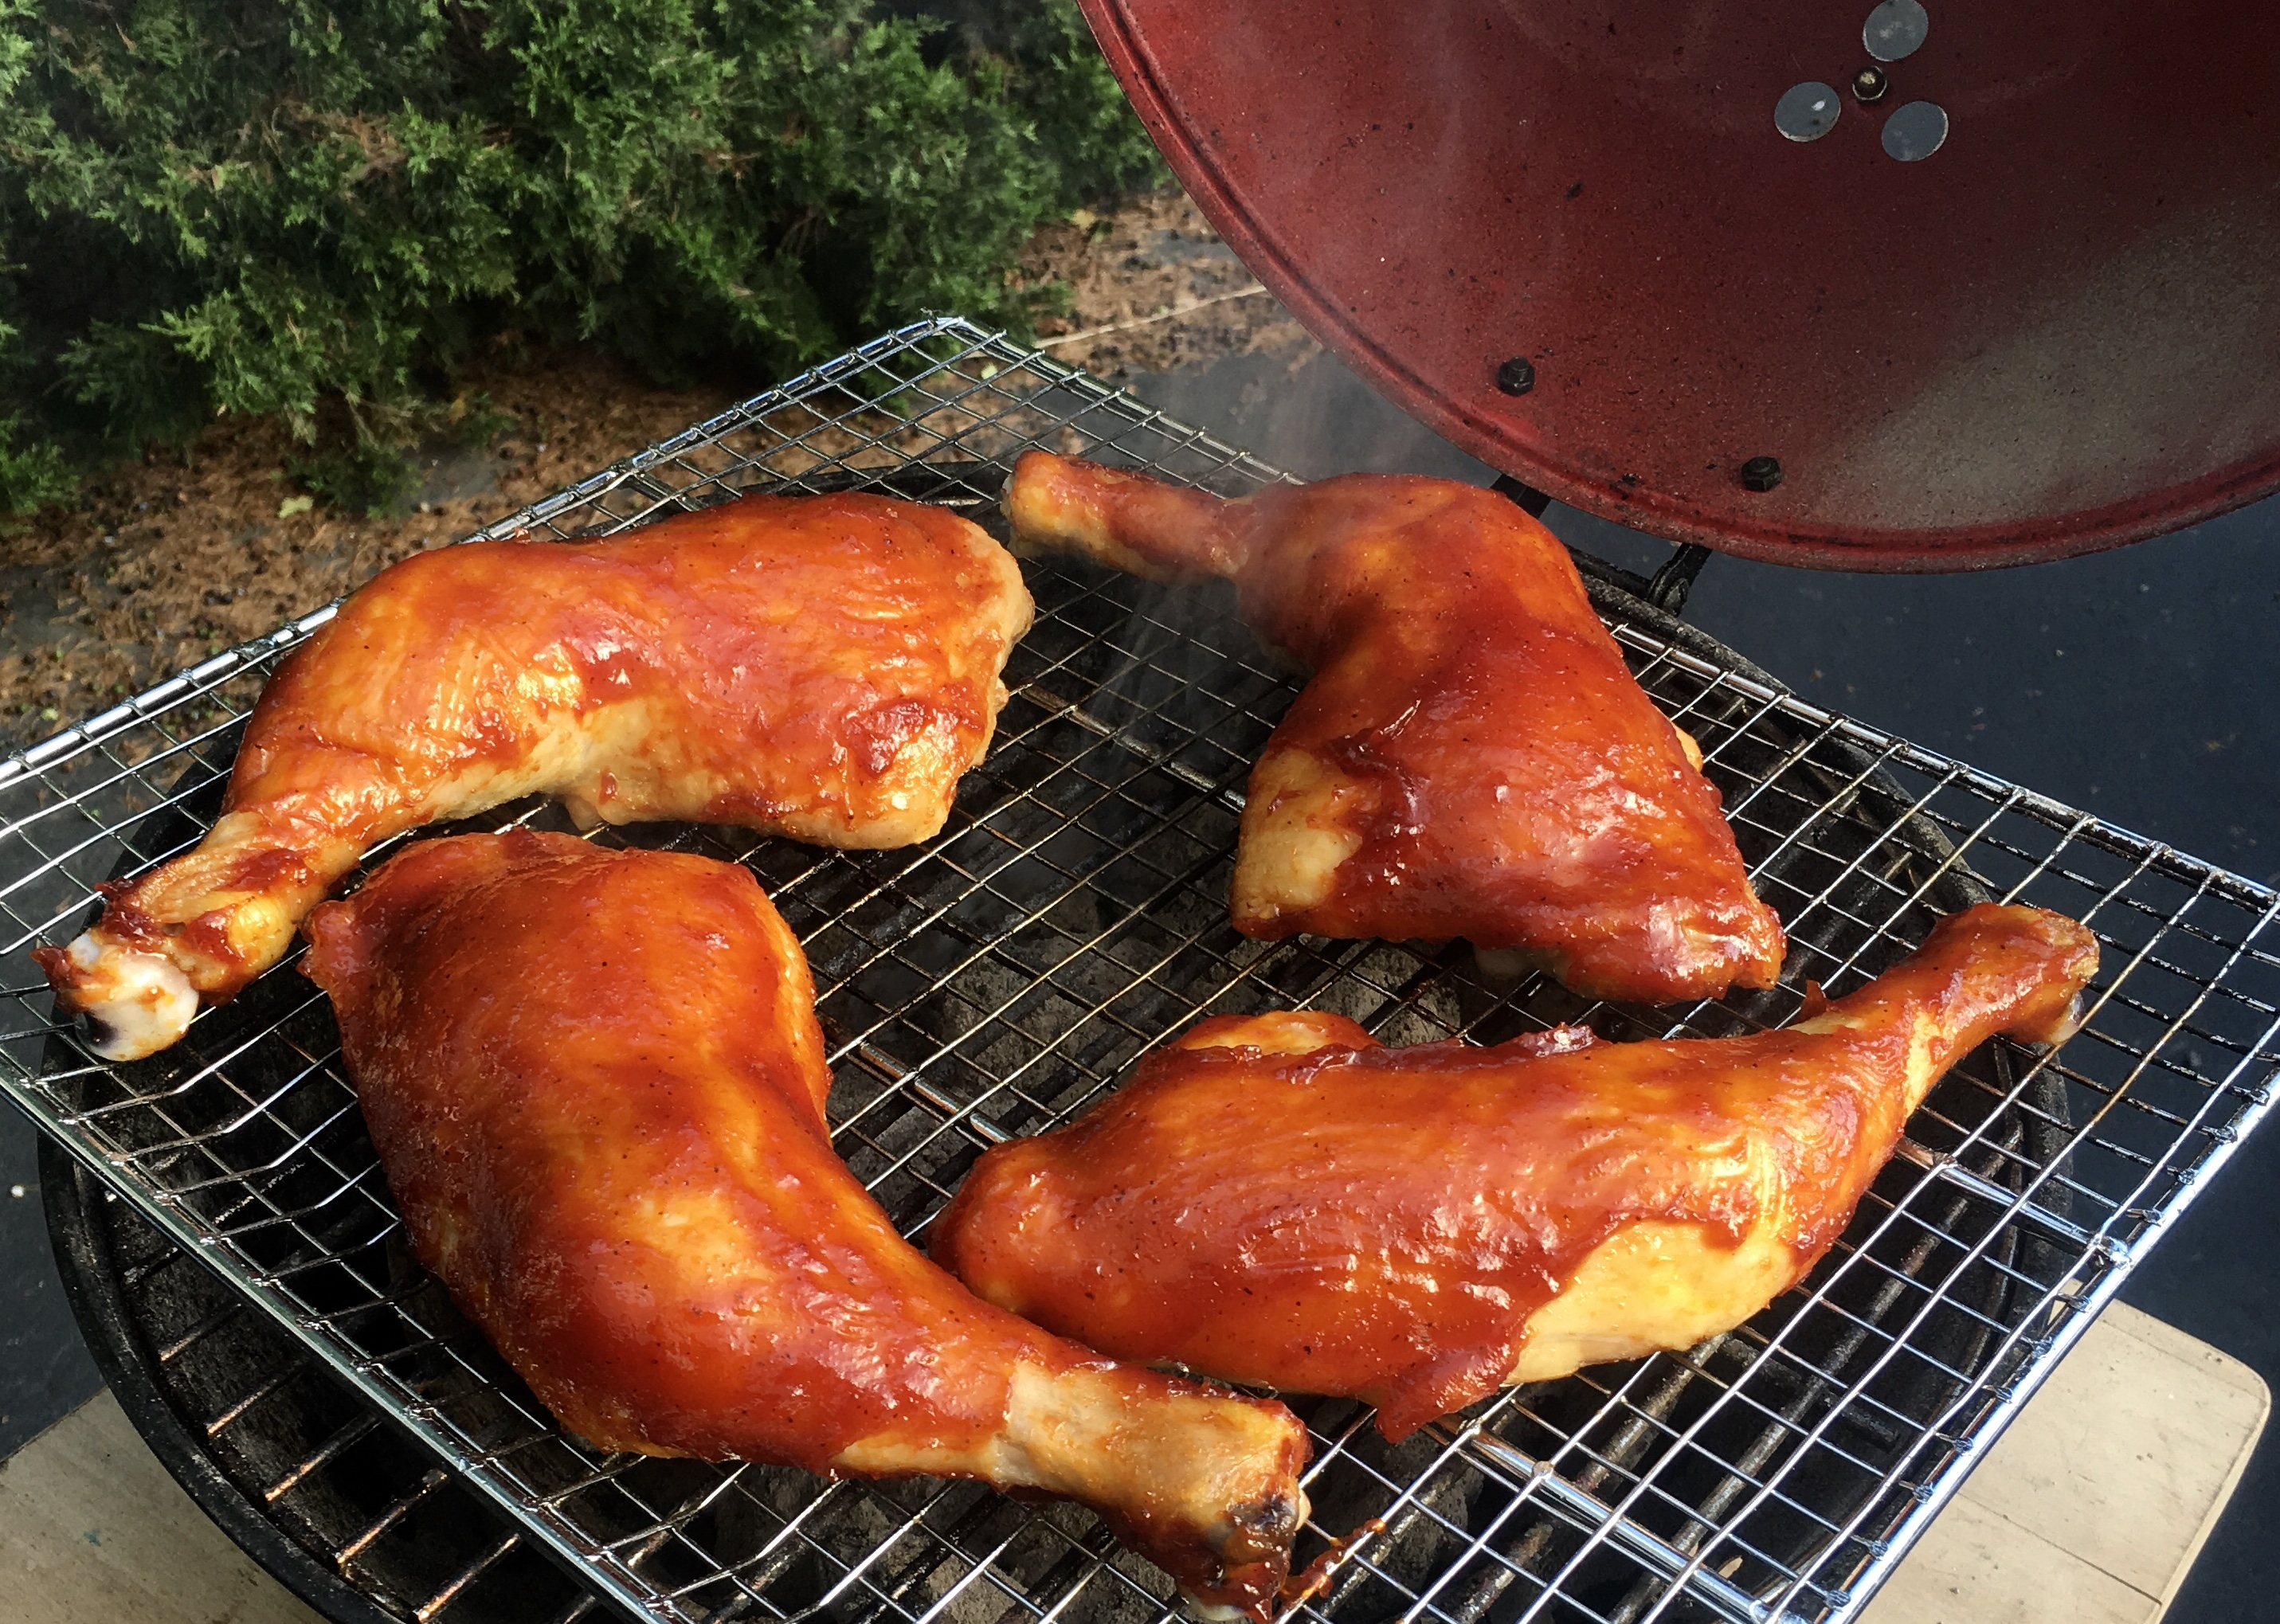
Once the chicken has cooked its total of 2 low-and-slow hours in the oven, I bring the pieces outside. I spread the coals evenly on my little grill, and place the chicken pieces on it, flipping the pieces so that both sides get nice and smokey with a little bit of char…about 5 or 10 minutes per side will do the trick.

Getting that char on the chicken is key to making it taste like it’s been on the grill all the time.


The chicken goes back to the kitchen, and while it’s still hot, I brush with the barbecue sauce one last time before serving.


Perfectly done…perfectly delicious!


Here is the magical barbecue sauce recipe…

1 cup ketchup
1/2 cup firmly packed brown sugar
Juice and zest of 1 grapefruit
3 tablespoons unsalted butter
1 teaspoon cayenne pepper sauce, like Frank’s Red Hot
1 teaspoon Worcestershire sauce
1 teaspoon granulated garlic
1 teaspoon granulated onion
1/4 teaspoon black pepper
(no salt)

Combine all the ingredients in a sauce pan. Bring it to a boil and then turn it down low, and let it simmer for about 20 minutes, or until slightly thickened.


SALMONELLA…SOLVED

Posted: October 5, 2018 in chicken, Food, Uncategorized
Tags: , , ,

I devour chicken at least three times week…fried, broiled, grilled, barbecued, smoked…it’s all good. But because of that, salmonella paranoia takes over my brain. Watch any cooking show and as soon as the host touches a piece of raw chicken, they show him or her washing their hands before doing anything else. Panicky corporate lawyers make sure you see that so nobody gets sued for something very bad that can be very easily avoided.

I use these easy steps to avoid salmonella worries in my kitchen…


Washable, disposable: the best way to keep salmonella away.


I open the plastic wrapper of the chicken in the sink. You won’t believe how much stuff splatters around when you unwrap chicken. Do it in the sink and it won’t fly onto your countertop, windows, eyeballs, or nearby fruit bowl.


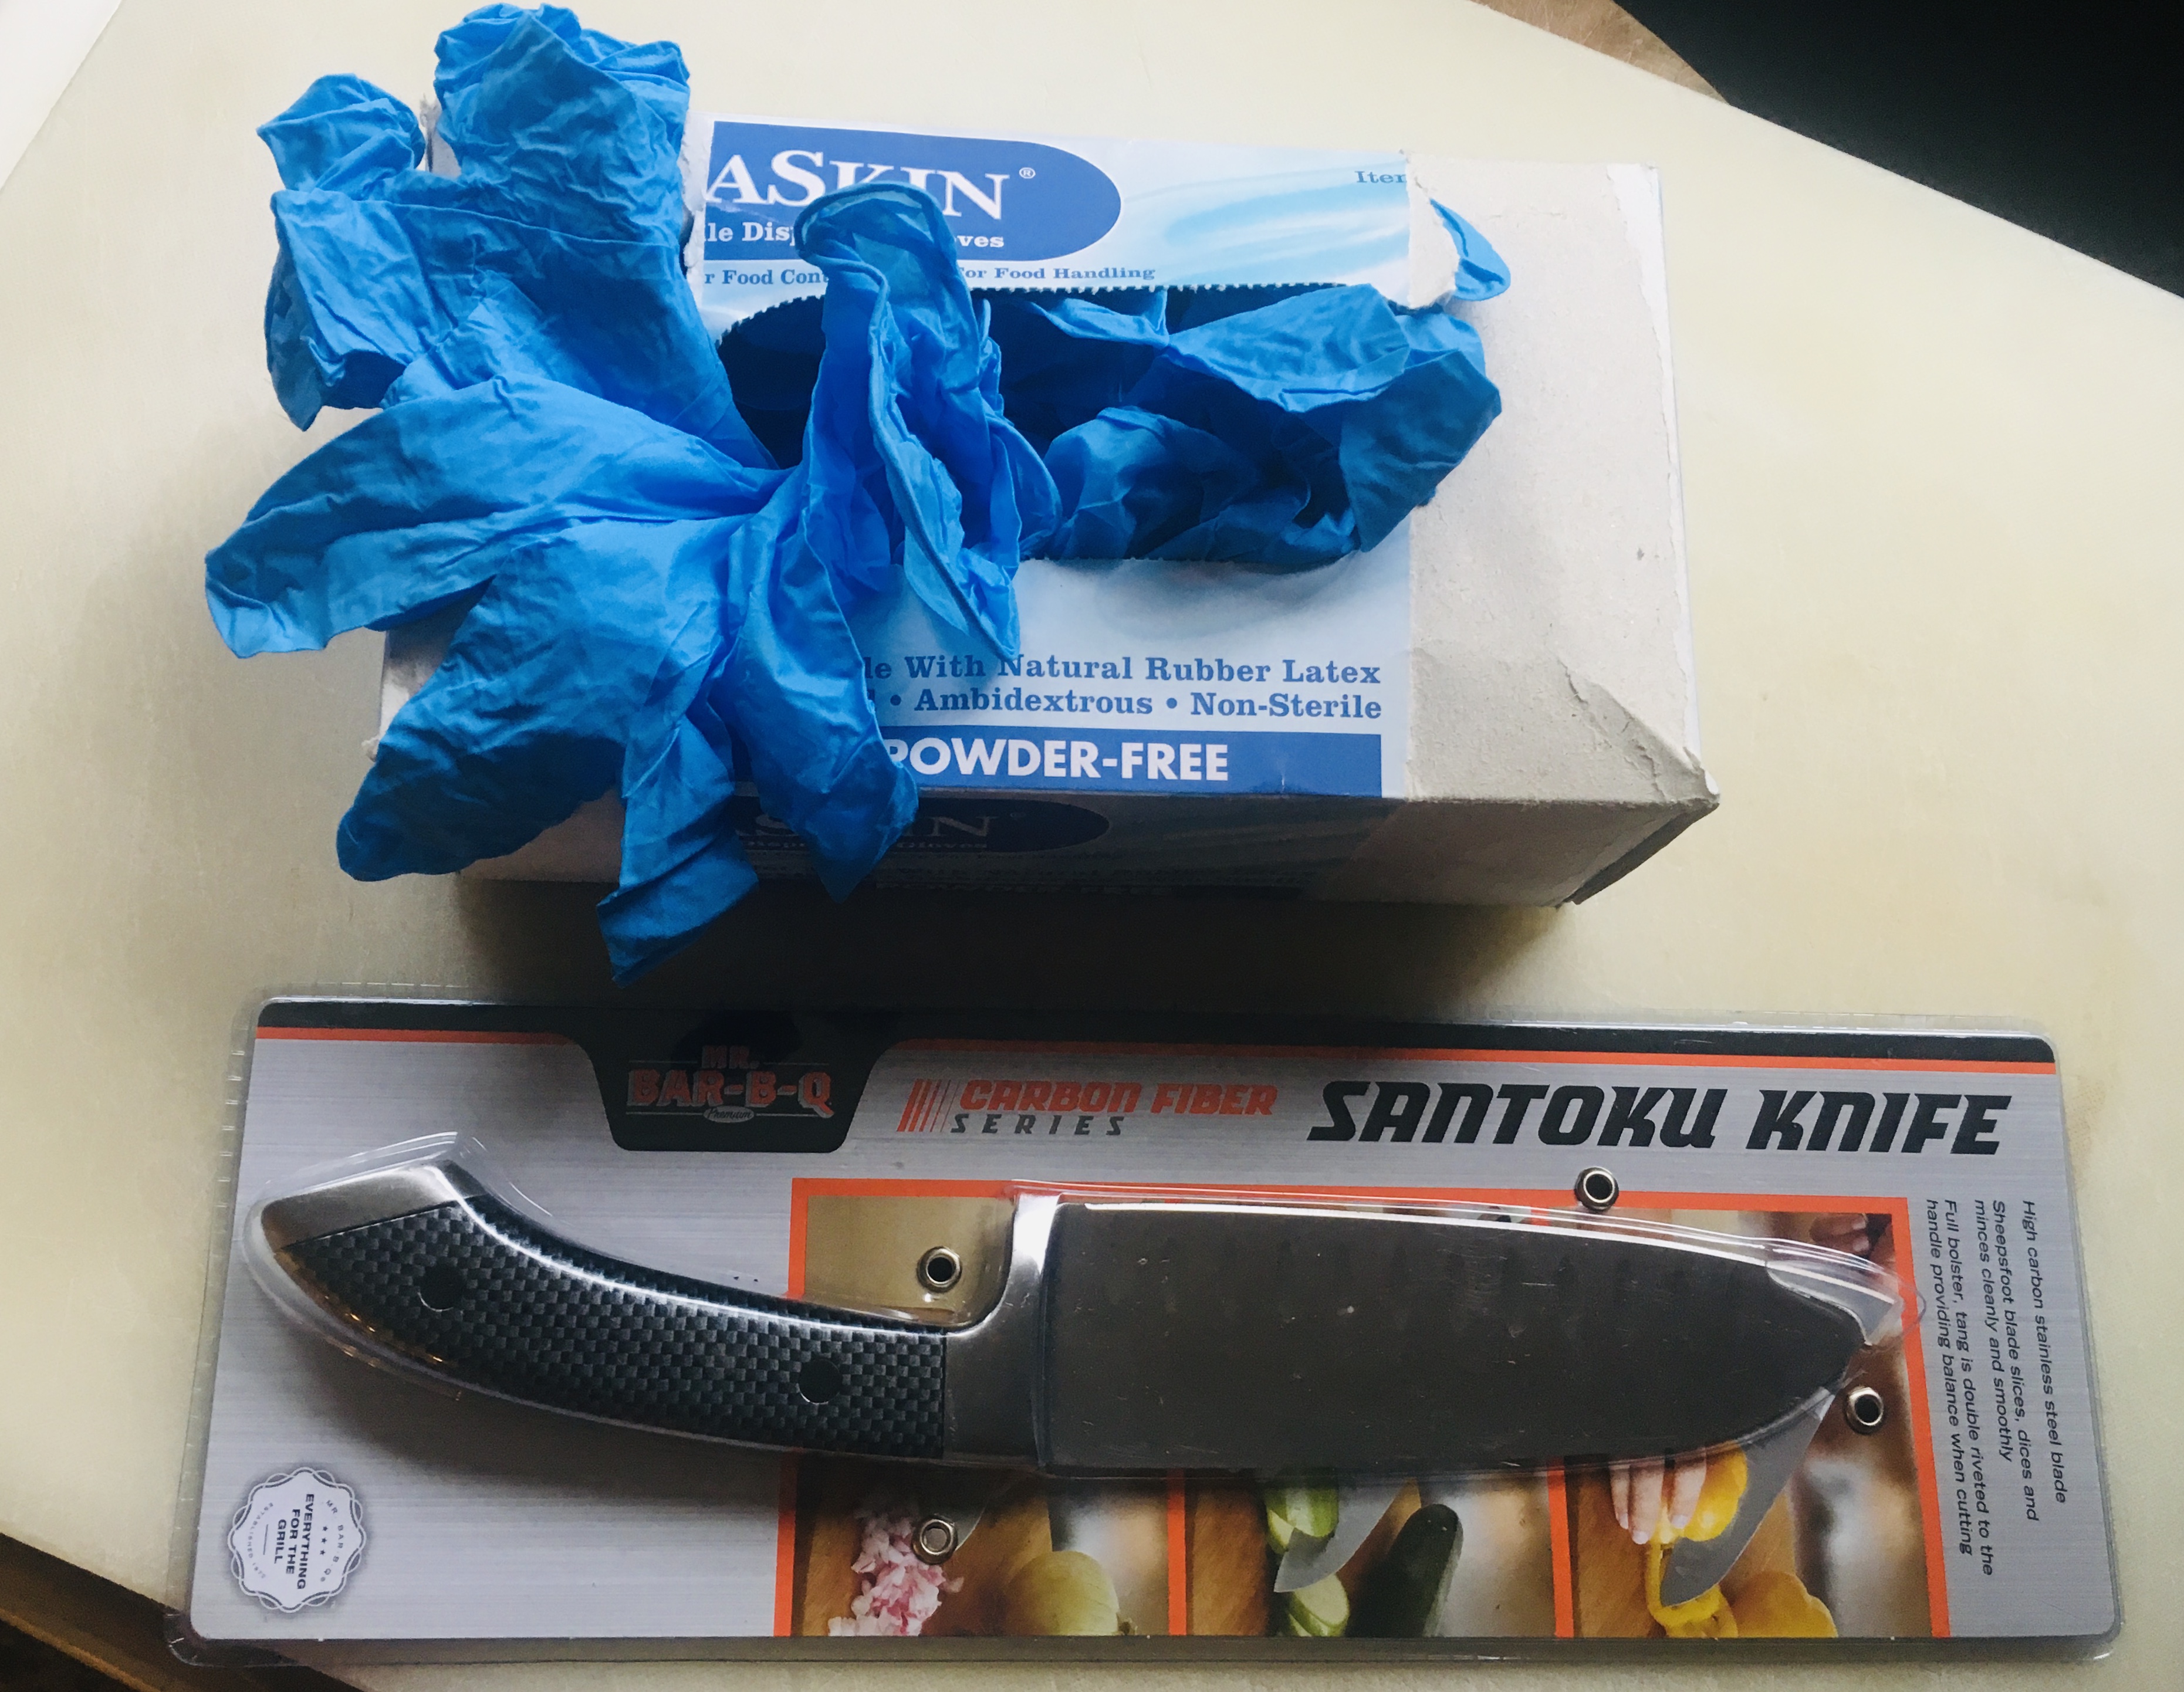
I buy very sharp and very cheap kitchen knives, like the one above. They go for about 6 bucks. Unlike my expensive prized chef knife which never goes into the dishwasher, these knives are easily sanitized by skipping the hand washing and letting the dishwasher do the work. I sharpen them when they get dull, but eventually, the get tossed out and I buy new ones. They’re not for every job in the kitchen, but they are perfect for any questionable food product like raw chicken.

While I’m at the store, I also buy a couple of acrylic cutting boards. The size and shape are a personal preference, but the idea is to use these boards when slicing and dicing chicken or any other nasty gooey thing. Unlike wooden boards that absorb everything, these are non-porous. The muck stays on the board, which is easily sanitized by tossing it in the dishwasher. The last thing I want to be doing with my deluxe wooden butcher blocks is bleaching and scrubbing those suckers because I cut up a couple of chicken breasts on them.

Finally, I buy myself a box of cheap disposable gloves. The main thing is to make sure they don’t slip off my hands while handling a sharp knife, or else I’ll be visiting the emergency room. When I’m done prepping the chicken, I just toss the gloves in the trash.

To be safe, I still rinse my hands with soap and water afterwards. But I don’t feel like I need to dip them in a vat of sulfuric acid to get them clean, and my kitchen workspace remains spotless.

Salmonella solved.

Here in Southern New England, the most popular brand of chicken salad you can buy is called Willow Tree. They’ve made it for over 50 years, and people crave it like crack. And it’s good: moist and “mayonnaisey”.

But I’ve never been a fan of “secret” ingredients, and Willow Tree is full of ’em, so my task was to make something that was as good as Willow Tree, with known ingredients. I got close…real close! As always, I use pastured chicken and organic veggies when possible. I found that boiling the chicken breasts in stock instead of water keeps the meat more flavorful.


image


1.5 lbs boneless skinless chicken breasts
4 pints salt-free chicken stock (I use home-made)
1/2 cup mayonnaise (I live on Hellman’s)
1/4 cup finely chopped celery
2 tablespoons finely chopped Vidalia onion
1 teaspoon light brown sugar
1/8 teaspoon granulated garlic
1/2 teaspoon salt
1/8 teaspoon black pepper


Heat the chicken stock in a large pot. Bring to a boil and add the chicken breasts. Bring to a boil again, then simmer uncovered for about 7 minutes. Turn the heat off, cover the pot with a lid, and let the breasts sit in the pot for 30 minutes. After 30 minutes, remove the breasts to a cutting board and allow them to cool. Save the chicken stock for another use, like soup. (See below.)

Meanwhile, in a large bowl, combine the mayonnaise, celery, onion, brown sugar, granulated garlic, salt and pepper. Mix them thoroughly to combine.

When the chicken has cooled, shred the breast meat into bite-sized pieces and then transfer it into the bowl with the mayonnaise mixture. Mix thoroughly and chill before serving.

I love my chicken salad on a Martin’s Long Roll.


BONUS: I don’t waste the chicken stock left over in the pot. I chop some carrots, celery and onion and throw it in there. I reserve some of the chicken breast meat–just a bit–and throw it in there, too. I add a little salt and pepper, and a pinch of dried Bouquet Garni. I bring it to a boil, then reduce the heat to a simmer and cook until the veggies are al dente. Pasta or potatoes optional.

Makes an awesome chicken soup!


SUPER-GARLICKY CHICKEN

Posted: August 27, 2018 in Uncategorized
Tags: , , ,

I love garlic, and I spend a lot of time trying to figure out how I can up the garlic in any particular dish. Now, this piece of chicken may look pretty harmless to you, but it is a garlic bomb…and it’s delicious. I tried to think of ways I could increase the garlic quotient without simply adding more granulated  garlic to the breading…and then it came to me: add fresh garlic to the egg wash! Brilliant!


3 lbs. chicken pieces
1 cup all-purpose flour ( I use Cup4Cup GF flour if I want this dish to be gluten-free)
2 teaspoons granulated garlic (add more if you like!)
1 teaspoon granulated onion
1 teaspoon oregano
1 teaspoon parsley
1 teaspoon basil
1 teaspoon black pepper
1 teaspoon salt
2 eggs
1 tablespoon (or more) fresh finely chopped garlic
oil for frying


I use the oven-fried method for my chicken. That means I fry the pieces until golden brown, then place them on a baking sheet and finish cooking them in the oven.

Pre-heat the oven to 350 degrees. Heat the oil in the pan to 350 degrees.

In a bowl, combine the flour, granulated garlic and onion, oregano, parsley, basil, pepper and salt. Mix well and set aside.

In another bowl, whisk the eggs together. Finely chop the fresh garlic, making it into a paste either by squishing it with the side of a chef’s knife or, my preferred method, pushing it through a garlic press. Add the garlic to the egg and mix well.

Take the chicken pieces and coat them in the egg and garlic mixture. Then place them in the flour mixture, coating well and shaking off the excess. You can place them in the hot oil at this point…or…dip them back in the egg/garlic mix again, then back into the flour, for a double-coating of crunchy garlic.

Fry the chicken pieces until they’re golden brown, but not cooked all the way through. Place them on the baking sheet. When all the pieces have been fried, place the baking sheet in a 350-degree oven to finish cooking.


Spaghetti alla Carbonara and Fettuccine Alfredo are my daughter’s two favorite pasta dishes. When she couldn’t decide which one she wanted for dinner one night, I decided that she’d get both! (Yes, I spoil my girl rotten!)

The addition of chicken and peas made for a more balanced plate. This is now one of my go-to dishes when guests arrive, since many parts can be prepared ahead of time. And the gluten-free version tastes as good the original!


fullsizerender-4


Start with the chicken…

The breading for the chicken uses gluten-free bread that I’ve toasted, crumbled and put into a food processor to make breadcrumbs. You get a lot more flavor this way than using store-bought GF breadcrumbs from a can. I add gluten-free flour to it to lighten it up. Cup4Cup is by far the best GF flour I’ve tried.

If you’re not on a GF diet, simply use regular breadcrumbs and all-purpose flour in the same proportions.

1/2 lb. chicken breasts, cut into 1″ pieces
1 egg, scrambled
4 oz. sliced gluten-free bread, toasted (I use Udi’s frozen bread)
1/2 cup gluten-free flour (I use Cup4Cup)
3 teaspoons dried parsley
2 teaspoons dried oregano
1 teaspoon dried basil
1/2 teaspoon granulated garlic
1/2 teaspoon granulated onion
1 1/2 teaspoons salt
1/4 teaspoon pepper
olive oil, for frying

Scramble the egg in a bowl. Cut the chicken into pieces, and add them to the egg, making sure they get evenly coated. Set aside.

In another bowl, combine the bread crumbs, flour, parsley, oregano, basil, garlic, onion, salt and pepper. Set aside.

Fill a pan with about an inch of olive oil. Heat to medium-high, for frying.

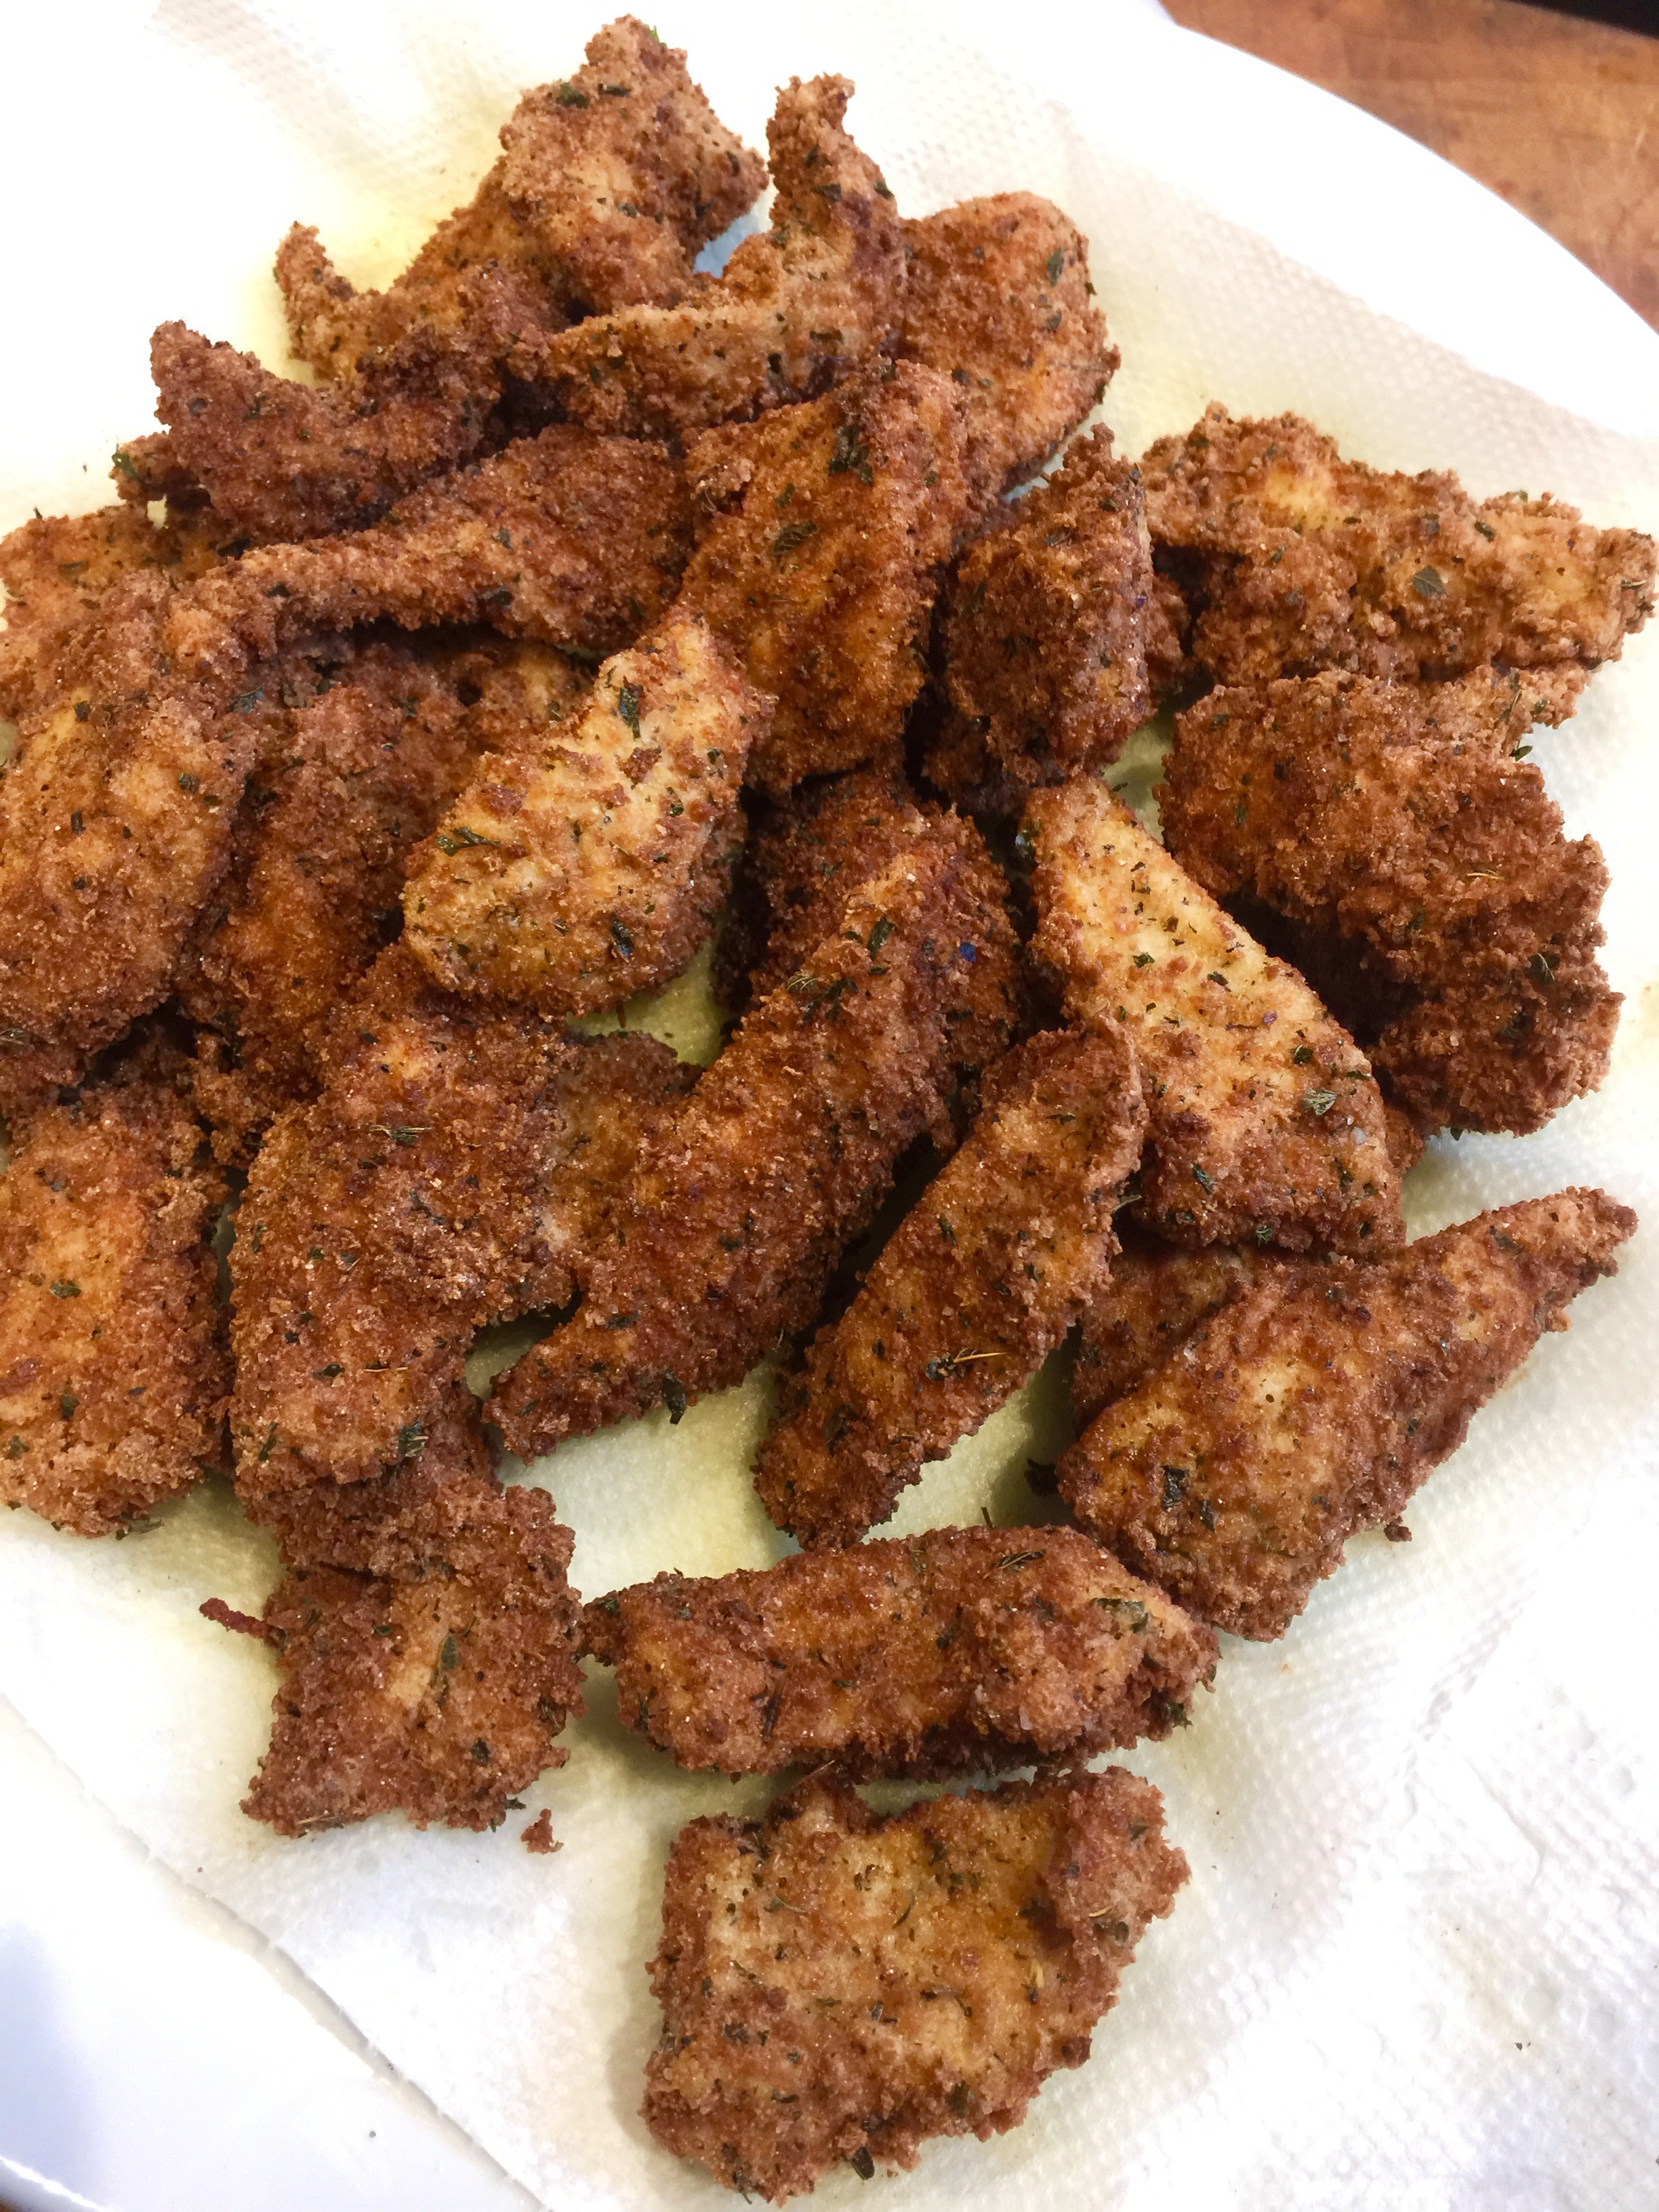
In batches not to overcrowd the pan, take the chicken pieces out of the egg and toss them in the bread crumb mixture, shaking off the excess. Place them carefully in the hot oil and fry on both sides until golden. Since they’re small pieces, they should cook all the way through easily. Drain on a plate covered with paper towels. Do this with all the chicken and set it aside. Try not to eat it all before you make the rest of the dish! (This chicken can also be eaten as is–these are my daughter’s favorite nuggets–or used with tomato sauce and mozzarella cheese to make a delicious chicken parmigiana.)


fullsizerender-6


The carbonara factor…

Many recipes for Spaghetti alla Carbonara use pancetta or bacon. But the original recipe calls for guanciale: cured (but not smoked) pig jowls, or cheeks. It’s easy enough to find in a good Italian food store, but I cure my own. I buy raw heritage Berkshire pork jowls from a farm that raises the pigs humanely, and cure the jowls for about 3 weeks in a combination of salt, pepper and fresh thyme leaves. Then I rinse them, pat them dry, and cut them into portion-sized pieces, which I wrap individually and freeze until I need them. It’s a lot of work, but to me, totally worth it.

3 oz. guanciale

If the guanciale is frozen, let it thaw just a little, then cut it into the smallest cubes you can manage. Place it in a pan and cook them until they’ve browned and crisped beautifully. Keep an eye on the pan, as guanciale can burn easily. Use the fried meat bits for this recipe and save the fat for flavoring a future dish! Set aside.


The Alfredo sauce…

Despite what you get in crappy restaurants like Olive Garden, Alfredo sauce should not be runny or soupy. It should cling to the pasta and be rich in flavor. When making this dish gluten-free, I use Garofalo gluten-free pasta exclusively, because it tastes just like real pasta. (Believe me, I’ve tried every GF pasta out there.) I buy mass quantities at Amazon.

If you’re not on a GF diet, simply use your favorite regular pasta.

1 cup heavy cream
3 tablespoons butter
Fleur de Sel or sea salt
1 lb. pasta, fresh or dried
2/3 cup freshly grated Parmigiano Reggiano cheese
freshly ground black pepper


Put 2/3 of the cream and all the butter in a large saucepan that will later accommodate all the pasta. Simmer over medium heat for less than a minute, until the butter and cream have thickened a bit. Turn off the heat.

Drop the pasta in a bowl of boiling salted water. If the pasta is fresh, it will take just seconds. If it’s dry, it will take a few minutes. (Gluten-free pasta takes a little longer.) Either way, you want to cook the pasta even firmer than al dente, because it will finish cooking in the pan with the butter and cream. Drain the pasta immediately when it reaches that firm stage, and transfer it to the pan with the butter and cream, tossing the pasta gently for a few seconds to coat.

Turn the heat under the saucepan on low, tossing the pasta, coating it with the sauce. Add the rest of the cream, all the Parmigiano Reggiano, and a bit of pepper (no salt because there’s plenty in the guanciale and cheese.) Toss briefly until the sauce has thickened and the pasta is well-coated.


At this point, you don’t want the pasta to get to dry, so you add…

1 cup of frozen peas

…tossing gently to warm them through. Also add the cooked guanciale at this time.

fullsizerender-5


Plate the pasta in a bowl or dish and serve the chicken alongside.


This is a huge hit wherever I bring it. I brought it to a dinner party last night to celebrate the 4th of July.

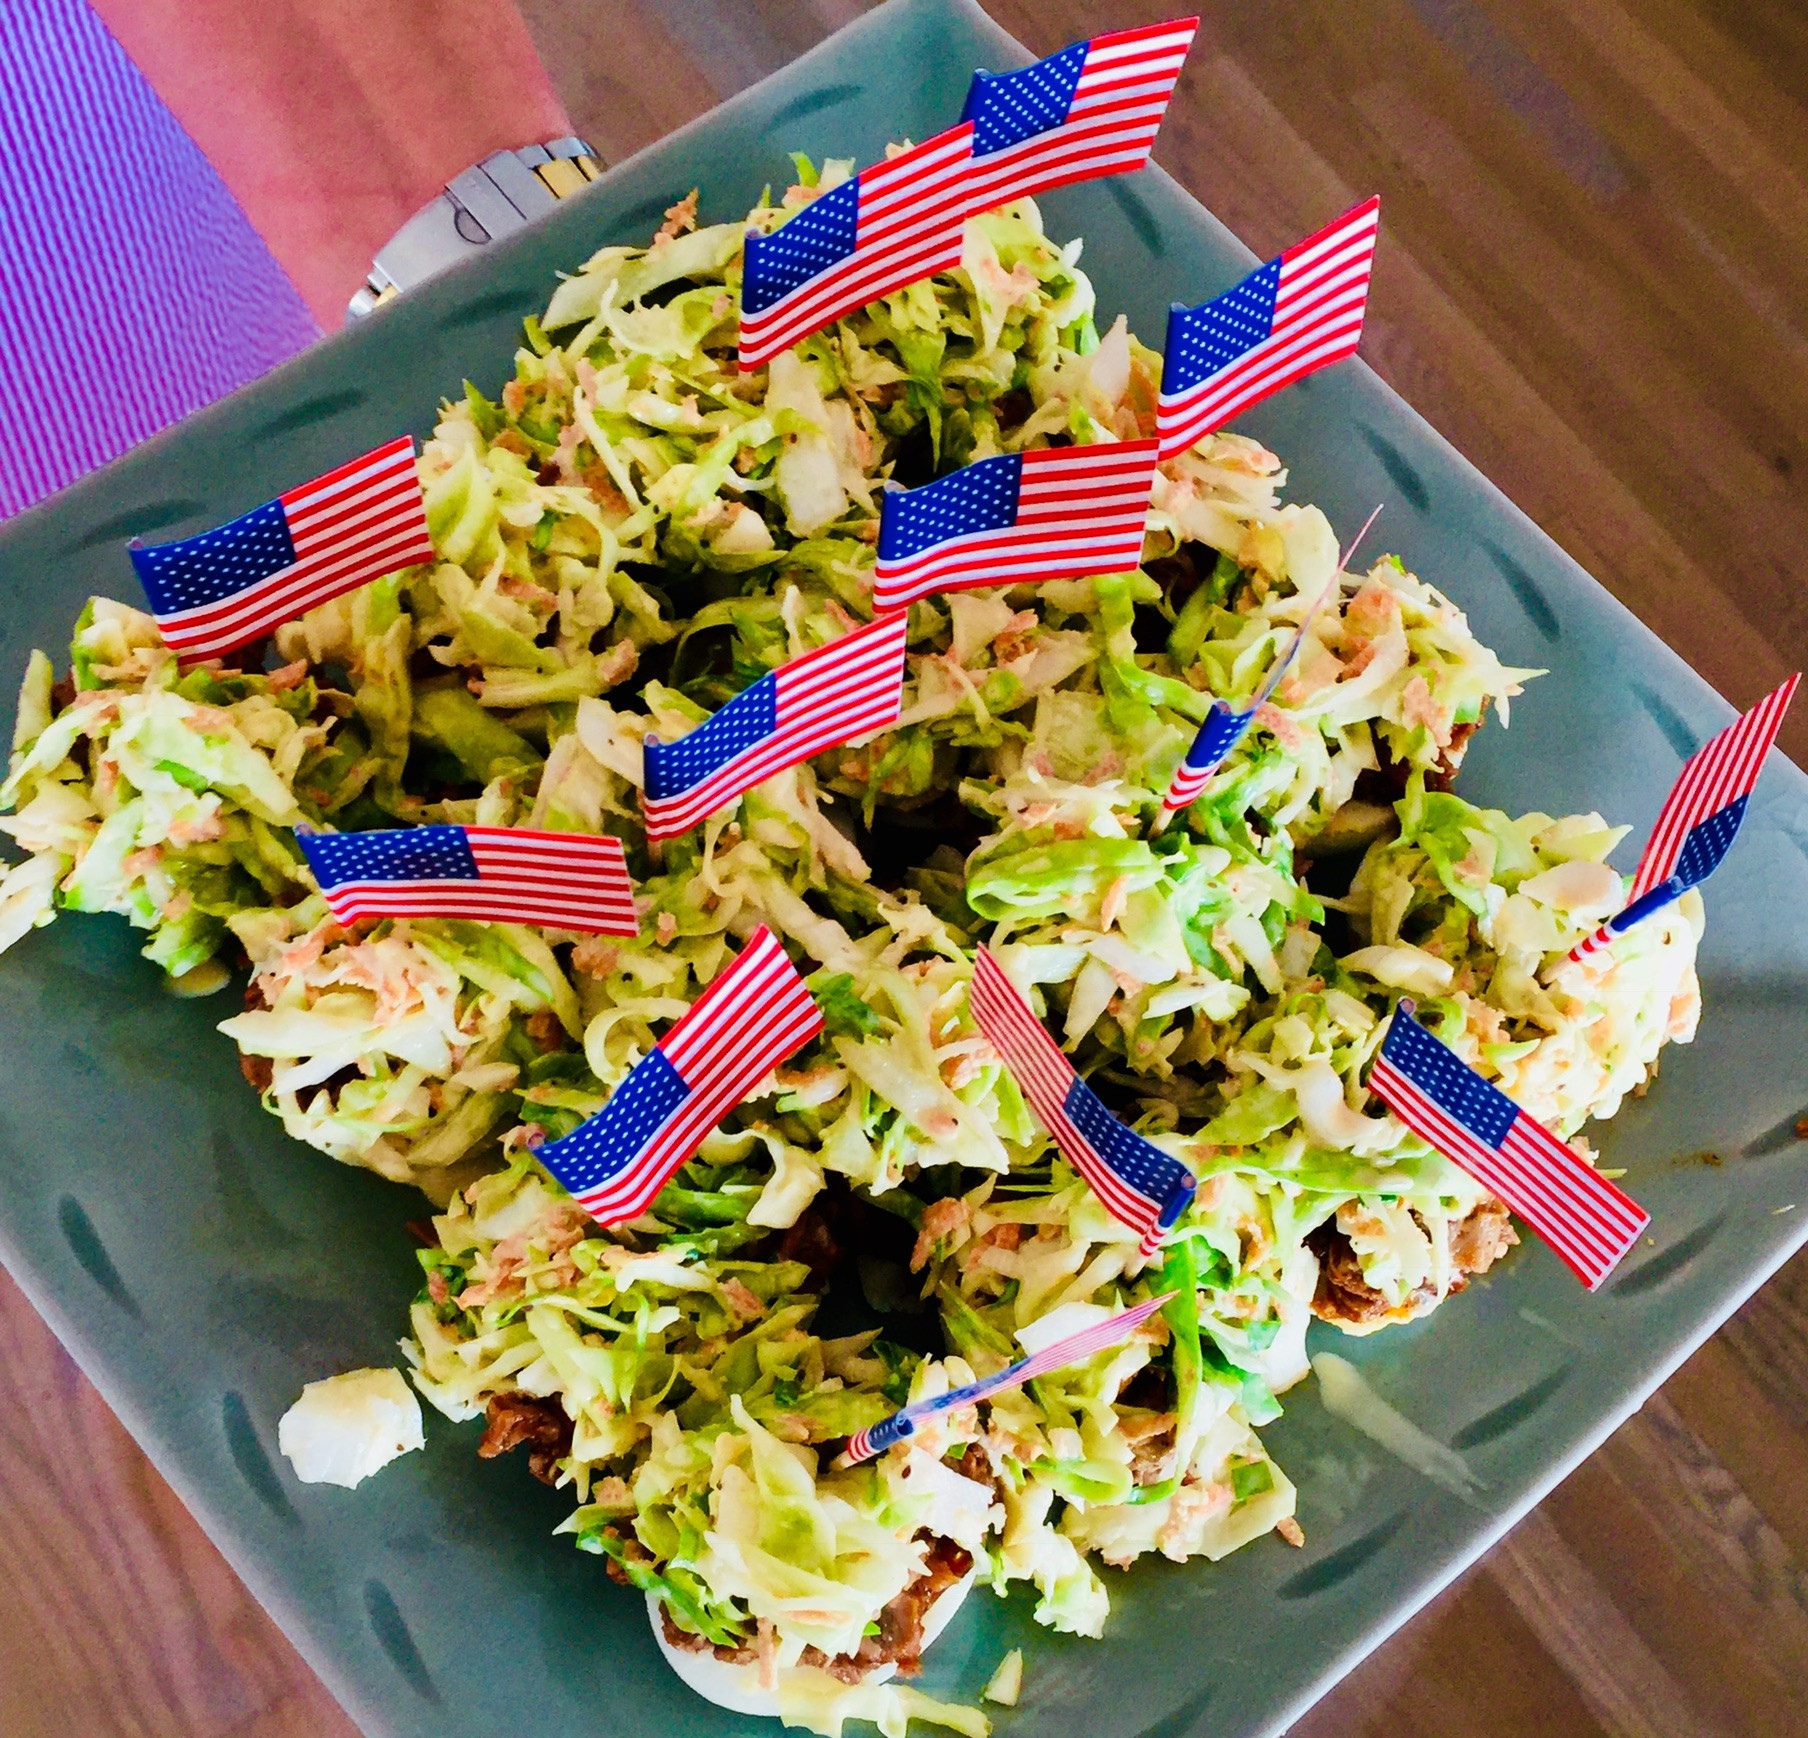
It’s easy to set up the parts at home, then put it together quickly at a party. If you know what a pulled pork sandwich North Carolina-style is all about (pulled pork on a bun with cole slaw right on top of the meat), then imagine taking away the bun and replacing with a deviled egg! It’s messy, it’s delicious, and everyone loves them.

I’ve tried this two ways now: with pulled pork and with chicken…and the big thumbs up goes to the pork. Of course, I will smoke a pork shoulder for 10 hours, pull the meat, and mix it with the barbecue sauce…all for this dish. If you don’t have a smoker, you can simply wrap a smaller piece of pork shoulder in aluminum foil (it’s good if it’s fatty), and bake it in the oven at 250 degrees for a few hours until the meat is juicy and falls apart.

Be sure to make a lot of these…they’ll go faster than the hard-boiled eggs in “Cool Hand Luke!”


For the BBQ sauce:
2 cups ketchup
3/4 cup water
6 tablespoons cider vinegar
6 tablespoons white vinegar
6 tablespoons brown sugar
3 tablespoons Worcestershire sauce
1 tablespoon chili powder
2 teaspoons salt
1 teaspoon black pepper
1 1/2 teaspoons cumin

Combine all the ingredients in a saucepan and simmer over medium heat for about 25 minutes, until the sauce has thickened. Let it cool to room temperature and then store it in the fridge. It will be good for several weeks.


For the cole slaw:
2 tablespoons mayonnaise
1 tablespoon rice wine vinegar
1/2 teaspoon sugar (I use organic cane sugar)
2 cups finely shredded cabbage

Combine all the cole slaw ingredients in a bowl, mixing well, and place it in the fridge. Making the cole slaw a day ahead of time is even better.

Always great to have a pretty helper!


For the deviled eggs:
6 hard-boiled eggs
1/4 cup mayonnaise
1 tablespoon mustard (I use Gulden’s)


Here’s my tip for perfectly hard-boiled eggs every time: place the eggs in a pot, cover them with cold water, and turn the heat on high. Just before the water starts to boil, put a lid on the pot and turn the heat off. Let the eggs sit in the hot water for 15 minutes. Perfect hard-boiled eggs every time! Once cooked, keep the eggs in the fridge.

Here’s another tip: the easiest peeling eggs are older eggs! No…that doesn’t mean you let your eggs sit out on the front porch for a week. What that means is: but them from your supermarket rather than the farm stand down the road. Super-fresh eggs still have a membrane attached to the shell that makes them difficult to peel. The membrane detaches in slightly older eggs, making them easier to peel.

Slice the eggs in half and place the yolks in a bowl with the mayonnaise and mustard. Mix it well and keep it in the fridge.


To assemble, take a teaspoon of the mayo/mustard/yolk mixture and place it in the cavity of one of the egg halves. Place a lump of pulled pork on top (I like it warm, to counter the cold of the mayo and cole slaw.) Then place a teaspoon of the cole slaw on top of the chicken.

I’m a wuss. I can’t do heat. But I’ve always been fascinated by jerk chicken: it looks amazing and smells fantastic. So I decided to try making a kinder, gentler version by eliminating the number one high-heat ingredient: Scotch bonnet peppers.

On the scale of hotness known as the Scoville scale, Scotch bonnets reach anywhere between 100,000 to 350,000 Scoville units. To give you an idea how hot that is, jalapenos only reach 2,500 to a maximum of 8,000 Scoville units! That means those suckers are 40 times hotter than jalapenos! And that’s why I left them out of my recipe.

I found that when I left the Scotch bonnets out, there was still plenty of fragrant, hot and smoky flavor in my jerk chicken.


Jerkalicious.


1 medium onion, coarsely chopped
3 medium scallions, chopped
2 garlic cloves, chopped
1 tablespoon Chinese five-spice powder
1 tablespoon allspice berries, coarsely ground
1 tablespoon black pepper, coarsely ground
1 teaspoon dried thyme
1 teaspoon freshly grated nutmeg
1 teaspoon salt
1/2 cup soy sauce
1 tablespoon olive oil
8 lbs. chicken, parts or whole birds quartered


In a food processor, combine the onion, scallions, garlic, five-spice powder, allspice, pepper, thyme, nutmeg and salt. Process it into a coarse paste.

With the machine on, add the soy sauce and olive oil in a steady stream.

Place the chicken pieces in a large Ziploc bag, and pour the marinade in. Zip the bag up and squish it around to make sure the marinade touches all parts of the chicken. Place the bag in a bowl (to prevent accidental leaks) and place the bowl in the fridge overnight.

Bring the chicken to room temperature before cooking.

Indoors: Place the chicken on a baking sheet and bake in a 350-degree oven for about 30 minutes. At the end, move the baking sheet under the broiler and cook a few minutes more, to get some caramelization going.

Outdoors: Light a grill and cook the chicken over a medium fire, turning it so it doesn’t burn. Cover the grill if you like, for smokier flavor. Make sure the chicken is cooked through before serving.


Bulgogi is the name given to the most common form of Korean barbecue. Unlike the daeji bulgogi that I cooked in a previous blog, this one is not based on a chili sauce that can take the roof of your mouth right off.

I used chicken, though this would work with pork as well, and for the best flavor, it’s best to marinate the meat in the fridge overnight.

FullSizeRender (12)

2/3 cup soy sauce
1/2 cup chopped scallions
6 tablespoons sugar (I use organic cane sugar)
5 tablespoons fresh garlic, grated or through a garlic press
5 tablespoons sesame oil
1 tablespoon sesame seeds
1 teaspoon black pepper
5 lbs. chicken pieces (skin-on thighs work best)


Combine all the ingredients except for the chicken in a bowl and mix well.

Place the chicken pieces in a large Ziploc bag and pour the marinade in. Seal the bag well and squish it around to make sure the marinade makes contact with the chicken. Place the bag in a bowl (to prevent accidental leakage) and keep it in the fridge overnight. Squish the bag around every few hours to make sure the marinade does its job.

When ready to cook the next day, pre-heat the oven to 350 and remove the bag from the fridge and let it come to room temperature. Place the chicken on a sheet pan (discard the remaining marinade) and bake for an hour.

Light a hot grill and push the coals to one side of the grill. Place the chicken pieces on the cool side of the grill and close the lid, opening the vents. Every few minutes, turn the chicken pieces over so they get nice grill marks but
don’t burn.


FullSizeRender (11)

I’ve always been fascinated by Korean barbecue. Every time I see it on TV or catch a recipe on an e-mail blast, my mouth waters and I say to myself that I’ve got to experience it some day. But the painful reality is: Korean barbecue can be really spicy…and I’m a total wuss.

Korean barbecue 101: Gogigui means “meat roast” in Korean, and it refers to the method of roasting beef, pork, chicken, and other meats. Meats can be marinated or not. Bulgogi is the name of the most common Korean barbecue. Meat is marinated with soy sauce, sugar, sesame oil, garlic and pepper, and then grilled. Galbi uses beef short ribs, and adds onions to the marinade. And the hot stuff is daeji bulgogi, because the marinade isn’t soy sauce-based, but based on the hot-n-spicy Korean chili paste known as gochujang.

All of the marinades looked delicious, but the hot one with gochujang would be my biggest challenge, so I decided to start there. I found a great recipe, and quickly realized that I would have to turn the heat way down if I was actually going to try to eat it! For example, the original recipe called for 2 tablespoons of white pepper. I totally left it out. And it called for a full cup of gochujang. Not only did I cut that part in half, I doubled many of the other non-spicy ingredients.

So is it authentic Korean barbecue? Probably not. But it’s my version of it. It’s got lots of flavor and still carries a bit of heat.

For gluten-free diets: finding GF hoisin and soy sauce is easy. Look for the La Choy brand. But I haven’t been able to find gochujang that has a GF label.


image


3/4 cup ketchup
1/2 cup gochujang
1/2 cup hoisin sauce (I use gluten-free hoisin)
1/2 cup honey
1/2 cup soy sauce
1/4 cup brown sugar
2 tablespoons freshly grated ginger
1 tablespoon freshly grated garlic (I use a garlic press)
1 tablespoon unseasoned rice vinegar
4 lbs. chicken pieces


Pre-heat the oven to 500 or its top temperature.

In a bowl, mix everything but the chicken pieces. Brush the sauce onto the chicken pieces, then wrap them in aluminum foil. (I like to tear a long piece of aluminum foil and lay it on top of a sheet pan. I place the chicken pieces on the foil, brush them with sauce on all sides, then fold the foil over the chicken, making one large pouch that holds all the meat.) Leave the pouch on the sheet pan and place it in the oven. Lower the oven temp to 350.

Cook the chicken for about an hour, making sure it’s almost completely cooked. Juices should run clear, not bloody, when you poke it with a fork.

Start a hardwood fire on your grill. Push the coals to one side of the grill so you have a hot side and a cooler side with no coals underneath it. Place the chicken pieces on the cool side of the grill (if you put it on the hot side, it will stick and burn), brush with more sauce, and put the lid on the grill, making sure you have the vents open for air circulation.

image

See those 2 black bits in the foreground? That’s where the chicken stuck to the grill because I placed them over the hot coals. Don’t do that.

After a few minutes, lift the lid, flip the chicken pieces over, brush them with sauce again, and close the lid. Keep doing this until the chicken is nice and caramelized, with tasty grill marks.

If you want to serve some of the sauce on the side, it’s important to pour some of the sauce off and set it aside in the very beginning, so you’re not using the same sauce that the basting brush touched the raw chicken with.


I recently hosted a “boys’ weekend” at Saule, our rental home in Little Compton, Rhode Island (http://www.sauleri.com. We’re listed at Homeaway.com.) Among the many meats I served, I cooked up a massive plate of these sweet, spicy and sticky Thai-inspired chicken wings and drumsticks.


6 lbs. chicken pieces
1 1/3 cups soy sauce
1 cup fresh cilantro
4 tablespoons canola or peanut oil
5 garlic cloves, roughly chopped
1 teaspoon white pepper
1 cup sugar
1/2 cup white vinegar
2 teaspoons red pepper flakes or crushed dried chiles
2 teaspoons salt

For the marinade, combine the soy sauce, cilantro, canola oil, garlic and white pepper in a food processor and let it run. Place the chicken pieces in a Ziploc bag and pour half of the marinade in. Save the other half for basting later. Seal the bag and let the chicken marinate overnight, or at least a few hours, squishing the bag around so that all the chicken gets marinated.

For the sauce: In a saucepan, combine the sugar, white vinegar, pepper flakes and salt. Bring it to a boil and make sure the sugar dissolves. Remove it from the heat and let it cool to room temperature.

After marinating overnight, discard the used marinade in the Ziploc bag. Place the chicken pieces over a hot hardwood fire or bake them in an oven at 350, basting them with the leftover marinade until fully cooked. If the coal fire gets too hot, move the chicken to a cooler part of the grill to prevent burning. If using the oven, switch to the broiler at the end to give the chicken a nice char.

Serve the chicken pieces with the sweet pepper sauce drizzled on top.

thai chicken LTL