Posts Tagged ‘food’

Chicken parmigiana, much like pizza, is a bit more difficult to make than you might think. Sure, there’s plenty of crappy chicken parm out there, made with processed frozen chicken cutlets, bad sauce and cheap cheese. But to make a really fantastic, mind-blowing chicken parm, that’s a real skill…one that I’ve honed over my many bachelor years. So when it was time to cook something that would impress the hell out of the woman who is now my wife, I have no doubt that is was my chicken parm that won her over.

The key to this recipe is simple: don’t skimp on the quality ingredients. And my recipe makes a lot. Trust me: you will want leftovers.

Gooey, cheesy, orgasmic.

Gooey, cheesy, orgasmic.

Ingredients:

6 Chicken breasts, the best quality you can get your hands on

Alz Italian bread crumb seasoning (see recipe below)

3 eggs

olive oil for frying

Alz “Don’t Call It Gravy” tomato sauce (see recipe below)

Fresh mozzarella cheese

oregano

Thaw the chicken breasts. Lay them flat on a cutting board, and you’ll see where the chicken tender is on the side of the breast. Cut the tender off and set aside, leaving the breast which is thinner at one end and thicker at the other. Slice the breast in half lengthwise at the thicker end, keeping the knife level, so that you wind up with 2 pieces of breast meat that are the same thickness, but one will be a longer piece (the bottom) and one about half its size (the top part you sliced off.) Do this with all the breasts.

By slicing the breasts lengthwise into evenly thick pieces, there is no need to pound the hell out of the chicken breasts.

Pour the olive oil into a large frying pan. Next to the pan, set up two bowls: one with Alz Italian bread crumb mix and in the other: crack the eggs and whisk them.

Now it’s your standard breading procedure: chicken meat in the egg, then in the breadcrumbs, coating well. Shake off the excess and place carefully in the pan of olive oil when the oil comes to temperature for frying.

Fry the chicken in the oil until golden brown. You want it cooked all the way through, but not overcooked. Place fried chicken pieces on paper towels to absorb excess oil. Do this with all the chicken. The fried chicken at this point is delicious all by itself: chop and place in a salad, or make a chicken sandwich. My daughter gets these instead of store-bought chicken tenders, and she loves them.

Cover a baking sheet with aluminum foil. Ladle out enough  sauce to create a thin layer of sauce on the bottom of the sheet. Place fried chicken breasts on top of the sauce. Cover the breasts with more sauce, then place pieces of sliced fresh mozzarella on top. Sprinkle top with a little oregano.

Place the baking sheet in a pre-heated 350 degree oven and bake until the cheese has melted and just starts to brown. Serve with pasta.


ALZ “DON’T CALL IT GRAVY” TOMATO SAUCE

It’s not hard to make a good tomato sauce. But it takes a little work to make an amazing tomato sauce. Honed from a recipe handed down by a friend-of-a-friend’s Italian grandma, it is one very important part in two of my favorite Italian comfort food recipes: my (meat)balls…and my kick-ass chicken parmigiana recipe.

Ingredients:

1 medium onion, finely chopped

2 cloves garlic, finely chopped

1/2 cup extra virgin olive oil

10 cups ground and peeled tomatoes…or 3 cans (28 oz) tomatoes (real San Marzanos preferred)

2 teaspoons each: dried oregano, basil and parsley

3/4 teaspoon each anise seed and fennel seed

1 1/2 teaspoons salt

1/2 teaspoon black pepper

2 bay leaves

1 small can (6 oz) tomato paste

1 teaspoon sugar, optional

Heat olive oil in a large pot and add onions. Cook until onions are translucent, then add garlic. Stir for 10 seconds.

Add tomatoes and cook until orange foam disappears, stirring frequently.

Add oregano, basil, parsley, anise seed, fennel seed, salt, pepper, and bay leaves. Stir to combine. Add tomato paste, stirring well. Let sauce just come to a boil (which helps the paste thicken the sauce), then reduce to a simmer, and cook uncovered for at least an hour, stirring constantly, until sauce reaches desired consistency.


ALZ ITALIAN BREAD CRUMB SEASONING

If I can’t make my own breadcrumbs from old bread, I’m OK with buying store-bought breadcrumbs. But I always buy them plain, and then season them myself. And for this recipe, I don’t use Panko.

Ingredients:

1 cup plain breadcrumbs

2 teaspoons dried parsley

1 teaspoon dried oregano

1 teaspoon dried basil

1 teaspoon salt

1/4 teaspoon black pepper

1/2 teaspoon granulated garlic

1/2 teaspoon onion powder

Combine all ingredients well.
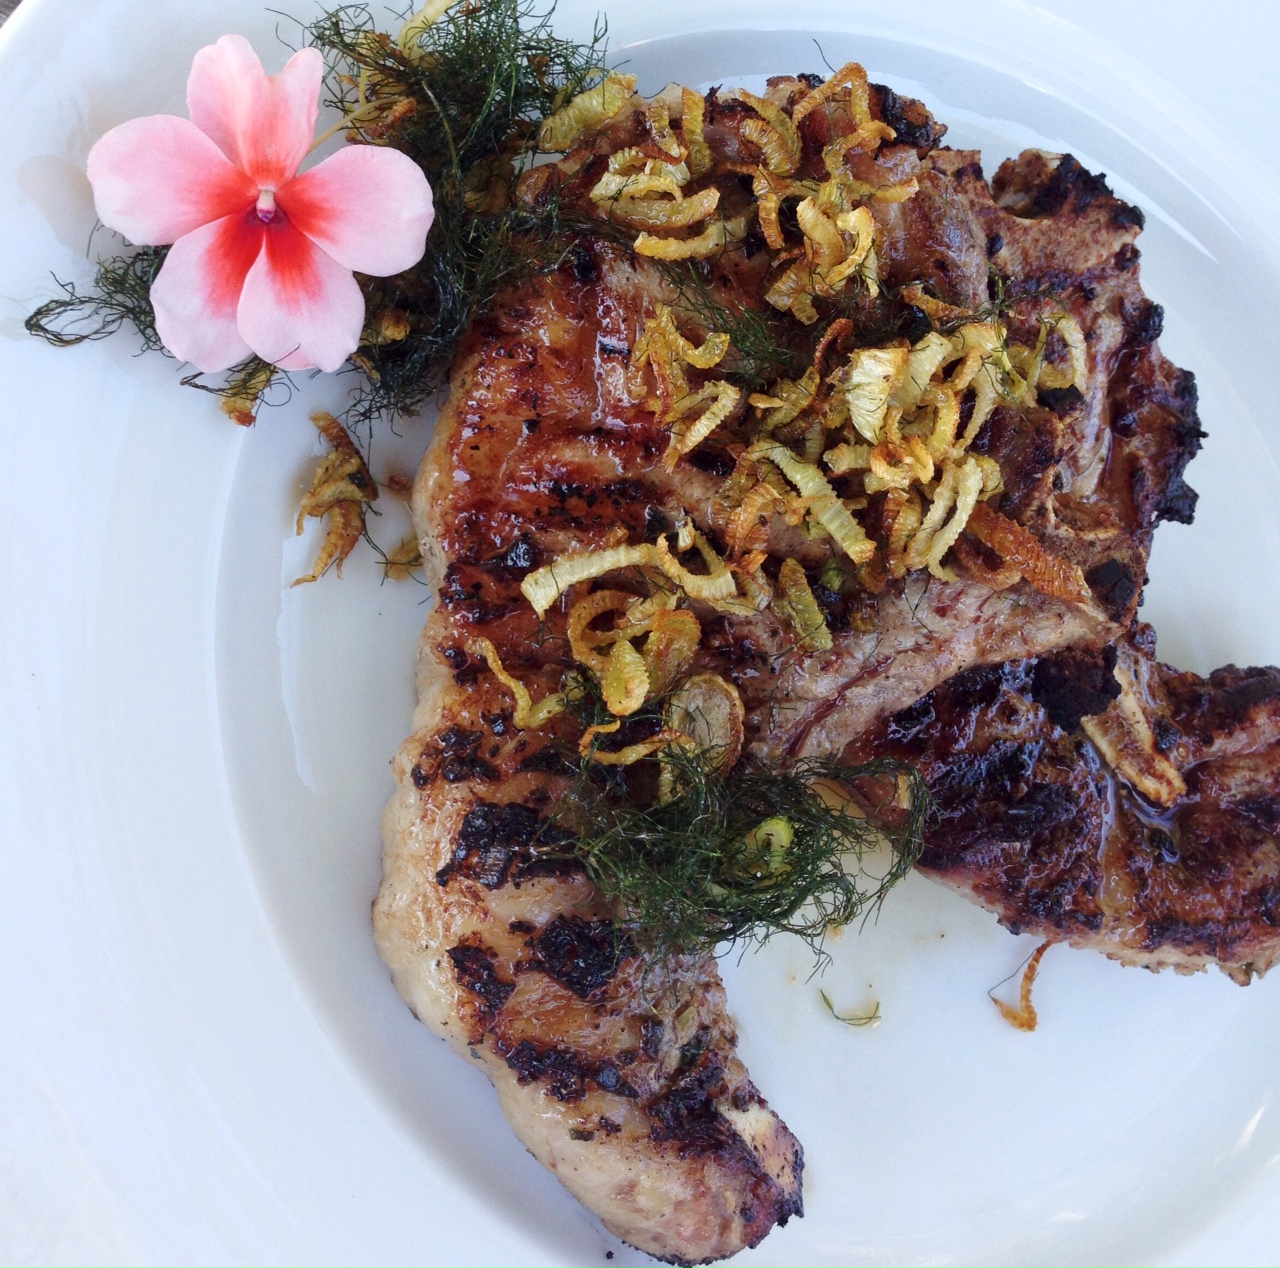
Inspired by a garden full of fennel and my fanatical love for all things pork, this recipe just happened this past fall. I use Berkshire heritage pork when possible, a far tastier and healthier choice over standard pork you find in a supermarket. I get it at: http://www.heritagepork.com.

pork chop fennel


Ingredients:


4 Berkshire pork chops

4 tablespoons finely chopped fennel bulb

2 teaspoons finely chopped fresh sage

4 teaspoons garlic salt

1 teaspoon ground black pepper

3 tablespoons extra virgin olive oil

extra fennel bulb and fennel fronds

extra olive oil, salt and pepper for sauteing


Combine the chopped fennel, sage, garlic salt, black pepper and olive oil in a bowl. Mix well and spread it all over the pork chops. Let them stand for an hour at room temperature.

Light a hot grill. Grill pork chops until done…with quality pork, that does not mean cook it to death!

Chop extra fennel bulb into thin strips about an inch long. Remove fennel fronds from their stems. Saute bulb strips in olive oil, salt and pepper until they are almost crisp. Toss in fennel fronds and cook until fronds and bulb strips are crisp.

Serve pork chops with crispy fennel and fronds on top.

Brining is a simple process of soaking a hunk of protein in a flavored salt solution for a time before cooking, resulting in a much more juicy and flavorful final product.

It’s basic high school science: the brine has a greater concentration of salt and water than the molecules of the protein (in this case, a turkey) that is soaking in it. By simple diffusion, the protein molecules suck up the salty water and retain it. When you cook the meat, some of the water evaporates, but the meat still has far more moisture in it than it would have without the brine soaking, and the result is a moister, delicious bird.

Some people use giant syringes to inject their turkeys with crazy solutions, but I think that the old way is still the best way when it comes to brining. Get a big pot, fill it with the brine, and soak the bird in it. Done.

Here’s my tried-and-true turkey brining recipe. Once the brining is done, you can cook the turkey whatever way you like best. I use a method where I grill it inside a Weber grill with charcoal. It comes out smokey and absolutely amazing. I’ll have that info in the next blog.

Ingredients:

1 gallon of water
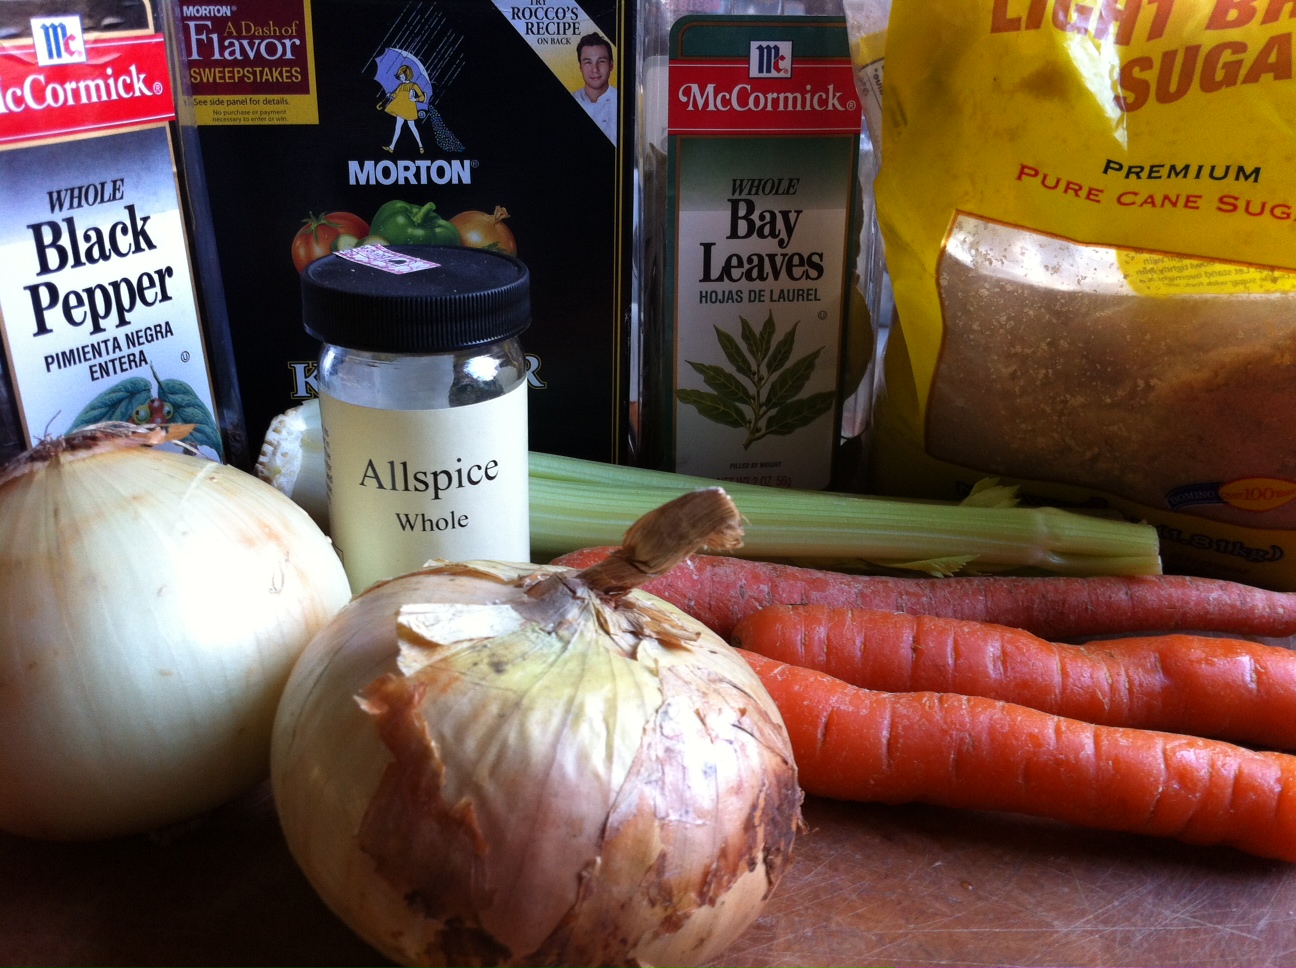
2 onions
3 carrots
3 stalks celery
1 cup kosher salt
1 tablespoon black peppercorns
1/2 cup light brown sugar
1.5 teaspoons whole allspice
4 bay leaves
1 gallon of ice water
14–15 lb turkey, thawed

Pour first gallon of water in a large pot. Quarter the onions, carrots and celery (no need to peel them) and add to the water. Add all the other ingredients, except ice water and turkey.

Let the pot come to a boil for a few minutes. Remove from heat and let brine cool down to room temperature.

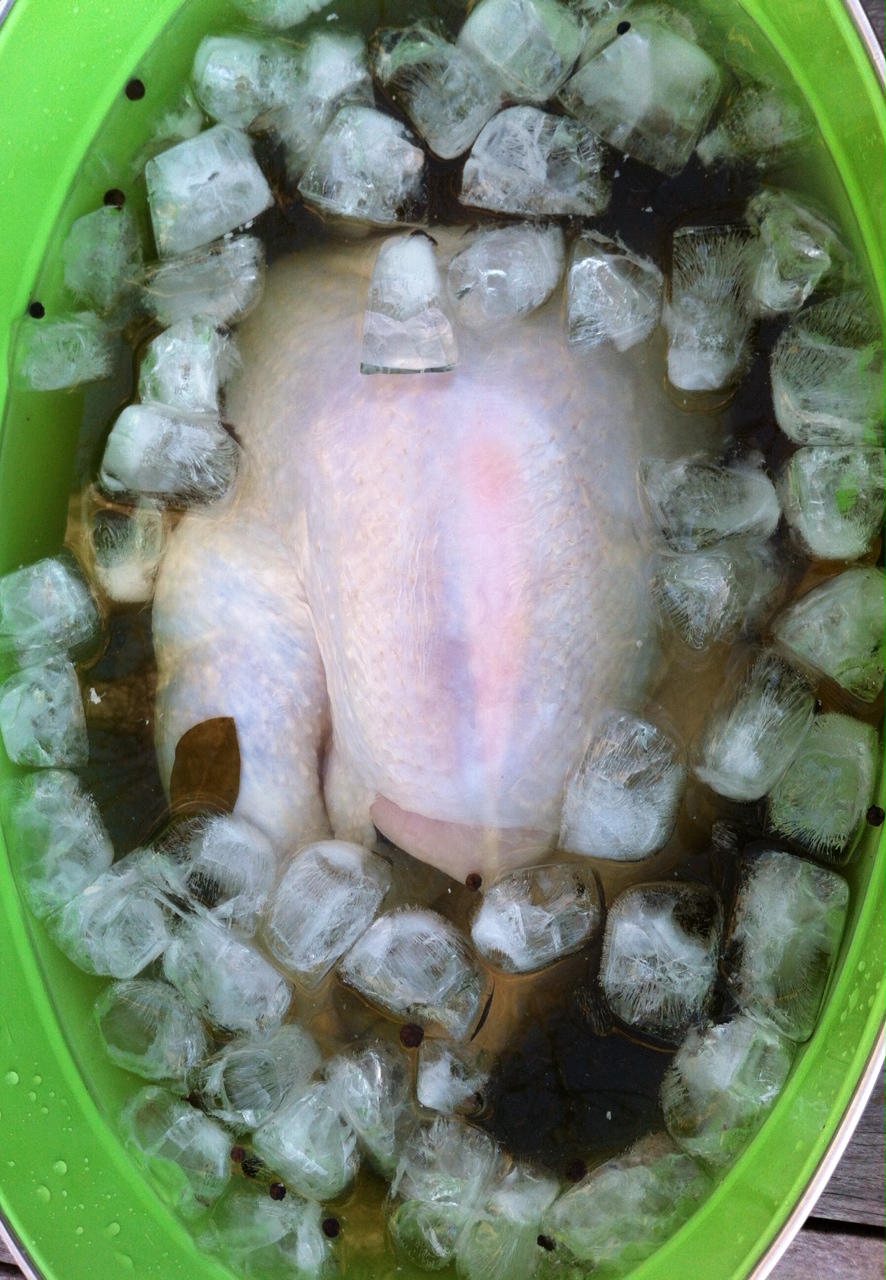
Remove giblets from turkey and place the bird in a container just big enough to hold it and 2 gallons of liquid.

Pour the now-cooled brine over the turkey, then pour in the gallon of ice water.

Make sure the turkey doesn’t float up by placing a plate on top. Put turkey container in fridge for 5 to 8 hours, flipping the turkey over in the container halfway through.

Drain turkey, pat dry with paper towels, and then cook using your favorite recipe.

Next time: cooking your turkey on a Weber grill in a fraction of the time.

PRETZEL BREAD

Posted: November 12, 2013 in Food, Recipes, Uncategorized
Tags: , , , ,

Pretzel bread has become a foodie phenomenon in a very short period: not just the bun of choice at your favorite fast-food burger joint, but the go-to bread in any upscale restaurant.

Making pretzel bread at home had one major stumbling block for me: the need for lye,  which has nasty corrosive qualities that I don’t want to deal with in my kitchen. Even special baker’s lye was not an option. So when I found a pretzel bread recipe that used baking soda, a much milder and safer alkaline ingredient that I could simply pour down my drain after using, I knew it was time to bake.

pretzel bread

Ingredients:

½ cup water

½ cup milk

2 tablespoons butter, softened

3 cups all-purpose flour

2 tablespoons brown sugar

1 tablespoon yeast

2 teaspoons salt

1 egg, separated

Cooking spray

¾ baking soda

Kosher salt for sprinkling

Combine the water, milk and butter in a glass container and microwave about 45 seconds to melt the butter and warm the milk. Set aside.

I a mixing bowl, combine flour, brown sugar, yeast, salt and egg yolk. Slowly add the milk mixture and mix until the dough comes together. If it seems too dry, add small amounts of water. Knead the dough until it is smooth and springy, about 5 minutes.

Place the dough in a bowl sprayed with cooking spray. Flip it over so all sides get oiled, and then wrap the bowl with plastic wrap. Place in a warm place until the dough has doubled in size, about an hour.

Preheat oven to 375 degrees.

Turn out risen dough on a floured surface and divide into equal pieces. You can make 15 small slider-sized buns, 8 burger buns, 8 hot dog buns or any other shape you like. Once all the pieces have been rolled, cover them with a clean dish towel and set aside to rest.

While the dough is resting heat about 12 cups of water in a large pot. When it comes to a gentle boil, carefully pour the baking soda into it. It will foam and bubble vigorously.

Add the rested pieces of dough to the simmering water and poach them for about 30 seconds and then flipping them over for another 30 seconds. You may need to do this in batches.

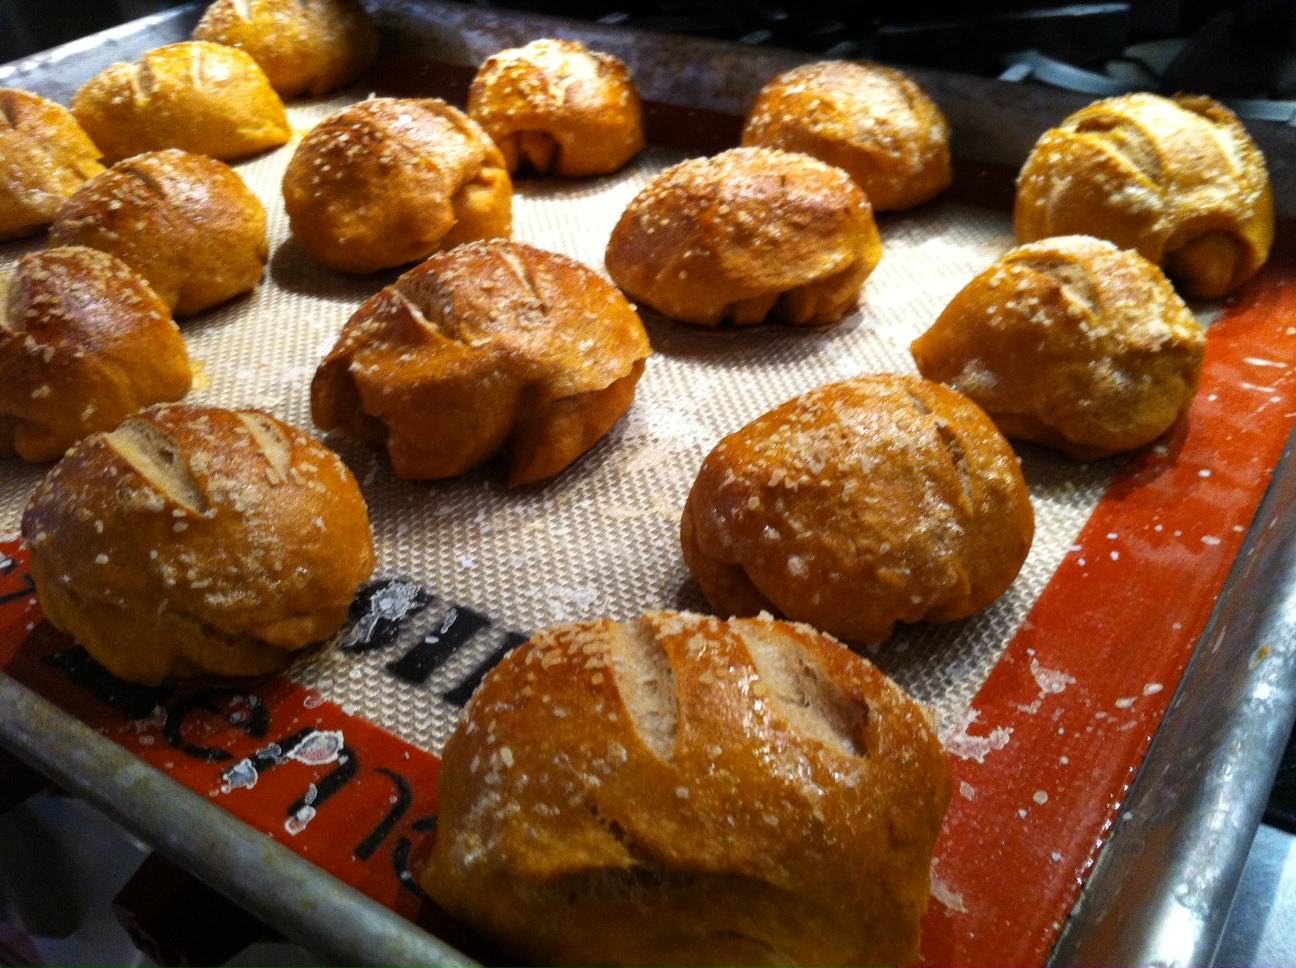
With a slotted spoon or spatula, lift the poached buns onto a Silpat baking sheet (or a baking sheet sprayed with oil, then sprinkled with cornmeal.)  Froth egg white with a fork, then brush each bun with egg white. Using a sharp knife, make a few slits on the top of the buns, about ¼-inch deep. Sprinkle with Kosher salt, then bake for 20 minutes until golden brown.

PICKLING BEETS

Posted: November 6, 2013 in beets, Food, pickling, Recipes
Tags: , ,

Growing up in a Lithuanian family, there was a small group of foods that I had to love to survive, since they constantly appeared on the dinner table: potatoes, cabbage, mushrooms, herring, and beets. Fortunately for me, I loved them all, despite my Mom’s desire to boil everything to death.

One of the many uses for beets, besides a cold summer soup and a hot winter soup, was pickling. Pickled beets are an excellent side dish for any hearty meat dish. (I love ’em with kielbasa!)  Store-bought pickled beets pack way too much sugar in every jar, so it was time to make my own. The addition of hard-boiled eggs to the mix is a personal one. If you don’t like ’em, leave ’em out and add more beets.

beets

Ingredients:

4 to 8 beets, scrubbed (your favorite variety)

1 cup apple cider vinegar

1 cup water

3 garlic cloves, crushed

3 tablespoons sugar

2 teaspoons whole black peppercorns

1 tablespoon Kosher salt

1 red onion, sliced

4 hard-boiled eggs, peeled

6 fresh dill sprigs

Preheat the oven to 450. Wrap the beets in foil and roast for about an hour, until tender. When cool enough, carefully peel and quarter them.

In a medium saucepan, combine the vinegar, water, garlic, sugar, peppercorns and salt. Bring to a boil and simmer over moderately high heat, stirring until the sugar is dissolved. Let the pickling liquid cool to warm, about 15 minutes.

In a heatproof glass jar or container, layer the beets, onion, eggs and dill sprigs and then cover with the pickling liquid. Let stand at room temp for 2 hours, then place in fridge overnight.

They stay fresh for a week, but they won’t last that long!

SALMONELLA…SOLVED

Posted: November 2, 2013 in chicken, Food, Uncategorized
Tags: , ,

I devour chicken at least three times week…fried, broiled, grilled, barbecued, smoked…it’s all good. But because of that, salmonella paranoia looms over my head, in part, because of the media hype: watch any cooking show and you’ll see the camera zooming in on the host, lathering up their hands, scrubbing them until they’re raw because they even glanced at a piece of chicken. It’s all to satisfy the panicky corporate lawyers so that nobody gets sued for something that can easily be avoided.

I use these steps to avoid salmonella worries in my kitchen…

photo(2)

I open the plastic wrapper of the chicken in the sink. You won’t believe how much stuff splatters around when you simply unwrap the chicken. Do it in the sink and it won’t fly onto your countertop, windows, or fruit bowl.

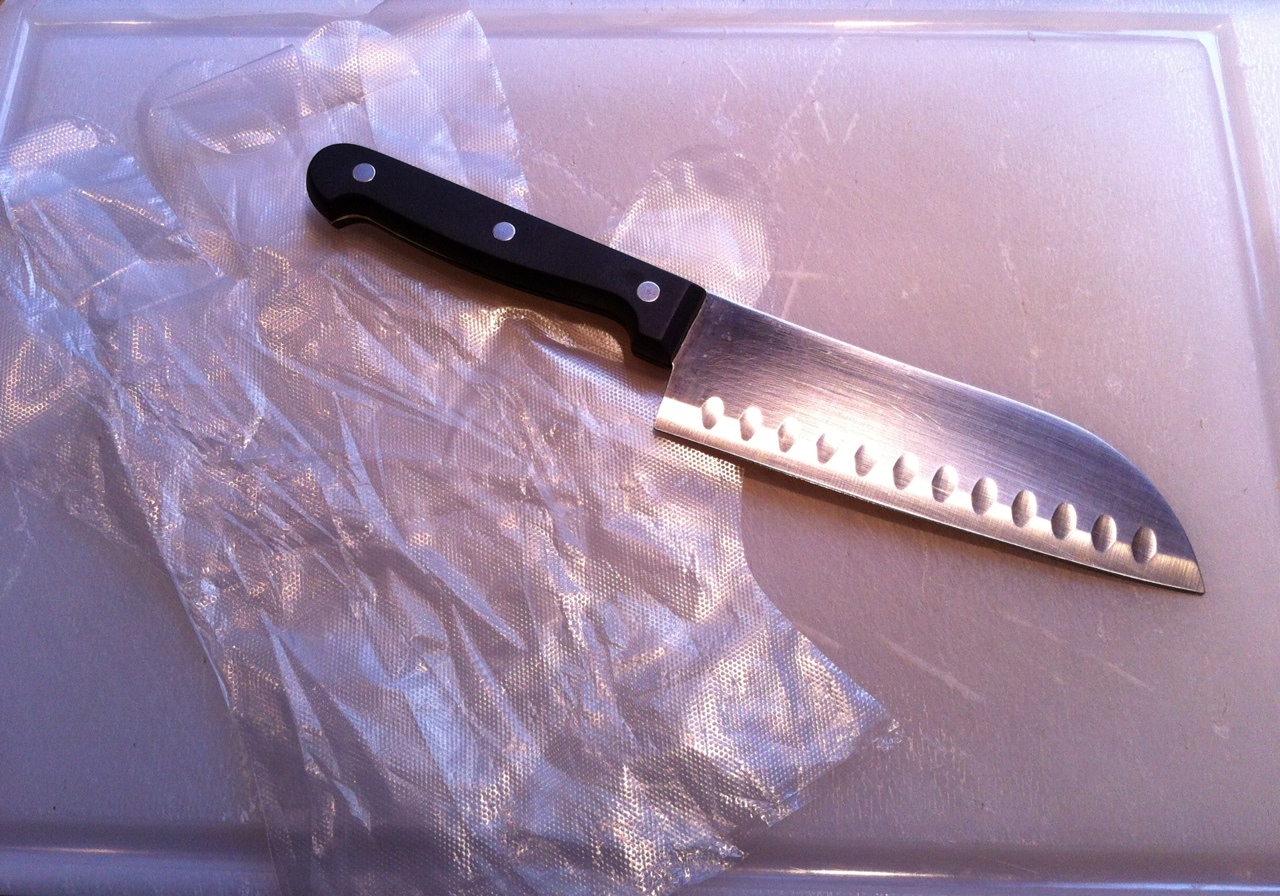
I buy a set of very sharp and very cheap kitchen knives. These are the ones that are usually around 12 bucks for 3 knives. Unlike my expensive prized chef knife, I sanitize them by throwing them in the dishwasher and not washing them by hand. When they get dull, I toss them out and buy new ones. They’re not for every job in the kitchen, but they are perfect for any questionable food product like raw chicken.

While I’m at the store, I also buy a couple of acrylic cutting boards. The size and shape are a personal preference, but the idea is to use these boards when slicing and dicing chicken or any other nasty gooey thing. The muck stays on the board, which is easily sanitized by tossing it in the dishwasher. The last thing I want to be doing with my deluxe wooden butcher block is bleaching and scrubbing that sucker because I cut up a couple of chicken breasts on it.

Finally, I buy myself a box of cheap disposable gloves. I like the lunch lady style gloves. What? The main thing is to make sure they don’t slip off your hands while handling a sharp knife. When I’m done prepping the chicken, I just toss the gloves.

To be safe, I still rinse my hands with soap and water afterwards. But I don’t feel like I need to dip them in a vat of sulfuric acid to get them clean, and my kitchen workspace remains spotless.

Salmonella solved.

It takes about 3 weeks to make corned beef, but it’s not difficult to do. Doing it yourself gives you a better quality product than that nasty slab from the supermarket that is full of chemicals and preservatives.

Corned beef has nothing to do with corn. ‘Corning’ is a technique for preserving raw meats for long periods by soaking it in salt brine. This method was used before the days of commercial refrigeration. Back then, the large salt kernels used in the brine were called “corns.”

Brining is a time-honored way of preserving and it prevents bacteria from growing. Both pastrami and corned beef are made by this method. Both corned beef and pastrami usually start with a brisket of beef. Corned beef is then cooked–usually boiled–and served. Pastrami is made when the brined meat is rubbed  with more spices and smoked to add extra flavor. So corned beef and pastrami are the same meat, just treated differently.

Saltpeter is an ingredient that has been used in brining beef for years. It adds the traditional red coloring to the corned beef and pastrami meat. But since saltpeter can also contain carcinogens, I leave it out. The meat may not be the usual bright red color, but the flavor and texture of the meat will not be affected.

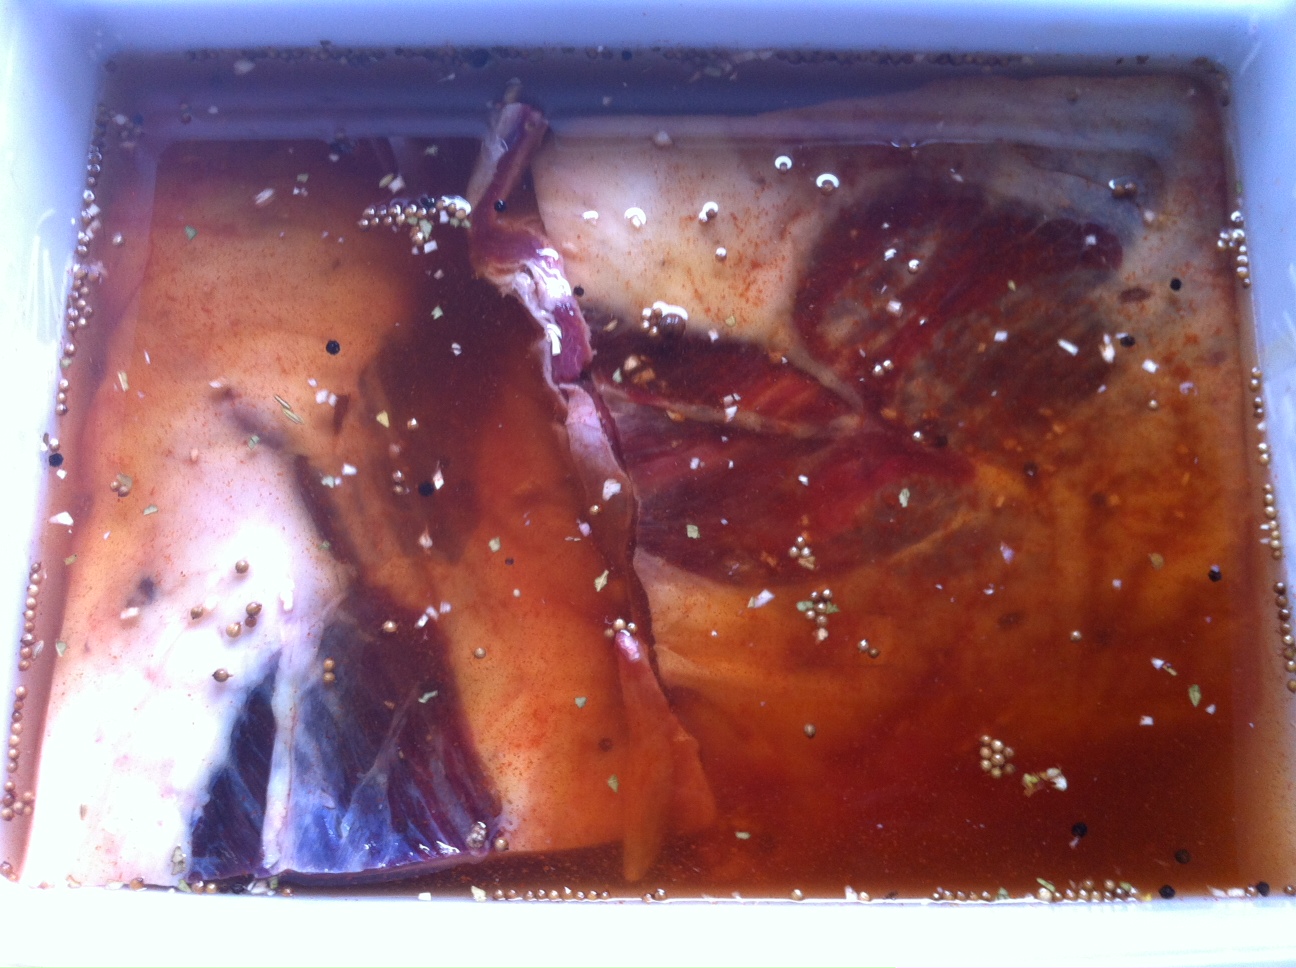
Brining the beef brisket

Brining the beef brisket

Step one: corned beef…

Ingredients:
beef brisket (about 8-10 pounds)
2 tsp. paprika
1/4 cup warm water
3 cloves of minced garlic
2 tablespoons sugar
1 tablespoon mixed pickling spices
3/4 cup salt
2 quarts water

Place the brisket in a large container made of non-reactive material, like glass or plastic.

In the 1/4 cup of warm water, dissolve the sugar, minced cloves, paprika and pickling spices.

Dissolve the 3/4 cup of salt in the 2 quarts of water. Pour in the sugar/garlic/paprika/pickling spices mix and stir everything together. Pour the mixture over the meat in the container. Make sure the meat is totally beneath the surface of the liquid. (You may need to weigh it down to do this.) Cover the container.

Refrigerate the container and contents for 3 weeks, turning the meat once or twice per week. At the end of the third week, remove the container from the refrigerator and take out the meat. Soak the meat in several changes of fresh cold water over a period of 24 hours to remove the excess salt.

At this point, if you want corned beef, prepare and cook it using your favorite recipe. But I’m all about the pastrami!

Step two: making Pastrami…

pastrami

Ingredients:

Brined and rinsed corned beef brisket from above recipe, patted dry with paper towels

1/4 cup Kosher salt

1/4 cup paprika

3 tablespoons coriander seeds

2 tablespoons black peppercorns

2 tablespoons yellow mustard seeds

1 tablespoon white peppercorns

3 tablespoons brown sugar

1 tablespoon granulated garlic

Combine coriander seeds, black and white peppercorns and mustard seeds in a spice grinder and grind coarsely. Place in a bowl. Add salt, paprika, brown sugar and granulated garlic. Mix well.

Rub the mix into the brisket well, covering all sides.

Heat smoker to 225 degrees and smoke for several hours using a less intense wood, like oak. When the internal temperature of the meat has reached 165 degrees, it’s done. It isn’t necessary to smoke pastrami as long as you would a regular brisket because the long brining time makes the meat tender.

It is very important that absolutely everything that comes in contact with the meat is very clean. (This includes your hands.) Also, make very sure that every inch of the meat reaches the 165 degrees before it is removed from the smoker. The corned beef is now pastrami.

Many years ago, my wife and I visited the Amalfi coast, and we spent several nights on the beautiful island of Capri. On our last night, we dined at the legendary Grand Hotel Quisisana, and our incredible meal ended with a glass of the most delicious limoncello I had ever had.

I asked the waiter if it was possible to get the recipe of the limoncello, and he made a big deal about the fact that the recipe was a “secret.” Though disappointed, I understood, and I left Capri thinking that I would never taste that limoncello again.

Two weeks later, now back at home, I was reading the latest issue of Conde Nast Traveler, and there in black and white, was the Quisisana limoncello recipe! WTF?

My twist on the recipe: instead of lemons, use grapefruit. I’ve tried other citrus, too, like oranges, but grapefruit-cello is fantastic!

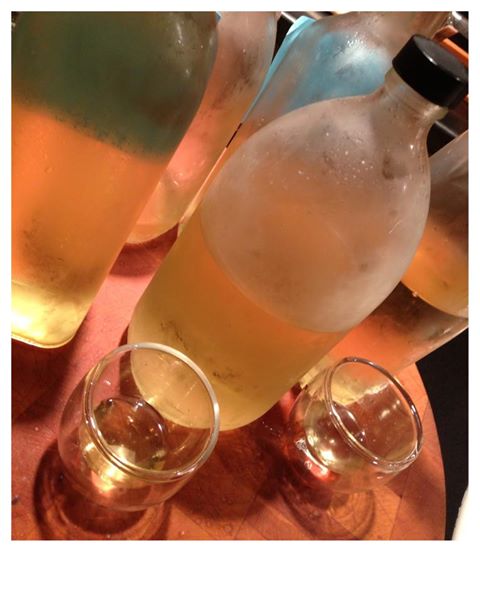
Sampling vintage limoncello and grapefruit-cello,  aged 2 years or more

Sampling vintage limoncello and grapefruit-cello, aged 2 years or more

Four ingredients, easy to make. The toughest part is waiting for it to mellow a bit.

Ingredients:

4 lbs lemons, zest only

2 750-ml bottles 100 proof vodka (I prefer Absolut)

5 1/2 cups sugar

6 cups filtered water

Peel the zest off all the lemons, making sure you don’t get any of the white pith that could make the limoncello bitter. Place all the zest in the bottom of a glass jar with a lid that can hold all the vodka.

Pour the vodka on top of the lemon zest pieces, seal the container, and keep at room temperature for a week, swirling the jar around gently once a day.

On the sixth day, combine the sugar and water in a pot over medium-high heat, and stir until all the sugar completely dissolves. Remove from the heat, cover, and let it thoroughly cool to room temperature (overnight is best.)

On day seven, strain the lemon zest, pouring the infused vodka into a clean glass jar. Discard the lemon zest.

Pour the sugar/water mixture into the vodka and mix well.

At this point, you can pour the finished product into individual bottles, but let it mellow for about a month before drinking.

I keep my limoncello refrigerated.

“Cope” chops are the creation of my long-time radio buddy, Marc Coppola, who is heard here in Providence, RI mid-days at our sister station B-101, and on stations throughout the country. Cope and I started in radio at WBAB on Long Island back in the early 80’s. He had the afternoon drive shift, and I was on after him from 7 to midnight. After his show, Cope would remove a hibachi grill out of the trunk of his car, light some charcoal in the radio station parking lot, and he’d grill up the most amazing pork chops I’ve ever had. They were thin, but juicy and beautifully charred, with a wonderful saltiness. He called ’em Cope chops, and we’d eat them by the stack, wrapping the hot bone of the chop with a paper towel, and then just chowing down. It was a great memory, and one that I regularly re-live by grilling Cope chops at home even today.

After three decades, I’m not sure if my Cope chop recipe is the same as the original, but they are damn good and incredibly easy to make.

Ironically, for this recipe, I don’t go all out and spend big money on thick, expensive pork chops. I want them thin, fatty and with the bone in. The secret to the success of these chops is to cook them hot and fast, sealing in the juices.

Cope chops

Ingredients:

Thin-cut pork chops

Dry white wine (I use an unoaked inexpensive chardonnay, like Alice White)

Lawry’s seasoned salt

Place the pork chops in a flat bowl, and pour the chardonnay over the top, making sure you cover the chops with the wine. Let them marinate in the wine for at least an hour, flipping them over halfway through so that all sides get covered by the wine.

Light a hot hardwood charcoal fire.

Pour off the wine from the chops and discard. Place the chops on the hot grill and season the top with the Lawry’s seasoned salt. Once they’ve charred nicely, flip the chops over and season the other side. Grill until the chops are cooked all the way through, but not dry. Serve immediately.

Enjoying clams without the clam knife: when you’ve got to feed a crowd, this is a delicious way to do it. Cooking clams on the grill is one of the tastiest ways to enjoy these awesome mollusks. Do it over hardwood charcoal to get that true smokey flavor.

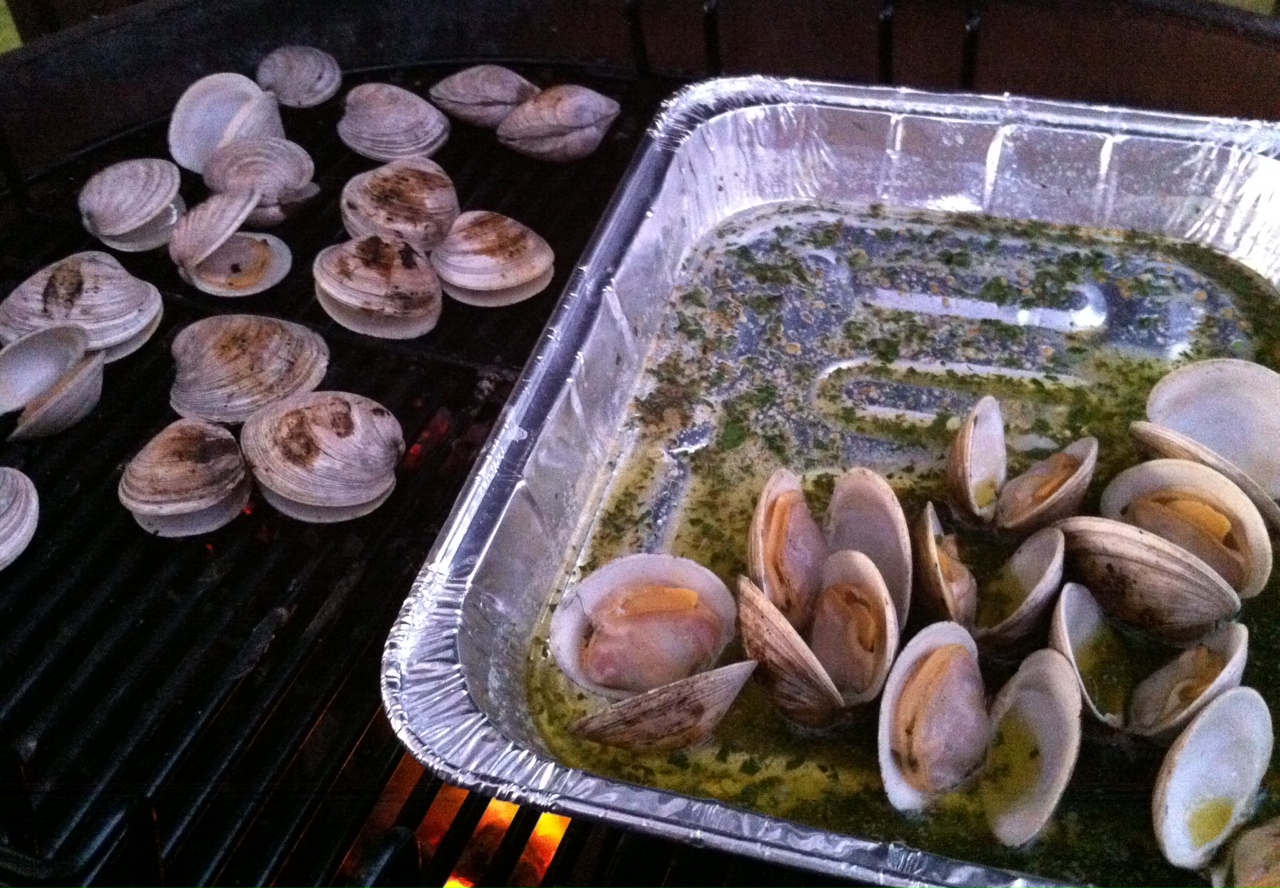
clams on the grill

Ingredients:

A couple of dozen (or more) little neck clams, washed and purged

1 stick (8 oz) of butter

1/4 cup extra virgin olive oil

1/4 cup chopped parsley

1 teaspoon dried oregano

1/2 teaspoon dried basil

1 teaspoon minced garlic

1 teaspoon sea salt

Clams should be stored cold and dry in a fridge until ready to use…not in water, not on ice.

Fill a large bowl with cold water,add sea salt and some corn meal to it, and mix it around. Add the clams to this bowl and let them purge in this liquid for at least an hour. They will suck up the corn meal and spit out sand and grit. After an hour, pour off the water/salt/meal/grit mix, and thoroughly wash the clams.

Start your hardwood charcoal grill and divide it in half: coals on one side, no coals on the other.

While the coals are heating up, grab a disposable aluminum foil tray and place it on a burner on your stove over medium heat. Add the butter, olive oil, parsley, oregano, basil, garlic and salt, and stir to combine. Once the butter has melted and everything has blended, bring the tray over to the charcoal grill and place on the side of the grill without coals. It will stay warm.

Once the coals are hot, just place the clams directly on the grill. (Use tongs, unless you want to remove all of your knuckle hair.) When they start to open, carefully flip them over, trying not to lose any of the precious juices inside the clam. Cook them for as long as you like, from raw, to more thoroughly cooked. As each one reaches its desired doneness, place it in the aluminum tray, making sure it gets swished around in the butter and herb mix.

When all the clams have been cooked and are in the tray, serve with a fresh baguette or even over pasta. A glass of great white wine is a must.