Posts Tagged ‘food’

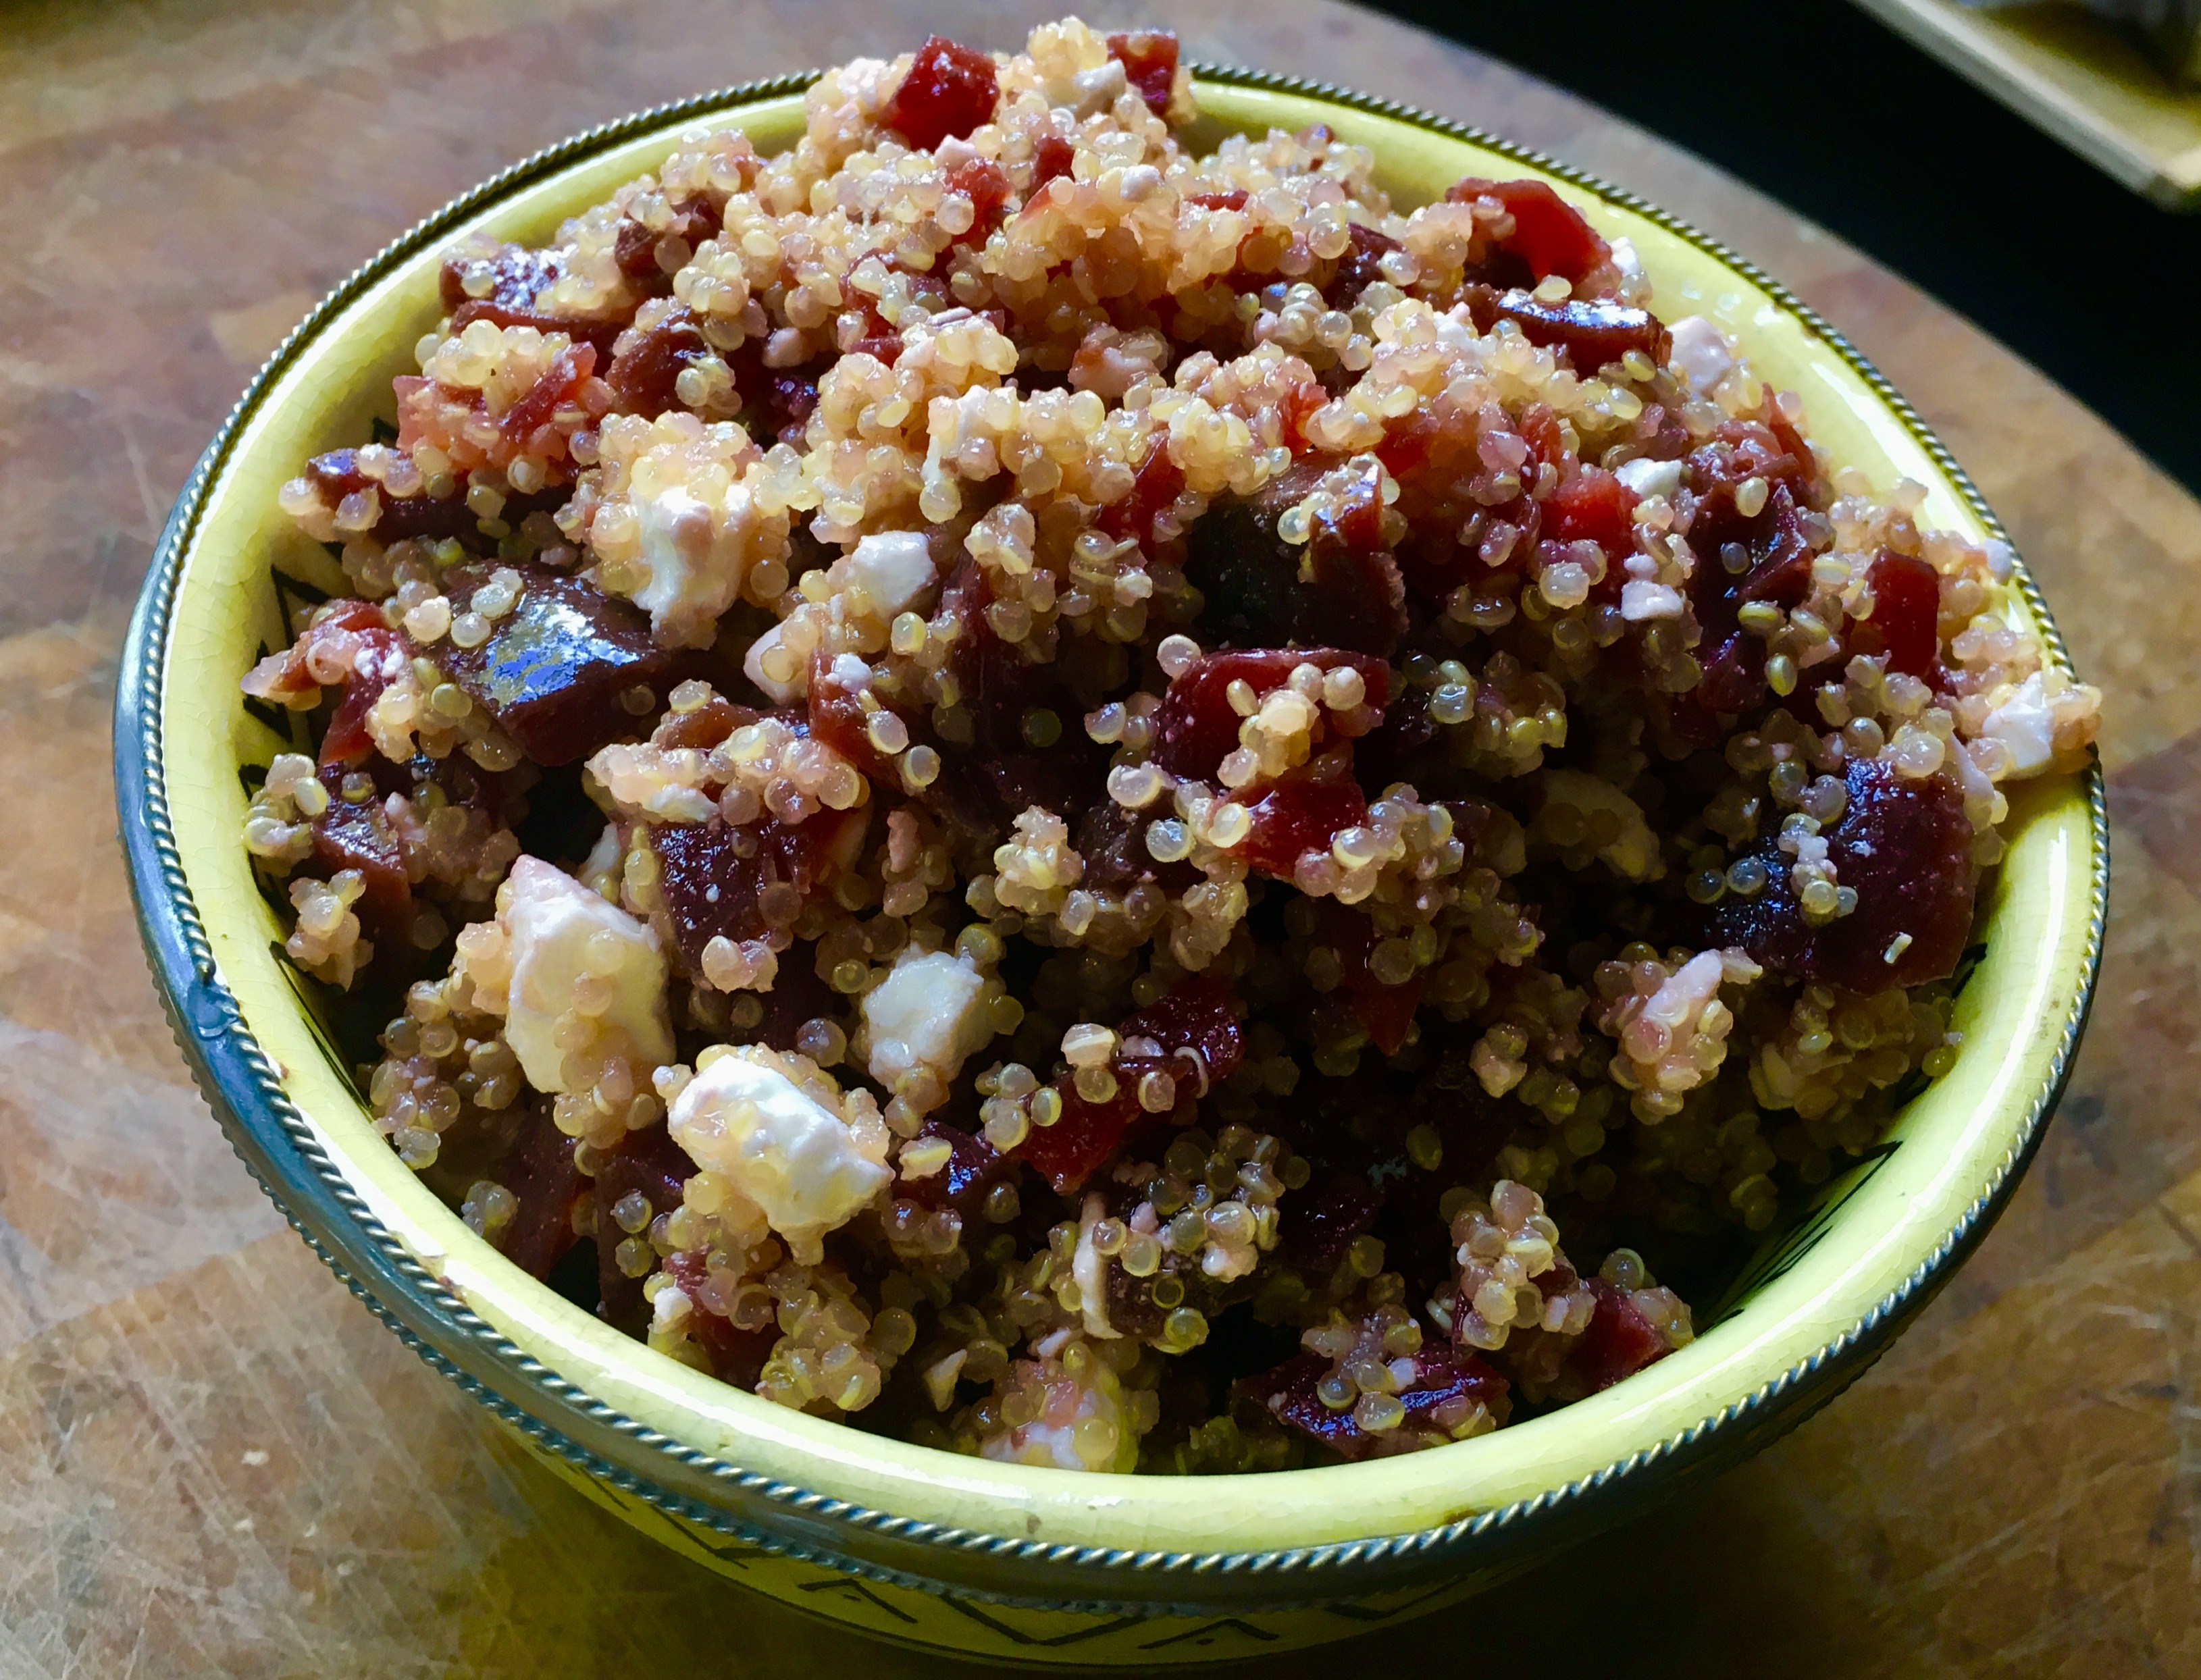
BEET AND QUINOA SALAD

Posted: September 24, 2017 in beets, Food, Recipes
Tags: , , , ,

Why was it that I could only find a great beet salad in a restaurant? Was there some secret to making one? Well, after some experimentation, I came up with a beet salad that I really enjoy…and it’s easy to put together ahead of time if you have guests coming over for dinner.


Sometimes I skip the arugula and just go for a bowl like this…

2 cups cooked quinoa
1/2 lb. beets, cooked and sliced
1/2 cup extra virgin olive oil
1/2 cup red wine vinegar
1 teaspoon sugar
1/2 clove garlic, through a press
1/2 teaspoon salt
1/4 teaspoon ground black pepper
1 scallion, finely minced
2 cups baby arugula
5 oz. feta cheese, crumbled


Prepare the quinoa according to the package instructions. I like to substitute half of the water with homemade chicken stock.

While the quinoa is cooking, combine the olive oil, vinegar, sugar, garlic, salt and pepper in a separate bowl.

Once the quinoa has cooked, place it in a bowl and add half of the dressing, mixing gently with a fork to fluff up the quinoa. Place it in the fridge to cool completely.

I like to use the product LoveBeets, available in any supermarket. The beets come fully cooked and peeled, ready to slice.

I go to the membership clubs and buy the beetlicious jumbo size!

Chop the beets to the size you like and place them in the bowl of quinoa. Add the scallions, arugula and cheese. Toss to combine.

When the mixture has cooled down, give it a taste and add more of the dressing if needed. This tastes great at room temperature as well.

Almost 95% of all shrimp sold in the United States comes from farmed shrimp in countries like China, Thailand, Vietnam and India…as well as Latin America. The stuff you buy at the supermarket comes frozen (since shrimp is highly perishable) and then is thawed out and placed on ice to make the display look nice. But the shrimp you’re getting is not “fresh” (unless you’re lucky enough to get some wild caught local shrimp) and it’s from countries where the methods of farming are questionable at best.
Shrimp farming in Asia and Latin America is destroying mangrove forests and because of that, coastal villages as well. Disease is commonplace in shrimp farms, so they’re pumped full of antibiotics and pesticides.
Imported wild shrimp are also a problem because of bycatch. For every pound of wild shrimp caught, several pounds of other animals such as turtles die needlessly in the trawler nets.
Wild-caught  American shrimp is the best way to go for your health and the environment. American shrimp fishermen are required by law to reduce bycatch. For example, they’re required to use Turtle Exclusion Devices to stop turtles from being caught in their nets.
I stopped eating tiger shrimp and other farmed shrimp from foreign countries a long time ago because I found a source of shrimp that not only delivers to my door, but offers me that shrimp at competitive pricing even with the shipping! And best of all, it’s wild caught in American waters. I’m supporting the lives of shrimp men along the Gulf of Mexico, not some foreign country that doesn’t give a rat’s ass about the environment, the shrimp they raise in it, or my family’s well-being.

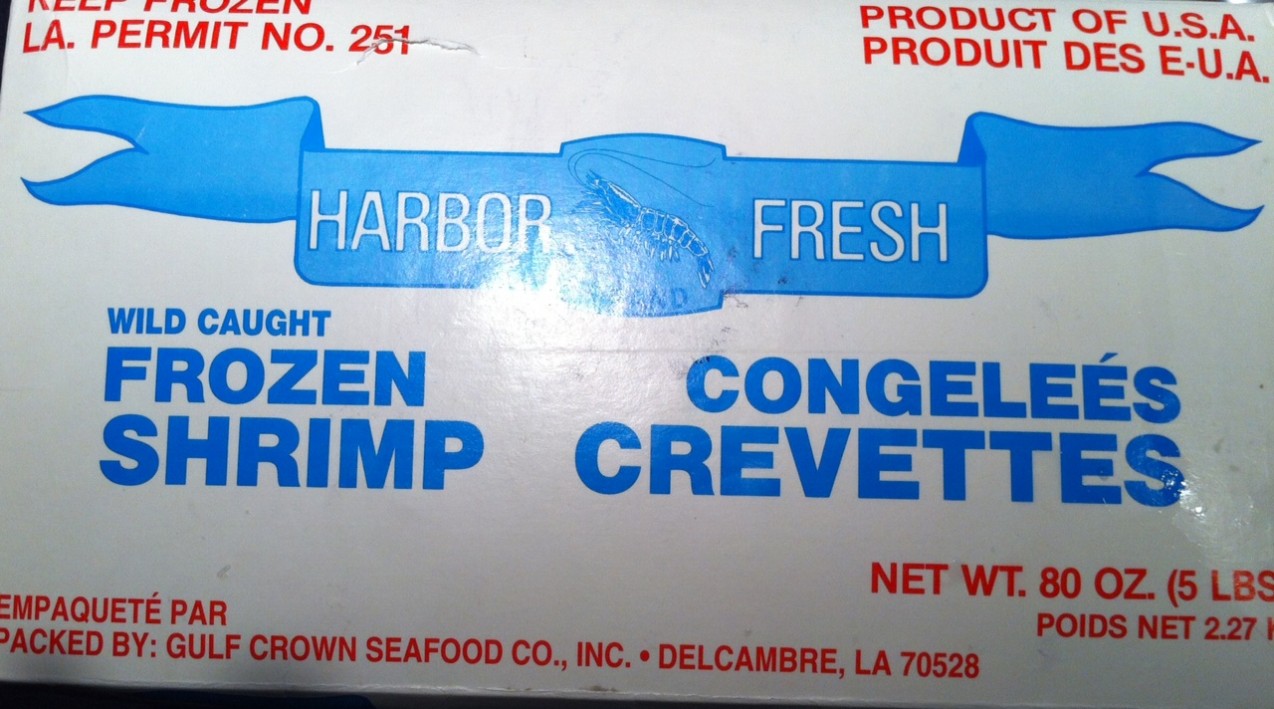
The real deal, usually sold in 5 lb. boxes.

On top of everything else, wild-caught American shrimp tastes better. And why shouldn’t it? The shrimp are eating their natural foods found in the wild…not some pellets thrown at them that contaminate the water and the shrimp themselves.
My favorite website for wild-caught American gulf shrimp is www.cajungrocer.com. I’ve been ordering my favorite Cajun foods, like Turduckens and alligator sausage, from these people for many years, but they also sell frozen shrimp and live crawfish (in season.)
Don’t cheat yourself, your friends or your family out of something really special. Wild-caught American gulf shrimp costs the same, supports our economy, is better for you and tastes better.
The basics of this recipe come from my friend, Lee, a retired chemist in New Jersey who also enjoys creating in the kitchen. What I found interesting about his recipe was the touch of sugar that doesn’t really add sweetness but rather helps create the light, tasty caramelized crust that forms on the shrimp when you sear it. I tweaked a few things in this recipe, but the essence of it remains the same.

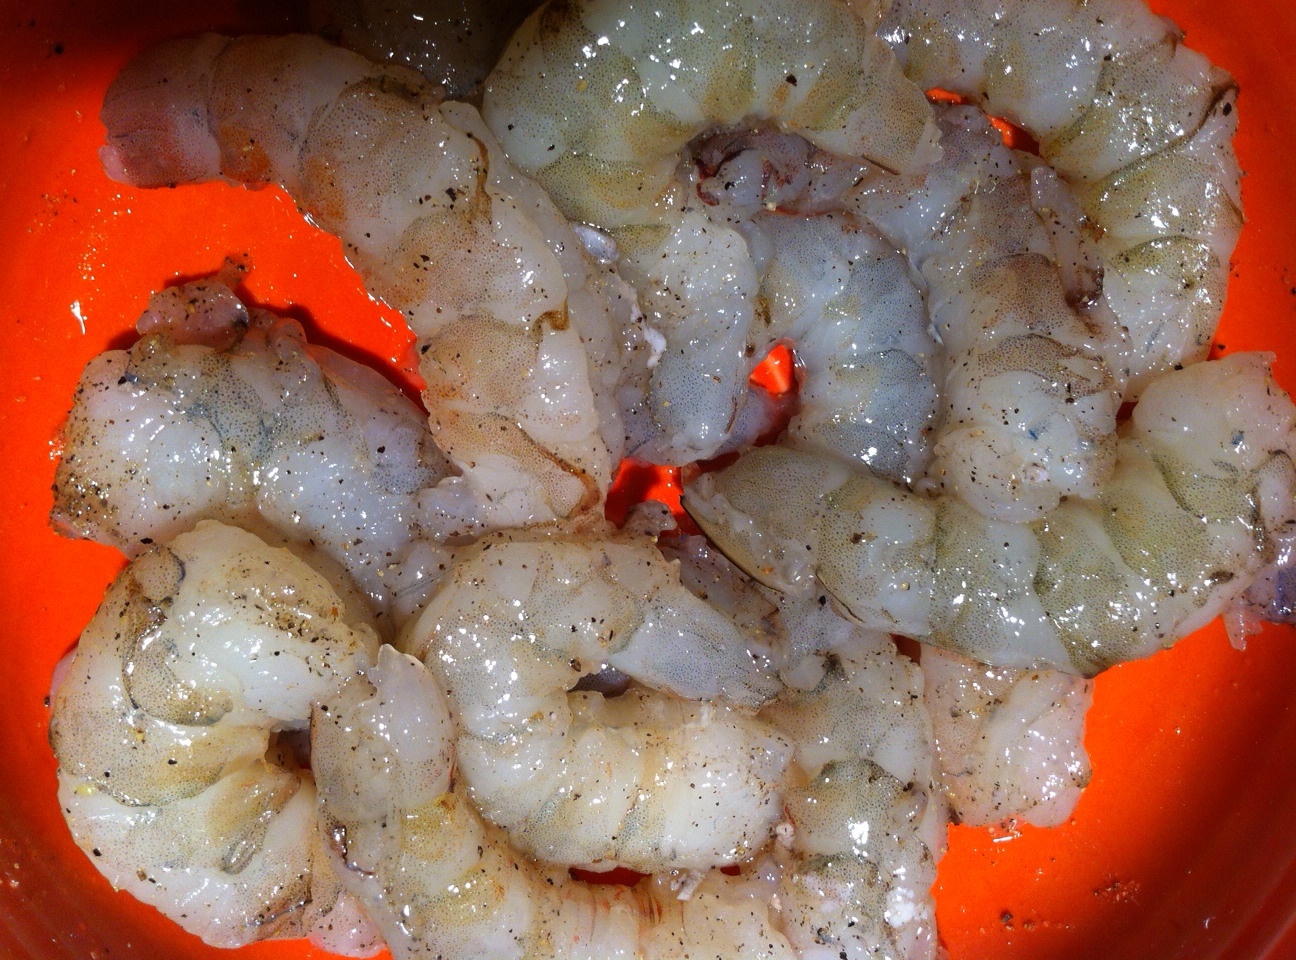
Seasoned shrimp.


1 lb. large peeled and deveined wild-caught American shrimp
Salt
Freshly ground pepper
Sugar
4 tablespoons softened butter
1 clove of garlic, squeezed through a press
1 tablespoon freshly squeezed lemon juice
2 tablespoons chopped parsley
1 teaspoon oregano
Extra Virgin olive oil
Toss the shrimp, 1/4 teaspoon salt, 1/4 teaspoon pepper, and 1/4 teaspoon sugar in a bowl.
In a separate bowl, mash the butter with a fork, folding in the garlic. Add the lemon juice, parsley, oregano, and 1/4 teaspoon salt.
Heat a tablespoon of olive oil in a large skillet over high heat. Add half the shrimp in a single layer to the pan and cook it at high heat until it’s caramelized on one side, about 1 minute. Flip the shrimp over with tongs and cook for another 30 seconds. Don’t over-cook it!
Remove the cooked shrimp to a covered bowl and similarly sear the other half of the shrimp, then return the other half of the shrimp back to the skillet. Turn down the heat to medium and add the butter/garlic/lemon/parsley/oregano/salt mixture, occasionally tossing shrimp around in the pan to evenly coat them with the glaze.
If you’re serving the shrimp over pasta, increase the amount of butter and olive oil to just lightly coat the pasta. Toss the cooked pasta into the pan of shrimp to combine.
I like to season lightly at the end with a tiny pinch of Fleur de Sel. Serve immediately.
I’ve known Plum Pt. Bistro owner Ralph Conte for about 20 years now. Back in the day, Ralph owned Raphael Bar Risto in Providence. At that time, it was not only the best restaurant in town, but The Tunnel Bar at Raphael’s was also the hottest singles bar in town.

My buddy, Charles, and I would spend every Friday and Saturday night there, from dinner until closing, chatting with the ladies, sipping cocktails, and enjoying incredible food. As much as that kind of lifestyle can take its toll on your health, so can running a restaurant like that. And after a number of years, Ralph decided to close the doors on our beloved restaurant.

I was heartbroken, not only because it was a favorite hang out of mine, but it was also where I met my wife!

Fast forward a half a dozen years later.

Restaurants are in Ralph’s blood, so it was no surprise that he opened a smaller, family-run establishment, this time far away from the noise of Providence. Plum Pt. Bistro in Saunderstown became an instant hit with the locals and there’s rarely any empty seat in the house no matter what day you go.

Plum Pt. Bistro is smaller and more manageable than the old Raphael’s, and Ralph has his family to help him. His wife, Alyssa, daughter Zoe, and son Raphael, all work at the restaurant. The result is a comfortable atmosphere that makes you feel like you’re home. Ralph’s skills with Mediterranean flavors has not diminished in the least.

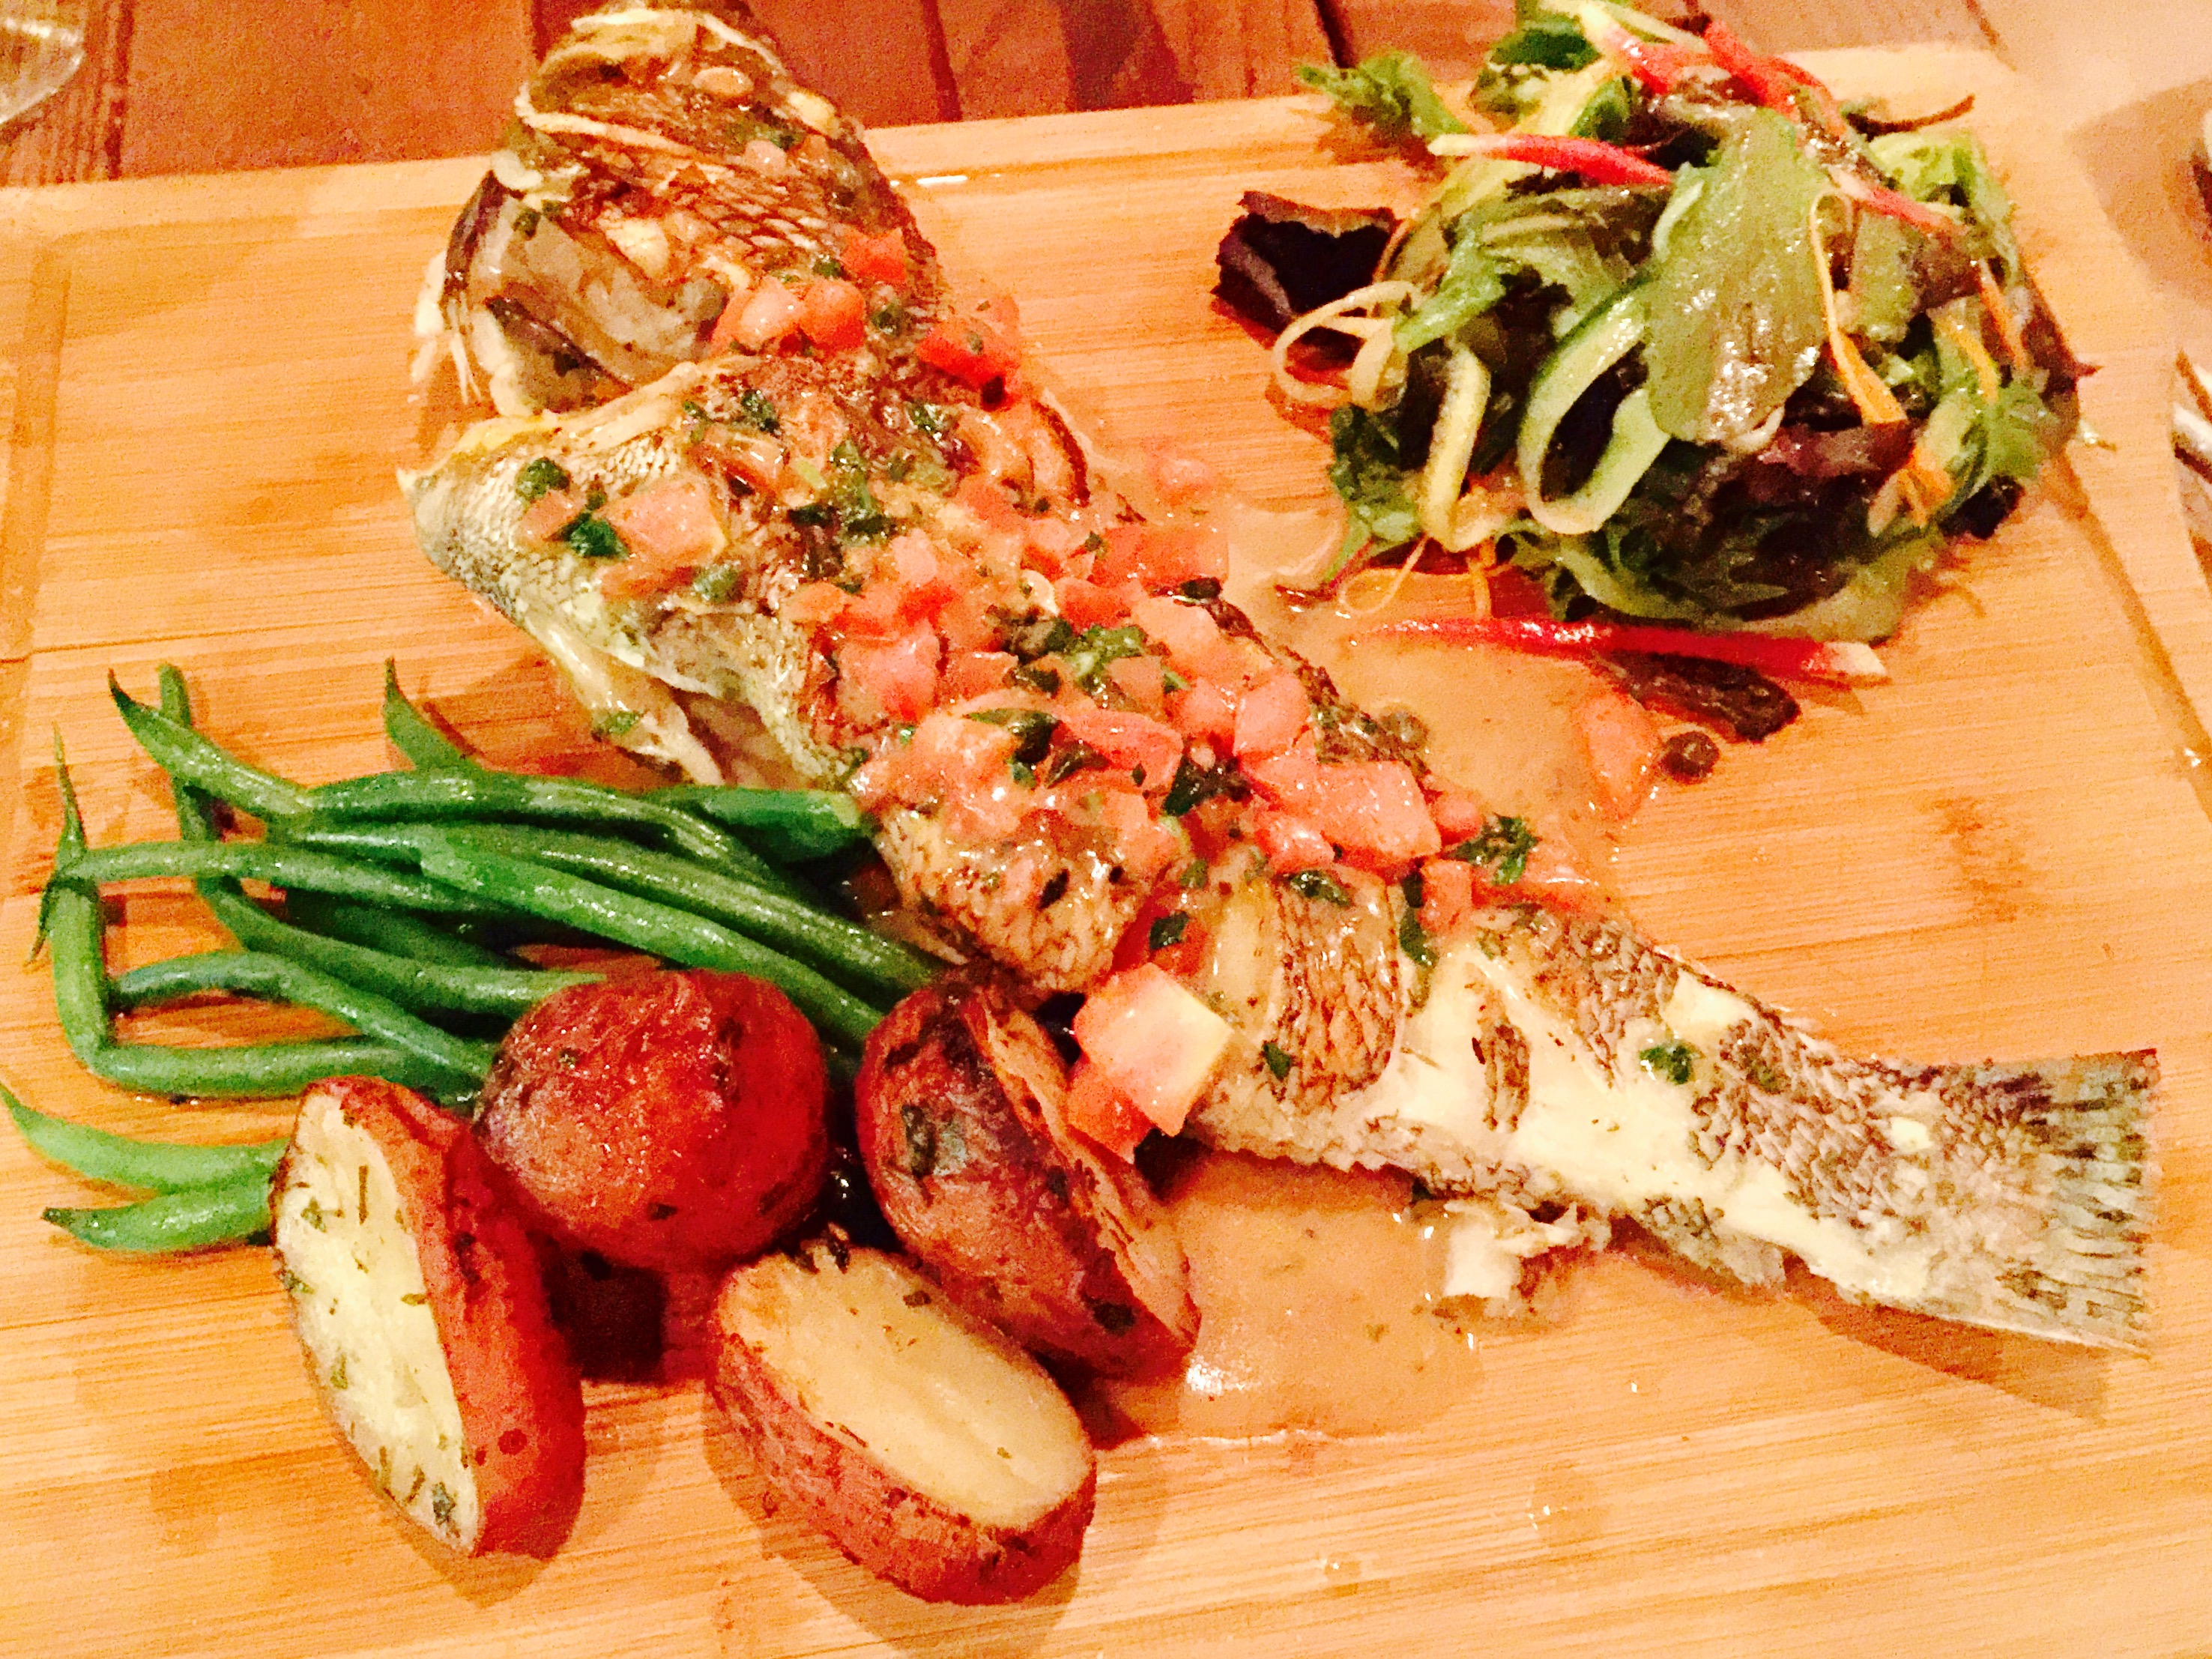
Although I love many of the standards that are on their menu, I always look to the blackboard first for the night’s specials. On a recent trip, there was fresh locally caught striped bass, tuna, and black bass. The tuna tartare was sensational. The whole fried black bass, served in a lemon butter caper sauce, with fresh seasonal vegetables and potatoes on the side, was the best whole fish I’ve had in many years. My daughter devoured the fried zucchini blossoms stuffed with ricotta cheese, sitting on a bed of beautiful marinara sauce. And her favorite regular dish on the menu is the potato gnocchi with pesto. My wife had the lettuce wraps, which were surprisingly fresh and tasty, dipping them in the Asian-style peanut sauce on the side. And a beet salad was raised to the next level by adding a perfectly cooked marinated steak to it.

My whole fried black bass, before I devoured it.


Plum Pt. Bistro has great bartenders that will make you your favorite cocktail, or create a new favorite for you. My buddy, Skip, from the Raphael days, still works for Ralph behind the bar. And they have a decent wine selection, too. Reservations are highly recommended. You need to call them since they don’t offer reservations online.

Plum Pt. Bistro is on the mainland of Rhode Island, right at the end of the Jamestown Bridge…just a stone’s throw from Wickford. Absolutely worth the trip if you’re spending any time in Newport. Cross the bridges and get some amazing food! Hey…I live on the other side of the state and it’s worth the trip for me!


The Saturday before Labor Day is traditionally considered to be International Bacon Day. So that makes it today!

Let’s face it: there are few foods as magical as bacon. Add bacon to just about any dish you’re preparing, and it elevates it to incredible new heights of flavor. The BLT is possibly the greatest food combination ever invented: just a few simple, fresh ingredients, when placed together, transforming into one of the most amazing sandwiches on planet Earth.

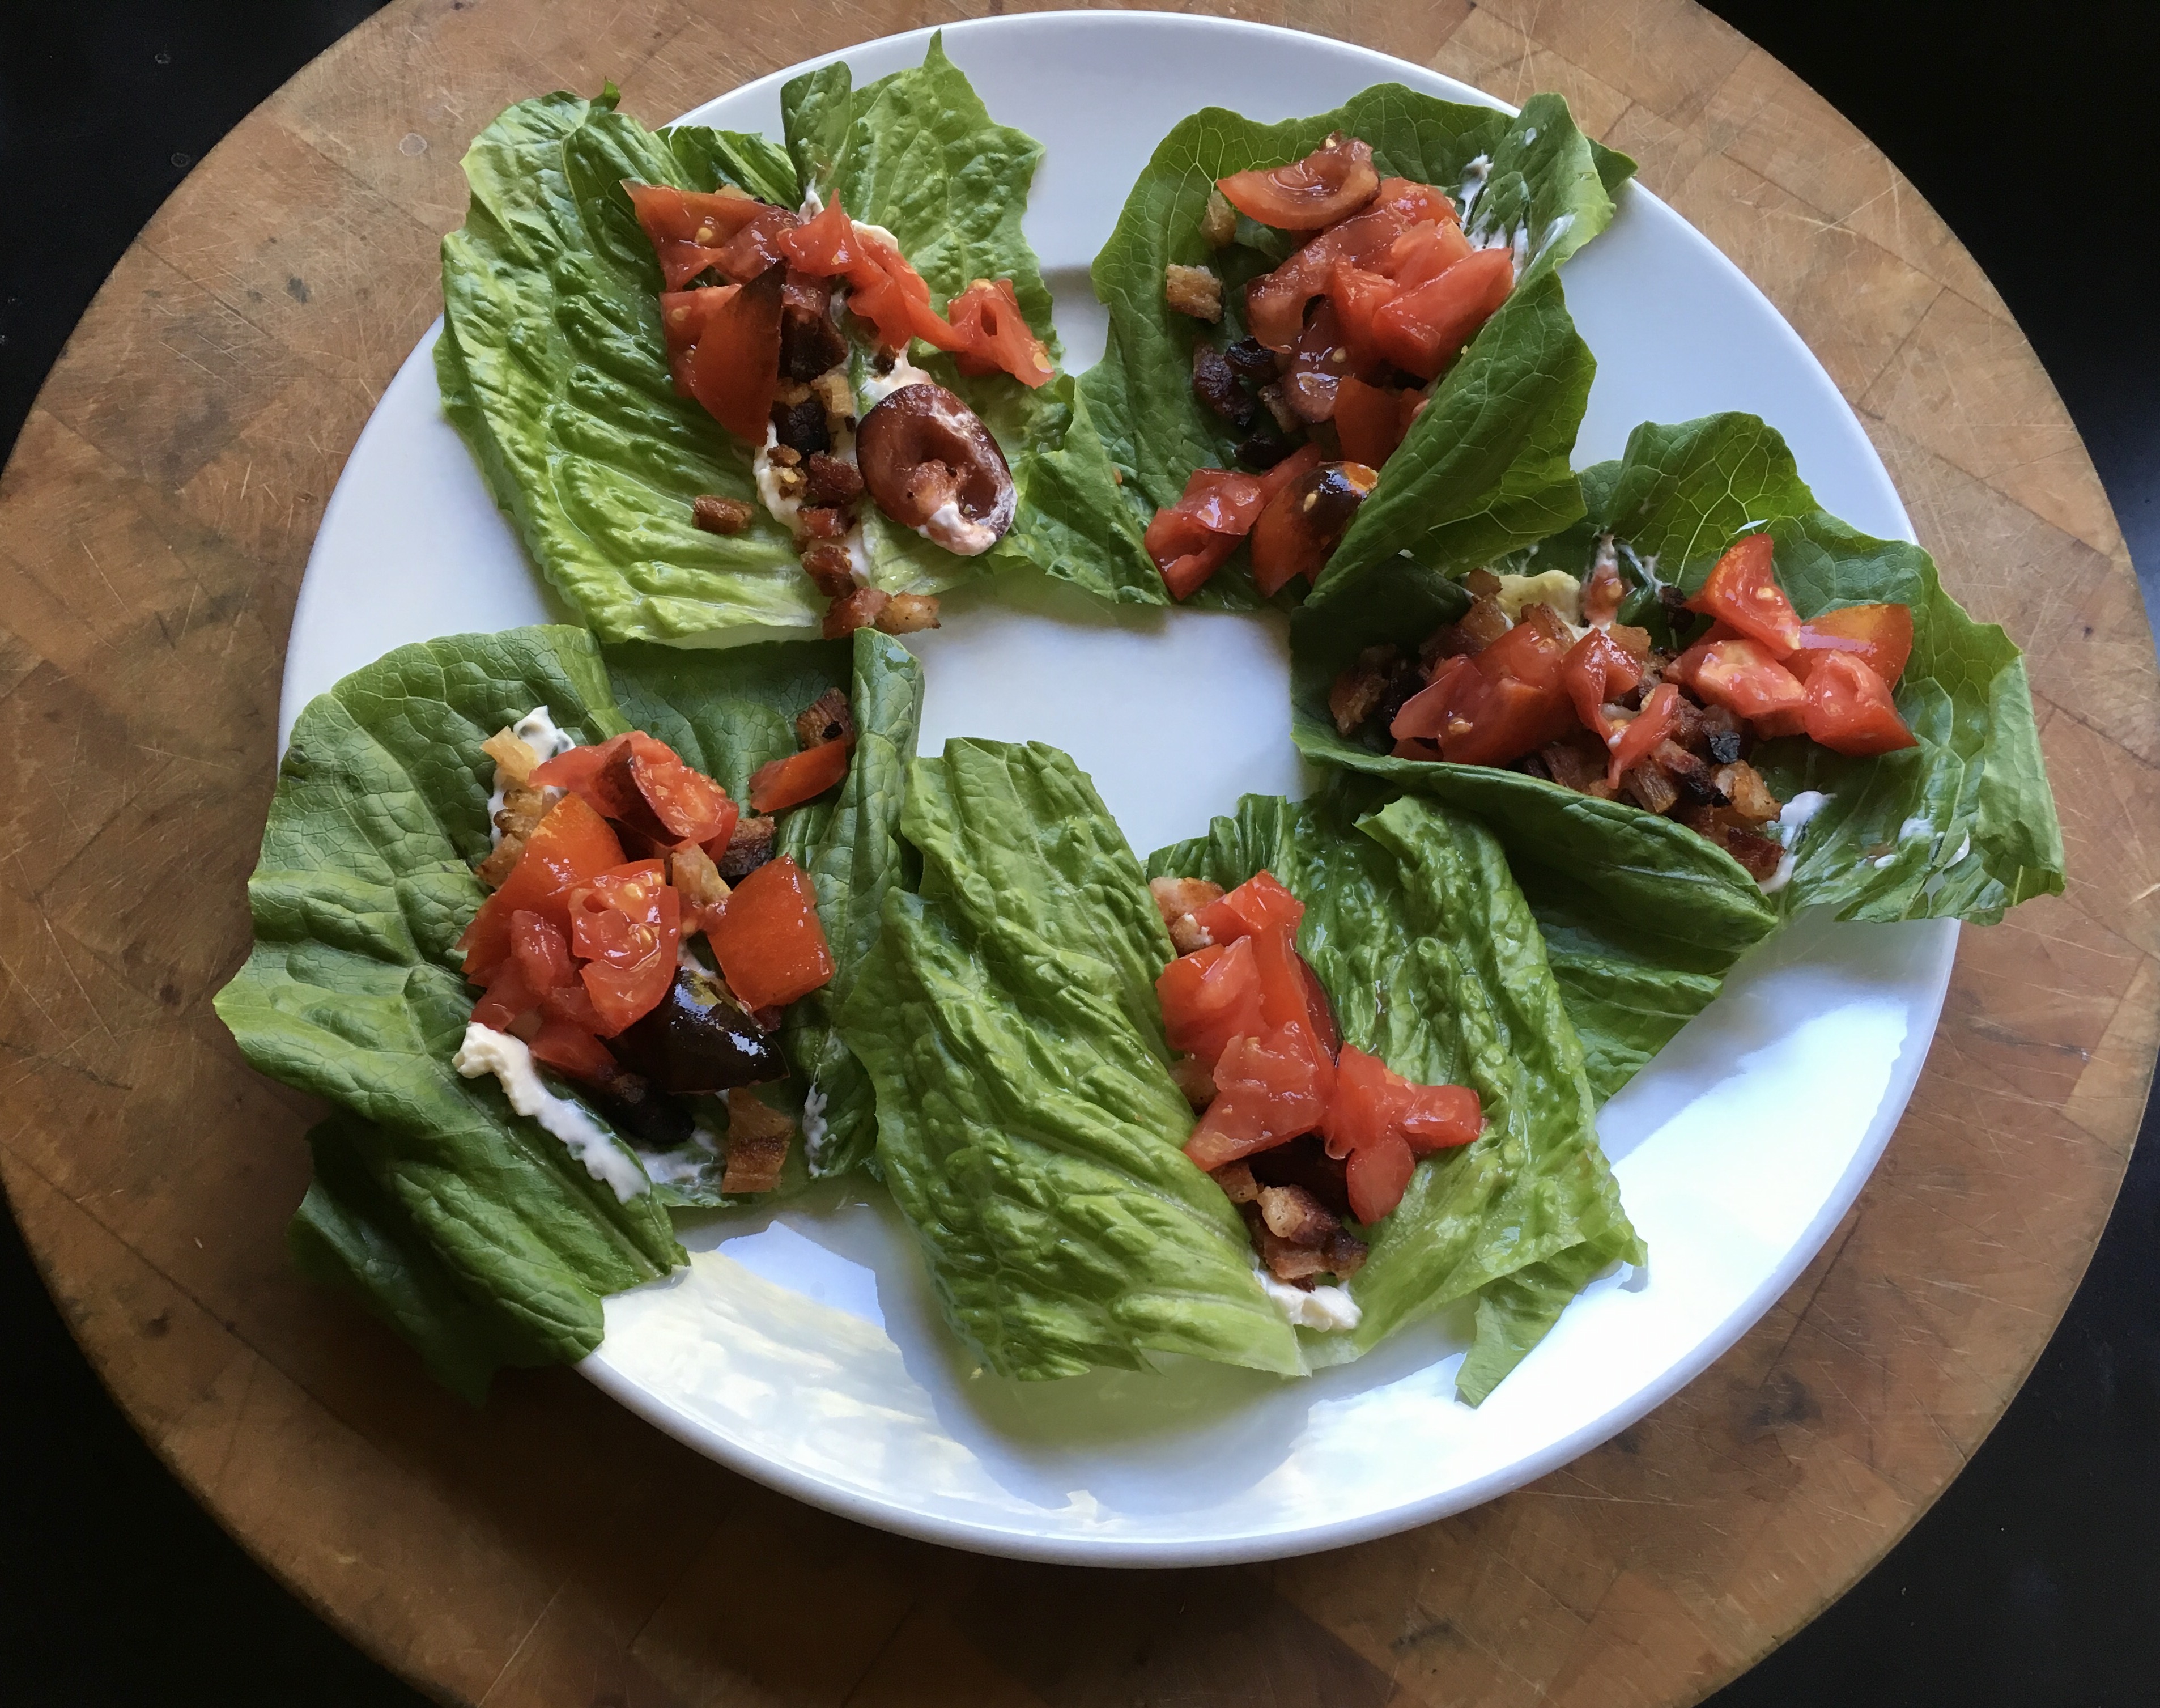
BLT wraps: home-cured and smoked bacon, local farmstead romaine, home garden tomatoes.


If I’m buying bacon, I go on-line to Burger’s Smokehouse, a family run business in Missouri that has made great bacon for decades. The prices are good, and they include shipping. (www.smokehouse.com) I buy in quantity and freeze what I don’t need right away. My favorite is the thick-sliced country bacon “steaks.”

But I also make my own.

Bacon comes from the pork belly, and they’re easy to find in any good butcher shop. But to get something a notch above, I’ll buy a heritage breed, like Berkshire pork, from Heritage Pork International. (www.heritagepork.com)  I follow the simple curing techniques outlined in “Charcuterie,” a great book written by Michael Ruhlman and Brian Polcyn.

To cure bacon, all you really need is salt and sugar, and what they in the curing biz call “pink salt,” which is not to be confused with salt that happens to be pink, like Himalayan salt you would find in a gourmet store. Pink salt is bright pink to let you know that this is a special salt that should only be used in small quantities for curing. The reason is it contains nitrites. Nitrites delay the spoilage of the meat, and help keep the flavors of spices and smoke. They also keep the meat nice and pink instead of an unappetizing gray. That’s good. But nitrites can break down into nitrosamines, which have been known to cause cancer in lab animals. But let’s face it: you would need to eat a ton of cured meat to really worry about this.

To make the basic dry cure:

1/2 lb. kosher salt
1/2 cup light brown sugar
1 teaspoon coarsely ground black pepper
1 oz. pink salt
optional ingredients: granulated garlic, granulated onion

Mix the ingredients well. An important note: all salts do not all weigh the same, so go by the weight and not a cup measurement.

Once you rub the pork belly with the basic dry cure, place it in a large Ziploc bag, squeeze the air out of it, and seal it tightly. If it’s too big for the bag, you can either cut the belly into two pieces, or wrap it tightly with several layers of plastic wrap. Place it in a container in the fridge for a couple of weeks, flipping it over every few days to let gravity do its work. You’ll see that the salt will draw moisture out of the meat and form a brine. This brine will continue to cure your pork belly, so leave it in there. (The container will capture any liquid that might seep out.)

In two or three weeks, once the pork belly has been cured, wash the brine off the meat, and pat it dry with paper towels. Now it’s time to cook. You can simply cook the pork belly at 200 degrees for about 2 hours, until the internal temperature reaches 160 degrees. I place the pork belly in a digital smoker, which allows me to set an exact temperature. I smoke it at 250 degrees for 2 hours, using hickory chips.


Bellies in the smoker

Bellies in the smoker.


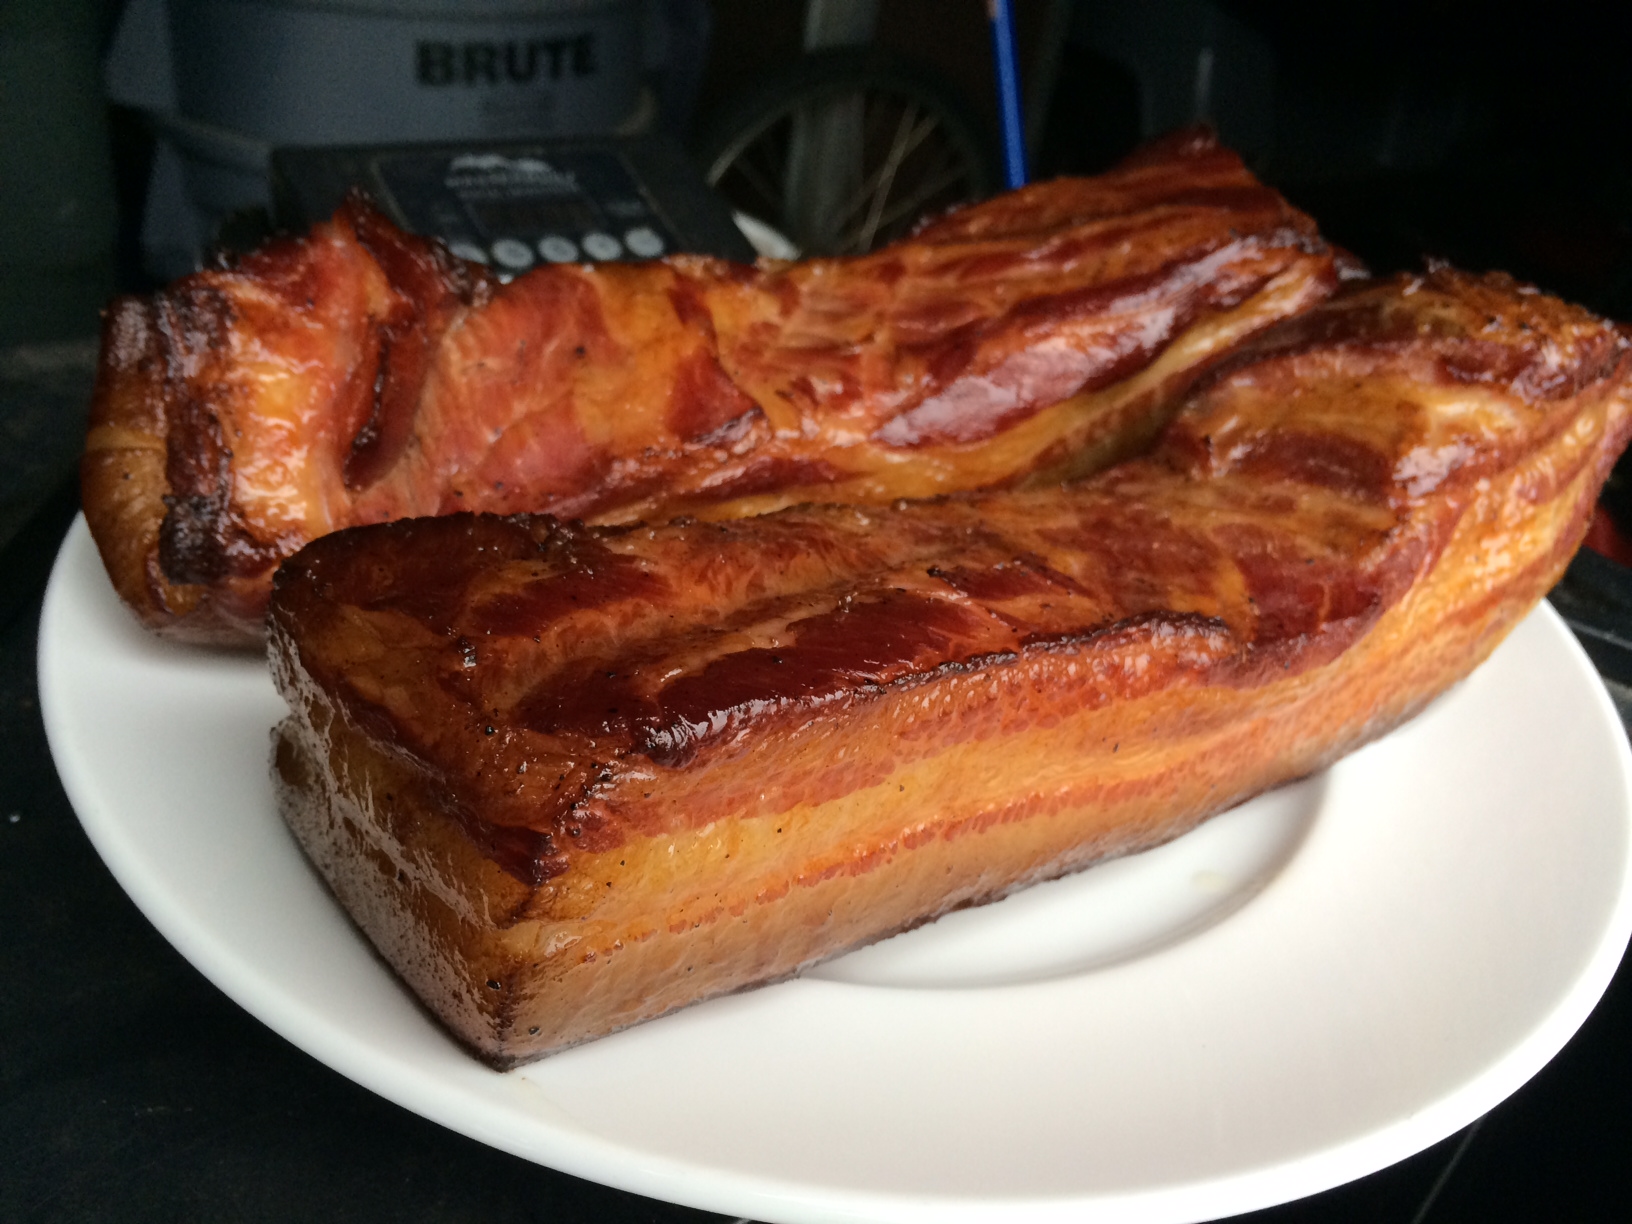
Smoked bacon

Smoked bacon!

That’s it. You have achieved bacon!

The reward is so worth the effort. Just remember that you still need to slice the bacon and fry it. Don’t eat it straight out of the smoker. That first slice you cut off your bacon and toss in a pan to lightly fry for a few moments will be the best bite you’ve ever had in your life!
And if you’re making one slab of bacon, why not make it three or four? It freezes well. And…you will eat it. You know you will!

Frying in the pan!

Frying in the pan!

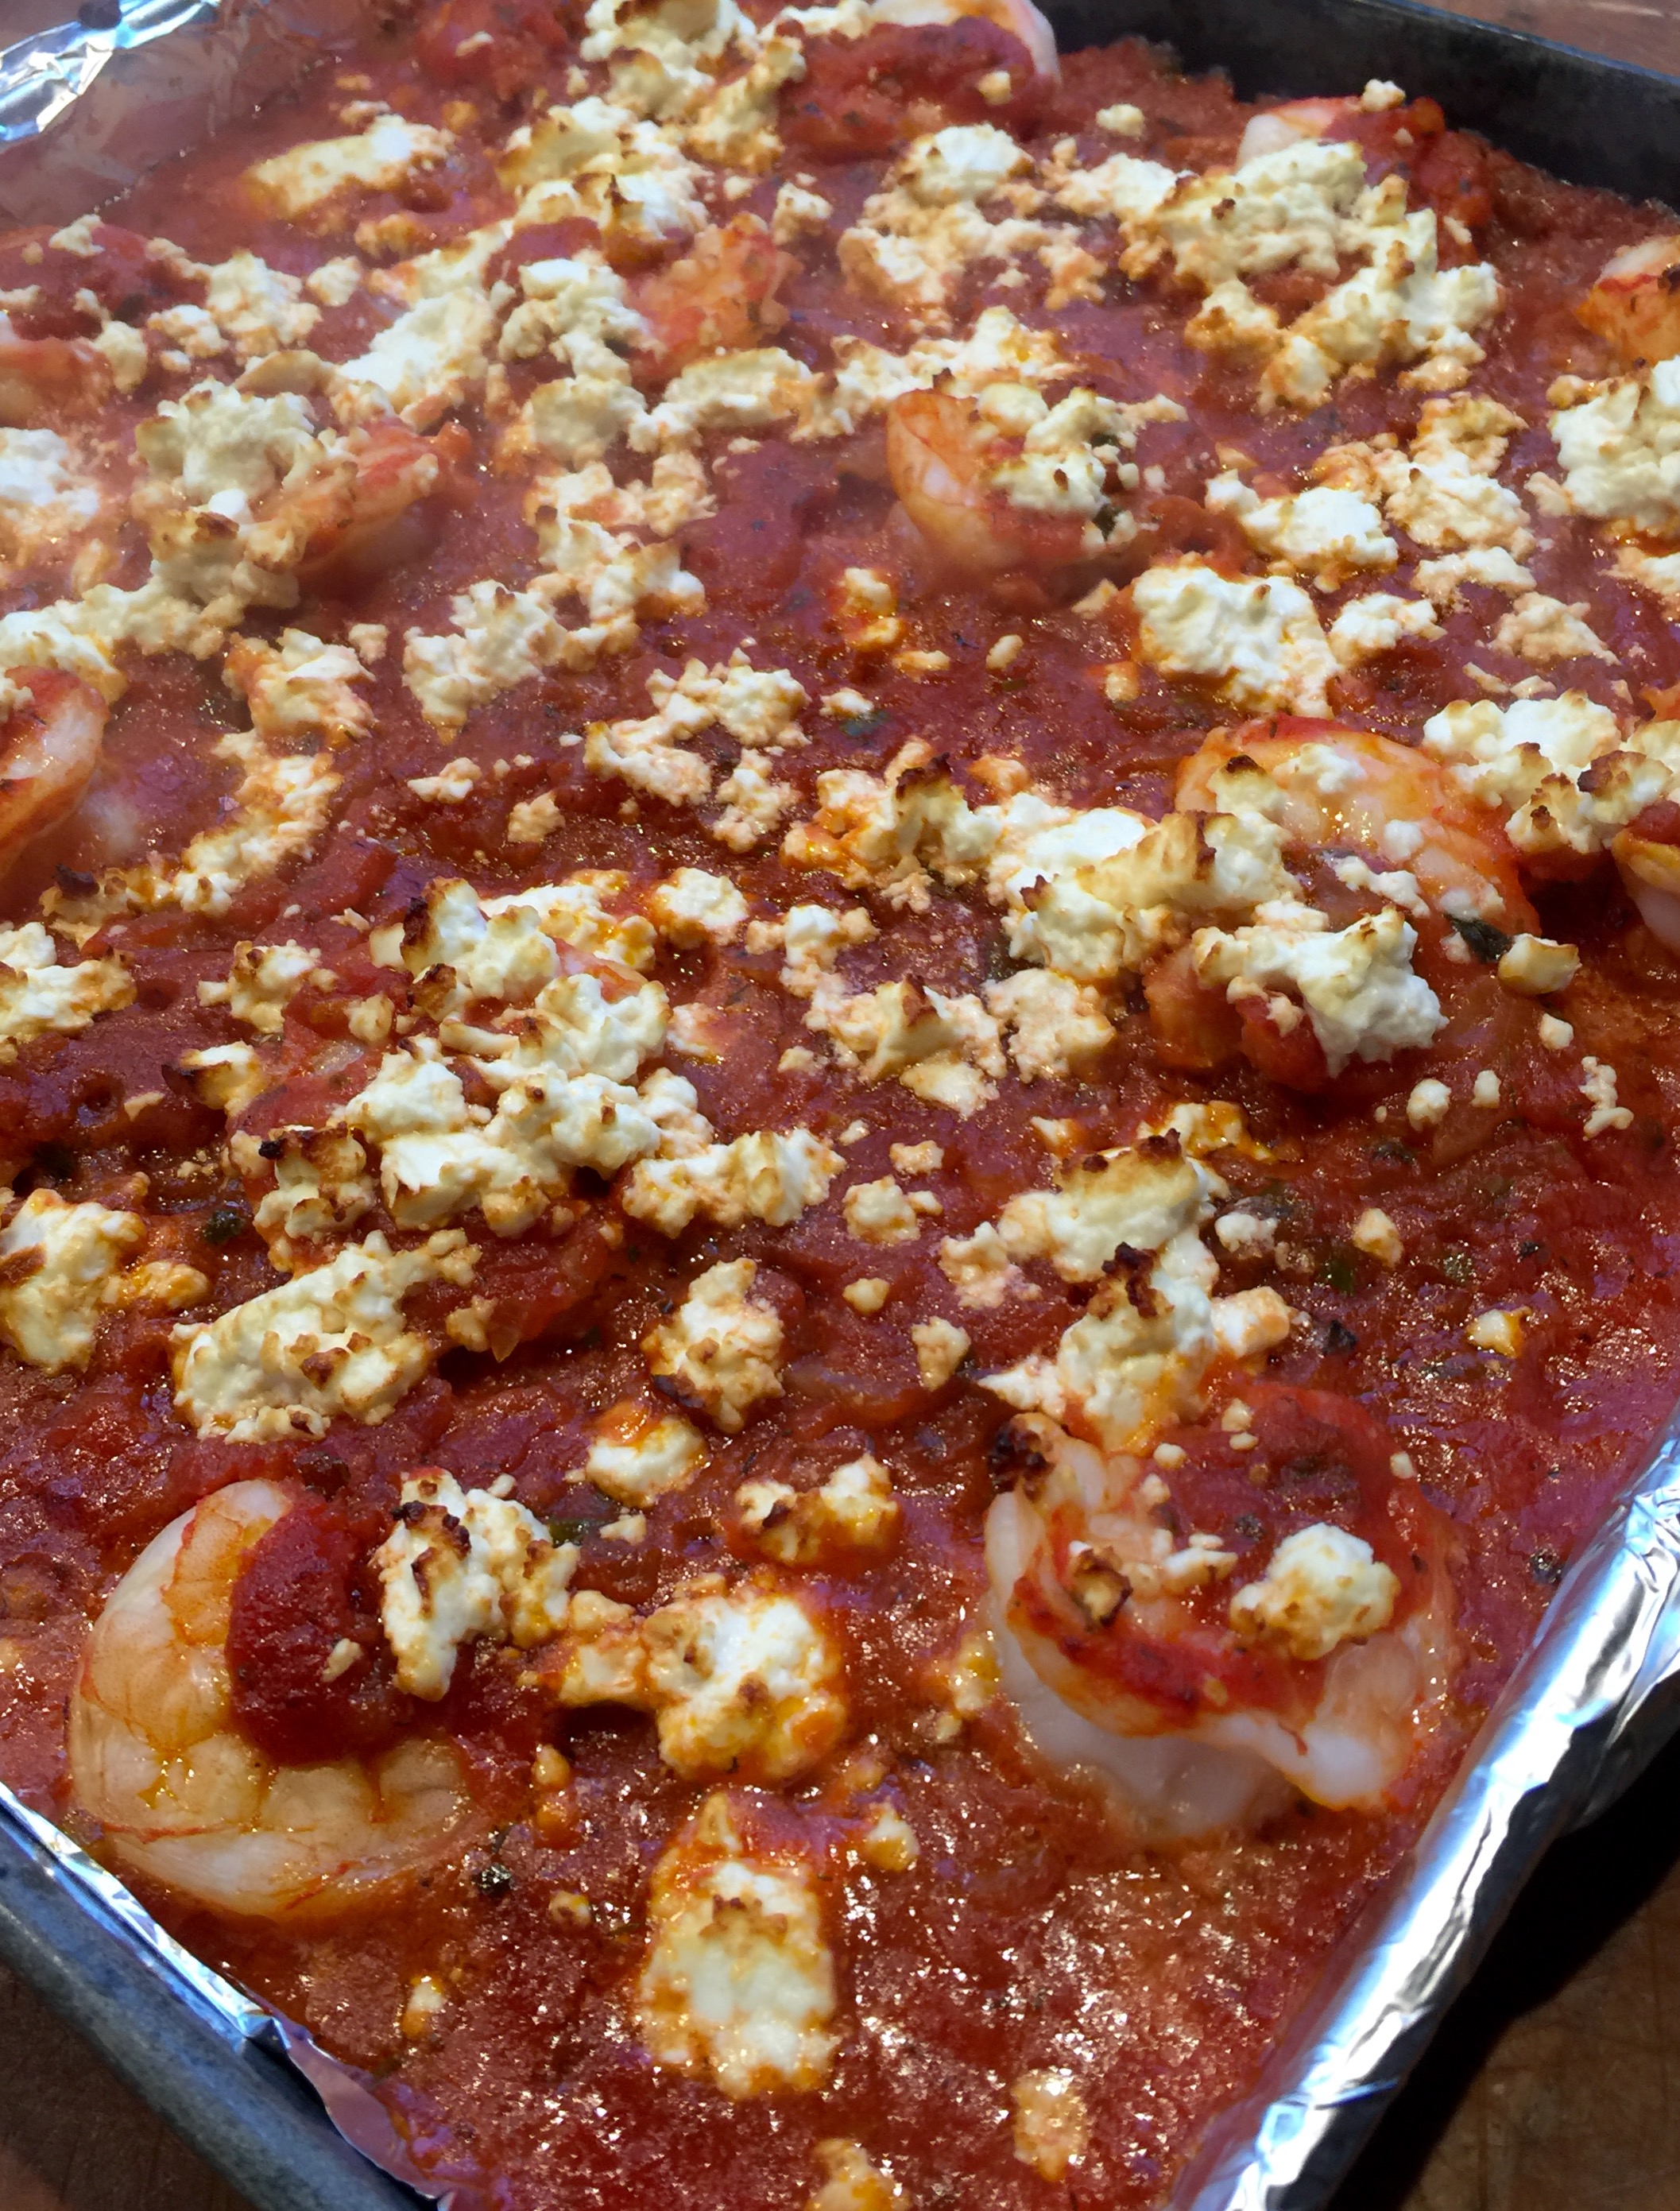
I love the combination of tomato sauce and feta, and this dish, served over some pasta, will have you licking the plate.

FullSizeRender (7)

8 oz. (or more!) feta cheese
1 can (28 oz.) whole tomatoes, ground into sauce
1 lb. (about 24) wild-caught American shrimp, peeled and deveined
1 medium onion, chopped
juice of 1/2 lemon
2 tablespoons olive oil
2 cloves garlic, through a press
pinch red pepper flakes
1 teaspoon fresh dill
1 teaspoon oregano
1 tablespoon Ouzo
salt and pepper

Peel and de-vein the shrimp. Place them in a bowl and squeeze the lemon juice over them and toss to mix. Open the can of tomatoes and puree it in a food processor.

In a saucepan, heat the olive oil. Saute the onions until they’re translucent and then add the garlic. Saute the garlic for 10 seconds, until fragrant, then add the red pepper flakes, dill and oregano. Add the tomato sauce, and cook over medium heat until the sauce has reduced a bit and isn’t watery. Add the Ouzo carefully–keep away from open flame! Add salt and pepper to taste.

Line a sheet pan with foil and pour a thin layer of the tomato sauce on the bottom. Lay the shrimp down in one layer on the sauce, and then cover the shrimp with the rest of the sauce. Crumble the feta cheese with your fingers and sprinkle all over the top.

Bake in a pre-heated 350 oven until the shrimp has cooked through and it’s nice and bubbly. Serve over pasta.

SHEET PAN EGGS

Posted: August 27, 2017 in breakfast, Food, Recipes, sausage
Tags: , , ,

When you’ve got 20 people showing up at your house for breakfast the morning after hosting a 165-person party the night before, you want to make it all as easy as possible for yourself. Sheet pan eggs are the answer!

I pre-cook everything but the eggs the day before…I caramelized some onions, cooked sausage patties and cut them into small cubes, and wilted a couple of handfuls of spinach…then kept them in the fridge, ready to use. Grating or crumbling some cheese–cheddar or feta–is also a good idea.

2 dozen eggs, scrambled
12 sausage patties, pre-cooked
2 large handfuls of spinach, wilted in a pan with some olive oil
1 large onion, thinly sliced, and sautéed until caramelized in a little olive oil
cheddar cheese or feta, optional
milk or cream, optional
butter
olive oil


The next morning, I get a large bowl out and scramble 2 dozen eggs. A touch of milk or cream is optional. Then I add all the pre-cooked ingredients, stirring well.

The secret to successful sheet pan eggs is to make sure the pan is greased really well. Using a cube of butter, I cover every inch of the sheet pan thoroughly. Then, I pour a small amount of extra virgin olive oil in the pan, and spread that around with my fingers.

Once the pan is nicely greased, I carefully pour the contents of the bowl into the sheet pan and place in a 300-degree oven.

Let the sheet pan eggs bake at this temperature, resisting to hurry the process by cranking the heat up. Higher temperatures will burn the bottom before the top is properly cooked.  Eventually, you’ll see the bottom of the pan solidify while the top is still a bit runny. Be patient! When the top is cooked to your liking, remove it from the oven and let it cool for at least 5 minutes before slicing it into squares.

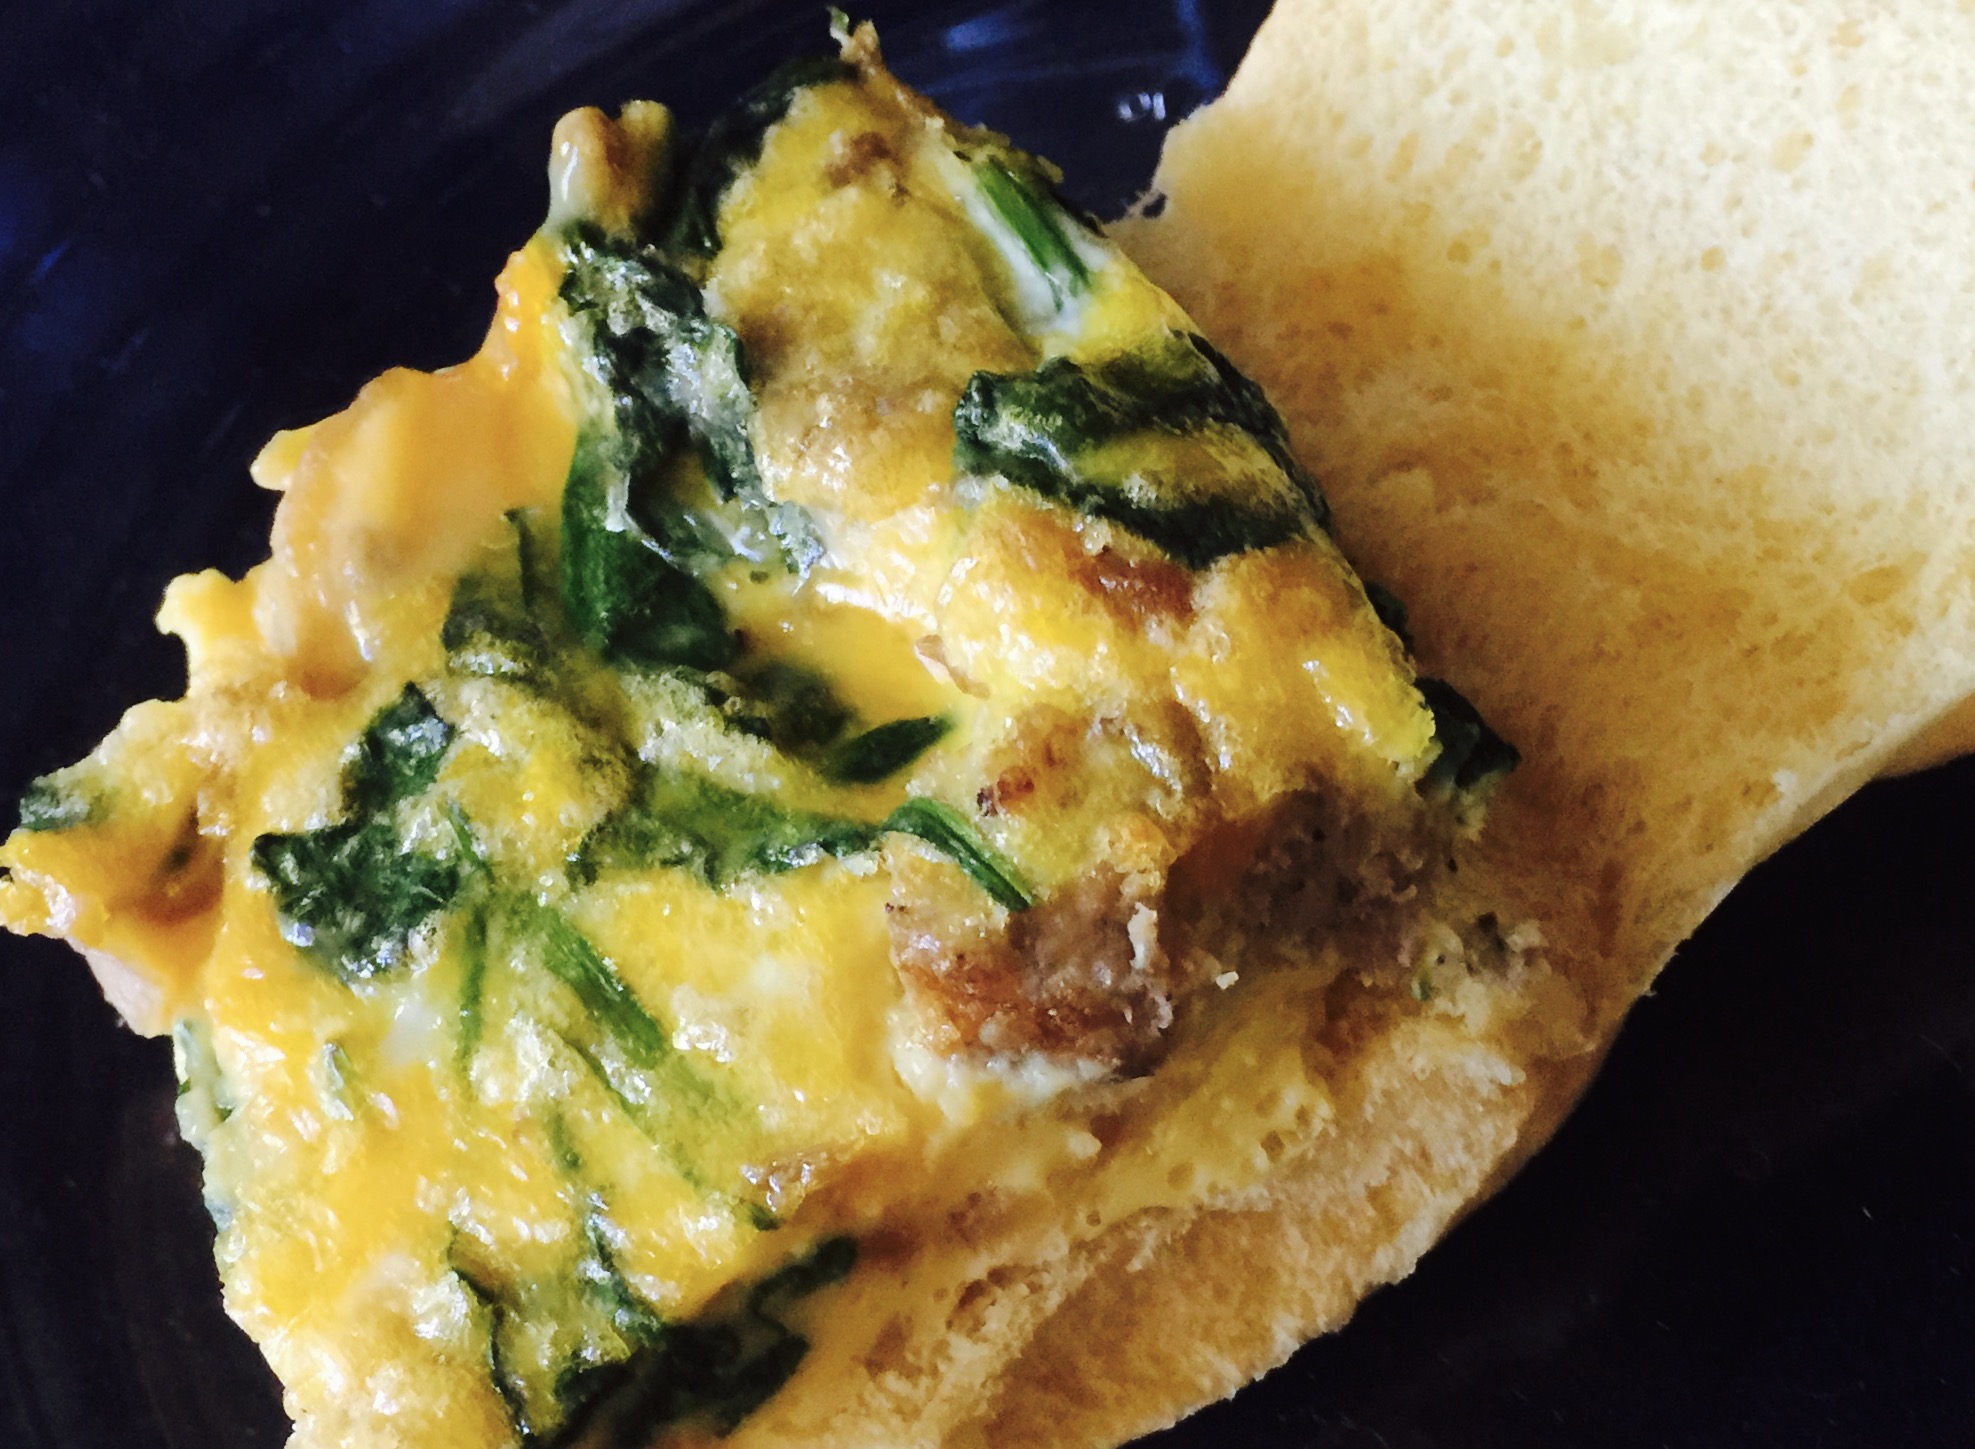
To serve, either go the sandwich route by toasting some fresh slider buns. Or simply serve a square on a plate, garnishing as you like, a little Tabasco on the side.


We recently invited our closest friends, neighbors and family members to our home to celebrate life after my wife’s last year of health issues. (We are grateful the prognosis is good!) We called it our FLY party (F*ck Last Year!) and it was a huge success.

Pre-party prep!

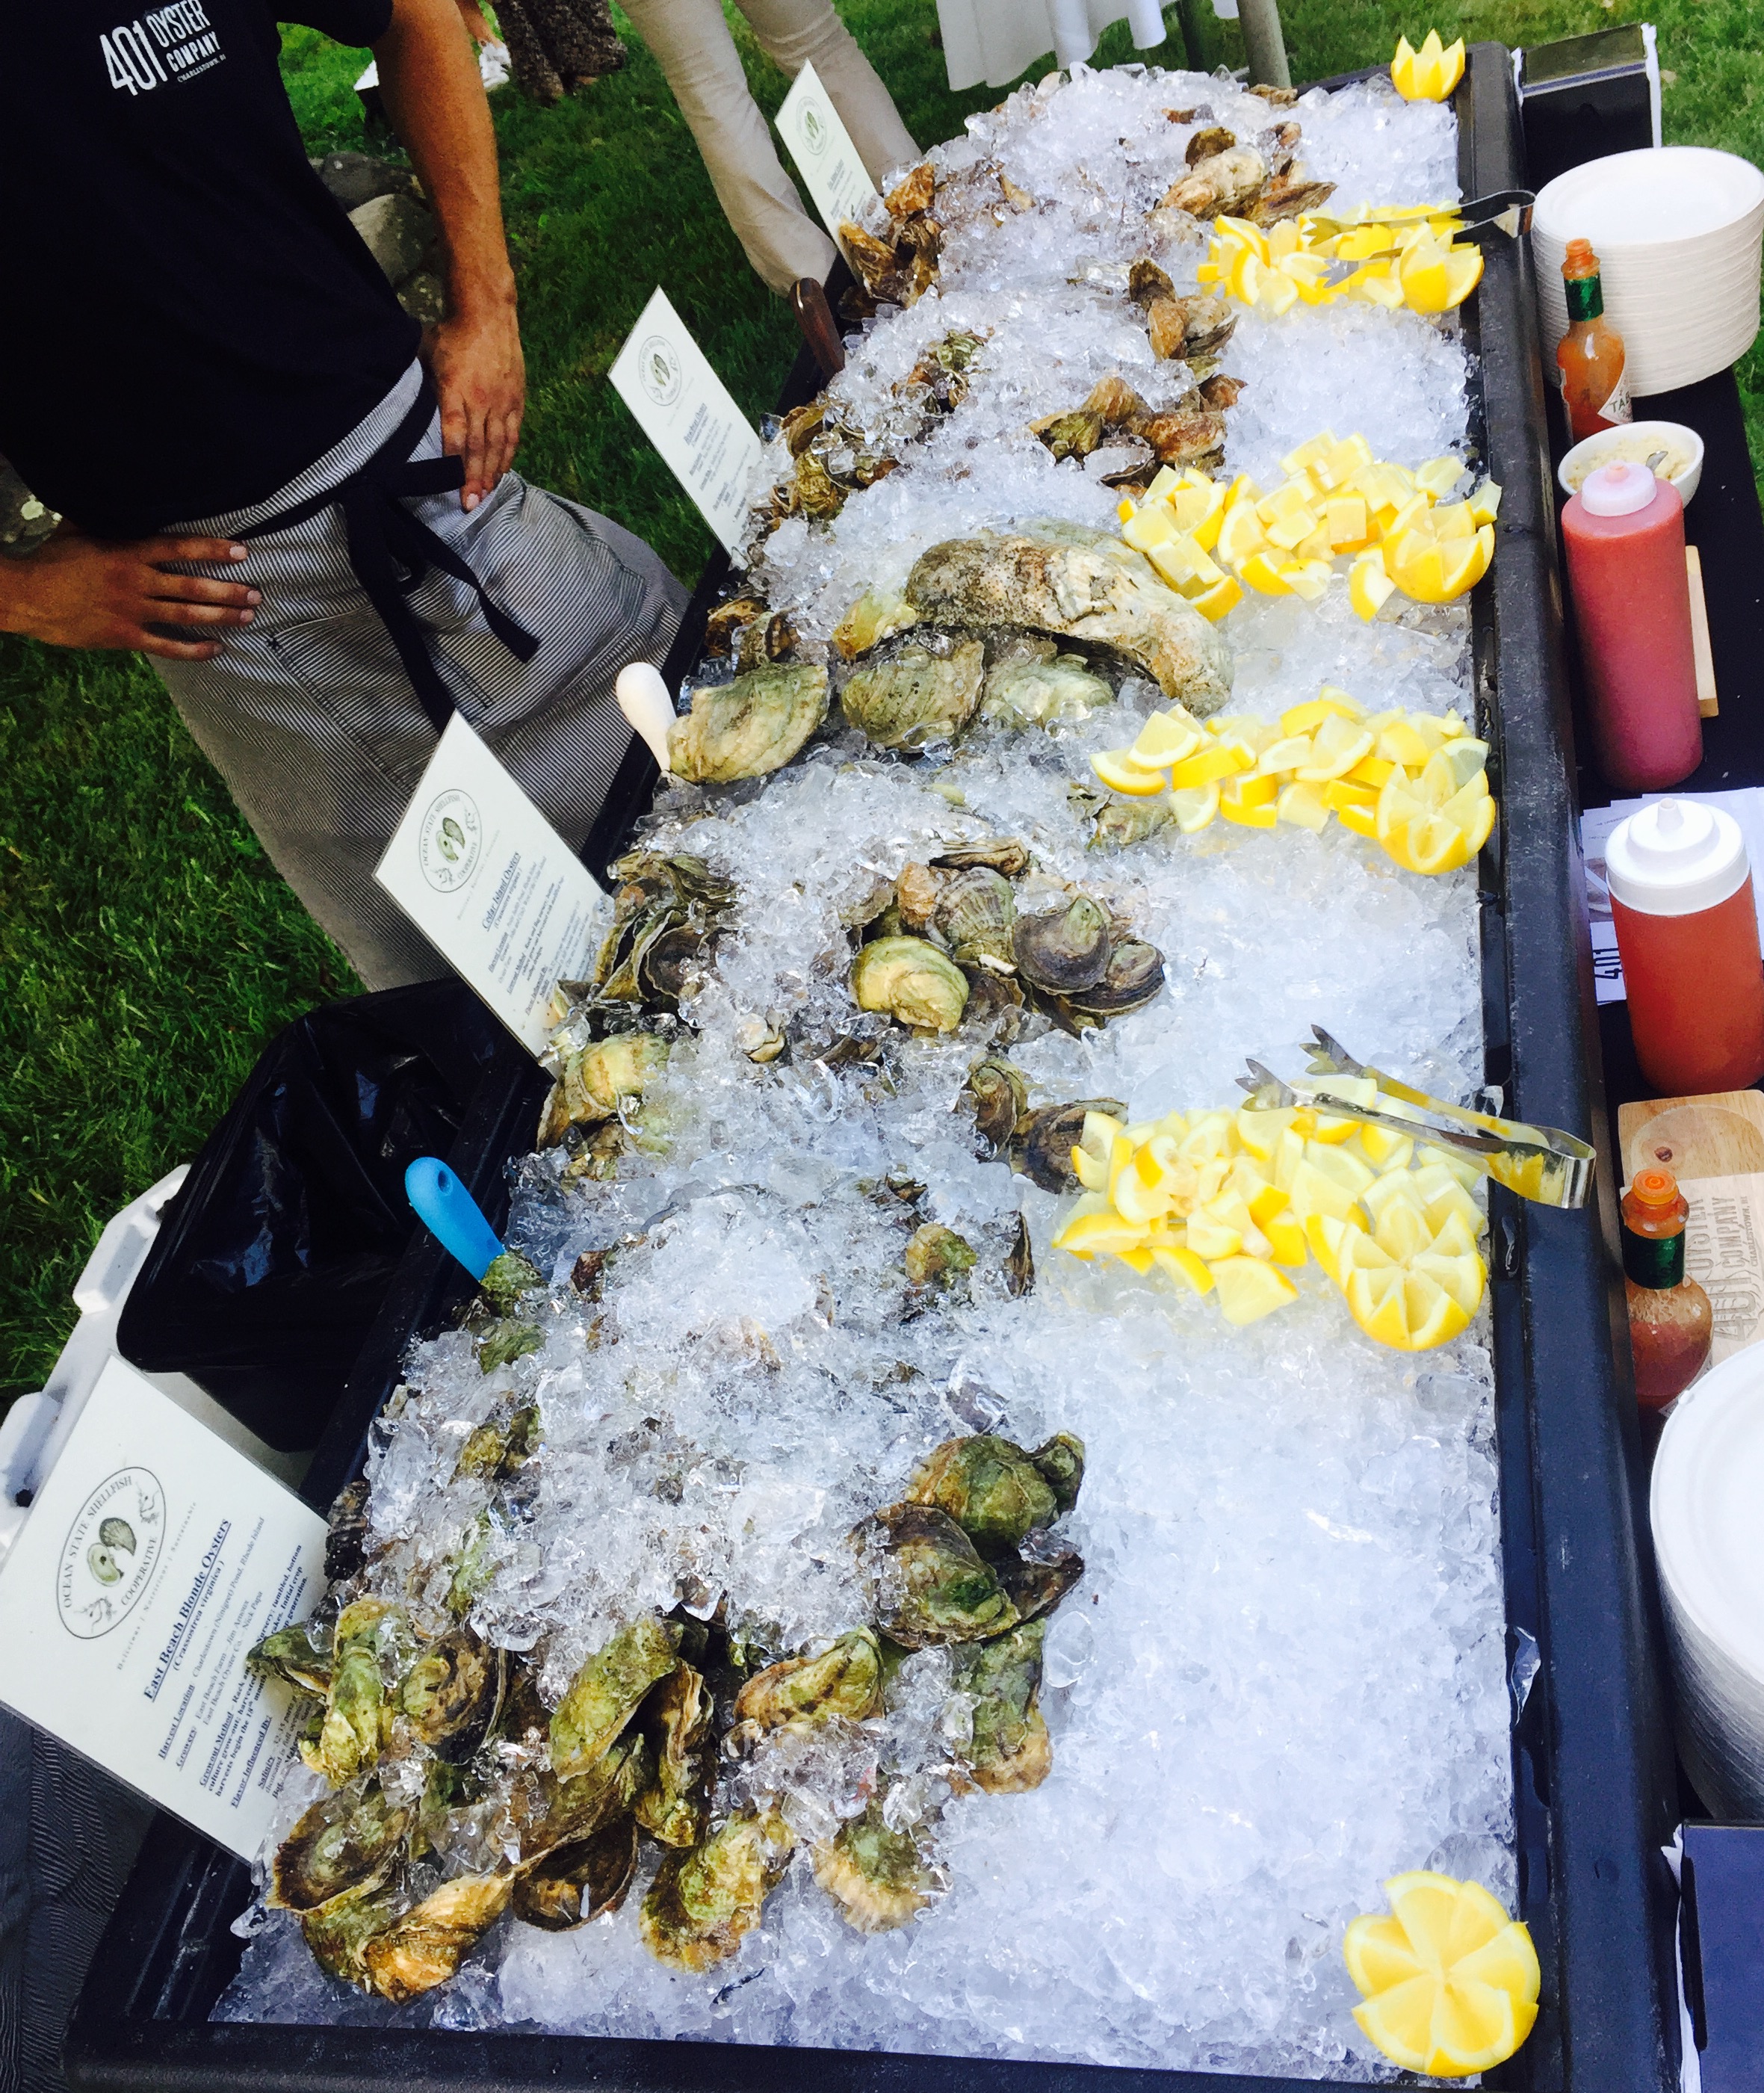
We went all-out this time, taking our “usual” 100-person summer party to the next level, renting a large tent and tables…hiring a staff to serve food and drinks and clear the tables and park cars…hiring a bartender…enlisting the culinary services of Rocket Fine Street Food of Providence and bringing in the best shucking oysters in Rhode Island with 401 Catering and Events.

Unlike past years, where I would spend all day cooking a few appetizers and ran around cleaning the yard all night–barely chatting with the very friends I’ve invited–this time, we coughed up the extra cash to hire people to do the work, allowing us to actually be part of the party!

What a fun night! Great food and drink…great friends.

If you’re in Providence, look for the Rocket truck! Go to their website (www.rocketstreetfood.com) and check out where they’ll be on their calendar. It’s worth the effort.

If you’ve got a big event, and are looking for the best Rhode Island oysters, go with the guys that supply the best east coast restaurants with the best the Ocean State has to offer. No gig is too big! Max, Brian and their staff are professional and truly some of the nicest guys you’ll ever meet. and they’re passionate about the quality of their oysters! Start here: www.401catering.com.


The definition of a consomme is: “a clear soup made with concentrated stock.” I might add “mind-blowing” to that sentence, especially with this recipe. The key to success– and this is crucial–is to use absolutely garden-fresh, in-season ingredients. If you try this with greenhouse or supermarket tomatoes, you’re just wasting your time.

FullSizeRender (9)

4 1/2 lbs. of fresh garden tomatoes (my favorite is the heirloom: Brandywine)
1 large bunch of fresh basil, leaves and stems
1 2-inch piece of fresh horseradish, peeled
1 clove of garlic, peeled
1 tablespoon white wine vinegar (I use Alessi)
2 oz. vodka (I use Tito’s)
sea salt and pepper


Remove the core of the tomatoes, but leave everything else, including seeds and skin.

Put all the tomatoes, basil, horseradish, garlic, vinegar and vodka in a blender or food processor. You might need to do this in batches if your equipment can’t handle it all.

Process until you get a kind of slush.

Line a mixing bowl with a double layer of cheesecloth and pour the tomato slush mixture into it. Gather up the corners of the cheesecloth carefully, and tie them securely so you can lift the bundle up by the knot. Hang the bundle from a hook over a clean bowl in the fridge so that it catches the liquid that drips out, and leave the whole thing in there overnight. The liquid that drips out will be clear. (You can place an optional slice of beet in the bowl to add color, but I choose not to, because I think it changes the flavor.)

Cheesecloth bundle dripping overnight in the fridge.

Cheesecloth bundle dripping overnight in the fridge.

To serve, chill bowls (or in this case: the sipping glasses) in the fridge. When ready to serve, ladle out the consomme and garnish with a tiny basil leaf. A drop of excellent quality olive oil is optional.

Synthetic cheesecloth apparatus. The real thing works better.

Synthetic cheesecloth apparatus. The real thing works better.


I tried using a synthetic cheesecloth for this recipe, and I found that it doesn’t filter out enough of the solids to make a clear consomme. You could use it along with real cheesecloth, just to use the stand, or just hang it all in real cheesecloth, as described in this recipe.

Now’s the time to head to your local farm stand and pick up a bag of gorgeous plum tomatoes, before the season is gone! And this is what you do with them…

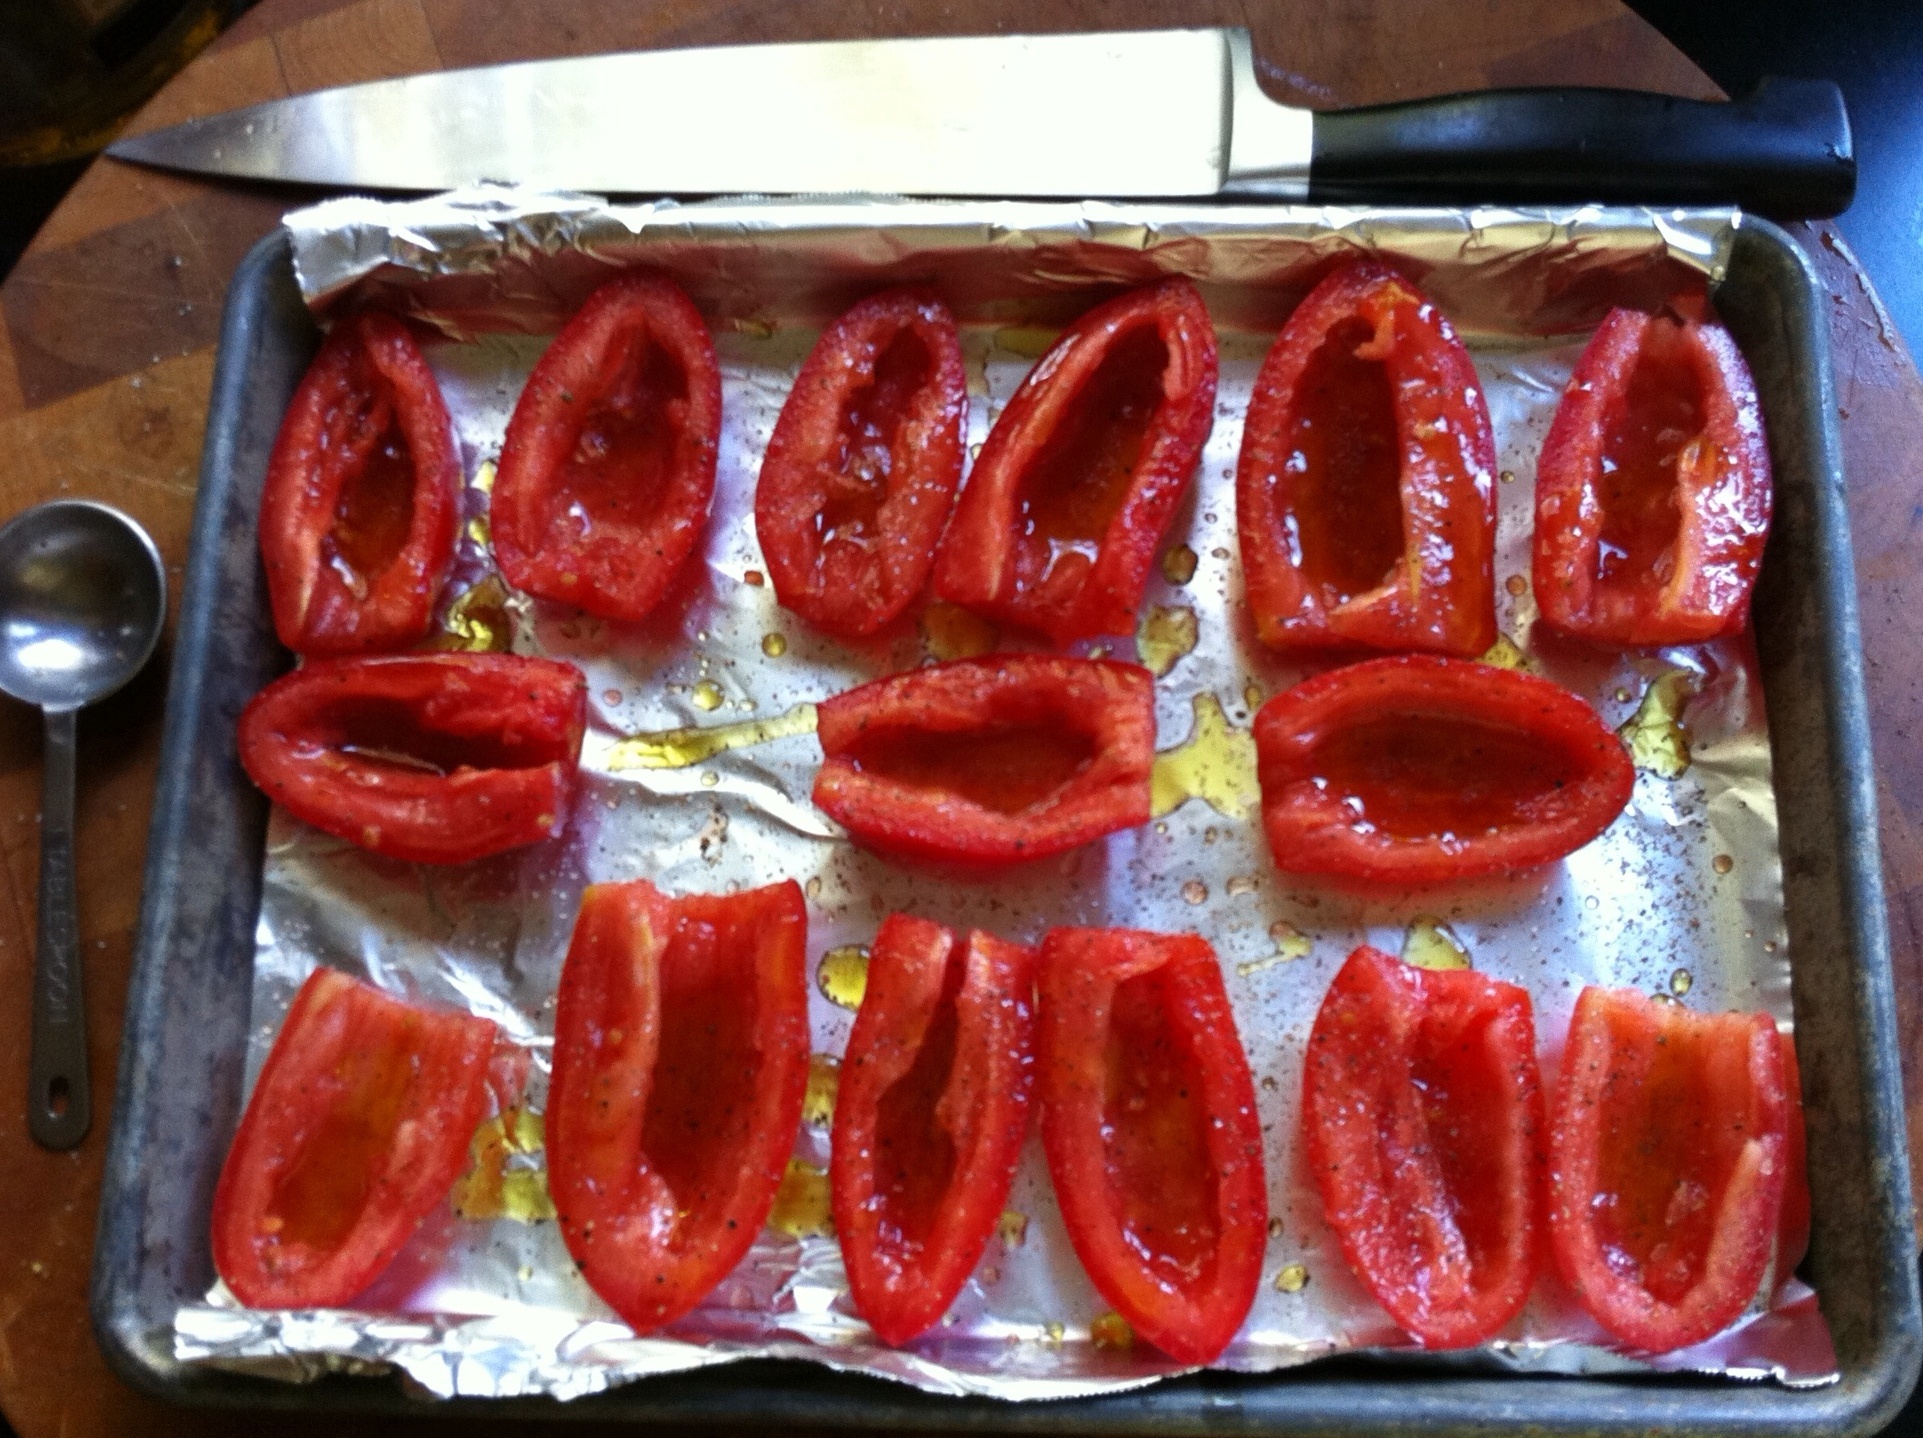
These are not sun-dried tomatoes. They’re better, because fresh plum tomatoes are still moist after roasting, with a bit of that magic tomato liquid in every cup! A great, simple platter to offer at parties.

Tomatoes before

Tomatoes before

12 to 18 halved, seeded plum tomatoes
1/4 cup extra virgin olive oil
2 tablespoons organic cane sugar
Freshly ground pepper
Fleur de Sel or sea salt

Pre-heat the oven to 250.

Line a baking sheet with foil and rub it lightly with olive oil.

Arrange halved and seeded tomatoes on it in a single layer, cut side up. Drizzle evenly with 1/4 cup olive oil, sprinkle with 2 tablespoons sugar, and season with pepper to taste.

Bake the tomatoes until they are still juicy but slightly wrinkled, about 3 hours. Transfer to a platter and let cool slightly.

Just before serving, sprinkle tomatoes with Fleur de Sel, and garnish if you like, with chopped parsley leaves, mint leaves, or basil.

Tomatoes after

Tomatoes after

Just because you’ve got a garden full of fresh veggies, it doesn’t mean you have to gorge on nothing but salads! Sometimes, a refreshing cocktail is just what you need after a long day of yard work. This one fits the bill!


4 fresh cucumbers, peeled and seeded
Small ice cubes
1 cup loosely packed fresh mint leaves
2 teaspoons granulated organic cane sugar
3 tablespoons fresh lime juice
1/2 cup vodka (I like Tito’s)
1 oz. orange liqueur (I like Cointreau)


Peel and seed the cucumbers. Coarsely chop them and then purée in a food processor until smooth. Strain through a fine sieve, pressing the solids to extract as much liquid as possible. Or, if you have one, use a juicer. Set the cucumber juice aside.

To a large glass pitcher, add the mint leaves, sugar and lime juice. Muddle the ingredients so that the mint leaves release their oils. Add 3/4 cup (at least) of the cucumber juice. Add the vodka and Cointreau. Muddle again briefly.

Fill tall drinking glasses with ice cubes. Strain the cocktail into glasses. Garnish with a cucumber spear or mint.