Posts Tagged ‘pork’

You make soup! And really tasty soup at that! The great thing about this soup is that you can pretty much add anything you like to it–ham, bacon, chicken, or keep it meat-free–and you just can’t go wrong.

Me? I had a couple of pigs’ feet in the freezer (seriously) and I plunked those suckers down into the soup as it cooked, removing and discarding the feet at the end. I chose not to pick the meat out of them…they had imparted a delicious porky flavor into the soup by then anyway.

I always use homemade chicken stock instead of water for extra flavor.

Lentil soup, with a pig's foot waving hello.

Lentil soup, with a pig’s foot waving hello.

Ingredients:

1/4 cup olive oil

2 carrots, diced

2 stalks celery, chopped

1 onion, chopped

2 cloves garlic, minced

1 bay leaf

1 tsp dried oregano

1 tsp dried basil

8 cups chicken stock

2 cups dry lentils

1 can crushed tomatoes (28 oz)

2 tbsp vinegar

1 cup spinach, rinsed

salt and pepper

Put olive oil, carrots, onions and celery in a large soup pot and place over medium heat. Add a little salt and pepper. Once the onion has softened, add the garlic, bay leaf, oregano and basil. Cook for a couple of minutes and add the chicken stock, lentils and tomatoes. Bring this to a boil, then reduce the heat. Let it simmer for an hour.

Before serving, add in the spinach and cook it until it wilts. Then stir in the vinegar and season with salt and pepper to taste.

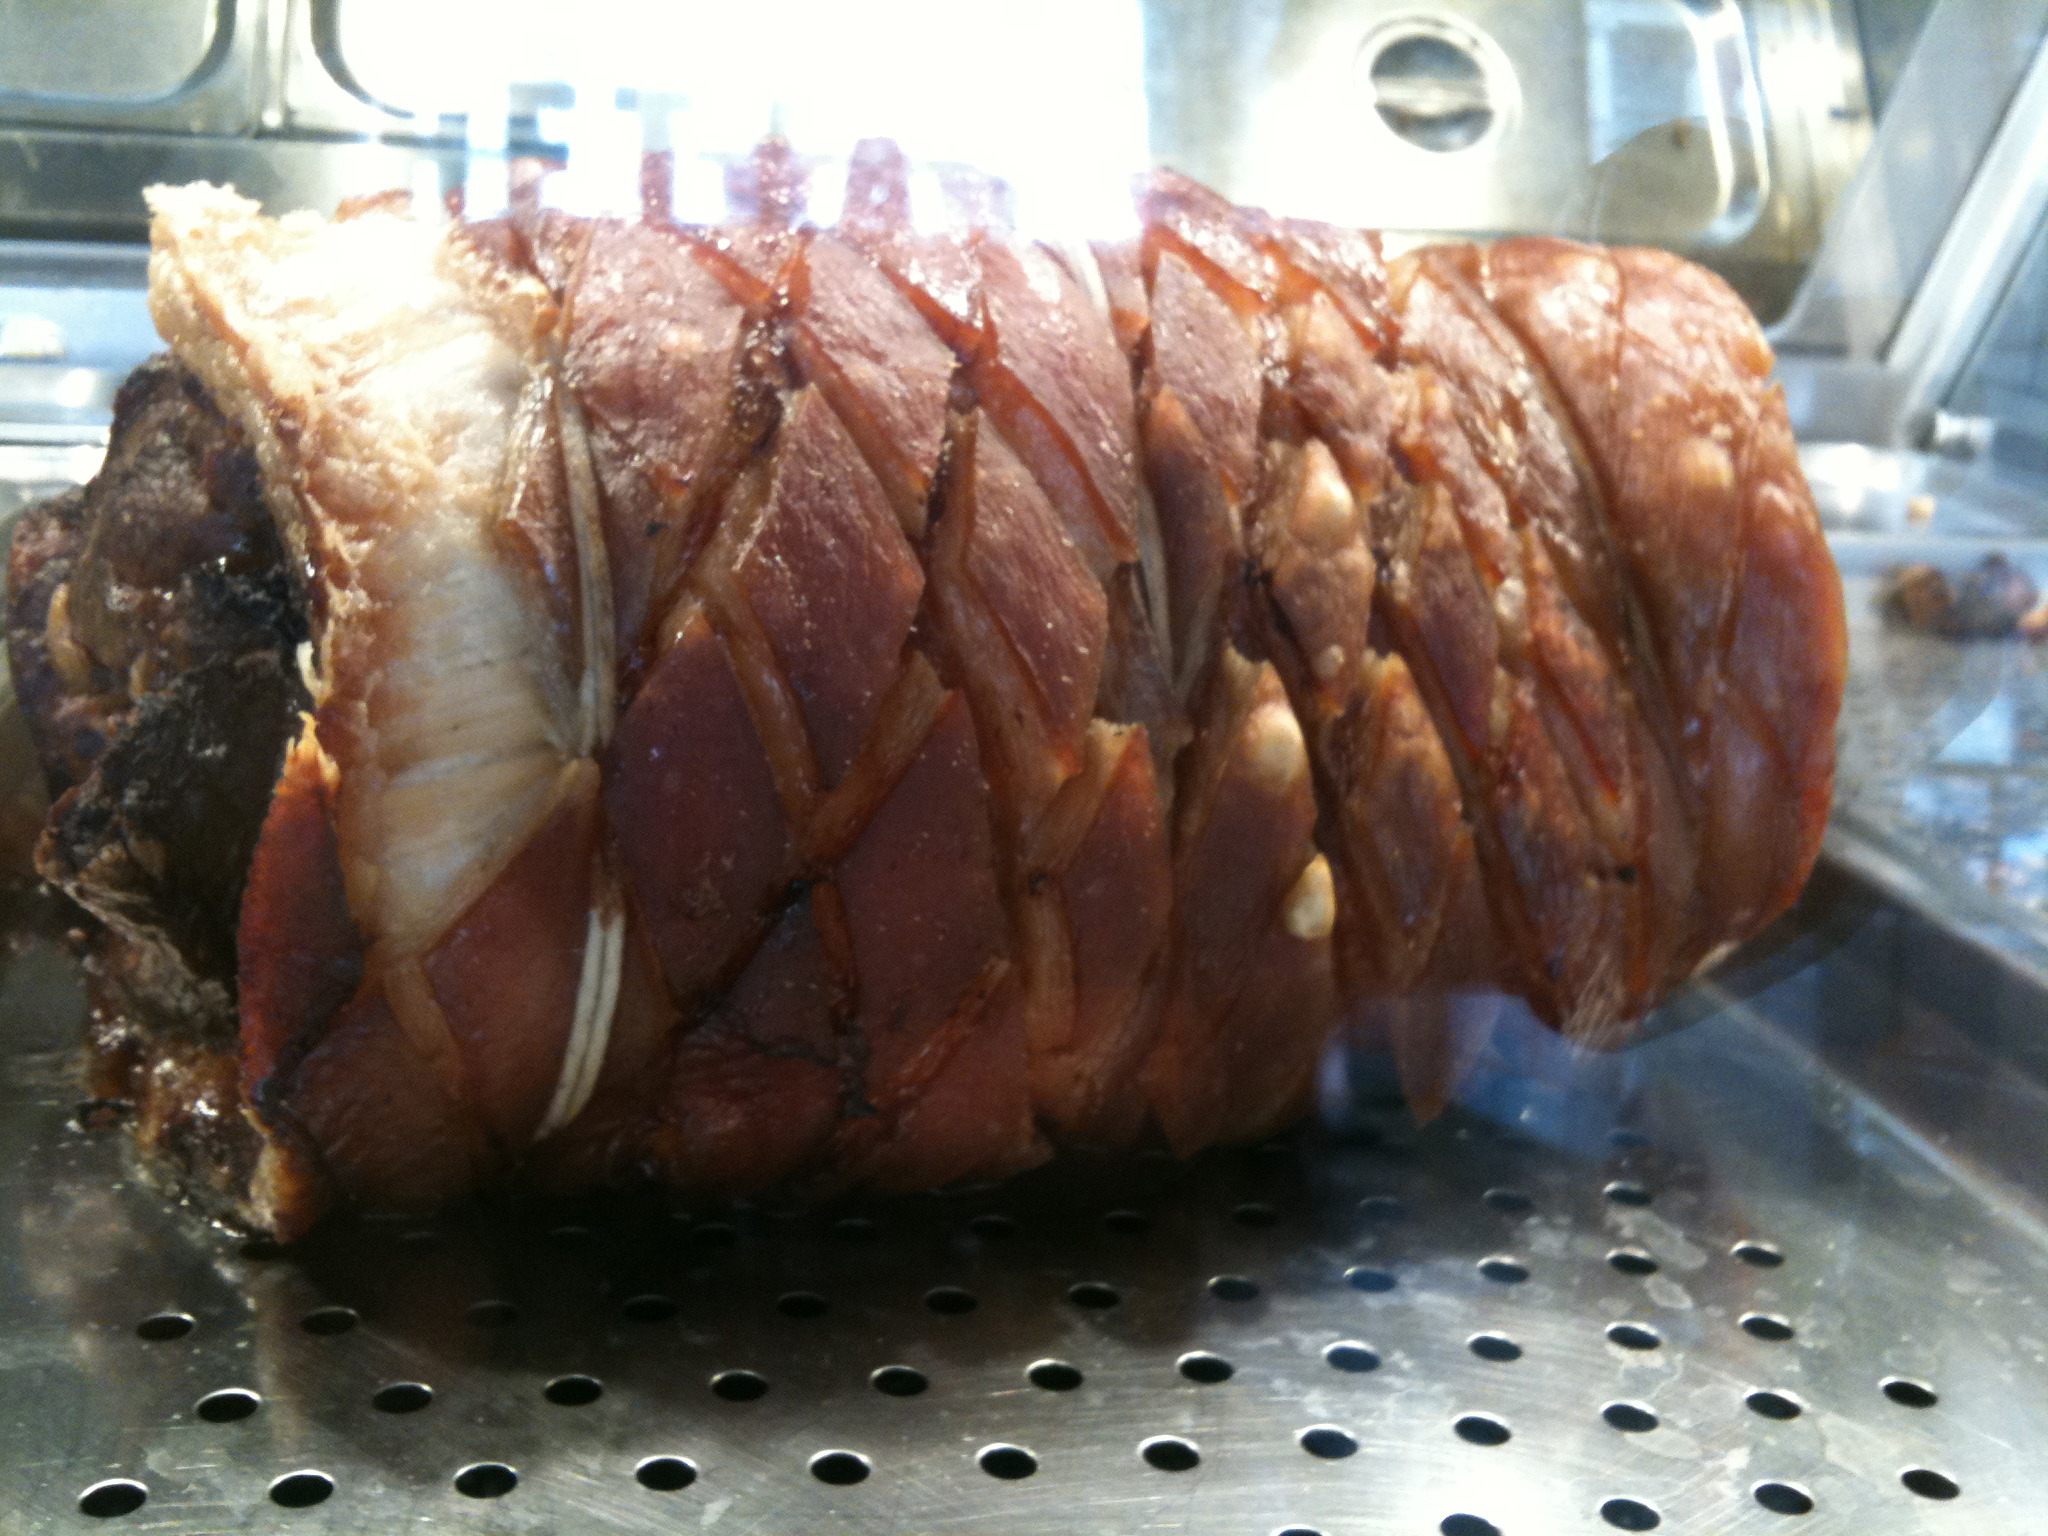
Porchetta is a savory, fatty, herby, delicious slab of pig that is slow roasted…a favorite in Italy. Porchetta is also the name of a small eatery on the Lower east side of New York City, the baby of chef Sara Jenkins, where they serve this Italian classic almost exclusively, with lines of people winding down the block, waiting for their taste of pig heaven.

porchetta1

Traditional porchetta is made from a hog that is butchered, boned and roasted. Porchetta in New York City takes the pork loin, wraps it with the belly and skin, and slow roasts it in their special Combi oven. The result is nothing short of fantastic.

porchetta2

Both methods are way too big for my kitchen, so I took a page out of one of my favorite cooking magazines, La Cucina Italiana , where chef Jenkins described how a homemade version of porchetta was possible using boneless pork shoulder.
Well, I didn’t have a boneless pork shoulder, dammit! I had two beautiful pork tenderloins…not nearly as fatty, and no pork skin to wrap them with. I knew that I would have to be extremely careful not to totally dry my pork out.

Before...

Before…

Ingredients:

10 small fresh sage leaves
3 fresh small rosemary sprigs, leaves only
1 garlic clove, chopped
2 tablespoons wild fennel pollen (see below)
1 1/2 teaspoons sea salt
1 1/2 teaspoons coarsely ground black pepper
2 pork tenderloins (2 1/2 to 3 lb total)
2 tablespoons extra virgin olive oil
1/2 cup dry white wine

Heat oven to 250 degrees.

Finely chop the sage, rosemary and garlic. (I place them in a food processor.) Place mixture in a small bowl and add fennel pollen, salt and pepper. Stir together well.

Rub the herb mixture all over the 2 tenderloin pieces. Tie the tenderloins together with butcher twine. (Usually one end of the tenderloin is fatter and the other thinner. Line them up so that one fat end is tied with one thin end, making the pork package of equal thickness.)

Set pork fat side up in a roasting pan. Drizzle with olive oil.

Roast the tenderloins, basting with the wine and pan juices every 15 minutes. Cook until pork has an internal temperature of 140 degrees.

After!

After!

Despite that it came out somewhat awesome, I plan on using a pork shoulder next time. Leftovers make great sandwiches!

I’ve made some changes to my bacon blog of over a year ago, taking many more steps toward true bacon greatness. Scroll down for my updates…

There are few foods as magical as bacon. Add bacon to just about any dish you’re preparing, and it elevates it to incredible new heights of flavor. The BLT is possibly the greatest sandwich ever invented: just a few simple, fresh ingredients, when placed together, transforming into one of the most amazing treats on planet Earth.

And it all depends on the bacon.

For many years, I’ve bought my bacon on-line from Burger’s Smokehouse, a family run business in Missouri that not only sells some great bacon (get the thick-sliced country bacon—my favorite), but also smoked turkeys, ham and more. The prices are excellent and they include shipping.

But it was time to take the next step: I had to make my own bacon!

Bacon comes from the pork belly. So I bought a few slabs of insanely good pork from my friends at Fire Fly Farms in Stonington, CT (www.fireflyfarmsllc.com), and followed the simple curing techniques outlined in a great book about making all kinds of prepared meats (sausages, salamis, and of course, bacon): “Charcuterie,” by Michael Ruhlman and Brian Polcyn.

To cure bacon, all you really need is some salt and some sugar, and what they in the curing biz call “pink salt,” which is not to be confused with salt that happens to be pink, like Himalayan salt you would find in a spice catalog. Pink salt is bright pink—to let you know that this is special salt that should only be used in small quantities for curing. And the reason for that is because it has nitrites. Nitrites delay the spoilage of the meat, and help keep the flavors of spices and smoke. That’s good. But nitrites can break down into nitrosamines, which have been known to cause cancer in lab animals. But let’s face it: you would need to eat a ton of cured meat to really worry about this.

To make the basic dry cure:

1/2 lb. kosher salt

4 oz sugar

1 ounce (5 teaspoons) pink salt

Combine these ingredients well. You won’t need all of it unless you’ve got a lot of pork belly. An important note: kosher salts do not all weigh the same, so that’s why I go by the weight and not a cup measurement.

Once you rub the pork belly with the basic dry cure, place it in a Ziploc bag, squeeze the air out of it, and seal it well. Place in the fridge for about a week, flipping it over a few times to let gravity do its work. You’ll see that the salt will draw moisture out of the meat and form a brine. This brine will continue to cure your pork belly, so leave it in there.
Once the pork belly has been cured, wash the brine off the meat, pat dry with paper towels. Now it’s time to cook. You can simply cook the pork belly at 200 degrees for about 2 hours, until the internal temperature reaches 160 degrees, or do what I did: place the pork belly in a digital smoker, cooking it at 250 degrees for 1 hour, then adding hickory chips and smoking it at 250 degrees for another hour.

That’s it. You have achieved bacon!

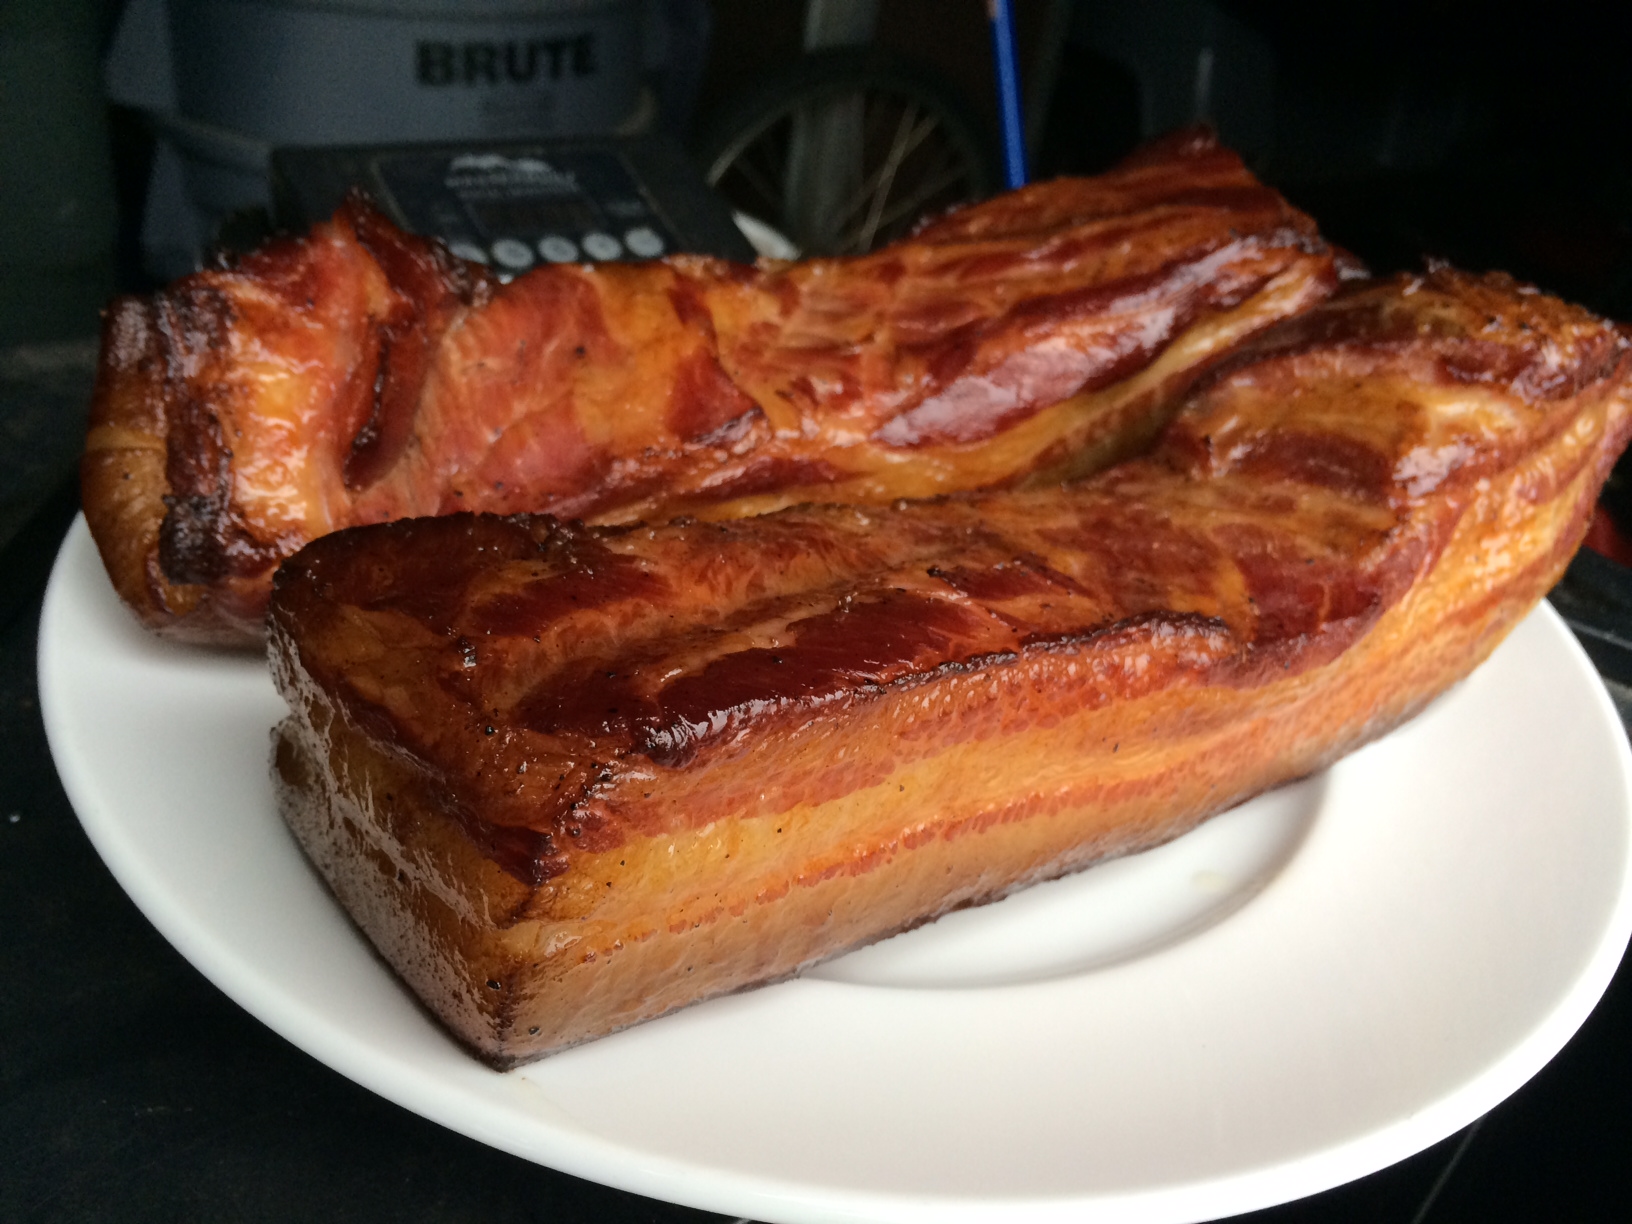
Bacon, straight out of the smoker.

Bacon, straight out of the smoker.

Let me tell you…that first slice you cut off that bacon and toss in a pan to lightly fry for a few moments will be the best bite of bacon you have ever had in your life!
The reward is so worth the effort. If you don’t want to bother going online or if you don’t have a local farm to buy your pork, simply go to your favorite butcher and ask for pork belly. It’s usually available. And if you’re making one slab of bacon, why not make it three or four? It freezes well. And…you will eat it. You know you will!

Sliced, and ready for frying.

Sliced, and ready for frying.

Since I posted the above information, I’ve had the opportunity to tweak my bacon curing recipe. The result was a more balanced, less salty bacon with tons of flavor…

Ingredients:

1/4 cup of the basic dry rub (recipe above)

1/2 cup light brown sugar

1/2 teaspoon ground black pepper

Combine these ingredients and rub on all sides of the pork belly. Place in Ziploc bags and squeeze all the air out of them. Place in a container in the fridge and turn them over every day to let gravity do its work. A brine will form inside the bag…this is good. It will cure the pork belly. After about a week, remove the pork bellies and rinse them with cold water. Pat them dry with paper towels and then proceed to the smoker.

Bellies in the smoker

Bellies in the smoker

I use a digital smoker, so I set the temp for 250 degrees and cook the pork bellies at this temperature for one hour. I then add hickory chips and smoke the bellies at 25o degrees for one more hour.

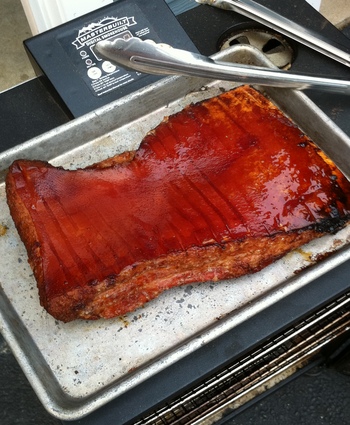
Smoked bacon

Smoked bacon

At this point, you have achieved bacon! While the bellies are still warm, you can easily slice off the pork skin off the belly. I discard it. Slice the bacon into whatever thickness you like, and fry some up immediately! Once the rest of the bacon has cooled to room temp, cut them into chunks, wrap individually, and freeze until ready to use.

Frying in the pan!

Frying in the pan!

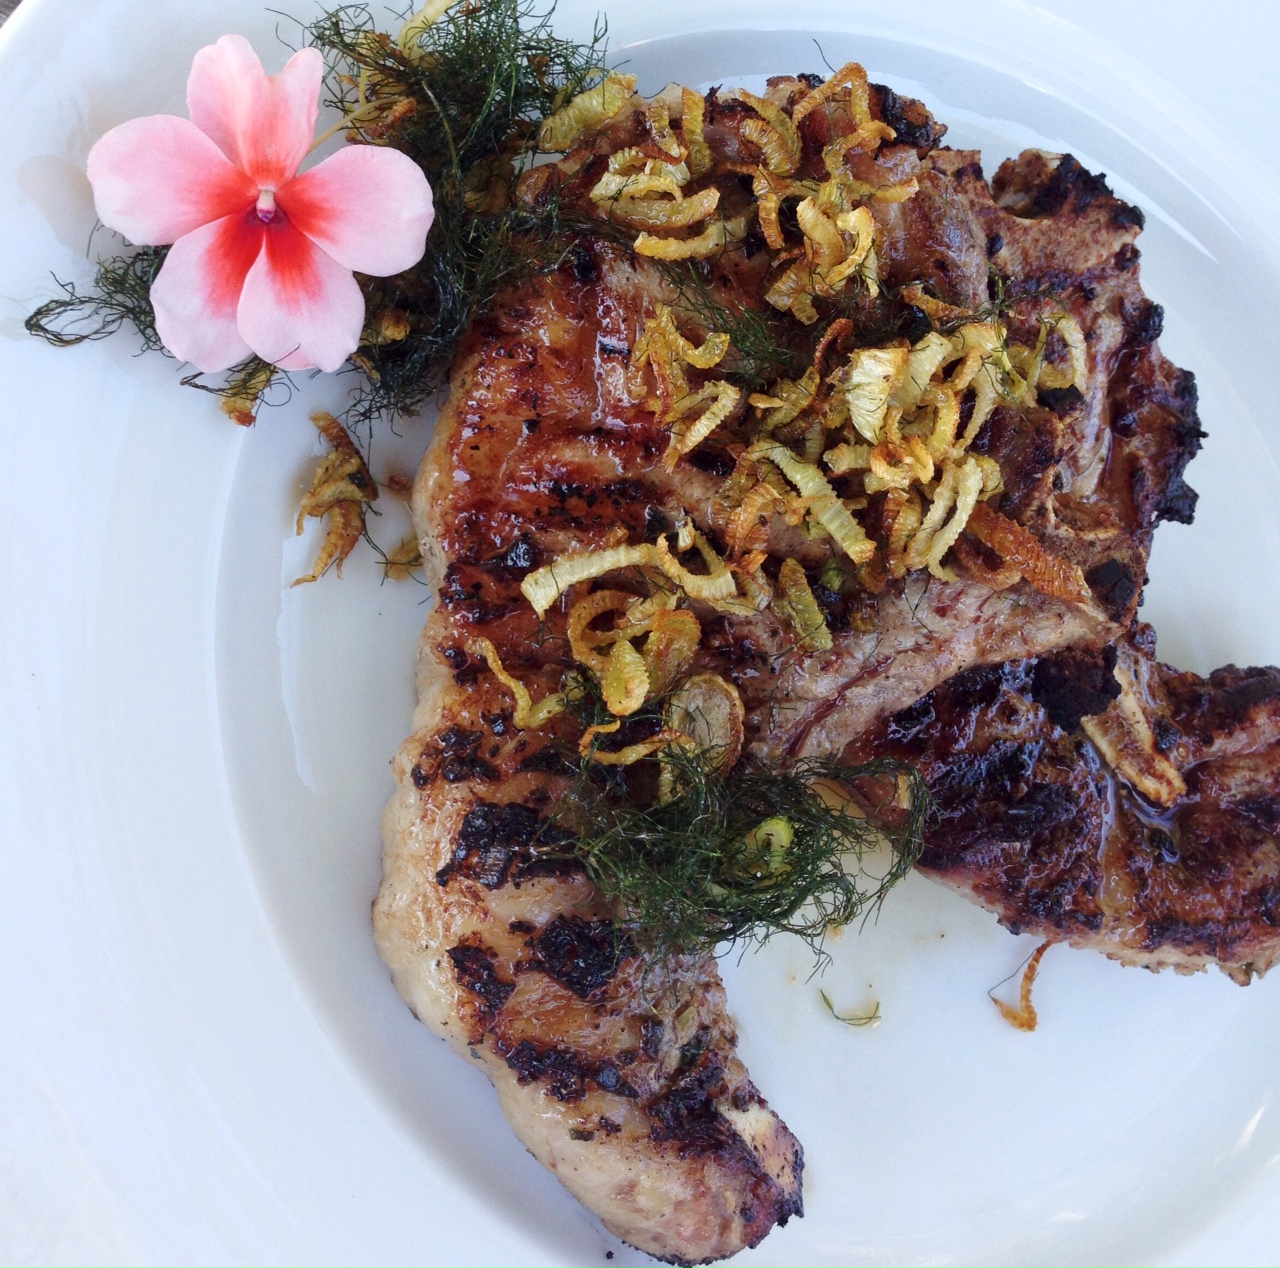
Inspired by a garden full of fennel and my fanatical love for all things pork, this recipe just happened this past fall. I use Berkshire heritage pork when possible, a far tastier and healthier choice over standard pork you find in a supermarket. I get it at: http://www.heritagepork.com.

pork chop fennel


Ingredients:


4 Berkshire pork chops

4 tablespoons finely chopped fennel bulb

2 teaspoons finely chopped fresh sage

4 teaspoons garlic salt

1 teaspoon ground black pepper

3 tablespoons extra virgin olive oil

extra fennel bulb and fennel fronds

extra olive oil, salt and pepper for sauteing


Combine the chopped fennel, sage, garlic salt, black pepper and olive oil in a bowl. Mix well and spread it all over the pork chops. Let them stand for an hour at room temperature.

Light a hot grill. Grill pork chops until done…with quality pork, that does not mean cook it to death!

Chop extra fennel bulb into thin strips about an inch long. Remove fennel fronds from their stems. Saute bulb strips in olive oil, salt and pepper until they are almost crisp. Toss in fennel fronds and cook until fronds and bulb strips are crisp.

Serve pork chops with crispy fennel and fronds on top.

“Cope” chops are the creation of my long-time radio buddy, Marc Coppola, who is heard here in Providence, RI mid-days at our sister station B-101, and on stations throughout the country. Cope and I started in radio at WBAB on Long Island back in the early 80’s. He had the afternoon drive shift, and I was on after him from 7 to midnight. After his show, Cope would remove a hibachi grill out of the trunk of his car, light some charcoal in the radio station parking lot, and he’d grill up the most amazing pork chops I’ve ever had. They were thin, but juicy and beautifully charred, with a wonderful saltiness. He called ’em Cope chops, and we’d eat them by the stack, wrapping the hot bone of the chop with a paper towel, and then just chowing down. It was a great memory, and one that I regularly re-live by grilling Cope chops at home even today.

After three decades, I’m not sure if my Cope chop recipe is the same as the original, but they are damn good and incredibly easy to make.

Ironically, for this recipe, I don’t go all out and spend big money on thick, expensive pork chops. I want them thin, fatty and with the bone in. The secret to the success of these chops is to cook them hot and fast, sealing in the juices.

Cope chops

Ingredients:

Thin-cut pork chops

Dry white wine (I use an unoaked inexpensive chardonnay, like Alice White)

Lawry’s seasoned salt

Place the pork chops in a flat bowl, and pour the chardonnay over the top, making sure you cover the chops with the wine. Let them marinate in the wine for at least an hour, flipping them over halfway through so that all sides get covered by the wine.

Light a hot hardwood charcoal fire.

Pour off the wine from the chops and discard. Place the chops on the hot grill and season the top with the Lawry’s seasoned salt. Once they’ve charred nicely, flip the chops over and season the other side. Grill until the chops are cooked all the way through, but not dry. Serve immediately.

When I used to go to my favorite barbecue place and asked for a pulled pork sandwich, I didn’t realize just how much work went into making it. But now that I make my own, I have a whole lotta respect for those barbecue guys…

pulled pork

First, I get a hunka pork. The kind of pig I get matters to me, and so I buy a heritage breed, like Berkshire (also known as Kurobuta), from a farm that humanely raises them in an environment that is not only better for the pig, but ultimately better for my family and me as a result.

Going to a supermarket for pork is certainly what most people do, but the names of the cuts of meat can be a bit confusing. Despite its name, pork butt is not from the back-end of the pig. It’s the shoulder. And the pork butt (or pork shoulder) picnic is a lower cut of the same area. These cuts can also go by the following names: Boston shoulder roast, Boston butt, Boston roast, shoulder butt, and shoulder-blade roast. Whatever the name, these are all nicely marbled hunks of pork that usually weigh in anywhere from 6 to 8 lbs, and are easy to find. Bone in or boneless doesn’t matter.

Once I’ve got my slab, I need to season it. I’ve found that a simple rub is the best way to go for the sauce I’m going to use later. Here are the ingredients for the basic rub I use when roasting pork:

BASIC DRY RUB

Ingredients:

1/4 cup kosher salt

1/4 cup black pepper

1/4 cup paprika

¼ cup brown sugar

1 tablespoon granulated garlic

1 tablespoon onion powder

Place all the ingredients in a jar with a lid and shake it up to blend.

Once I’ve made the rub, I generously sprinkle it all over the pork, and rub it in really well. I have a digital smoker at home, which allows me to cook and smoke my pork butt all in one place. I place the pork butt on a rack, put a drip tray underneath it to catch the grease, and set the smoker for 200 degrees. I cook the pork at 200 degrees for about 6 to 8 hours, and then I add hickory chips to the smoker and smoke the butt at 200 degrees for at least another 2 hours. The marbled fat in the pork butt slowly melts over time and the pork becomes incredibly tender and flavorful.

I remove the pork butt from the smoker and let it rest, covered with aluminum foil, for at least 20 minutes before pulling the meat apart with a couple of forks, shredding it into beautiful meaty bits.

While the pork is cooking and smoking, there’s plenty of time to make two other very important parts of this recipe: a vinegar-based barbecue sauce, and the cole slaw.


BARBECUE SAUCE


Ingredients:

1 1/2 cups cider vinegar

1/2 cup ketchup

1 teaspoon salt

1/2 teaspoon cayenne pepper

1/8 teaspoon red pepper flakes

1 tablespoon granulated sugar

1/2 cup water

Combine all the ingredients in a saucepan. Bring to a boil, then simmer and stir until sugar is dissolved. Cool to room temp.


COLE SLAW

My unusual cole slaw recipe uses an interesting ingredient: pickle juice! Just a splash of juice from your favorite jar of pickles is all you need.


Ingredients:

1 package of cole slaw veggies

splash of pickle juice

1/4 cup mayonnaise (more to taste)

teaspoon celery seed (not salt)

salt and pepper

There are no real specific measurements for cole slaw, because I’ve found that some people like it dry, others wet…some peppery, some not. Play around with it and make it your own. I prefer a more mayonnaise-y cole slaw, and usually err on the wet side.

In a bowl, combine all the ingredients. Cover with plastic wrap and chill. When ready to use, re-mix, and taste for seasoning before using.


OK…time to make that sandwich!

I drizzle the barbecue sauce on the pulled pork and mix well…trying not to oversauce the pork! Then I take a nice amount of pork and place it on a freshly baked bun and then add the cole slaw on top. Yes…right on top of the pork! (That’s the way they do it in the Carolinas.)

Whether you go through all this trouble yourself or not, just remember that if you’re at a barbecue joint, someone else did. Whatever you pay for that pulled pork sandwich… it’s a bargain!

Despite gardening for almost 50 years, I sowed and harvested my first batch of fennel this season. Having received a recent shipment of heritage Berkshire pork chops, I thought it was time to get creative. This is a rustic Italian-style recipe that works great for pork and fennel…

fennelfrond


PORK WITH FENNEL AND CAPERS


Ingredients:


4 Berkshire pork chops, medium thickness

2 fennel bulbs with stems and fronds, finely chopped

2 shallots, finely chopped

1/2 cup fresh parsley, chopped

olive oil

salt and pepper

1 28 oz can tomatoes

1 tablespoon capers

Zest of 1 lemon

1/2 cup dry white wine

pork and fennel


In a large pan, heat some olive oil. Season the pork chops on both sides with salt and pepper, then brown on both sides in the pan with the olive oil. Remove chops from pan and set aside.

Add a little more olive oil to the pan and add the chopped fennel and shallots, stirring for a few minutes. Add the white wine, and stir well to get the tasty bits of pork from the bottom of the pan. Add half of the parsley. Add the can of tomatoes, squishing the tomatoes between your fingers so that they are broken up when they hit the pan. Stir for a few minutes over medium heat.

Return the pork chops to the pan, nestling the in the sauce. Add the capers, lemon zest and remaining parsley. Stir in a bit, and then let the chops cook for about 10 to 15 minutes..


This was my most popular blog post of 2012. Thought I’d re-run it here this week…


Food magazines and cooking shows are pretty obvious places to be inspired by new recipes from common ingredients. But I’ve found inspiration from some strange places, including old TV sitcoms. I had some nice thick pork chops thawed, and I was trying to think of something new to do with them. The classic “pork chops and applesauce” episode of The Brady Bunch was on TV that afternoon. I looked in the pantry, found a small container of my daughter’s applesauce, and came up with this recipe.

The applesauce and honey creates a tasty crust.

pork chop 2
Ingredients:

2 nice, thick cut pastured pork chops
1 small tub (4oz) unsweetened apple sauce
1 tablespoon fresh sage, finely chopped

A few sprigs of fresh thyme–leaves only–finely chopped

1 teaspoon honey

1 teaspoon salt
1/2 teaspoon granulated garlic
1/4 teaspoon fresh cracked black pepper

In a small bowl, combine everything but the pork chops.

Smear this applesauce mix all over the pork chops, place in a non-reactive covered container in the fridge, and let it marinate overnight.

The next day, make sure all the gooey applesauce mix gets re-smeared on the chops. You want it nice and thick on the meat.

On the stove, heat an oven-proof pan. Use a little olive oil. Place the chops in the pan gooey side down, then re-smear with any leftover applesauce on what is now the top side. Let the first side sear to a golden brown before flipping the chops over. Once you’ve flipped the chops, place in a pre-heated 350-degree oven. Cook the pork chops until just pink. (It’s no longer necessary to cook pork to death like our parents used to do.)

MAKIN’ BACON!

Posted: December 1, 2012 in bacon, Food, pork, smoking, Uncategorized
Tags: , , , , ,

There are few foods as magical as bacon. Add bacon to just about any dish you’re preparing, and it elevates it to incredible new heights of flavor. The BLT is possibly the greatest sandwich ever invented: just a few simple, fresh ingredients, when placed together, transforming into one of the most amazing treats on planet Earth.

And it all depends on the bacon.

For so many years, I’ve bought my bacon on line from Burger’s Smokehouse, a family run business in Missouri that not only sells some of the best bacon I’ve ever had (get the thick-sliced country bacon—my favorite), but also smoked turkeys, pork, beef, chicken and more. The prices are very fair and they include shipping, so you know exactly what it’s going to cost you right from the start. (www.smokehouse.com)

But it was time to take the next step: I had to make my own bacon!

My favorite source of heritage breeds of pork, pasture-raised with tender loving care, is Caw Caw Creek, based out of North Carolina. They raise only a handful of pigs in an area that other pig farms would jam in hundreds. The pigs are allowed to roam freely and forage for their food. And as a result, the pork is some of the most flavorful you will find anywhere. (www.cawcawcreek.com) Tell Emile I sent you.

Bacon comes from the pork belly. So I bought a couple slabs from Caw Caw Creek, and followed the simple curing techniques outlined in a great book about making all kinds of prepared meats (sausages, salamis, and of course, bacon): “Charcuterie,” by Michael Ruhlman and Brian Polcyn.

If there is a skin on the belly, I choose to remove it before curing, but that’s a personal preference. I don’t eat it, so why have it? And it’s so thick, it blocks the cure.

To cure bacon, all you really need is some salt, some sugar, a little pepper, and what they in the curing biz call “pink salt,” which is not to be confused with salt that happens to be pink, like you would find in a basic spice catalog. Pink salt is bright pink—to let you know that this is special salt that should only be used in small quantities for curing. And the reason for that is because it contains nitrites. Nitrites delay the spoilage of the meat, and help preserve the flavors of spices and smoke. That’s good. But nitrites can break down into nitrosamines, which have been known to cause cancer in lab animals. But let’s face it: you would need to eat a ton of cured meat to really worry about this.

Once you rub the pork belly with the salt and sugar mixture, place it in a Ziploc bag, squeeze the air out of it, and seal it well. Place in the fridge for about a week, flipping it over a few times to let gravity do its work. You’ll see that the salt will draw moisture out of the meat and form a brine. This brine will continue to cure your pork belly, so leave it in there.
Once the pork belly has been cured, wash the brine off the meat, pat dry with paper towels. Now it’s time to cook. You can simply cook the pork belly at 200 degrees for about 2 hours, until the internal temperature reaches 160 degrees, or do what I did: place the pork belly in a digital smoker, cooking it at 200 degrees for 1 hour, then adding hickory chips and smoking it at 200 degrees for another hour.

That’s it. You have achieved bacon!

Bacon, straight out of the smoker.

Bacon, straight out of the smoker.

Let me tell you…that first slice you cut off that bacon and toss in a pan to lightly fry for a few moments will be the best bite of bacon you have ever had in your life!
The reward is so worth the effort. If you don’t want to bother going online to buy your pork, simply go to your favorite butcher and ask for pork belly. It’s usually available. And if you’re making one slab of bacon, why not make it three or four? It freezes well. And…you will eat it. You know you will!


Sliced, and ready for frying.

Sliced, and ready for frying.


Sausage, like bacon, is magical. It contains but a handful of simple ingredients. But when you mix them together, they form a truly flavorful food that is far more than the sum of its parts.
What has always kept me from trying to make my own sausage at home was that it seemed like a very complex process, from mixing and grinding all the ingredients, to stuffing them into casings. But then I thought about it: most of the time when I cook sausage at home, I remove the casings beforehand anyway…so why put them into casings in the first place? Once I realized I didn’t have to deal with the hassle of stuffing casings, making sausage became something I knew I really wanted to try.
The best book for anyone interested in making their own sausage, bacon, salami and more is called “Charcuterie,”by Michael Ruhlman and Brian Polcyn. It shows you step-by-step how make these meaty creations, and I used their basic garlic sausage recipe to make my first-ever batch, though I did add a tweak of my own.This recipe makes a 5 lb batch of sausages…enough for you to pig out for some time, and still have enough to share with your friends.
Cutting the pork and bacon pieces into small cubes that grind more easily.
Ingredients:A total of 5 lbs of pork, containing 25% to 30% fat. I used lean pork loin, and then added pork fat to bring the fat level to around 30%. My special tweak was to include a half-pound of my home-made bacon (a future blog), to add some salt and smoky flavor.

3 Tablespoons kosher salt

1 Tablespoon ground black pepper

2 Tablespoons fresh finely minced garlic

1 cup chilled good red wine…I used Pinot Noir

It’s important to use at least 25% fat (or you’ll have dry, tasteless sausage) and I keep the meat as cold as possible at all times, so that the fat doesn’t break down or melt. I chop the meat and fat into small-sized bits that will be easier to grind…place them in a bowl, adding the salt, pepper and garlic. I mix the ingredients really well, place in a Ziploc bag, and store in the refrigerator overnight to chill and marinate.
The next day, I set up the grinder, keeping the meat in the fridge until the last minute. I have a Kitchen Aid mixer with a grinding attachment that does a great job of grinding the sausage. Using the smaller die, I grind the contents of the Ziploc, letting the ground meat fall into a bowl that sits in ice.
Ready to grind!
Once all the meat has passed through the grinder, I place the meat in the bowl of the mixer and, using the mixing paddle, mix the meat slowly for about 1 minute. I then add the 1 cup of cold Pinot Noir and mix for another minute, on medium.
If the sausage meat is sticky, I know I’ve reached the stage where it can go into casings–after I fry up and taste a small sample piece to make sure all of the seasonings are just right. If you do plan to use casings, keep the sausage meat in the fridge until you’ve set your casings equipment up.
As I said, I totally skip the casings part of the equation. So once the sausage meat has chilled for a bit, I roll them into small meatballs, placing the meatballs on trays lined with non-stick aluminum foil for easy removal later. These trays of meatballs go into the freezer, and once the meatballs freeze up, I can place them in freezer bags and properly store them.
I’ve also made sausage patties using a mold I have for beef sliders. Any shape will work.

Once you’ve made your own sausage, you will never settle for store-bought again. Knowing every ingredient that goes in…knowing the quality of the meat you’ve used…binding (and flavoring) with a quality red wine instead of simple water…it makes an incredible difference!