Posts Tagged ‘recipes’

CANTONESE CHICKEN

Posted: January 11, 2013 in chicken, Food, Recipes, Uncategorized
Tags: , ,
Peking duck is one of my favorite treats, but there aren’t many Chinese restaurants in my area that prepare it really well. So when I can’t get to Chinatown in Boston or New York, I’m happy to settle with this recipe that I’ve adapted from one of my favorite cookbooks: “The Chinese Cookbook,” by former NY Times food editor and critic Craig Claiborne and Virginia Lee.
It isn’t Peking duck, but it sure is good! I prefer using a whole pasture-raised organic chicken from my good friends at Fire Fly Farms in Stonington, CT (www.fireflyfarmsllc.com)…but use what works best for you. This time around, I used two Barred Rock chickens, about 3 lbs each, instead of one larger bird.
 chix1
CANTONESE CHICKEN
Ingredients:
1 whole chicken, about 6 lbs.
1 Tablespoon Peanut oil
1 Tablespoon Soy sauce
6 Tablespoons Hoi Sin sauce
2 teaspoons Sesame Oil
4 teaspoons Chinese Five Spice powder
2 teaspoons Garlic Powder
2 teaspoons Salt
1/2 teaspoon Black Pepper
Remove all giblets from chicken. Rinse and pat dry.
Rub the soy sauce all over the chicken. Then rub the peanut oil all over the chicken.
Combine Chinese Five Spice, garlic powder, salt and pepper in a bowl. Season entire chicken, including inside the cavity, with this mixture.
Pre-heat oven to 350 degrees. Place chicken in a pan lined with aluminum foil (cleanup will be easier) and bake.
Meanwhile, combine hoi sin sauce and sesame oil in a small bowl. When chicken is about 15 minutes away from being done, reduce oven temp to 300, and brush chicken with hoi sin/sesame oil mixture. Cook another 15 minutes until chicken has a nice dark glaze…do not burn!
chix2
Let rest about 15 minutes before carving.

Can’t get a fresher scallop than that!

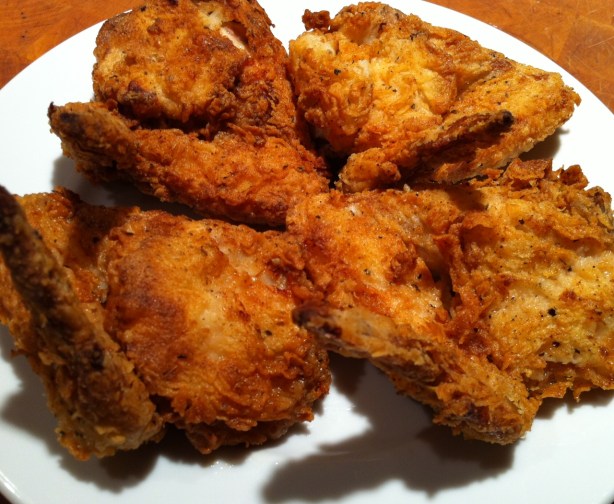
I love fried chicken. And despite what most people think, fried food is really not that bad for you if you fry it properly. Use clean oil every time, and get the oil to the right temperature: two key factors that will result in crispy chicken that isn’t bogged down with grease. But frying also means you have to stand over the chicken and watch it all the time…especially a pain in the butt if you’ve got guests and you’re making a lot of chicken! What makes this recipe great is that you get all the benefits of a crispy fried chicken without all the grease and without standing watch over it the whole time.

You can use chicken wings or any chicken parts for this recipe. Either way, I fry the chicken until it just turns golden brown and then bake it in the oven.

Ingredients:

10 lbs large chicken wings or chicken pieces

Vegetable oil, for frying

For soaking:

1 quart buttermilk

2 teaspoons Frank’s Red Hot, or other hot sauce

For the seasoned flour:

1 ½ cups all purpose flour

½ cup whole wheat flour

1 Tablespoon sea salt

1 teaspoon freshly ground black pepper

1 teaspoon paprika

1 teaspoon granulated garlic

1 teaspoon onion powder

1 teaspoon basil

1 teaspoon oregano

Open the bottle or carton of buttermilk and add 2 teaspoons of hot sauce. Close container and shake to combine. Place chicken pieces in a bowl and cover with buttermilk, letting the chicken soak in it for at least several hours or overnight.

Chicken soaking in buttermilk/hot sauce mixture overnight.

Pre-heat oven to 350 degrees.

Combine all purpose and whole wheat flours in a bowl. Add salt, pepper, paprika, granulated garlic, onion powder, basil and oregano. Mix well.

After chicken has soaked in the buttermilk, remove the pieces one at a time, leaving the buttermilk on them as you toss the pieces into the seasoned flour. Set pieces aside on a metal baking rack placed on a sheet pan.

Pour the vegetable oil into a large heavy-bottomed stock pot to a depth of 1-inch. Heat the oil to 360 degrees on a thermometer.

From the buttermilk, to the breadcrumb mixture, to the oil.

From the buttermilk, to the breadcrumb mixture, to the oil.

Working in batches, place the chicken pieces in the oil, being careful not to overcrowd them. Fry the chicken until it is golden brown on both sides, then place each piece back on the metal baking rack set on the sheet pan.

Once all the chicken has been fried, place the sheet pan in the oven for 30 to 40 minutes, until fully cooked and crispy.

fried chix

Feast!

MAKIN’ BACON!

Posted: December 1, 2012 in bacon, Food, pork, smoking, Uncategorized
Tags: , , , , ,

There are few foods as magical as bacon. Add bacon to just about any dish you’re preparing, and it elevates it to incredible new heights of flavor. The BLT is possibly the greatest sandwich ever invented: just a few simple, fresh ingredients, when placed together, transforming into one of the most amazing treats on planet Earth.

And it all depends on the bacon.

For so many years, I’ve bought my bacon on line from Burger’s Smokehouse, a family run business in Missouri that not only sells some of the best bacon I’ve ever had (get the thick-sliced country bacon—my favorite), but also smoked turkeys, pork, beef, chicken and more. The prices are very fair and they include shipping, so you know exactly what it’s going to cost you right from the start. (www.smokehouse.com)

But it was time to take the next step: I had to make my own bacon!

My favorite source of heritage breeds of pork, pasture-raised with tender loving care, is Caw Caw Creek, based out of North Carolina. They raise only a handful of pigs in an area that other pig farms would jam in hundreds. The pigs are allowed to roam freely and forage for their food. And as a result, the pork is some of the most flavorful you will find anywhere. (www.cawcawcreek.com) Tell Emile I sent you.

Bacon comes from the pork belly. So I bought a couple slabs from Caw Caw Creek, and followed the simple curing techniques outlined in a great book about making all kinds of prepared meats (sausages, salamis, and of course, bacon): “Charcuterie,” by Michael Ruhlman and Brian Polcyn.

If there is a skin on the belly, I choose to remove it before curing, but that’s a personal preference. I don’t eat it, so why have it? And it’s so thick, it blocks the cure.

To cure bacon, all you really need is some salt, some sugar, a little pepper, and what they in the curing biz call “pink salt,” which is not to be confused with salt that happens to be pink, like you would find in a basic spice catalog. Pink salt is bright pink—to let you know that this is special salt that should only be used in small quantities for curing. And the reason for that is because it contains nitrites. Nitrites delay the spoilage of the meat, and help preserve the flavors of spices and smoke. That’s good. But nitrites can break down into nitrosamines, which have been known to cause cancer in lab animals. But let’s face it: you would need to eat a ton of cured meat to really worry about this.

Once you rub the pork belly with the salt and sugar mixture, place it in a Ziploc bag, squeeze the air out of it, and seal it well. Place in the fridge for about a week, flipping it over a few times to let gravity do its work. You’ll see that the salt will draw moisture out of the meat and form a brine. This brine will continue to cure your pork belly, so leave it in there.
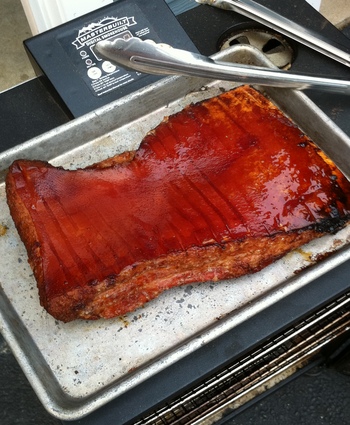
Once the pork belly has been cured, wash the brine off the meat, pat dry with paper towels. Now it’s time to cook. You can simply cook the pork belly at 200 degrees for about 2 hours, until the internal temperature reaches 160 degrees, or do what I did: place the pork belly in a digital smoker, cooking it at 200 degrees for 1 hour, then adding hickory chips and smoking it at 200 degrees for another hour.

That’s it. You have achieved bacon!

Bacon, straight out of the smoker.

Bacon, straight out of the smoker.

Let me tell you…that first slice you cut off that bacon and toss in a pan to lightly fry for a few moments will be the best bite of bacon you have ever had in your life!
The reward is so worth the effort. If you don’t want to bother going online to buy your pork, simply go to your favorite butcher and ask for pork belly. It’s usually available. And if you’re making one slab of bacon, why not make it three or four? It freezes well. And…you will eat it. You know you will!


Sliced, and ready for frying.

Sliced, and ready for frying.


Almost 95% of all shrimp sold in the United States comes from farmed shrimp in countries like China, Thailand, Vietnam and India…as well as Latin America. The stuff you buy at the supermarket comes frozen (since shrimp is highly perishable) and then is thawed out and placed on ice to make the display look nice. But the shrimp you’re getting is not “fresh” (unless you’re lucky enough to get some wild caught local shrimp) and it’s from countries where the methods of farming are questionable at best.
Shrimp farming in Asia and Latin America is destroying mangrove forests and because of that, coastal villages as well. Disease is commonplace in shrimp farms, so they’re pumped full of antibiotics and pesticides.
Imported wild shrimp are also a problem because of bycatch. For every pound of wild shrimp caught, several pounds of other animals such as turtles die needlessly in the trawler nets.
Wild American shrimp is the best way to go for your health and the environment. American shrimp fishermen are required by law to reduce bycatch. For example, they’re required to use Turtle Exclusion Devices to stop turtles from being caught in their nets.
I stopped eating tiger shrimp and other farmed shrimp from foreign countries a long time ago because I found a source of shrimp that not only delivers to my door, but offers me that shrimp at competetive pricing even with the shipping! And best of all, it is wild caught in American waters. I’m supporting the lives of shrimp men along the Gulf of Mexico, not some foreign country that doesn’t give a rat’s ass about the environment, the shrimp they raise in it, or my family’s well-being.

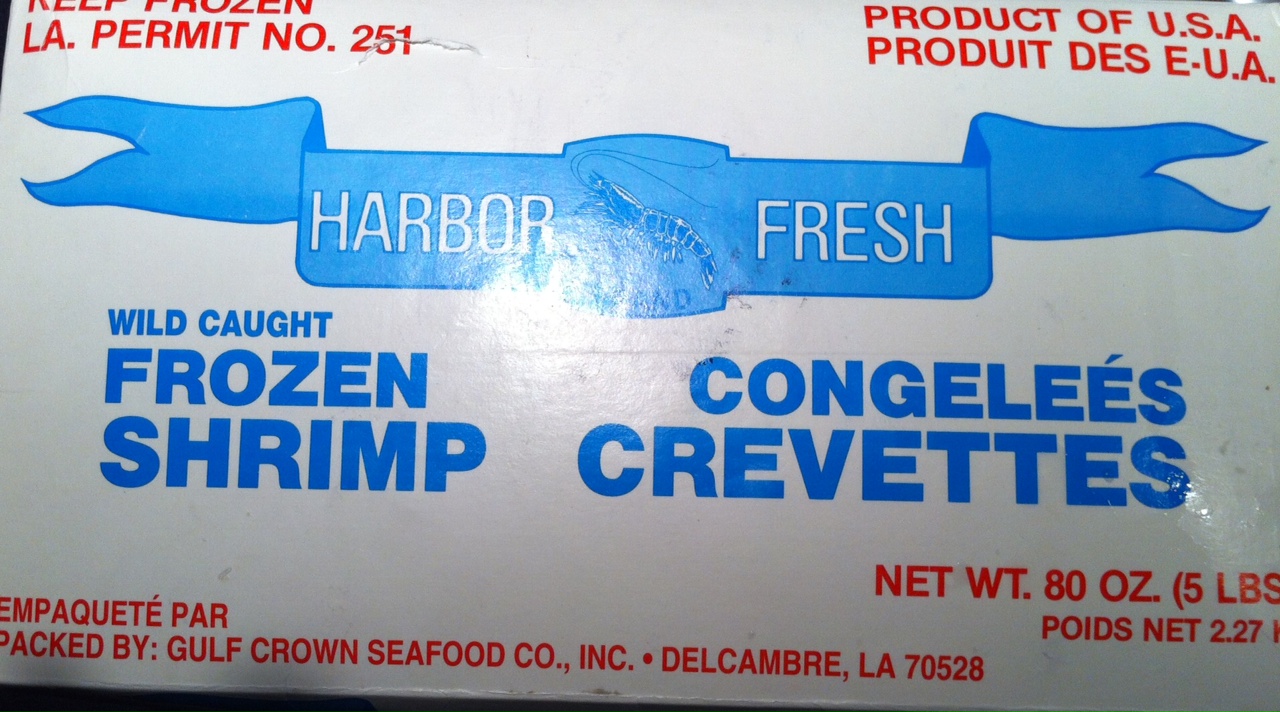
The real deal, usually sold in 5 lb boxes.

And on top of everything else, wild caught American shrimp tastes better. And why shouldn’t it? The shrimp are eating their natural foods found in the wild…not some pellets thrown at them that contaminate the water around them, not to mention the shrimp themselves.
My favorite website for wild caught American gulf shrimp is www.cajungrocer.com. I have been ordering my favorite Cajun foods, like Turduckens and alligator sausage, from these people for many years, but they also sell shrimp and live crawfish (in season.)
Don’t cheat yourself, your friends or your family out of something really special. Wild caught American gulf shrimp costs the same, supports our economy, is better for you and tastes better.
The basics of this recipe come from my friend, Lee, a chemist in New Jersey who also enjoys creating in the kitchen. What I found interesting about his recipe was the touch of sugar that doesn’t really add sweetness but rather helps create the light, tasty caramelized crust that forms on the shrimp when you sear it. I tweaked a few things in this recipe, but the essence of it remains the same.

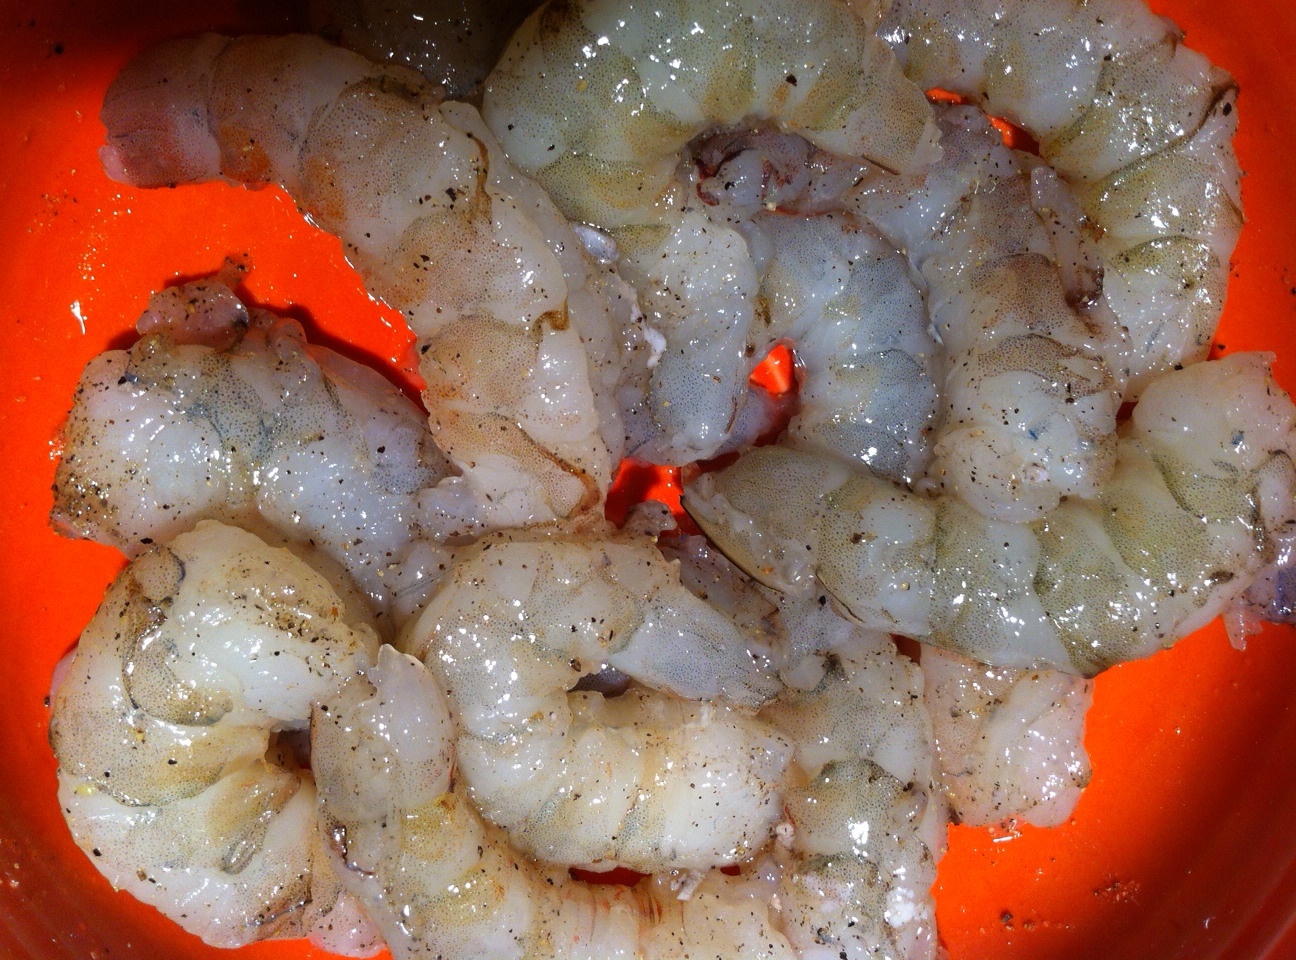
Seasoned shrtimp.

Ingredients:
1 pound large peeled and deveined wild-caught American shrimp
Salt
Freshly ground pepper
Sugar
4 Tablespoons softened butter
1 clove of garlic, squeezed through a press
1 Tablespoon freshly squeezed lemon juice
2 Tablespoons chopped parsley
1 teaspoon oregano
Extra Virgin olive oil
Toss shrimp, 1/4 teaspoon salt, 1/4 teaspoon pepper, and 1/4 teaspoon sugar in a bowl.
In a separate bowl, mash butter with a fork, folding in the garlic. Add the lemon juice, parsley, oregano, and 1/4 teaspoon salt.
Heat a Tablespoon of olive oil in a large skillet over high heat. Add half the shrimp in a single layer to the pan and cook at high heat until caramelized on one side, about 1 minute. Flip shrimp over with tongs and cook for another 30 seconds. Do not overcook.
Remove cooked shrimp to a covered bowl and similarly sear the other half of the shrimp, then return other half of the shrimp back to the skillet. Turn down the heat to medium and add the butter/garlic/lemon/parsley/oregano/salt mixture, occasionally tossing shrimp around in the pan to evenly coat them with the glaze.
If serving over pasta, increase the amount of butter and olive oil to just lightly coat the pasta. Toss cooked pasta into the pan of shrimp to combine.
I like to season lightly at the end with a tiny pinch of Fleur de Sel. Serve immediately.

I know a lot of people are tempted to buy the turkey deep fryer this time of year, especially now that there’s an electric home turkey fryer that seems to make the job a lot easier and safer. (I’m still not OK with frying turkeys indoors, no matter how safe they say it is.)

The concept of a deep-fried turkey sounds pretty cool. And if you do it right, it tastes pretty good. I’ve had my share of fried turkeys when I lived in Alabama many years ago. But for me, it’s just too much damn work: finding a safe spot in the yard to blast the propane-fueled fryer so that you don’t burn your house down, standing outside and freezing your ass off while it fries, and then disposing of gallons of used oil at the end of it all. And making sure the oil is at the right temperature so you don’t get a scorched turkey on the outside and raw turkey on the inside.

So here’s what I do: I cook the turkey in my good old Weber grill. The standard Weber grill allows you to cook up to a 15 lb. turkey–big enough for my purposes–and it comes out crispy, smokey and delicious. If you’re afraid to try this for the first time at Thanksgiving when it really matters, wait a few months and buy a turkey when you have the craving and try it out.

The charcoal chimney with hot coals awaits.

Although I’ve stopped using charcoal briquettes a long time ago, and now strictly use natural hardwood charcoal, this recipe works best with Kingsford. The idea is for the coals to cook slowly and evenly. And never use lighter fluid…always start your fire with a few pieces of crumbled newspaper under a charcoal chimney.

Needed:

Weber grill, with the dome top

Kingsford charcoal briquettes (do not use Match Lite or other pre-soaked briquettes)

Heavy duty aluminum pan (disposable)


Ingredients:

Whole turkey, up to 15 lbs, thawed and previously brined (see my blog about brining a turkey)

Olive oil (to rub on turkey)

2 yellow onions, chopped

4 stalks of celery, chopped

½ lb (2 sticks) of unsalted butter, melted

1 tablespoon granulated garlic

1 tablespoon onion powder

2 tablespoons salt

1 tablespoon pepper

Spreading the coals away from the center of the grill.

If you want stuffing, make it separately and cook it separately.

Light 8 to 10 lbs of charcoal in the grill…depending on the size of the turkey and how cold it is outside.

Remove the giblets from the turkey. Place the bird in the aluminum pan.

In a small bowl, mix granulated garlic, onion powder, salt and pepper Add any other seasonings you like.

Coarsely chop onions and celery. Place in a another bowl. Mix with the melted butter and 1/3 of the salt/pepper/garlic powder mixture. Place a small handful of this “stuffing” mixture in the neck cavity of the turkey. Place the rest in the body cavity (where the stuffing would usually go.) You can fasten the bird with turkey skewers if you like. This “stuffing” is strictly to flavor the turkey…you don’t eat it!

The rubbed, stuffed and seasoned bird.

Rub the outside of the entire turkey with the olive oil and sprinkle the rest of the garlic/onion/salt/pepper mixture on the outside of the bird. Make sure you get the whole bird…on the bottom as well.

When the coals in the grill have ashed over, spread them to the outside edges of the Weber equally. Put the cooking grill rack in place. Place the aluminum pan with the turkey in the center of the grill, keeping it away from the direct heat of the coals. If using a a meat thermometer, insert the probe into the thickest part of the breast, being careful not to hit the bone. Place the lid on the grill. (You may need to bend your pan a bit.) Open the vents on the bottom of the Weber as well as the lid. Important to get air circulating!

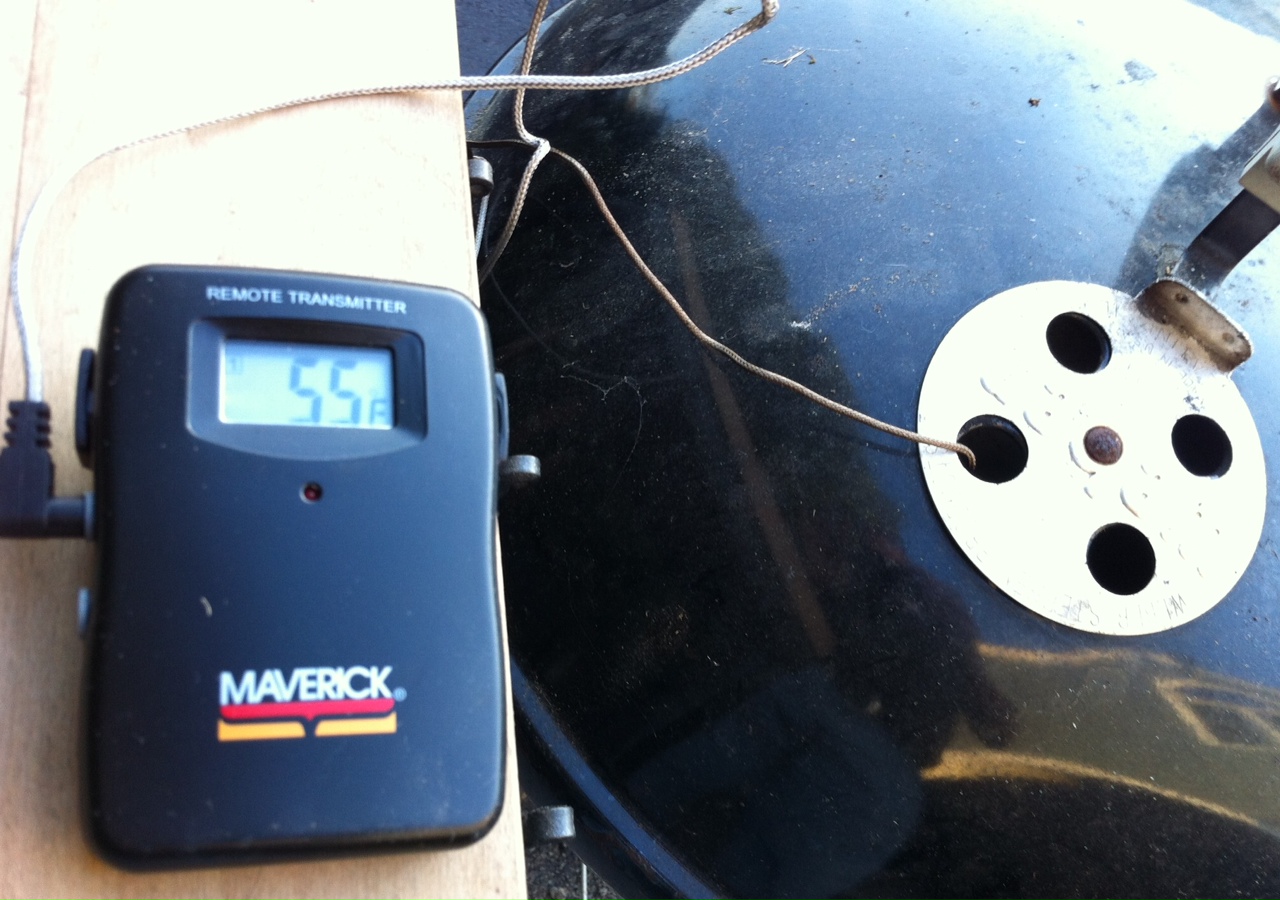
My meat thermometer calls me from as far as 100 feet away when the turkey reaches the optimum temperature that I pre-set. Time for a drink!

No basting is necessary.

Now here’s the tough part: DO NOT OPEN THE GRILL TO CHECK ON THE TURKEY! (If you must look, shine a flashlight into the vent holes on the lid to take a peek at the pop-up timer, if there is one.) The whole point is to keep the heat inside the kettle. You’ll know your turkey is done when no more smoke or heat rises from the grill, and the turkey inside stops making sizzling noises.

Remove the turkey and let it rest at least 15 minutes before carving.

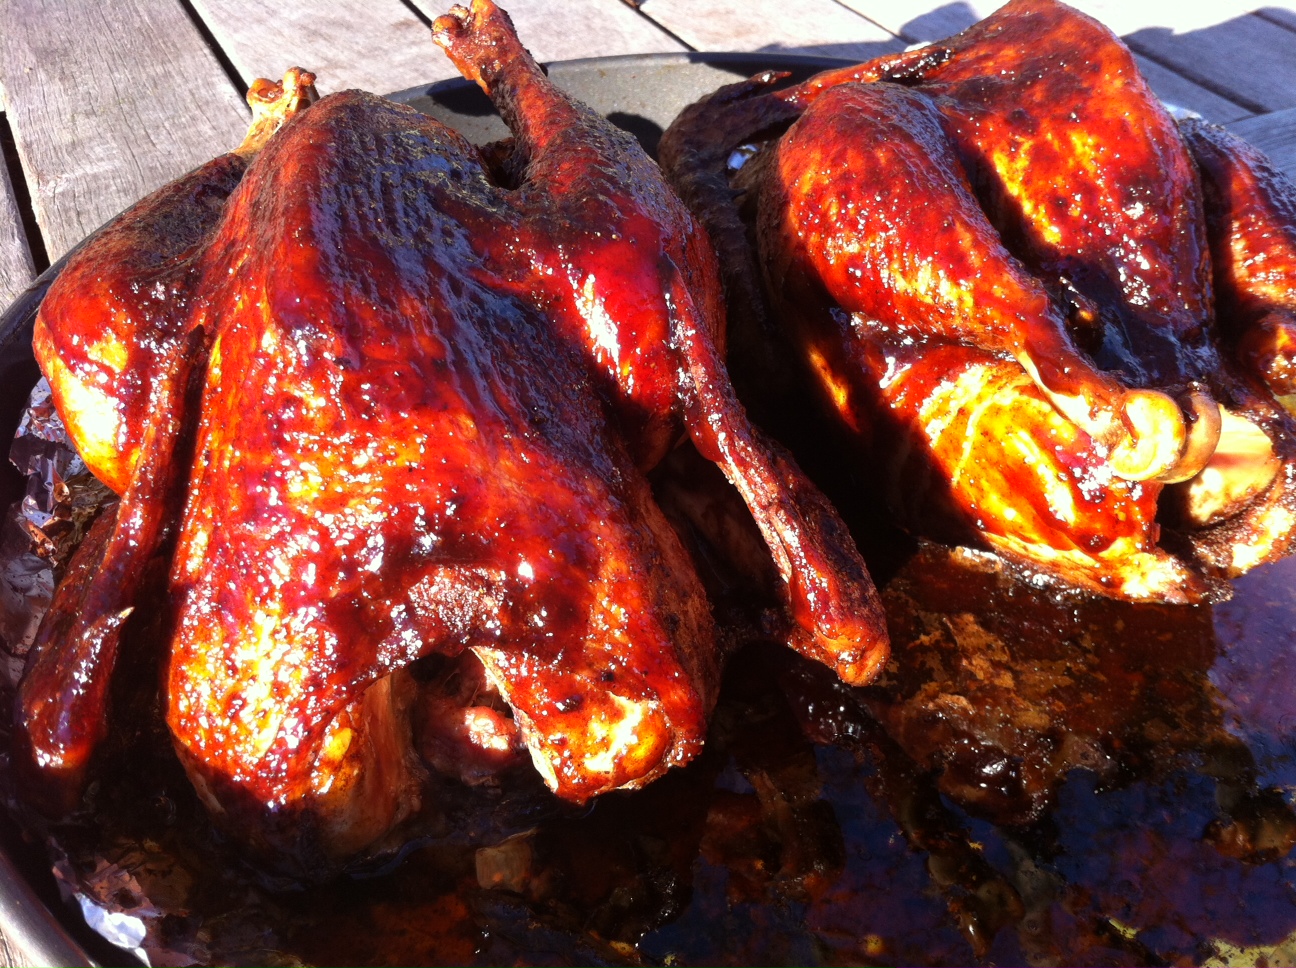
Beautifully grilled, cooked to 180 degrees in less than 2 hours!

BRINING A TURKEY

Posted: November 10, 2012 in brining, Food, marinade, turkey
Tags: , , , ,

Brining is a simple process of soaking a hunk of protein in a flavored salt solution for a period of time before cooking, resulting in a much more juicy and flavorful final product.

It’s basic high school science: the brine has a greater concentration of salt and water than the molecules of the protein (in this case, a turkey) that is soaking in it. By simple diffusion, the protein molecules suck up the salty water and retain it. When you cook the meat, some of the water evaporates, but the meat still contains far more moisture in it than it would have without the brine soaking, and the end result is a moister, simply delicious bird.

Some people use giant syringes to inject their turkeys with crazy solutions, but I think that the old way is still the best way when it comes to brining. Get a big pot, fill it with the brine, and soak the bird in it. Done.

Here’s my tried-and-true turkey brining recipe. Once the brining is done, you can cook the turkey whatever way you like best. I use a method where I grill it inside a Weber grill with charcoal. It comes out smokey and absolutely amazing. I’ll have that info in the next blog.

Brine Ingredients:

1 gallon of water
2 onions
3 carrots
3 stalks celery
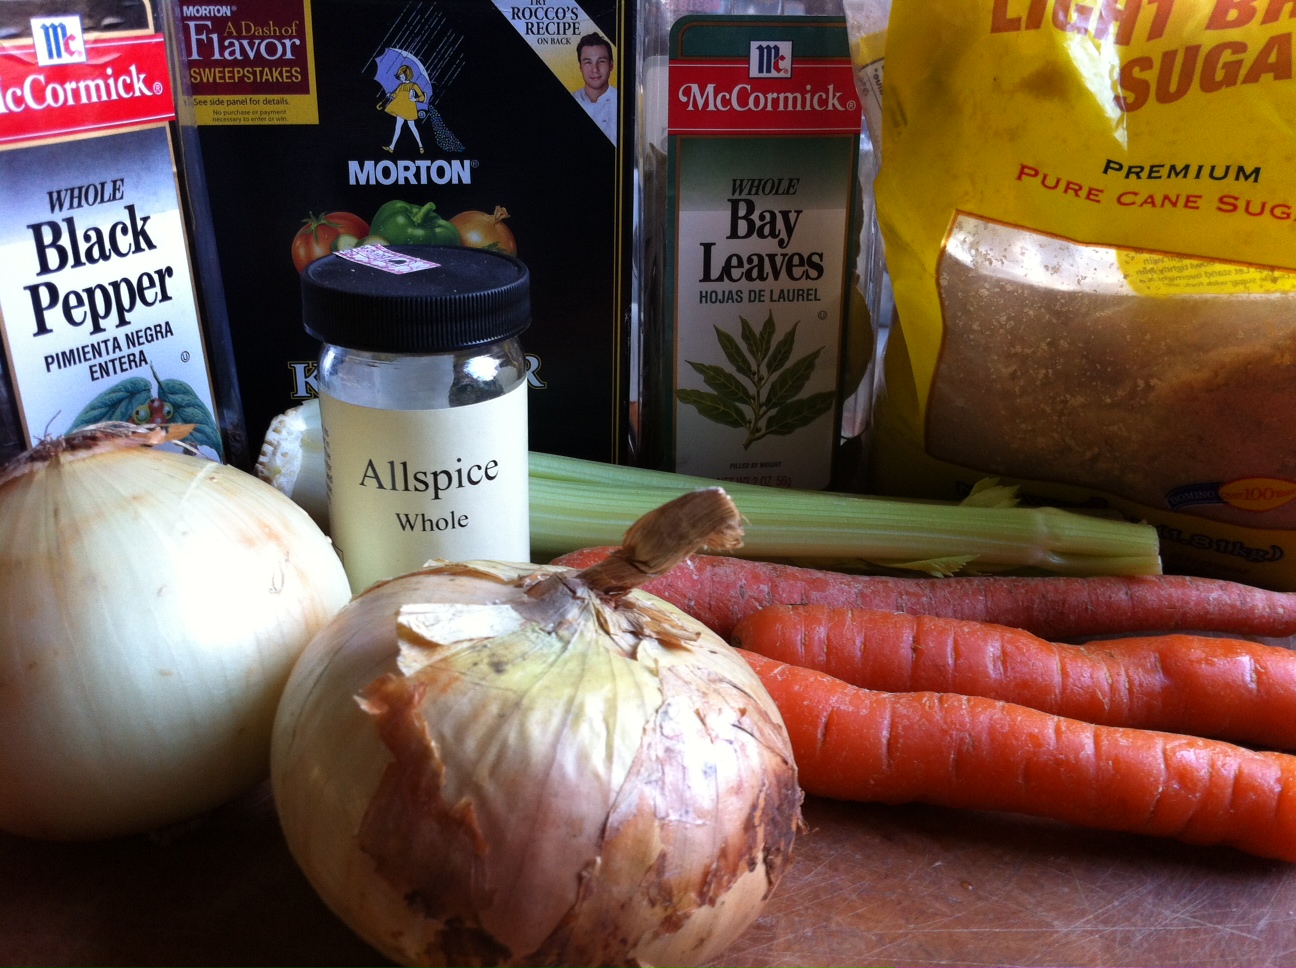
1 cup kosher salt
1 tablespoon black peppercorns
1/2 cup light brown sugar
1.5 teaspoons whole allspice
4 bay leaves
1 gallon of ice water
14–15 lb turkey, thawed

Pour first gallon of water in a large pot. Quarter the onions, carrots and celery (no need to peel them) and add to the water. Add all the other ingredients, except ice water and turkey.

Let the pot come to a boil for a few minutes. Remove from heat and let brine cool down to room temperature.

Remove giblets from turkey and place the bird in a container just big enough to hold it and 2 gallons of liquid.

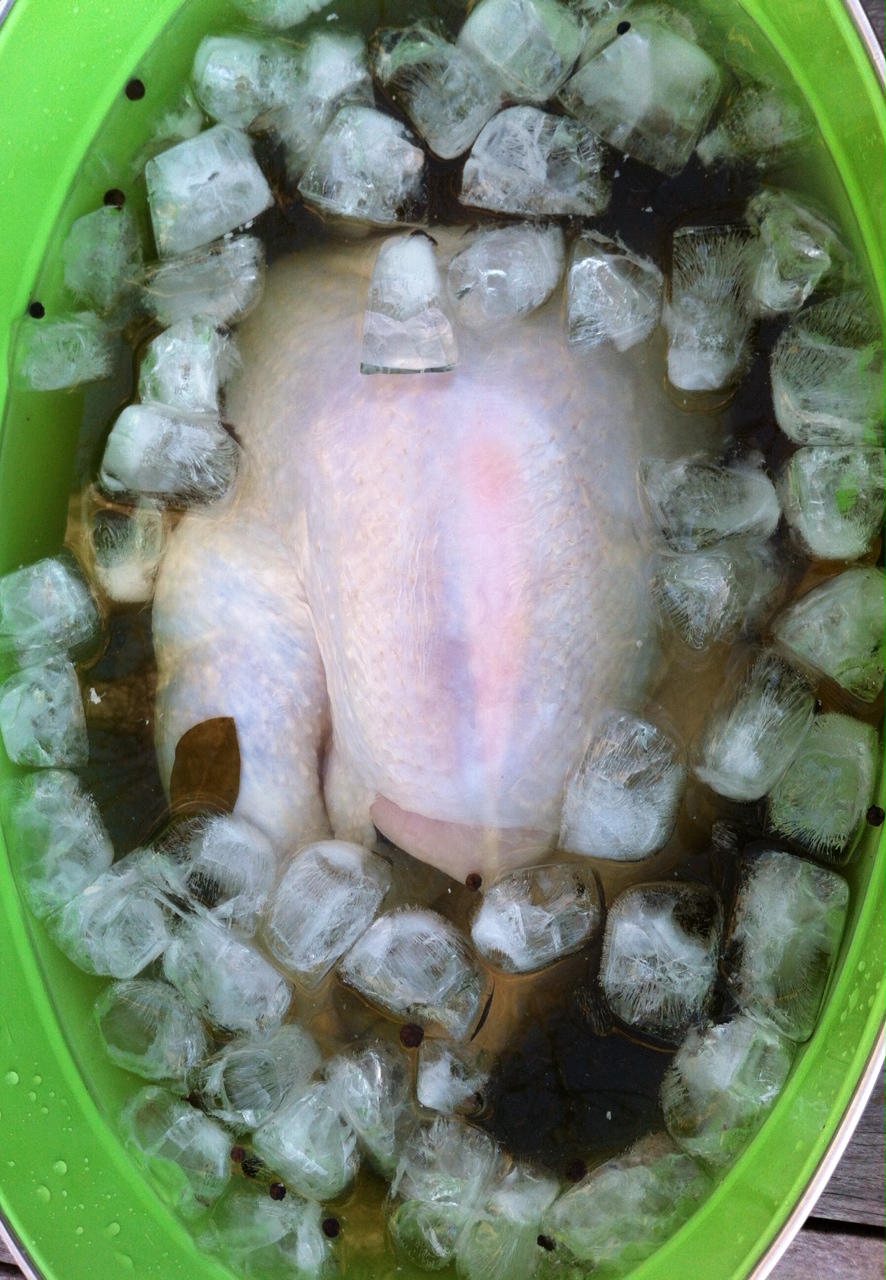
Pour the now-cooled brine over the turkey, then pour in the gallon of ice water.

Make sure the turkey doesn’t float up by placing a plate on top. Put turkey container in fridge for 5 to 8 hours, flipping the turkey over in the container halfway through.

Drain turkey, pat dry with paper towels, and then cook using your favorite recipe.

Next time: cooking your turkey on a Weber grill in a fraction of the time.

I went on line and looked at many websites that claimed to have the “real” recipe for a Scorpion Bowl…you know, the classic drink you get in a large Trader Vic volcano glass with a little cup in the volcano for the 151 rum that you take a small hit of before you suck down more of the drink? I tell you what: it makes the Asian food you’re eating that much tastier and the world around you spin that much faster!
Most of the recipes I’ve found on line don’t match the one that I’ve been using for many years. This recipe comes from a bartender (whose name I can’t remember–too many Scorpion bowls, I guess) from a long-gone Chinese restaurant, China Garden, that was located in Warwick, Rhode Island. A car dealership now stands in that location. This is the best Scorpion Bowl I’ve ever had…and continue to have!
Make sure to use top shelf booze for this or you’ll be a Suffering Bastard the next morning! (A little drink humor…)

Look carefully, and you may see the flame coming out of the volcano! Hope I don’t need to tell you not to drink the 151while it’s lit!

SCORPION BOWL
2 oz. light rum (I use Don Q silver)
2 oz. dark rum (I use Mt Gay)
1 oz. gin (I use Bombay Sapphire)
½ oz. brandy (I use good ol’ E&J)
½ oz. Disaronno Originale
½ oz. Cointreau
6 oz Pineapple juice
6 oz Orange juice
½ oz. Bacardi 151 rum for the little cup in the volcano

In a blender half-full of ice, add all the alcohol, except the 151 rum. Add the pineapple juice and the orange juice.  (Use less if you like it stronger.) Give the drink a quick 1-second pulse in the blender, and pour with ice into Scorpion Bowl or very large glass. If you do have a Scorpion Bowl with the volcano in it, add the 151 rum to the bowl in the volcano. If not, you can mix the 151 into your drink.

Don’t drive!

The fact that I can’t remember a damn thing anymore has actually worked in my favor when it comes to getting recipe ideas from television. I can no longer get the exact ingredients down and so I wind up make stuff up as I go along. The end result: my own original take on a particular recipe.
A perfect example of that was a few months ago when I was watching Adam Richman’s Best Sandwich In America on the Travel Channel, which featured some of the most innovative sandwiches from around the country. I was particularly intrigued by the methods used by the folks at Faidley’s in Baltimore to make their famous crab cake sandwich. I jotted down what I thought they did (of course, they don’t reveal their recipe secrets) and I wound up creating the best crab cake I’ve ever made:
Alz Crab Cakes

1 pound crab meat
1/3 cup oyster crackers
1 teaspoon Old Bay seasoning
1/2 cup mayo/mustard blend

To make the mayo/mustard blend, combine 4 parts mayonnaise to 1 part mustard. You your favorite. I use Maiile Chablis mustard, but it’s only available in France. (See my previous blog about the Maille mustard shop in Paris.) However, Maille Dijon mustard is great, too. Set aside.

Take the oyster crackers and pulse them in a food processor until it resembles oatmeal…not too fine.

In a bowl, gently mix all the ingredients. With your hands, form small crab cake balls, like meatballs. Place on a tray lined with foil, and pop in the fridge for at least 15 minutes to set.
Heat oil in a pan to 375 degrees. Gently drop the crab cakes into the oil, and fry for only 10 to 15 seconds. Flip over, and fry 10 to 15 seconds more, just to form a light crust. Don’t over-fry or they will fall apart!

Drain crab cakes on paper towels and enjoy.

Any leftover mayo/mustard works great as a tartar dipping sauce, or a spread if you’re making a crab cake sandwich. Just finely chop some pickles, add a splash of Worcestershire and/or hot sauce, and mix with the mayo/mustard.

This recipe works equally well with a light, flaky fish, like cod. Combine mayo/mustard mix with Old Bay. Slather the fish in it, then roll the fish in the crumbs and fry in oil.


Don’t let the fact that your brain isn’t what it used to be get you down. Take advantage of it! You just might come up with an original recipe that blows the doors off anything you copy down word for word.

When you’ve had enough of Buffalo wings, try this Asian version. They are easy to make, and taste awesome. A nice change of pace from your usual wings. This recipe works well with larger chicken pieces, too.
Asian style chicken wings
10 lbs chicken wings, the larger the better
2 cups soy sauce
1 small can (6 oz) pineapple juice
1 cup brown sugar
1 tablespoon powdered onion
1 tablespoon granulated garlic
1 teaspoon Chinese five spice
a squirt of sesame oil
Salt and pepper
Mix all the marinade ingredients in a large Ziploc bag, shake to mix, and then add the chicken. Marinate in the fridge overnight, turning the bag once in a while to make sure everything gets an even coating of the marinade.
The next day, pour off the marinade and discard, remove chicken wings from the bag, place on a cookie sheet lined with foil, and bake at 325 degrees for about 30 minutes, until sizzling and done.