Author Archive

OVERNIGHT OATS

Posted: September 9, 2015 in breakfast, Food, Recipes
Tags: , , , , , ,

I wake up at 4AM to go to work every day, so to have something really tasty and healthy already waiting for me, next to my carafe of iced coffee in my fridge, is awesome.

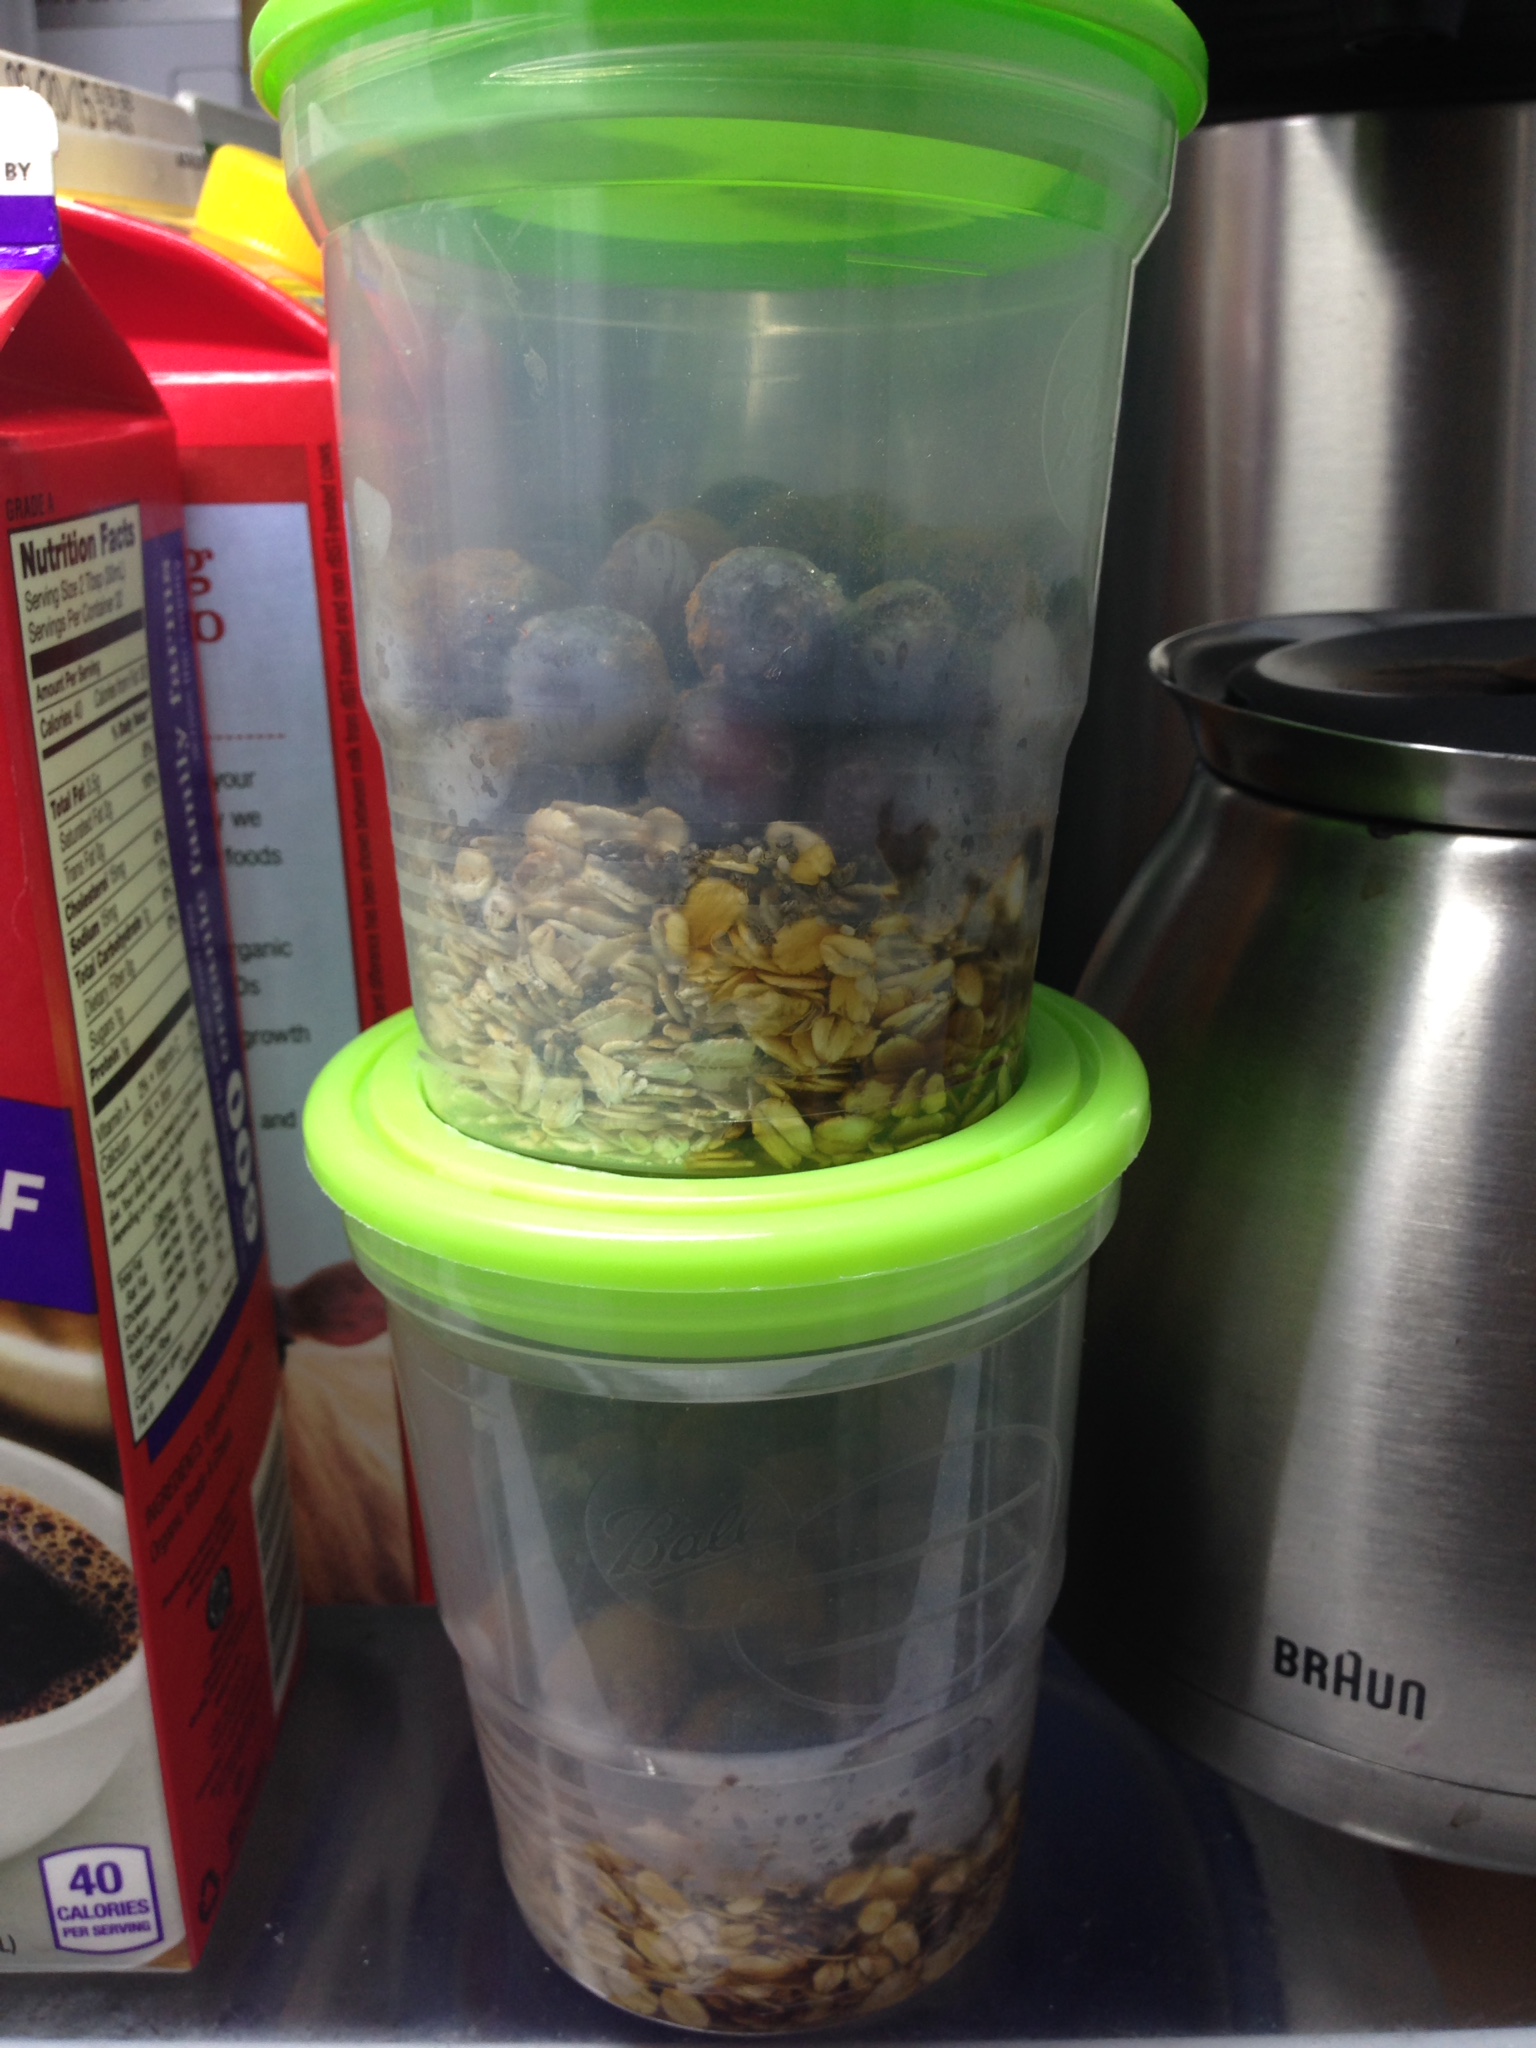
The original recipe called for almond milk. But most almond milk has little or no nutritional value (or almonds, for that matter.) And I’m not a fan of soy, especially non-organic soy that’s usually grown with Monsanto’s Roundup-ready products. So I go for organic grass-fed no-fat milk. The chia seeds add anti-oxidants and omega-3’s. Cinnamon has some health benefits, too, but it’s mainly here for flavor. And I use frozen organic blueberries in this recipe, but any frozen or fresh berries will work.

IMG_7103


1/2 cup rolled oats
1/2 cup organic blueberries or other berries
3/4 cup organic no-fat milk
1 teaspoon chia seeds
2 teaspoons maple syrup
1/4 teaspoon cinnamon

Combine the ingredients in a Mason jar and refrigerate overnight. Eat cold or warm the next morning.

It’s Labor Day weekend, and it’s all about the grill! (Hardwood, that is…not gas.) You can make this recipe in the kitchen, but a wood fire brings it to the next level.

thai chicken LTL


3 lbs. chicken pieces (I used drumsticks for this recipe)
2/3 cup soy sauce
1/2 cup fresh cilantro
2 tablespoons canola or peanut oil
2 garlic cloves, roughly chopped
1/2 teaspoon white pepper
1/2 cup sugar
1/4 cup white vinegar
1 teaspoon red pepper flakes or crushed dried chiles
1 teaspoon salt

Marinade: Combine soy sauce, cilantro, canola oil, granulated garlic and white pepper in a food processor and let it run. Place chicken pieces in a Ziploc bag and pour half of the marinade in. Save the other half for basting later. Seal the bag and let the chicken marinate overnight, or at least a few hours, squishing the bag around so that all the chicken gets marinated.

Sauce: In a saucepan, combine sugar, white vinegar, pepper flakes and salt. Bring to a boil and make sure the sugar dissolves. Remove from heat and let it cool to room temperature.

After marinating overnight, discard the used marinade in the Ziploc bag. Place chicken pieces over a hot hardwood fire or bake in an oven at 350, basting them with the leftover marinade until fully cooked. If the coal fire gets too hot, move the chicken to a cooler part of the grill to prevent burning. If using the oven, switch to the broiler at the end to give the chicken a nice char.

Serve with the sweet pepper sauce drizzled on top.

image

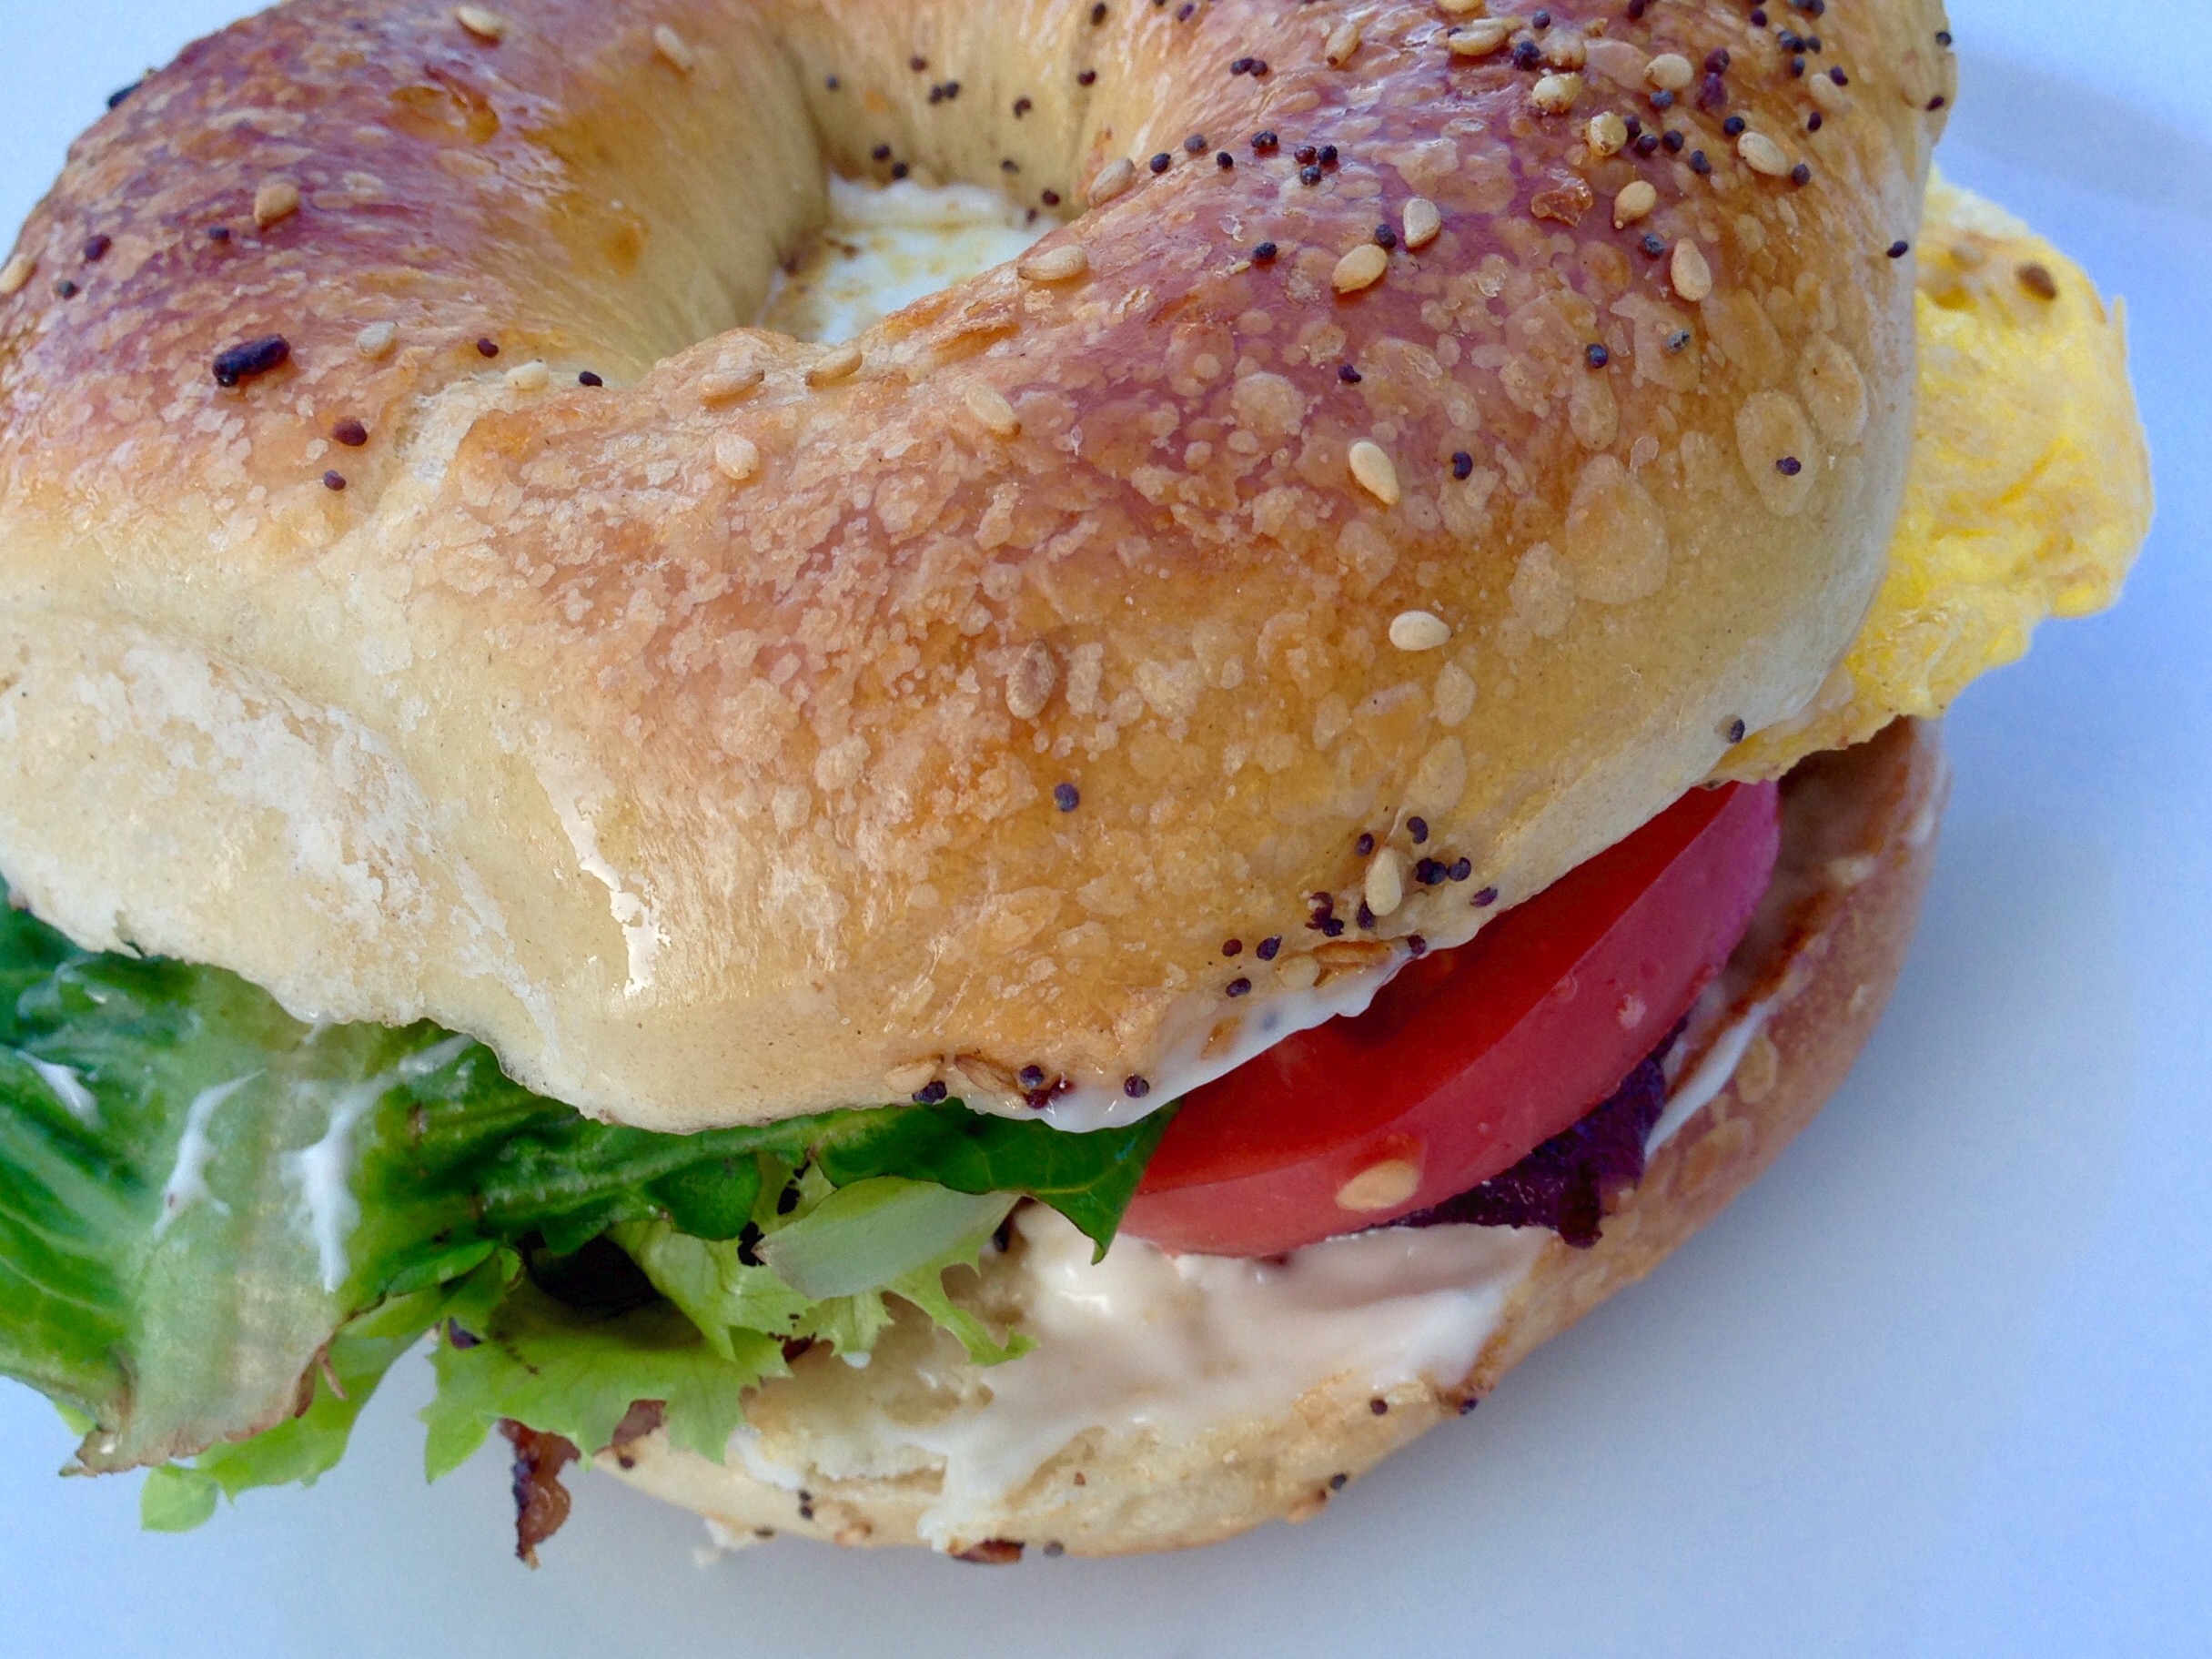
My breakfast of champions: home-cured and smoked bacon, organic garden lettuce and tomato, Wishing Stone Farm free-range egg, on a genuine NYC everything bagel! (Hellman’s mayo a must.)

Cheers!

The Saturday before Labor Day is traditionally considered to be International Bacon Day. So that makes it September 5th this year.

Let’s face it: there are few foods as magical as bacon. Add bacon to just about any dish you’re preparing, and it elevates it to incredible new heights of flavor. The BLT is possibly the greatest food combination ever invented: just a few simple, fresh ingredients, when placed together, transforming into one of the most amazing sandwiches on planet Earth.

I buy my bacon on-line from Burger’s Smokehouse, a family-run business in Missouri that not only sells some great bacon (get the thick-sliced country bacon—my favorite), but also smoked turkeys, ham and more.

But I also make my own.

Bacon comes from the pork belly. One of the places I buy pork bellies is from my friends at Fire Fly Farms in Stonington, CT (www.fireflyfarmsllc.com). I follow the simple curing techniques outlined in “Charcuterie,” a great book written by Michael Ruhlman and Brian Polcyn.

To cure bacon, all you really need is salt and sugar, and what they in the curing biz call “pink salt,” which is not to be confused with salt that happens to be pink, like Himalayan salt you would find in a gourmet store. Pink salt is bright pink—to let you know that this is special salt that should only be used in small quantities for curing. The reason for that is because it has nitrites. Nitrites delay the spoilage of the meat, and help keep the flavors of spices and smoke. They also keep the meat nice and pink instead of an unappetizing gray. That’s good. But nitrites can break down into nitrosamines, which have been known to cause cancer in lab animals. But let’s face it: you would need to eat a ton of cured meat to really worry about this.

To make the basic dry cure:

1/2 lb. kosher salt
1/2 cup light brown sugar
1 teaspoon coarsely ground black pepper
1 ounce (5 teaspoons) pink salt
optional ingredients: garlic, onion

Mix the ingredients well. An important note: all Kosher salts do not all weigh the same, so go by the weight and not a cup measurement.

Once you rub the pork belly with the basic dry cure, place it in a Ziploc bag, squeeze the air out of it, and seal it tightly. Place it in the fridge for a couple of weeks, flipping it over every few days to let gravity do its work. You’ll see that the salt will draw moisture out of the meat and form a brine. This brine will continue to cure your pork belly, so leave it in there.
Once the pork belly has been cured, wash the brine off the meat, pat it dry with paper towels. Now it’s time to cook. You can simply cook the pork belly at 200 degrees for about 2 hours, until the internal temperature reaches 160 degrees, or place the pork belly in a smoker, cooking it at 250 degrees for 1 hour, then adding hickory chips and smoking it at 250 degrees for another hour. I use my digital smoker to do this.


Bellies in the smoker

Bellies in the smoker.


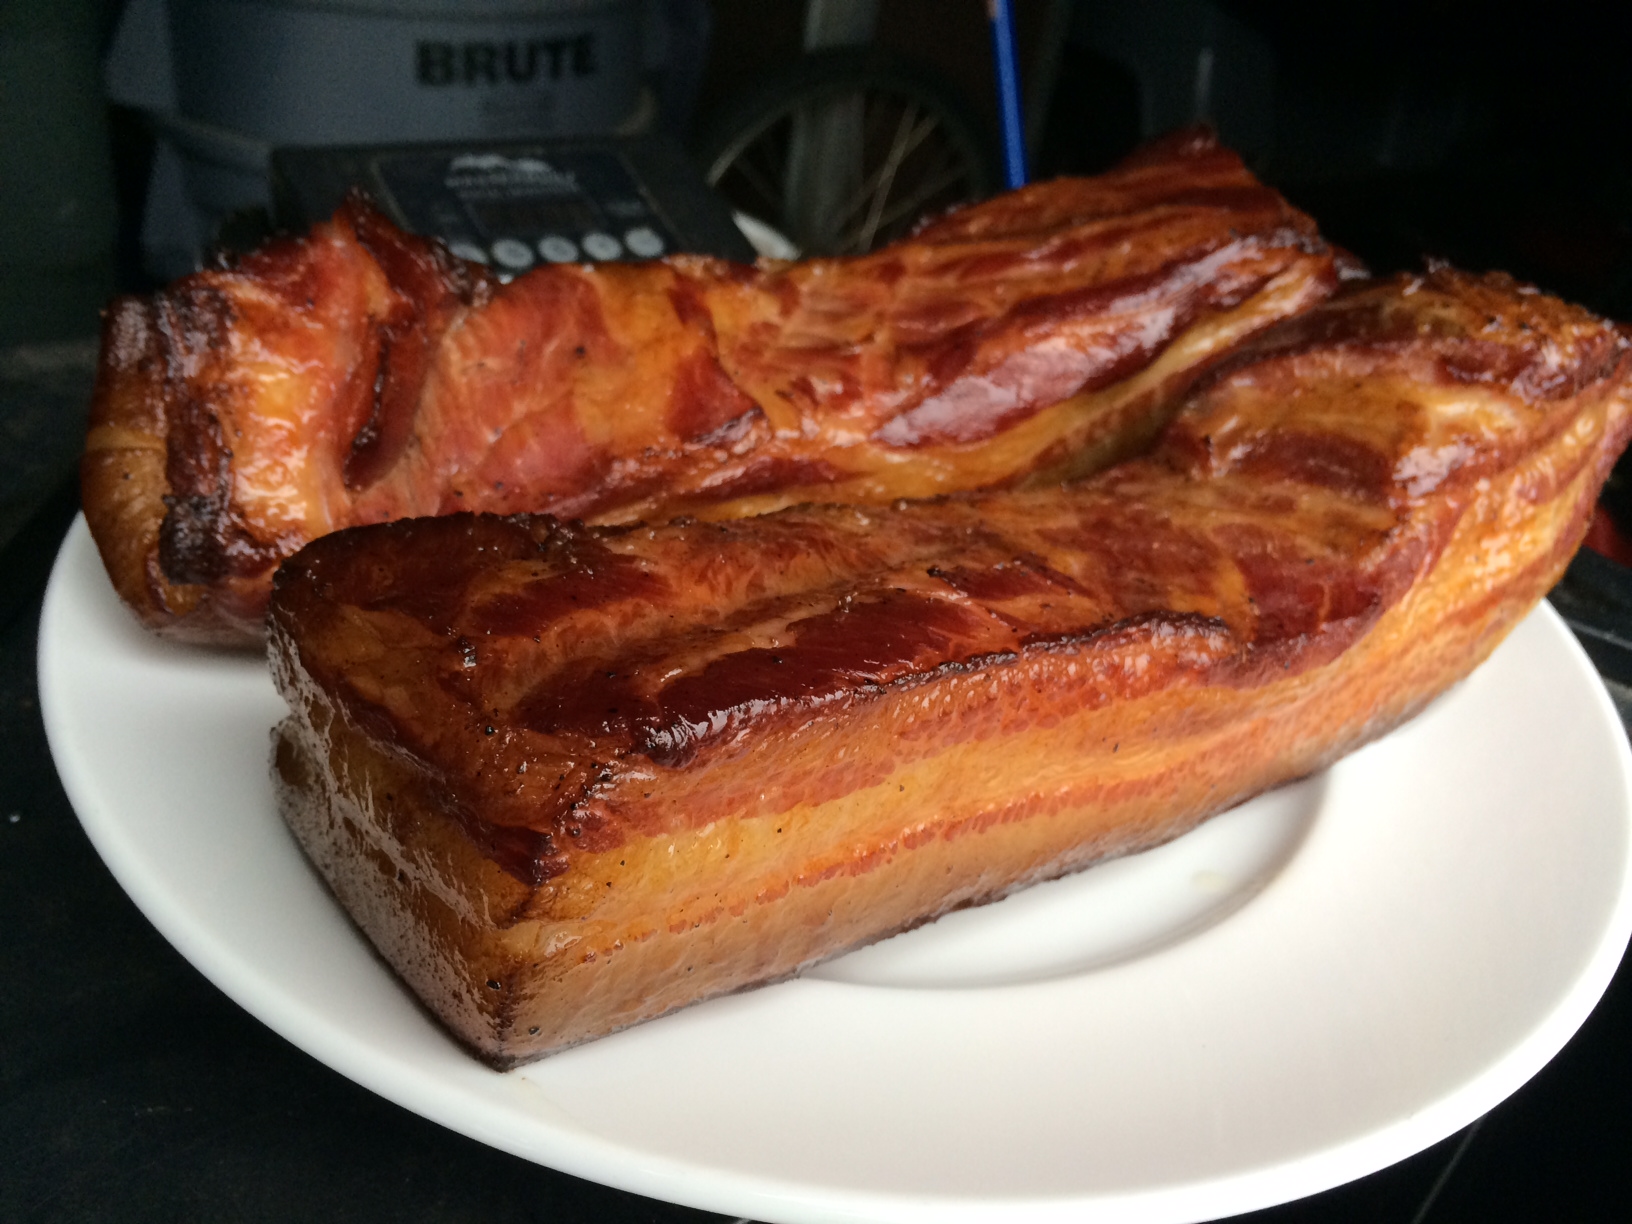
Smoked bacon

Smoked bacon

That’s it. You have achieved bacon!

The reward is so worth the effort. That first slice you cut off your bacon and toss in a pan to lightly fry for a few moments will be the best bite you’ve ever had in your life!
And if you’re making one slab of bacon, why not make it three or four? It freezes well. And…you will eat it. You know you will!
Frying in the pan!
Frying in the pan!

My blueberry buttermilk cornmeal pancakes are delicious (see my previous blog), but the recipe leaves some leftovers. So I froze the extra pancakes, not really knowing what I’d do with them later on.

Later in the week when I thawed a pack of chicken thighs, I decided to thaw some of the pancakes as well, planning to use them as a substitute for bread crumbs. Worked out pretty well…a crispy, flavorful piece of chicken. If you don’t make the pancakes, using store-bought cornbread will work just as well.

image

5 lbs. chicken thighs
8 oz. cornbread (or leftover pancakes)
1 teaspoon salt
1/2 teaspoon granulated garlic
1/2 teaspoon granulated onion
1/2 teaspoon tarragon
2 eggs
oil, for frying (I use avocado oil)


Break the cornbread (or pancakes) into smaller pieces and place them on a sheet pan in a 200-degree oven. Bake until they dry out but don’t burn, about 30 minutes. Let them cool to room temperature, then place them in a food processor and process until they resemble breadcrumbs. Place the breadcrumbs in a bowl.

Add the salt, garlic, onion and tarragon to the breadcrumbs and mix well.

In another bowl, crack and whisk the 2 eggs.

Pre-heat the oven to 350 degrees.

Heat a frying pan with 2 inches of oil to medium-high. Roll the thighs one at a time in the egg and then in the breadcrumb mixture. Press the breadcrumbs onto the chicken so they stick. Gently place the breaded thigh in the pan with the oil. Fry until golden on one side, then flip the thigh over and fry on the other side. When the thighs are golden and crisp, place them on a sheet pan covered with non-stick aluminum foil. Repeat with all the thighs.

Place the sheet pan with the thighs in the oven and bake until cooked through, about 35 minutes.

This is our family’s favorite pancake recipe, but the need to go gluten-free for my wife meant a change in the ingredients. Fortunately, my favorite go-to all-purpose flour, “Cup 4 Cup,” worked so well in this recipe, there was no difference in taste or texture.
 image
1 cup all-purpose flour (or Cup 4 Cup original multi-purpose flour)
1 1/2 cups stone-ground yellow cornmeal
2 tablespoons organic cane sugar
2 teaspoons baking powder
1/2 teaspoon baking soda
1/2 teaspoon salt
2 cups buttermilk (or 1 1/2 cups milk and the juice of 1 large lemon)
zest of 1 organic lemon
1 large egg
3 tablespoons melted unsalted butter, slightly cooled
1–2 teaspoons avocado oil
1 cup fresh or frozen blueberries, preferably wild, rinsed and dried
Whisk the flour, corn meal, sugar, baking powder, baking soda, and salt in a medium bowl
to combine.
In a separate bowl, whisk the egg, lemon zest, and melted butter into the buttermilk to combine.
Make a well in the center of the dry ingredients in the bowl. Pour in the milk mixture and
whisk very gently until just combined. Do not over mix. A few lumps are OK.
Heat non-stick skillet over medium heat. Add 1 teaspoon of oil and use a brush to coat the skillet
bottom evenly. Pour 1/4 cup of the batter into 3 spots on the skillet. Sprinkle 1 tablespoon of the
blueberries over each pancake. Cook the pancakes until large bubbles begin to appear,
about 1 1/2 to 2 minutes. Using a thin, wide spatula, flip the pancakes and cook until they’re golden
brown on the other side, 1 to 1 1/2 minutes longer.
Chow down immediately!
image

PICKLED BEETS

Posted: August 23, 2015 in beets, Food, pickling, Recipes
Tags: , , , ,

Growing up in a Lithuanian family, there was a small group of foods that I had to love to survive, since they constantly appeared on the dinner table: potatoes, cabbage, mushrooms, herring, and beets. Fortunately for me, I loved them all, despite my Mom’s desire to boil everything to death.

One of the many uses for beets, besides soups, was pickling. Pickled beets are an excellent side for any hearty meat dish. (I love ’em with kielbasa or steak!)  I add hard-boiled eggs and hunks of onion to the mix because I like them. If you don’t like ’em, leave ’em out and just add more beets.

I combined store-bought already-cooked beets (the brand is called Love Beets) with Chiogga beets that I grew in my own garden and peeled and roasted before pickling.

image


4 to 8 beets, scrubbed (your favorite variety)
1 cup apple cider vinegar
1 cup water
3 garlic cloves, crushed
3 tablespoons sugar
2 teaspoons whole black peppercorns
1 tablespoon Kosher salt
2 Vidalia onions, quartered
4 hard-boiled eggs, peeled
6 fresh dill sprigs

Pre-heat the oven to 450. Wrap the beets in foil and roast for about an hour, until tender. When cool enough, carefully peel and quarter them.

In a medium saucepan, combine the vinegar, water, garlic, sugar, peppercorns and salt. Bring to a boil and simmer over moderately high heat, stirring until the sugar is dissolved. Let the pickling liquid cool to warm, about 15 minutes.

In a heat-proof glass jar or container, layer the beets, onion, eggs,  and dill sprigs and then cover with the pickling liquid. Let stand at room temp for 2 hours, then place in fridge overnight.

They stay fresh for a week, but they won’t last that long!

image

Now’s the time to head to your local farm stand and pick up a bag of gorgeous plum tomatoes, before the season is gone! And this is what you do with them…

These are not sun-dried tomatoes. They’re better, because fresh plum tomatoes are still moist after roasting, with a bit of that magic tomato liquid in every cup! A great, simple platter to offer at parties.

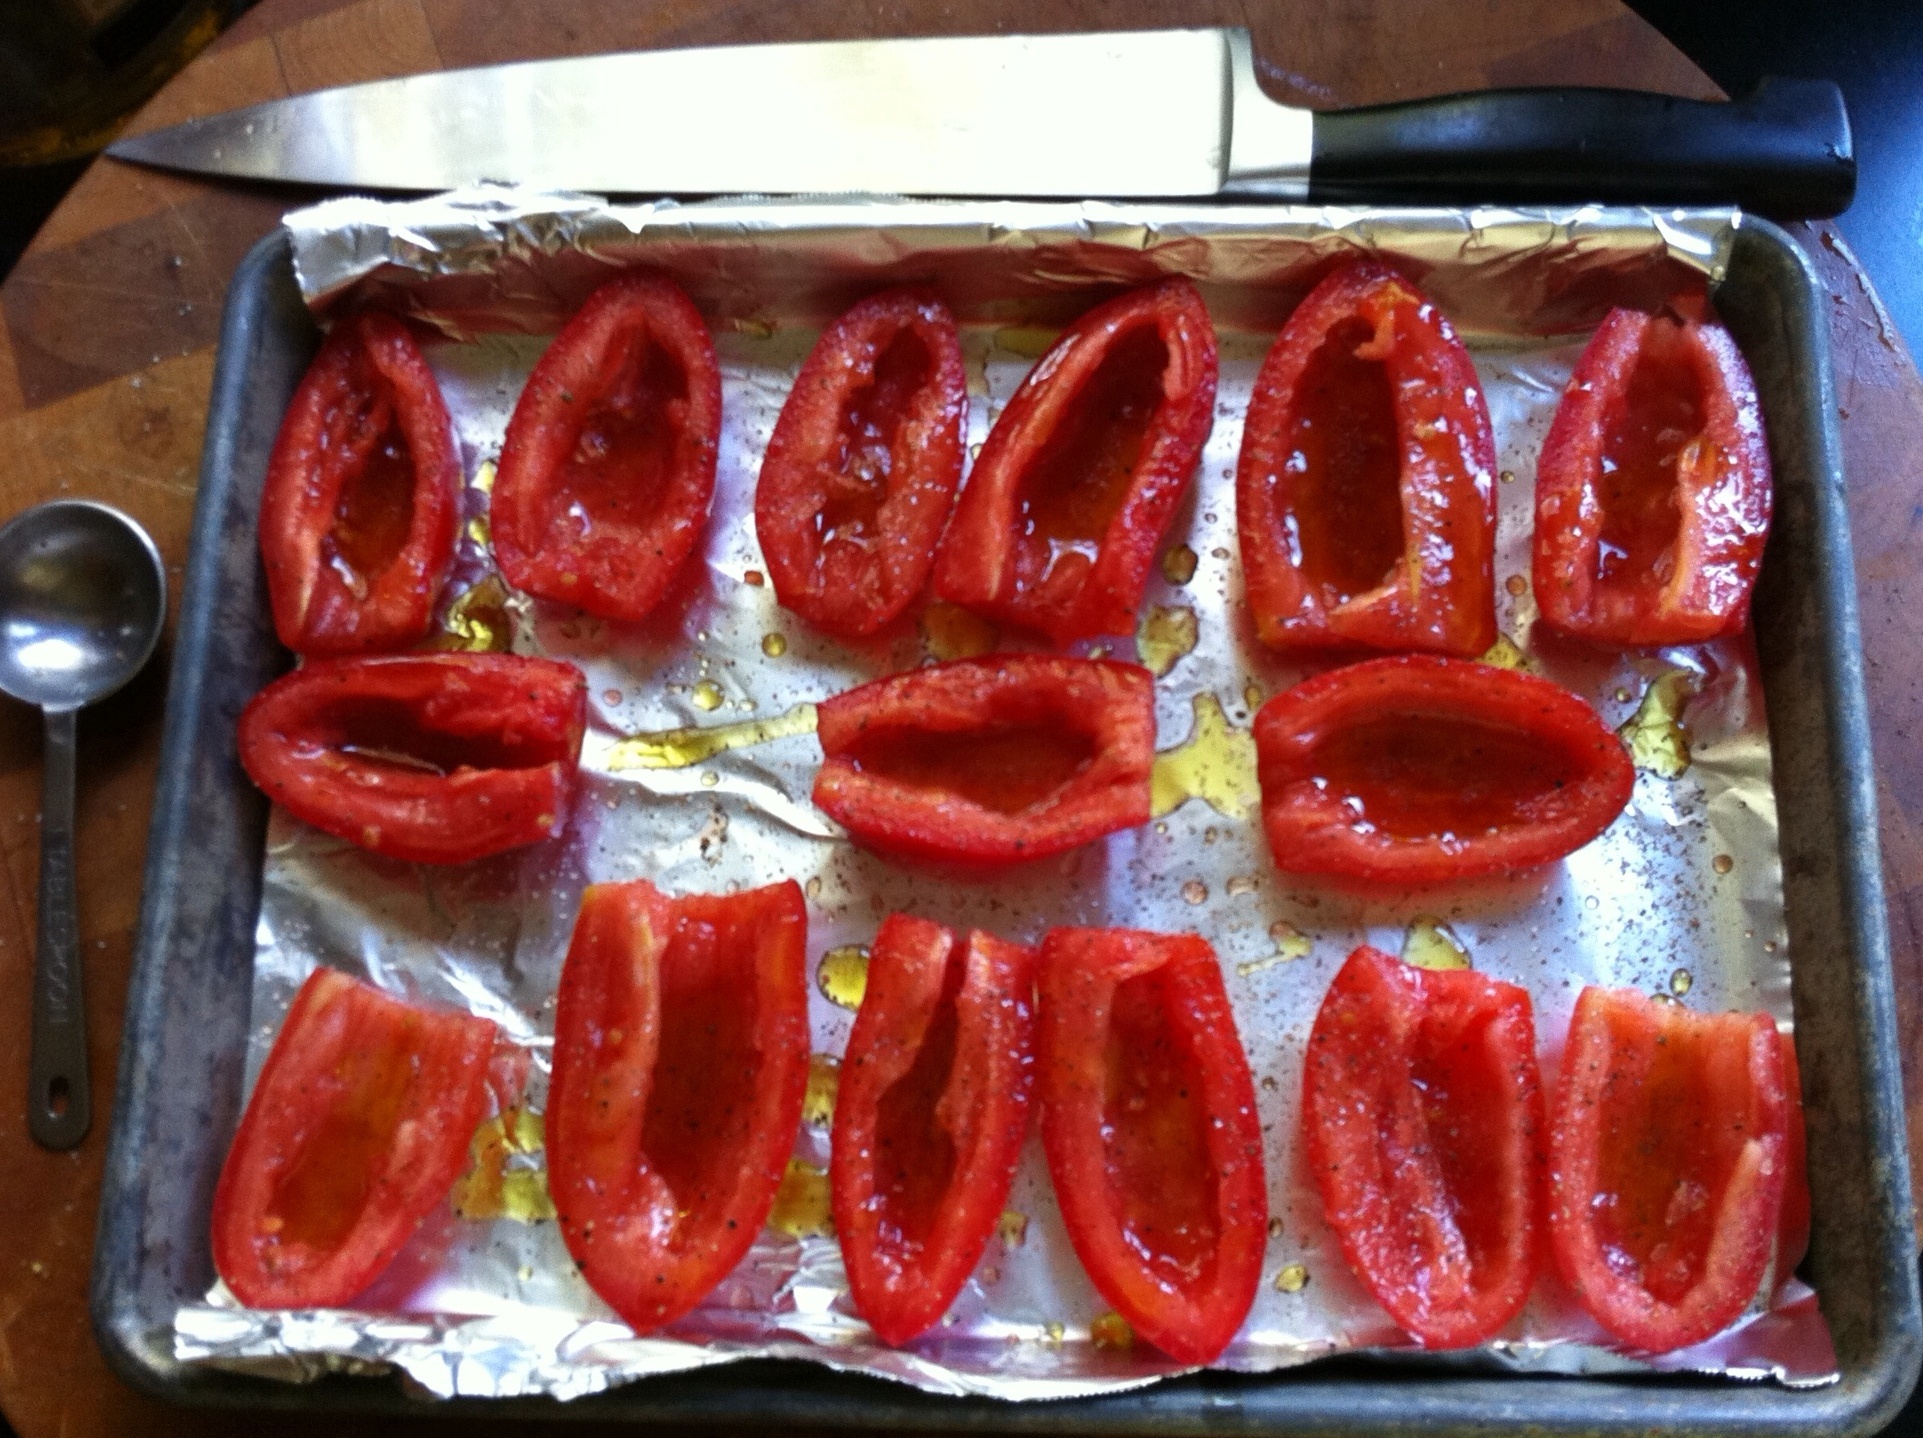
Tomatoes before

Tomatoes before

12 to 18 halved, seeded plum tomatoes
1/4 cup extra virgin olive oil
2 tablespoons organic cane sugar
Freshly ground pepper
Fleur de Sel or sea salt

Pre-heat the oven to 250.

Line a baking sheet with foil and rub it lightly with olive oil.

Arrange halved and seeded tomatoes on it in a single layer, cut side up. Drizzle evenly with 1/4 cup olive oil, sprinkle with 2 tablespoons sugar, and season with pepper to taste.

Bake the tomatoes until they are still juicy but slightly wrinkled, about 3 hours. Transfer to a platter and let cool slightly.

Just before serving, sprinkle tomatoes with Fleur de Sel, and garnish if you like, with chopped parsley leaves, mint leaves, or basil.

Tomatoes after

Tomatoes after

I had a pound of leftover lobster meat (I know, I know…how could you ever have leftover lobster?!) So I wrapped it tightly and kept it frozen. When I had a craving for crab cakes, I figured I’d try my recipe out with lobster instead. So good, I sprained my arm patting myself on the back!

lobstercake2

1 cup mayo (I like Hellman’s)
1/4 cup Dijon mustard (I like Maille)
1 teaspoon Old Bay seasoning
1 lb. cooked lobster meat (thawed, if frozen)
3/4 cup saltine crackers or oyster crackers
Olive oil

In a bowl, combine mayo, mustard and Old Bay Seasoning.

Chop the lobster into small pieces and add it to the mayo/mustard mix.

Pulse the crackers in a food processor until it resembles oatmeal. Add it to the bowl and gently combine the ingredients.

Form small patties. I use either a small beef slider mold or the lid from a small mouth Mason jar. I won’t kid you: it gets messy, but it’s worth it! Place the patties on a sheet pan lined with Reynold’s non-stick aluminum foil.

Place the sheet pan in the freezer for about 15 minutes to stiffen up the patties.

Heat some olive oil in a pan. Cook the patties on both sides until golden brown.

lobstercake1

If you do your share of Italian recipes, a common product found in just about any store has many people confused: San Marzano tomatoes. Most good cooks agree that San Marzano tomatoes are some of the best canned tomatoes you can buy.

But unfortunately,  the label can say “San Marzano tomatoes” even if they are not real San Marzano tomatoes.

San Marzano is a region in Italy near Naples and Mt. Vesuvius, and the special combination of climate and volcanic soil make these plum tomatoes world-famous. They have less water, fewer seeds and are picked off the vine when perfectly ripe, then processed the same day.

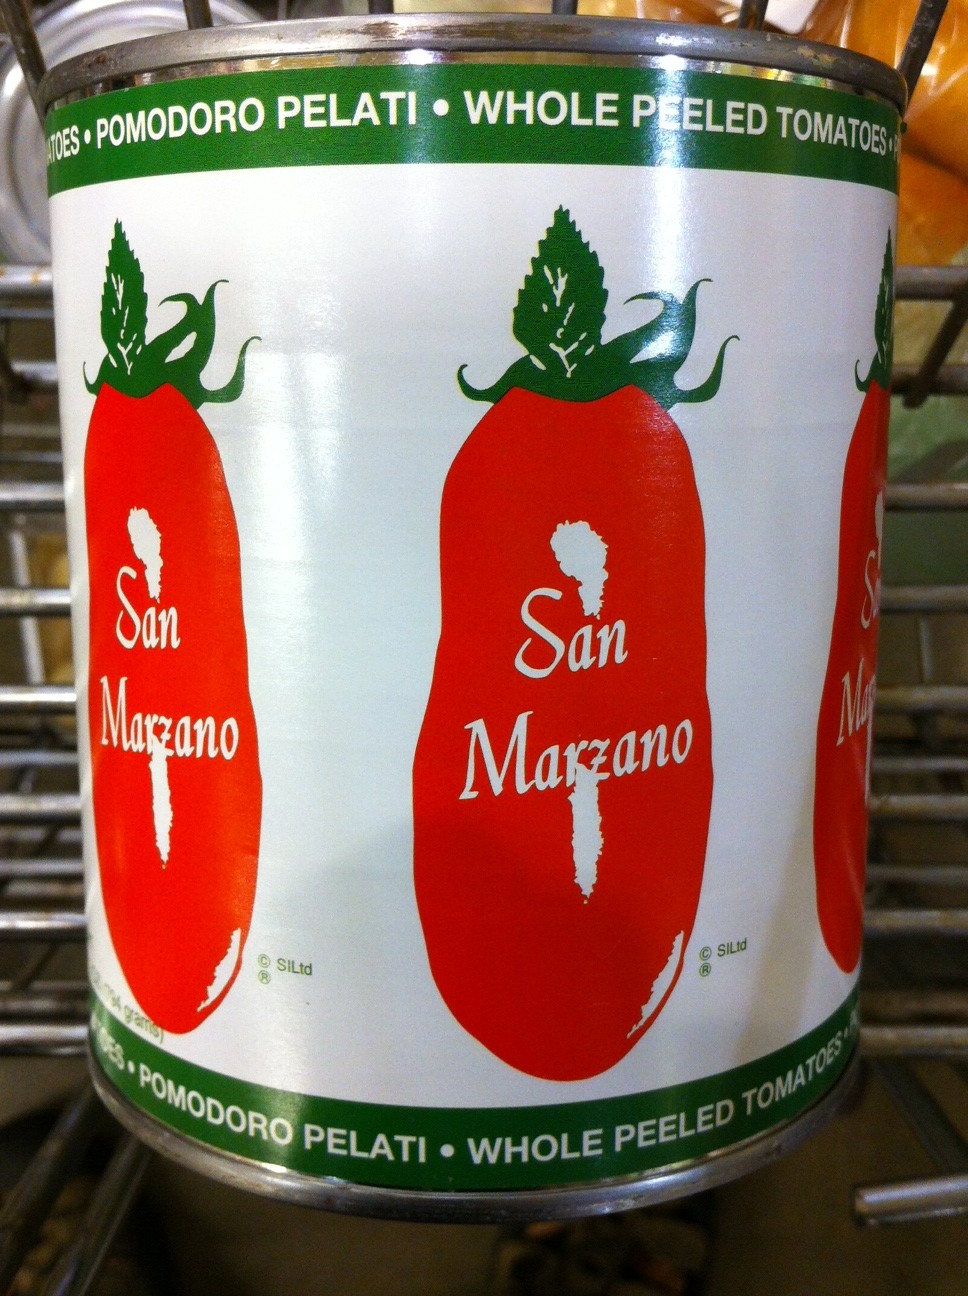
But San Marzano is a variety of tomato, too…and so you can have a can of San Marzano tomatoes that are not from San Marzano. And to add to the confusion, there’s actually a brand of tomatoes called San Marzano, with tomatoes grown in the United States. Bet your ass the sellers of these tomatoes are counting on you not to know the difference!

Sold everywhere, but not real San Marzanos from Italy. Grown in the USA.

The company has now changed their label, just calling it "SM."

The company has now changed their label, just calling it “SMT.”

Real San Marzano Tomatoes are a very old variety, extremely limited in quantity, grown and produced exclusively in the San Marzano region of Italy. Because production is so very limited, the Italian Government and the European Union have formed a way of protecting consumers from fraud by having San Marzano tomatoes tightly controlled. DOP, or denomination of protected origin, is the mechanism that the government is using to control the production and marketing of genuine San Marzano tomatoes. Labels for DOP products must be individually numbered and manually applied to each can in specific lots and government officials must oversee this application. So here’s the deal: unless you see “DOP” on the label with a hand-stamped number on the can, it’s not a real San Marzano tomato.

Nope. Italian, but not from the region.

Nope. Italian, and the correct variety, but not from the region.

Nope. "San Marzano region," but not necessarily the variety.

Nope. “San Marzano region,” but not necessarily the variety.

Nope. San Marzan "style."

Nope. San Marzan “style.”

Yes! Always look for D.O.P. on the can or jar.

Yes! Always look for D.O.P. on the can or jar.