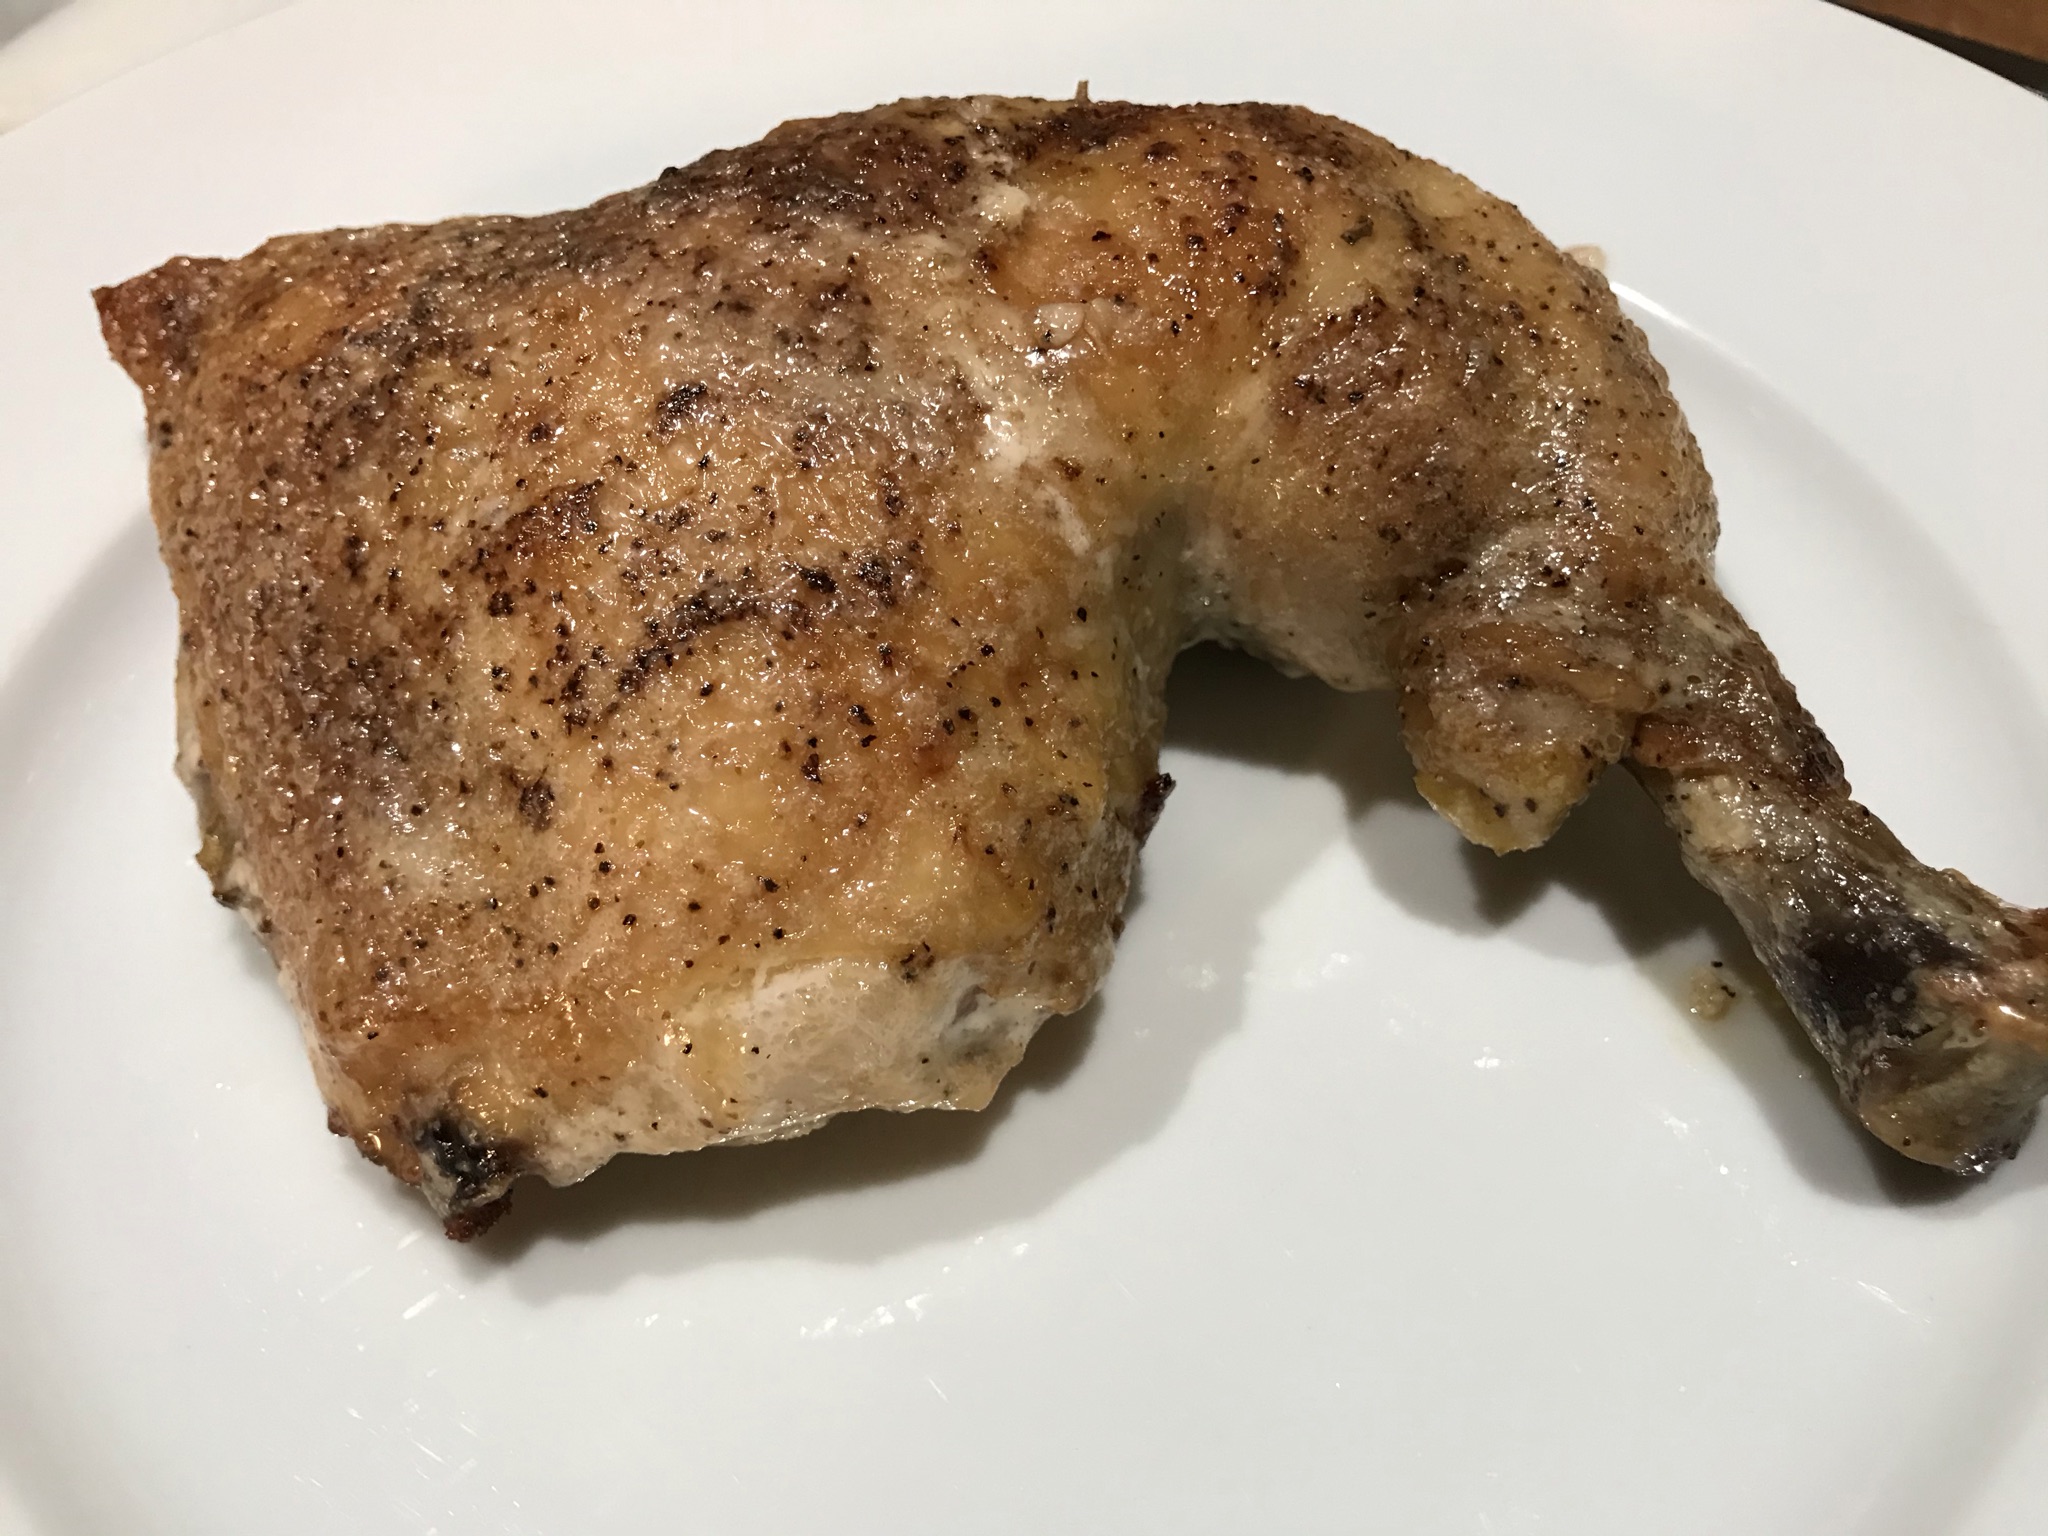
If you watch as much Food Network and Cooking Channel as I do, you’ve probably heard of Big Bob Gibson’s Bar-B-Q in Decatur, Alabama. Smokin’ and grillin’ since 1925, they put the now-famous Alabama white sauce on the map. They would smoke whole birds, then dunk the entire bird in a bucket of white sauce before returning them to the smoker to cook some more. And then they’d serve more of the precious white sauce on the side as you tore into the most amazing chicken you’ve ever had.
I lived in Mobile, Alabama about 37 years ago. Never made it to Decatur. Probably never will. So it was time for me to try to recreate the magic at home. I think I did pretty well.
If you Google “Alabama white sauce,” you’ll get dozens of versions, each, I’m sure, pretty similar and pretty good. I did just that, and then tweaked it to make it my own.
I don’t smoke the birds. I simply season them with salt and pepper, and roast them in a convection oven at 350. When they’re almost done, I brush the chicken all over very liberally with my white sauce…bottom of the bird, too. Then it goes back in the oven for a little bit more.
Parts work as well as whole birds. I love using leg quarters for this recipe.
Combine all the ingredients and mix well. I like to keep it in a container with a lid so I can shake it up before using it.
Even though we’re still shoveling ourselves out from under the last snowstorm here in New England, now’s the time to start prepping brisket for corned beef on St. Patrick’s Day!
Before every St. Patty’s Day, supermarkets are full of packages of processed corned beef in preparation for the big celebration. But, interestingly, corned beef isn’t really an authentic Irish dish.
The phrase “corned beef” was coined by the British, and although the Irish were known for their corned beef throughout Europe in the 17th century, beef was far too expensive for the Irish themselves to eat and all of it was exported to other countries. Owning a cow in Ireland was a sign of wealth, and the Irish used theirs for dairy products, not beef.
The Irish ate pork, and a lot of it, because it was cheap to raise pigs, and they traditionally prepared something like Canadian bacon to celebrate St. Patrick’s Day in Ireland.
In the 1900’s, when the Irish came to America, both beef and salt were more affordable, and the Irish, who lived in poor, tight-knit communities, often next to Jewish communities, bought much of their beef from Kosher butchers. And so many of the Irish learned how to corn their beef using Jewish techniques, but adding cabbage and potatoes to the mix. That’s what we have today.
It takes about 3 weeks to make corned beef. Doing it yourself is not difficult. It just takes time.
Corned beef has nothing to do with corn. ‘Corning’ is a technique for preserving raw meats for long periods by soaking it in a salt brine. This method was used in England before the days of commercial refrigeration. Back then, the large salt kernels used in the brine were called “corns.”
Brining is a time-honored way of preserving meat and it prevents bacteria from growing. Both pastrami and corned beef are made by this method. Both start with a brisket of beef. Corned beef is then cooked–usually boiled–and served. Pastrami is made when the brined meat is rubbed with more spices and then smoked to add extra flavor. So corned beef and pastrami are the same meat, just treated differently.
Saltpeter is an ingredient that has been used in brining beef for years. It adds the traditional pink coloring to the corned beef and pastrami meat, a bit more appetizing than the gray color it tends to have if you don’t use it.
Saltpeter can also contain carcinogens, so there’s always talk of avoiding it. It’s found in pink curing salt, which is used in small amounts during the curing process. (Not to be confused with Himalayan pink salt, which is just plain salt.) Since I only make my corned beef once a year, I’m OK with it either way. The general rule of thumb is only 1 teaspoon pink curing salt per 5 pounds of meat.
I get grass-fed brisket in 10-pound slabs, but use whatever size you find comfortable. Just don’t go too small, or the brine will make that tiny piece of meat extremely salty.
Brining the beef brisket
Step one: corned beef…
beef brisket (about 8-10 pounds)
2 teaspoons paprika
1/4 cup warm water
3 cloves of minced garlic
2 tablespoons sugar
1 tablespoon mixed pickling spices
3/4 cup salt
1 teaspoon pink curing salt (optional)
2 quarts water
Place the brisket in a large container made of non-reactive material, like glass or plastic.
In the 1/4 cup of warm water, dissolve the sugar, minced cloves, paprika and pickling spices.
Dissolve the 3/4 cup of salt (and optional teaspoon of pink curing salt) in the 2 quarts of water. Pour in the sugar/garlic/paprika/pickling spices mix and stir everything together. Pour the mixture over the meat in the container. Make sure the meat is totally beneath the surface of the liquid. (You may need to weigh it down to do this. I place a couple of plates on top, which pushes the meat down into the brine.) If there’s just not enough liquid, double the recipe, leaving out the pink salt the second time. Cover the container.
Refrigerate the container and its contents for 3 weeks, turning the meat once or twice per week. At the end of the third week, remove the container from the refrigerator and take out the meat. Soak the meat in several changes of fresh cold water over a period of 12 hours to remove the excess salt. I add ice to the water to keep the meat cold.
At this point, if you want corned beef, most people boil it.
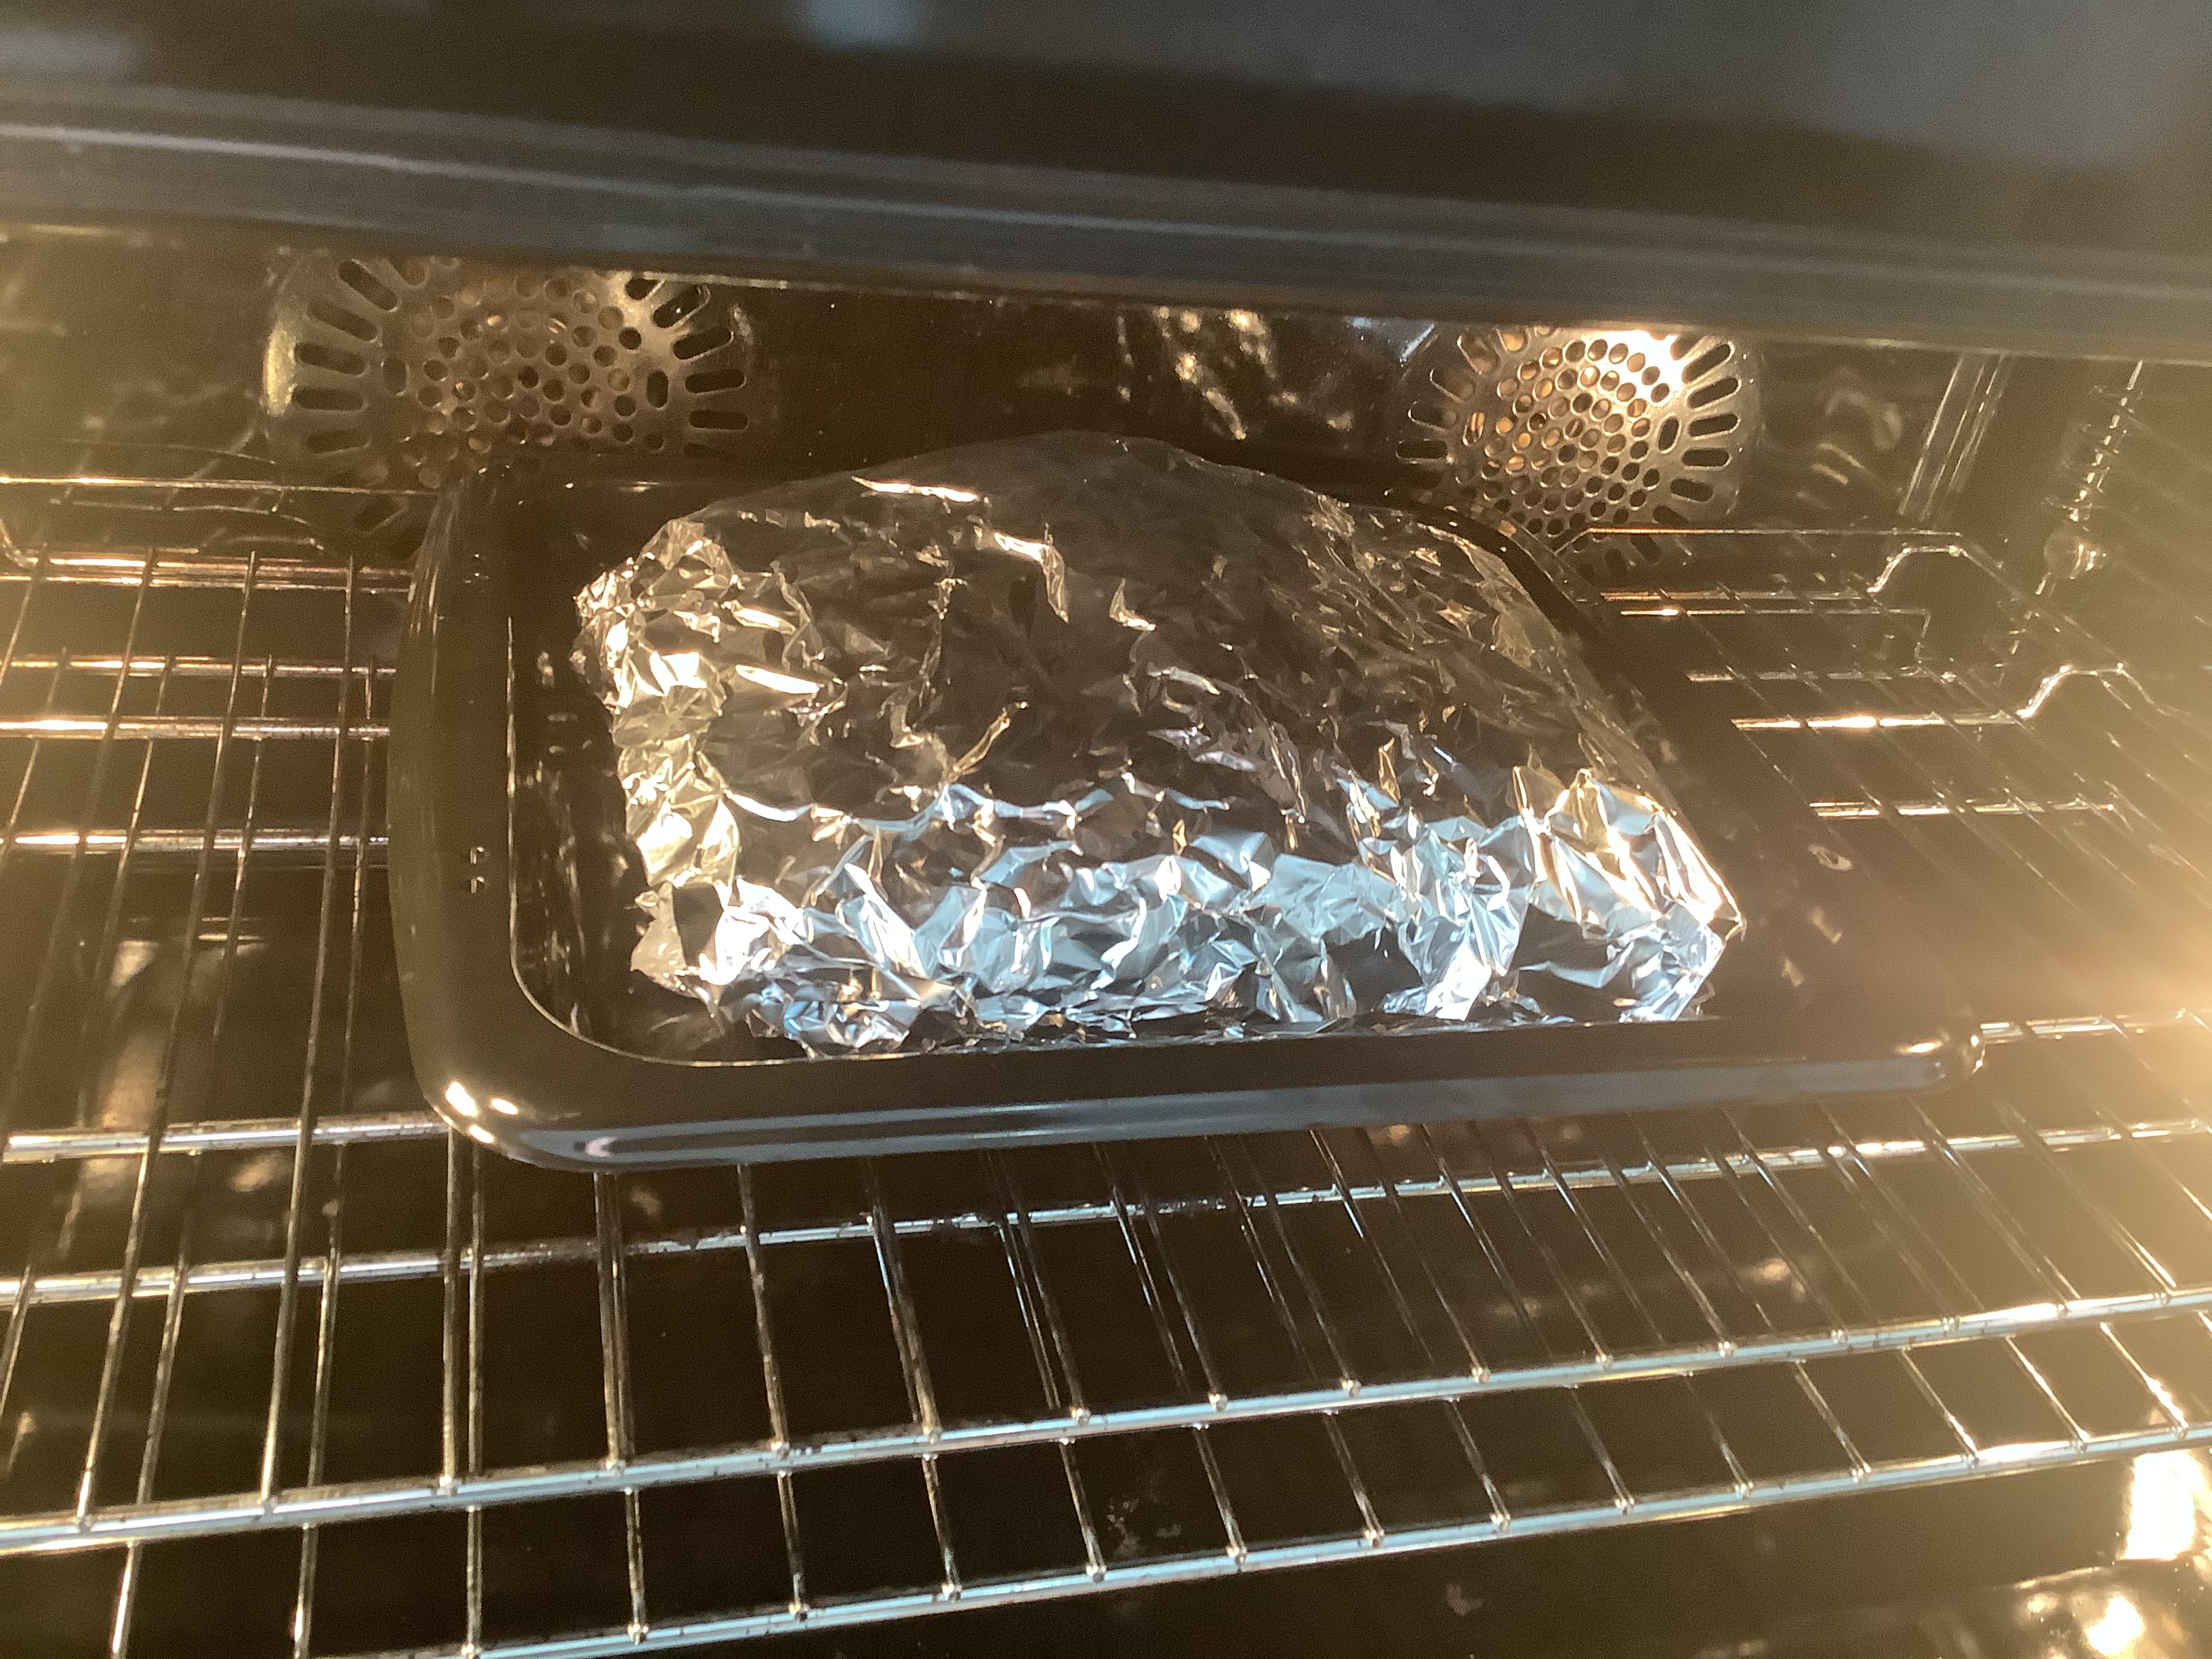
I prefer to lay some aluminum foil down on a sheet pan. Then I coarsely chop carrots, onions, and celery, placing them in a single layer on the foil. Then I lay my brisket on top of the veggies, and wrap the meat tightly in the foil. I place the baking pan in a pre-heated 350 degree oven and cook for about 3 1/2 hours. (That’s for an 8-pound slab of meat. The cooking time will be less for a smaller cut.)
If you want to make pastrami, there are more steps to take…
Step two: making Pastrami…
Brined and rinsed corned beef brisket from above recipe, patted dry with paper towels
1/4 cup Kosher salt
1/4 cup paprika
3 tablespoons coriander seeds
2 tablespoons black peppercorns
2 tablespoons yellow mustard seeds
1 tablespoon white peppercorns
3 tablespoons brown sugar
1 tablespoon granulated garlic
Combine the coriander seeds, black and white peppercorns and mustard seeds in a spice grinder and grind them coarsely. Place them in a bowl. Add the salt, paprika, brown sugar and granulated garlic. Mix well.
Rub the mix into the corned beef well, covering all sides.
Heat your smoker to 225 degrees and smoke the meat for several hours. (My wood of choice is always hickory.) When the internal temperature of the meat has reached 165 degrees, it’s done. It isn’t necessary to smoke pastrami as long as you would a regular brisket because the long brining time makes the meat more tender, and you’ll be steaming it next.
It is very important that absolutely everything that comes in contact with the meat is very clean. (This includes your hands.) Also, make very sure that every inch of the meat reaches the 165 degrees before it is removed from the smoker. The corned beef is now pastrami.
Delis that serve pastrami go one step further: they steam the meat so that it becomes incredibly tender and easy to slice. I place a baking pan with boiling water in the center of a 350° oven. I put a grate on top of it, placing the pastrami on top of the grate. Then I invert a bowl over the pastrami to keep the steam in. I will cook it this way for at least an hour to steam the meat before slicing and serving.
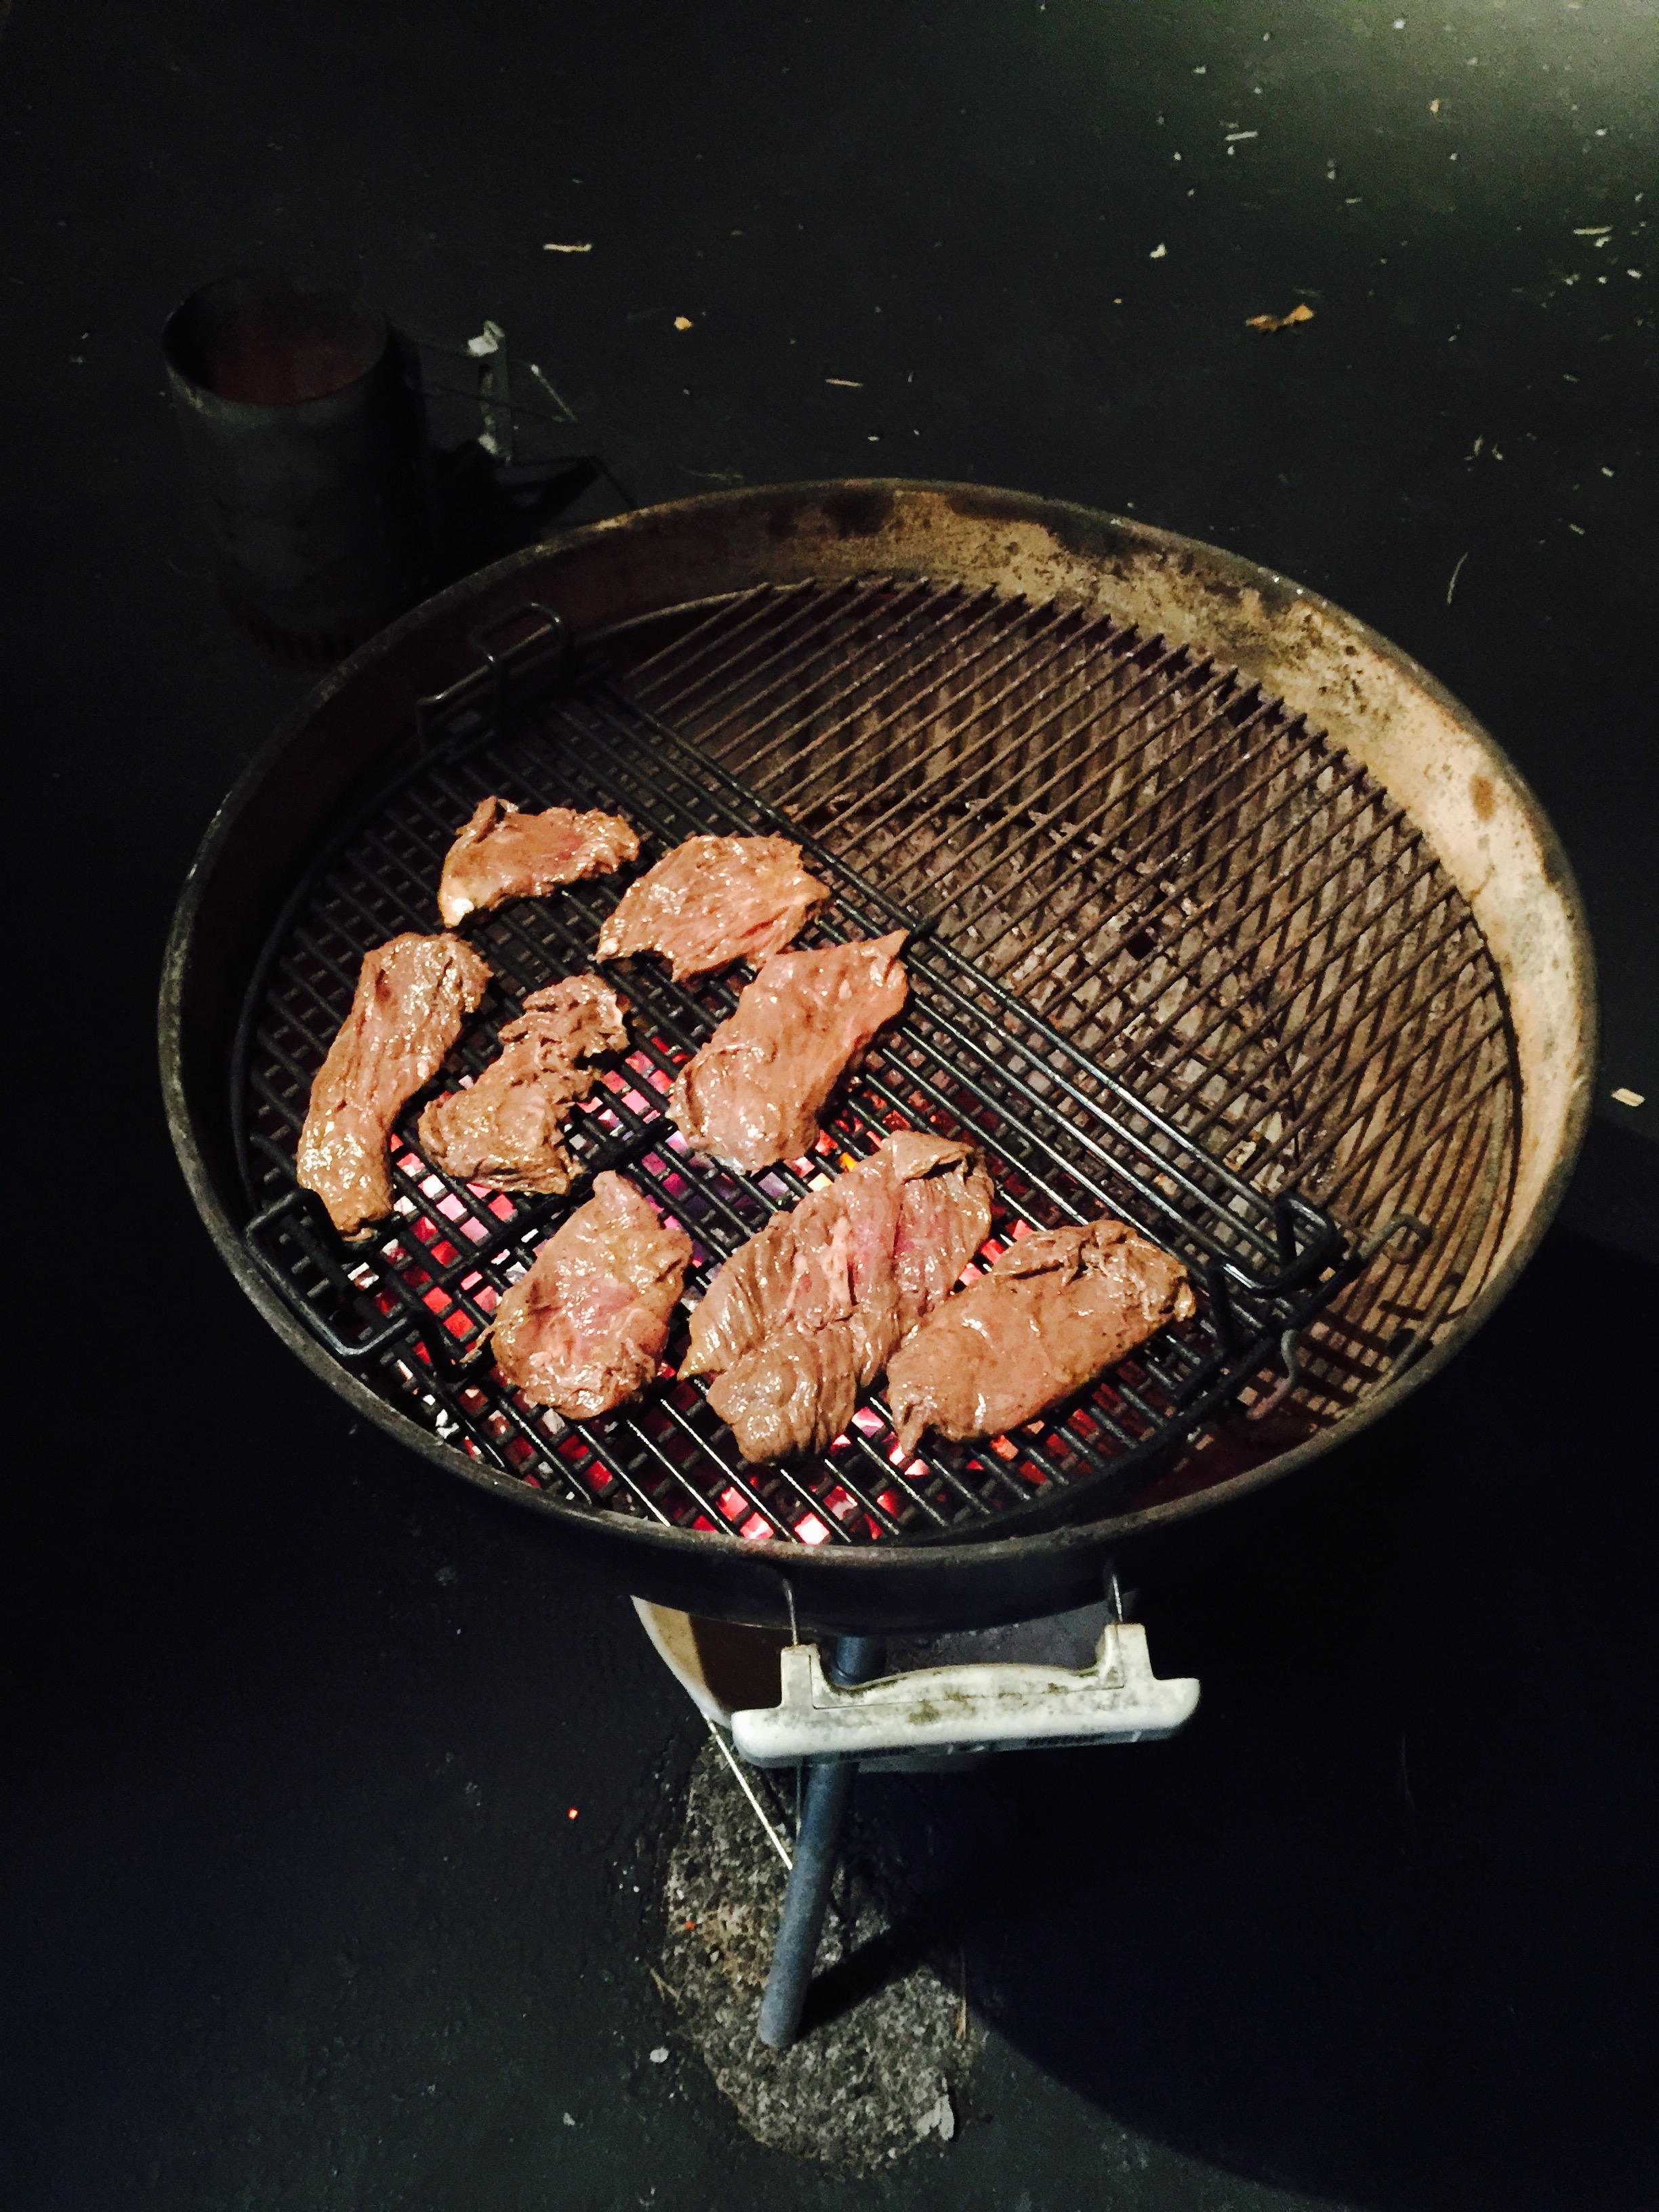
If I’m at a steakhouse and craving beef, I’ll usually order a cut like porterhouse or ribeye…great cuts of meat that need nothing more than a little salt and pepper, and a skillful grillmaster. The prep on that slab of meat before it even hits the grill has already been done: carving, dry-aging, trimming.
At home, I eat only humanely raised grass-fed beef. It’s expensive, so I buy the cuts that cost less, but need a bit of TLC before cooking. A cut like beef flap, which comes from the bottom sirloin butt (the back of the animal), looks like a skirt steak, a hanger steak, or a flank steak because of its thinness, but each comes from a different part of the animal.
Though the beef flap is somewhat thin, I will often slice it lengthwise into two thinner pieces, because the meat’s thickness often varies, which can give you uneven cooking. I like to cook it hot and fast on a hardwood fire grill, but still keep it medium-rare. If the weather is really unforgiving, like it is right now, cooking the beef in a hot cast iron skillet works really well, too.
Marinades are the key to tenderizing and flavoring tougher or cheaper cuts of meat. What you put in your marinade really depends on what flavors you like.
The recipes below are for 3 to 5 lbs. of beef. I always make more, because leftover marinated grilled beef makes an awesome steak and egg breakfast the next day!
A cold night is no excuse not to grill!
The instructions with all of these marinades is basically the same: combine all the ingredients in a bowl. Cut the beef flap (or whatever cut of meat you’re using) to a manageable size so that it fits a gallon-sized Ziploc bag easily. (Smaller, thinner pieces will also absorb the marinade better.) Place the beef in the bag, and then pour the marinade into the bag. Squeeze the excess air out and seal the bag. Gently squish the bag around so that the marinade makes contact with all the meat. Place the bag in a bowl in the fridge overnight, squishing the bag every few hours to make sure the marinade penetrates the meat. The bowl will prevent any accidents from happening in your fridge in case the bag leaks. The next day, remove the bag from the fridge and let it come to room temperature before grilling the meat. Discard the leftover marinade.
ALZ MARINADE #355
1/4 cup olive oil
1 lemon, zest and juice
1 tablespoon Worcestershire sauce
1 tablespoon soy sauce
1 teaspoon garlic salt
1 teaspoon Dijon mustard
Combine the ingredients. Marinate the meat overnight in the fridge or several hours at room temperature. Grill.
Marinating beef flap.
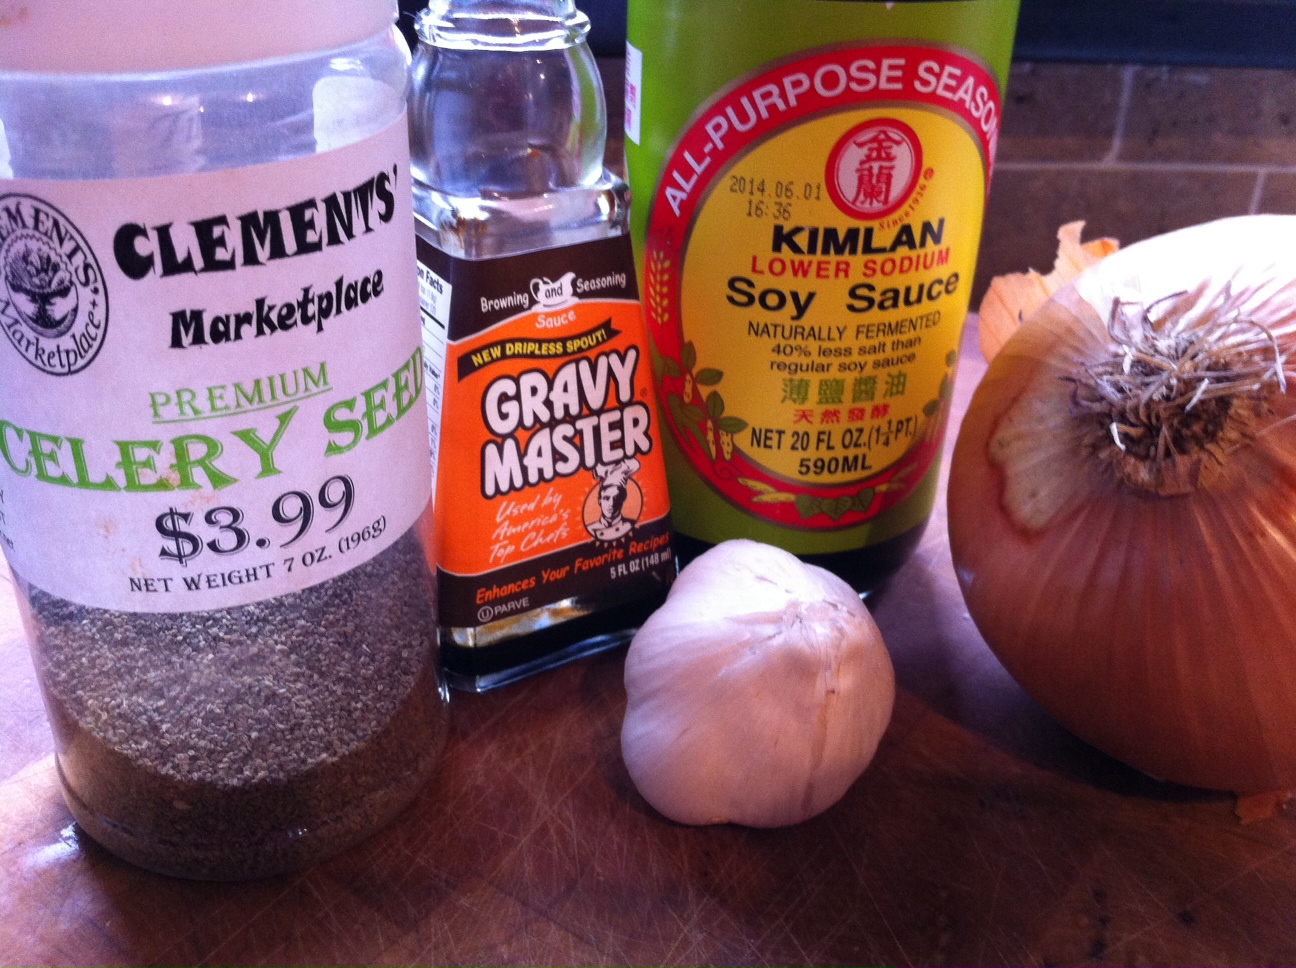
On the North Fork of Long Island, in the middle of wine country, there’s a restaurant that’s been around for a long time: a sort of hole-in-the-wall place you might not think twice about visiting, unless you hear that they’ve got a special secret marinade for their beef. The place is called The Elbow Room (I think they’ve expanded to a second or third location by now), and though I wasn’t impressed by the quality of their beef, I was impressed with its flavor. Here, with the help of friends, is what we think comes as close to that marinade as we can get. Gravymaster is a product you can find in any supermarket, usually in the gravy section. This marinade also works well with beef tips or a London broil.
1 cup soy sauce
1/4 cup Gravymaster
2 large Vidalia onions
2 cloves of garlic
2 teaspoons celery seed
1/2 teaspoon black pepper
Combine the onions and garlic in a large food processor and purée. Add the remaining ingredients and run the processor until it’s smooth and sort of resembles root beer (below.)
Marinate the meat overnight in the fridge or for several hours at room temperature. Grill. Awesome with beef sirloin tips (below.)
This incredibly simple marinade falls into the “Italian” category. You could almost use it as an Italian dressing on salads, but it works really well as a marinade for beef.
1/2 cup olive oil
1/4 cup balsamic vinegar
2 teaspoons Kosher salt
1 teaspoon pepper
The balsamic vinegar I use is not the expensive aged stuff that costs a fortune. It’s the $9-a-bottle stuff you can find in any supermarket. Simply combine the ingredients. Marinate the meat in the fridge overnight or for several hours at room temperature. Grill.
Mardi Gras is a couple of weeks away!! Here’s a great dish from New Orleans…
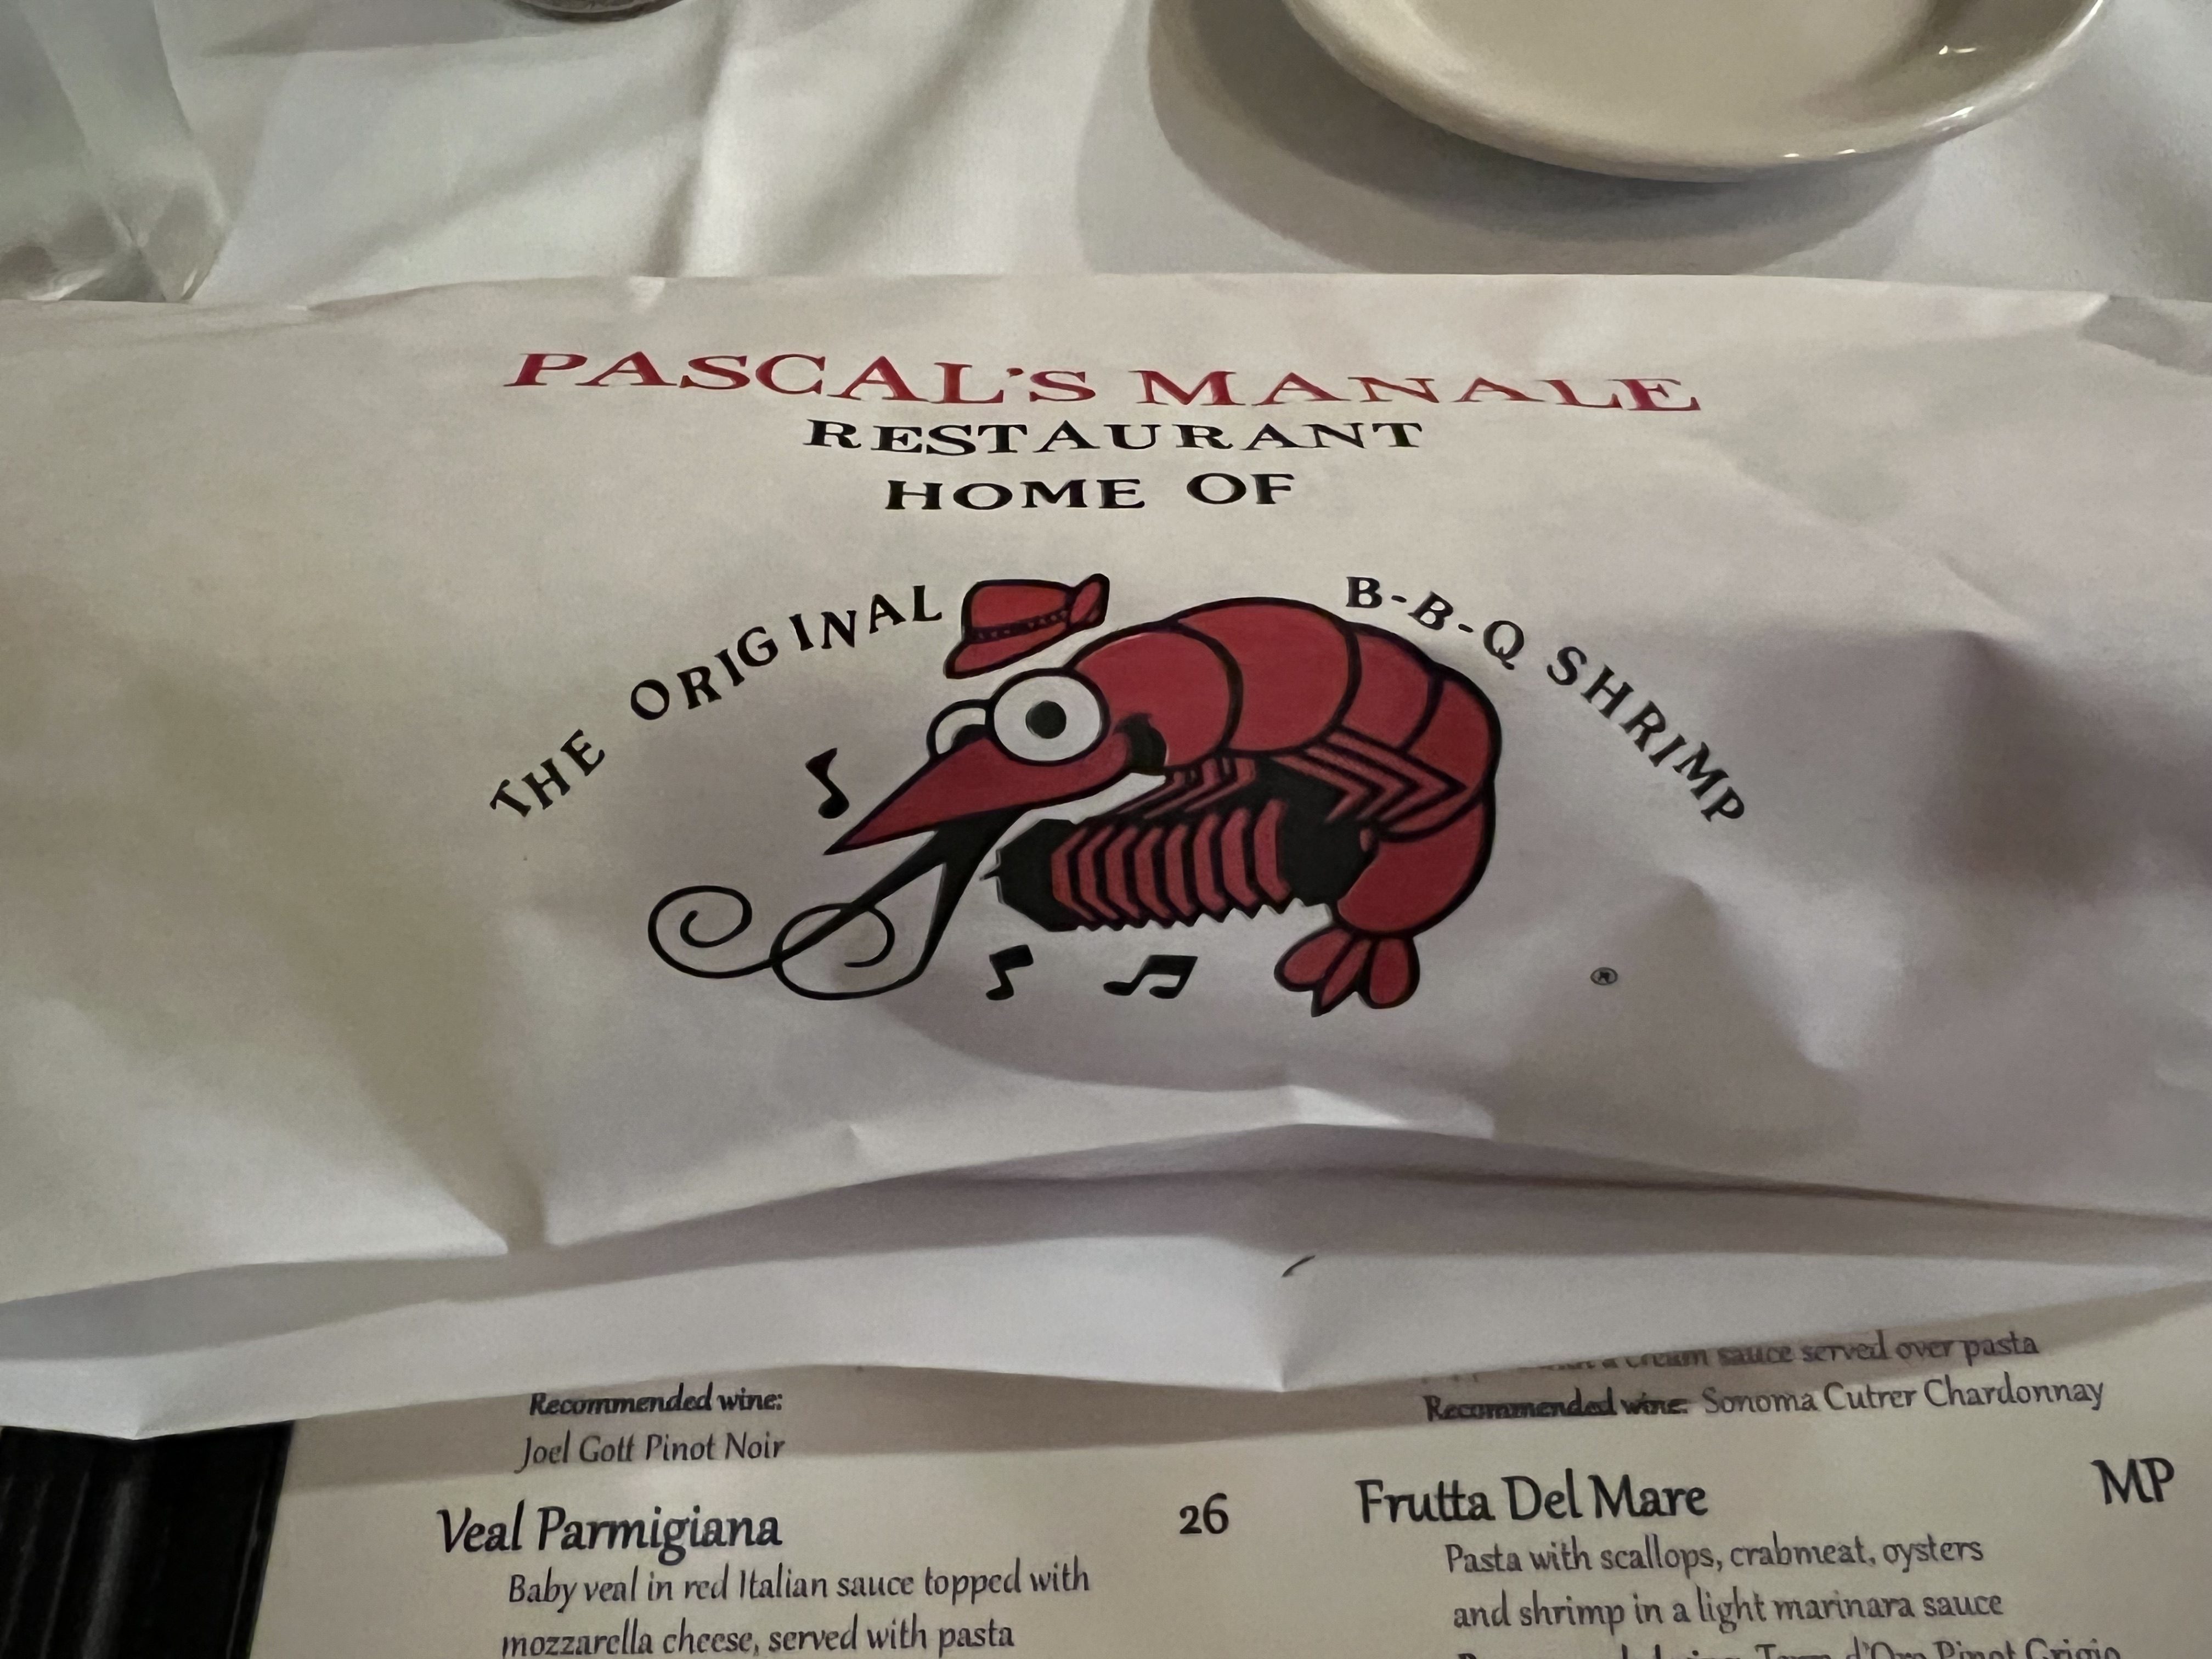
One of my favorite dishes to come out of New Orleans is Barbecue Shrimp, so on a visit to the Crescent City a couple of years ago, I had to make a stop at the place where it all started.
The first unusual thing you notice about the classic dish, New Orleans Barbecue Shrimp, is that it’s not cooked on a barbecue grill and it has no barbecue sauce.
So why the name?
Its origin goes back to the mid-1950’s, to an Italian restaurant in New Orleans called Pascale’s Manale. The story goes that a regular customer had just returned from Chicago, where he had dined on an amazing shrimp dish. He asked the chef at Pascale’sManale to try to replicate it, and what resulted was actually better than the original. And though no barbecue grill or sauce was used, it is believed that they gave it the name “BBQ Shrimp” to cash in on the backyard barbecuing craze that was all the rage at the time. Whatever they call it, I have to say that it’s worth a special trip to have the dish!
The classic New Orleans Barbecue Shrimp is served with shell-on shrimp, so you have to make a big, buttery mess of yourself as you devour it. And it’s served with plenty of crusty French bread.
At home, sometimes I’ll leave out the bread and go for rice instead. And I’ll peel the shrimp completely, using the shrimp shells to make the stock I cook the rice in.
2 lbs. large wild-caught American shrimp, peeled and de-veined 1 stick butter (4 oz.) 1/2 cup beer 1/4 cup Worcestershire sauce olive oil
For the rice…
1 cup rice (I like jasmine rice) 2 1/4 cups water or seafood stock (see below) 1 teaspoon olive oil 1/2 teaspoon Tony Chachere’s Original Creole Seasoning
Cook the rice following the directions on the package. I like using stock instead of water when I cook my rice, so after peeling all the shrimp, I toss the shells in a saucepan full of water and I boil the heck out of it, strain it, and use that stock to cook the rice. I add the olive oil and the Tony Chachere’s (available online or at your favorite food store) to the stock before cooking the rice.
To cook the shrimp, I heat a little olive oil in a large skillet over moderate heat. Then I add the shrimp, and sear them on one side (about 30 seconds) and then flip them over to sear on the other side (another 30 seconds.) I’m not trying to cook them all the way through, just get them a bit caramelized. Then I remove the shrimp from the skillet and set them aside.
(I often serve the BBQ Shrimp over the rice with broccoli. If you want to use broccoli, add a little butter and olive oil to the same pan you seared the shrimp in. Cook until the broccoli is nicely caramelized, then remove from the pan and set aside.)
In the same skillet, I heat the butter until the foam subsides. Then I add the beer, Worcestershire sauce, and 2 teaspoons of the seasoning mix. I mix well, then add the shrimp and broccoli back in the pan, simmering for about 5 minutes, stirring occasionally.
With Thanksgiving on everyone’s mind, I’d like to share my recipe for what I consider to be the perfect turkey.
I often get asked if I deep-fry my turkey for Thanksgiving. I think it’s way too messy and time-consuming for nothing better than an “OK-tasting” bird. I lived in the South for a few years, and my friends fried a turkey on several occasions. I wasn’t that impressed.
When frying, you need to find a safe spot in the yard to blast the propane-fueled fryer so you don’t burn your house down. Then you need to stand outside and freeze your butt off while it fries, while your friends and family are all indoors having cocktails. Then you need to get rid of gallons of used oil, and clean up a huge mess at the end of it all. And through all this, you need to make sure the oil is at the right temperature so you don’t get a scorched turkey on the outside and a raw turkey on the inside.
No, thanks.
I get great results by cooking my turkey in my Weber grill. I’ve cooked it this way every Thanksgiving for about 30 years. The standard Weber allows me to cook up to a 15 lb. bird–big enough for my purposes–and it comes out crispy, smoky and delicious. If you’re afraid to try this for the first time at Thanksgiving when it really matters, I understand. That’s how I did it years ago, and I never looked back.
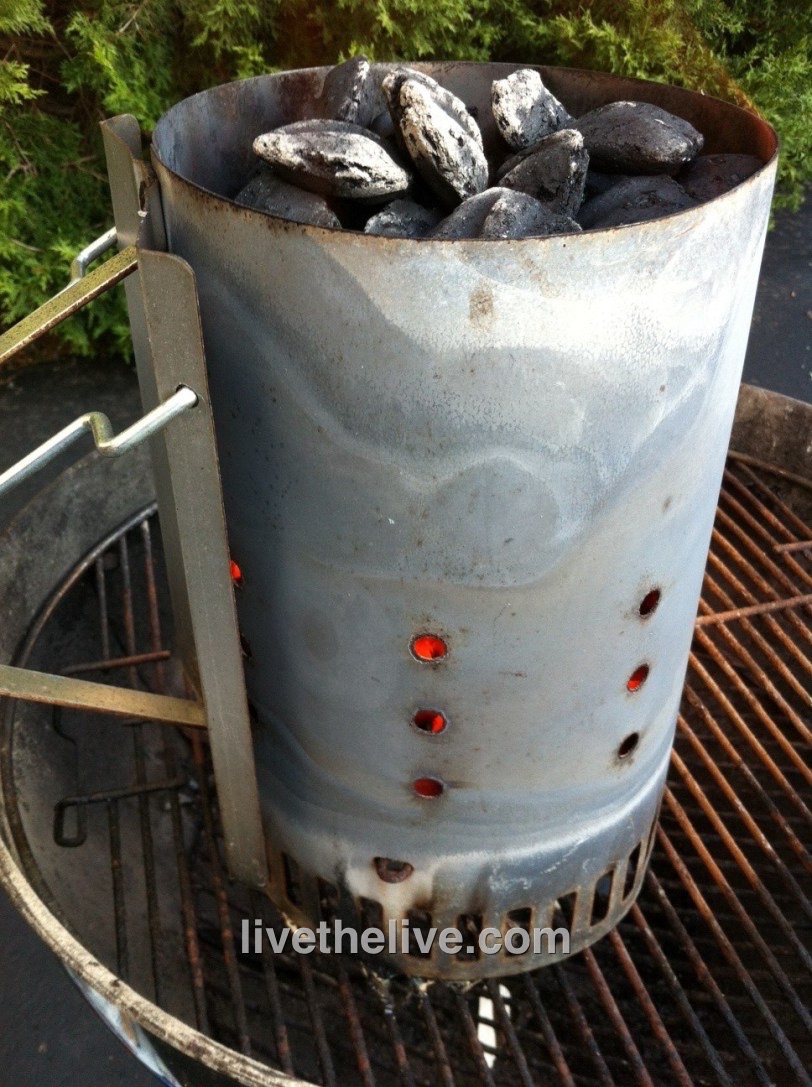
The charcoal chimney with hot coals awaits.
Although I’ve stopped using charcoal briquettes for basic grilling a long time ago, and now strictly use natural hardwood charcoal, this recipe works best with Kingsford briquettes. They burn slowly and evenly. I never use lighter fluid…I always start my fire with a few pieces of crumbled newspaper under a charcoal chimney.
The tools you need:
A Weber grill, with the dome top Kingsford charcoal briquettes (don’t t use Match Lite or other pre-soaked briquettes)
A charcoal chimney, easily found at Home Depot or Lowe’s
A heavy-duty disposable aluminum pan
Ingredients:
Whole turkey, up to 15 lbs., thawed and brined (see my previous blog about brining a turkey)
Olive oil (to rub on the turkey)
2 yellow onions, chopped
4 stalks of celery, chopped
½ lb. (2 sticks) of unsalted butter, melted
1 tablespoon granulated garlic
1 tablespoon granulated onion
2 tablespoons salt
1 tablespoon pepper
Spreading the coals away from the center of the grill.
If you want stuffing, it’s always wise to make it separately and cook it separately.
Light 8 to 10 lbs. of charcoal in the grill…depending on the size of the turkey and how cold it is outside.
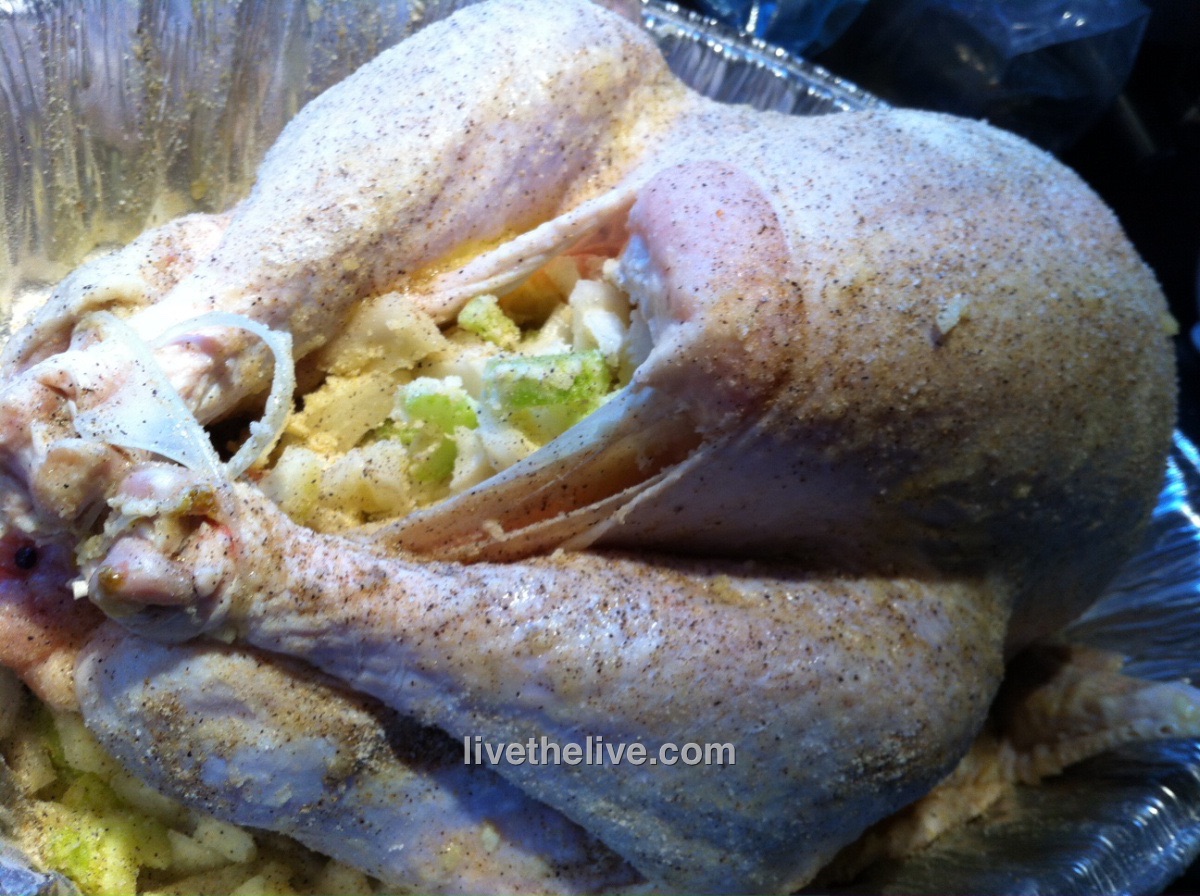
If you brined the turkey first, you’ve already removed the giblets. If you’re not brining, go ahead remove the giblets from the thawed bird now. Place the turkey in the aluminum pan.
In a small bowl, mix the granulated garlic, granulated onion, salt, and pepper. (Add any other seasonings you might like.)
Coarsely chop the onions and celery. Place them in a another bowl. Mix them with the melted butter and 1/3 of the garlic/onion/salt/pepper mixture.
Place a small handful of this onion and celery “stuffing” mixture in the neck cavity of the turkey. Place the rest in the body cavity (where the stuffing would usually go.) You can fasten the bird with turkey skewers if you like. This “stuffing” is strictly to flavor the turkey…you don’t eat it!
The rubbed, stuffed and seasoned bird.
Rub the outside of the entire turkey with the olive oil and sprinkle the rest of the garlic/onion/salt/pepper mixture on the outside of the bird. Make sure you get the bird on the bottom as well.
When the coals in the grill have ashed over, spread them to the outside edges of the Weber grill equally. Put the cooking grill rack in place. Place the aluminum pan with the turkey in the center of the grill, keeping it away from the direct heat of the coals. If you’re using a meat thermometer, insert the probe into the thickest part of the breast, being careful not to hit the bone. Place the lid on the grill. (You may need to bend your aluminum pan a bit.) Open the vents on the bottom of the Weber as well as the vents on the lid. It’s important to get air circulating!
My old-school meat thermometer calls me from as far as 100 feet away! (Newer thermometers are wireless and talk to your smart phone.) Time to join family and friends for a cocktail!
No basting is necessary.
Now here’s the tough part: DO NOT OPEN THE GRILL TO CHECK ON THE TURKEY! (If you must look, shine a flashlight into the vent holes on the lid to take a peek at the pop-up timer, if there is one.) The whole point is to keep the heat inside the kettle. You’ll know your turkey is done when no more smoke or heat rises from the grill, and the turkey inside stops making sizzling noises. The internal meat temperature should be around 165 degrees.
And believe it or not, a 15-lb. turkey will be cooked in about 2 hours!
If you’re using a meat thermometer (recommended), remove the turkey when it hits about 155 degrees, wrap it in foil, leaving the thermometer still in the bird, and let it rest at least 20 minutes. The temperature will go up a bit to 165 or even a little higher, before it starts going down.
Sometimes the best ideas come from out of nowhere.
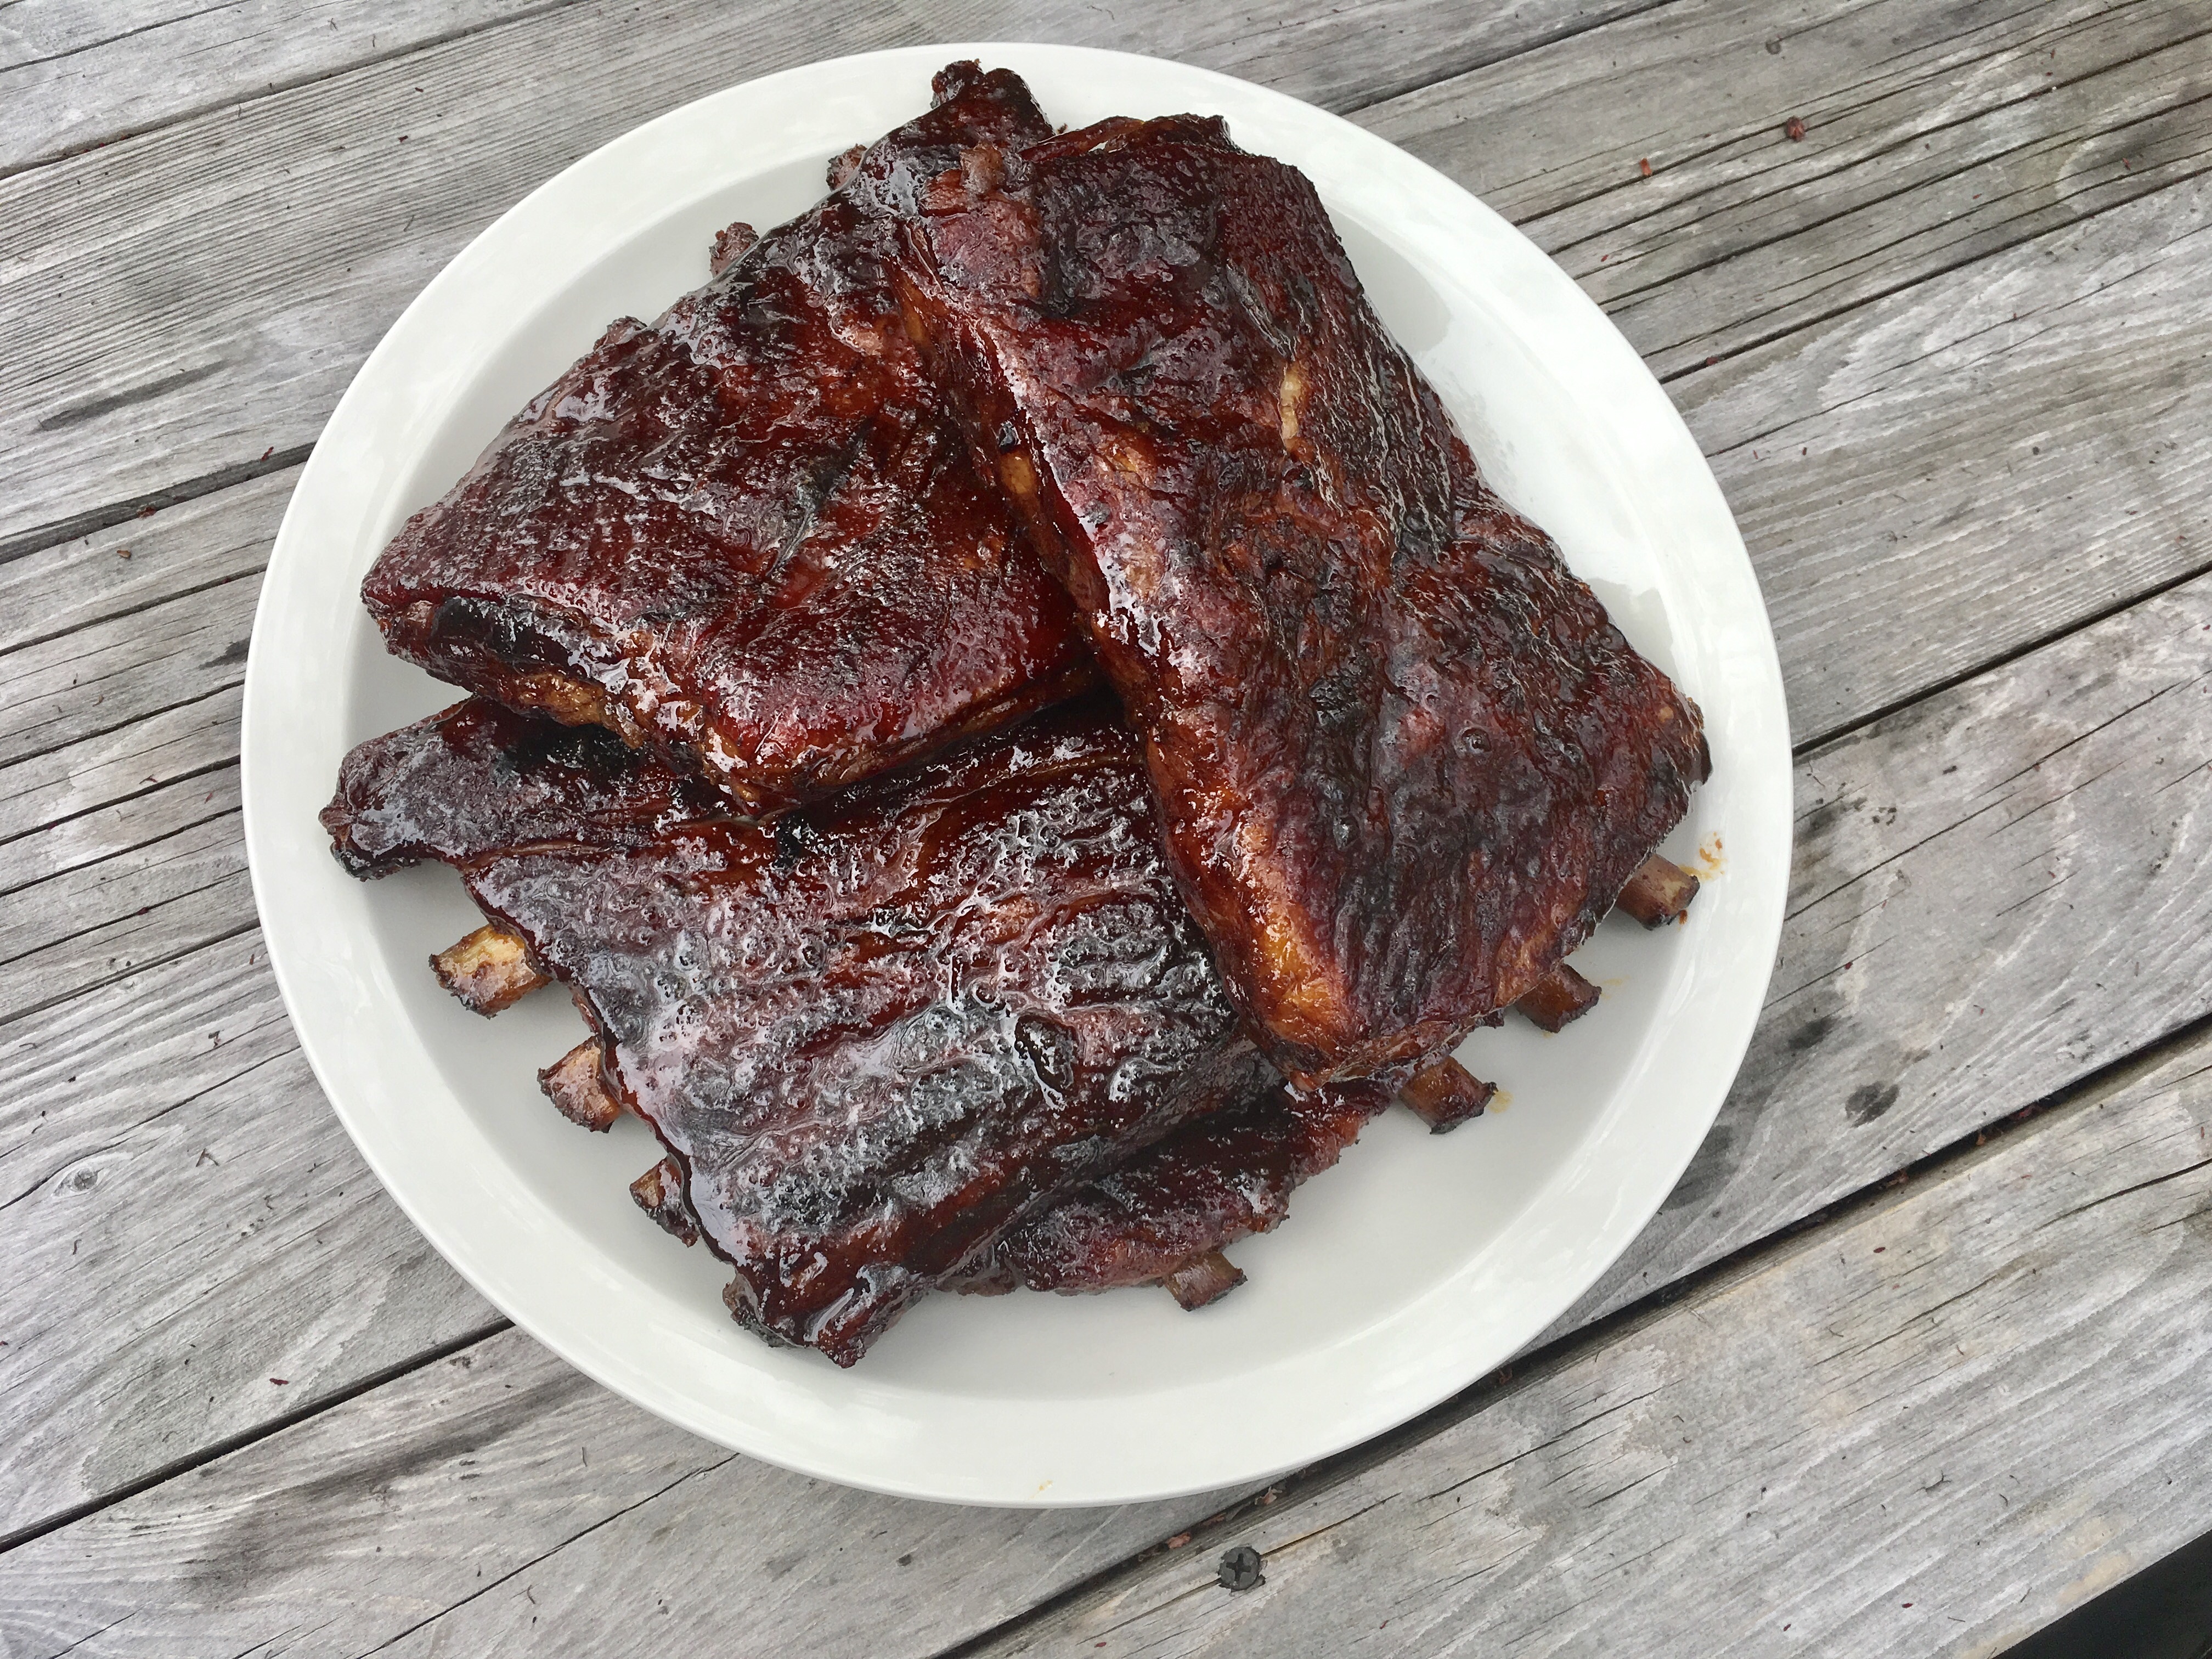
I had 5 lbs. of beautiful St. Louis-style heritage Berkshire (also known as Kurobuta) pork ribs thawing in the fridge, and I knew I wanted to create a new sauce or glaze with them, but I was feeling less than inspired. Our food-loving friends, Don and Johanna, showed up at our door with a gift they bought in Maine, at a shop called LeRoux Kitchen. It was a bottle of maple balsamic vinegar. It smelled wonderful…and tasted even better! I knew I had what I was looking for.
I used a smoker to make these ribs, but if you don’t have one (or just don’t want to bother with one), the ribs are just as awesome when baked in the oven.
You can easily make your own maple balsamic vinegar by combining a 1/2 cup of balsamic (not the super-expensive kind, but the $9-a-bottle kind) with 1 tablespoon of maple syrup. Add more or less maple to taste.
Yup…my old smoker…she’s been used a few times!
I originally used an electric digital smoker made by Masterbuilt. That beauty (above) has now made way for the Ninja Outdoor Woodfire Pizza Oven, which is also a smoker. I like the fact that I can set the temperature and time, and not have to constantly watch it. It has a side chute where I can add hickory smoking pellets when I want, and the results are consistent. I suppose some grilling fanatics might say I’m cheating, but a digital smoker allows me to live a life, hang out, do some yard work, whatever. I don’t have time to babysit.
I chose to smoke my ribs for about 4 hours in the smoker, lightly seasoning them first with Lawry’s Seasoned Salt, adding hickory chips to the smoker only once to give them a “light smoke.”
To avoid drying out the ribs, after a few hours of smoking, I like to brush them with a glaze, wrap them in foil, and then put them back in the smoker…or even in the oven. The glaze flavors the meat and also adds a little steam that tenderizes it.
Brushing with glaze, then wrapping in foil.
5 lbs. pork ribs (I get St. Louis-style Berkshire pork) Lawry’s Seasoned Salt
1 cup water
1/2 cup maple balsamic vinegar (OR 1/2 cup balsamic vinegar + 1 tablespoon maple syrup)
1/4 cup brown sugar
1/2 teaspoon granulated onion
1/2 teaspoon granulated garlic
1/2 teaspoon cayenne pepper sauce (I like Franks’ Red Hot)
Prepare the ribs by removing the inedible skin on the back of the rack. The easiest way to do this is to cut a little “tab” of skin, then pull it with your fingers. Holding the skin with a dry paper towel will help your grip. I cut the racks in half to fit my smoker.
Season the ribs lightly with Lawry’s Seasoned Salt on both sides and place them into a 250° smoker (or oven, if you don’t have a smoker) for 3 hours, smoking lightly with hickory wood. (Skip the hickory if you’re using the oven.)
In a saucepan over high heat, combine the water, maple balsamic vinegar, brown sugar, onion, garlic, and cayenne pepper sauce. Stir well, and let it come to a boil. Let it reduce by half, leaving it still watery. Set it aside.
After 3 hours, remove the ribs from the smoker (or oven), placing them on a sheet of aluminum foil. (I use Reynold’s Non-Stick Foil, since the glaze will be sticky.) Brush both sides of the ribs with half of the glaze, and place the ribs meat-side-up on the foil before sealing the it around the ribs. Place the aluminum foil packets on a baking sheet, then into a pre-heated 250° oven (or back in the smoker.)
Remove the ribs from the oven or smoker after 1 hour. Open the foil packets so that the ribs are now exposed. Brush the top of the ribs one more time, then put the foil back over the top and cook for 1 hour more.
I grill year-round. I’ll stand in 3 feet of snow to get smoked ribs just right, if I have to. Through years of tireless experimentation, I’ve come up with a barbecue sauce that I can be proud of. I prefer a slightly sweet and tangy barbecue sauce, and it works really well with pork or chicken.
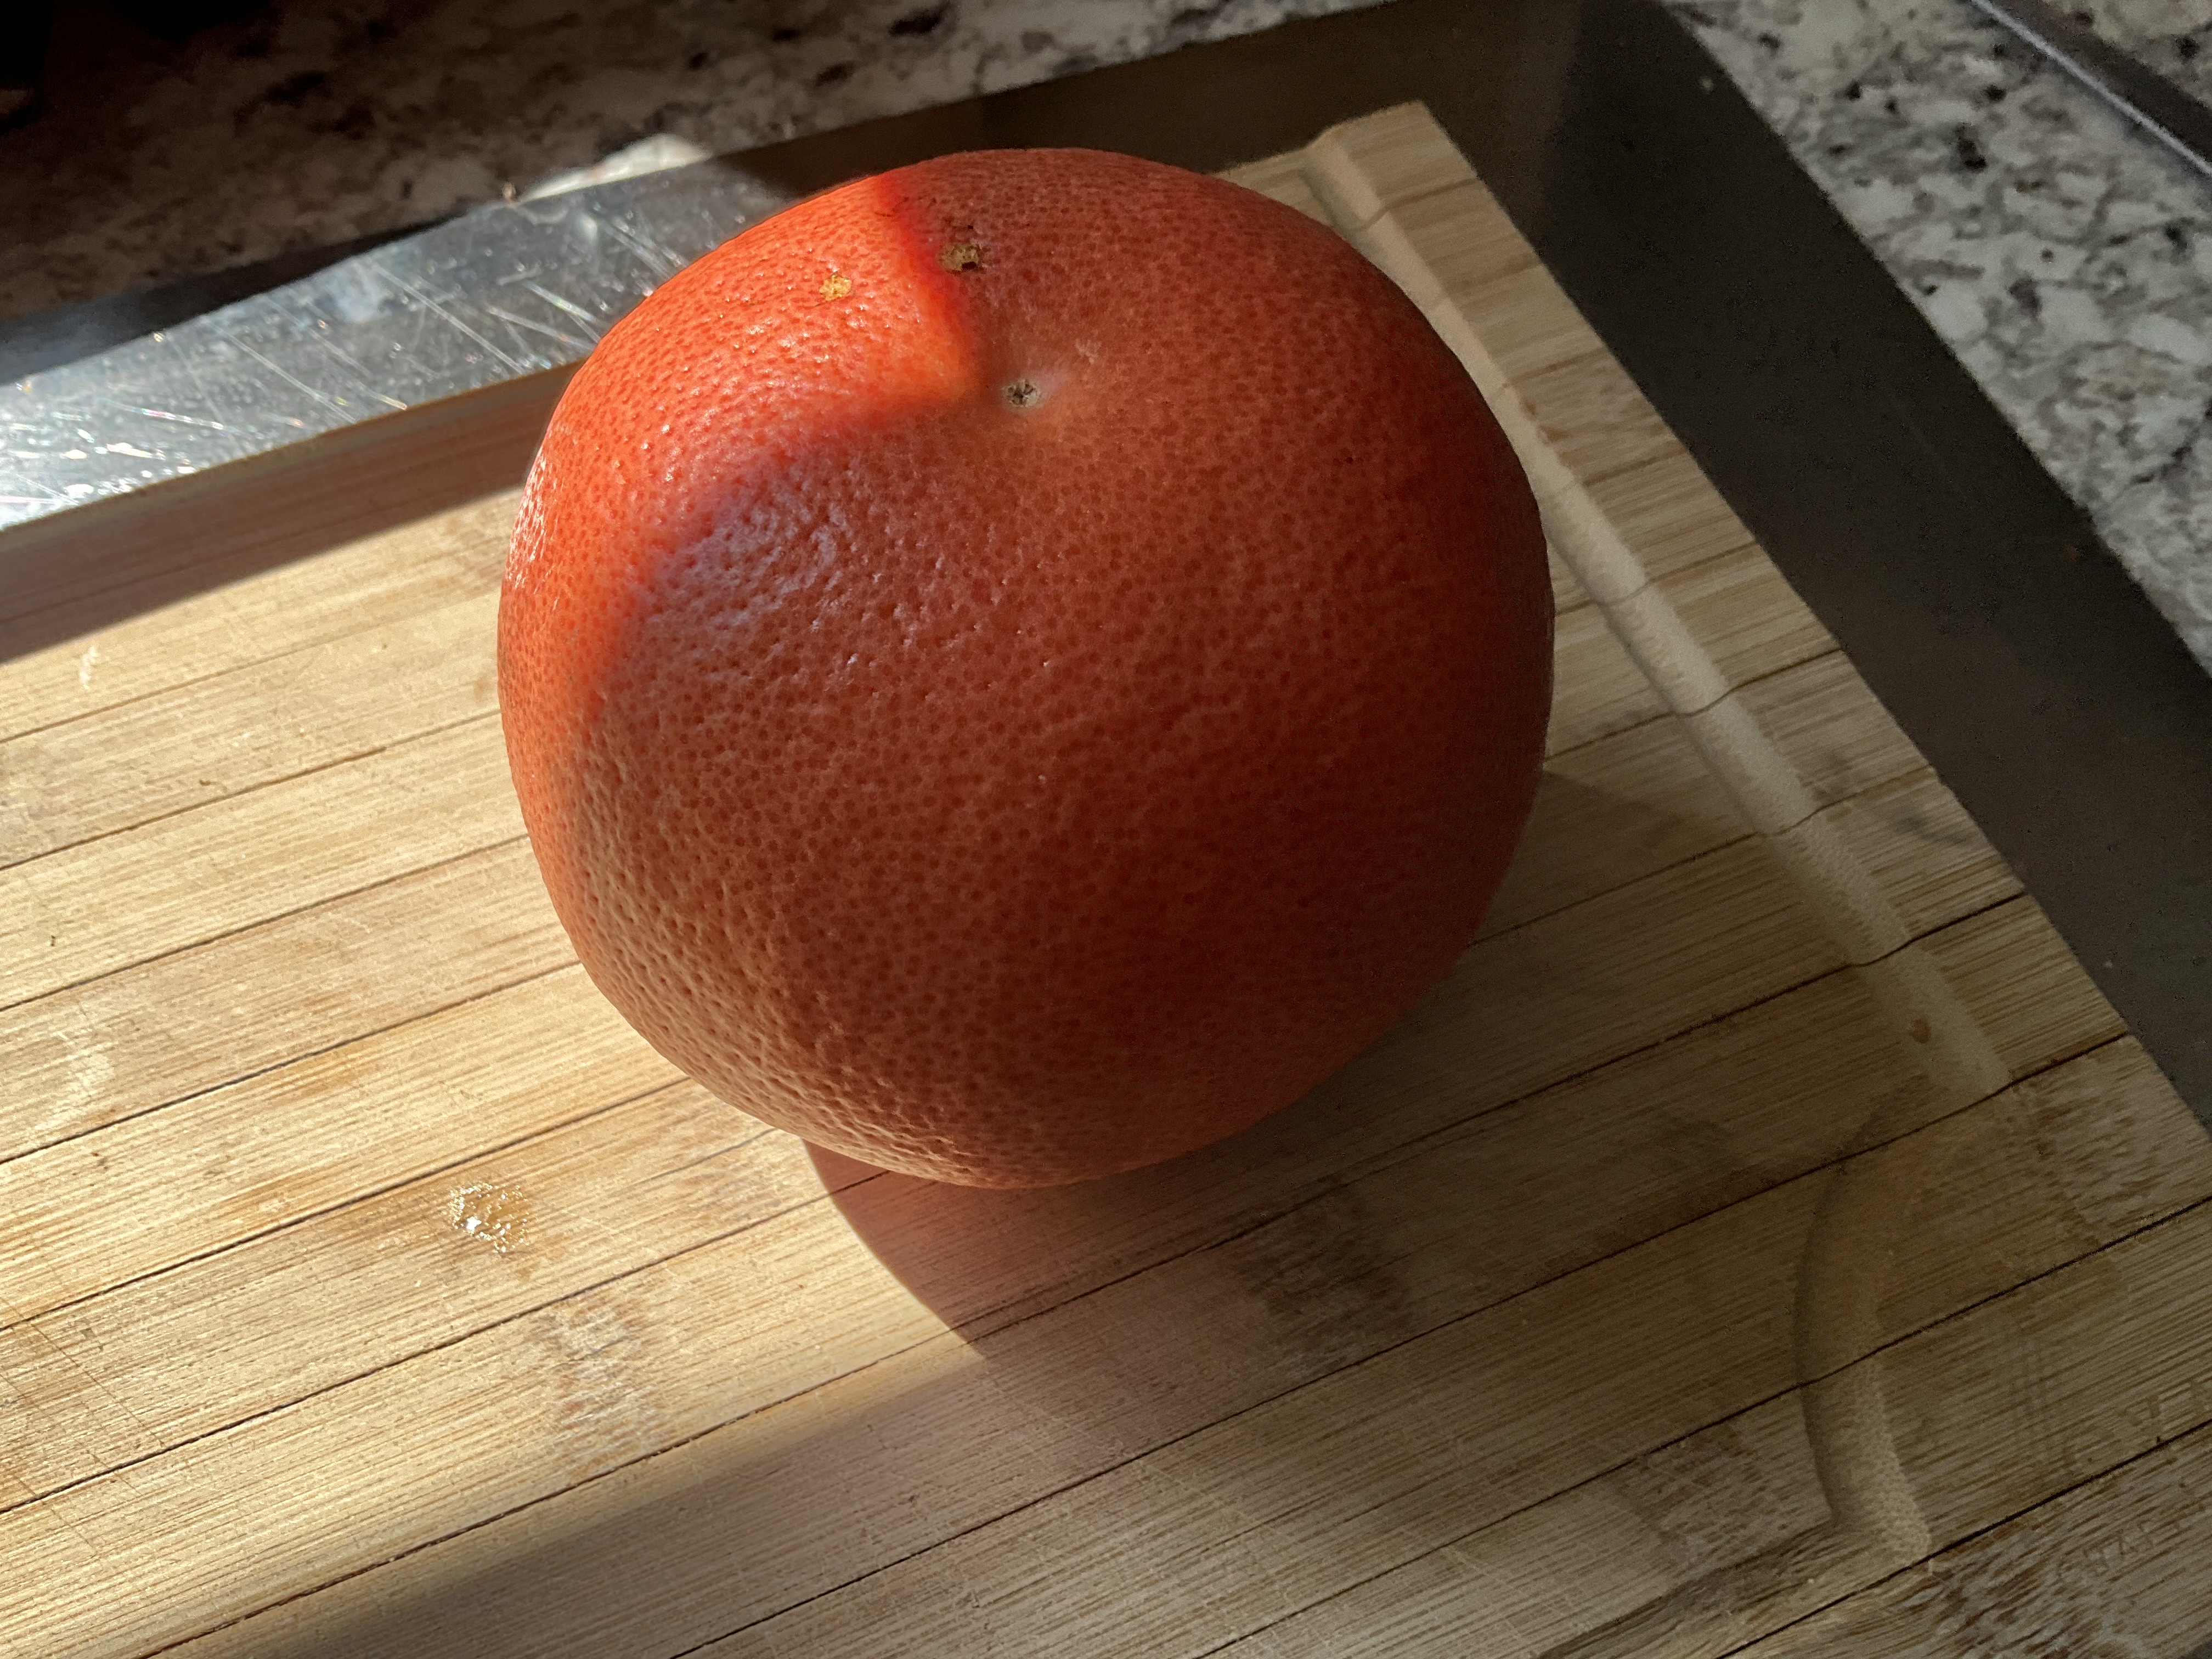
What makes this sauce special is the citrus. I originally used lemon juice for this recipe and it was good. Lime juice was better. Adding lime zest: even better than that. I tried orange juice and zest, even Meyer lemon. But the Big Daddy of ’em all was grapefruit. I was craving my barbecue sauce one day and only had a grapefruit in the fridge. I thought: how bad could this be? Turned out to be the perfect foil to the sweetness of the brown sugar and ketchup.
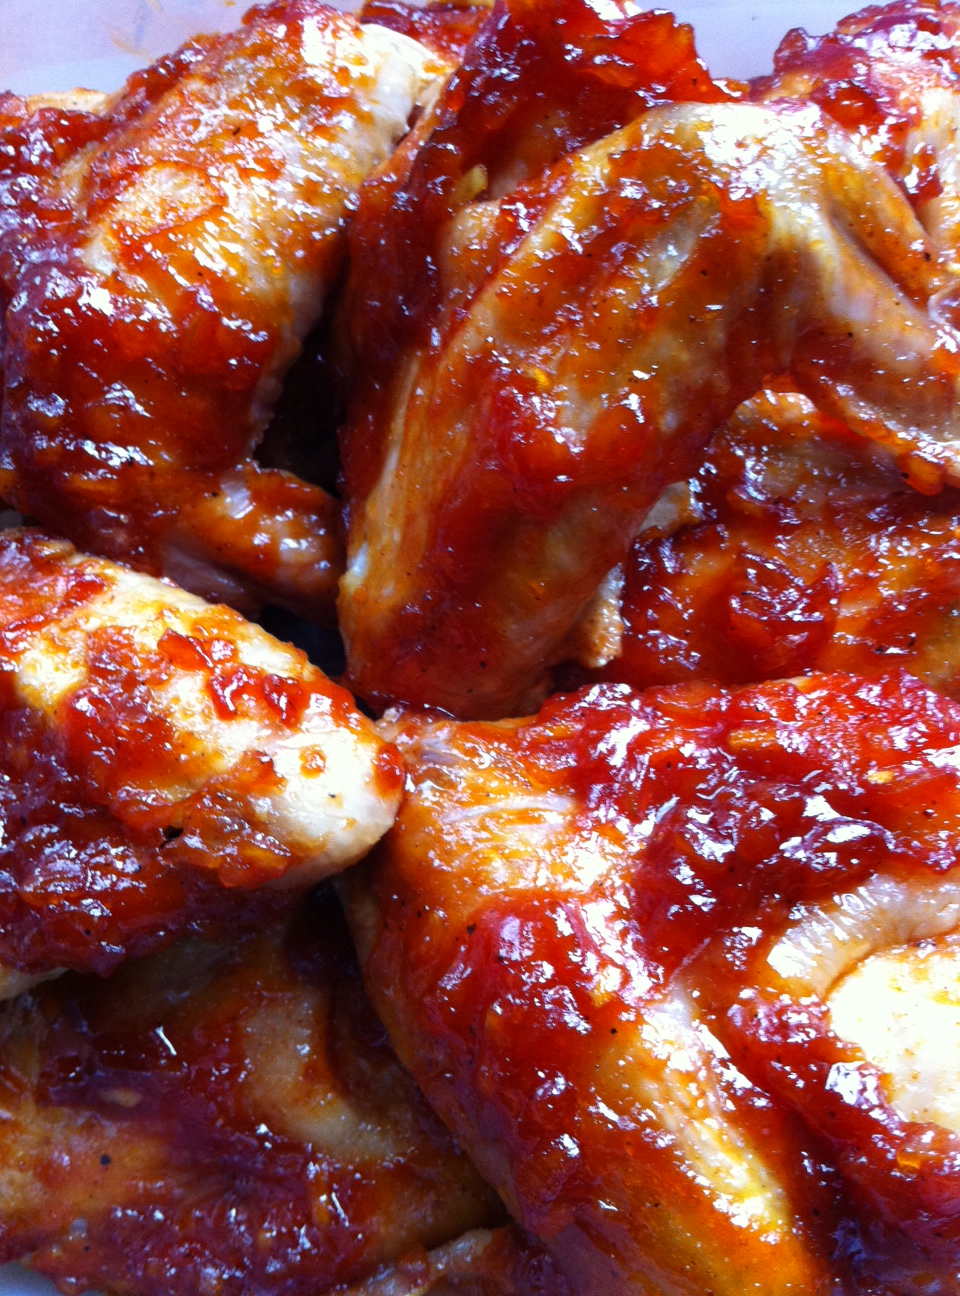
Try this sauce on your next rack of ribs, batch of chicken wings, or even a whole bird. Cook the meat almost all the way through, brushing the sauce on for the last 20 minutes so that the sugars don’t burn. Then just try to stop eating it!
GRAPEFRUIT BARBECUE SAUCE
1 cup ketchup
1/2 cup firmly packed brown sugar
Juice and zest of 1 grapefruit
3 tablespoons unsalted butter
1 teaspoon granulated onion
1 teaspoon cayenne pepper sauce, like Frank’s Red Hot
1 teaspoon Worcestershire sauce
1 teaspoon granulated garlic
1/4 teaspoon black pepper
(no salt)
Combine all the ingredients in a sauce pan. Bring it to a boil and then simmer for about 20 minutes on low, until it’s slightly thickened.
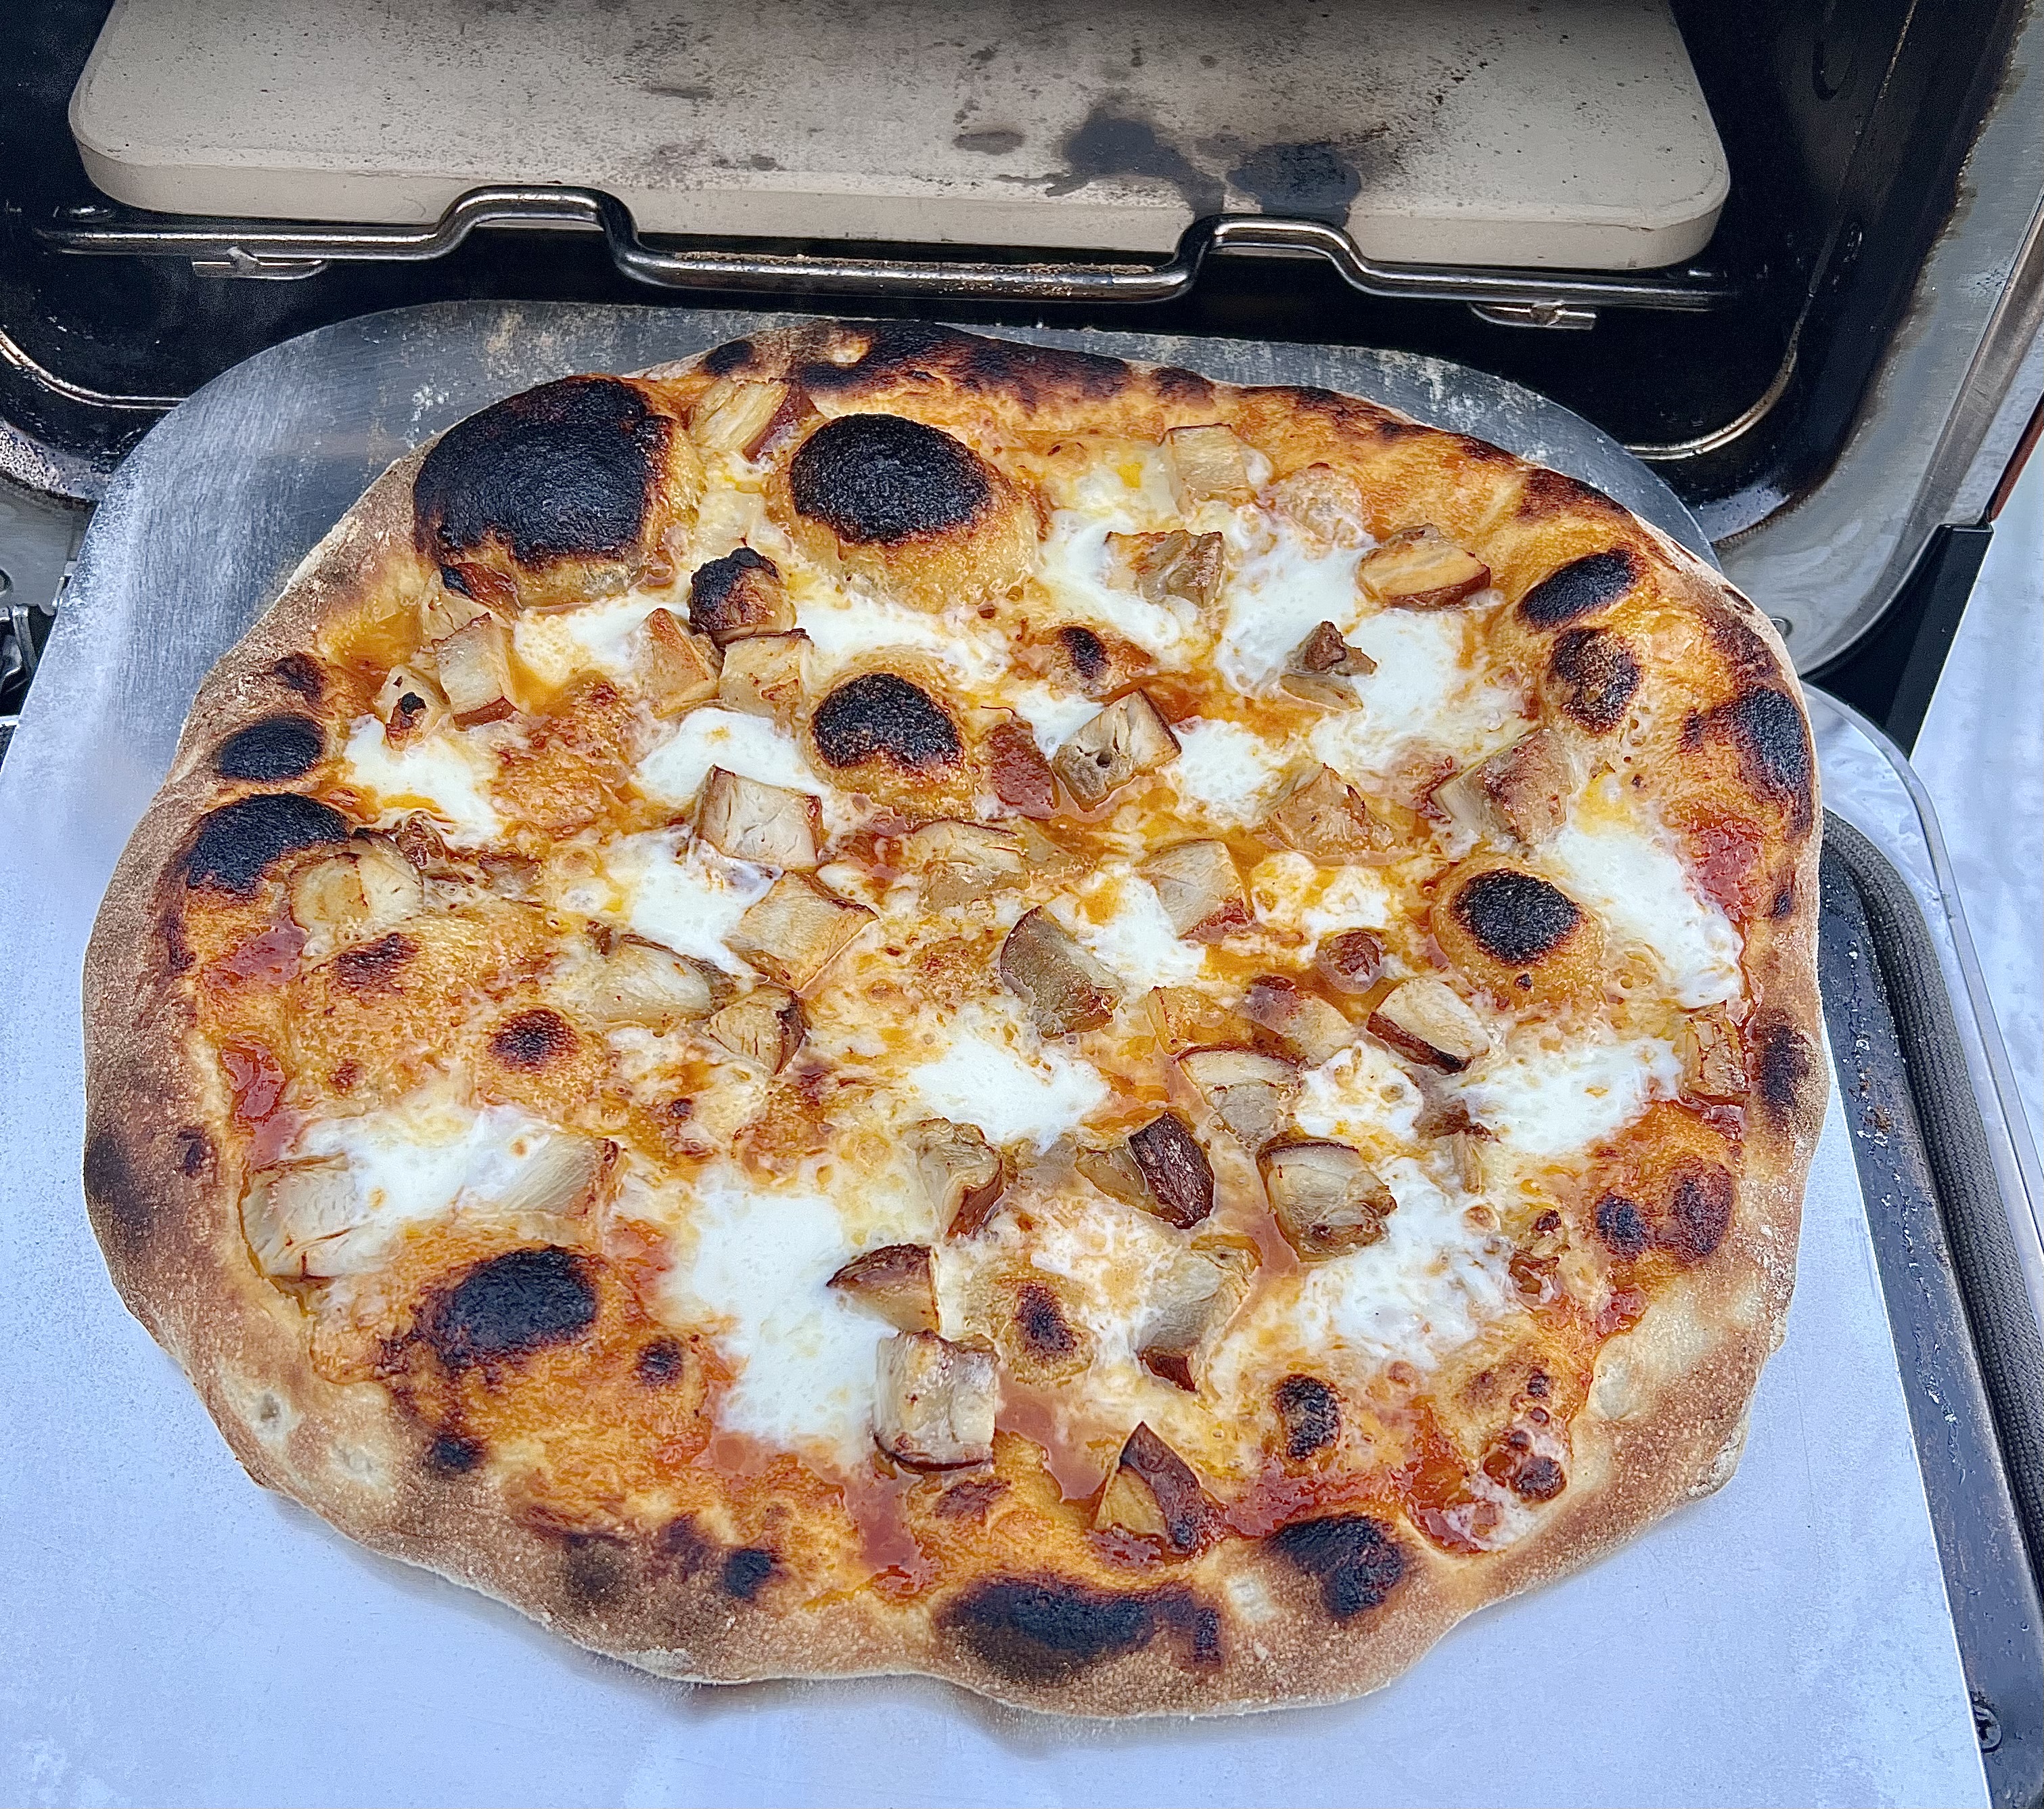
It’s almost impossible to imagine that there would be any leftovers, but the last time I made a batch of boneless skinless barbecued chicken thighs with the sauce, we had a little bit left over. So we decided to make a barbecued chicken pizza with it the next day.
Fresh pizza dough, some of the barbecue sauce, a combination of sharp cheddar and mozzarella cheeses, and of course, the barbecued chicken thighs.
I grill year-round. I’ll stand in 3 feet of snow to get smoked ribs just right, if I have to. Through years of tireless experimentation, I’ve come up with a barbecue sauce that I can be proud of. I prefer a slightly sweet and tangy barbecue sauce, and it works really well with pork or chicken.
What makes this sauce special is the citrus. I originally used lemon juice for this recipe and it was good. Lime juice was better. Adding lime zest: even better than that. I tried orange juice and zest, even Meyer lemon. But the Big Daddy of ’em all was grapefruit. I was craving my barbecue sauce one day and only had a grapefruit in the fridge. I thought: how bad could this be? Turned out to be the perfect foil to the sweetness of the brown sugar and ketchup.
Try this sauce on your next rack of ribs, batch of chicken wings, or even a whole bird. Cook the bird almost all the way through, brushing the sauce on for the last 20 minutes so that the sugars don’t burn. Then just try to stop eating it!
GRAPEFRUIT BARBECUE SAUCE
1 cup ketchup
1/2 cup firmly packed brown sugar
Juice and zest of 1 grapefruit
3 tablespoons unsalted butter
1 teaspoon granulated onion
1 teaspoon cayenne pepper sauce, like Frank’s Red Hot
1 teaspoon Worcestershire sauce
1 teaspoon granulated garlic
1/4 teaspoon black pepper
(no salt)
Combine all the ingredients in a sauce pan. Bring it to a boil and then simmer for about 20 minutes on low, until it’s slightly thickened.
If you like a less sweet, more vinegary style to your barbecue sauce, this is the one. How could a sauce that’s inspired by what most people claim to be the best barbecue joint in the USA, Franklin’s Barbecue in Austin, Texas, be bad? People line up early in the morning and wait as much as four hours for a slab of brisket from this place. I’ll get there one day. In the meantime, I have the sauce.
use this sauce on chicken, pork, or beef. The vinegar really cuts through the fat.
2 cups ketchup
3/4 cup water
6 tablespoons cider vinegar
6 tablespoons white vinegar
6 tablespoons brown sugar
3 tablespoons Worcestershire sauce
1 tablespoon chili powder
2 teaspoons salt
2 teaspoons black pepper
1 1/2 teaspoons cumin
Mix all the ingredients in a saucepan and simmer until the flavors have blended, about 20 minutes. Remove it from heat and cool to room temp. If you store it in an airtight container in the fridge, it’ll stay good for a couple of months.
Fourth of July weekend means it’s time to do some serious barbecue!
When I smoke my brisket low-and-slow in my smoker, I use a coffee steak rub that I developed a couple of years ago. It gives a deep, rich crust to the meat that is just fantastic.
Low and slow is the way to go! Deliciously smokey and juicy.
Depending on the size of the brisket, you might need to double the recipe. This is for a brisket that weighs about 9 pounds.
3 tablespoons brown sugar
1 tablespoon Kosher salt
1 tablespoon ground coffee (use your favorite)
1 teaspoon granulated garlic
1 teaspoon granulated onion
1 teaspoon unsweetened cocoa powder
If the brisket is frozen, I like to thaw it a couple of days ahead of cooking it, rubbing it down with the coffee rub, and placing it in the fridge for about 24 hours to rest. I bring it out about an hour before smoking, to let the meat come back to room temperature, and then I place it in the smoker for about 12 hours at 225 degrees, smoking it with hickory wood.
When it’s done, I remove it from the smoker, and wrap in foil and let it rest at least 30 minutes before slicing. If I’m not serving it right away, I place the wrapped brisket in the oven at the lowest setting, about 150 degrees, just to keep it warm.
When I’m ready to serve, I always slice the brisket on the bias, against the grain of the meat.
I find little or no difference between the stove in my kitchen and an outdoor gas grill…so I don’t own one. I can make a perfectly delicious steak by searing it in a cast iron pan on the stovetop, then finishing it in a hot oven. So, for me, if the real reason for outdoor grilling is flavor, nothing can replace a hardwood charcoal grill.
Besides the quality and source of my beef, wood and smoke are what make the difference between a good steak and a great steak.
I know the #1 argument for going with gas over hardwood charcoal is time. “It takes too long to start a charcoal grill.” That’s completely untrue. It takes no more time to light a charcoal fire than it does to start up a gas grill.
Of course, it starts with the grill itself. The classic Weber is still an awesome choice. For larger cooking needs, I also have a Primo ceramic grill.
Then I get a bag of hardwood charcoal. I’m not talking charcoal briquets, like Kingsford, that have a ton of additives in them. And I’m definitely not talking about Match Light. I’m talking pure hardwood charcoal, easily found in supermarkets and home stores.
Next, a charcoal chimney. It’s a metal tube with a handle and a grate at the bottom. I crumble a couple of sheets of newspaper into the bottom, pour charcoal into the top, light it, and I have hot coals in 10 minutes without lighter fluid.
And I NEVER use lighter fluid! Why spend good money on a great steak only to make it taste like gasoline?
The variety of wood chips available for smoking is another flavor factor when it comes to grilling with charcoal. My personal favorite is hickory, especially when I’m cooking pork or chicken. But apple, cherry, oak, mesquite: they all impart their own unique flavors. And they’re all available in most home stores where you find all the other barbecue gear.
Although I have an electric smoker for those low-and-slow jobs, like a big ol’ brisket or pork shoulder, I don’t need it when grilling a steak. I simply soak some wood chips in water for about a 1/2 hour before grilling (I’ve found that hot water speeds the process up), drain the water, and then sprinkle the moist chips on the hot coals in my grill. I throw the meat on the grill, close the lid (opening the vents, of course) and off we go.
So now, in 10 minutes, I’ve got a grill that’s ready to cook a steak with…about the same time as gas.
If you say: “I don’t cook with charcoal because it’s so messy!” …I honestly don’t know if you and I can be friends.
Because I’m using a small amount of hardwood charcoal for the average dinner, I don’t have to clean out my grill every time I use it. After a while, yes, some ashes pile up in the bottom of my grill and I have to dump them. But because they’re pure wood ashes, I can dump mine into my strawberry or raspberry patch. They love the stuff.
You still have to clean a gas grill after a while, and it always runs out of propane halfway through cooking when you have guests over for dinner. So where’s the convenience in that?
Charcoal grills give you everything you could ask for: low maintenance, ease of use–no propane tanks, valves and igniters–real wood flavor, not lava rocks, and the thrill of cooking meat over a real fire, bonding with the caveman in you. Grab a beer–or even better: a bourbon on the rocks–and start grilling!