Archive for the ‘Carnivore!’ Category

I get requests to publish my holiday recipes every year, so, with the countdown to Turkey Day already ticking, let’s get it started…

No matter what method you prefer to cook your bird, brining it beforehand will make it so much tastier and juicier. You really need to try it…and it’s easy to do.

It’s basic high school science: the brine has a greater concentration of salt and water than the molecules of the protein (in this case, a turkey) that is soaking in it. By simple diffusion, the protein molecules suck up the salty water and keep it. When you cook the meat, some of the water evaporates, but the meat still has far more moisture in it than it would have without the brine soaking, and the result is a moister, more delicious bird.

Some people use giant syringes to inject their turkeys with crazy solutions, but I think that the old way is still the best when it comes to brining. Get a big pot, fill it with the brine, and soak the bird in it. Done.

Here’s my tried-and-true turkey brining recipe. Once the brining is done, you can cook the turkey whatever way you like best. I use a method where I grill it inside a Weber grill with charcoal. It comes out smokey and absolutely amazing. I’ll have that info in my next blog.

You must brine a thawed bird, so use your favorite method to thaw your turkey so that it’s ready on Thanksgiving morning. Brining can take 4 to 6 hours, so start early!

For this recipe, you’ll need a large pot to boil the brine ingredients, and then a larger pot to hold the turkey submerged in the brine. I use a turkey no bigger than 15 lbs. for two main reasons: there are only 3 people in our family, and the Weber grill I will later use can’t handle anything bigger.


image

1 gallon of water
2 onions
3 carrots
3 stalks celery
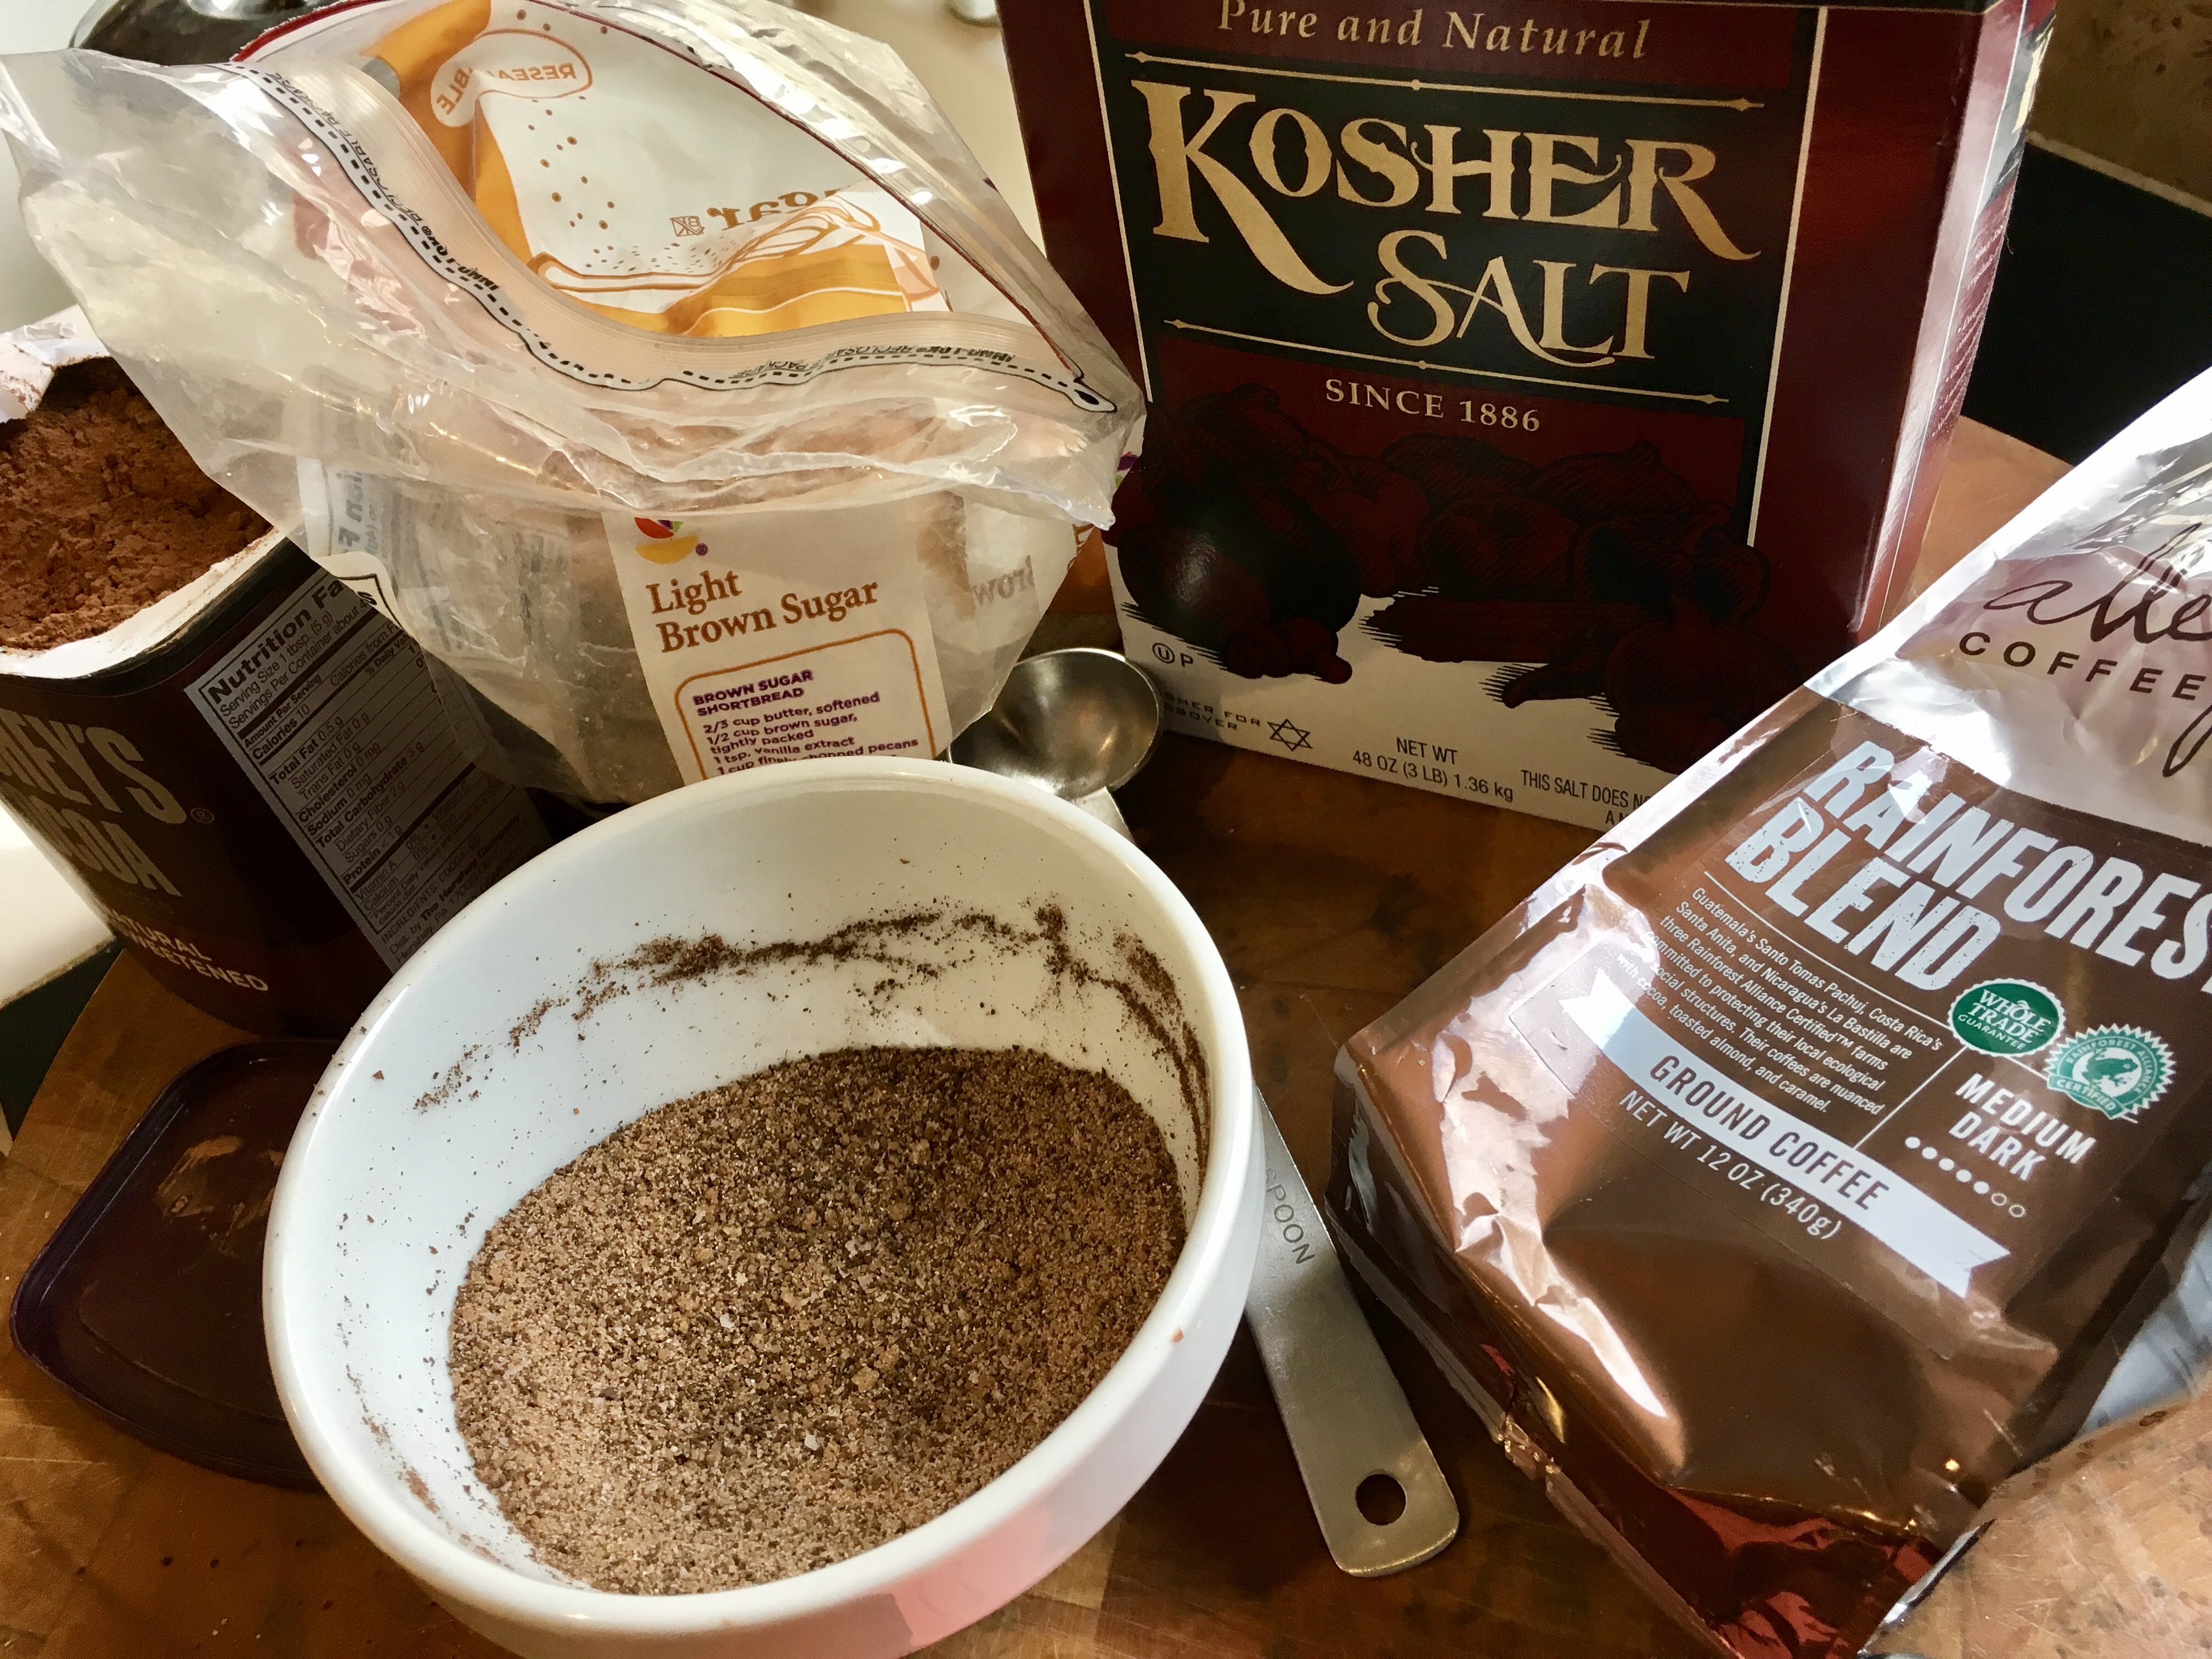
1 cup Kosher salt (I use Diamond Crystal…see below)
1 tablespoon black peppercorns
1/2 cup light brown sugar
1 1/2 teaspoons whole allspice
4 bay leaves
1 gallon of ice water
14–15 lb turkey, thawed

Pour the first gallon of water in a large pot. Quarter the onions, carrots and celery (no need to peel them) and add them to the water. Add the salt, black peppercorns, brown sugar, allspice, and bay leaves. (I specify Diamond Crystal Kosher salt because it weighs differently than other salts. For example, Morton Kosher salt is much heavier for the same 1-cup measurement, so the brine will be saltier.)

Let the pot come to a boil for a few minutes. Remove it from the heat and let the brine cool down to room temperature.

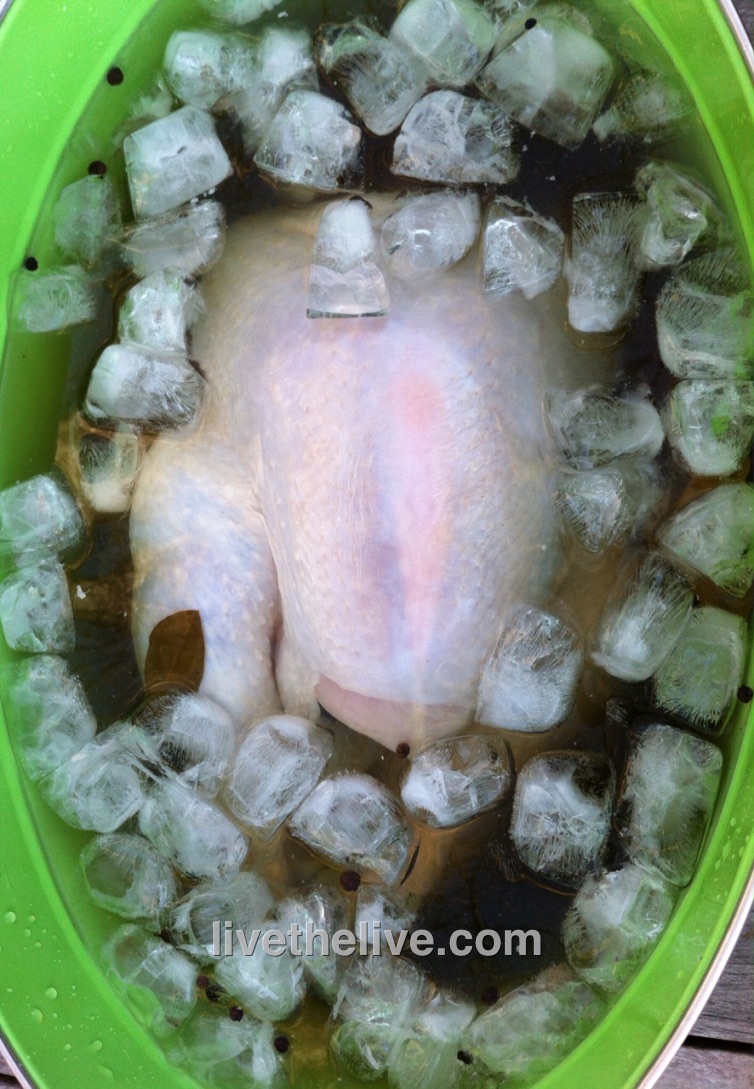
Remove the giblets from the thawed turkey and place the bird in a container just big enough to hold it and 2 gallons of liquid.

Pour the now-cooled brine over the turkey, then pour in the gallon of ice water.

Make sure the turkey doesn’t float up by placing a plate on top. Put the turkey container in the fridge (or a cold garage or basement) for 4 to 6 hours, flipping the turkey over in the container halfway through.

After 4 to 6 hours, drain the turkey, rinsing off any spices that stuck to it, then pat it dry with paper towels. Now it’s ready to cook, using your favorite recipe.

If I’m brining a turkey for Thanksgiving, I do the brining in the morning and the turkey is ready to cook by early afternoon. And grilling it on a Weber grill only takes a couple of hours. It’s fast, requires no basting, and is absolutely delicious! That’s next time…

I’ve got to post this before October ends, since it’s #NationalPorkMonth! Time to get piggish!

Few slabs of meat are as amazing as a pork butt or shoulder, rubbed with a special dry rub, then slow-smoked for 8 hours (or more), pulled and slathered with amazing barbecue sauce. It takes time, but it’s not really that hard to do.

My electric smoker allows me to set the time and temp and walk away.

Here’s how I do it…

First, I get a hunka pork. The kind of pig I get matters to me, so I buy a heritage breed, like Berkshire (also known as Kurobuta), from a farm that raises them humanely. I’m willing to pay the extra bucks.

But going to a supermarket or butcher shop for pork is what most people do. The names of the cuts of meat can be a bit confusing. Despite its name, pork butt is not from the back-end of the pig.  (The term “butt” referred to the barrel the meat was stored in when the only method of preservation was salting the meat and storing it in barrels.)

The pork butt is actually the shoulder of the pig. The pork shoulder picnic is a lower cut of the same area. These cuts can also go by the names: Boston shoulder roast, Boston butt, Boston roast, shoulder butt, pork shoulder picnic, and shoulder-blade roast. Whatever the name, these are all nicely marbled hunks of meat that usually weigh in anywhere from 6 to 8 lbs, are easy to find, and are rather inexpensive. Barbecue fanatics claim the bone-in pork butt is more flavorful, but boneless is all you can find, that’ll work, too.

Once I’ve got my slab of pork, I remove the skin if it has any. I want my pork rub to make contact directly with the meat, so I always remove the tough skin. No skin? No problem. But leave the fat on!

Now I need to season it. I’ve found that a simple rub is the best way to go for the sauce I’m going to use later.

After 8 hours in the smoker, the rub makes a crust on the meat that is just fantastic!

BASIC DRY RUB

1/4 cup kosher salt
1/4 cup black pepper (freshly ground is best)
1/4 cup paprika
1/4 cup brown sugar
2 tablespoons granulated garlic
2 tablespoons granulated onion

Place all the ingredients in a jar with a lid and shake it up to blend.

Once I’ve made the rub, I generously sprinkle it all over the pork, and rub it in really well. Ideally, I let the pork shoulder sit in the fridge for 24 hours before smoking, bringing it out an hour beforehand to have it come up to room temperature.

I have a digital smoker at home, which allows me to set the temperature to cook and smoke my pork butt. I place the pork butt on a rack, put a drip pan with water underneath it to catch the grease, and set the smoker for 250 degrees. I cook the pork at 250 for 8 to 10 hours, depending on the size of the meat, adding hickory chips to the smoker every few hours. The marbled fat in the pork butt slowly melts over time and the pork becomes incredibly tender and flavorful.

I remove the pork butt from the smoker and let it rest, covered with aluminum foil, for at least 20 minutes before pulling it apart with a couple of forks, or chopping it up with a cleaver.

While the pork is cooking and smoking, there’s plenty of time to make two other very important parts of this recipe: a vinegar-based barbecue sauce, and the cole slaw.

Slaw on the side or on the sandwich…up to you!

BARBECUE SAUCE

2 cups ketchup
3/4 cup water
6 tablespoons cider vinegar
6 tablespoons white vinegar
6 tablespoons brown sugar
3 tablespoons Worcestershire sauce
1 tablespoon chili powder
2 teaspoons salt
2 teaspoons black pepper
2 teaspoons cumin

Mix all the ingredients in a saucepan and simmer until the flavors have blended, about 20 minutes. Remove from the heat and cool it to room temp. If you store it in an airtight container in the fridge, it’ll stay good for several weeks.

COLE SLAW

My unusual cole slaw recipe uses an interesting ingredient: pickle juice! Just a splash of juice from your favorite jar of pickles is all you need.

1 package of cole slaw veggies
splash of pickle juice
1/4 cup mayonnaise (more to taste)
teaspoon celery seed (not salt)
salt and pepper

There are no real specific measurements for cole slaw, because I’ve found that some people like it dry, others wet…some peppery, some not. Play around with it and make it your own. I prefer a more mayonnaise-y cole slaw, and usually err on the wet side.

In a bowl, combine all the ingredients. Cover it with plastic wrap and chill. When ready to use, re-mix it, and taste for seasoning before using. Letting it sit overnight before serving is best.

OK…time to make that sandwich!

You can either go Carolina style and place the cole slaw right on top of the pulled pork in the bun, or simply serve the slaw on the side. No rules!

Whether you go through all these steps yourself or not, it’s nice to appreciate a labor of love that is worth every bit of time and trouble invested in it.

It’s never a healthy option to eat fast food. Michael Pollan said it best: “It’s not food if it arrived through the window of your car.”

A few years ago, the nephew of Colonel Sanders revealed the 11 secret herbs and spices that made KFC‘s original recipe chicken a worldwide success. He claimed he worked for his uncle for many years and had to make huge batches of the seasoning mix.

For me, KFC is like crack. Although I’m a big proponent of grass-fed this and pastured that, my kryptonite is KFC‘s original recipe chicken. There’s a KFC right next door to a local Home Depot in my area and my car literally drives itself to the pick-up window…I can’t help it. I justify the consumption of this heavenly grease by asking for no sides–no biscuit, no nothing. I get one breast and one thigh, and I drive off, steering my car with my knees as I indulge in my dirty secret, the hot grease dripping down my chin, a roll of paper towels at my side.

Making the KFC chicken recipe at home means I do have some control over product quality. I can use pastured or organic chicken. I can use clean oil. I don’t have the fancy pressure fryer they use at KFC, but I can use the healthier option of oven-frying. That means I fry my chicken in oil until golden brown, then finish the cooking process in the oven.

I have to say, the recipe really works! Maybe if I placed the real KFC side-by-side with my home-made chicken, I’d notice a big difference. But my brain said it was pretty damn close and absolutely delicious! If I could change one thing, I would use smaller chicken pieces next time. I used large pieces and the meat-to-breading ratio was off. Though it was mighty tasty, I was craving more breading per bite.

The recipe calls for all-purpose flour, but if you follow a gluten-free lifestyle, using Cup4Cup GF flour works just as well.

2 cups all-purpose flour
3 tablespoons paprika
1 tablespoon celery salt
1 tablespoon dried mustard
1 tablespoon garlic salt
1 tablespoon ground ginger
2 teaspoons black pepper
1/2 teaspoon white pepper
1 1/2 teaspoons thyme
1 1/2 teaspoons basil
1 1/2 teaspoons oregano
1 teaspoon salt
1 cup milk
1 egg
5 lbs. chicken pieces…your choice
oil, for frying

Combine the flour and the “11 herbs and spices” in a bowl. Mix well.

In another bowl, whisk together the milk and the egg. Add the chicken pieces to this bowl and let the chicken soak in it for 10 minutes.

Pre-heat the oven to 350 degrees.

Pour a couple of inches of the oil into a pan with high sides and heat it to 340 degrees, using a thermometer. Don’t fill it with too much oil, because oil expands when hot and it could spill over.

Take the chicken pieces out of the milk and egg mixture and coat them with the seasoning mix one at a time, making sure you coat them well. Carefully place the chicken in the hot oil. Don’t overcrowd the pan…work in small batches. Too much chicken could cause the oil to spill over the top.

Fry the chicken pieces just until golden…no need to cook them all the way through. Place the pieces on a baking sheet lined with non-stick aluminum foil. When all the chicken has been fried, place the baking sheet in the oven and cook until the chicken pieces reach an internal temperature of at least 160 degrees.

Make a lot! Leftovers are great, and they re-heat really well in the oven! (Don’t use a microwave…the oven is best.)

Sometimes the happiest of cooking accidents happen with bacon. My original plan was to make Chinese-style honey ribs for dinner. But instead of pulling a nice rack of ribs out of the freezer, I accidentally took out a slab of pork belly. I only realized my mistake after I thawed it, so I decided to use it! The results were pretty damn tasty.


image

Marinade:
¾ cup light soy sauce
6 Tablespoons hoisin sauce
5 lbs. pork belly
Zest and juice of 1 lemon
2 whole star anise
2 cinnamon sticks (3”)
1/2 cup honey
4 cups chicken broth (preferably homemade)
image
Pre-heat the oven to 350 degrees.
Mix the marinade ingredients. Set them aside.
Cut the pork belly into pieces that are about 2 inches square. Place them in a large pot. Cover them with water and bring the pot to a boil. Boil for 5 minutes. Drain the water.
Place the pork belly pieces on a sheet pan lined with non-stick aluminum foil. Coat them with the marinade. Let them sit for 10 minutes.
Bake the pork belly pieces on the sheet pan in the oven for 30 minutes.
While the pork belly is baking, start the sauce in a large non-stick pan or pot: combine the lemon zest and juice, star anise, cinnamon sticks, honey and chicken broth. Bring it to a boil, then reduce it to a simmer.
When the pork belly pieces have finished baking, add them to the sauce pot and simmer (covered) for about 15 minutes or until meat is tender.
Turn the heat on high, uncover the pot and cook until the sauce has reduced to a glaze that coats the ribs. Reduce the heat as the sauce thickens to avoid the sugars in the honey from burning. When the pieces are sticky and gooey, they are ready!
Devour them just like that, or…
Let a piece of pork belly cool, then slice it to your desired thickness and fry it like regular bacon. It’s great with an omelet!
image

I’ve been experimenting with my coffee rub, one that combines coffee with cocoa powder, brown sugar, salt, garlic and onion. I’ve tried it on various cuts of beef, on chicken, and pork…and it works well on everything!


A Berkshire pork belly, cured for several weeks, then rinsed.


I took some of the rub and cured a beautiful Berkshire pork belly with it, to make bacon. I simply scored the fat side of the belly, then massaged both sides of the belly with the rub, and placed it in a container in the fridge for several weeks. I flipped it over every few days to allow both sides of the belly to come in contact with the liquid that formed when the salt in the rub extracted moisture from the meat. After several weeks, I removed the belly from the container and rinsed it well with clean water, drying it with paper towels. I then re-rubbed the pork belly with more of the coffee rub and placed it in the smoker for 2 hours at 250 degrees, smoking it with hickory, my favorite wood for bacon.


The pork belly, re-rubbed and ready to smoke.


It just so happened that on the weekend I was smoking the belly, I decided to smoke a couple of racks of pork ribs for myself. These also came from a beautiful heritage Berkshire pig, and I coated them with the coffee rub, allowing them to rest in the fridge for 24 hours putting them in the smoker.


The Berkshire pork ribs, rubbed and ready to smoke. I cut the racks in half for easier handling.


Since the ribs and belly were in the smoker at the same time, the ribs first smoked at 250 degrees with hickory along with the bacon, for about 2 hours. Once I removed the bacon, I dropped the temperature of the smoker to 225, and smoked the ribs for 2 more hours. I then removed the ribs, sprinkled them with a little more coffee rub, and wrapped them in aluminum foil, before returning them to the smoker for another hour.


The ribs, and the bacon, were absolute perfection!


The ribs, smoked for several hours.


Re-sprinkling a little coffee rub on the ribs.


Wrapping the half-racks in foil. Some go back to the smoker, some head for the freezer to be enjoyed later.


Since I had 2 full racks of ribs, more than enough for several meals, I cut each rack in half before smoking for easier handling. Once I wrapped them in foil, I let a couple of them cool on the counter before placing them in a freezer bag and putting them in the freezer for future use. Already smoked and cured, all I’ll need to do is take a foil package out of the freezer, and place it in a 250-degree oven for a couple of hours to warm the ribs up and make them fall-off-the-bone tender.


The ribs, after another hour in the foil.


Here’s my coffee rub recipe. Make a lot of it and use it on everything from burgers to whole chickens to pulled pork sandwiches.

3 tablespoons brown sugar
1 tablespoon Kosher salt (I use Diamond Crystal)
1 tablespoon ground coffee (use your favorite)
1 teaspoon granulated garlic
1 teaspoon granulated onion
1 teaspoon unsweetened cocoa powder


Rib perfection!

When it comes to grilling, lamb is often overlooked. Some folks think it tastes too gamey, which can be true with grass-fed lamb that comes from New Zealand or Australia. Although you can’t beat their strict quality standards, the flavor can be intense.

I don’t mind that intense lamb flavor in a chop, but when I make lamburgers, I like to mix ground beef with ground
lamb to give it a milder flavor. And when I cook them over hardwood charcoal, the flavor is outstanding! Even seared in a cast iron skillet and finished in the oven, these burgers are awesome.

1 lb. ground lamb
1 lb. ground beef
2 tablespoons
1/2 onion, minced
1 tablespoon Dijon mustard
1 teaspoon each fresh parsley, mint, and dill, finely chopped
1 teaspoon dried Greek oregano
1/2 teaspoon cumin
1 large clove garlic, squeezed through a garlic press
1 scallion, finely chopped, green part only
1/2 cup breadcrumbs
1 egg
1 teaspoon salt
1/2 teaspoon black pepper

Fresh herbs make the difference!

Heat the olive oil in a skillet over medium heat. Add the onion. Cook it until it’s translucent, about 6 minutes. Transfer the onion to a plate to cool.

In a bowl, mix the cooled onion, mustard, parsley, mint, dill, oregano, cumin, garlic, scallion, and salt and pepper.

In another bowl, combine the lamb with the beef, so they are mixed well. Then add the onion mix bowl to the meat and make sure all the ingredients are combined. Add the breadcrumbs and mix again. Then add the egg and mix one more time.

Form the meat into patties. Place them on a baking sheet covered with non-stick foil, and place the baking sheet in the fridge.

The indentation in the center of the patty keeps it from swelling up while cooking.

Don’t let the lamburgers get too cold in the fridge…just enough to firm the meat up a bit. If it gets too cold, give it a few minutes at room temp to warm up again.  Grill the burgers over hardwood charcoal until they are cooked to medium.

If you’re cooking indoors, heat some avocado oil in an oven-proof pan, preferably cast iron. Sear the burgers well on both sides, then place the pan in a 350-degree oven to finish cooking.

Extra meat is great for meatballs! Just freeze them for another time.

Place the burgers on buns, and smear the bun with the feta cheese dressing.

If the food is good, someone’s always watching!

My recipe for feta cheese dressing works really well with lamburgers. But it’s also great on a salad.

3/4 cup plain Greek yogurt
1  cup mayo
1 teaspoon Worcestershire sauce
1/2 teaspoon cayenne pepper sauce, like Franks Red Hot
1 teaspoon Dijon mustard
1/2 teaspoon granulated garlic
1/2 teaspoon salt
1/2 teaspoon ground black pepper
4–5 oz. crumbled feta cheese

Combine all the ingredients in a bowl. Mix well. Cover and refrigerate. If you can wait a day, it’s even better.

FullSizeRender (14)

Chourico is as important to the Portuguese as bacon is to us Lithuanians. Here in Southern New England, they pronounce it “sha-rees,” not “chaw-reezo,” like you hear on the Food Network.

I was joking with a friend the other day that if I won the lottery, I could buy a lifetime supply of chourico at my favorite store: Mello’s, in Fall River, Mass. His response was: “Is there such a thing as a lifetime supply of chourico?!”

Good point!

If you’ve had really great chourico, you’re always looking for new ways to include it in your cooking. Inspired by chef Chuck Hughe’s recipe, this is a great chourico appetizer that’s really easy to make. Whip up the arugula pesto ahead of time and keep it in the fridge. Then when guests come, just slice the chourico, sauté it in a pan until brown, and serve.

fullsizerender

3 cups fresh baby arugula
1/2 cup walnuts
1/2 cup olive oil
1 clove garlic
1 teaspoon salt
1/4 teaspoon pepper
1/2 cup + one tablespoon grated Parmigiano Reggiano or other good quality parmesan cheese
2 lbs. chourico, sliced into 1/2″ pieces

Combine the arugula, walnuts, olive oil, garlic, salt, pepper and the 1/2 cup of cheese in a food processor or blender and blend until smooth. Set the tablespoon of cheese aside for garnishing later.

fullsizerender-1

Remove the casing from the chourico and slice it into 1/2″ thick pieces. Sauté the chourico slices in a pan until both sides are caramelized and golden.

Place the chourico on a plate, topping with some of the pesto. Sprinkle a touch of the grated cheese to garnish. Serve immediately, while the chourico is still hot!

fullsizerender-3

This is a really delicious grilled steak full of wonderful Thai flavors. You do need to marinate it overnight, so keep that in mind. The overnight marinating is key to the intense and unbelievable flavor of the beef.

The original recipe called for skirt steak, but I didn’t have any in my freezer. I did have a fat ribeye, though, so once I thawed it, I sliced it lengthwise to get two large, thin steaks which would easily suck up the marinade I was going to make. And the ribeye was nicely marbled, so it stayed juicy and tender. Beef flap is another favorite cut that would work well with this recipe.

image

1/4 cup toasted sesame oil
1/4 cup soy sauce
2 tablespoons grated ginger
2 tablespoons finely chopped garlic
2 tablespoons finely chopped cilantro
2 tablespoons chopped dry roasted unsalted peanuts
2 scallions, minced
1 tablespoon light brown sugar
1 tablespoon fresh squeezed lime juice
1 tablespoon chile oil
2 lbs. beef ribeye (or skirt steak or beef flap)
1/4 cup chicken stock (homemade is best)

In a bowl, whisk together the sesame oil, soy sauce, ginger, garlic, cilantro, peanuts, scallions, sugar, lime juice and chile oil. Transfer half of it to a shallow dish.

Add the steak to the dish and turn the meat to coat it well. Cover and refrigerate the beef overnight. Refrigerate the other half of the marinade in a separate container.

The next day, light a grill. While it’s warming up, get out a sauce pan and pour the chicken stock in along with the reserved marinade. Heat it to combine it well, but not letting it reach a boil. Remove it from the heat and let it come to room temperature. This will be the dipping sauce for the beef.

About 30 minutes before cooking, take the marinated steak out of the fridge and let it come to room temperature. Season it with salt and pepper, and grill it over high heat until it’s medium-rare, about 5 minutes.

If it’s too cold to light a grill, or if you just want to use the oven, heat a cast iron pan on the stovetop, add a few drops of avocado oil or pork fat, and sear the beef on both sides before placing it in a pre-heated 375-degree oven to finish cooking.

Devour the beef with the dipping sauce!

When my daughter hangs out with me, I always ask her what she wants me to cook for her, and there are a few “Dad” recipes that are her favorites. This is one of them, especially when fresh asparagus is available. And as any parent will tell you, if your kid is craving a dish that has vegetables in it, count yourself lucky–and make it!!
Prepping asparagus is easy, and you don’t need a knife to cut off the woody bottoms of the stalks. Simply bend the stalks at the bottom and they will naturally snap off at the right point.
4 mild Italian sausages, sliced into pieces 1/2″ thick
1 lb. penne pasta
1/2 onion, finely chopped
1 cup chopped fresh trumpet mushrooms (white button mushrooms work, too)
2 cups fresh asparagus, sliced into 1-inch pieces
1 clove garlic, passed through a garlic press
1 cup homemade chicken broth
6 fresh sage leaves, finely chopped
1/2 cup freshly grated Parmigiano Reggiano cheese
extra virgin olive oil
salt and pepper
Have the pasta water salted and boiling, and add the pasta, cooking until just a bit more undercooked than al dente.
Heat a large pan, and drizzle in some olive oil. Sauté the sausage pieces until browned and cooked through, but not overcooked. Remove the sausages from the pan and place them in a separate bowl. Remove all but 2 tablespoons of the fat left behind in the pan.
Place the pan back on stove and sauté the onion until translucent. Add the garlic, and sauté for 10 seconds. Add the sage, and saute for 10 seconds, stirring. Add the chopped mushrooms and saute for a few minutes, then add the chicken broth, and simmer until almost all the liquid has evaporated. Pour the contents of the pan into the bowl with the sausages.
Return the pan to the stove, add a little more olive oil, and on medium heat, sauté the asparagus pieces. Cook them until they are al dente, not too soft. Once the asparagus has reached this stage, return all the contents of the sausage/mushroom bowl to the pan to heat through. Drain the pasta, and add it to the pan as well, combining all the ingredients. If it looks too dry, add a little pasta water to the pan. Season with salt and pepper.
Make sure you serve this hot, with grated Parmigiano Reggiano on top, and drizzle lightly over the top with extra virgin olive oil.

I rarely order beef at a restaurant, because I can usually make a better steak at home. For one thing, I use humanely raised grass-fed beef, something few restaurants offer. And I can cook it for less than a third of the price of a steakhouse. Granted, most steakhouses dry-age their beef, a time-consuming process of taking slabs of beef and keeping them in a fridge for weeks until a certain amount of moisture is sucked out of the meat, intensifying the flavor. I can do that at home in my fridge, but it takes a lot of time and effort.

There is one steak that I couldn’t match for the longest time, and that was the Capital Grille’s bone-in Kona crusted dry-aged NY strip. I would have dreams about that steak! It was time to find a way to make something that would satisfy my craving for that amazing steak at home.

Looking at a variety of coffee rub recipes on-line, I started the slow and steady process of combining ingredients in just the right proportions, tasting as I went. What I came up with really accentuated the flavor of the beef I was cooking, better than I had imagined!

img_0100

3 tablespoons brown sugar
1 tablespoon Kosher salt
1 tablespoon ground coffee (use your favorite)
1 teaspoon granulated garlic
1 teaspoon granulated onion
1 teaspoon unsweetened cocoa powder

Combine the ingredients, mixing well, and keep them in a tightly sealed container at room temperature.

The secret ingredients are the brown sugar and the cocoa. The brown sugar gives the steak a caramelized crust when cooking, and the cocoa rounds out the flavors and gives the beef an extra “umph!”

When using, sprinkle the seasoning liberally on both sides of the steak before cooking. I like to add bacon fat to a cast iron skillet, searing the steak on all sides and then finishing it in the oven. But let’s face it: nothing beats the grill!

img_0104