Archive for the ‘Carnivore!’ Category

St. Patty’s Day is this Sunday, so supermarkets are full of packages of processed corned beef in preparation for the big celebration. Too bad corned beef isn’t an authentic Irish dish!

The phrase “corned beef” was actually coined by the British, and although the Irish were known for their corned beef throughout Europe in the 17th century, beef was far too expensive for the Irish themselves to eat and all of it was exported to other countries. Owning a cow in Ireland was a sign of wealth, and the Irish used theirs for dairy products, not beef.

The Irish ate pork, and a lot of it, because it was cheap to raise pigs, and they traditionally prepared something like Canadian bacon to celebrate St. Patrick’s Day in Ireland.

In the 1900’s, when the Irish came to America, both beef and salt were more affordable, and the Irish, who lived in poor, tight-knit communities, often next to Jewish communities, bought much of their beef from Kosher butchers. And so many of the Irish learned how to corn their beef using Jewish techniques, but adding cabbage and potatoes to the mix.

It takes about 3 weeks to make corned beef. But now that you know it’s not Irish anyway, that’s OK! (If you’re dying to have it on St Patty’s Day anyway, just buy yourself a supermarket slab this time, then make your own when the craving hits again.) Doing it yourself is not difficult. It just takes time…and you get a really delicious slab of beef.

Corned beef has nothing to do with corn. ‘Corning’ is a technique for preserving raw meats for long periods by soaking it in salt brine. This method was used in England before the days of commercial refrigeration. Back then, the large salt kernels used in the brine were called “corns.”

Brining is a time-honored way of preserving meat and it prevents bacteria from growing. Both pastrami and corned beef are made by this method. Both start with a brisket of beef. Corned beef is then cooked–usually boiled–and served. Pastrami is made when the brined meat is rubbed with more spices and then smoked to add extra flavor. So corned beef and pastrami are the same meat, just treated differently.

Saltpeter is an ingredient that has been used in brining beef for years. It adds the traditional red coloring to the corned beef and pastrami meat. But since saltpeter can also contain carcinogens, I leave it out. The meat may not be the usual bright red color, but the flavor and texture of the meat will not be affected.
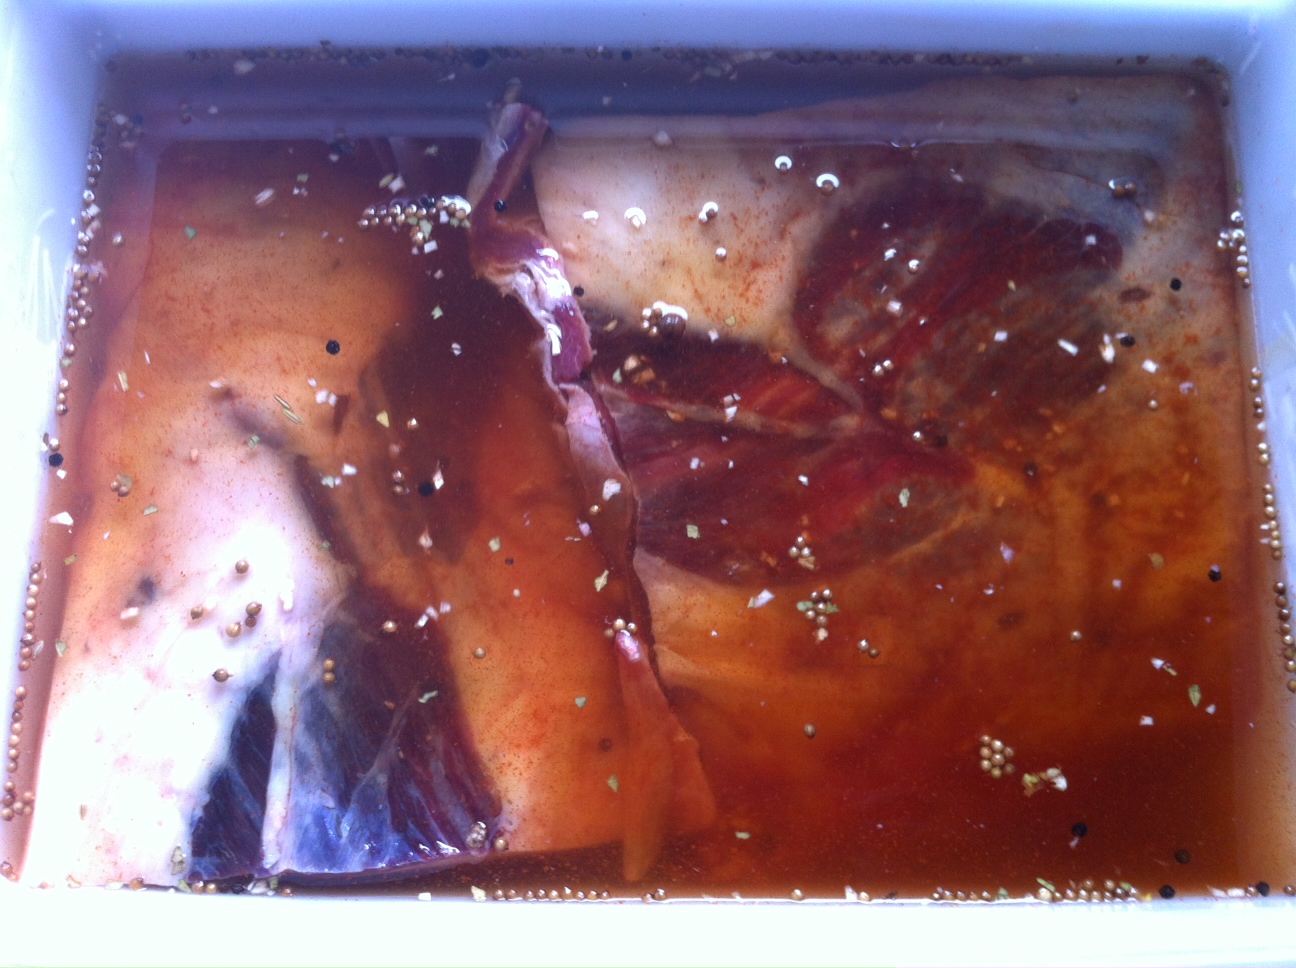
Brining the beef brisket

Brining the beef brisket

Step one: corned beef…

beef brisket (about 8-10 pounds)
2 teaspoons paprika
1/4 cup warm water
3 cloves of minced garlic
2 tablespoons sugar
1 tablespoon mixed pickling spices
3/4 cup salt
2 quarts water

Place the brisket in a large container made of non-reactive material, like glass or plastic.

In the 1/4 cup of warm water, dissolve the sugar, minced cloves, paprika and pickling spices.

Dissolve the 3/4 cup of salt in the 2 quarts of water. Pour in the sugar/garlic/paprika/pickling spices mix and stir everything together. Pour the mixture over the meat in the container. Make sure the meat is totally beneath the surface of the liquid. (You may need to weigh it down to do this.) Cover the container.

Refrigerate the container and its contents for 3 weeks, turning the meat once or twice per week. At the end of the third week, remove the container from the refrigerator and take out the meat. Soak the meat in several changes of fresh cold water over a period of 24 hours to remove the excess salt.

At this point, if you want corned beef, prepare and cook it using your favorite recipe. But I’m all about the pastrami!

Step two: making Pastrami…

pastrami


Brined and rinsed corned beef brisket from above recipe, patted dry with paper towels
1/4 cup Kosher salt
1/4 cup paprika
3 tablespoons coriander seeds
2 tablespoons black peppercorns
2 tablespoons yellow mustard seeds
1 tablespoon white peppercorns
3 tablespoons brown sugar
1 tablespoon granulated garlic

Combine the coriander seeds, black and white peppercorns and mustard seeds in a spice grinder and grind coarsely. Place in a bowl. Add the salt, paprika, brown sugar and granulated garlic. Mix well.

Rub the mix into the brisket well, covering all sides.

Heat your smoker to 225 degrees and smoke for several hours using a less intense wood, like oak. When the internal temperature of the meat has reached 165 degrees, it’s done. It isn’t necessary to smoke pastrami as long as you would a regular brisket because the long brining time makes the meat tender.

It is very important that absolutely everything that comes in contact with the meat is very clean. (This includes your hands.) Also, make very sure that every inch of the meat reaches the 165 degrees before it is removed from the smoker. The corned beef is now pastrami.


Happy St. Patty’s Day!

True: the inspiration behind this dish was a conversation I had with friends, talking about our early childhood days. Someone brought up the name Shari Lewis, and her famous puppet Lamb Chop. Next thing I knew, I was grilling the critter in my yard.

This is a great grilled lamb recipe that works best if you marinate it ahead of time, but it’s not absolutely necessary. Cook it indoors or outside on the grill. I use grapefruit zest and juice in the recipe, but any citrus you like will work.

American lamb is different from lamb raised in New Zealand or Australia. If you like a milder flavor, go with the American lamb. Lamb from New Zealand and Australia is entirely grass-fed, making for a stronger “gamier” flavor but a healthier cut of meat, as all grass-fed meat products are.


L2


6–8 small lamb chops
1/4 cup brown mustard (I like Gulden’s)
Zest of 1 grapefruit
1 tablespoon grapefruit juice
1 tablespoon honey
1 teaspoon garlic salt
1/4 teaspoon black pepper
1/4 teaspoon dried thyme


In a bowl, combine the mustard, grapefruit zest and juice, honey, garlic salt, pepper, and thyme. Mix well.

Place the lamb pieces in a  Ziploc bag and pour the marinade in, sealing the bag well. Squish the bag around gently to make sure the marinade makes contact with all the meat surfaces. Marinate at least 1 hour at room temperature, or longer in the fridge.

Pre-heat a hardwood charcoal grill…or if cooking indoors, pre-heat the oven to 350, and on the stove top, heat an oven-proof pan (cast iron is best) with a little pork fat or oil.

After marinating, remove the lamb pieces from the bag and save the marinade to baste with while cooking. (Don’t use the marinade uncooked, since it made contact with raw meat.)

On the grill: Grill the lamb on all sides first, then start brushing the marinade on them, flipping them, brushing again, and grilling. Keep doing this until you’ve used up all the marinade and the lamb is cooked to proper doneness. Don’t overcook it!

In the pan: Sear the lamb on all sides, then brush all sides with the marinade. Place the lamb in the oven to finish cooking, making sure you don’t overcook it. Let it rest before serving.


image

Sometimes the best ideas come from out of nowhere.

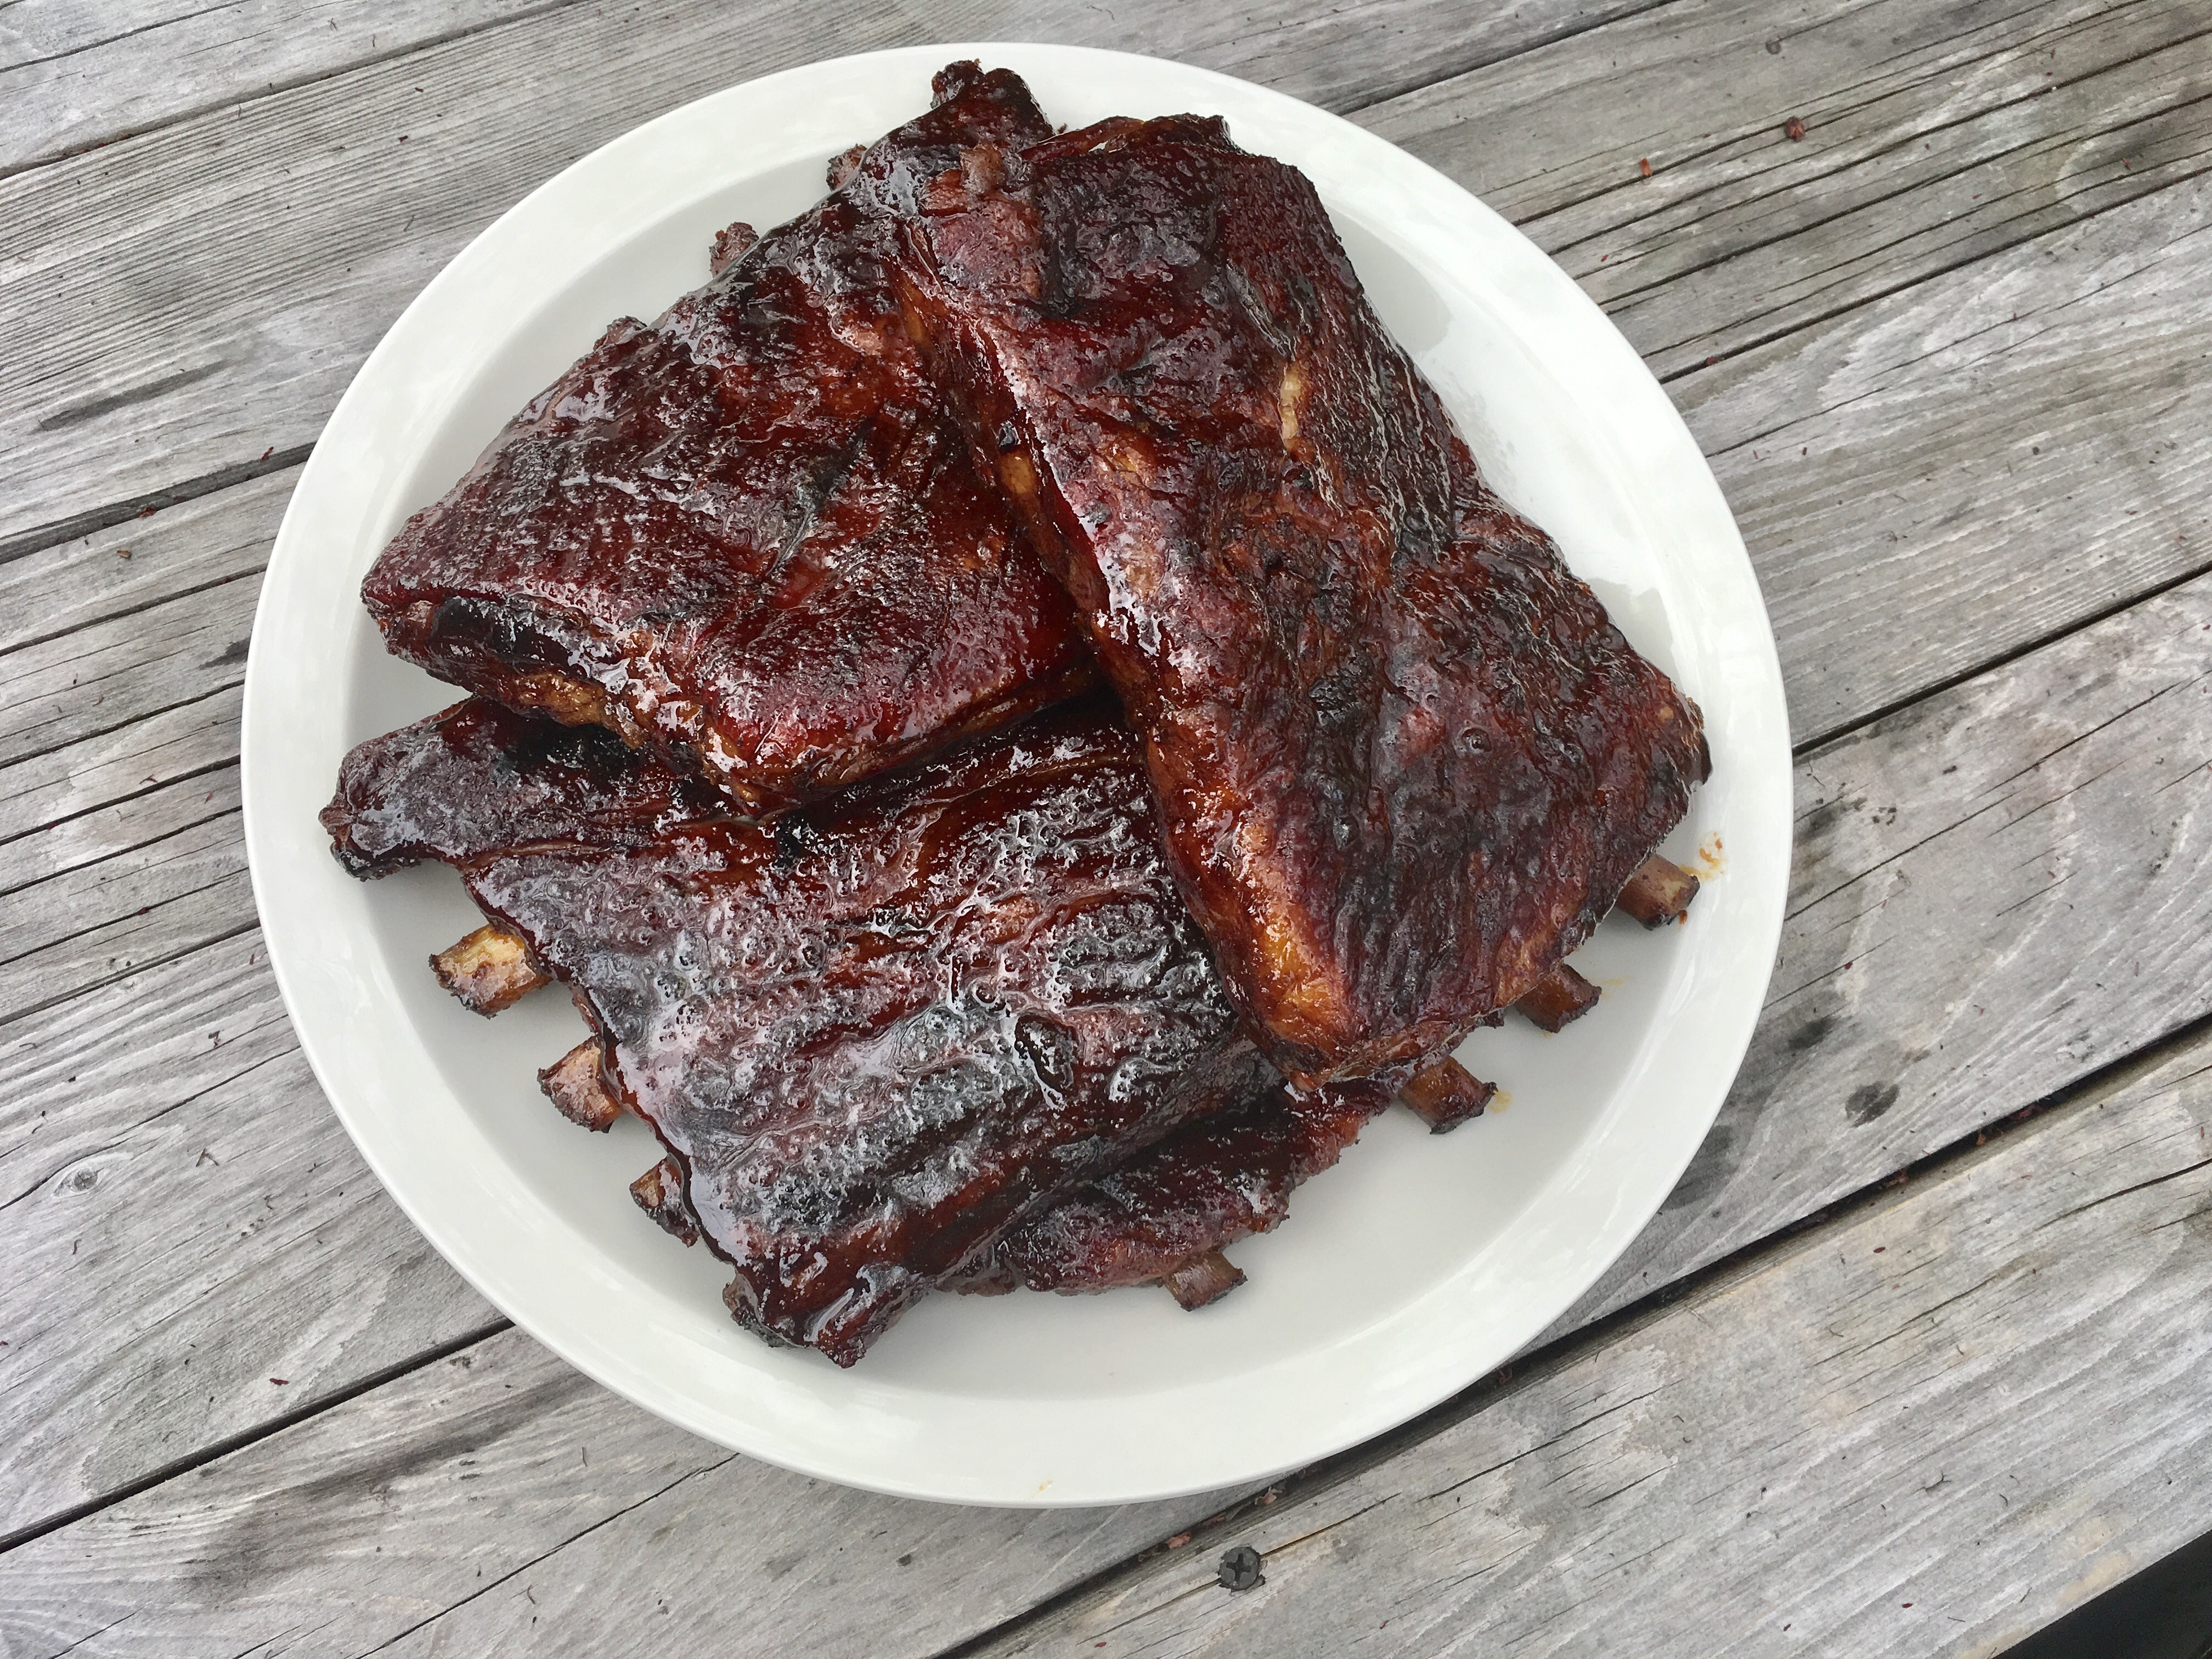
I had 5 lbs. of beautiful St. Louis-style heritage Berkshire (also known as Kurobuta) pork ribs thawing in the fridge, and I knew I wanted to create a new sauce or glaze with them, but I was feeling less than inspired. Our food-loving friends, Don and Johanna, showed up at our door with a gift they bought in Maine, at a shop called LeRoux Kitchen. It was a bottle of maple balsamic vinegar. It smelled wonderful…and tasted even better! I knew I had what I was looking for.

I used a smoker to make these ribs, but if you don’t have one (or just don’t want to bother with one), the ribs are just as awesome when baked in the oven.


By the way, if Don (a talented local artist: http://www.doncadoret.net) and Johanna (a talented teacher) aren’t your friends, you can easily make your own maple balsamic vinegar by combining a 1/2 cup of balsamic (not the super-expensive kind, but the $9-a-bottle kind) with 1 tablespoon of maple syrup. Add more or less maple to taste.


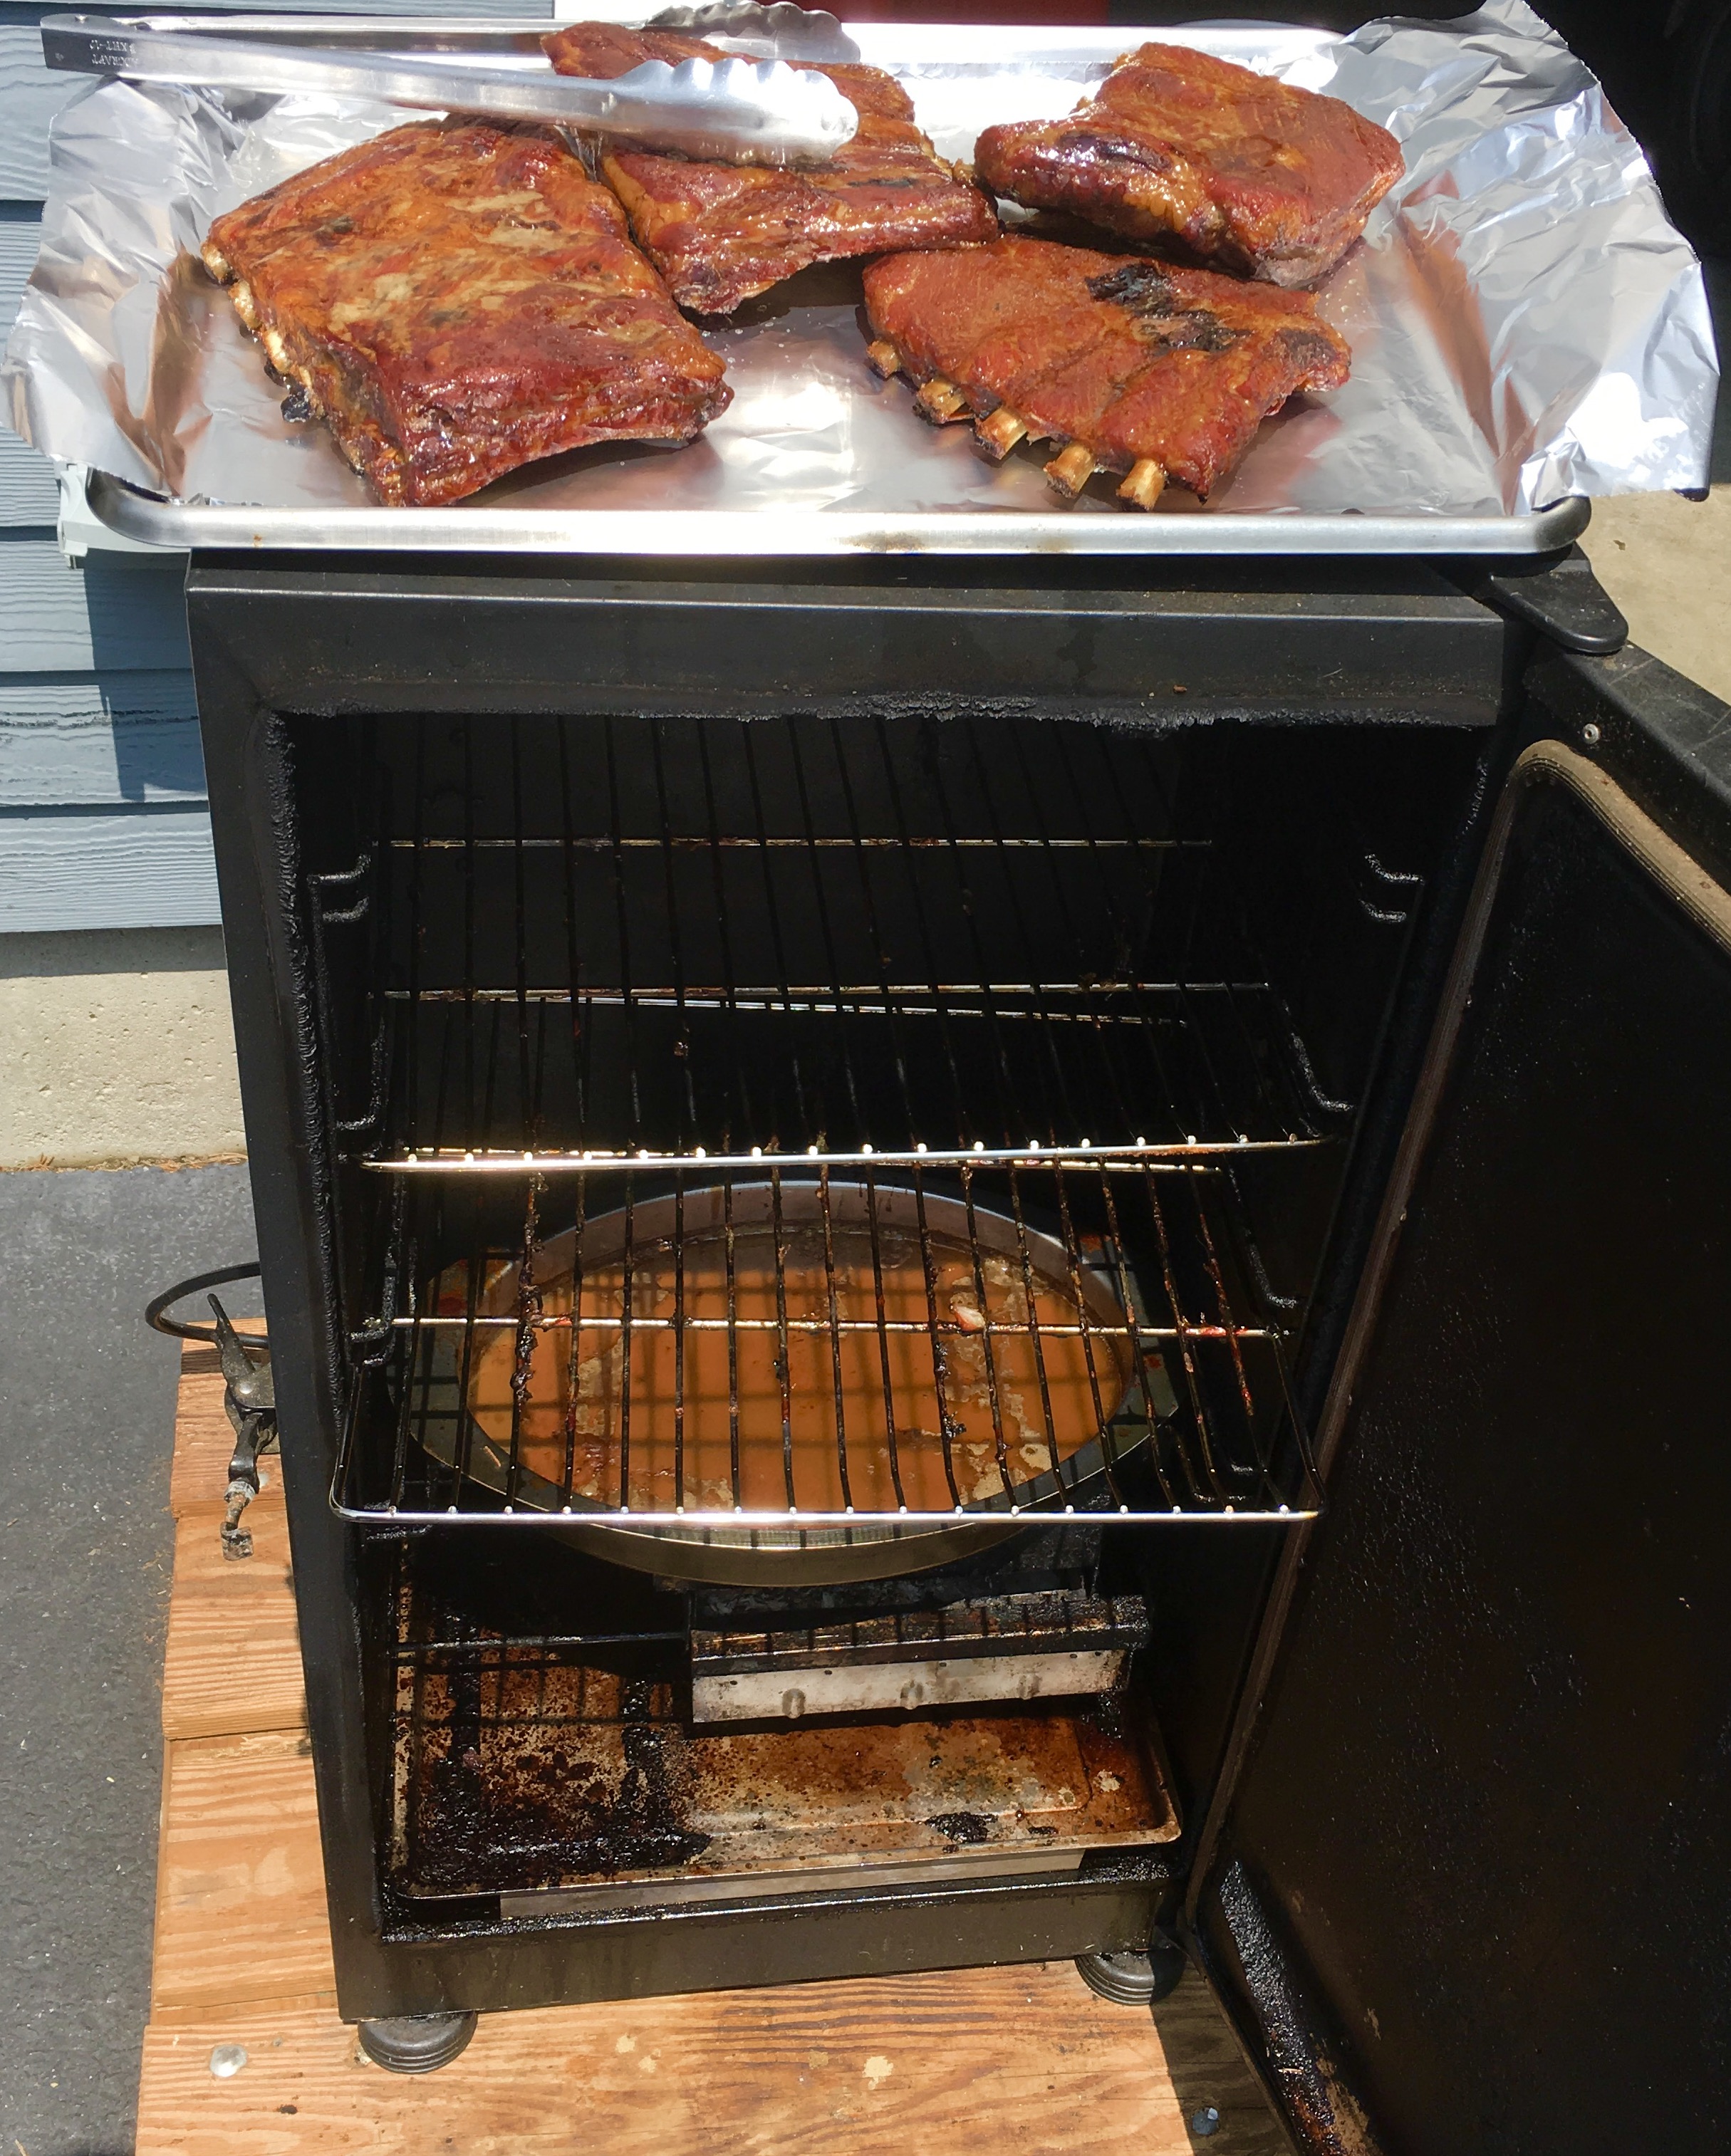
Yup…my smoker…she’s been used a few times!


I use an electric digital smoker made by Masterbuilt. I like the fact that I can set the temperature and time, and not have to constantly watch it. It has a side chute where I can add smoking chips when I want, and the results are consistent. I suppose some grilling fanatics might say I’m cheating, but a digital smoker allows me to live a life, hang out with my family, do some yard work. I don’t have time to babysit.

I chose to smoke my ribs for about 4 hours in the smoker, lightly seasoning them first with Lawry’s Seasoned Salt, adding hickory chips to the smoker only once to give them a “light smoke.”

Although I always use a water bath in my smoker, the ribs still come out visibly dry, so I like to brush them with a glaze, wrap them in foil and finish the cooking process in the oven. The glaze flavors the meat and also adds a little steam that tenderizes it.


Brushing with glaze, then wrapping in foil.


5 lbs. pork ribs (I get St. Louis-style Berkshire pork)
Lawry’s Seasoned Salt

1 cup water
1/2 cup maple balsamic vinegar (OR 1/2 cup balsamic vinegar + 1 tablespoon maple syrup)
1/4 cup brown sugar
1/2 teaspoon granulated onion
1/2 teaspoon granulated garlic
1/2 teaspoon cayenne pepper sauce (I like Franks’ Red Hot)


Prepare the ribs by removing the inedible skin on the back of the rack. The easiest way to do this is to cut a little “tab” of skin, then pull it with your fingers. Holding the skin with a dry paper towel will help your grip. I cut the racks in half to fit my smoker.

Season the ribs lightly with Lawry’s Seasoned Salt on both sides and place them into a 225-degree smoker (or oven, if you don’t have a smoker) for 3 hours, smoking lightly with hickory wood. (Skip the hickory if you’re using the oven.)

In a saucepan over high heat, combine the water, maple balsamic vinegar, brown sugar, onion, garlic, and cayenne pepper sauce. Stir well, and let it come to a boil. Let it reduce by half, leaving it still watery. Set it aside.

After 3 hours, remove the ribs from the smoker (or oven), placing them on a sheet of aluminum foil. (I use Reynold’s Non-Stick Foil, since the glaze will be sticky.) Brush both sides of the ribs with half of the glaze, and place the ribs meat-side-up on the foil before sealing the it around the ribs. Place the aluminum foil packets on a baking sheet, then into a pre-heated 250-degree oven.


Remove the ribs from the oven after 1 hour. Open the foil packets so that the ribs are now exposed. Brush the top of the ribs one more time, then put the foil back over the top and cook for 1 hour more.


My 12-year-old daughter’s at the age where she’s fascinated by the world of music. Working in radio, I’m lucky that I’m able to offer her some great experiences. Thanks to my boss, Rob, the man with all the connections, she got to meet her favorite band, AJR. She went backstage and met the guys from Imagine Dragons. She received a hand-written birthday greeting from Brendan Urie of Panic! at the Disco.

I saw my first concert at the age of 17. It was Three Dog Night and T.Rex at the Nassau Coliseum on Long Island. My daughter has already seen more concerts than I did in my teens.

As touristy as they are (and as mediocre as the food is), Hard Rock Cafes and their walls full of pictures, guitars, photos and other memorabilia, offer a glimpse into the world of music that fascinates my daughter. Once she visited her first Hard Rock, the world’s largest at Universal Studios in Orlando, Florida, she was hooked. If we were traveling anywhere near a Hard Rock Cafe, we had to go.

The Hard Rock at Universal was followed by New York City, Washington DC, the Cayman Islands, Paris, and Reykjavik. Yet we never made to the one in Boston, closest to our home in Rhode Island. It was time to go.

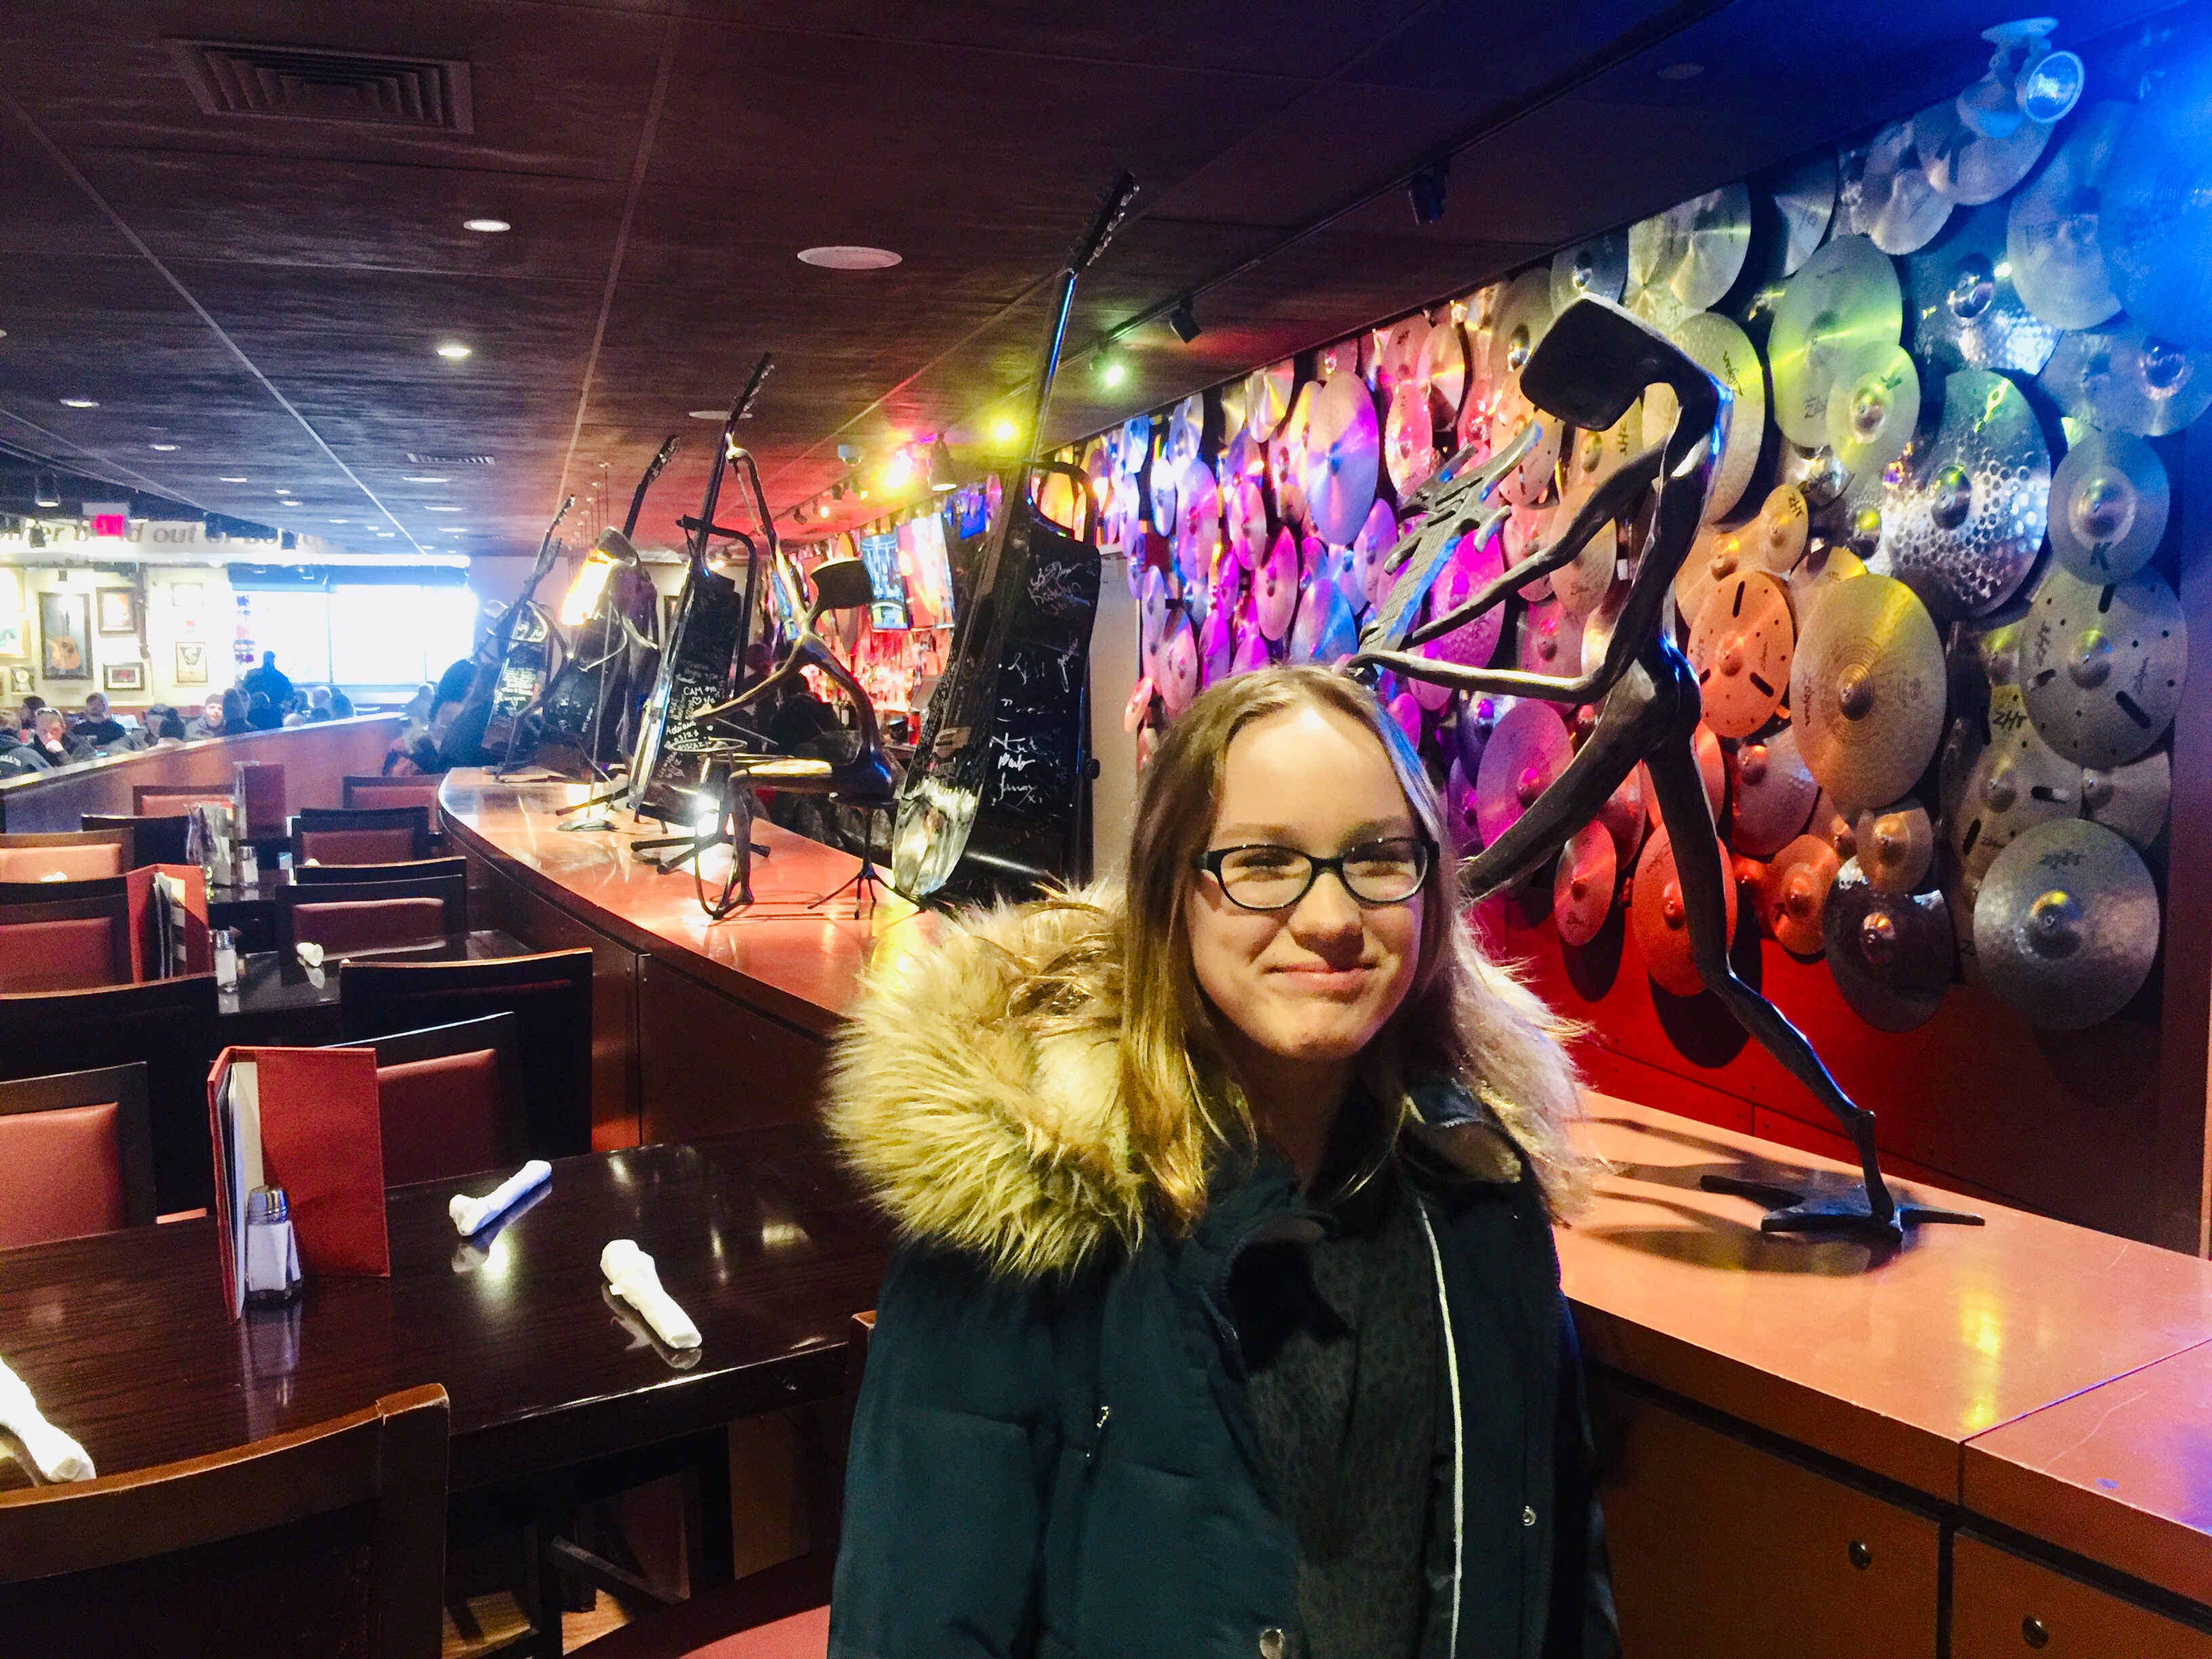
Hard Rock Cafe, Boston.


Our stay in Boston began with lunch at the Hard Rock Cafe, near Fanuel Hall. Nothing particularly amazing about the venue, but we could now scratch it off the list.

I clearly don’t know what the hell I’m doing.


Because our main point of going to Boston was to visit the New England Aquarium, I chose to get a room at the Marriott Long Wharf Hotel, located right on the water and literally a few steps from the aquarium. The area around Long Wharf includes many restaurant and shopping choices.

The Marriott Long Wharf is a huge hotel, and I was surprised at just how clean the property was, despite the vast numbers of people who were moving through the lobby and hallways. Our room was clean and technologically up-to-date: everything you’d want in a hotel room. Beds were comfortable, towels were plentiful.

The only complaint I had about our hotel is one that I have with most of the Marriotts and Westins that I’ve been to recently. They’ve decided to make the move away from old-fashioned room service with carts, real plates and silverware, and decent food. Now they all offer what amounts to take-out service. You get a bag full of cardboard boxes that contain your meals….paper napkins…plastic utensils…and crappy food. I highly doubt all of this gets recycled. So in a world where we’re supposed to be thinking about how not to overload our landfills, these guys came up with the idea to make everything disposable. Really dumb. Goes without saying that we didn’t eat at the hotel.

No carts. No fuss. No thanks.


The New England Aquarium is a great place to take the family and see penguins up close. We arrived at feeding time, and it was fun to watch them eat; some of them fussy, some of them devouring their offerings of fish. The center of the building is a spiral, and inside the spiral is a huge 4-story aquarium. So as you slowly walk up the spiral, you get a constantly changing view of the aquarium and the thousands of fish and other sea life (manta rays, tortoises, sea horses, jellyfish, starfish, eels, seals, and lots more that thrive there. Again, you might be lucky to catch them at feeding time, when workers in scuba gear swim down to the different groups of fish and make sure they get fed.

One note: buy your tickets online before you go. The outdoor line for last-minute ticket buyers was huge, and we visited on a bone-chilling winter’s day. Those people standing in line were very unhappy. We just walked right in with our online printed tickets.


The Red Lantern in Boston.


We don’t have many great Asian restaurant choices in Rhode Island, so when we go to Boston, it’s almost always on our list. This time, we decided to skip Chinatown and go to a restaurant that was as much about the atmosphere as it was about the food: The Red Lantern. Great music, cool lighting, awesome design, very good food and a huge cocktail menu. My daughter had miso soup and a massive delicious bowl of beef lo mein. I shoved a few large chopstick-fulls into my mouth “for blogging purposes.” Really good. I started with a plate of boneless ribs, sweet and sticky. My main dish was a huge spicy tuna toro maki roll: a tempura fried roll with avocado, cucumber, chili soy and toro tuna, slightly torched. Over the top. The Red Lantern has a beautiful bar, and my original mai-tai was well-made, though very sweet.

Dessert selections weren’t what we wanted…and we needed a breather…so we Ubered over to Newbury Street, where we found a wonderful gelato shop: Amorino. It’s an Italian chain, and they know how to do gelato!

I suppose if I wasn’t hanging out with my daughter, I’d take this opportunity to go to a bar for one last cocktail, but instead, we just went back to the hotel and focused on the next day, thinking we’d hit the indoor pool. Turns out it wasn’t a great idea, because the pool last the Marriott Long Wharf was really small and full of screaming little kids. Plan B: find a really great Sunday brunch.

Mooo, in Boston.


Mooo is a steak restaurant inside the beautiful XV Beacon Hotel, on historic Beacon Street. As I was searching for brunch possibilities, I saw the tempting list of freshly-baked treats on their menu, very different from those offered elsewhere, and I knew this was where we needed to go. We were not disappointed!

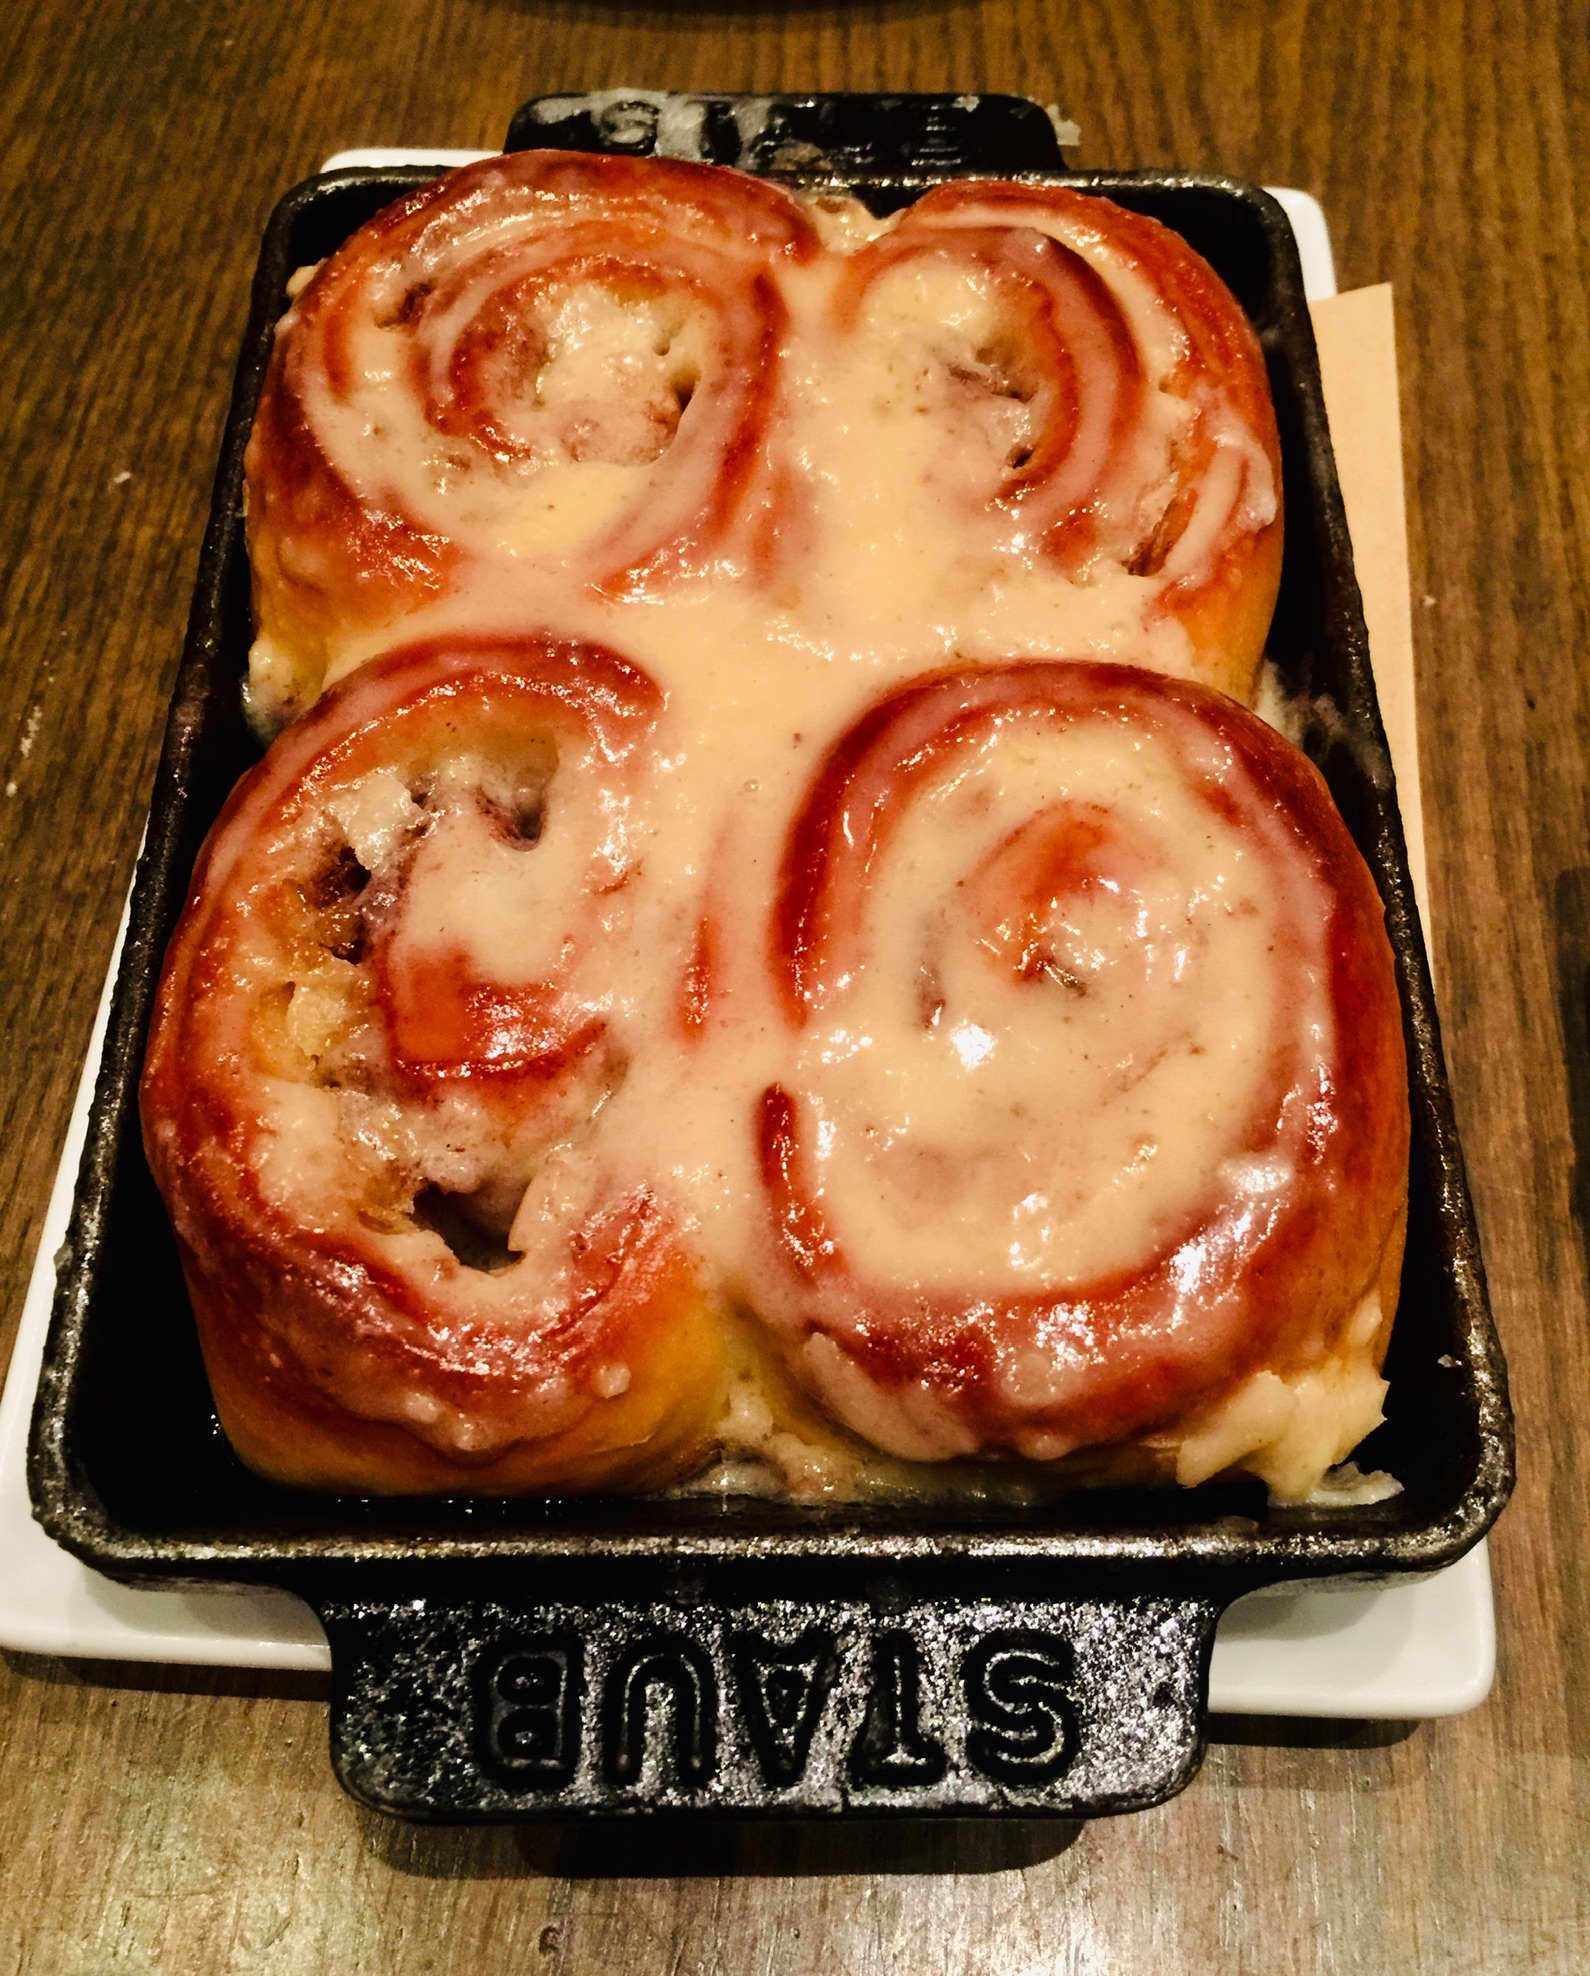
Ordering the cinnamon buns was a no-brainer. The moment they say on the menu that you “need to give it a little extra time,” you know it’s going to be worth the wait! as we slowly pulled apart the gooey rolls, shoving them into mouth, I moaned like Patton Oswalt in The Secret Life of Walter Mitty: “Cinnnabonnnn……” (Though it was way better than any Cinnabon I ever head!)

The incredible cinnamon buns at Mooo.


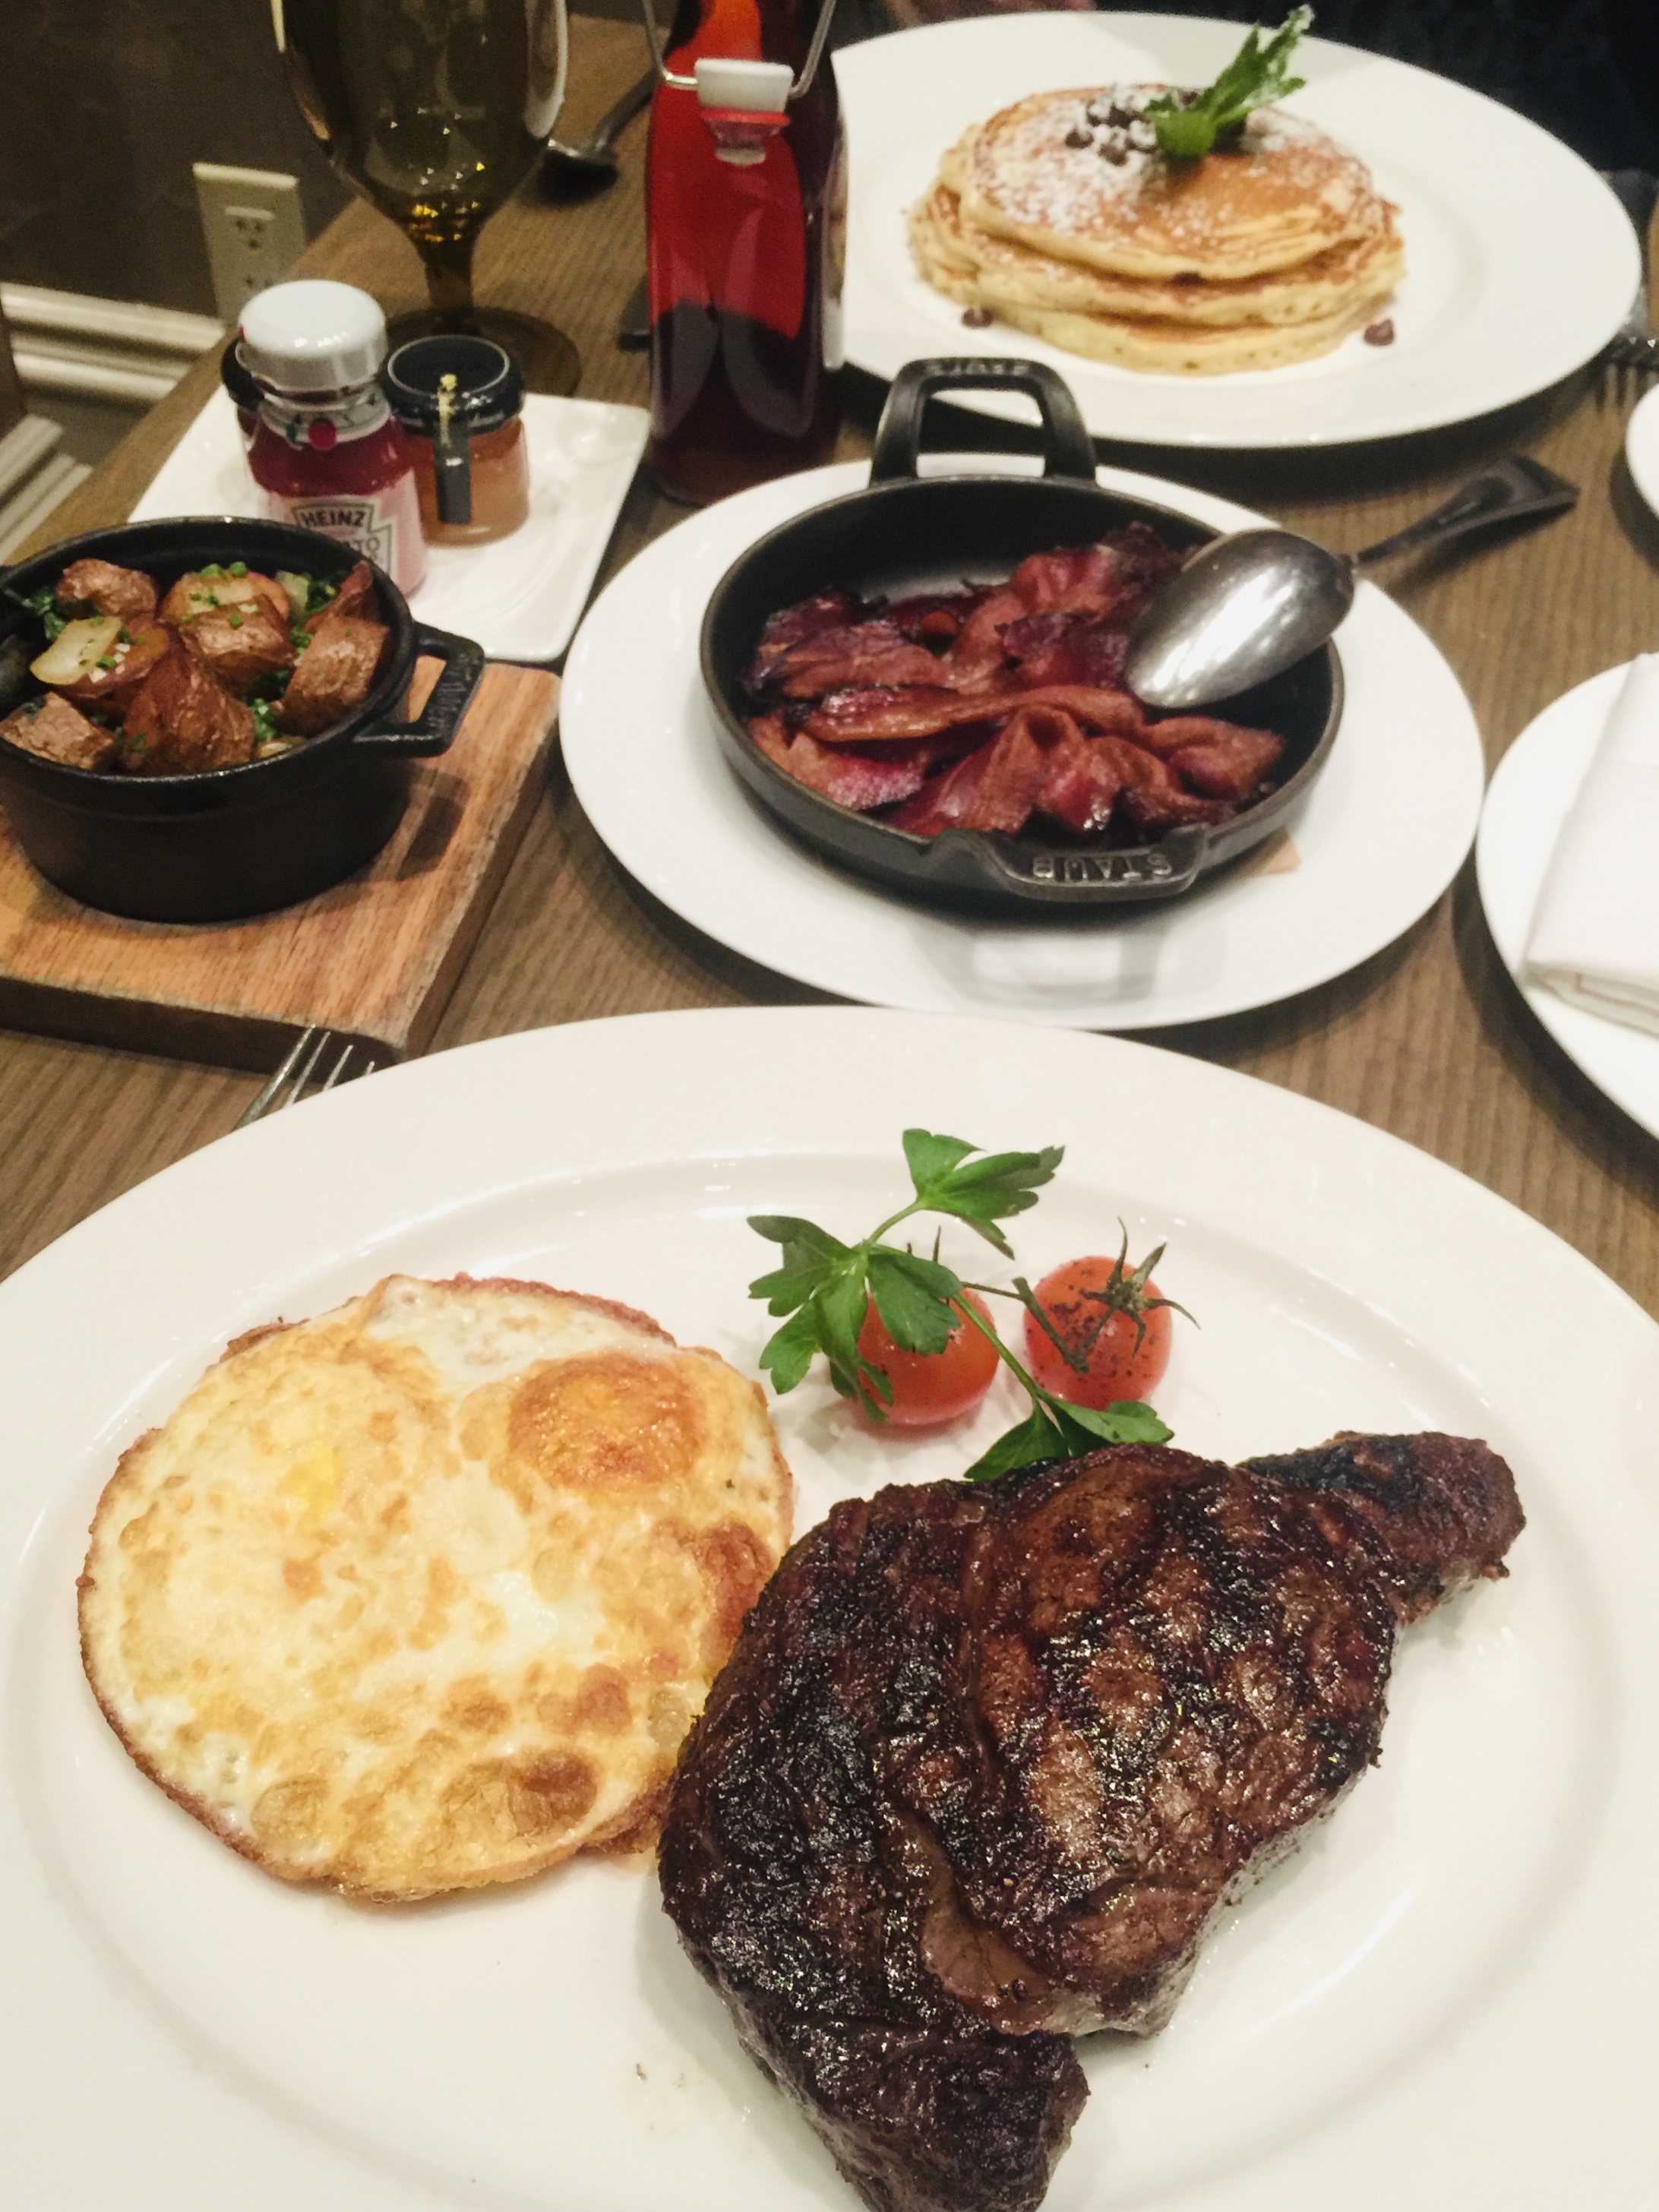
My daughter knew almost instantly that she was going to have the chocolate chip pancakes…with a side of bacon, of course. I was contemplating the lobster eggs Benedict (I’m a huge fan of bennies), but then I said to myself: “Wait…this is a steak restaurant. They have half-a-dozen steak and eggs offerings on the menu. Have a steak, for crying out loud!” My inner voice served me well.

I had a choice of 2 ribeyes: either a 12-oz. American corn-fed ribeye, or a 14-oz. pastured, grass-fed Australian ribeye. I’m a grass-fed guy, so the larger Australian ribeye (which was also less expensive) was a no-brainer. It was cooked to a perfect medium-rare, and was one of the best steaks I’ve had in a very long time. A couple of eggs and a side of perfectly cooked potatoes made for an ideal meal.

Brunch is served!


Mooo was such a great choice for brunch that I will keep it in mind for dinner on a return trip to Boston.


We returned to our hotel after brunch, simply to pack up and head home. A nice 24-hour getaway with wonderful food and a fun time with my daughter. I know my daughter and I will be back in June to see a Billie Eilish concert at the Rockland Trust Bank Pavilion, so we’ll have more opportunities to hit a couple of restaurants, this time in the Seaport District, which, sadly, is being overrun by so much new construction that you can’t even see the water anymore. It’s sad because Boston’s traffic has just been rated the worst in the country, and this will only add to a crumbling infrastructure that is already overloaded.


I have to give credit for this recipe where it’s due. Last year, we traveled to Washington, DC and one of our best dining experiences was at the Blue Duck Tavern, a stunning restaurant matched by its unique and beautifully prepared plates. It is the restaurant I recommend to any friends in the DC area, and one I would go back to in a heartbeat. One of the incredible appetizers I enjoyed was the roasted beef bone marrow, which had a delicious pretzel crumble on top. The moment I had a taste, I knew that I would have to recreate this for myself.

The amazing bone marrow plate at the Blue Duck Tavern in Washington, DC.


Bone marrow played an important role in the evolution of early man. Perhaps that’s why some of us still have that primitive craving for it.

Early man had small teeth and ate anything he could lay his hands on, especially meat. But he was no hunter. Attracted by circling vultures, he probably scavenged the leftovers from a big kill such as an antelope left in a tree by a leopard, or a large animal such as a wildebeest that had been slaughtered by lions.

Because meat is relatively easy to digest and rich in calories and nutrients, early man lost the need for the big intestines of apes and earlier hominids. This freed up energy for use by other organs. This surplus of energy seems to have been diverted to one organ in particular – the brain. But scavenging meat from under the noses of big cats is a risky business, so good scavengers needed to be smart. At this stage in our evolution, a big brain was associated with greater intellect. Big brains require lots of energy to operate: the human brain uses 20% of the body’s total energy production. The concentrated calories and nutrition found in meat was responsible for an increase in the brain size of early humans.

But around two million years ago, telltale cut marks on the surface of animal bones reveal that early humans were using crude stone tools to smash open the bones and extract the marrow. Stone tools allowed early man to get at a food source that no other creature was able to obtain – bone marrow. Bone marrow contains long chain fatty acids that are vital for brain growth and development. This helped further fuel the increase in brain size, allowing our ancestors to make more complex tools. Many historians believe that the blunt force required to break bones with tools to extract the bone marrow was a crucial ingredient in the development of the human hand, and the unique dexterity it has over that of apes.

Of course, these days, we can simply go to our butcher and ask them to slice some beef bones for us so that we can enjoy the marrow like our ancestors did. It’s much more civilized.

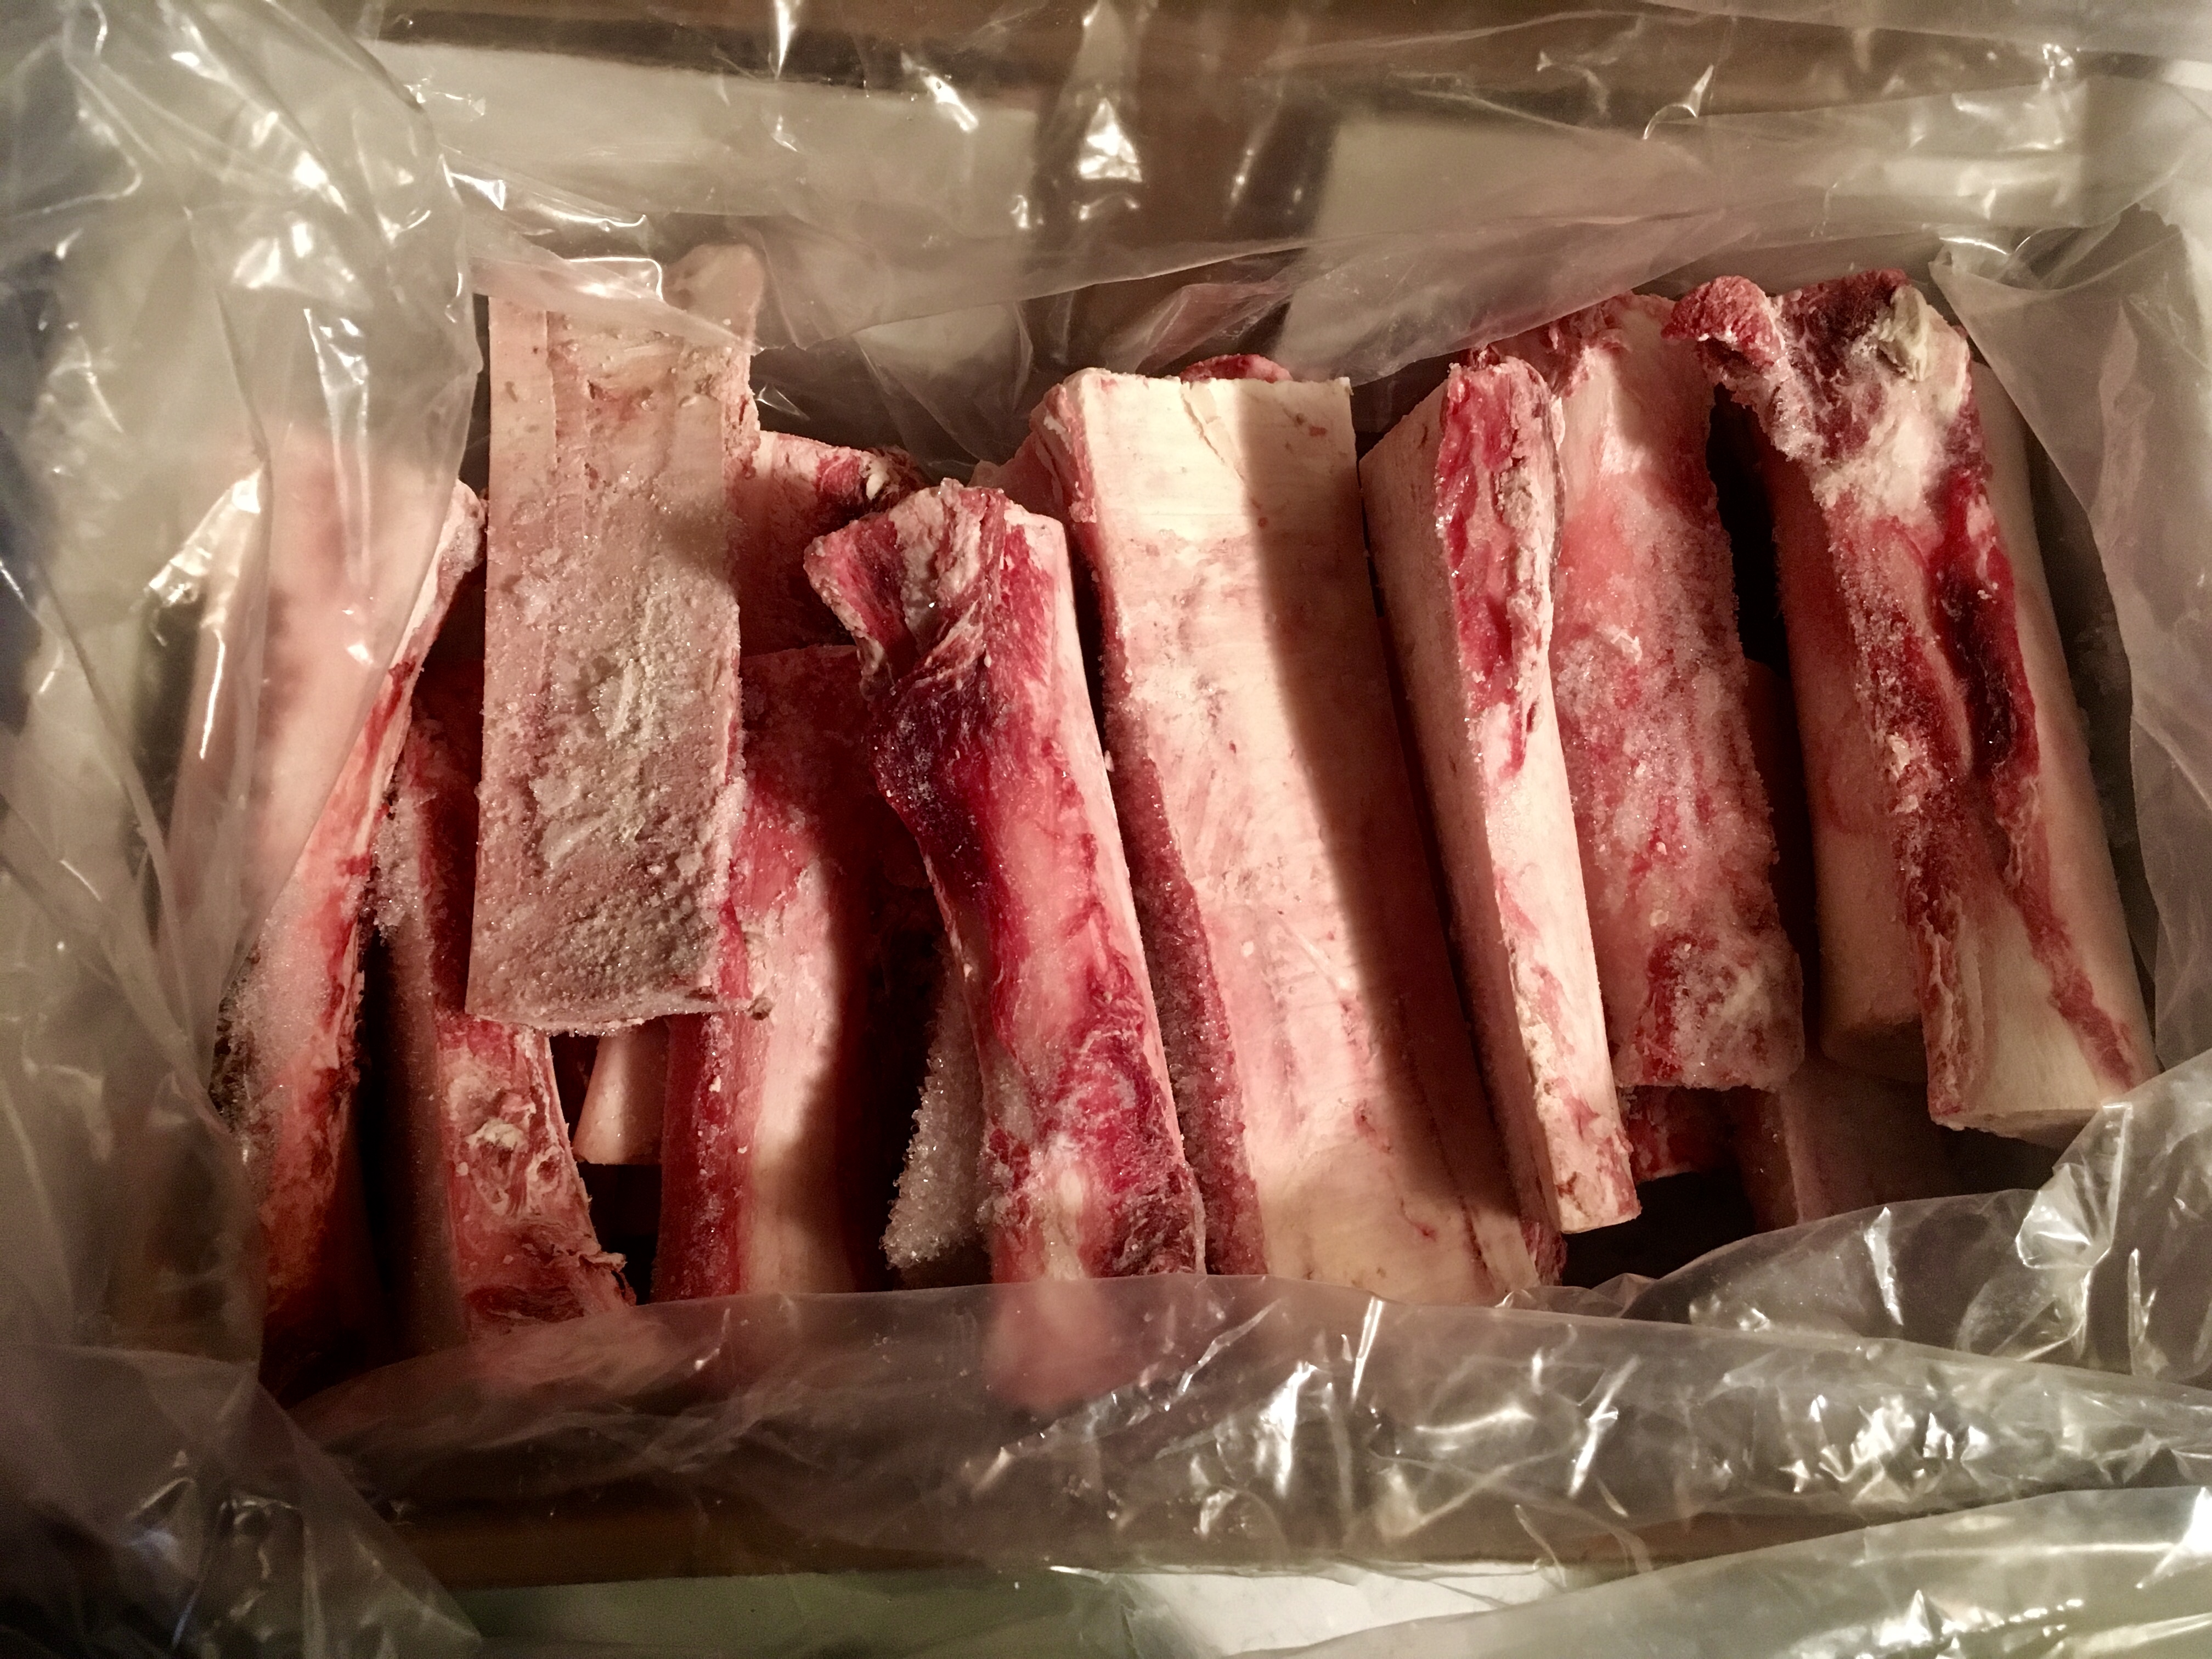
My box o’ frozen bones. I ordered about 25 lbs. of marrow bones from a grass-fed beef farm in Texas.


They key to roasting marrow bones properly is to keep an eye on them. The bones can go from frozen solid to blazing hot in no time, and that means the marrow can go beyond its rich, gelatinous perfection into a puddle of fat at the bottom of your pan in mere moments.


3 lbs. beef marrow bones (I like them sliced lengthwise)
3/4 cup finely ground salted pretzel sticks
1 teaspoon dried parsley flakes
1 teaspoon granulated onion
1/2 teaspoon granulated garlic
1/4 teaspoon black pepper
olive oil


I keep the beef bones frozen, moving them to the fridge until I’m ready to roast them.

Pre-heat the oven to 450 degrees.

Grind them up!

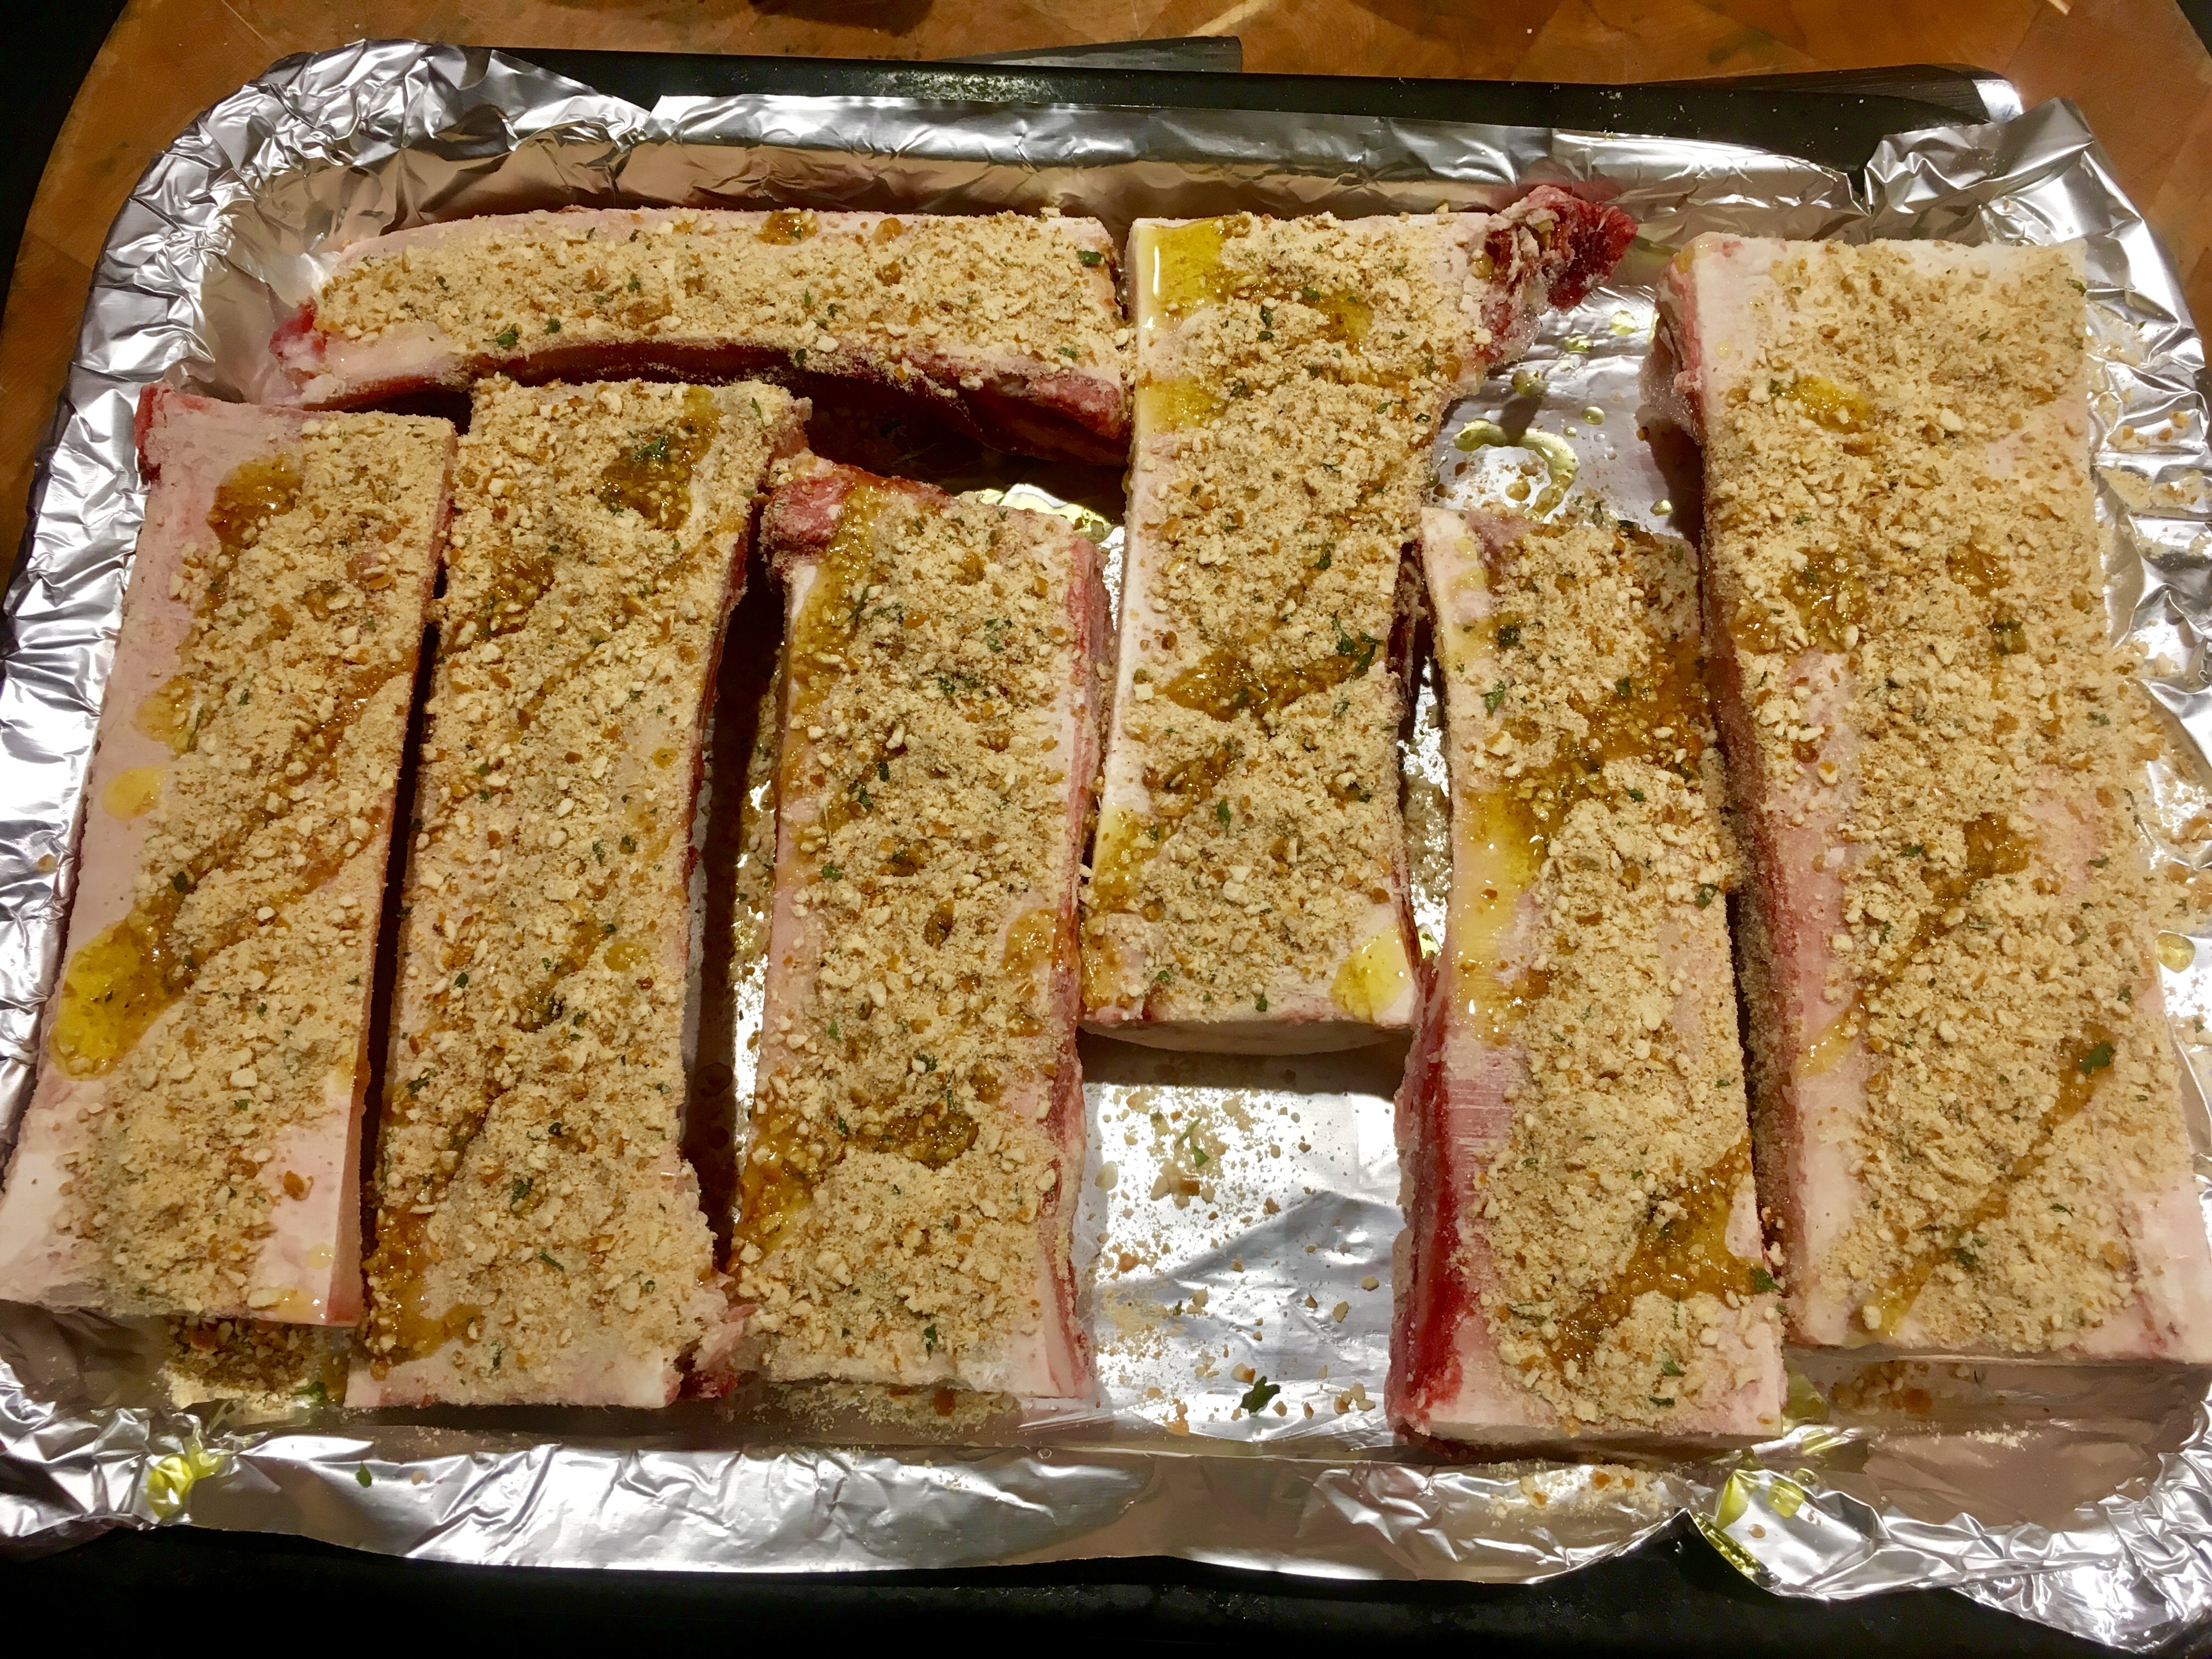
Place a handful of salted pretzel sticks in a food processor, and pulse them until the pretzels are ground fine. When you’ve got 3/4 cup of ground pretzel powder, move it to a bowl and add the parsley, onion, garlic and black pepper. No salt is needed if the pretzels are salted.


Lay the bones flat on a baking pan. If they wobble, place them on a layer of coarse salt to hold them steady. Sprinkle the pretzel mix on the bones, a little drizzle of olive oil on top, and place them in the oven.


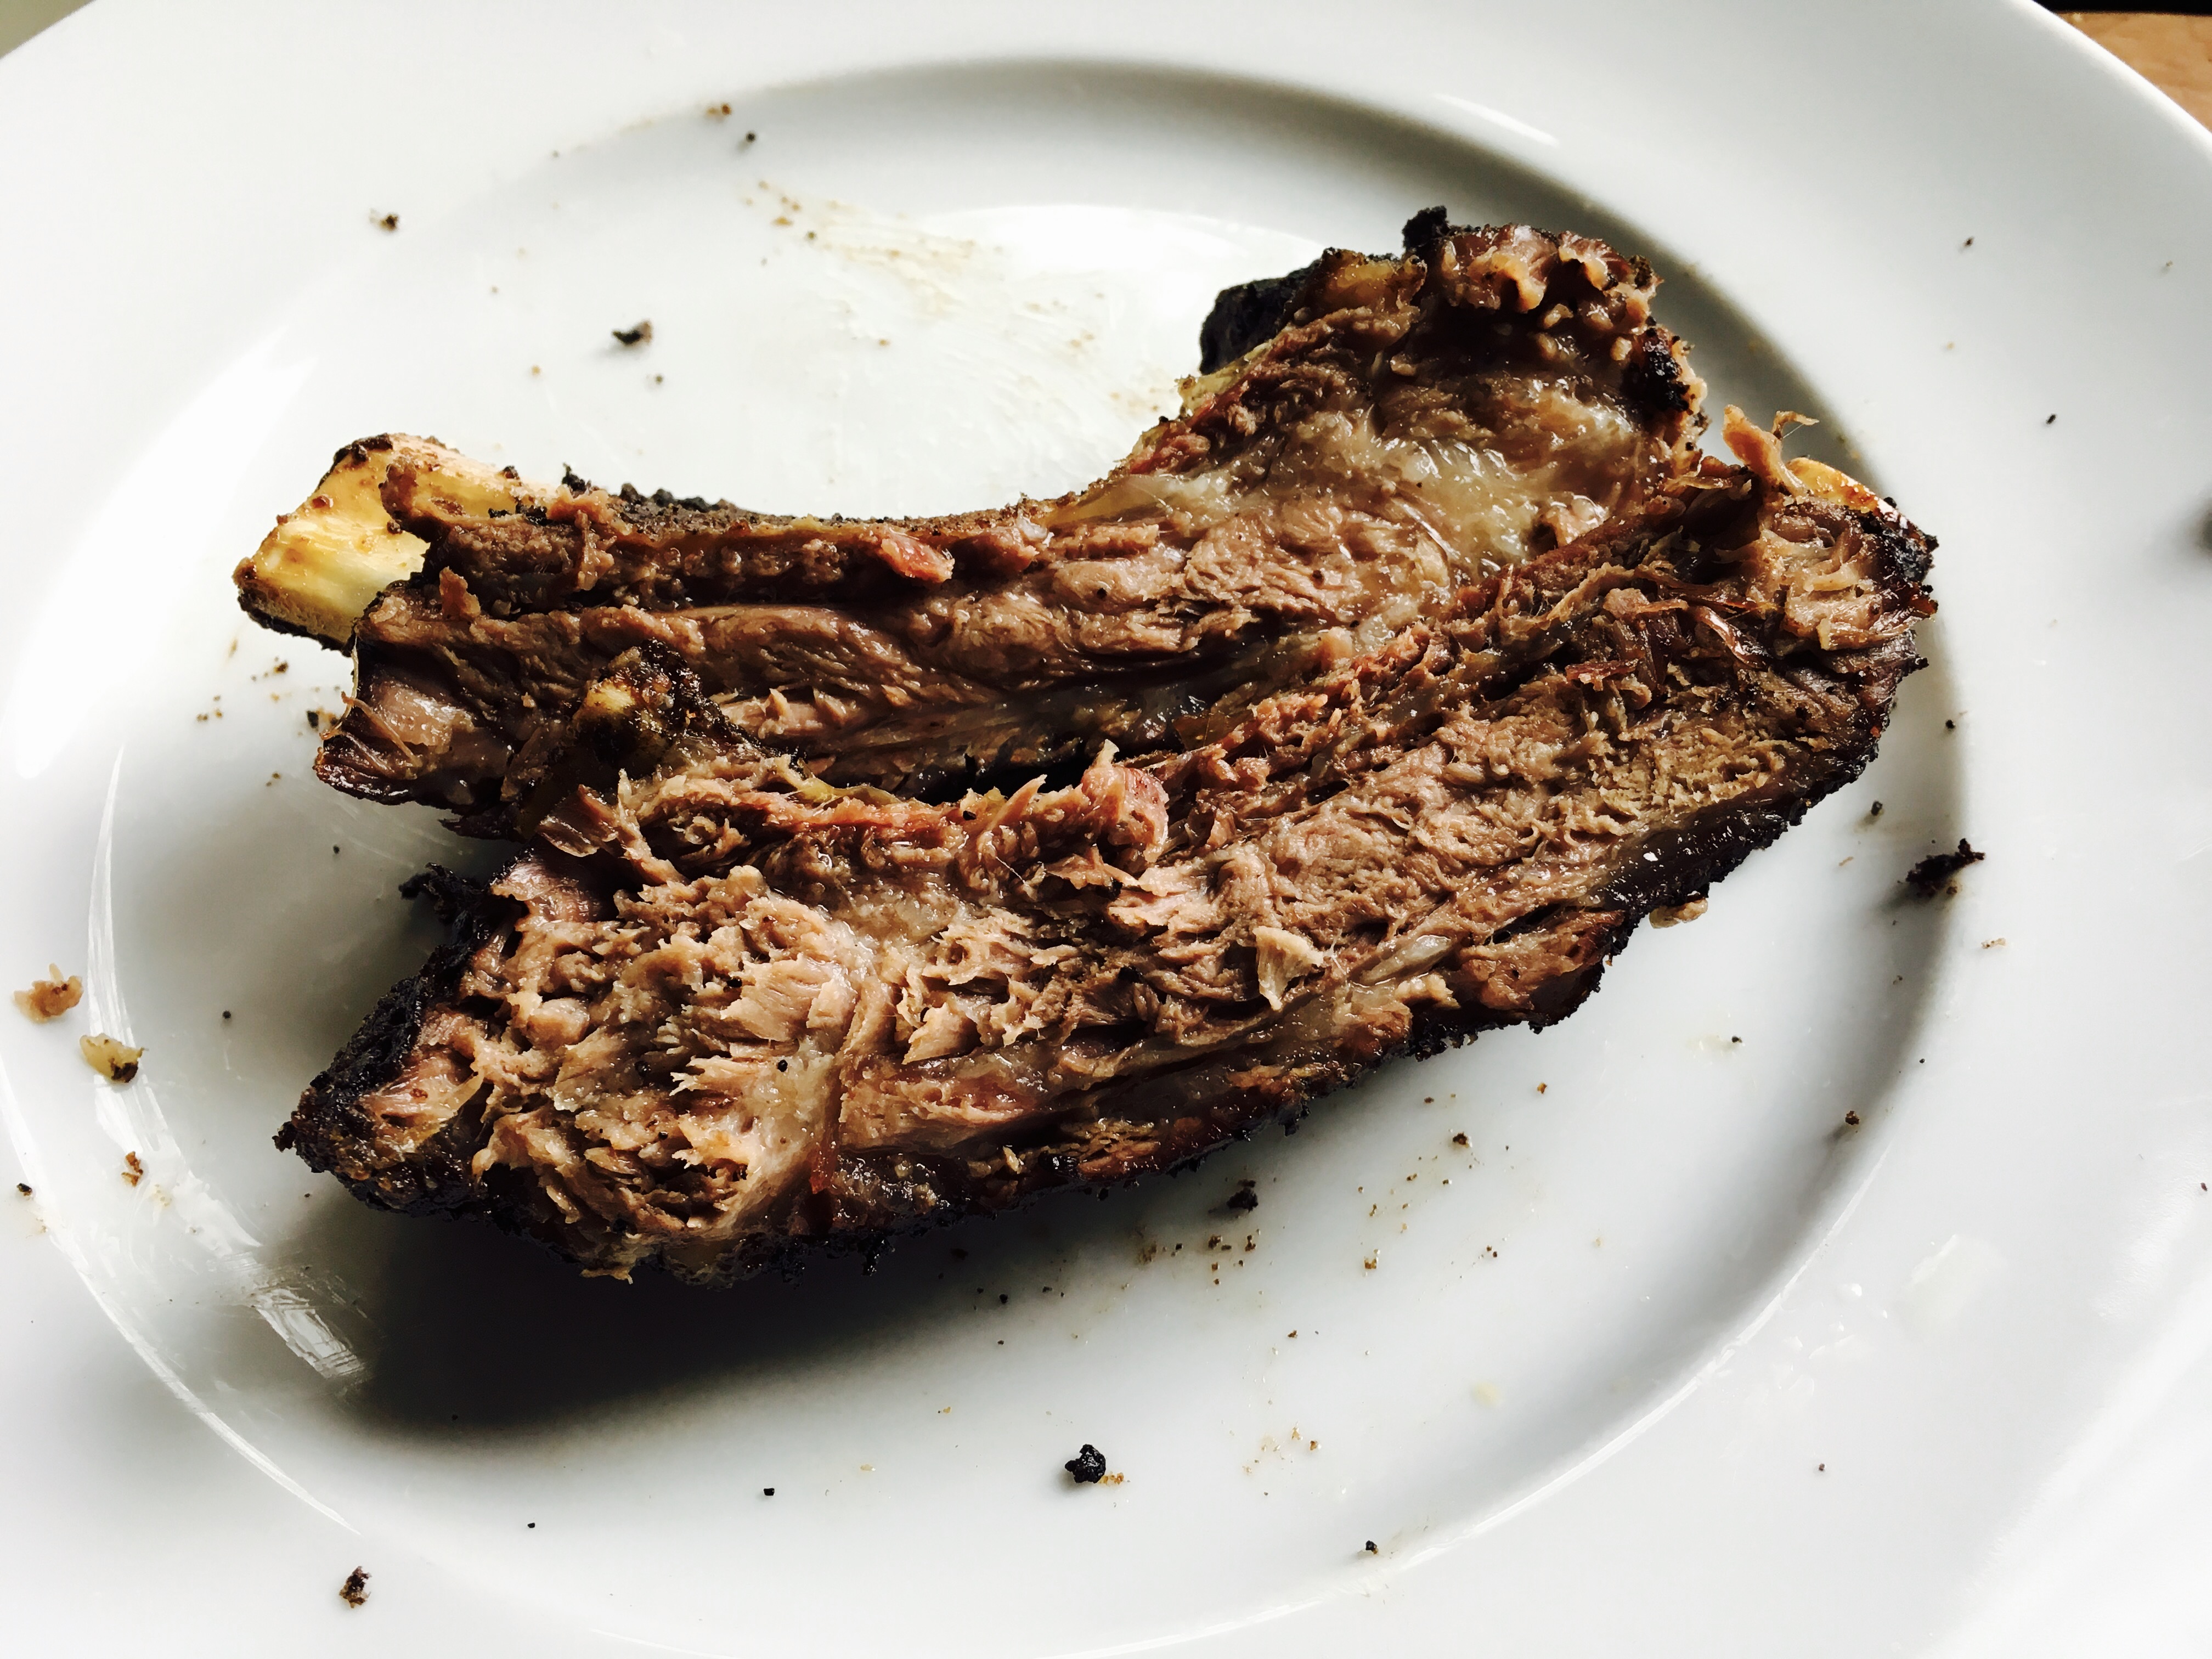
Now you watch…there’s that one point where they go from “not quite yet” to perfection to “Oops! Too much!” …so be careful!

Perfection!


Some toasted bread on the side is all you need!


If you’re cooking gluten-free, try Snyder’s of Hanover GF pretzels. They are awesome…you’ll never know the difference.


There’s still time to get all the ingredients that will make your Super Bowl party over the top!

Here are some links to my favorite recipes. All of them work really well when you want to feed a large group of hungry people, no matter what team they’re rooting for!

I’ve included classic chicken wing recipes, delicious ribs (without the need of a smoker or grill), classic Italian dishes, seafood and more.


CHICKEN WINGS AND DRUMSTICKS…

HONEY GLAZED CHICKEN WINGS

SPICY BRINED AND GRILLED CHICKEN WINGS

ASIAN STYLE CHICKEN WINGS

“MEXICAN” CHICKEN WINGS


PORK RIBS…

CHINESE STYLE HONEY RIBS FOR THE BIG GAME


BEEF RIBS…

KONA BEEF RIBS


SHRIMP COCKTAIL WITH SAUCE…

PERFECT SHRIMP COCKTAIL, FROM BOIL TO SAUCE


FRIED SHRIMP…

FANTASTIC FRIED SHRIMP


LASAGNA AND BAKED ZITI…

LASAGNA AND ITS COUSIN, BAKED ZITI


ASIAN NOODLES…GREAT HOT OR COLD

ASIAN NOODLES WITH PEANUT SAUCE


OYSTERS…

OYSTERS ROCK-A-FELLOW (IMPROVED!)


I really love the deep flavor of soy sauce and the sweetness of hoisin on poultry. Peking duck is the best example of this, but since I live in Rhode Island, I don’t get a chance to jump in the car and drive to Chinatown in Boston or New York at the drop of a hat. I had to come up with a plan B…and a good plan B!

I found it while looking through an old Chinese cookbook I had bought many years ago. Written by legendary NY Times food critic Craig Claiborne and Virginia Lee, “The Chinese Cookbook” has become my bible for all of my Asian dishes.

I use chicken instead of duck. It’s cheaper, easier to find, and I can easily buy a whole pasture-raised chicken from local farms here in Rhode Island. But it is just as delicious.

As long as you use gluten-free soy sauce and hoisin sauce (La Choy and Kikkoman make them and they’re found in just about any supermarket), this recipe is gluten-free.


Cantonese chicken


1 whole chicken, about 6 lbs., or 2 smaller chickens (pictured)
1 tablespoon peanut oil
1 tablespoon soy sauce
4 teaspoons Chinese five spice powder
2 teaspoons granulated garlic
2 teaspoons salt
1/2 teaspoon black pepper
6 tablespoons hoisin sauce
2 teaspoons sesame oil


Remove all the giblets from the chicken and discard. Rub the soy sauce first all over the chicken. (The chicken will absorb the flavors better if you do it before you rub the bird with the oil.) Then rub the peanut oil all over the chicken.

Combine the Chinese five spice, garlic, salt and pepper in a bowl. Season the entire chicken, including inside the cavity, with this mixture.

Pre-heat the oven to 325 degrees. Place the chicken in a pan lined with aluminum foil (cleanup will be easier) and bake.

Meanwhile, combine the hoisin sauce and sesame oil in a small bowl. When the chicken is about 15 minutes away from being done, brush it with the hoisin/sesame oil mixture. Cook it another 15 minutes until the chicken has a nice dark glaze. Don’t let it burn!

Let it rest about 15 minutes before carving.


I love pastrami. I love ribs. So why can’t the two get along? (Using my best announcer voice): Well now they can!!

I’ve seen a few recipes that use pastrami ingredients on foods other than pastrami and I thought it could work with pork ribs as well. I was right. And for these ribs, you don’t need a smoker or anything like that. They bake in the oven, then get finished under a broiler for that tasty char that you always look for in a grilled rib.

There’s a 2-step process to making these ribs. First, you combine the rub ingredients and let the ribs hang out in the fridge overnight. Then you bake them and broil them the next day, brushing a special sauce on them.

I prefer St. Louis-style ribs because they cook more evenly and have lots of meat. I prefer a heritage breed like Berkshire pork (also known as kurobuta) because of it has fantastic flavor, “good” fat, and is humanely raised.

Time to get ribbin’…


1/4 cup freshly ground black pepper
1 tablespoon ground coriander
1 tablespoon light brown sugar
1 tablespoon mustard powder
1 tablespoon paprika
1/4 teaspoon cayenne pepper
1/4 cup distilled white vinegar
2 tablespoons salt
2 racks St. Louis-style pork spare ribs (about 5 lbs.), preferably Berkshire pork

To make the rub, combine the black pepper, coriander, brown sugar, mustard powder, paprika and cayenne in a bowl. Mix well. To grind larger amounts of pepper and other spices, I use a small coffee grinder that I keep just for spices. It does the job quickly and easily.

My spice grinder.


Cut the racks of ribs into halves, removing the skin on the back of the ribs that can make it tough. Brush both sides of the ribs with the white vinegar, and then season with the salt. Pat the ribs with the spice rub, and place them on a rimmed baking sheet. Place the baking sheet in the fridge for at least an hour. Overnight is better.

Vinegar, salt and then the spice rub.


Pre-heat the oven to 325. Transfer the ribs to a large roasting pan, or you can use the rimmed baking sheet. Place the ribs fatty side up, and add 1/2 cup of water to the pan. Cover the ribs with aluminum foil and bake them for about 2 hours.

After 2 hours, remove the ribs from the oven and let them sit at room temperature, still covered by the foil, for about 30 minutes.

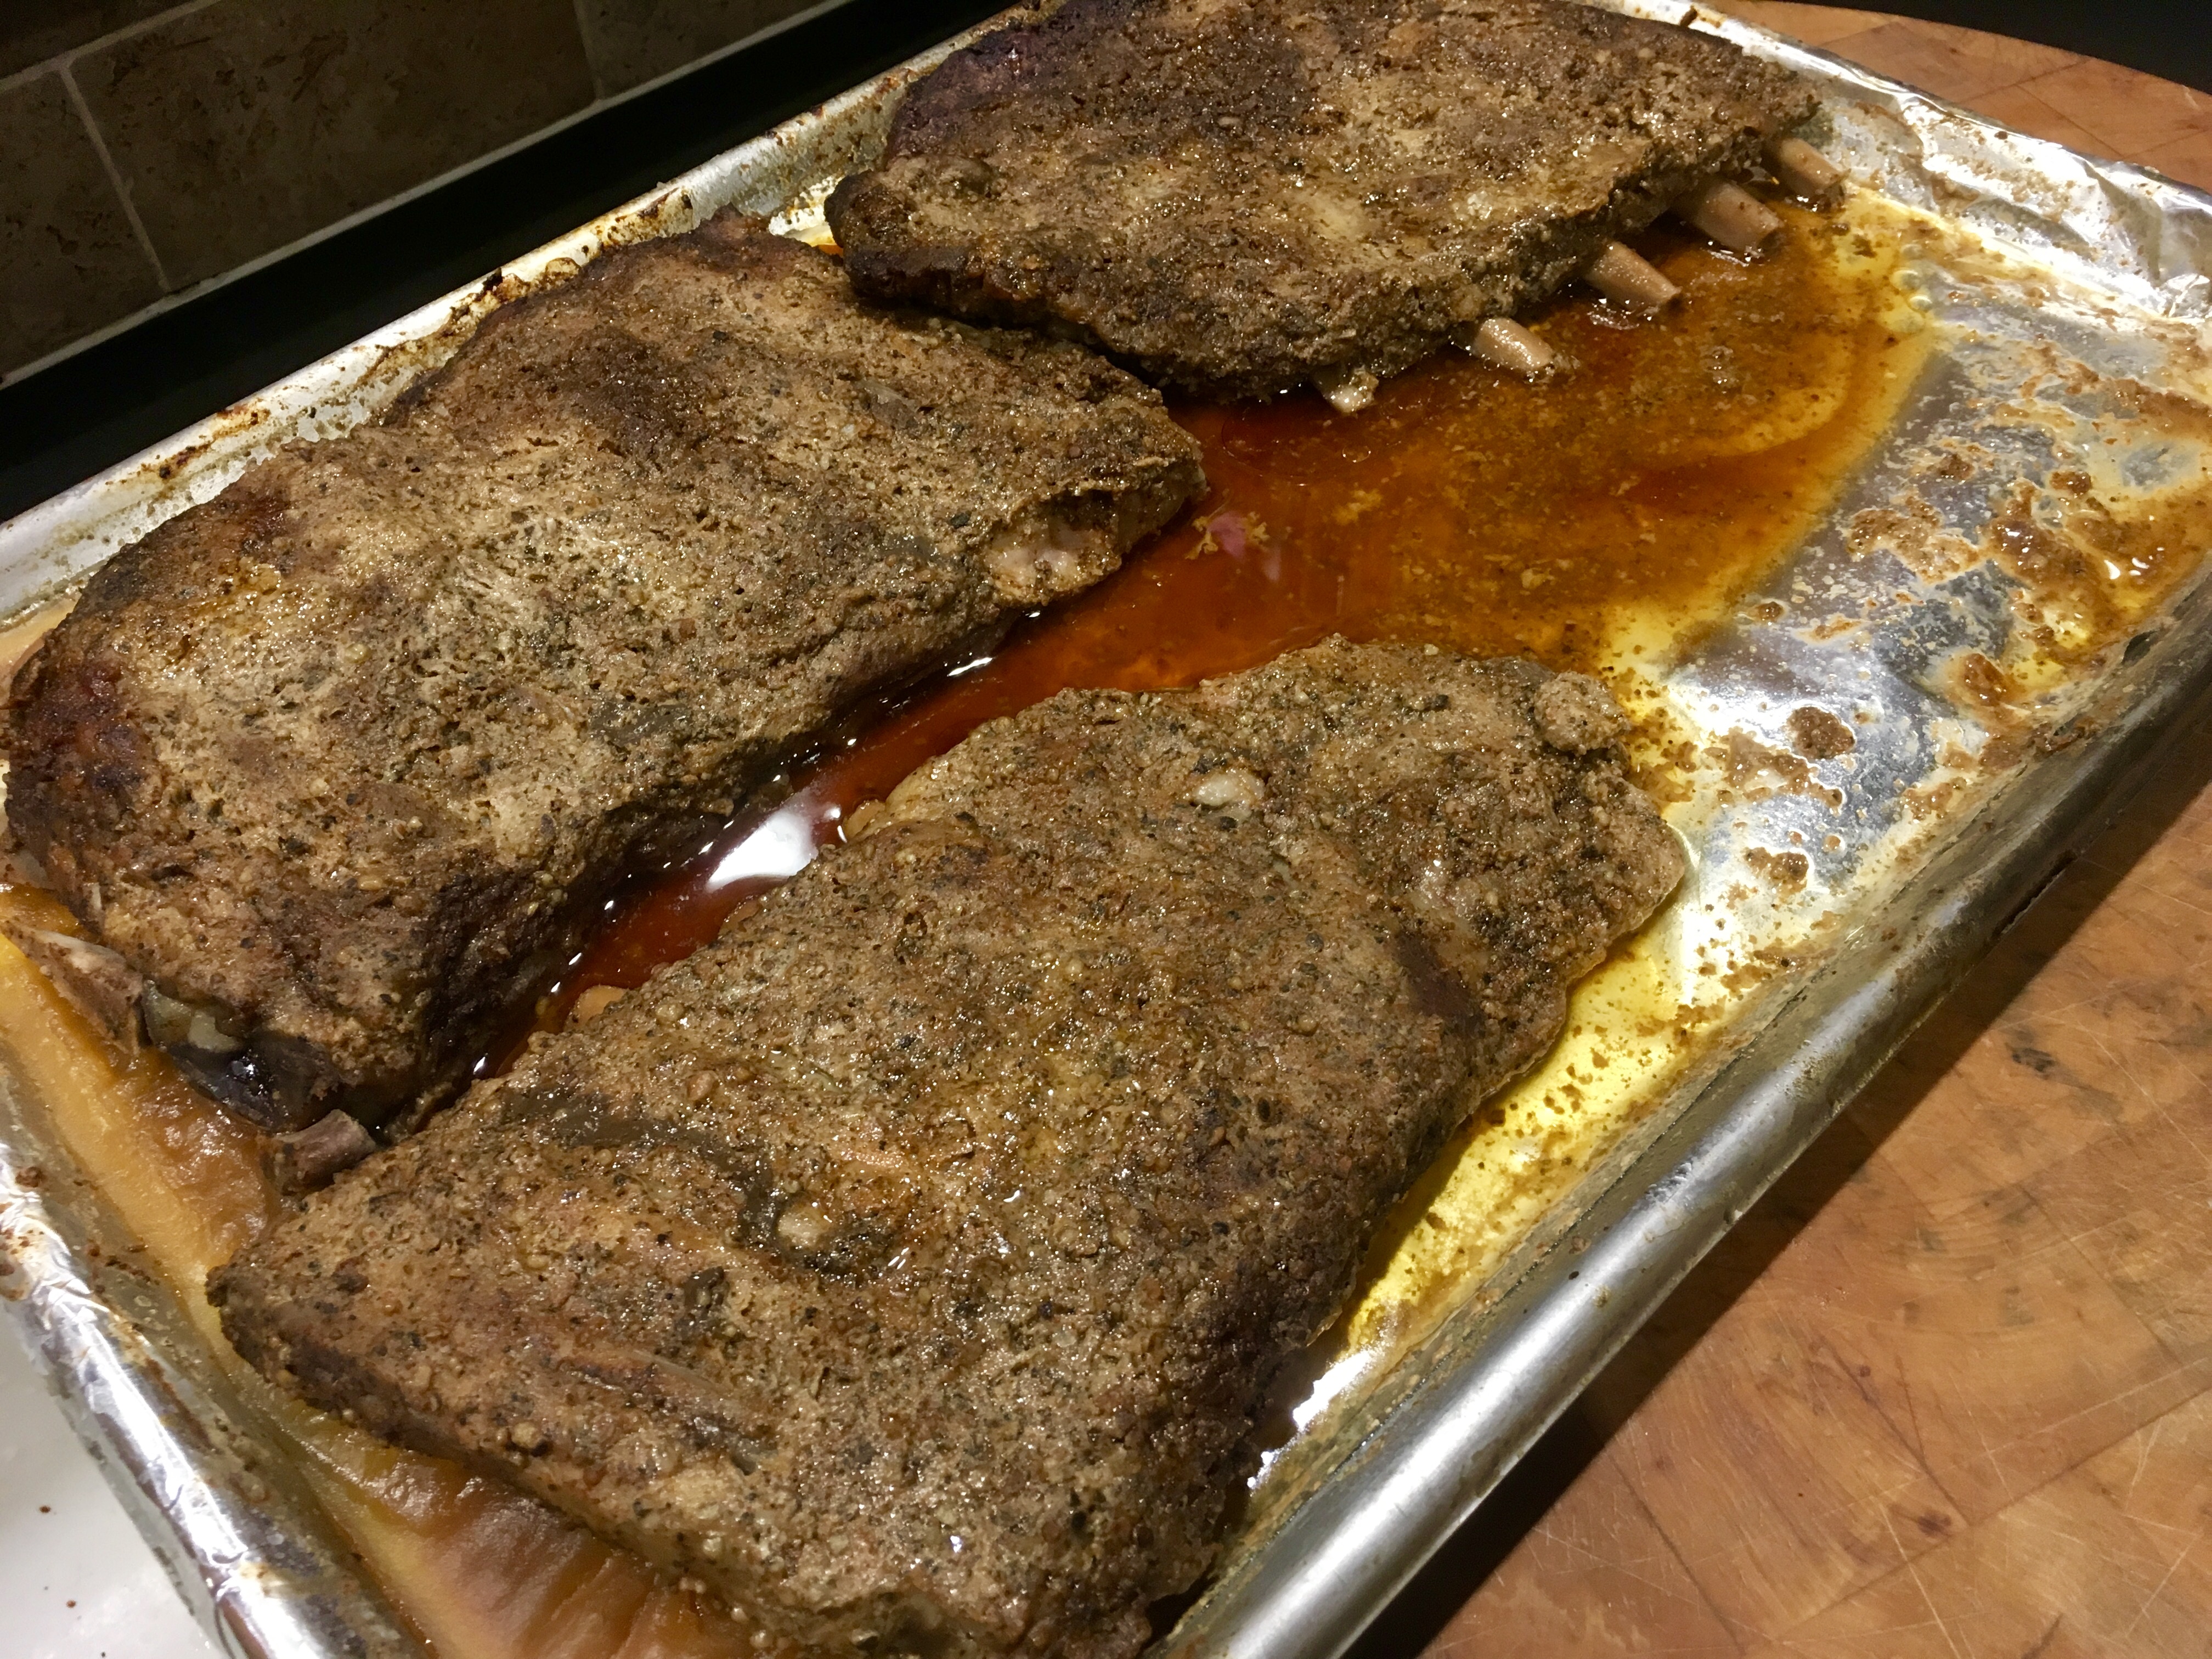
Out of the oven and ready to be brushed with sauce.


1/4 cup Dijon mustard
3 tablespoons apple cider vinegar
3 tablespoons honey
2 tablespoon soy sauce

In a small bowl, combine the Dijon mustard, apple cider vinegar, honey and soy sauce. If the honey’s very thick, I place the glass jar (no lid) in the microwave for a few seconds to make it flow better. (Don’t do this if it’s in a plastic container, and don’t microwave for too long–honey will foam up and make a big mess!)

Pre-heat a broiler.


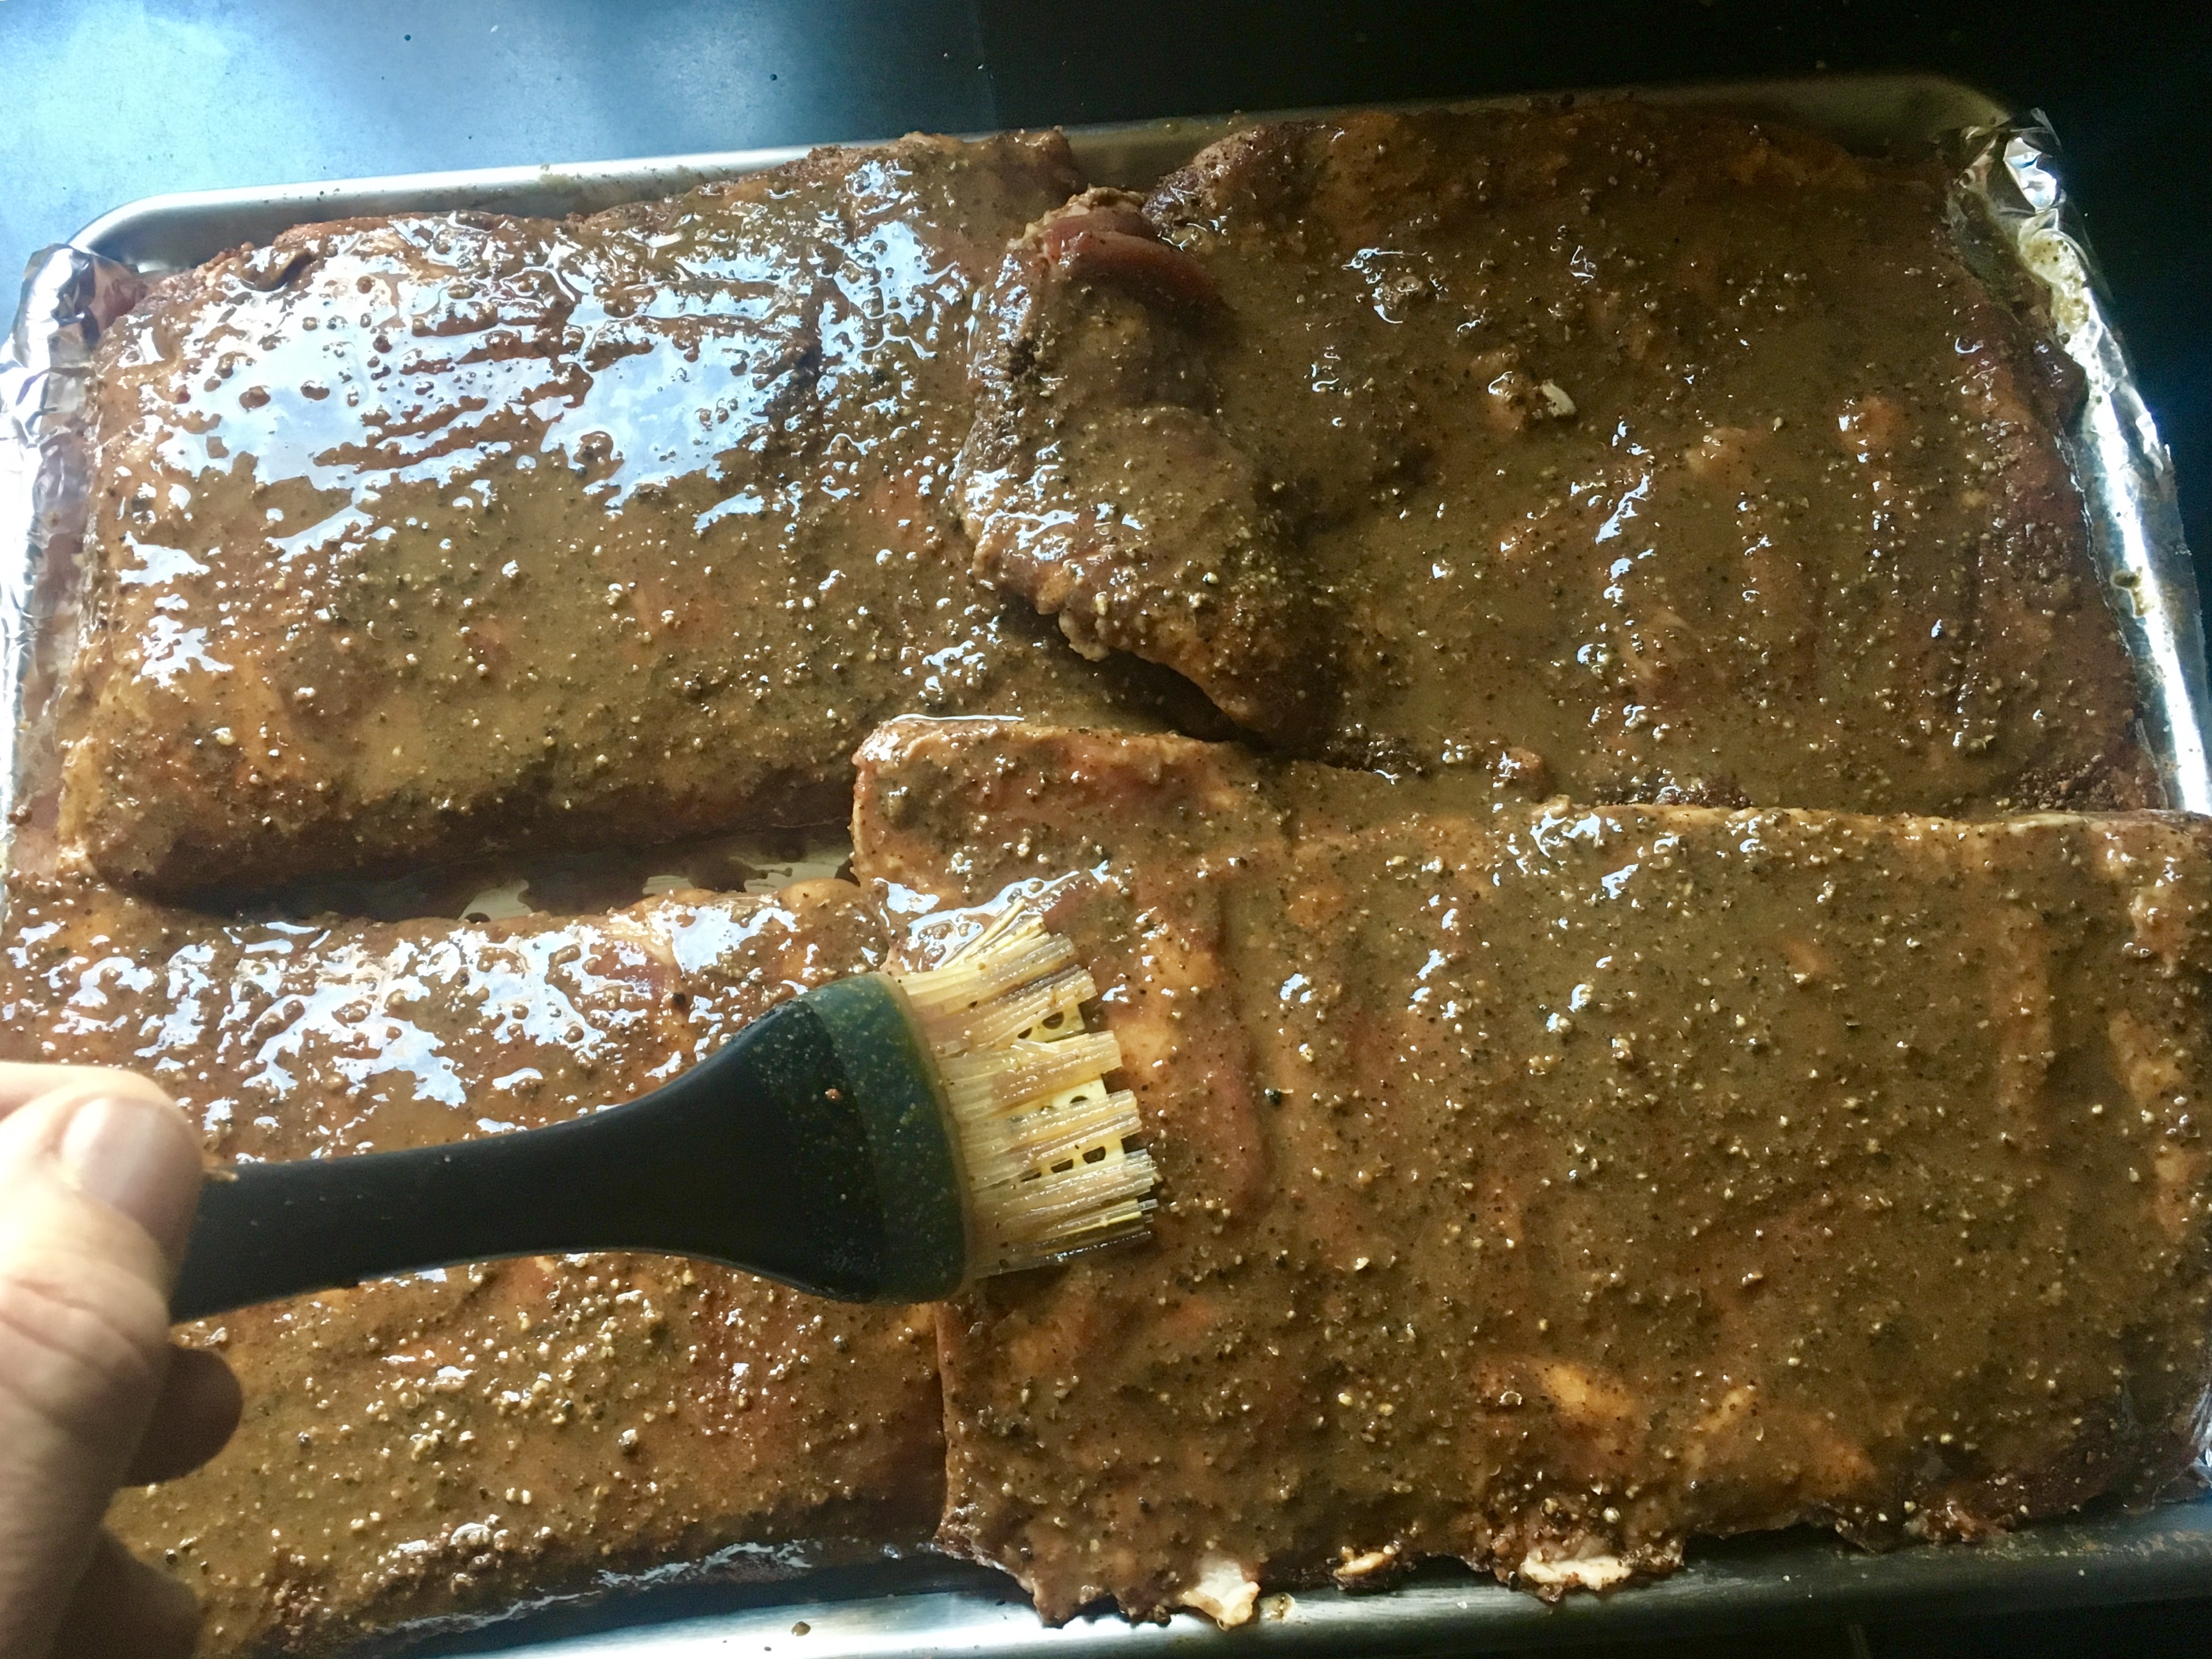
Brushing the ribs with the sauce.


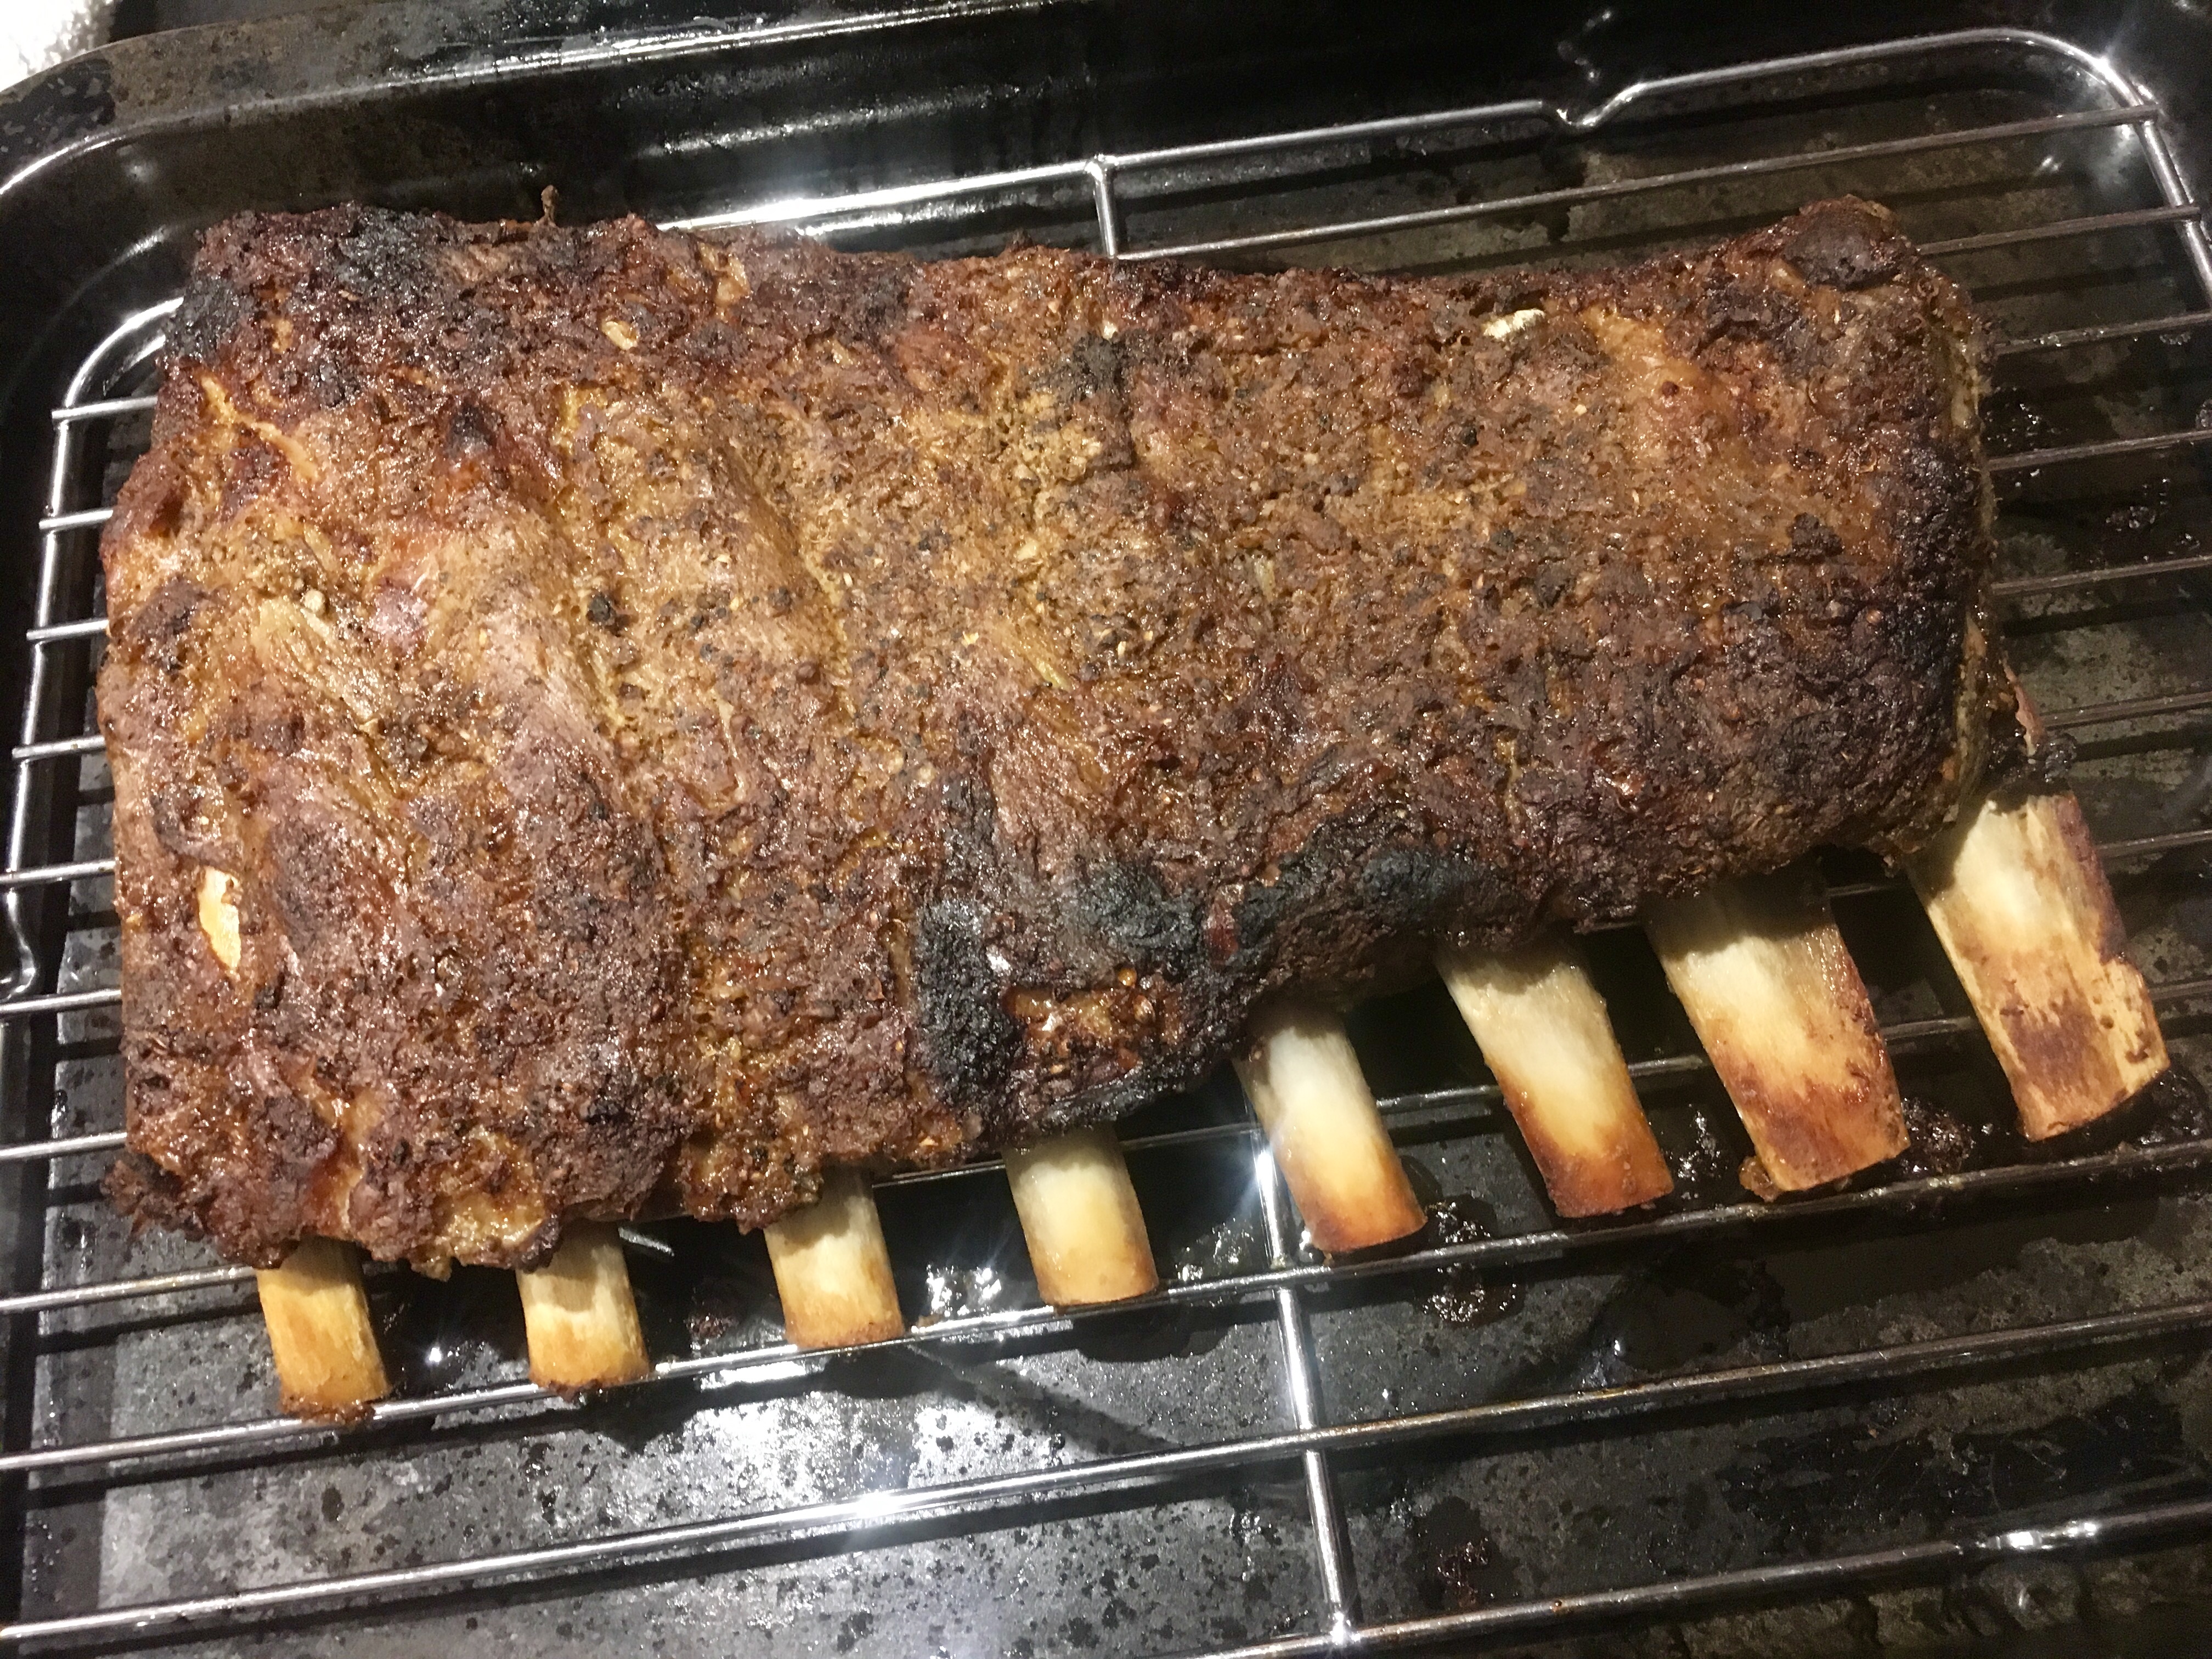
Take the foil off the ribs and brush them with the sauce. Then place the ribs under the broiler until lightly charred, about 3 minutes. Slice into individual ribs or devour a slab at a time!

Charred and delicious!


There are few things that make me happier than a plateful of really tasty chicken wings. If I watched football, I could easily finish a plate off within the first quarter of the game. I don’t though (watch football, that is) so let’s just say I can finish a plate off before the credits roll on the end of an episode of “Chef’s Table” on Netflix. That’s right…I’m bad.

I come from a long line of gnawers. Nothing is better than meat on a bone. A porterhouse is the ultimate steak for that very reason. So nothing bothers me more than someone who orders a plate of chicken wings and leaves all that tasty gristle and cartilage–along with some serious meat–behind. What is that? When I finish my wings, I walk my plate over to the trash can and drop a pile of surgically cleaned bones into the bag…not a bit left behind. One look at that pile of clean bones, and even my dog high-fives me.

Brining is a process where you soak a hunk of protein in a seasoned salt solution for a few hours. It’s a great way to add flavor and moisture to any cut of meat. I brined these wings for 3 hours before using a sweet and spicy rub. They can be grilled or roasted in the oven.

image

The brine…

1/2 cup Kosher salt
3 tablespoons light brown sugar
1 teaspoon whole black peppercorns
1 whole bay leaf
2 quarts water

Combine all ingredients in a saucepan and heat until the sugar and salt dissolve. Remove from heat, and let it cool to room temperature.

The rub…

1/4 cup light brown sugar
1/4 cup granulated sugar
1/4 cup sweet paprika
1 tablespoon Kosher salt
1 tablespoon granulated onion
2 teaspoons black pepper
1 teaspoon dried thyme
1 teaspoon dry mustard
1 teaspoon ground ginger
1 teaspoon cayenne pepper

Combine all the rub ingredients in a bowl.

Place 3 lbs. of chicken wings in a Ziploc bag and pour the cooled brine into the bag. Place the bag in a bowl to prevent leaks and place it in the fridge for several hours.

After a few hours, remove the chicken from the brine and dry the wings with paper towels. Discard the brine.

Place the chicken wings in a large bowl and sprinkle them with 1/3 cup of the rub, tossing to coat the chicken well. Place the bowl with the chicken in the fridge until ready to cook.

About 30 minutes before cooking, remove the bowl from the fridge and let the chicken come to room temperature.
Pre-heat the oven to 350 or light a grill.

Toss the chicken with some more of the rub, if you like, then place the pieces on a sheet pan lined with non-stick aluminum foil or a wire rack. Bake at 350 for 30 minutes or until done. Lower the oven temperature if it starts to burn.

If you’re grilling, cook the wings over medium heat, turning frequently them to prevent burning. Cook until the wings are done.

Sometimes I’ll do a combination of the two and I’ll cook the wings in the oven until they’re almost done. Then I’ll throw them on a grill to get that smokey char on them, flipping them often to prevent burning.


Maybe you saw in the news recently that KFC just sold out (in just a few hours) of a firelog that contains the 11 secret herbs and spices of their original recipe chicken. Catch the story here: https://www.dailyrecord.com/story/money/2018/12/13/kfc-firelog-smells-just-like-its-fried-chicken-but-supplies-limited/2293216002/

It was just over a year ago where the nephew of Colonel Sanders himself revealed the 11 secret herbs and spices that made KFC‘s original recipe chicken a worldwide success. He claimed he worked for his uncle for many years and had to make huge batches of the seasoning mix.

Despite what they might say when asked, let’s face it: people just can’t get enough of KFC.

For me, going to KFC is a guilty pleasure. Although I’m a big proponent of grass-fed this and pastured that, my kryptonite is KFC’s original recipe chicken. There’s a KFC right next door to a local Home Depot in my area and my car literally drives itself to the pick-up window…I can’t help it. I justify the consumption of this heavenly grease by asking for no sides–no biscuit, no nothing. I get one breast and one thigh, and I drive off, steering my car with my knees as I indulge in my dirty secret, the hot grease dripping down my chin, a roll of paper towels at my side.

Making the KFC chicken recipe at home means I do have some control over product quality. I can use pastured or organic chicken. I can use clean oil. And I can oven-fry my chicken, meaning I fry it in oil until golden brown, then finish the cooking process in the oven.

I have to say, the recipe really works! Maybe if I placed the real KFC side-by-side with my home-made chicken, I’d notice a difference. But it was pretty damn close and absolutely delicious! If I could change one thing, I would use smaller chicken pieces next time. I used large pieces and the meat-to-breading ratio was off. Though it was mighty tasty, I was craving more breading per bite.

The recipe calls for all-purpose flour, but I used Cup4Cup gluten-free flour, and the results were excellent!


2 cups all-purpose flour (I use Cup4Cup gluten-free flour)
3 tablespoons paprika
1 tablespoon celery salt
1 tablespoon dried mustard
1 tablespoon garlic salt
1 tablespoon ground ginger
2 teaspoons black pepper
1/2 teaspoon white pepper
1 1/2 teaspoons thyme
1 1/2 teaspoons basil
1 1/2 teaspoons oregano
1 teaspoon salt
1 cup milk
1 egg
5 lbs. chicken pieces…your choice
oil, for frying


Combine the flour and the “11 herbs and spices” in a bowl. Mix well.

In another bowl, whisk together the milk and the egg. Add the chicken pieces to this bowl and let the chicken soak in it for 10 minutes.

Pre-heat the oven to 350 degrees.

Pour a couple of inches of the oil into a pan with high sides and heat it to 340 degrees, using a thermometer. Don’t fill it with too much oil, because oil expands when hot and it could spill over.

Take the chicken pieces and coat them with the seasoning mix one at a time, making sure you coat them well. Carefully place the chicken in the hot oil. Don’t overcrowd the pan…work in small batches. Too much chicken could cause the oil to spill over the top.

Fry the chicken pieces just until golden…no need to cook them all the way through. Place the pieces on a baking sheet lined with non-stick aluminum foil. When all the chicken has been fried, place the baking sheet in the oven and cook until the chicken pieces reach an internal temperature of at least 160 degrees.


Make a lot! Leftovers are great, and they re-heat really well in the oven! (Don’t use a microwave…the oven is best.)