Archive for the ‘Recipes’ Category

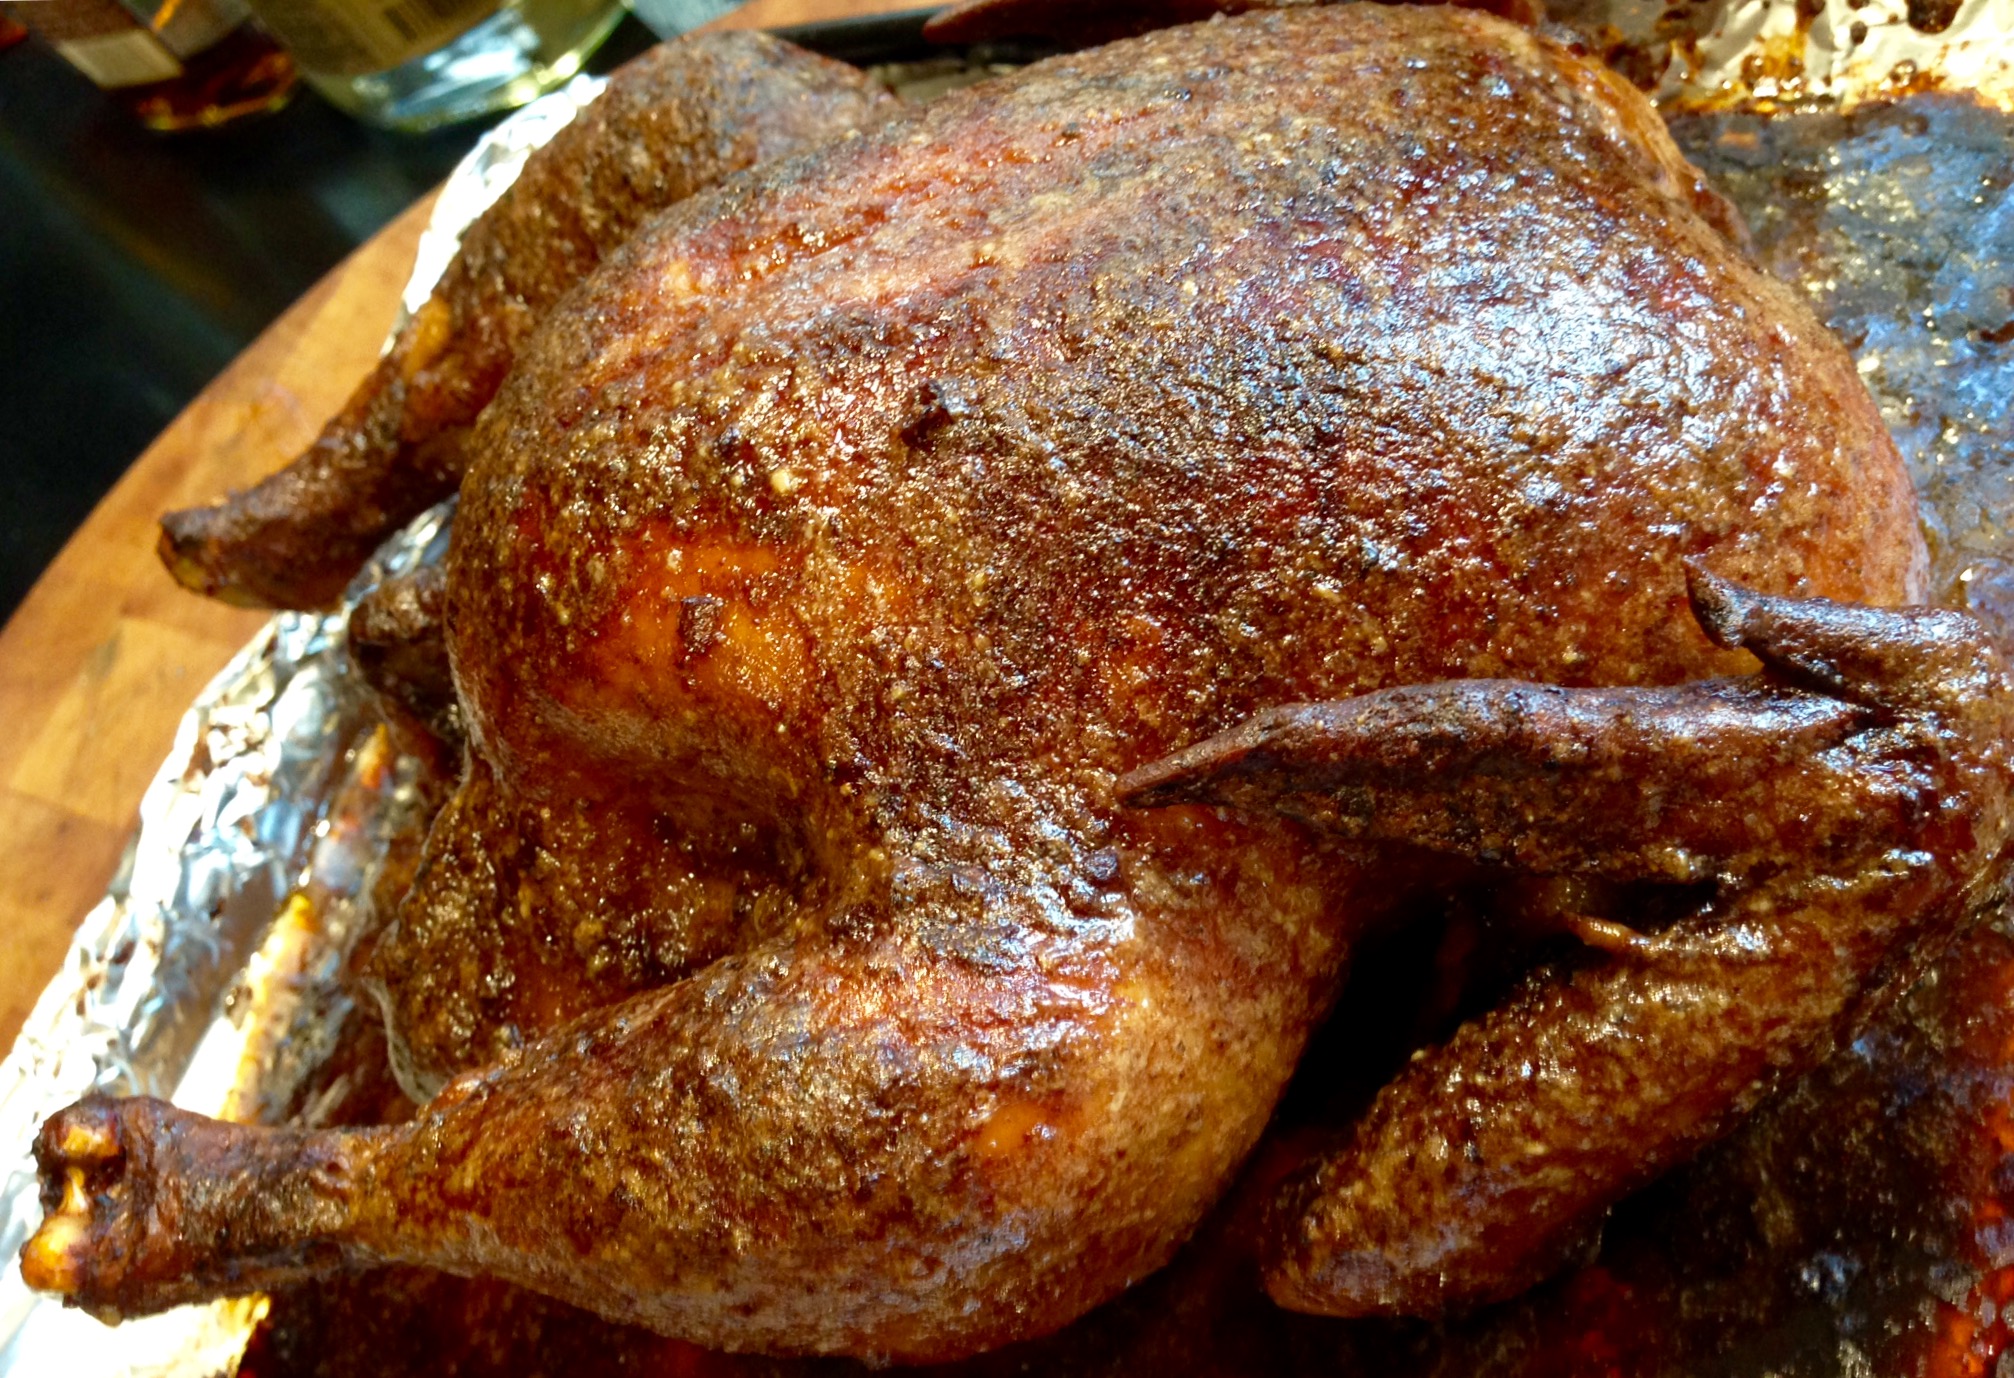
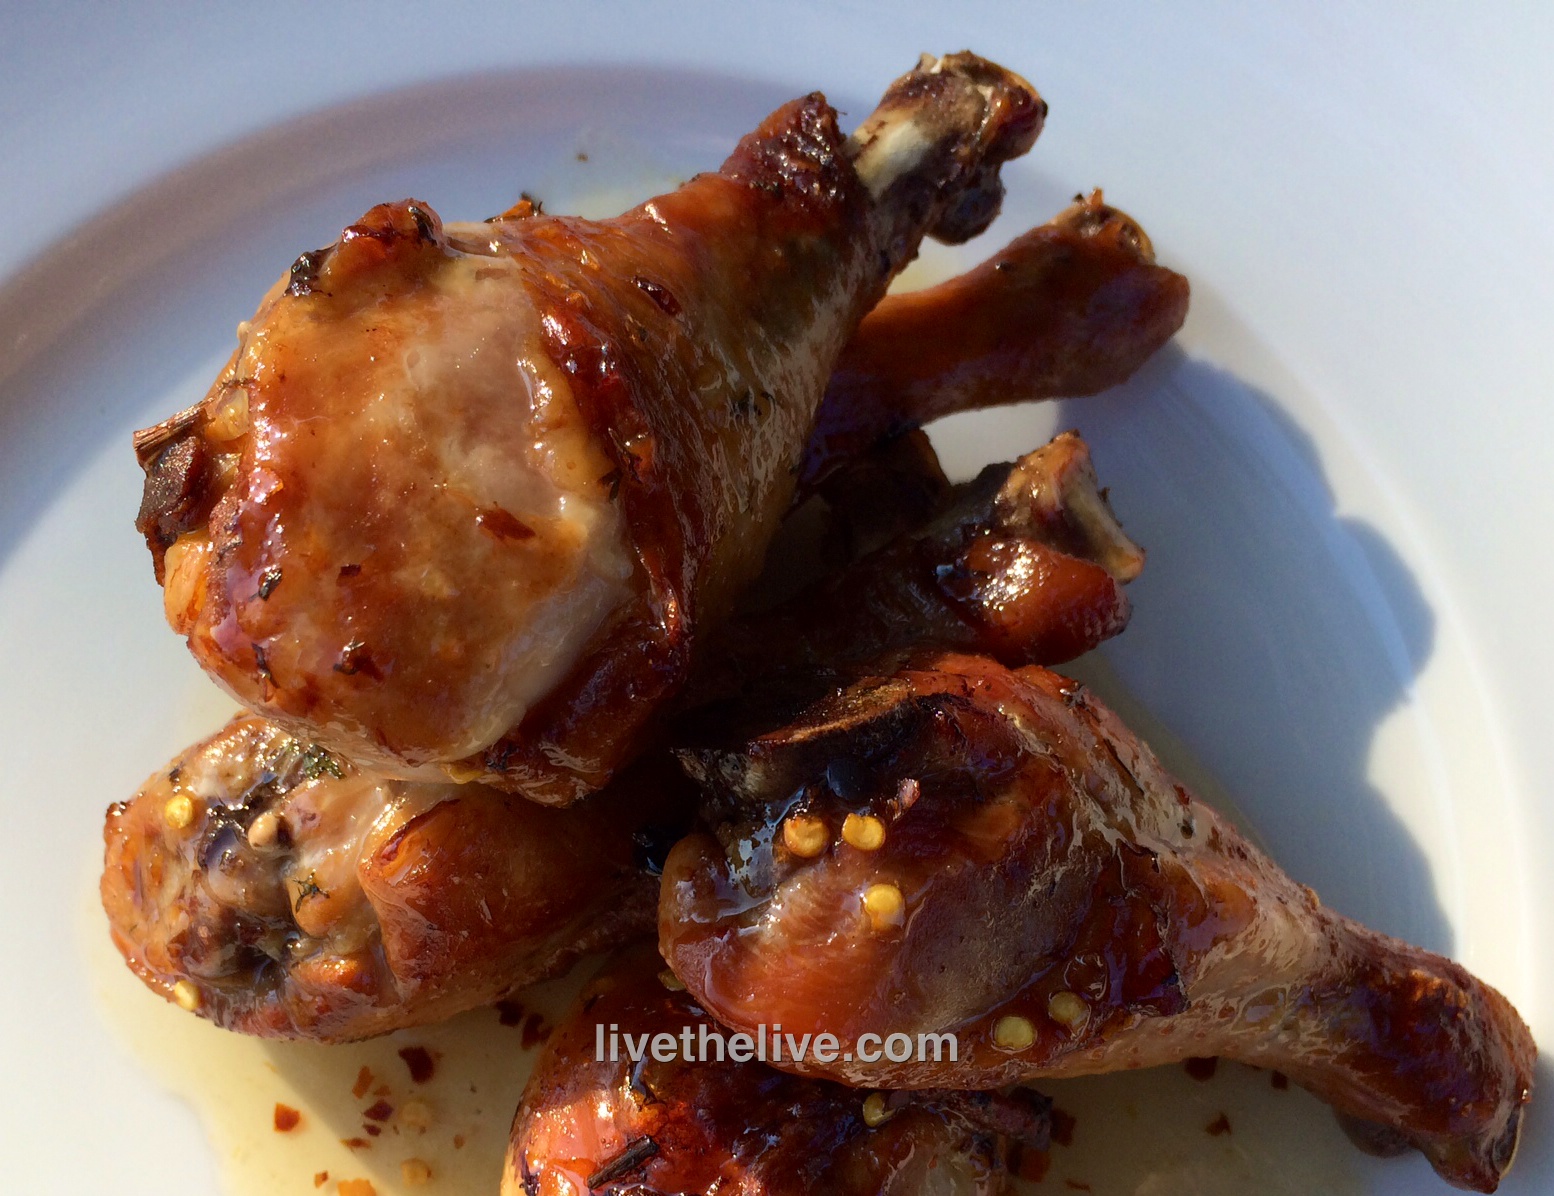
I love fried chicken. And despite what most people think, fried food is really not that bad for you if you fry it properly. I use clean avocado oil every time, sometimes adding bacon fat or pork fat if I have it. And I get the oil to the right temperature: two key factors that will result in crispy chicken that isn’t bogged down with grease. What makes this recipe great is that I get all the benefits of crispy fried chicken without all the grease and without standing watch over it the whole time.

You can use any chicken parts for this recipe. Fry the chicken until it just turns golden brown and then finish it in the oven.


10 lbs. large chicken wings or chicken pieces
Avocado oil, for frying

For soaking:

1 quart buttermilk
1 tablespoon hot sauce (I use Frank’s Red Hot)

For the seasoned flour:

2 cups all purpose flour (I use gluten-free flour)
1 tablespoon sea salt
1 teaspoon freshly ground black pepper
1 teaspoon paprika
1 teaspoon granulated garlic
1 teaspoon onion powder
1 teaspoon basil
1 teaspoon oregano

Open the bottle or carton of buttermilk and add 2 teaspoons of hot sauce. Close the container and shake to combine. Place the chicken pieces in a Ziploc bag, cover with the buttermilk, and seal the bag, letting the chicken soak in it for at least several hours. Overnight is best.

image


Pre-heat the oven to 350 degrees.

In a bowl, combine the flour, salt, pepper, paprika, granulated garlic, onion powder, basil and oregano. Mix well.

After the chicken has soaked in the buttermilk, remove the pieces one at a time, leaving the buttermilk on them as you toss the pieces into the seasoned flour. Shake off the excess flour, and then set the pieces aside on a metal baking rack placed on a sheet pan.

Pour the oil into a large heavy-bottomed stock pot to a depth of 1-inch. Heat the oil to 360 degrees on a thermometer.

image

Working in batches, place the chicken pieces in the oil, being careful not to overcrowd them. Fry the chicken until it is golden brown on both sides, then place each piece back on the metal baking rack set on the sheet pan.

Once all the chicken has been fried, place the sheet pan in the oven for 30 to 40 minutes, until it’s fully cooked and crispy.

image


Feast!

They call it fava, but it’s not the bean we usually associate with that name. Originally, broad beans were used in this dish, but quickly it changed to a type of yellow shelled lentil that is much smaller and flavorful than its American counterpart, the yellow split pea, no doubt due in part to the dry, volcanic Santorini soil it grows in. The lentil is smaller and the art of turning this simple gem into a sublime porridge is worth learning.
The fava at Dimitris Amoudi Taverna

The fava at Dimitris Amoudi Taverna

As common in Santorini as pasta is in Italy, grains of fava have been found in archaeological sites in the ancient city of Akrotiri (on the southern side of Santorini) dating as far back as 3500 years ago. Every taverna on the island offers their own version of fava, and though the differences are subtle, they can be significant.
Most recipes start with the dried lentils, which are washed thoroughly. They are added to a pot of fresh water and then boiled until the water reduces and the lentils slowly absorb the liquid and soften into a porridge. Often chopped onion is added to the pot of water in the very beginning, so that it completely dissolves and flavors the fava. Some recipes call for a subtle mixture of local dried herbs, similar to oregano and thyme, to be wrapped in cheesecloth and added to the pot to infuse flavor.
Like making a great Italian tomato sauce, cooking fava is a labor of love. It requires low heat and constant stirring to make it perfectly smooth. Often it is pureed in a blender at the end.
When the fava is ready to serve, the toppings can vary. Thin slices of red onion and a liberal drizzle of Greek olive oil are common. Sometimes it’s topped with locally harvested and brined caper berries or caper berry leaves, or a few kalamata olives.
Proud of his fava

Proud of his fava

On our last trip to Santorini, our most memorable fava dish was a simple, rustic version with onion, capers, olive oil and a side of lemon at Dimitris in Amoudi, and a light-as-a-cloud creamy fava topped with caper berry leaves and olive oil at Roka in Oia.
Finding real Santorini fava can be difficult and expensive on line, but it is possible. You can easily find dried yellow split peas in local US supermarkets, but it’s not quite the same.
We bring loads of Santorini fava home with us, making our already-heavy luggage even heavier. But it’s worth it to be able to enjoy this Greek comfort food at home.
Whether you use the real fava from Santorini, or yellow split peas, you’ll find it’s a great side dish to replace the usual potatoes or rice. My personal touch–no surprise here–bacon!
 image
1/2 cup olive oil
4 strips bacon, finely chopped
1/2 onion, finely chopped
4 cups water
2 cups chicken stock (I use homemade)
2 cups fava or yellow split peas, rinsed in a colander
salt and pepper
In a large saucepan over medium heat, heat the olive oil and the bacon until the fat renders and the bacon is crispy. Add the onions and cook until they’re translucent. Add the water, the chicken stock and the fava. Stir well. Season with salt and pepper.
Bring the pot to a boil, then reduce to medium. Using a large spoon, scoop off any foam that appears.
Stir often, and cook until the fava absorbs the liquid and becomes a creamy porridge. Lower the heat as you cook to prevent burning. You may need to add water while cooking if you see that it’s getting too dry.
The fava will be done when it’s creamy and smooth. (Optional: zap it in a blender to make it really creamy.) Serve with finely chopped onions, a sprinkling of capers, and a drizzle of good quality olive oil.

ASIAN CHICKEN

Posted: October 10, 2015 in Carnivore!, chicken, Food, Recipes
Tags: , , , ,

When I’m jonesing for really good Chinese food, I have to make it myself. I live in the boonies, nowhere near my favorite Chinatown restaurants of Boston or New York City. This chicken satisfies my cravings.

image

1 pastured whole chicken, about 5 lbs.
Soy sauce
Coconut oil
1 tablespoon Chinese Five Spice
1 teaspoon granulated garlic
1 teaspoon salt
1/2 teaspoon pepper
4 tablespoons soy sauce
4 teaspoons sesame oil
1 tablespoon honey
1 tablespoon peanut butter
1 tablespoon orange juice
2 teaspoons rice vinegar
1/4 teaspoon Sambal chili paste

Pre-heat oven to 325.

Rub the chicken with the soy sauce, and then rub it with the coconut oil.

In a bowl, combine the Chinese Five Spice, garlic, salt and pepper. Rub this all over the bird, placing some in the body cavity as well.

In a separate bowl, combine the glaze ingredients: soy sauce, sesame oil, honey, peanut butter, orange juice, rice vinegar and Sambal.

Cook the bird until it’s about 10 minutes before it’s done. Then brush the glaze on the bird and return it to the oven for 5 minutes. Do this twice.

Let the bird rest before carving.


My interest in food and cooking goes back to my first restaurant job as a teenager, at an Italian restaurant called Pizza City East in my hometown of Plainview, NY.  (There was also an original Pizza City on Crossbay Blvd. in Ozone Park, Queens.) It was there that I learned how to open clams by the bushel, how to make the perfect cappucino, and how to use basic restaurant kitchen equipment like the convection oven and the fryer. I peeled thousands of shrimp for scampi, washed barrels of lettuce for salads, and grated hundreds of pounds of mozzarella for pizza.

I also made baked ziti by the barrelful. It was much easier to make in large quantities than lasagna, and it basically contained all the same ingredients. No worries about making perfect layers. No pasta sheets sticking together. Just put all the ingredients in an oven-proof baking pan, mix them around and throw them in the oven. And it tasted great.

Now I make baked ziti, or shells, or elbows–whatever pasta I have on hand–at home, using gluten-free ingredients.

To make the perfect baked ziti, it's important to have a good helper.

To make the perfect baked ziti, it’s important to have a good helper.

I substitute whole milk for the usual bechamel sauce used in many lasagna recipes. Since this dish is gluten-free, I can’t use the flour required to thicken bechamel sauce, and gluten-free flour doesn’t work here.

1 lb. regular or gluten-free pasta
2 lbs. (32 oz.) ricotta cheese
1/4 cup Parmigiano Reggiano cheese
12 oz. mozzarella cheese, grated
1 cup whole milk
1 can (28 oz.) whole tomatoes
1/2 teaspoon granulated garlic
1 teaspoon salt
1 teaspoon oregano
1 teaspoon basil
1 teaspoon parsley

image


In a bowl, mix together the ricotta cheese, Parmigiano Reggiano, half of the mozzarella, and the milk.

Pour  the contents of the tomato can in a blender and blend until smooth. Add this to the bowl and combine.

Add the granulated garlic, salt, oregano, basil, and parsley to the bowl and combine again.

Cook the pasta until just before al dente. You want it to be chewy because it will still bake in the oven. Drain the pasta and place it in an ovenproof baking dish.

Add the contents of the cheese and milk blend bowl to the pasta and stir thoroughly to combine. It’s going to be mushy.

Pre-heat the oven to 350°.

Top the baking dish with the rest of the mozzarella cheese. Sprinkle a little oregano on top. Bake for 30-45 minutes, until the cheese on top has melted and it’s bubbling hot.

Let it rest for about 10 minutes before serving.


Baked elbows, this time with meatballs.

Baked elbows. This time, I added meatballs.

What can I say? I was craving both dishes, so I combined them. I figured: if I love each one of them, I’d be crazy over both together! Just make sure, like I had to do, that your spouse isn’t around that night if they don’t like a lot of garlic. You’ll reek for a week! But damn, it was crazy-good!

image


Pasta
1/4 lb. bacon, finely chopped
1 onion, finely chopped
18 small clams, washed and purged*
1 teaspoon fresh oregano, finely chopped
1/4 cup white wine
Good quality olive oil
6 large garlic cloves, finely chopped
1/4 cup fresh parsley, finely chopped


In a large pot, salt some water and bring to a boil. Cook the pasta until al dente.

In another large pot on medium-high heat, fry the bacon until it’s crisp. Add the onions and saute until they’re translucent. Add the clams, oregano and wine, and cover the pot with a lid. Reduce heat to medium. The clams are cooked when they open. Discard any unopened clams.

In a frying pan, heat the olive oil to medium. Add the chopped garlic and fry until just crispy. Toss in the parsley and stir to combine.

Place the pasta in a bowl or plate. Pour clams and juice over the pasta. Pour the fried garlic and oil all over the clams.


*Purging clams: Clams can be pretty sandy and gritty, so it’s important not only to scrub the outside of the shell, but to purge them as well. Clams should be stored in a bowl in the fridge with a wet dish towel over them, never in water. Once you’re ready to use them, fill a bowl with water and add salt (think salty like ocean water) and a tablespoon of corn meal. Mix this around, then add the clams and let them sit in this solution in the fridge for a couple of hours. The clams will purge (clean themselves) out. Discard the liquid and rinse the clams before cooking.

The key to great tuna tartare is super fresh tuna. And although I get it practically off-the-boat fresh here in RI from the folks at The Local Catch, a group that sells only fresh, local and sustainable seafood, I still freeze my tuna before using it. It’s easier to cut tuna cleanly into cubes when it’s still a bit frozen.


image


1 lb. super-fresh tuna
1/4 cup olive oil
zest of 1 lime
1/4 cup fresh lime juice
1/2 teaspoon wasabi powder
1 1/2 teaspoons soy sauce
1/2 teaspoon hot pepper sauce (I use Frank’s)
1/2 teaspoon sea salt
1/2 teaspoon black pepper
1/4 cup scallions, minced (white and green parts)
1 avocado, chopped into 1/4″ cubes
1 1/2 teaspoons toasted sesame seeds (optional)


Chop the tuna into 1/4″ cubes or smaller. Place in a large bowl and keep in the fridge.

In another bowl, combine the olive oil, lime zest and juice, wasabi powder, soy sauce, hot pepper sauce, salt and pepper, and scallions. Pour this over the tuna and mix gently.

Add the chopped avocado to the bowl and mix gently.

Let it sit in the fridge for at least an hour for the flavors to combine. Before serving, take the bowl out of the fridge and let it warm just slightly. Taste for seasoning. Top with sesame seeds.

Serve on crackers or over fresh greens.

Hoisin sauce goes great with every Asian-inspired dish I make. But since my wife needs to eat only gluten-free products, finding GF hoisin is not easy. And when I did find it online, it was ridiculously expensive. So it was time to make it myself. The recipe requires gluten-free soy sauce, which is easily found in any supermarket under the La Choy brand. You can also use Japanese Tamari sauce instead of soy sauce, but read the label: some tamari sauces do contain wheat. (The San-J brand is gluten-free.)

If you do a side-by-side taste test with jarred hoisin, you’ll find that this tastes quite different. But if you use it in your favorite Asian recipe, you’ll see that it works beautifully.

image

4 tablespoons GF soy sauce
2 teaspoons natural creamy peanut butter
1 tablespoon honey
2 teaspoons rice vinegar
1/4 teaspoon granulated garlic
2 teaspoon sesame oil
1/4 teaspoon Sambal chili paste


Combine all the ingredients in a food processor and mix thoroughly, stopping and scraping down the sides of the bowl to incorporate all the ingredients. Keep it in a tightly sealed container, refrigerated.

image

For the dish above…

1 1/2 lbs. boneless country-style pork ribs, cut into pieces
2 tablespoons corn starch
coconut oil
1 onion, peeled and diced
1 summer squash, diced
2 scallions, chopped (green and white parts)
2 heads of broccoli, washed and chopped into individual florets
hoisin recipe (above)

Once you’ve cut the pork into inch-long pieces, place it in a bowl and toss with the corn starch until it’s coated.

Heat a pan til hot. Add a tablespoon or 2 of the coconut oil and then the pork. Cook until the pork has browned on all sides and has cooked through. Scrape the pork out into a bowl and put the pan back on the stove, setting the heat to medium. Add another tablespoon of the coconut oil and saute the onions until translucent. Add the squash and saute for a few minutes until softened. Add the scallions and saute a couple of minutes more. Add the broccoli, tossing the pan ingredients to combine, and then spoon out about 2 tablespoons of the hoisin sauce into the pan, mixing well.

Add the pork and any juices in the bowl back into the pan and toss to combine. Taste carefully to check for seasoning. Add more hoisin if needed. Don’t add too much or it will be too salty.

Serve over rice, if desired.

OVERNIGHT OATS

Posted: September 9, 2015 in breakfast, Food, Recipes
Tags: , , , , , ,

I wake up at 4AM to go to work every day, so to have something really tasty and healthy already waiting for me, next to my carafe of iced coffee in my fridge, is awesome.

The original recipe called for almond milk. But most almond milk has little or no nutritional value (or almonds, for that matter.) And I’m not a fan of soy, especially non-organic soy that’s usually grown with Monsanto’s Roundup-ready products. So I go for organic grass-fed no-fat milk. The chia seeds add anti-oxidants and omega-3’s. Cinnamon has some health benefits, too, but it’s mainly here for flavor. And I use frozen organic blueberries in this recipe, but any frozen or fresh berries will work.

IMG_7103


1/2 cup rolled oats
1/2 cup organic blueberries or other berries
3/4 cup organic no-fat milk
1 teaspoon chia seeds
2 teaspoons maple syrup
1/4 teaspoon cinnamon

Combine the ingredients in a Mason jar and refrigerate overnight. Eat cold or warm the next morning.

It’s Labor Day weekend, and it’s all about the grill! (Hardwood, that is…not gas.) You can make this recipe in the kitchen, but a wood fire brings it to the next level.

thai chicken LTL


3 lbs. chicken pieces (I used drumsticks for this recipe)
2/3 cup soy sauce
1/2 cup fresh cilantro
2 tablespoons canola or peanut oil
2 garlic cloves, roughly chopped
1/2 teaspoon white pepper
1/2 cup sugar
1/4 cup white vinegar
1 teaspoon red pepper flakes or crushed dried chiles
1 teaspoon salt

Marinade: Combine soy sauce, cilantro, canola oil, granulated garlic and white pepper in a food processor and let it run. Place chicken pieces in a Ziploc bag and pour half of the marinade in. Save the other half for basting later. Seal the bag and let the chicken marinate overnight, or at least a few hours, squishing the bag around so that all the chicken gets marinated.

Sauce: In a saucepan, combine sugar, white vinegar, pepper flakes and salt. Bring to a boil and make sure the sugar dissolves. Remove from heat and let it cool to room temperature.

After marinating overnight, discard the used marinade in the Ziploc bag. Place chicken pieces over a hot hardwood fire or bake in an oven at 350, basting them with the leftover marinade until fully cooked. If the coal fire gets too hot, move the chicken to a cooler part of the grill to prevent burning. If using the oven, switch to the broiler at the end to give the chicken a nice char.

Serve with the sweet pepper sauce drizzled on top.

This is our family’s favorite pancake recipe, but the need to go gluten-free for my wife meant a change in the ingredients. Fortunately, my favorite go-to all-purpose flour, “Cup 4 Cup,” worked so well in this recipe, there was no difference in taste or texture.
 image
1 cup all-purpose flour (or Cup 4 Cup original multi-purpose flour)
1 1/2 cups stone-ground yellow cornmeal
2 tablespoons organic cane sugar
2 teaspoons baking powder
1/2 teaspoon baking soda
1/2 teaspoon salt
2 cups buttermilk (or 1 1/2 cups milk and the juice of 1 large lemon)
zest of 1 organic lemon
1 large egg
3 tablespoons melted unsalted butter, slightly cooled
1–2 teaspoons avocado oil
1 cup fresh or frozen blueberries, preferably wild, rinsed and dried
Whisk the flour, corn meal, sugar, baking powder, baking soda, and salt in a medium bowl
to combine.
In a separate bowl, whisk the egg, lemon zest, and melted butter into the buttermilk to combine.
Make a well in the center of the dry ingredients in the bowl. Pour in the milk mixture and
whisk very gently until just combined. Do not over mix. A few lumps are OK.
Heat non-stick skillet over medium heat. Add 1 teaspoon of oil and use a brush to coat the skillet
bottom evenly. Pour 1/4 cup of the batter into 3 spots on the skillet. Sprinkle 1 tablespoon of the
blueberries over each pancake. Cook the pancakes until large bubbles begin to appear,
about 1 1/2 to 2 minutes. Using a thin, wide spatula, flip the pancakes and cook until they’re golden
brown on the other side, 1 to 1 1/2 minutes longer.
Chow down immediately!
image