An easy way to marinate beef is to simply throw the meat in a bag and dump some Italian dressing into it. As simple as that sounds, it flavors the meat really nicely. But I’ve got a problem with anything that comes from a jar and was made in a factory, especially when it’s so easy to make my own Italian seasoning.
I recently bought some sirloin beef tips and after trimming the fat and silver skin (they always leave it on the meat), I cut it up into 1 inch cubes. I put the pieces in a glass container–a plastic bag would be fine–and then made my marinade. Combine the first set of ingredients to make the marinade.

1/4 cup decent quality balsamic vinegar–not the expensive stuff
1/4 cup avocado oil
1 teaspoon dried oregano
1 teaspoon dried parsley
1 teaspoon granulated garlic
1 teaspoon granulated onion
1 teaspoon salt
1/2 teaspoon pepper
2 lbs. sirloin beef tips, trimmed and cut into 1″ cubes
avocado oil
3 onions, sliced into rings
2 sweet bell peppers, sliced into thin strips
splash of white wine

Combine the marinade ingredients and pour them into the bag or container with the meat. Mix it around so that every bit of the meat gets coated with the marinade. Seal the container and place in the fridge overnight.
Next day, remove it from the fridge and let it come to room temperature before cooking.


Marinated beef, ready to cook.

Marinated beef, ready to cook.


Heat a large cast-iron skillet until hot. You may not need to add oil, since the meat has marinated in it. Using tongs to shake off any marinade, place the beef tips in the skillet, and brown on all sides, constantly flipping them. Cook the meat until it is done: medium to medium rare. (Of course, a hardwood fire is great for cooking these, too.)

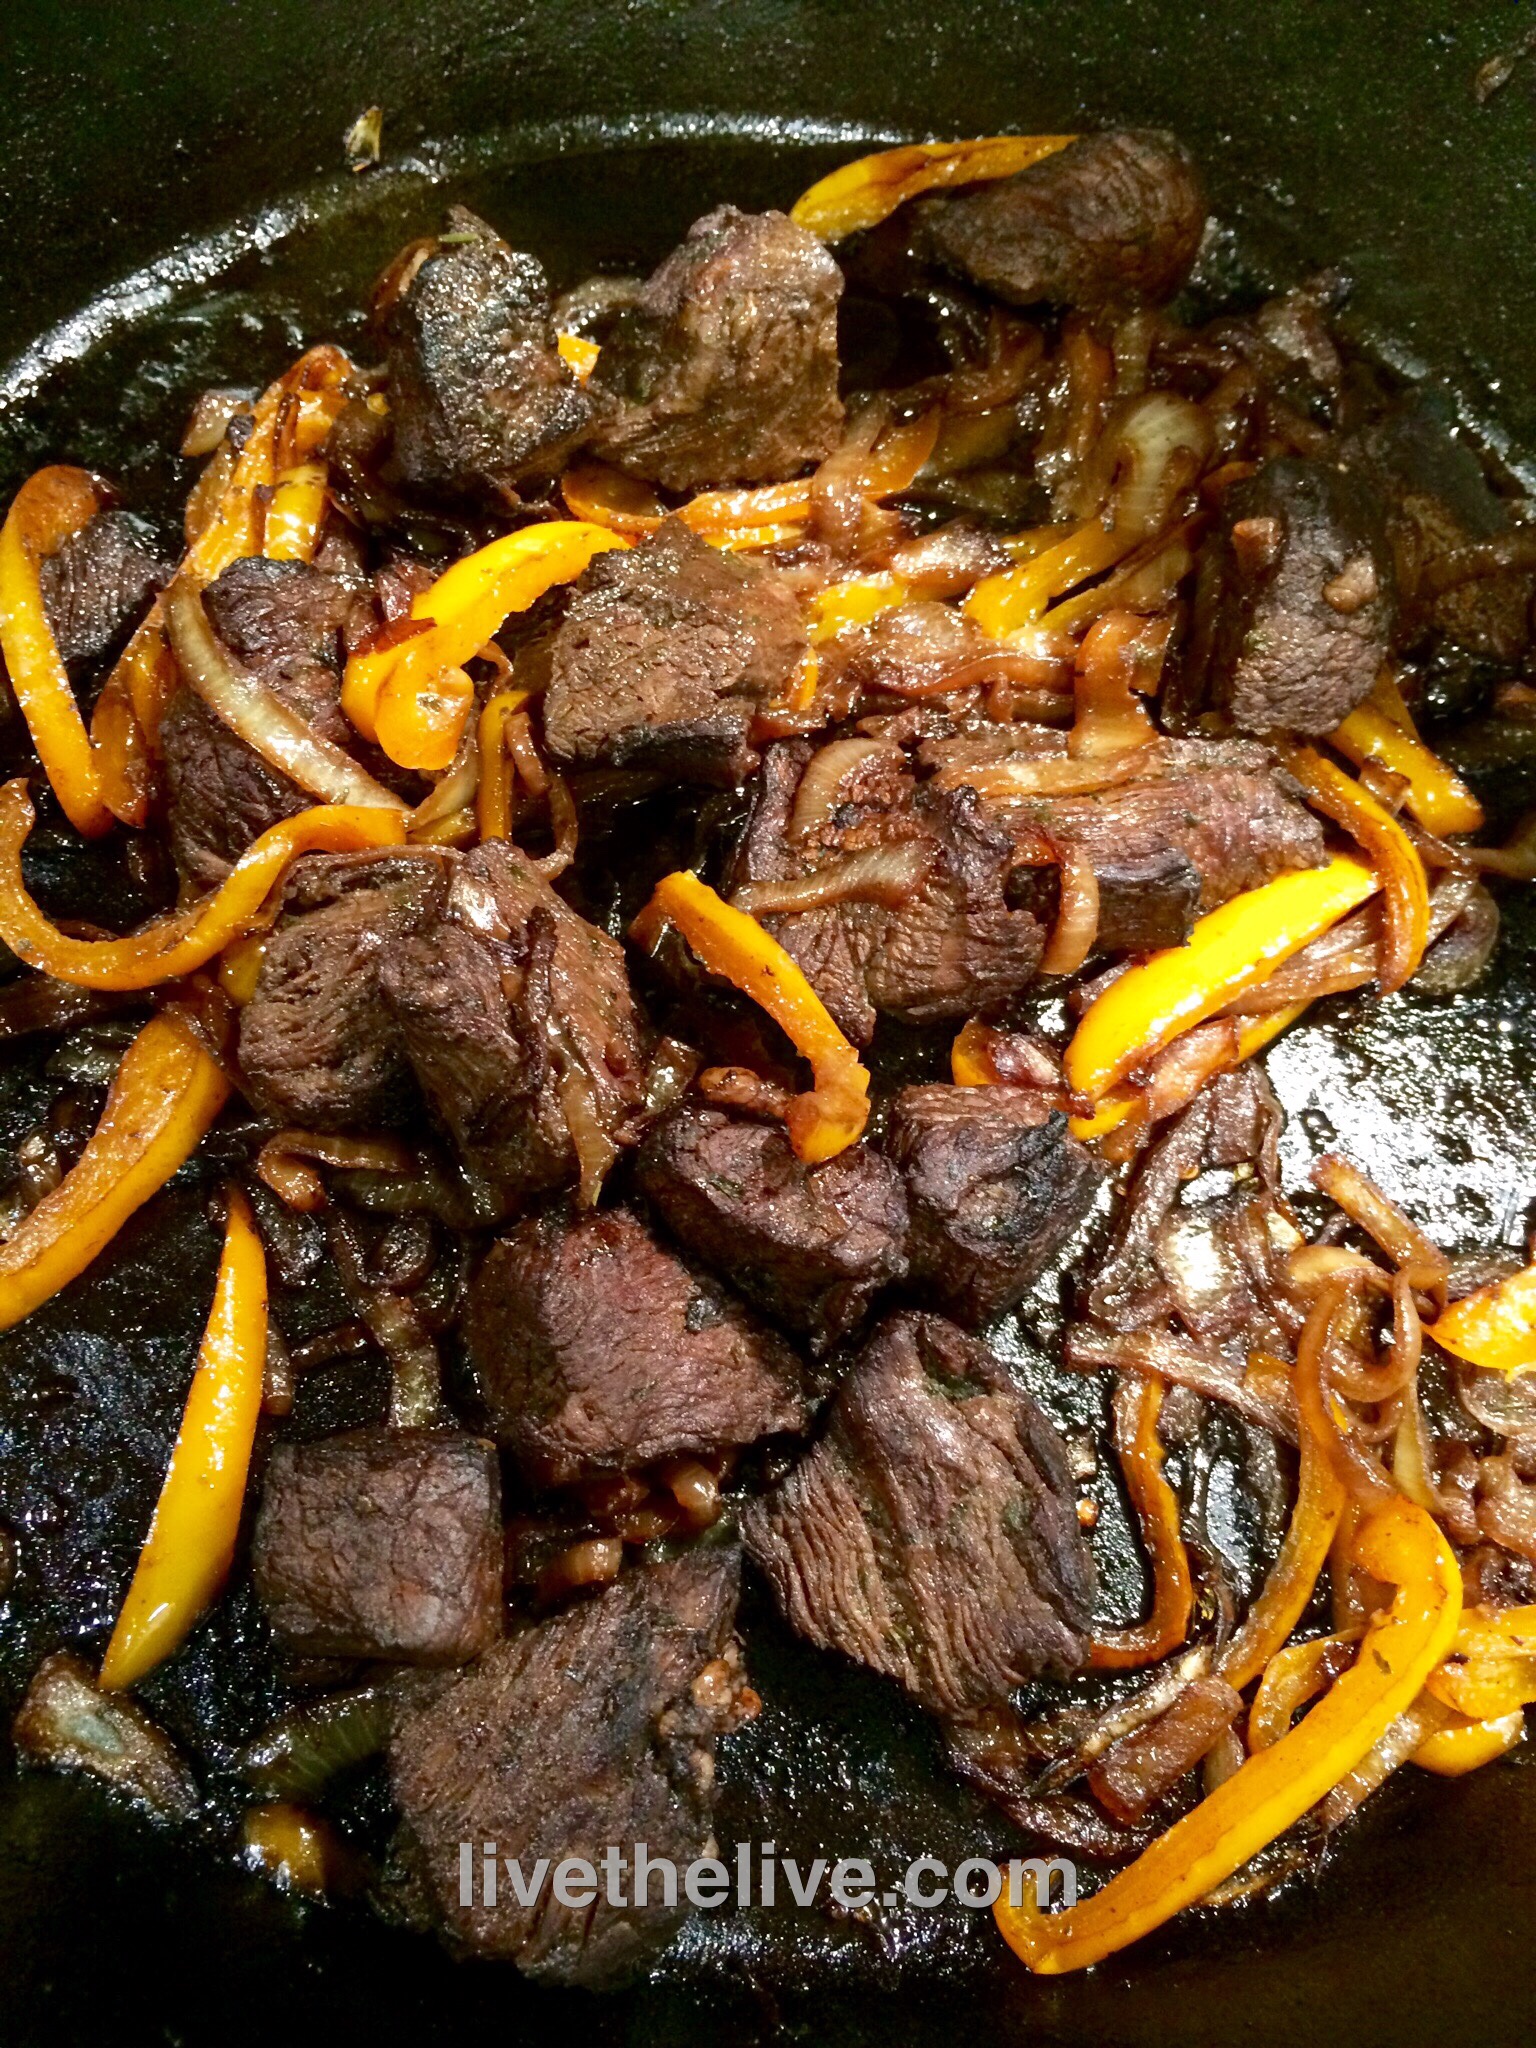
Remove the meat from the pan and put it in a bowl to the side. In the hot pan, toss in the sliced onions and peppers. Cook until the onions and peppers are caramelized, and splash a little white wine to de-glaze the pan if you like. (The alcohol cooks off.) If there’s any left over marinade in the bag or container, you can pour it into the pan at this time.

Return the beef to the pan, being sure to include all the juices that may have settled into the bottom of the bowl. Mix through until it’s all thoroughly heated and serve immediately.


I made a lot more...forgot to take the pic before devouring!

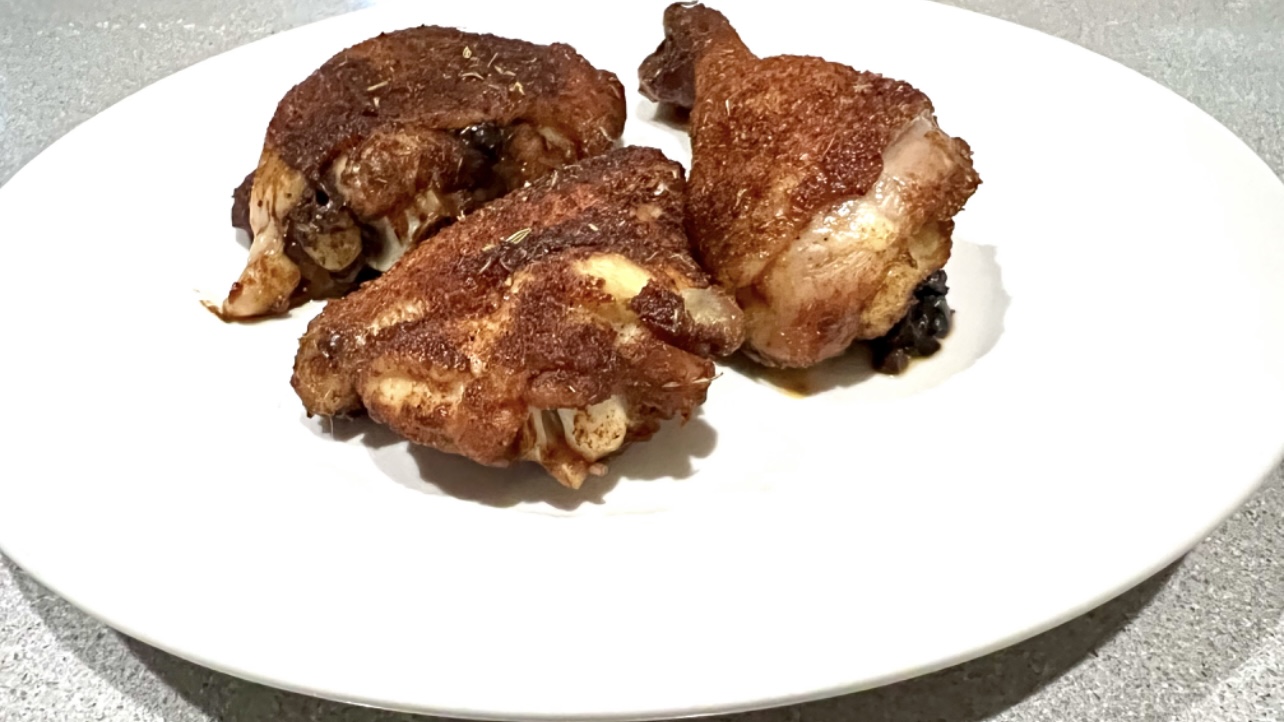
I made a lot more…forgot to take the pic before devouring!


It’s been a few years since I visited New Orleans, and it was great to see that many of the old food destinations were still there: the Napoleon House, Café Dumonde, Acme Oyster House, and across the street from it: Felix‘s Oyster House.

My friend, Rick, told me I had to try the char-grilled oysters at Felix‘s. He hadn’t been there, but he read a lot about them and they were supposed to be amazing.  Well, that’s all the encouragement I needed, and I made a beeline to Felix’s that very day.

When you think about it, it’s no great culinary feat to grill an oyster. But yet, I never thought of doing it on my own. The dozen oysters I devoured that day were buttery, garlicky, with a hint of char and smoke that made them absolutely delicious, quite easily the best oysters I’ve ever had in my life.

I knew that as soon as I came home from this trip, I would have to try to make these myself. I have to say I came pretty darn close!

If you don’t use a charcoal or wood fire to make these, you’re simply leaving out one of the most important ingredients to the entire recipe. A gas grill or a kitchen stove can cook an oyster, but the only way you can take it to the next level is by putting it on open flame, a wood-burning flame.

This recipe is good for about a dozen oysters. Using gluten-free breadcrumbs makes this recipe gluten-free.

The first step is to get your hardwood charcoal fire started. I use a charcoal chimney and newspaper–never any lighter fluid.

Once the coals are lit, head to the kitchen…

4 tablespoons salted butter
2 tablespoons minced garlic
2 tablespoons fresh Italian parsley, finely chopped
2 tablespoons Parmesan cheese, grated (I use Parmigiano Reggiano)
4 tablespoons breadcrumbs


Combine the butter, garlic, parsley, and cheese in a sauté pan over medium heat. All you’re looking to do is to melt the butter, so once it’s melted, take the pan off the heat and this mix is ready to use.

Shuck your dozen oysters. Remember: they will shrink a little bit while cooking, so don’t be afraid to go for bigger ones.

Lay the opened oysters in a pan, carefully trying to preserve as much of the oyster liquor (liquid) in each shell as possible.

When the hardwood charcoal has heated up, and you’ve spread the coals evenly on your grill, you are ready to cook the oysters. You want the grill to be hot.

You don’t need to put the oysters directly on the hardwood charcoal. Putting a grill over the coals is fine, and it keeps the oyster shells from tipping over.


Before placing the oysters on the grill, sprinkle each one with some of the breadcrumbs. Then place the oysters on the grill, being careful not to burn your hands! 


Using a spoon, pour some of the butter mixture into each oyster shell. It will flame up! That’s OK. Use up the entire butter mixture for all 12 oysters.


The oysters are ready when you see that golden brown color all around the edges of the oyster shell, when most of the liquid in the shell has evaporated. Don’t let them dry out completely.

Using tongs, remove the oysters from the flame and enjoy! Just be careful…they can be lava hot!

I’ve always loved Manhattans and Negronis…two different cocktails, yet similar in certain respects. Both use sweet vermouth. Both have a touch of bitterness: Manhattans will often include a few dashes of angostura bitters, where a Negroni gets its bitterness from Campari. So when I visited Food Network chef Geoffrey Zakarian’s The Lambs Club restaurant in NYC many years ago, and tasted my first Boulevardier, I was instantly hooked.

Loosely translated, a boulevardier is a “man about town.”

The cocktail was created by Erskine Gwynne, the publisher of “Boulevardier,” a magazine for expats living in Paris in the 1920s. It’s basically a Negroni with whiskey instead of gin.

My personal preference for whiskey is bourbon, and one of my favorite bourbons to mix with is the very affordable 1792 Small Batch, though Buffalo Trace is another great choice. And for sweet vermouth, nothing beats the grandaddy of them all: Carpano’s Antica Formula.

I was just reading an interview with food blogger and cocktail expert, David Lebovitz, in the Wall Street Journal, and he mentioned the Boulevardier as one of his favorite cocktails. I hadn’t had one in ages, and started digging in my bar inventory. Bourbon is something I always have…but I also found Campari and an unopened small bottle of Antica Formula. I was all set!

Be very careful, especially with the vermouth. If you stray and buy some cheap brand, the drink will resemble nothing even close to what it could truly be!


Eagle Rare is a great choice for bourbon as well, but its prices have skyrocketed recently.

Many recipes go for the classic 1:1:1 ratio, like you’d find in a Negroni. Others boost the bourbon to 1.5 ounces. But I actually prefer a 2:1:1 ratio.

2 oz. bourbon, whiskey, or rye
1 oz. Campari
1 oz. sweet vermouth (Antica Formula preferred)


Add some ice to a cocktail shaker. Add the ingredients and stir. Strain into a rocks glass with a large cube.

Some add a twist of lemon or orange. Others, a maraschino cherry. I like it as is.


Perfection.


1792 Small Batch bourbon: Everyone has their favorite bourbon, and I really enjoy this one, because it mixes well and, at about $40 a bottle, is very affordable. Made by the Buffalo Trace distillery, who can pretty much do no wrong. (Which is why I also recommend Buffalo Trace bourbon itself.)

Campari: A liqueur, invented in 1860 by Gaspare Campari, considered an aperitif. Its alcohol content depends on the country it’s sold in. It’s unique bitter flavor is obtained from the infusion of herbs and fruit in alcohol and water.

Carpano Antica Formula: First invented in 1786 in Turin by Antonio Benedetto Carpano, it has survived in its original recipe thanks to the Fratelli Branca Distillerie. It costs more than the typical 5-buck bottle of vermouth, because it’s simply the best you can get. Buy it once and you’ll never buy another sweet vermouth again.


Butter and cheese. Can anything be better?

It’s especially great when asparagus is in season, growing in my garden, like right now.

This is a great side dish with any main course like a big slab of meat, and has special meaning to me because my cousin first introduced me to asparagus with this recipe when I was just a kid. She passed away many years ago, but I think of her every time I make this simple but delicious dish.

You can use almost any grated “parmesan” cheese, but nothing beats real Parmigiano Reggiano that you freshly grate yourself. Whatever you use, please, just don’t use the junk that comes in a plastic container on the store shelf.


image

1 lb. fresh asparagus spears
1 tablespoon unsalted butter
2 tablespoons extra virgin olive oil
3/4 cup grated Parmigiano Reggiano cheese
sea salt and freshly cracked black pepper


The easy way to trim an asparagus spear is to grab the thicker end between two fingers and bend it. It will snap at the point where the tough part ends and the softer, edible part begins. I toss the bottoms into my compost pile.

I heat the butter and oil together in a pan and then add the asparagus spears, cooking over medium heat for about 5 minutes, until al dente. (You don’t want them mushy.)

While the asparagus is still in the pan, I sprinkle the Parmigiano Reggiano on top, letting it melt a bit. I season with sea salt (I prefer Fleur de Sel) and freshly cracked black pepper.


When it comes to grilling, lamb is often overlooked. Some folks think it tastes too gamey, which can be true with grass-fed lamb that comes from New Zealand or Australia. Although you can’t beat their strict quality standards, the flavor can be intense.

I don’t mind that intense lamb flavor in a chop, but when I make lamburgers, I like to mix ground beef with ground lamb to give it a milder flavor. And when I cook them over hardwood charcoal, the flavor is outstanding! Even seared in a cast iron skillet and finished in the oven, these burgers are awesome.

1 lb. ground lamb
1 lb. ground beef
1/2 onion, minced
1 tablespoon Dijon mustard
1 teaspoon each fresh parsley, mint, and dill, finely chopped
1 teaspoon dried Greek oregano
1/2 teaspoon cumin
1 large clove garlic, squeezed through a garlic press
1 scallion, finely chopped, green part only
1/2 cup breadcrumbs
1 egg
1 teaspoon salt
1/2 teaspoon black pepper


Fresh herbs make the difference!


Heat the olive oil in a skillet over medium heat. Add the onion. Cook it until it’s translucent, about 6 minutes. Transfer the onion to a plate to cool.

In a bowl, mix the cooled onion, mustard, parsley, mint, dill, oregano, cumin, garlic, scallion, and salt and pepper.

In another bowl, combine the lamb with the beef, so they are mixed well. Then add the onion mix bowl to the meat and make sure all the ingredients are combined. Add the breadcrumbs and mix again. Then add the egg and mix one more time.

Form the meat into patties. Place them on a baking sheet covered with non-stick foil, and place the baking sheet in the fridge.


The indentation in the center of the patty keeps it from swelling up while cooking.


Don’t let the lamburgers get too cold in the fridge…just enough to firm the meat up a bit. If it gets too cold, give it a few minutes at room temp to warm up again.  Grill the burgers over hardwood charcoal until they are cooked to medium.

If you’re cooking indoors, heat some avocado oil in an oven-proof pan, preferably cast iron. Sear the burgers well on both sides, then place the pan in a 350-degree oven to finish cooking.


Extra meat is great for meatballs! Just freeze them for another time.


Place the burgers on buns, and smear the bun with the feta cheese dressing.

If the food is good, someone’s always watching!


My recipe for feta cheese dressing works really well with lamburgers. But it’s also great on a salad.

3/4 cup plain Greek yogurt
1  cup mayo
1 teaspoon Worcestershire sauce
1/2 teaspoon cayenne pepper sauce, like Franks Red Hot
1 teaspoon Dijon mustard
1/2 teaspoon granulated garlic
1/2 teaspoon salt
1/2 teaspoon ground black pepper
4–5 oz. crumbled feta cheese

Combine all the ingredients in a bowl. Mix well. Cover and refrigerate. If you can wait a day, it’s even better.

FullSizeRender (14)

Who says you have to only cook burgers and steaks on the grill? This is one of my favorite ways to enjoy clams…and without the clam knife! I always use hardwood charcoal.

image

A couple of dozen (or more) little neck clams, washed and purged
1 stick (8 oz.) of unsalted butter
1/4 cup extra virgin olive oil
1/4 cup chopped parsley
1 teaspoon dried oregano
1 teaspoon minced garlic
1/2 teaspoon dried basil
1/2 teaspoon sea salt

image

The clams should be stored in the fridge until ready to use…not in water, not on ice. Place the clams in a bowl and cover them with a wet dish towel.

About an hour before cooking, I like to purge my clams to remove as much grit as possible. I fill a large bowl with cold water, add sea salt and some corn meal to it, and mix it around. Then I add the clams to this bowl and let them sit in this liquid for an hour. They will suck up the corn meal and spit out sand and grit. After an hour, I pour off the water/salt/meal/grit mix, and thoroughly wash the clams. Now they’re ready to grill!

I start my hardwood charcoal grill and divide it in half: coals on one side, no coals on the other.

While the coals are heating up, I grab a disposable aluminum foil tray and place it on a burner on my kitchen stovetop over medium heat. I add the butter, olive oil, parsley, oregano, basil, garlic and salt, and stir it all to combine. Once the butter has melted and everything has blended, I bring the tray over to the charcoal grill and place on the side of the grill without coals. It will stay warm.

Once the coals are hot, just place the clams directly on the grill. (Use tongs, unless you want to remove all of your knuckle hair.) They’re done as soon as they open, but you can cook them as long as you like, from raw to more thoroughly cooked. As each one reaches its desired doneness, place it carefully in the aluminum tray, making sure you don’t lose any of that precious liquid inside the clam shell. Give it a swish in the butter and herb mix.

When all the clams have been cooked and are in the tray, serve them with that herby butter sauce on top of pasta…or simply eat them with a fresh baguette. A glass of great white wine is a must.

image

Really easy and really delicious!

Season it, pop it in the oven and walk away. Couldn’t be easier!


3 tablespoons brown sugar
1 tablespoon Kosher salt
1 tablespoon ground coffee (use your favorite)
1 teaspoon granulated garlic
1 teaspoon granulated onion
1 teaspoon unsweetened cocoa 


Pre-heat the oven to 325 degrees.

Whether you spatchcock your chicken or not, doesn’t really matter. I find that doing it will cook the chicken faster and more evenly. Bell & Evans, an excellent brand, sells their whole birds that way alrerady. see if your market carries them.

To spatchcock, you cut down both sides of the backbone of the chicken. (I freeze the backbone for future chicken stock.) Then you flatten the bird out in the pan.

Combine the rub ingredients in a bowl.

Rub the chicken with a little olive oil, then sprinkle the coffee rub all over the top and bottom of the chicken.


Bake until the internal temperature of the chicken reaches 165. Check the breast temp as well as the thigh. The thighs cook a little faster. Let the bird rest for 10–15 minutes before serving.


When my daughter hangs out with me, I always ask her what she wants me to cook for her, and there are a few “Dad” recipes that are her favorites. This is one of them, especially when fresh asparagus is available. And as any parent will tell you, if your kid is craving a dish that has vegetables in it, count yourself lucky–and make it!!
Prepping asparagus is easy, and you don’t need a knife to cut off the woody bottoms of the stalks. Simply bend the stalks at the bottom and they will naturally snap off at the right point.
4 mild Italian sausages, sliced into pieces 1/2″ thick
1 lb. penne pasta
1/2 onion, finely chopped
1 cup chopped fresh trumpet mushrooms (white button mushrooms work, too), optional
2 cups fresh asparagus, sliced into 1-inch pieces
1 clove garlic, passed through a garlic press
1 cup homemade chicken broth
6 fresh sage leaves, finely chopped
1/2 cup freshly grated Parmigiano Reggiano cheese
extra virgin olive oil
salt and pepper
Have the pasta water salted and boiling, and add the pasta, cooking until just a bit more undercooked than al dente.
Heat a large pan, and drizzle in some olive oil. Sauté the sausage pieces until browned and cooked through, but not overcooked. Remove the sausages from the pan and place them in a separate bowl. Remove all but 2 tablespoons of the fat left behind in the pan.
Place the pan back on stove and sauté the onion until translucent. Add the garlic, and sauté for 10 seconds. Add the sage, and saute for 10 seconds, stirring. Add the chopped mushrooms and saute for a few minutes, then add the chicken broth, and simmer until almost all the liquid has evaporated. Pour the contents of the pan into the bowl with the sausages.
Return the pan to the stove, add a little more olive oil, and on medium heat, sauté the asparagus pieces. Cook them until they are al dente, not too soft. Once the asparagus has reached this stage, return all the contents of the sausage/mushroom bowl to the pan to heat through. Drain the pasta, and add it to the pan as well, combining all the ingredients. If it looks too dry, add a little pasta water to the pan. Season with salt and pepper.
Make sure you serve this hot, with grated Parmigiano Reggiano on top, and drizzle lightly over the top with extra virgin olive oil.

There’s something about Asian noodle dishes that make them incredibly addictive. They’re great hot or cold, and easy to make at home. I store an arsenal of basic Asian ingredients in my pantry, so slapping this together is no effort at all. And if you don’t have Asian noodles around, chances are you’ve got a box of pasta, which works just as well.

Next time you’ve got a bunch of people coming over, cook a batch a few hours beforehand and let it come to room temperature. It’s great with anything, really. Grab a bag of frozen egg rolls or some potstickers, and you’ve got great munchies for your guests.

Adding boiled and chilled shrimp to these noodles makes it a cool meal. I usually double the sauce recipe when I do that.

If you need to go gluten-free, use GF pasta or rice noodles…and you can find gluten-free hoisin sauce in the Asian food section of many supermarkets.

Asian noodles

4 tablespoons creamy peanut butter
1 tablespoon hoisin sauce
2 teaspoons sesame oil
1 teaspoon Chinese chili garlic sauce (more, if you like it spicy!)
16 oz. package Chinese noodles or pasta

Combine the peanut butter, hoisin sauce, sesame oil, and chili garlic sauce in a bowl. Set it aside. I keep my peanut butter in the fridge once the jar is open, so sometimes it’s a bit thick. So I just zap it in the microwave for about 10 seconds to soften it up.

Boil the noodles or pasta until al dente. Drain it and place it in a large bowl.

Mix the noodles with the sauce.

It’s easy to make this recipe a meal by adding meat and veggies, which is what I did recently.

I took about a pound of chicken breasts, and sliced them thin, into strips, placing them in a bowl. I added a little soy sauce (go gluten-free soy sauce if you need to…La Choy is the brand I use) and a little rice vinegar, and I let the chicken marinate in the fridge for a few hours.

Meanwhile, I chopped up some broccoli and blanched it in boiling water, just to cook it a little. I drained the water and set the broccoli aside.

I chopped some sugar snap peas on the bias, and set them aside. And I had a bag of mung bean sprouts purchased, ready to go.

This time, I used Udan noodles for this dish (by my daughter’s request) and I found a brand that simply needed to be microwaved for 90 seconds before using.

So once we were ready to eat, I put a little avocado oil in a hot pan and seared the chicken that was marinating, getting some nice caramelization on the meat. Toward the end, I threw in the snap peas and broccoli just to heat them up. I tossed it all into a large bowl.

I heated the Udon noodles in the microwave and tossed them in the bowl.

I added the bean sprouts to the bowl, and then a generous supply of the peanut sauce mixture, as above.

I really gave it all a good mix before serving it in bowls, with a garnish of fresh cilantro on top.

Brining, the process of letting a hunk of protein soak in a salt solution for a few hours, is a great way to add flavor and moisture to any cut of meat. I brine these wings for 3 hours before using a sweet and spicy rub. They can be grilled or roasted in the oven.


image

The brine…

1/2 cup Kosher salt
3 tablespoons light brown sugar
1 teaspoon whole black peppercorns
1 whole bay leaf
2 quarts water

Combine all ingredients in a saucepan and heat until the sugar and salt dissolve. Remove it from the heat, and let it cool to room temperature.

The rub…

1/4 cup light brown sugar
1/4 cup granulated sugar
1/4 cup sweet paprika
1 tablespoon Kosher salt
1 tablespoon granulated onion
2 teaspoons black pepper
1 teaspoon dried thyme
1 teaspoon dry mustard
1 teaspoon ground ginger
1 teaspoon cayenne pepper

Combine all the ingredients in a bowl.

Place 3 lbs. of chicken wings in a Ziploc bag and pour the cooled brine into the bag. Place the bag in a bowl to prevent leaks and keep it at room temp for 3 hours. I wouldn’t brine it longer than that, or it will get really salty.


After 3 hours, remove the chicken from the brine and dry the wings with paper towels. Discard the brine.

Place the chicken pieces in a large bowl and sprinkle them with 1/3 cup of the rub, tossing to coat the chicken well. Place the bowl with the chicken in the fridge until you’re ready to cook.


About 30 minutes before cooking, remove the bowl from the fridge and let the chicken come to room temperature.

Pre-heat the oven to 350 or light a grill.

Toss the chicken with some more of the rub, if you like, then place the pieces on a sheet pan lined with non-stick aluminum foil.

Bake at 350 for 30 minutes or until done. Lower the oven temperature if it starts to burn.

If you’re grilling, cook the wings over medium heat, turning them frequently to prevent burning. Cook until the wings are done.