Posts Tagged ‘recipes’

Happy National Vodka Day! If you think cucumbers are boring, this drink will change your mind. Garden-fresh cukes are always best.


image

4 fresh cucumbers, peeled and seeded
Small ice cubes
1 cup loosely packed fresh mint leaves
2 teaspoons granulated organic cane sugar
3 tablespoons fresh lime juice
1/2 cup vodka (I like Tito’s)
1 oz. orange liqueur (I like Cointreau)


Peel and seed the cucumbers. Coarsely chop them and then purée in a food processor until smooth. Strain through a fine sieve, pressing solids to extract as much liquid as possible. Or, if you have one, use a juicer. Set the cucumber juice aside.

To a large glass pitcher, add the mint leaves, sugar and lime juice. Muddle the ingredients so that the mint leaves release their oils. Add 3/4 cup (at least) of the cucumber juice. Add the vodka and Cointreau. Muddle again briefly.

Fill tall drinking glasses with ice cubes. Strain the cocktail into glasses. Garnish with a cucumber spear or mint.

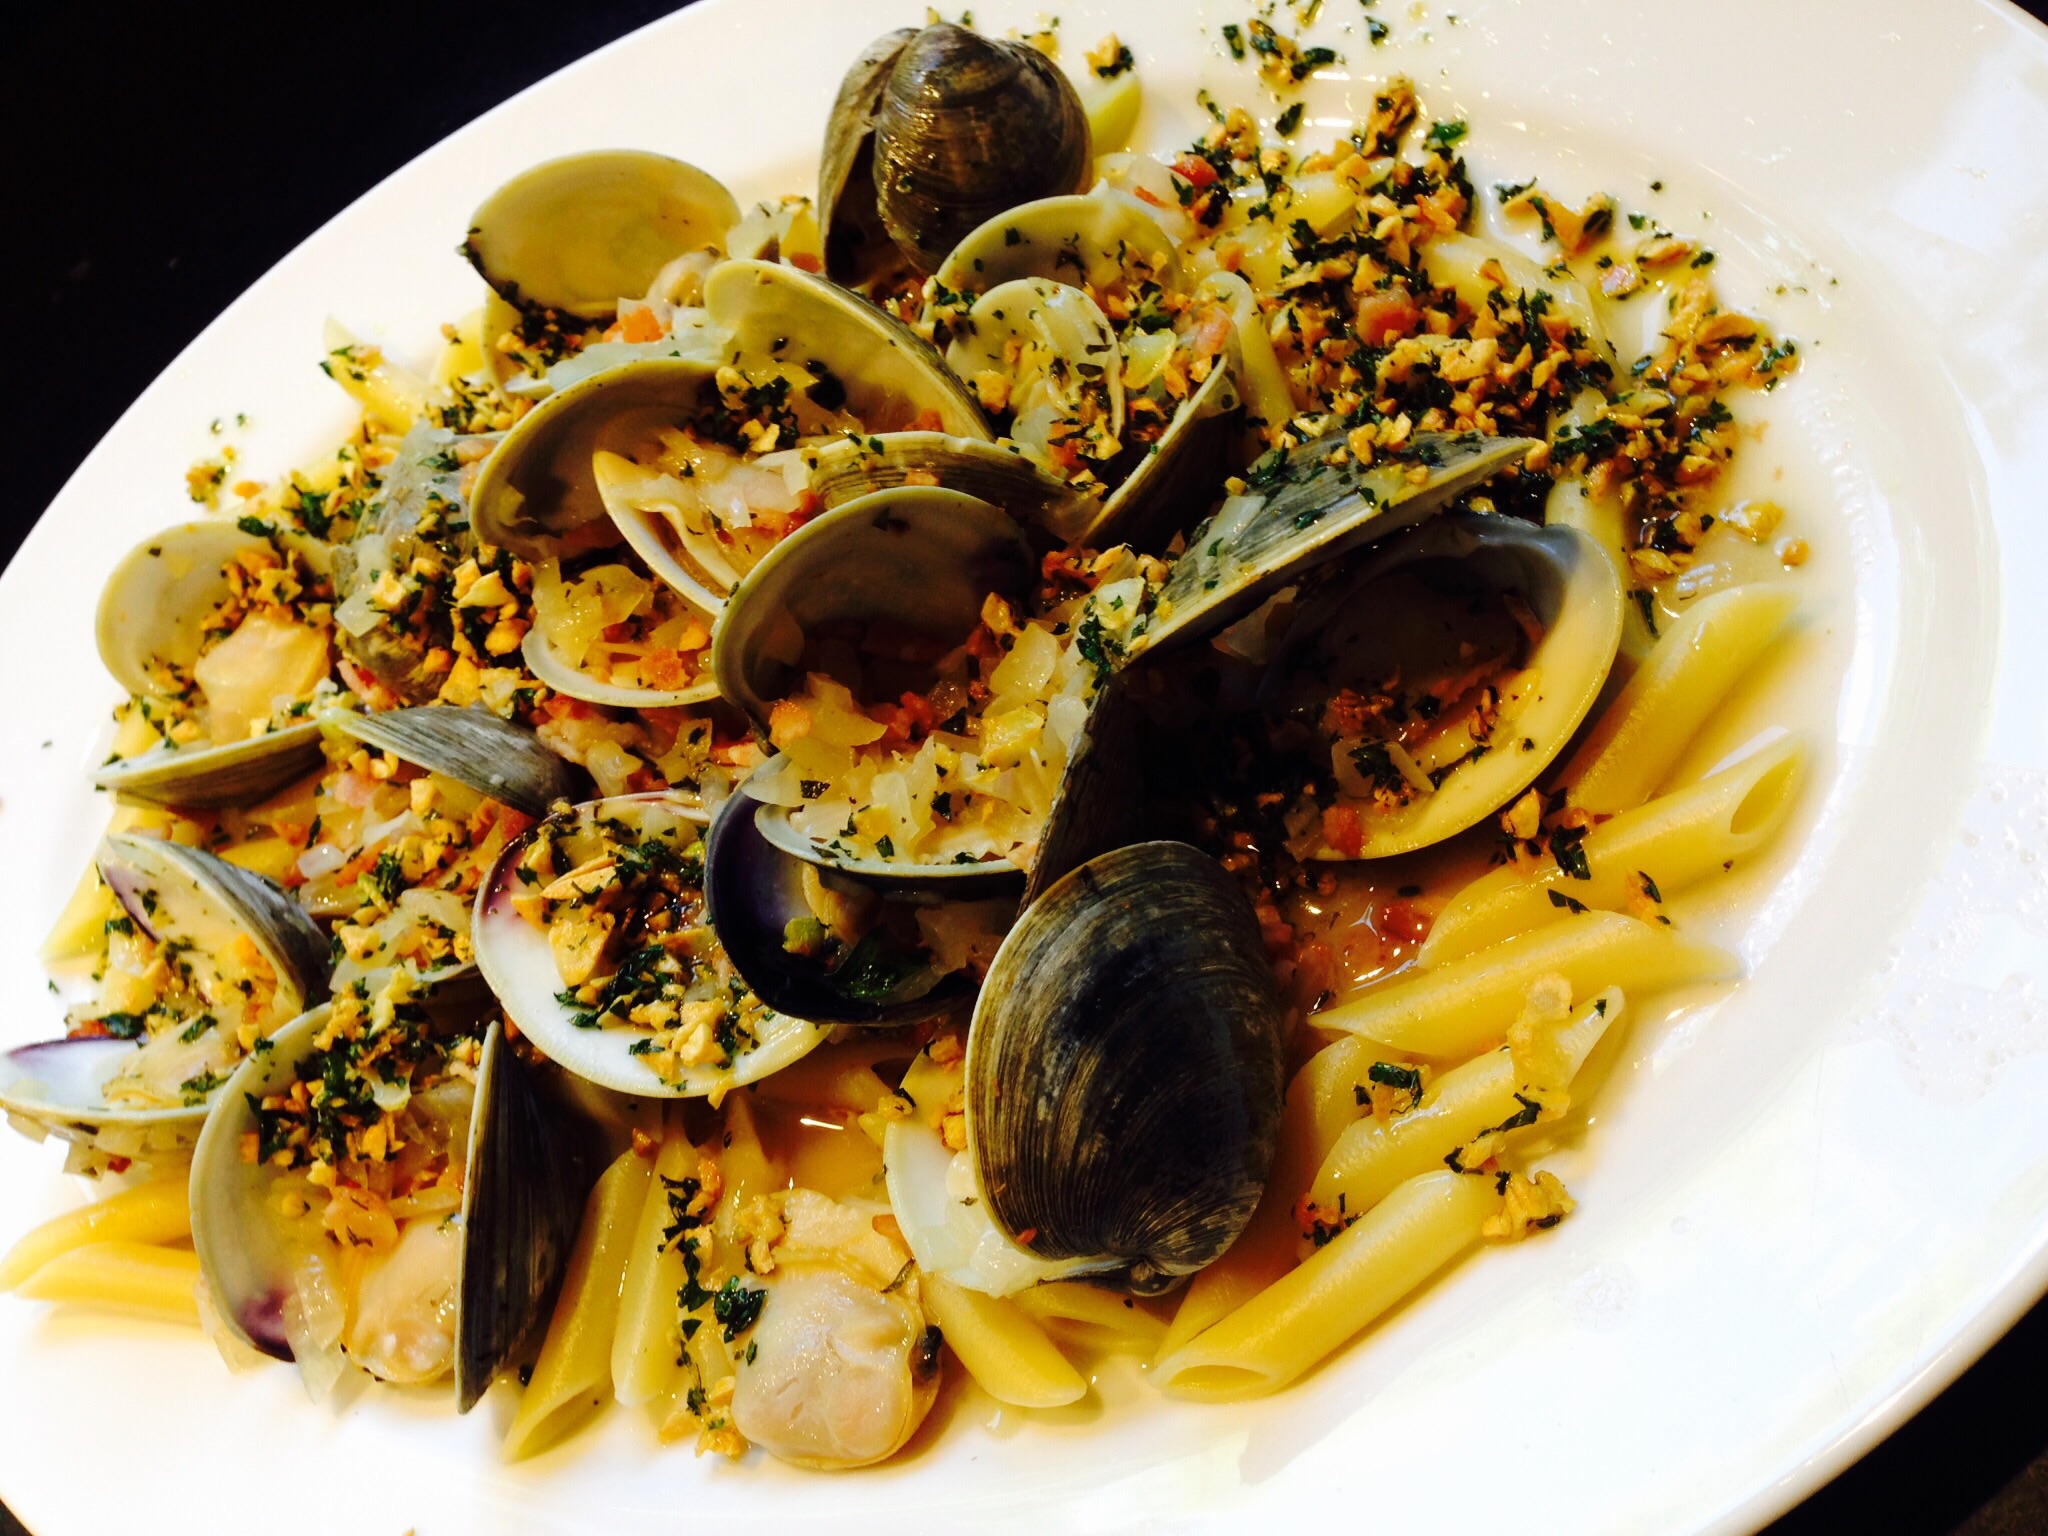
My interest in food and cooking goes back to my first restaurant job as a teenager, at an Italian restaurant called Pizza City East in my hometown of Plainview, NY.  (There was also an original Pizza City on Crossbay Blvd. in Ozone Park, Queens.) It was there that I learned how to open clams by the bushel, how to make the perfect cappucino, and how to use basic restaurant kitchen equipment like the convection oven and the fryer. I peeled thousands of shrimp for scampi, washed barrels of lettuce for salads, and grated hundreds of pounds of mozzarella for pizza.

I also made baked ziti by the barrelful. It was much easier to make in large quantities than lasagna, and it basically contained all the same ingredients. No worries about making perfect layers. No pasta sheets sticking together. Just put all the ingredients in an oven-proof baking pan, mix them around and throw them in the oven. And it tasted great.

Now I make baked ziti, or shells, or elbows–whatever pasta I have on hand–at home, using gluten-free ingredients.

To make the perfect baked ziti, it's important to have a good helper.

To make the perfect baked ziti, it’s important to have a good helper.

I substitute whole milk for the usual bechamel sauce used in many lasagna recipes. Since this dish is gluten-free, I can’t use the flour required to thicken bechamel sauce, and gluten-free flour doesn’t work here.

1 lb. regular or gluten-free pasta
2 lbs. (32 oz.) ricotta cheese
1/4 cup Parmigiano Reggiano cheese
12 oz. mozzarella cheese, grated
1 cup whole milk
1 can (28 oz.) whole tomatoes
1/2 teaspoon granulated garlic
1 teaspoon salt
1 teaspoon oregano
1 teaspoon basil
1 teaspoon parsley

image


In a bowl, mix together the ricotta cheese, Parmigiano Reggiano, half of the mozzarella, and the milk.

Pour  the contents of the tomato can in a blender and blend until smooth. Add this to the bowl and combine.

Add the granulated garlic, salt, oregano, basil, and parsley to the bowl and combine again.

Cook the pasta until just before al dente. You want it to be chewy because it will still bake in the oven. Drain the pasta and place it in an ovenproof baking dish.

Add the contents of the cheese and milk blend bowl to the pasta and stir thoroughly to combine. It’s going to be mushy.

Pre-heat the oven to 350°.

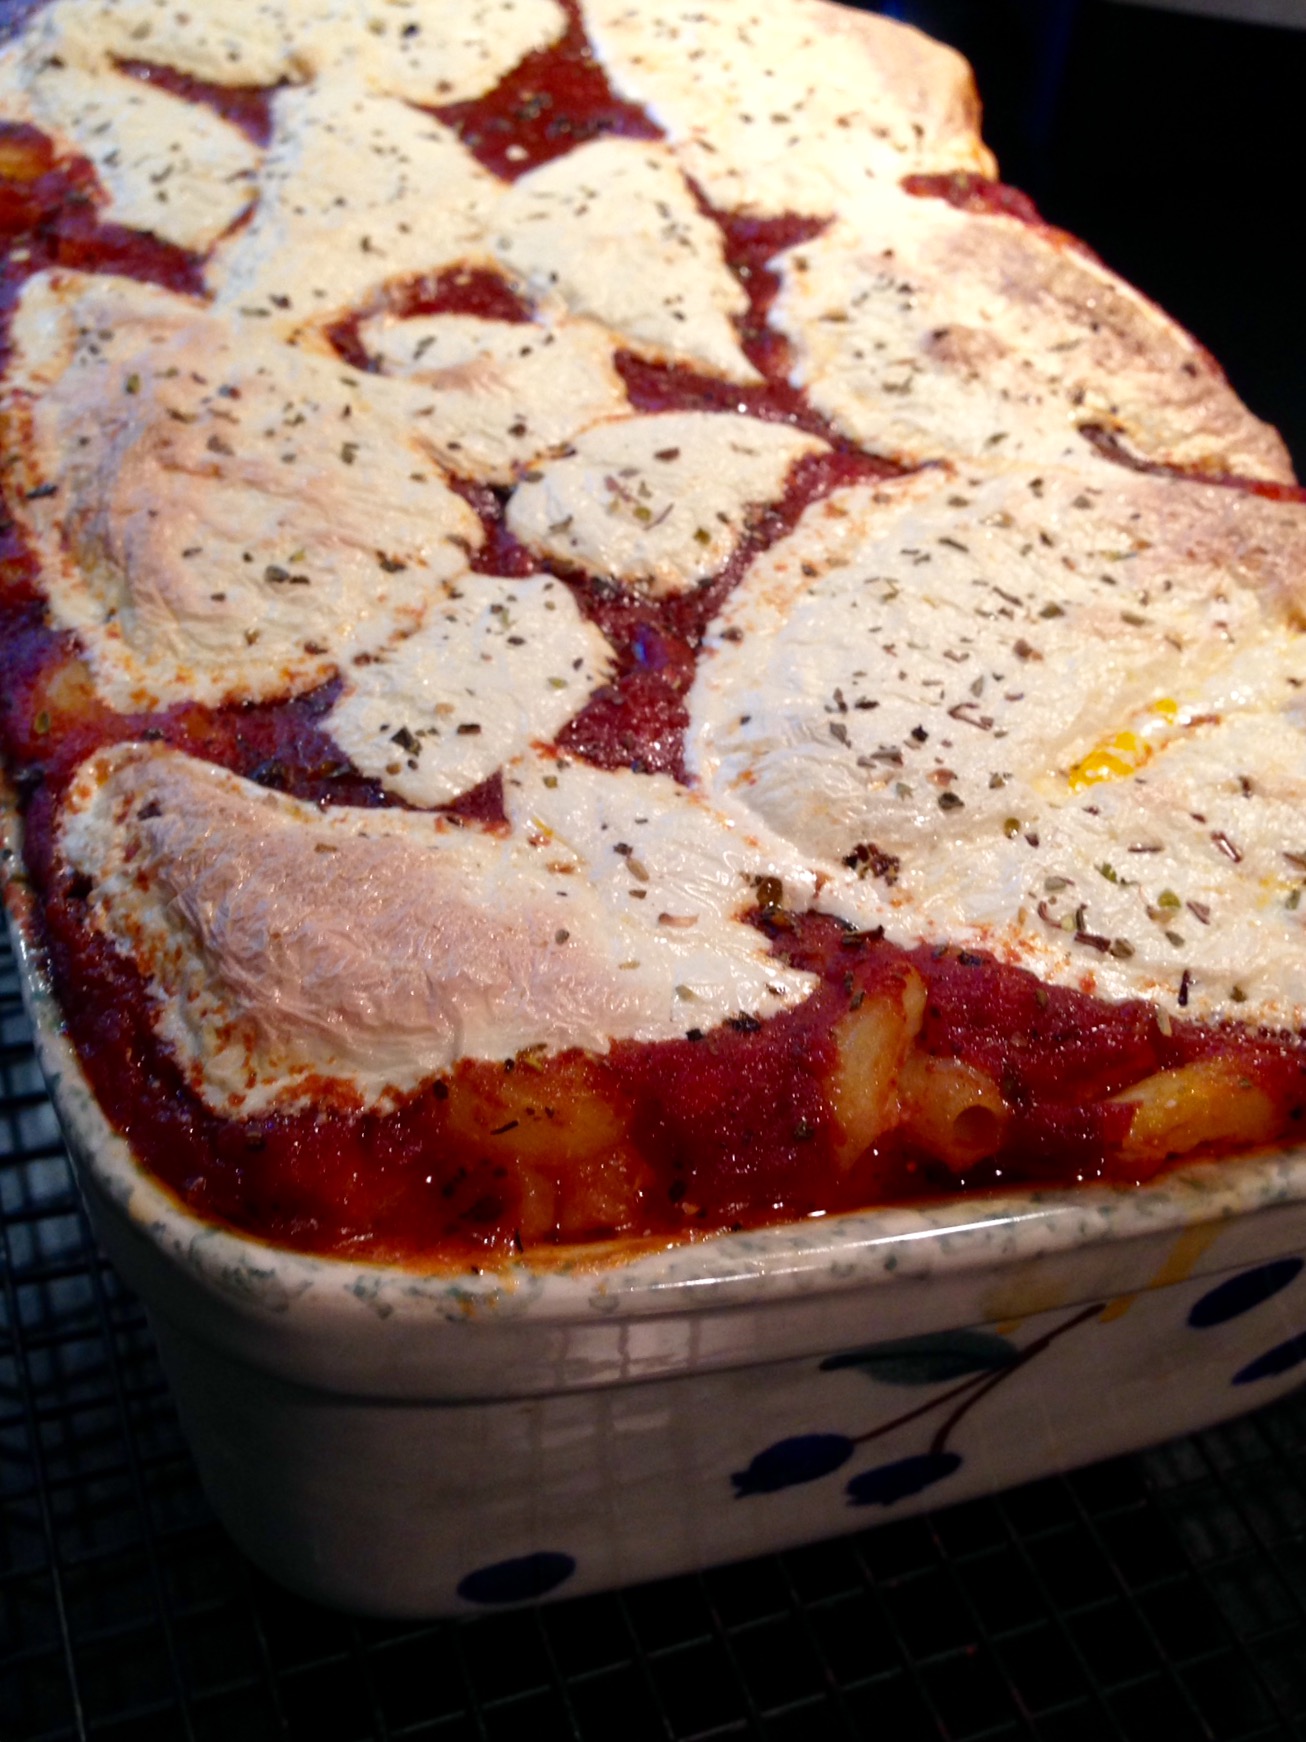
Top the baking dish with the rest of the mozzarella cheese. Sprinkle a little oregano on top. Bake for 30-45 minutes, until the cheese on top has melted and it’s bubbling hot.

Let it rest for about 10 minutes before serving.


Baked elbows, this time with meatballs.

Baked elbows. This time, I added meatballs.

My original banana bread recipe blog is featured directly below. It’s awesome. But my wife’s dietary needs required that I make some changes. My gluten-free version of the recipe, at the bottom of the page, is so good, you won’t miss the wheat!


The original recipe…

What makes this banana bread special is that it uses whole wheat flour…less sugar…and no artificial extracts that make most banana breads taste like crap. It relies on very ripe bananas to give it its wonderful natural flavor.
It’s not always easy to get bananas to ripen exactly when you’re trying to make your banana bread recipe. So here’s what I do: I by a large bunch of bananas and let them get very ripe at room temperature. I then take 5 at a time (for this recipe), peel them, and place the bananas in a Ziploc bag in the freezer. When it’s time to make banana bread, I just pull one of those Ziplocs out of the freezer, let it thaw, and mash with a potato masher.


Nana bread blog


3 cups all-purpose flour
1/2 cup whole wheat flour
2 tsp baking soda
1/2 tsp salt
1 1/4 cup sugar
3/4 cup vegetable oil
2 eggs
5 medium-sized bananas, peeled and mashed
2 tsp real vanilla extract
Cooking spray

Pre-heat the oven to 350 degrees.
Combine the all-purpose flour, whole wheat flour, baking soda and salt in a medium bowl. Set aside.
Combine the sugar and oil in a mixing bowl and mix at medium speed for 2 minutes. (I use the whisk attachment.) Add the eggs, one at a time. Beat until the mixture is light and lemon colored.
With the mixer running at low speed, add the flour mixture alternately with the bananas, beginning and ending with the flour mixture. Blend well after each addition. Add the vanilla extract and blend some more to mix.
Pour the batter into 2 loaf pans that have been sprayed with cooking spray. Bake for 45 minutes or until a wooden pick inserted in the center comes out clean. Cool 15 minutes in the loaf pan on a wire rack.
Remove from the pan and let it cool completely on the wire rack before slicing.

image


The gluten-free recipe…

Wow…things have changed since I made the original recipe!  First, the flour: My go-to gluten-free flour is the brand called Cup 4 Cup. You can find it in most supermarkets. I only use this flour in this recipe.

image

If you want a slightly more “rustic” flavor, you can substitute 1/2 a cup of corn meal for 1/2 a cup of the flour. I now use organic cane sugar instead of regular sugar. I no longer use vegetable oil, especially not canola, so I use healthier avocado oil. Eggs are pastured when I can get ’em. Bananas are organic. And I rub the pans with coconut oil instead of using cooking spray.

image

4 cups gluten-free flour
2 teaspoons baking soda
1/2 teaspoon salt
1 1/4 cup organic cane sugar
3/4 cup avocado oil
2 eggs
5 medium-sized bananas, peeled and mashed
2 teaspoons real vanilla extract
coconut oil


Pre-heat the oven to 350 degrees.
Combine the flour, baking soda and salt in a bowl. Set aside.
Combine the sugar and oil in a mixing bowl and mix at medium speed for 2 minutes. (I use the whisk attachment.) Add the eggs, one at a time. Beat until the mixture is light and lemon colored.
With the mixer running at low speed, add the flour mixture alternately with the bananas, beginning and ending with the flour mixture. Blend well after each addition. Add the vanilla extract and blend some more to mix.
Pour the batter into 2 loaf pans that have been rubbed with the coconut oil. Bake for 45 minutes or until a wooden toothpick inserted in the center comes out clean. Cool 15 minutes in the loaf pan on a wire rack.
Remove from the pan and let it cool completely on the wire rack before slicing.

What can I say? I was craving both dishes, so I combined them. I figured: if I love each one of them, I’d be crazy over both together! Just make sure, like I had to do, that your spouse isn’t around that night if they don’t like a lot of garlic. You’ll reek for a week! But damn, it was crazy-good!

image


Pasta
1/4 lb. bacon, finely chopped
1 onion, finely chopped
18 small clams, washed and purged*
1 teaspoon fresh oregano, finely chopped
1/4 cup white wine
Good quality olive oil
6 large garlic cloves, finely chopped
1/4 cup fresh parsley, finely chopped


In a large pot, salt some water and bring to a boil. Cook the pasta until al dente.

In another large pot on medium-high heat, fry the bacon until it’s crisp. Add the onions and saute until they’re translucent. Add the clams, oregano and wine, and cover the pot with a lid. Reduce heat to medium. The clams are cooked when they open. Discard any unopened clams.

In a frying pan, heat the olive oil to medium. Add the chopped garlic and fry until just crispy. Toss in the parsley and stir to combine.

Place the pasta in a bowl or plate. Pour clams and juice over the pasta. Pour the fried garlic and oil all over the clams.


*Purging clams: Clams can be pretty sandy and gritty, so it’s important not only to scrub the outside of the shell, but to purge them as well. Clams should be stored in a bowl in the fridge with a wet dish towel over them, never in water. Once you’re ready to use them, fill a bowl with water and add salt (think salty like ocean water) and a tablespoon of corn meal. Mix this around, then add the clams and let them sit in this solution in the fridge for a couple of hours. The clams will purge (clean themselves) out. Discard the liquid and rinse the clams before cooking.

The key to great tuna tartare is super fresh tuna. And although I get it practically off-the-boat fresh here in RI from the folks at The Local Catch, a group that sells only fresh, local and sustainable seafood, I still freeze my tuna before using it. It’s easier to cut tuna cleanly into cubes when it’s still a bit frozen.


image


1 lb. super-fresh tuna
1/4 cup olive oil
zest of 1 lime
1/4 cup fresh lime juice
1/2 teaspoon wasabi powder
1 1/2 teaspoons soy sauce
1/2 teaspoon hot pepper sauce (I use Frank’s)
1/2 teaspoon sea salt
1/2 teaspoon black pepper
1/4 cup scallions, minced (white and green parts)
1 avocado, chopped into 1/4″ cubes
1 1/2 teaspoons toasted sesame seeds (optional)


Chop the tuna into 1/4″ cubes or smaller. Place in a large bowl and keep in the fridge.

In another bowl, combine the olive oil, lime zest and juice, wasabi powder, soy sauce, hot pepper sauce, salt and pepper, and scallions. Pour this over the tuna and mix gently.

Add the chopped avocado to the bowl and mix gently.

Let it sit in the fridge for at least an hour for the flavors to combine. Before serving, take the bowl out of the fridge and let it warm just slightly. Taste for seasoning. Top with sesame seeds.

Serve on crackers or over fresh greens.

Hoisin sauce goes great with every Asian-inspired dish I make. But since my wife needs to eat only gluten-free products, finding GF hoisin is not easy. And when I did find it online, it was ridiculously expensive. So it was time to make it myself. The recipe requires gluten-free soy sauce, which is easily found in any supermarket under the La Choy brand. You can also use Japanese Tamari sauce instead of soy sauce, but read the label: some tamari sauces do contain wheat. (The San-J brand is gluten-free.)

If you do a side-by-side taste test with jarred hoisin, you’ll find that this tastes quite different. But if you use it in your favorite Asian recipe, you’ll see that it works beautifully.

image

4 tablespoons GF soy sauce
2 teaspoons natural creamy peanut butter
1 tablespoon honey
2 teaspoons rice vinegar
1/4 teaspoon granulated garlic
2 teaspoon sesame oil
1/4 teaspoon Sambal chili paste


Combine all the ingredients in a food processor and mix thoroughly, stopping and scraping down the sides of the bowl to incorporate all the ingredients. Keep it in a tightly sealed container, refrigerated.

image

For the dish above…

1 1/2 lbs. boneless country-style pork ribs, cut into pieces
2 tablespoons corn starch
coconut oil
1 onion, peeled and diced
1 summer squash, diced
2 scallions, chopped (green and white parts)
2 heads of broccoli, washed and chopped into individual florets
hoisin recipe (above)

Once you’ve cut the pork into inch-long pieces, place it in a bowl and toss with the corn starch until it’s coated.

Heat a pan til hot. Add a tablespoon or 2 of the coconut oil and then the pork. Cook until the pork has browned on all sides and has cooked through. Scrape the pork out into a bowl and put the pan back on the stove, setting the heat to medium. Add another tablespoon of the coconut oil and saute the onions until translucent. Add the squash and saute for a few minutes until softened. Add the scallions and saute a couple of minutes more. Add the broccoli, tossing the pan ingredients to combine, and then spoon out about 2 tablespoons of the hoisin sauce into the pan, mixing well.

Add the pork and any juices in the bowl back into the pan and toss to combine. Taste carefully to check for seasoning. Add more hoisin if needed. Don’t add too much or it will be too salty.

Serve over rice, if desired.

OVERNIGHT OATS

Posted: September 9, 2015 in breakfast, Food, Recipes
Tags: , , , , , ,

I wake up at 4AM to go to work every day, so to have something really tasty and healthy already waiting for me, next to my carafe of iced coffee in my fridge, is awesome.

The original recipe called for almond milk. But most almond milk has little or no nutritional value (or almonds, for that matter.) And I’m not a fan of soy, especially non-organic soy that’s usually grown with Monsanto’s Roundup-ready products. So I go for organic grass-fed no-fat milk. The chia seeds add anti-oxidants and omega-3’s. Cinnamon has some health benefits, too, but it’s mainly here for flavor. And I use frozen organic blueberries in this recipe, but any frozen or fresh berries will work.

IMG_7103


1/2 cup rolled oats
1/2 cup organic blueberries or other berries
3/4 cup organic no-fat milk
1 teaspoon chia seeds
2 teaspoons maple syrup
1/4 teaspoon cinnamon

Combine the ingredients in a Mason jar and refrigerate overnight. Eat cold or warm the next morning.

It’s Labor Day weekend, and it’s all about the grill! (Hardwood, that is…not gas.) You can make this recipe in the kitchen, but a wood fire brings it to the next level.

thai chicken LTL


3 lbs. chicken pieces (I used drumsticks for this recipe)
2/3 cup soy sauce
1/2 cup fresh cilantro
2 tablespoons canola or peanut oil
2 garlic cloves, roughly chopped
1/2 teaspoon white pepper
1/2 cup sugar
1/4 cup white vinegar
1 teaspoon red pepper flakes or crushed dried chiles
1 teaspoon salt

Marinade: Combine soy sauce, cilantro, canola oil, granulated garlic and white pepper in a food processor and let it run. Place chicken pieces in a Ziploc bag and pour half of the marinade in. Save the other half for basting later. Seal the bag and let the chicken marinate overnight, or at least a few hours, squishing the bag around so that all the chicken gets marinated.

Sauce: In a saucepan, combine sugar, white vinegar, pepper flakes and salt. Bring to a boil and make sure the sugar dissolves. Remove from heat and let it cool to room temperature.

After marinating overnight, discard the used marinade in the Ziploc bag. Place chicken pieces over a hot hardwood fire or bake in an oven at 350, basting them with the leftover marinade until fully cooked. If the coal fire gets too hot, move the chicken to a cooler part of the grill to prevent burning. If using the oven, switch to the broiler at the end to give the chicken a nice char.

Serve with the sweet pepper sauce drizzled on top.

The Saturday before Labor Day is traditionally considered to be International Bacon Day. So that makes it September 5th this year.

Let’s face it: there are few foods as magical as bacon. Add bacon to just about any dish you’re preparing, and it elevates it to incredible new heights of flavor. The BLT is possibly the greatest food combination ever invented: just a few simple, fresh ingredients, when placed together, transforming into one of the most amazing sandwiches on planet Earth.

I buy my bacon on-line from Burger’s Smokehouse, a family-run business in Missouri that not only sells some great bacon (get the thick-sliced country bacon—my favorite), but also smoked turkeys, ham and more.

But I also make my own.

Bacon comes from the pork belly. One of the places I buy pork bellies is from my friends at Fire Fly Farms in Stonington, CT (www.fireflyfarmsllc.com). I follow the simple curing techniques outlined in “Charcuterie,” a great book written by Michael Ruhlman and Brian Polcyn.

To cure bacon, all you really need is salt and sugar, and what they in the curing biz call “pink salt,” which is not to be confused with salt that happens to be pink, like Himalayan salt you would find in a gourmet store. Pink salt is bright pink—to let you know that this is special salt that should only be used in small quantities for curing. The reason for that is because it has nitrites. Nitrites delay the spoilage of the meat, and help keep the flavors of spices and smoke. They also keep the meat nice and pink instead of an unappetizing gray. That’s good. But nitrites can break down into nitrosamines, which have been known to cause cancer in lab animals. But let’s face it: you would need to eat a ton of cured meat to really worry about this.

To make the basic dry cure:

1/2 lb. kosher salt
1/2 cup light brown sugar
1 teaspoon coarsely ground black pepper
1 ounce (5 teaspoons) pink salt
optional ingredients: garlic, onion

Mix the ingredients well. An important note: all Kosher salts do not all weigh the same, so go by the weight and not a cup measurement.

Once you rub the pork belly with the basic dry cure, place it in a Ziploc bag, squeeze the air out of it, and seal it tightly. Place it in the fridge for a couple of weeks, flipping it over every few days to let gravity do its work. You’ll see that the salt will draw moisture out of the meat and form a brine. This brine will continue to cure your pork belly, so leave it in there.
Once the pork belly has been cured, wash the brine off the meat, pat it dry with paper towels. Now it’s time to cook. You can simply cook the pork belly at 200 degrees for about 2 hours, until the internal temperature reaches 160 degrees, or place the pork belly in a smoker, cooking it at 250 degrees for 1 hour, then adding hickory chips and smoking it at 250 degrees for another hour. I use my digital smoker to do this.


Bellies in the smoker

Bellies in the smoker.


Smoked bacon

Smoked bacon

That’s it. You have achieved bacon!

The reward is so worth the effort. That first slice you cut off your bacon and toss in a pan to lightly fry for a few moments will be the best bite you’ve ever had in your life!
And if you’re making one slab of bacon, why not make it three or four? It freezes well. And…you will eat it. You know you will!
Frying in the pan!

Frying in the pan!

My blueberry buttermilk cornmeal pancakes are delicious (see my previous blog), but the recipe leaves some leftovers. So I froze the extra pancakes, not really knowing what I’d do with them later on.

Later in the week when I thawed a pack of chicken thighs, I decided to thaw some of the pancakes as well, planning to use them as a substitute for bread crumbs. Worked out pretty well…a crispy, flavorful piece of chicken. If you don’t make the pancakes, using store-bought cornbread will work just as well.

image

5 lbs. chicken thighs
8 oz. cornbread (or leftover pancakes)
1 teaspoon salt
1/2 teaspoon granulated garlic
1/2 teaspoon granulated onion
1/2 teaspoon tarragon
2 eggs
oil, for frying (I use avocado oil)


Break the cornbread (or pancakes) into smaller pieces and place them on a sheet pan in a 200-degree oven. Bake until they dry out but don’t burn, about 30 minutes. Let them cool to room temperature, then place them in a food processor and process until they resemble breadcrumbs. Place the breadcrumbs in a bowl.

Add the salt, garlic, onion and tarragon to the breadcrumbs and mix well.

In another bowl, crack and whisk the 2 eggs.

Pre-heat the oven to 350 degrees.

Heat a frying pan with 2 inches of oil to medium-high. Roll the thighs one at a time in the egg and then in the breadcrumb mixture. Press the breadcrumbs onto the chicken so they stick. Gently place the breaded thigh in the pan with the oil. Fry until golden on one side, then flip the thigh over and fry on the other side. When the thighs are golden and crisp, place them on a sheet pan covered with non-stick aluminum foil. Repeat with all the thighs.

Place the sheet pan with the thighs in the oven and bake until cooked through, about 35 minutes.