It’s my birthday! I just might have a Vesper (or two) to celebrate!
An update on the Dukes Hotel: right now, they are refurbishing it, so the hotel is closed. But the Dukes Bar remains open for business! That means you don’t have to battle with hotel guests to get a seat at this iconic bar! Almost worth a trip to London just to get a seat before the hotel reopens this fall!
A few years ago, I took a trip to London with my daughter, and we checked off quite a large list of things we wanted to do: trips to Oxford and Stonehenge, museums, the theater, restaurants with fabulous food (and some with equally amazing views), college tours, a proper British afternoon tea at the Ritz, and much more.
One of the top things on my personal list was to pay a visit to the renowned Dukes Bar at the Dukes Hotel, where, as legend has it, Ian Fleming, the author of the James Bond novels, not only came up with the phrase “shaken, not stirred,” but also created the now-famous Vesper martini.
Sadly, this is as close as I got to the Dukes Bar. People who stay at the hotel get to reserve a space in the incredibly small bar area, and everyone else has to wait in line on a first-come, first-served basis. Unfortunately for me, the wait to be seated was way too long and I never got to experience the Dukes Bar for myself.
*sigh*…looks like I’ll need to make another trip to London to check this one off my bucket list.
In the meantime, I can enjoy a Vesper at home…
At first, it seemed almost silly to try to make one…but the classic James Bond martini has always fascinated me. I’m not talking about the clichéd Sean Connery “vodka martini, shaken, not stirred.” I’m talking about the real James Bond martini, which appeared in Ian Fleming’s first 007 novel “Casino Royale” and only appeared in the 2006 “Casino Royale” motion picture starring Daniel Craig (the best Bond of all, if you ask me.)
To quote the novel:
‘A dry martini,’ he said. ‘One. In a deep champagne goblet.’ ‘Oui, monsieur.’ ‘Just a moment. Three measures of Gordon’s (gin), one of vodka, half a measure of Kina Lillet. Shake it very well until it’s ice-cold, then add a large thin slice of lemon peel. Got it?’ ‘Certainly, monsieur.’ The barman seemed pleasant with the idea. ‘Gosh that’s certainly a drink,’ said Leiter.
Bond laughed. ‘When I’m … er … concentrating.’ he explained, ‘I never have more than one drink before dinner. But I do like that one to be large and very strong and very cold and very well-made. I hate small portions of anything, particularly when they taste bad. This drink’s my own invention. I’m going to patent it when I can think of a good name.’
He watched carefully as the deep glass became frosted with the pale golden drink, slightly aerated by the bruising of the shaker. He reached for it and took a long sip.
‘Excellent,’ he said to the barman, ‘but if you can get a vodka made with grain instead of potatoes, you will find it still better.’
Bond named this drink the Vesper martini, after the character Vesper Lynd, portrayed by Ursula Andress in the 1967 adaptation, and Eva Green in the 2006 adaptation of “Casino Royale.”
My first homemade version of this classic drink remained true to the measurements of the original, though I changed brands due to personal preference. In the novel, Bond just asks for “vodka.” (Of course, this was back in the 1950’s when we didn’t have hundreds of brands to choose from!) My choice for best-bang-for-the-buck grain vodka is Tito’s, made from corn. But an excellent choice for wheat-based vodka is Grey Goose.
Bond asks for Gordon’s gin. I’m partial to the floral notes of Hendrick’s.Again, in the 50’s, what good British agent wouldn’t drink Gordon’s?
And the original Kina Lillet had its recipe changed in the 1980’s to keep up with the times by reducing the quinine, which made it bitter. (Kina refers to the quinine, so it was removed from the label when the quinine was removed from the formula.) The French aperitif wine, Lillet, is today’s version: a blend of wine grapes, oranges, orange peels and quinine. Lillet is not a vermouth, though you’ll find it in the vermouth section of your favorite liquor store. With the rise in popularity of the Vesper martini, many bartenders and aficionados claim it’s just not the same without the original Kina Lillet formulation, and a search began to find a better substitute, one with a more pronounced quinine assertiveness.
Enter Cocchi Americano, an aromatized wine also found in the vermouth section of many liquor stores. With its quinine-forward recipe, Vesper fans claim it comes closer to the original Kina Lillet. Add a more London-style dry gin to the mix, like Bombay Sapphire, and you just about nail the cocktail Bond created all those years ago.
So…with measurements true to Bond, may I suggest two versions of the same cocktail!
My original, more floral, version…
3 oz. Hendrick’s gin 1 oz. grain-based vodka (like Tito’s or Grey Goose) 1/2 oz. Lillet
Combine these over ice in a cocktail shaker, and shake vigorously. Strain it into a chilled martini glass. I’m happy with a lemon peel or even olives with this combination.
Or…
The version closer to Bond’s original, which is equally wonderful in its own right: crisp and refreshing, a strong drink with a hint of bitterness from the quinine. Dangerously addictive!
3 oz. London dry gin (like Bombay Sapphire)
1 oz. grain-based vodka (like Grey Goose)
1/2 oz. Cocchi Americano
Combine these over ice in a cocktail shaker, and shake vigorously. Strain it into a chilled martini glass. Garnish with a large, thin lemon peel.
With the rising popularity of the Vesper martini, and the use of Cocchi Americano instead of Lillet, the makers of Lillet now claim they “never removed” the quinine from their original recipe. Many feel this is an outright lie, (back-pedaling a bit, aren’t we?) because they themselves stated they changed in the formula back in the 80’s. A little too late now for them to re-formulate. CocchiAmericano has become the go-to with many bartenders (and myself) when recreating this classic cocktail. But if I can’t find it at my favorite liquor store, Lillet will do in a pinch.
If you don’t want to spend the extra cash for Grey Goose, I found that this combination is also very satisfying: for the vodka, go with the original red label of Stoli with Bombay Sapphire gin and CocchiAmericano in the original proportions.
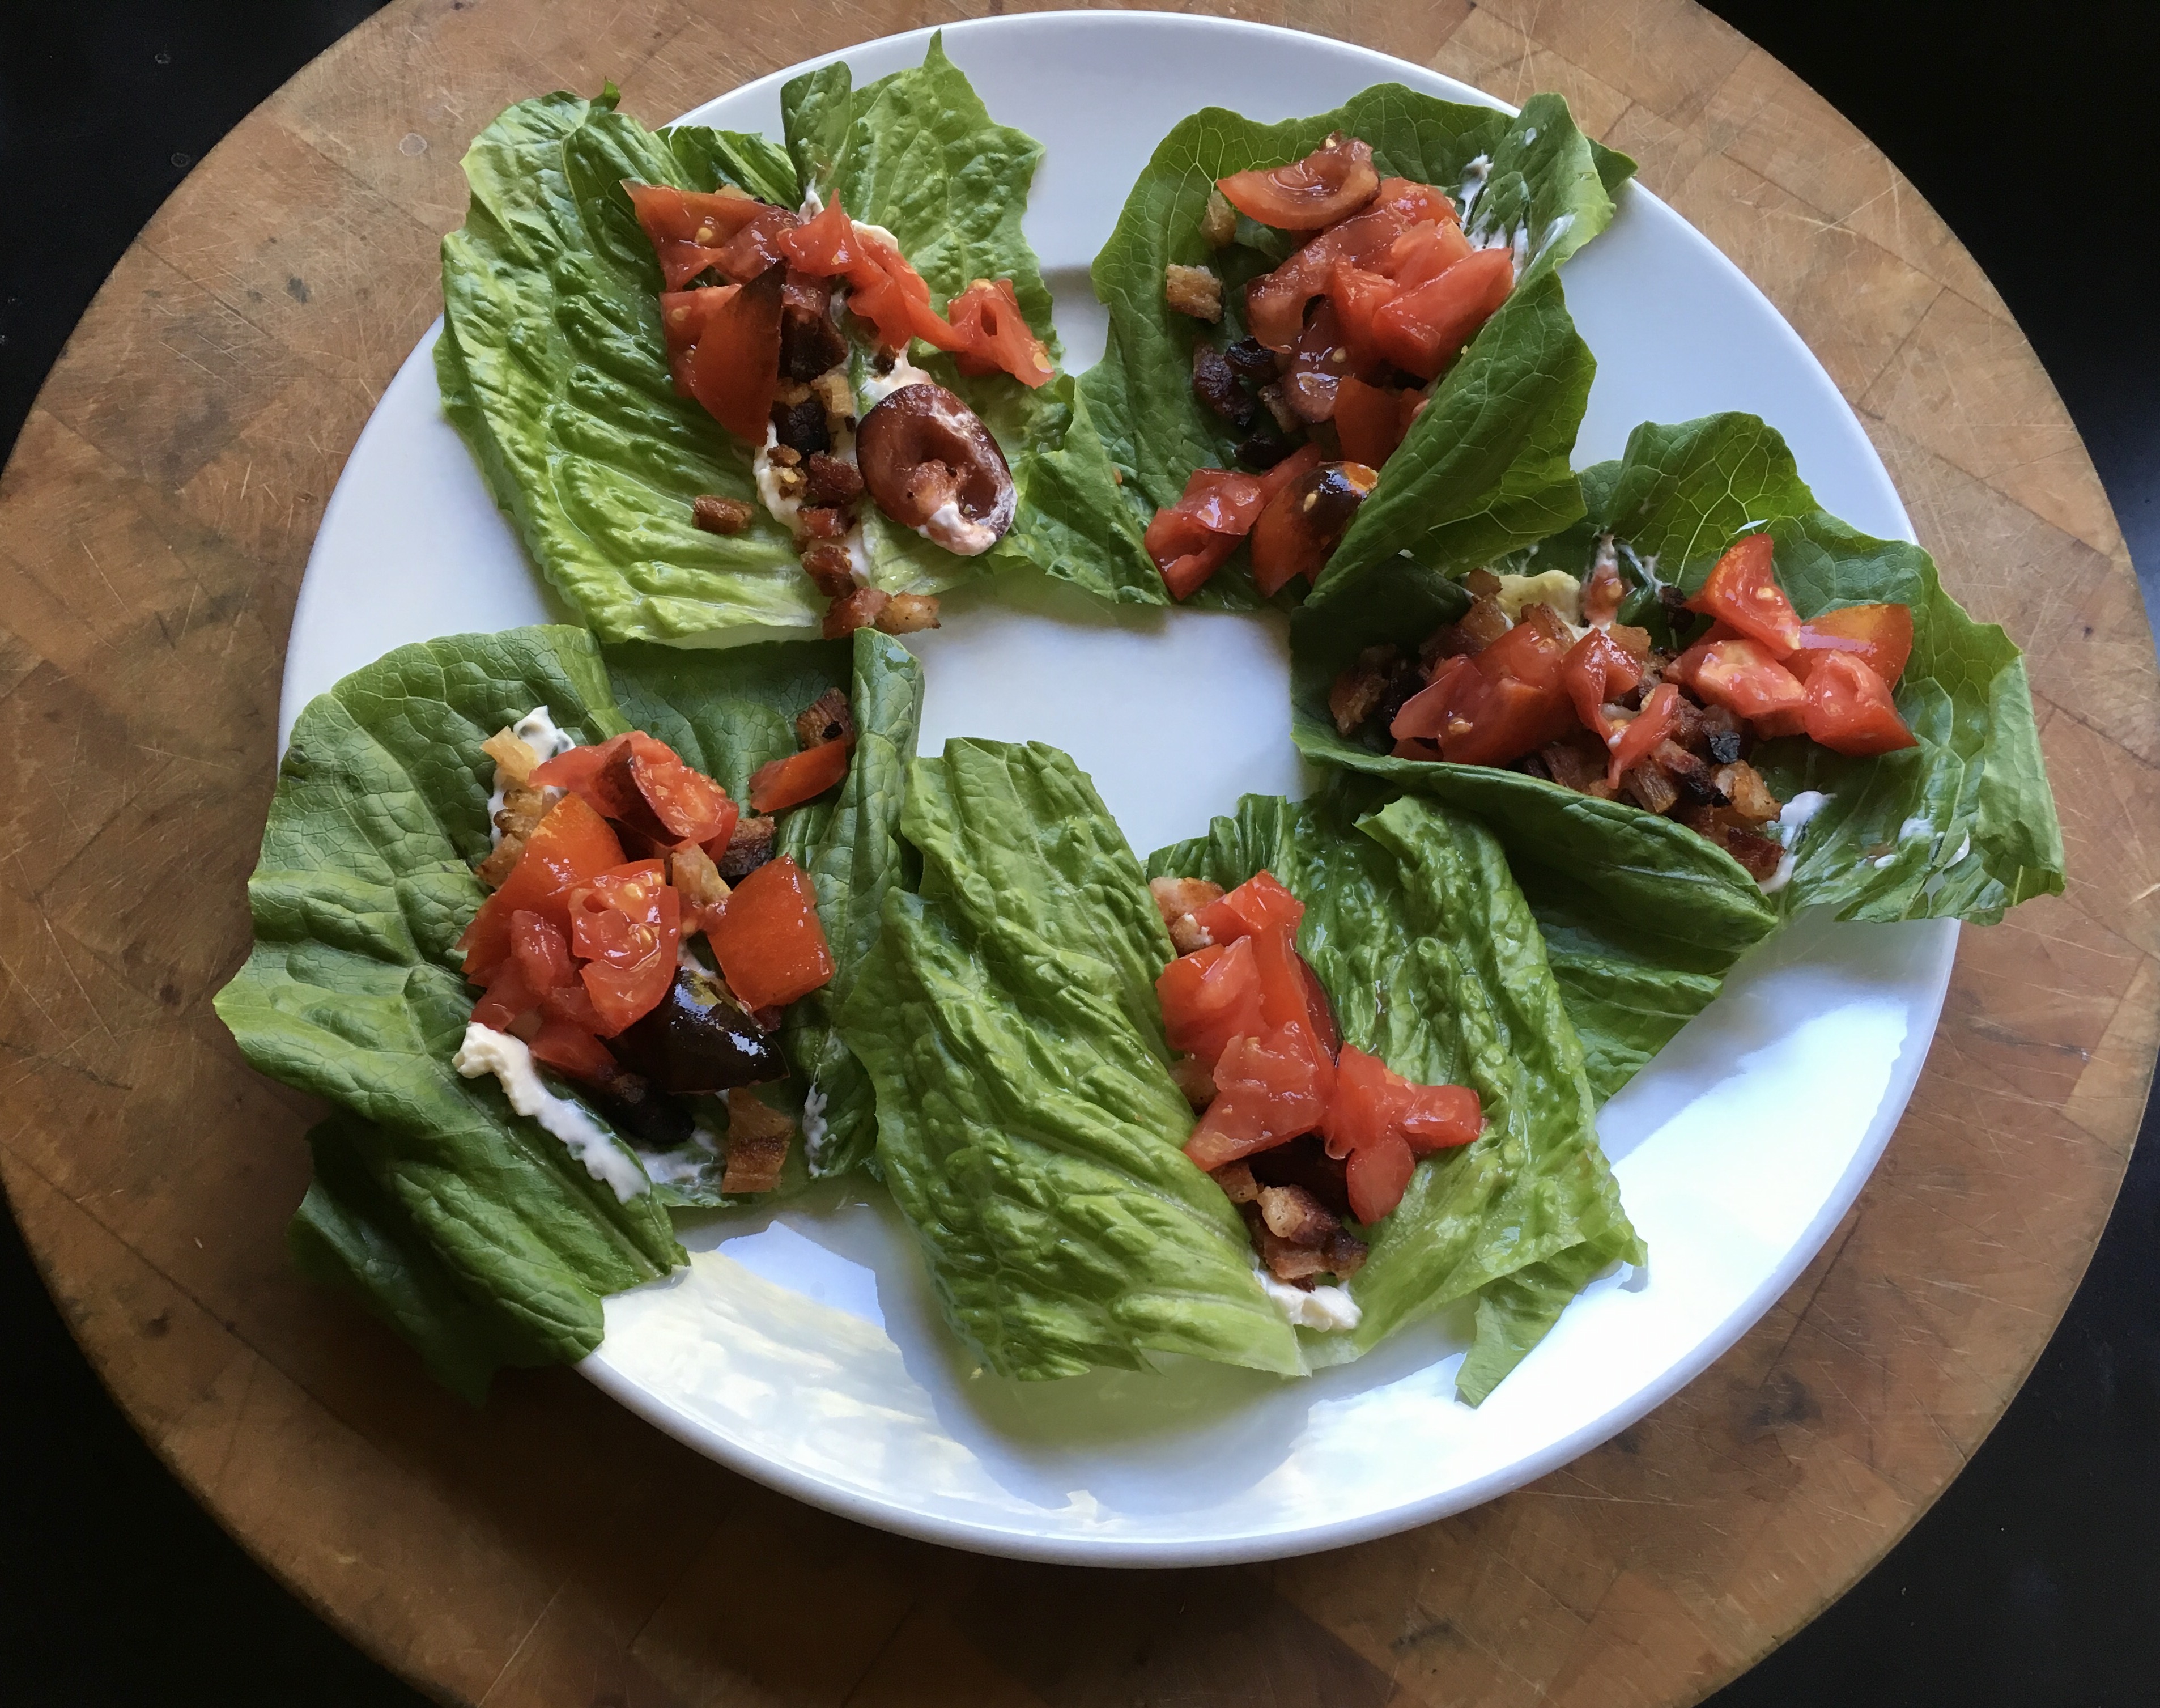
Let’s face it: there are few foods as magical as bacon. Add bacon to just about any dish you’re preparing, and it elevates it to incredible new heights of flavor. The BLT is possibly the greatest food combination ever invented: just a few simple, fresh ingredients, when placed together, transforming into one of the greatest sandwiches on planet Earth.
BLT wraps: home-cured and smoked bacon, local farmstead romaine, home garden tomatoes, always Hellman’s mayo.
If I’m buying bacon, I go on-line to Burger’s Smokehouse, a family run business in Missouri that has made great bacon for decades. The prices are good, and they include shipping. (smokehouse.com) I buy in quantity and freeze what I don’t need right away. My favorite is the thick-sliced country bacon “steaks.”
But nothings beats making your own.
Bacon comes from the pork belly, and they’re easy to find in any good butcher shop. But to get something a notch above, I’ll buy a heritage breed, like Berkshire pork, from Heritage Pork International. (heritagepork.com) I follow the simple curing techniques outlined in “Charcuterie,” a great book written by Michael Ruhlman and Brian Polcyn.
To cure bacon, all you really need is salt and sugar, and what they in the curing biz call “pink salt,” which is not to be confused with salt that happens to be pink, like Himalayan salt you would find in a gourmet store. Pink curing salt is bright pink to let you know that it’s a special salt that should only be used in small quantities for curing. The reason is: nitrites. Nitrites delay the spoilage of the meat, and help keep the flavors of spices and smoke. They also keep the meat nice and pink instead of an unappetizing gray. That’s good. However, nitrites can break down into nitrosamines, which have been known to cause cancer in lab animals. But let’s face it: you would need to eat a ton of cured meat to really worry about this. (I buy uncured deli meats and hot dogs at the supermarket, because processed meats are a different story. But since I know exactly what goes into my own bacon, I’m not worried about the level of nitrites.)
To make the basic dry cure:
1/2 lb. kosher salt (I use Diamond Crystal Kosher salt) 1/2 cup light brown sugar or turbinado sugar 1 oz. pink curing salt
Mix the ingredients well. An important note: all salts do not all weigh the same, so go by the weight and not a cup measurement. (Morton’s Kosher salt, for example, is heavier than Diamond Crystal.) I keep this basic dry cure stored in my pantry, ready to use when I need it.
When it’s time to be makin’ the bacon, I combine this dry cure with other ingredients to make my bacon rub.
My bacon rub:
1/2 cup basic dry cure 1/2 cup brown sugar or turbinado sugar 1 tablespoon fresh cracked black pepper 1 tablespoon granulated garlic 1 tablespoon granulated onion
Mix these ingredients well (yes, there’s quite a bit of sugar there, but I like my bacon a little sweet!) Rub it generously all over the pork belly.
I have a large plastic container with a lid that fits one average (4-lb.) slab of pork belly perfectly. I place the belly inside it, put the lid on, and place the container in the fridge. (Sometimes, I’ll season the belly and wrap it tightly with plastic wrap before putting it in the container. Optional.) The pork belly stays there for at least a couple of weeks, maybe three. I flip the belly every few days. You’ll see that the salt will draw moisture out of the meat and form a gooey brine. This brine will continue to cure your pork belly, so leave it in there. Just flip it, put the lid back on the container, and back in the fridge.
In two or three weeks, you’ll be able to tell the pork belly has cured because it feels firm. Wash the brine off the meat well with cold water, and pat it dry with paper towels. Place the belly in the fridge for an hour or so and it will develop a tackiness to the touch. This is a thin layer of proteins known as a pelicle, and it helps the smoke stick to the meat.
Now it’s time to cook. You can simply cook the pork belly (without smoking it) at 200° for about 2 hours, until the internal temperature reaches 160°. This isn’t bacon…it’s pancetta. Or you can simply slice it and fry it up in a pan. (Also delicious.) But it’s the smoke that makes it bacon.
Smoking foods can be a challenge to many, so a great alternative to the traditional charcoal smoker is an electric one. It allows you to control the exact temperature inside the smoker without checking on it constantly (a real luxury when you’re slow smoking brisket or pork shoulder for many hours), and it offers a tray where you place your wood chips or pellets to give your food that authentic smoky flavor.
My electric smoker has a digital readout, which allows me to set an exact temperature. I smoke my pork belly at 250° for 2 hours, using hickory chips. (I’m not a fan of applewood, the other commonly used smoking wood for bacon.)
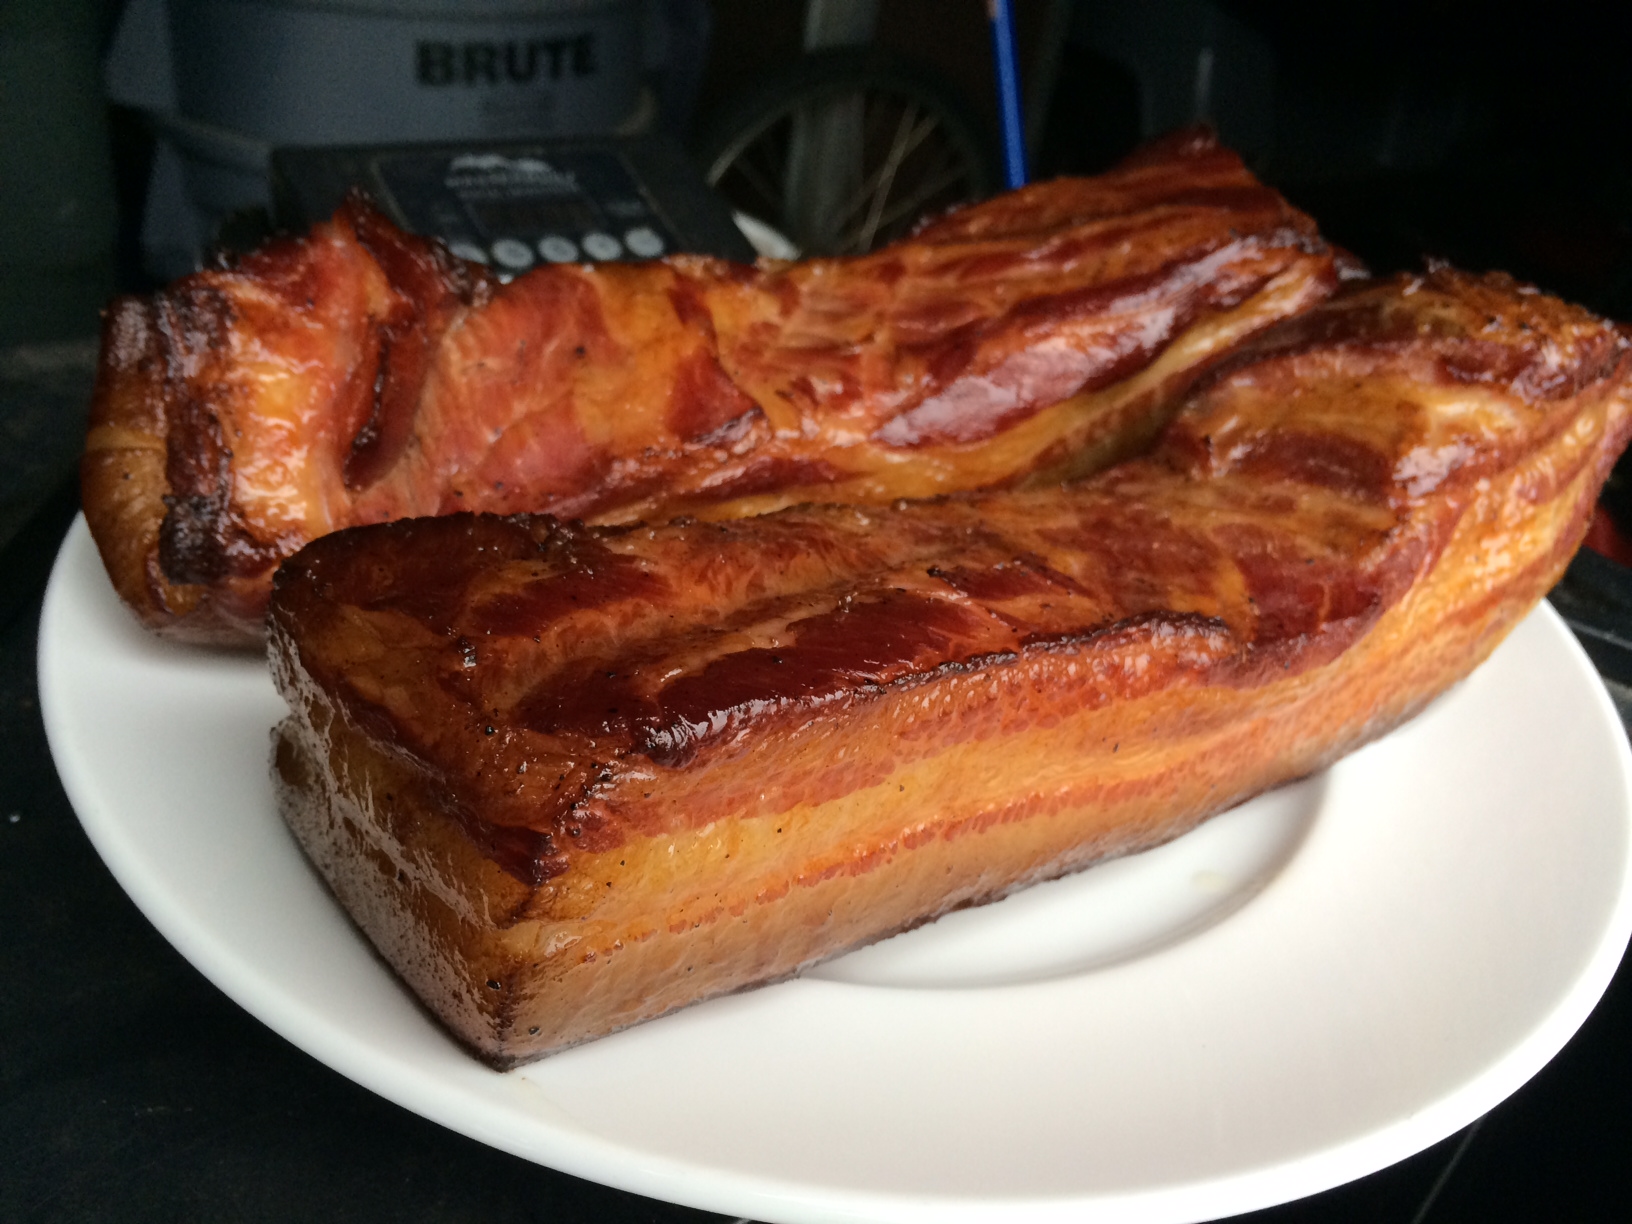
Bellies in the smoker. A water bath underneath to catch any grease drippage.A couple of hours later: beautiful bacon!
The reward is so worth the effort. Just remember that you still need to cook the bacon before you can eat it. Don’t eat it straight out of the smoker. That first slice you cut off your bacon and toss in a pan to lightly fry for a few moments will be the best bite you’ve ever had in your life!
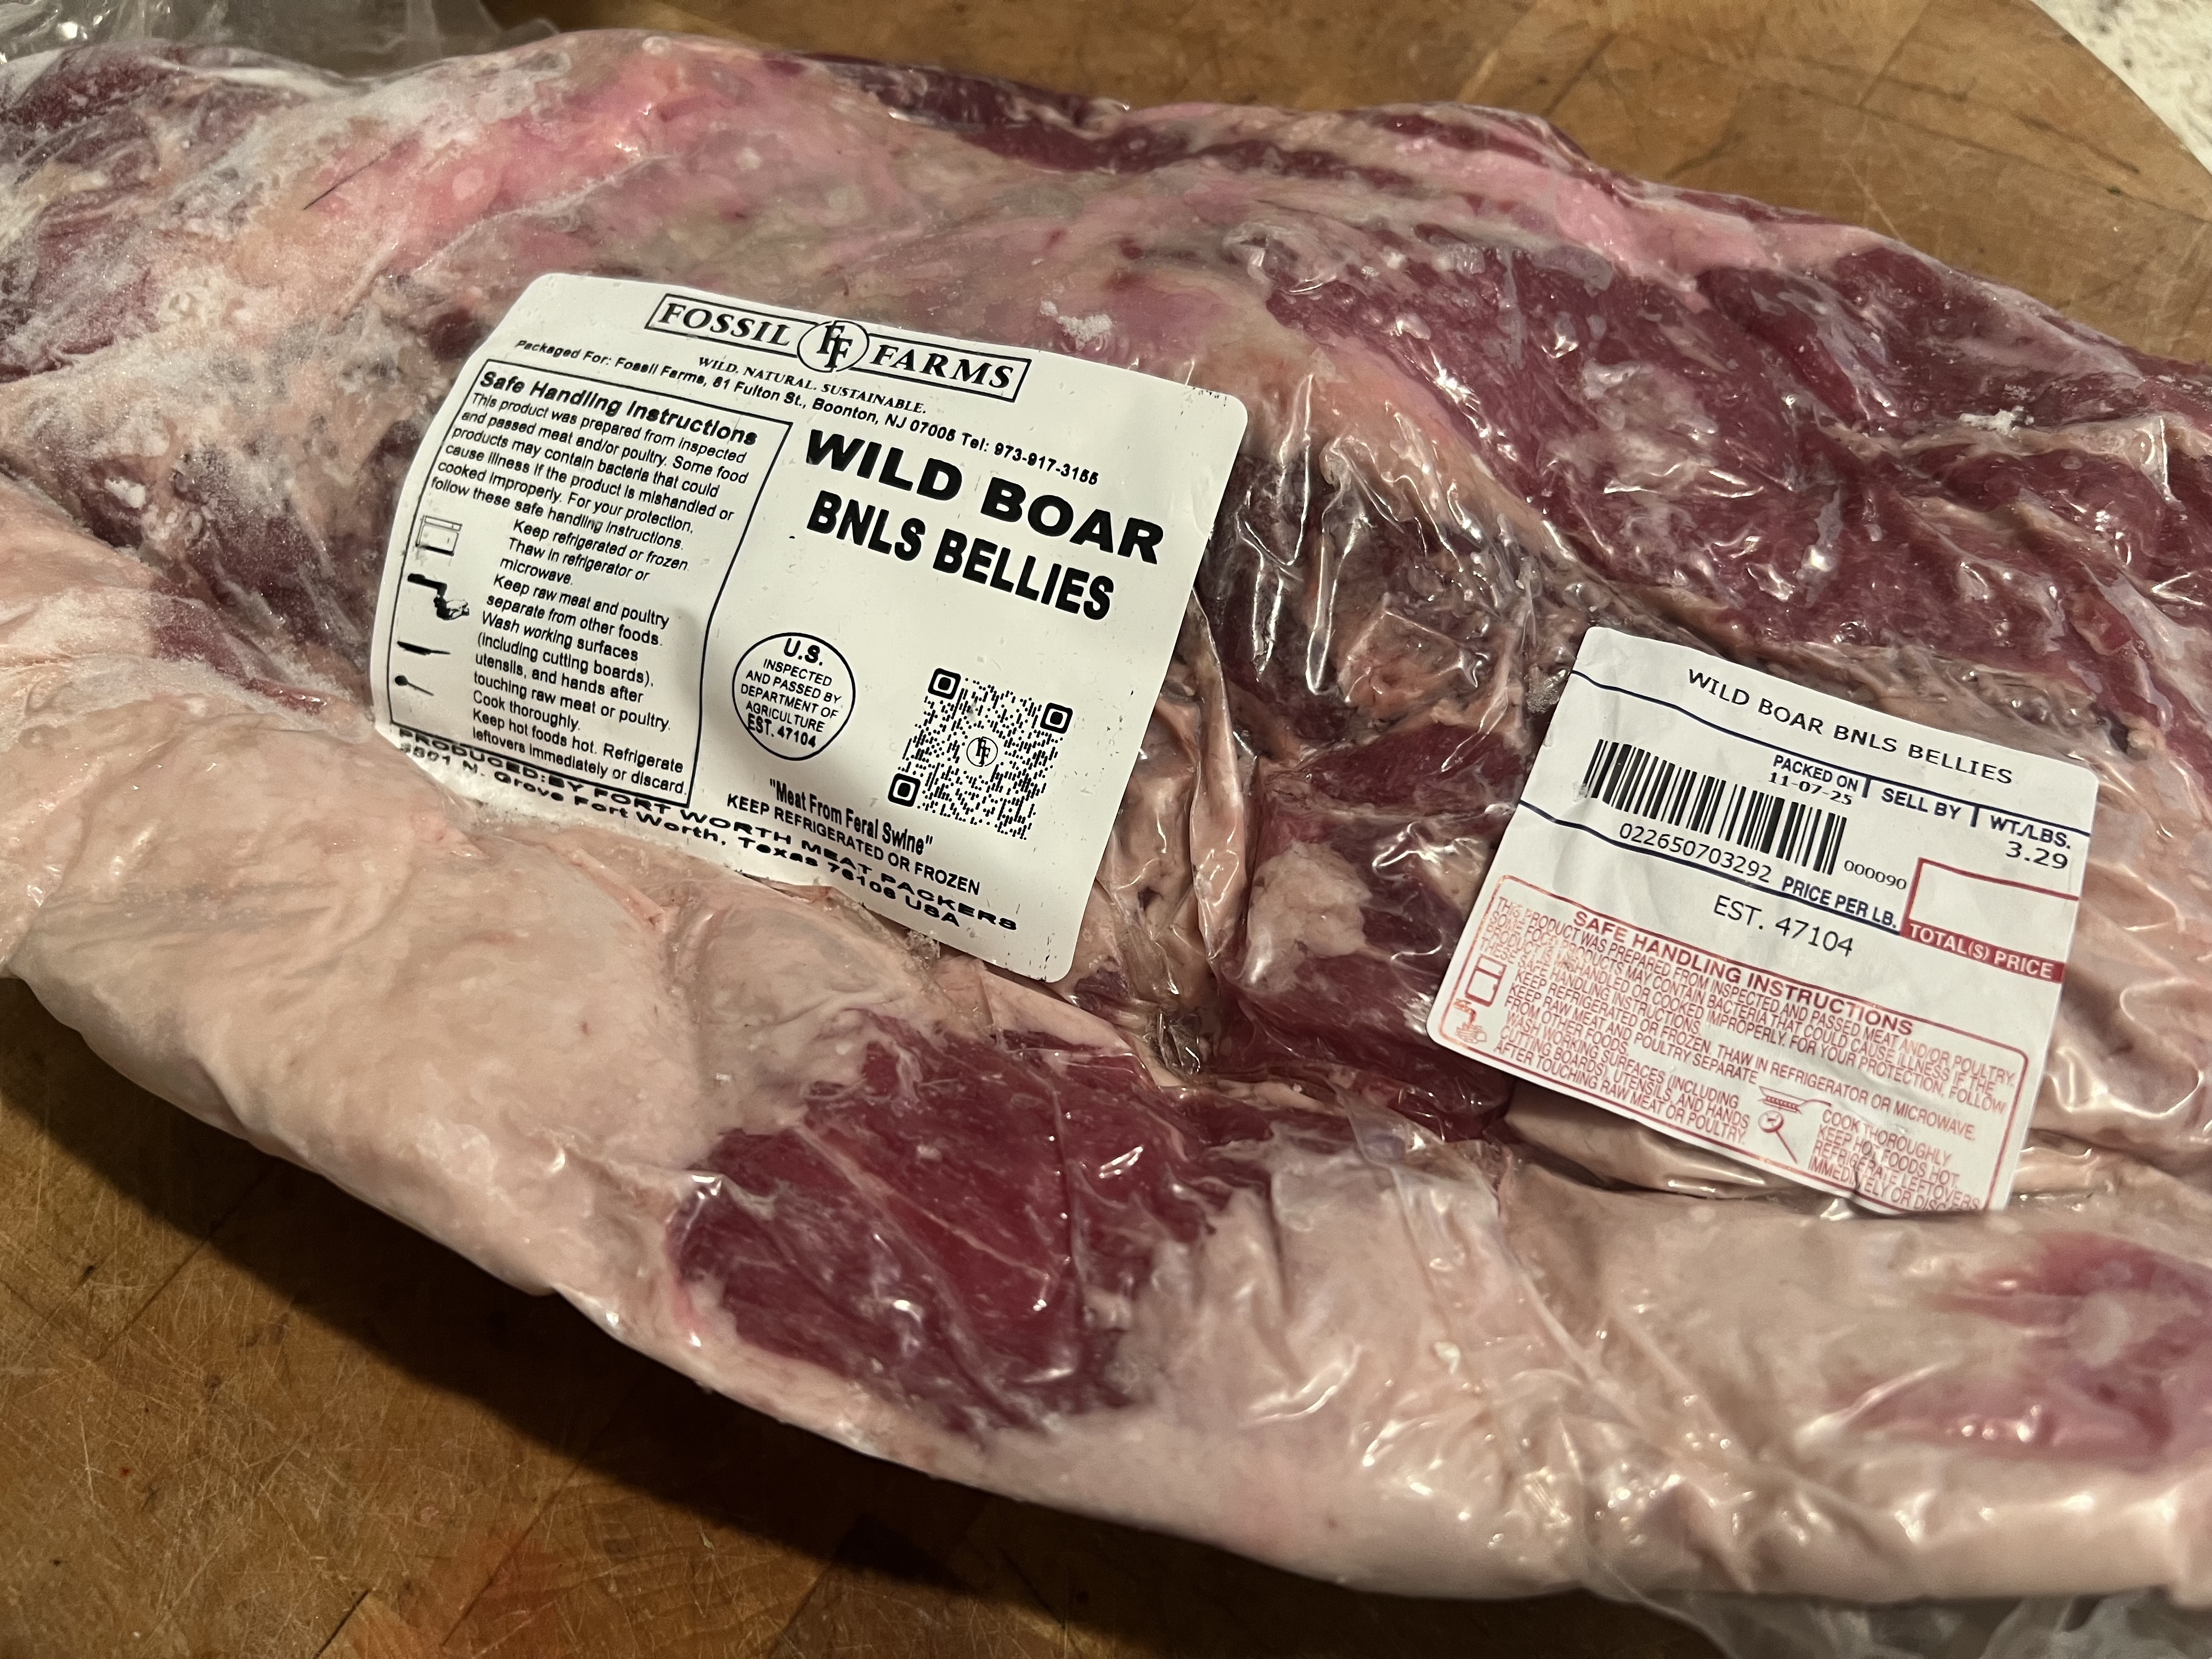
I recently received this wonderful gift from my buddy, Dr. Chezwick. I’ll be using the same techniques that I would for a regular slab of bacon, only I’ll cure it for less time, since it weighs less, and is thinner. I’m thinking it will be delicious!
Even though we’re still shoveling ourselves out from under the last snowstorm here in New England, now’s the time to start prepping brisket for corned beef on St. Patrick’s Day!
Before every St. Patty’s Day, supermarkets are full of packages of processed corned beef in preparation for the big celebration. But, interestingly, corned beef isn’t really an authentic Irish dish.
The phrase “corned beef” was coined by the British, and although the Irish were known for their corned beef throughout Europe in the 17th century, beef was far too expensive for the Irish themselves to eat and all of it was exported to other countries. Owning a cow in Ireland was a sign of wealth, and the Irish used theirs for dairy products, not beef.
The Irish ate pork, and a lot of it, because it was cheap to raise pigs, and they traditionally prepared something like Canadian bacon to celebrate St. Patrick’s Day in Ireland.
In the 1900’s, when the Irish came to America, both beef and salt were more affordable, and the Irish, who lived in poor, tight-knit communities, often next to Jewish communities, bought much of their beef from Kosher butchers. And so many of the Irish learned how to corn their beef using Jewish techniques, but adding cabbage and potatoes to the mix. That’s what we have today.
It takes about 3 weeks to make corned beef. Doing it yourself is not difficult. It just takes time.
Corned beef has nothing to do with corn. ‘Corning’ is a technique for preserving raw meats for long periods by soaking it in a salt brine. This method was used in England before the days of commercial refrigeration. Back then, the large salt kernels used in the brine were called “corns.”
Brining is a time-honored way of preserving meat and it prevents bacteria from growing. Both pastrami and corned beef are made by this method. Both start with a brisket of beef. Corned beef is then cooked–usually boiled–and served. Pastrami is made when the brined meat is rubbed with more spices and then smoked to add extra flavor. So corned beef and pastrami are the same meat, just treated differently.
Saltpeter is an ingredient that has been used in brining beef for years. It adds the traditional pink coloring to the corned beef and pastrami meat, a bit more appetizing than the gray color it tends to have if you don’t use it.
Saltpeter can also contain carcinogens, so there’s always talk of avoiding it. It’s found in pink curing salt, which is used in small amounts during the curing process. (Not to be confused with Himalayan pink salt, which is just plain salt.) Since I only make my corned beef once a year, I’m OK with it either way. The general rule of thumb is only 1 teaspoon pink curing salt per 5 pounds of meat.
I get grass-fed brisket in 10-pound slabs, but use whatever size you find comfortable. Just don’t go too small, or the brine will make that tiny piece of meat extremely salty.
Brining the beef brisket
Step one: corned beef…
beef brisket (about 8-10 pounds)
2 teaspoons paprika
1/4 cup warm water
3 cloves of minced garlic
2 tablespoons sugar
1 tablespoon mixed pickling spices
3/4 cup salt
1 teaspoon pink curing salt (optional)
2 quarts water
Place the brisket in a large container made of non-reactive material, like glass or plastic.
In the 1/4 cup of warm water, dissolve the sugar, minced cloves, paprika and pickling spices.
Dissolve the 3/4 cup of salt (and optional teaspoon of pink curing salt) in the 2 quarts of water. Pour in the sugar/garlic/paprika/pickling spices mix and stir everything together. Pour the mixture over the meat in the container. Make sure the meat is totally beneath the surface of the liquid. (You may need to weigh it down to do this. I place a couple of plates on top, which pushes the meat down into the brine.) If there’s just not enough liquid, double the recipe, leaving out the pink salt the second time. Cover the container.
Refrigerate the container and its contents for 3 weeks, turning the meat once or twice per week. At the end of the third week, remove the container from the refrigerator and take out the meat. Soak the meat in several changes of fresh cold water over a period of 12 hours to remove the excess salt. I add ice to the water to keep the meat cold.
At this point, if you want corned beef, most people boil it.
I prefer to lay some aluminum foil down on a sheet pan. Then I coarsely chop carrots, onions, and celery, placing them in a single layer on the foil. Then I lay my brisket on top of the veggies, and wrap the meat tightly in the foil. I place the baking pan in a pre-heated 350 degree oven and cook for about 3 1/2 hours. (That’s for an 8-pound slab of meat. The cooking time will be less for a smaller cut.)
If you want to make pastrami, there are more steps to take…
Step two: making Pastrami…
Brined and rinsed corned beef brisket from above recipe, patted dry with paper towels
1/4 cup Kosher salt
1/4 cup paprika
3 tablespoons coriander seeds
2 tablespoons black peppercorns
2 tablespoons yellow mustard seeds
1 tablespoon white peppercorns
3 tablespoons brown sugar
1 tablespoon granulated garlic
Combine the coriander seeds, black and white peppercorns and mustard seeds in a spice grinder and grind them coarsely. Place them in a bowl. Add the salt, paprika, brown sugar and granulated garlic. Mix well.
Rub the mix into the corned beef well, covering all sides.
Heat your smoker to 225 degrees and smoke the meat for several hours. (My wood of choice is always hickory.) When the internal temperature of the meat has reached 165 degrees, it’s done. It isn’t necessary to smoke pastrami as long as you would a regular brisket because the long brining time makes the meat more tender, and you’ll be steaming it next.
It is very important that absolutely everything that comes in contact with the meat is very clean. (This includes your hands.) Also, make very sure that every inch of the meat reaches the 165 degrees before it is removed from the smoker. The corned beef is now pastrami.
Delis that serve pastrami go one step further: they steam the meat so that it becomes incredibly tender and easy to slice. I place a baking pan with boiling water in the center of a 350° oven. I put a grate on top of it, placing the pastrami on top of the grate. Then I invert a bowl over the pastrami to keep the steam in. I will cook it this way for at least an hour to steam the meat before slicing and serving.
They say February 22nd was chosen as National Margarita Day to help us get through the end of those dreary winter months. I like the sound that, especially since we here in Southern New England are getting hit with more snow this weekend.
I love watermelon margaritas, especially when they’re made with the sweetness of fresh watermelons.
All you need.
Many recipes add a lot of sugar: sugar on the rim of the glass as well as sugar in the margarita itself. I think that a ripe watermelon and the Cointreau add enough sweetness, so I leave any extra sugar out of my recipe.
4 cups cubed, seeded watermelon 4 oz. (or more!) tequila (I like Patron silver) 3 tablespoons fresh squeezed lime juice 1 oz. orange liqueur (I like Cointreau)
Combine the watermelon, tequila, lime juice, and orange liqueur in a blender. Process until it’s smooth. (If I wanted to strain the watermelon juice before making the cocktail, I’d put it in the blender by itself first, whizz it up, then strain. But I’m totally OK with making this as easy as possible. Everything in the blender all at once!)
Pour it into margarita glasses filled with ice. Garnish with a lime wedge.
Watermelon margarita, aerial view. (No drone required.)
Fat Tuesday is February 17! Laissez les boss temps rouler!
Back in the 80’s, I worked at a radio station in Mobile, Alabama. My New York buddies thought I was crazy to move to the South, but that’s where the job was. When they realized that I was only a 2-hour ride from New Orleans, I wasn’t so crazy after all! I spent every possible weekend there: the food, the music, the people…
When I moved to Rhode Island, I really missed all the fun of the Big Easy. So I decided to have a Mardi Gras party every year. I’d invite 80+ people, and I cooked all of the dishes myself. I made all the classics: red beans and rice, crawfish etouffe, gumbo, Cajun chicken (my own recipe), and, of course, jambalaya.
For the seasoning mix:
2 bay leaves
1 teaspoon salt
1/2 teaspoon white pepper
1 teaspoon granulated garlic
1/4 teaspoon cayenne pepper
1/4 teaspoon black pepper
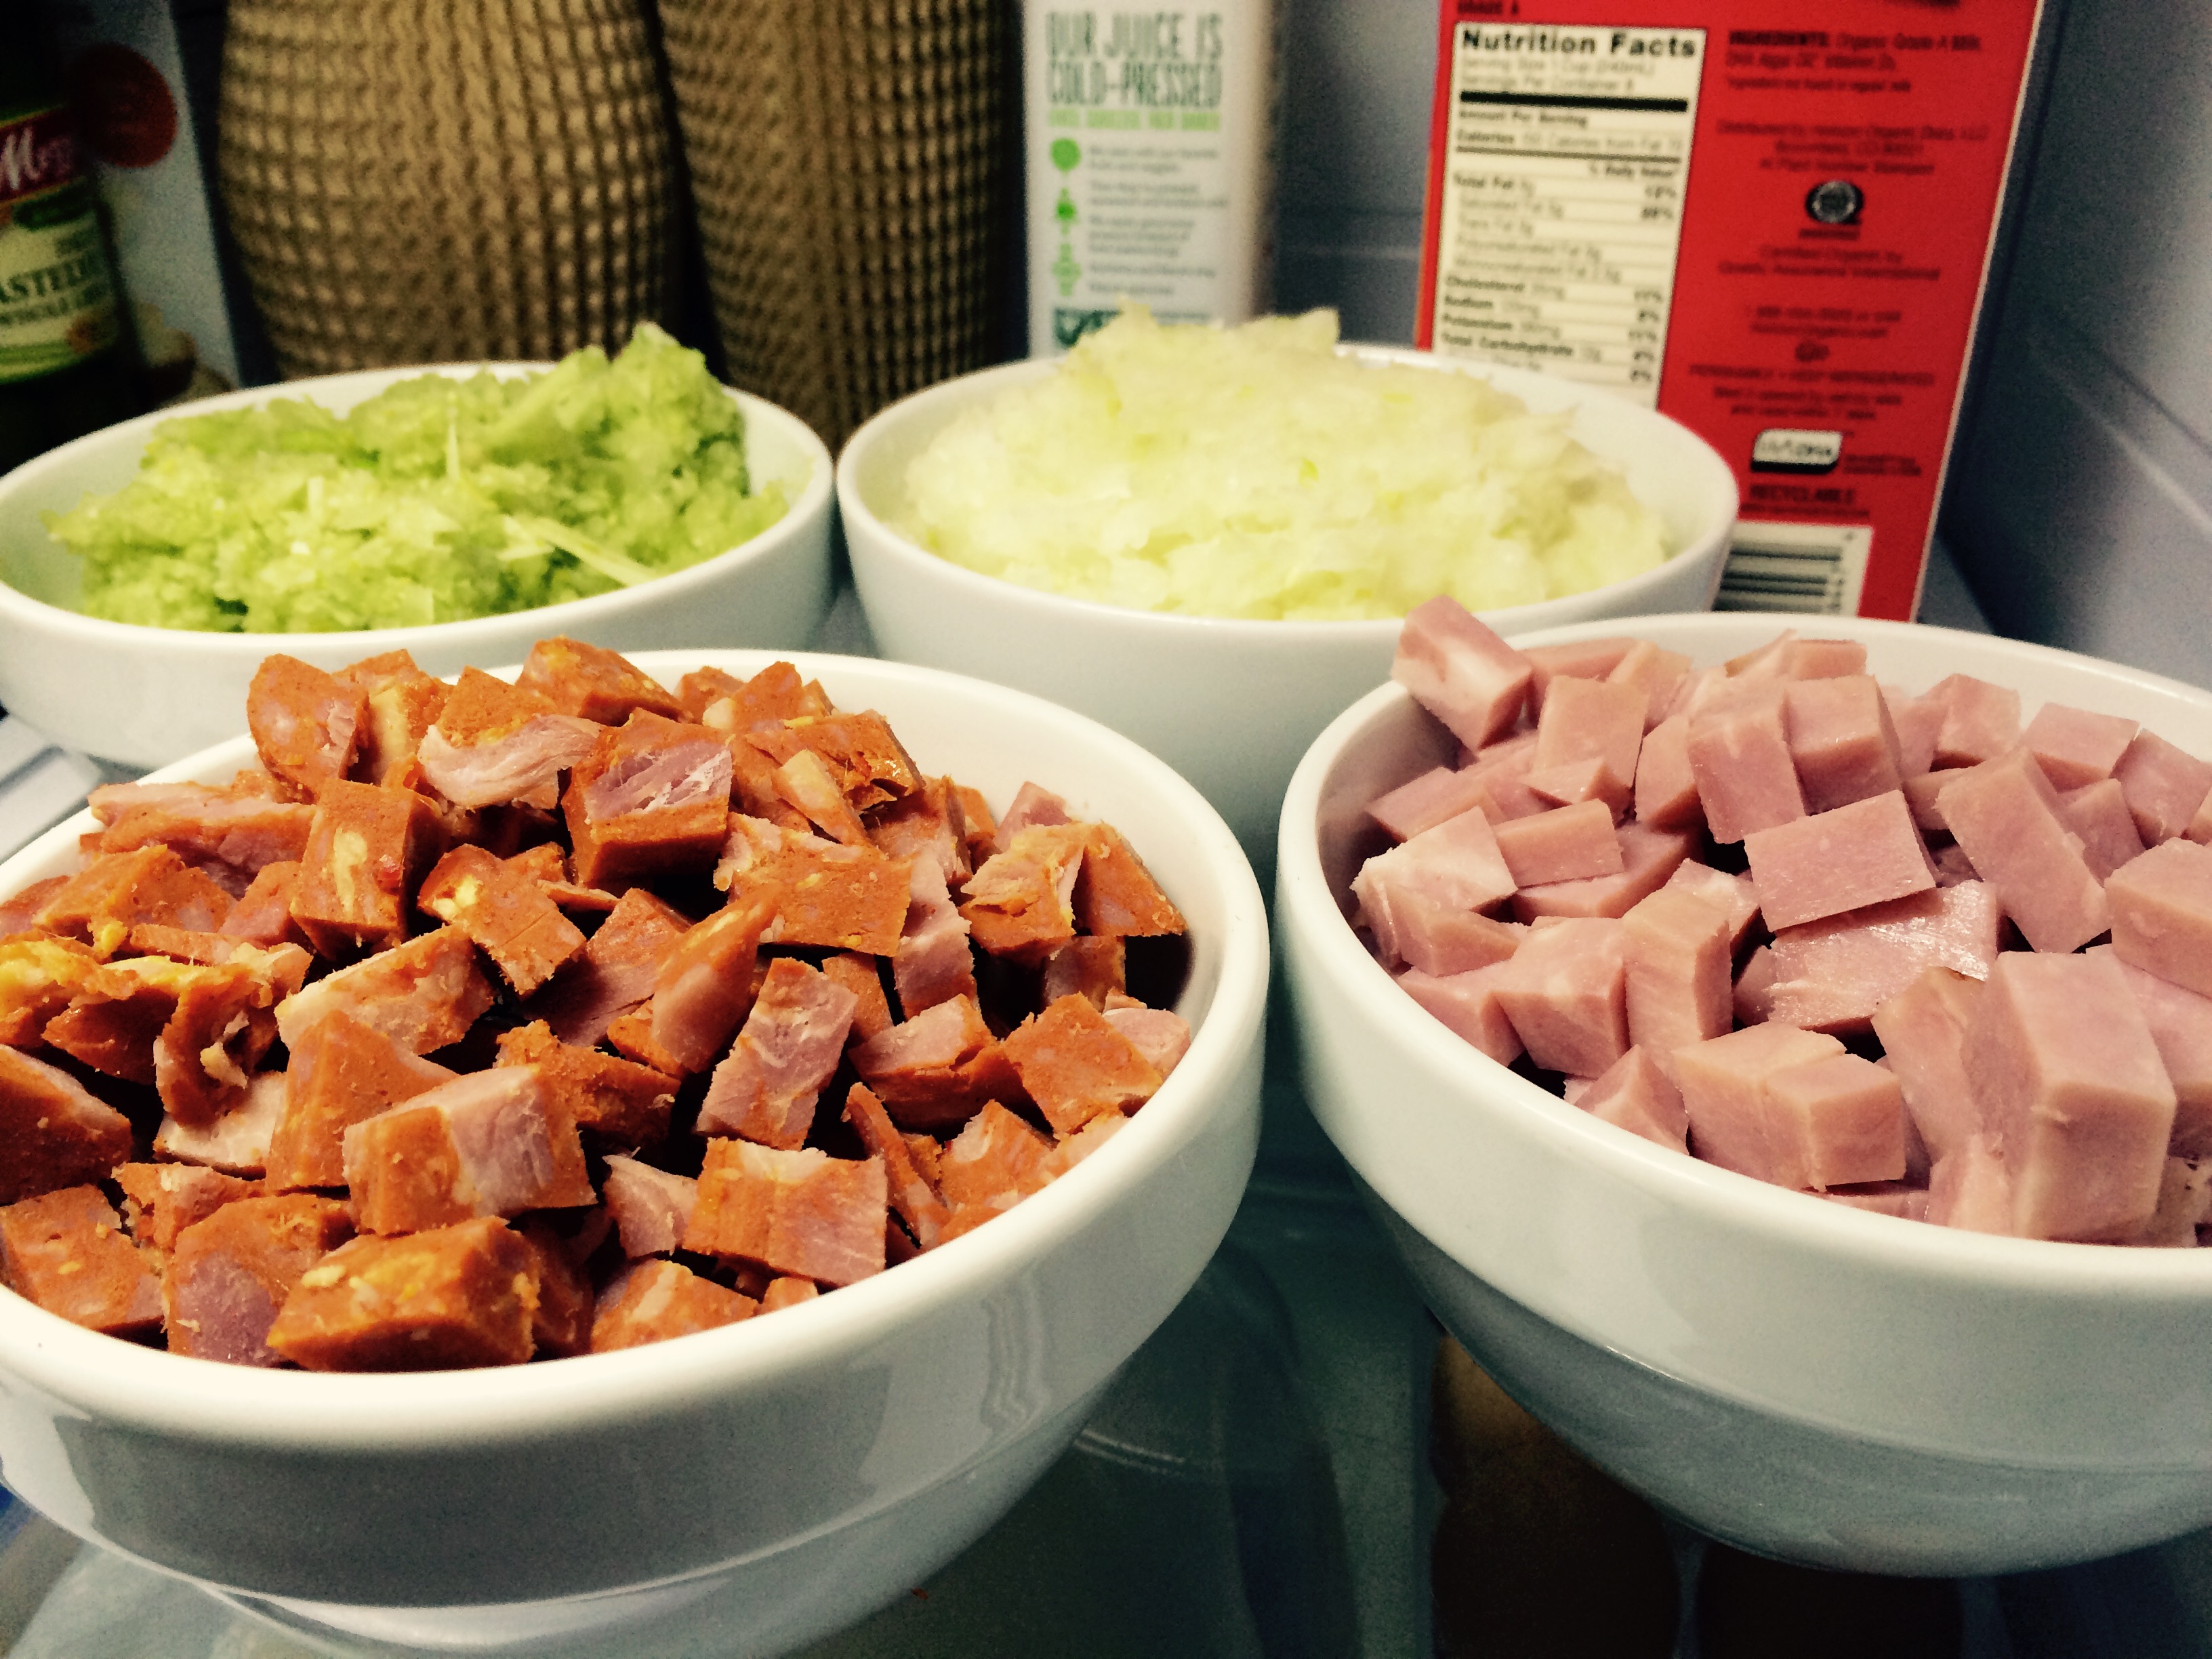
I find it easier to measure and chop all the ingredients before I start cooking.
4 tablespoons olive oil
1 1/2 cups finely chopped onions, in all
1 1/2 cups finely chopped celery, in all
1 1/2 cups good quality chopped ham
1 1/2 cups chopped andouille sausage (Here in RI, I use local Portuguese chourico from Fall River, MA)
1 teaspoon cayenne pepper sauce (I use Frank’s Red Hot)
3/4 cup tomato sauce made from pureed whole tomatoes
2 cups uncooked rice (I like Texmati brown basmati rice)
3 cups chicken stock (preferably homemade)
1 lb. peeled and de-veined wild-caught American shrimp
Over medium-high heat, heat the olive oil in a large sauce pan. Add 3/4 cup of the onions and 3/4 cup of the celery. Cook until the onions are translucent.
Stir in the seasoning mix, then the chopped ham and the chourico, and then the cayenne pepper sauce. Cook until the onions are a dark brown, about 20 minutes, stirring constantly.
Add the remaining 3/4 cup of the onions and celery. Cook about 5 minutes.
Open a can of whole tomatoes and puree them in a food processor to make sauce. Add 3/4 cup of this and cook for about 5 minutes.
Stir in the rice, mixing well. Reduce the heat and simmer for about 12 minutes.
Add the chicken stock, stir well, and bring it all to a boil. Then reduce the heat and simmer, covered, over very low heat until the rice is tender but firm, about 15 minutes.
Remove the cover, toss in the shrimp, stir, then put the cover back on and cook for 5 minutes more.
Sometimes it’s hard to get wild-caught American shrimp at my local seafood store or supermarket. But for me, buying tiger shrimp or other Asian products is not an option. Once I learned about how they are farmed, I decided I’d never eat those shrimp again!
When I find wild-caught American shrimp locally, I buy extra to keep in the freezer. (The better supermarkets, like Whole Foods, have them.) For many years, I bought my shrimp online from http://www.cajungrocer.com. Not only will you find shrimp there, you’ll find many other Cajun classics: King cakes, Turduckens, andouille and alligator sausage, even live crawfish. And the price of their shrimp, even with shipping, is the same as the nasty Asian shrimp you buy in the store. Make some room in your freezer, order large to save, and stock up on the real deal!
If I’m at a steakhouse and craving beef, I’ll usually order a cut like porterhouse or ribeye…great cuts of meat that need nothing more than a little salt and pepper, and a skillful grillmaster. The prep on that slab of meat before it even hits the grill has already been done: carving, dry-aging, trimming.
At home, I eat only humanely raised grass-fed beef. It’s expensive, so I buy the cuts that cost less, but need a bit of TLC before cooking. A cut like beef flap, which comes from the bottom sirloin butt (the back of the animal), looks like a skirt steak, a hanger steak, or a flank steak because of its thinness, but each comes from a different part of the animal.
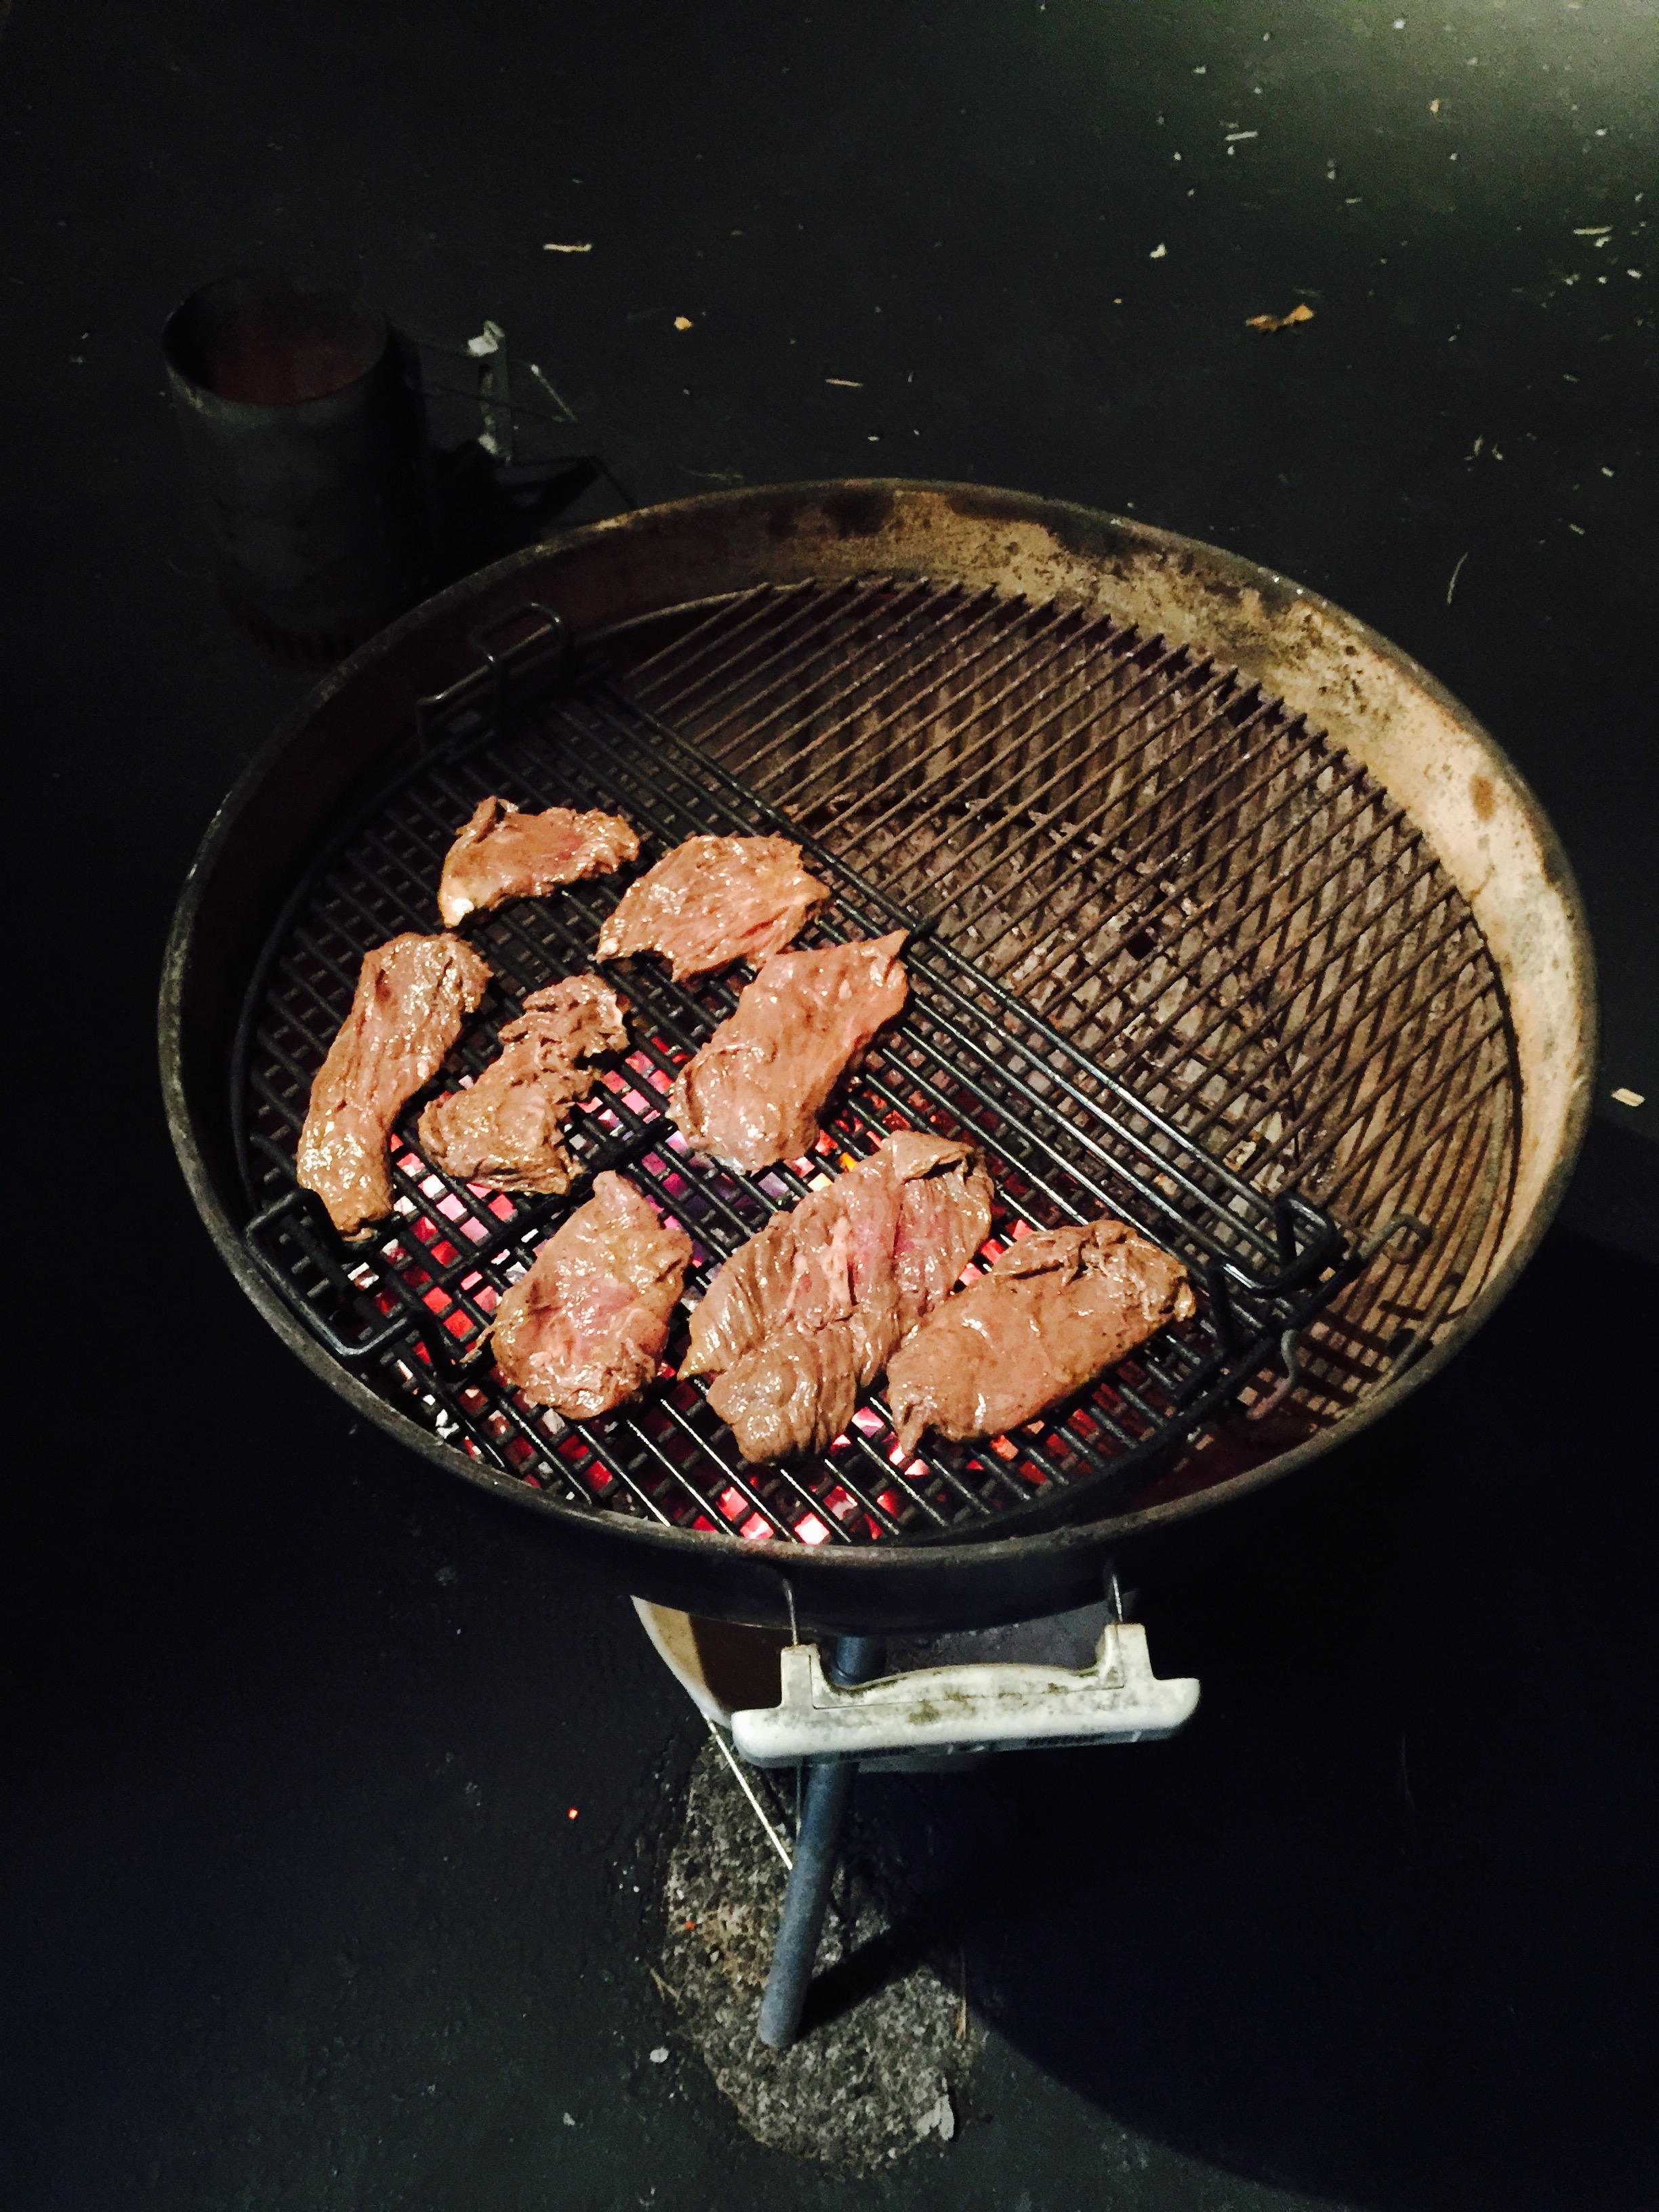
Though the beef flap is somewhat thin, I will often slice it lengthwise into two thinner pieces, because the meat’s thickness often varies, which can give you uneven cooking. I like to cook it hot and fast on a hardwood fire grill, but still keep it medium-rare. If the weather is really unforgiving, like it is right now, cooking the beef in a hot cast iron skillet works really well, too.
Marinades are the key to tenderizing and flavoring tougher or cheaper cuts of meat. What you put in your marinade really depends on what flavors you like.
The recipes below are for 3 to 5 lbs. of beef. I always make more, because leftover marinated grilled beef makes an awesome steak and egg breakfast the next day!
A cold night is no excuse not to grill!
The instructions with all of these marinades is basically the same: combine all the ingredients in a bowl. Cut the beef flap (or whatever cut of meat you’re using) to a manageable size so that it fits a gallon-sized Ziploc bag easily. (Smaller, thinner pieces will also absorb the marinade better.) Place the beef in the bag, and then pour the marinade into the bag. Squeeze the excess air out and seal the bag. Gently squish the bag around so that the marinade makes contact with all the meat. Place the bag in a bowl in the fridge overnight, squishing the bag every few hours to make sure the marinade penetrates the meat. The bowl will prevent any accidents from happening in your fridge in case the bag leaks. The next day, remove the bag from the fridge and let it come to room temperature before grilling the meat. Discard the leftover marinade.
ALZ MARINADE #355
1/4 cup olive oil
1 lemon, zest and juice
1 tablespoon Worcestershire sauce
1 tablespoon soy sauce
1 teaspoon garlic salt
1 teaspoon Dijon mustard
Combine the ingredients. Marinate the meat overnight in the fridge or several hours at room temperature. Grill.
Marinating beef flap.
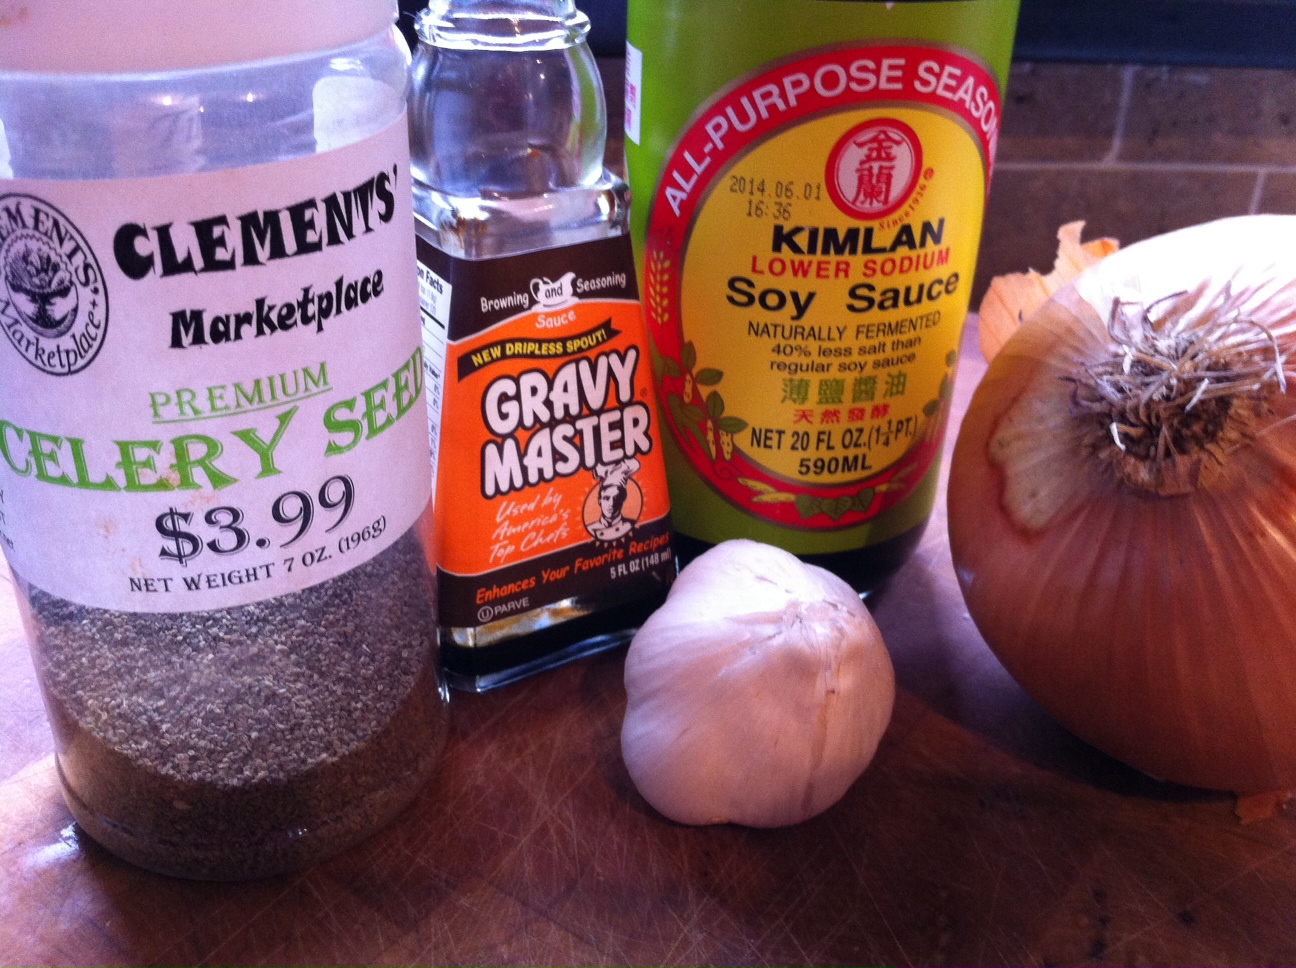
On the North Fork of Long Island, in the middle of wine country, there’s a restaurant that’s been around for a long time: a sort of hole-in-the-wall place you might not think twice about visiting, unless you hear that they’ve got a special secret marinade for their beef. The place is called The Elbow Room (I think they’ve expanded to a second or third location by now), and though I wasn’t impressed by the quality of their beef, I was impressed with its flavor. Here, with the help of friends, is what we think comes as close to that marinade as we can get. Gravymaster is a product you can find in any supermarket, usually in the gravy section. This marinade also works well with beef tips or a London broil.
1 cup soy sauce
1/4 cup Gravymaster
2 large Vidalia onions
2 cloves of garlic
2 teaspoons celery seed
1/2 teaspoon black pepper
Combine the onions and garlic in a large food processor and purée. Add the remaining ingredients and run the processor until it’s smooth and sort of resembles root beer (below.)
Marinate the meat overnight in the fridge or for several hours at room temperature. Grill. Awesome with beef sirloin tips (below.)
This incredibly simple marinade falls into the “Italian” category. You could almost use it as an Italian dressing on salads, but it works really well as a marinade for beef.
1/2 cup olive oil
1/4 cup balsamic vinegar
2 teaspoons Kosher salt
1 teaspoon pepper
The balsamic vinegar I use is not the expensive aged stuff that costs a fortune. It’s the $9-a-bottle stuff you can find in any supermarket. Simply combine the ingredients. Marinate the meat in the fridge overnight or for several hours at room temperature. Grill.
Fat Tuesday is coming! This is a great recipe to cook up if you’ve got friends coming over. Let’s do some Cajun-style cookin’! Poo-yah! I garonteee!
I lived in Mobile, Alabama, back in the late 80’s, and if you asked the locals, they’d quickly tell you that Mardi Gras originated in Mobile, not New Orleans.
Joe Caine paraded through the streets of Mobile dressed in a Native American costume in 1868, and is credited for our current way of observing the Mardi Gras celebration. Of course, it’s hard not to think of New Orleans when you hear the phrase “Mardi Gras,” and I spent many a weekend on the streets and bars of the Crescent City back in the mid-80’s…actually was part of a Mardi Gras parade one year.
It was then that I fell in love with Cajun food, and needed to learn how to cook it. I bought cookbooks by two of the greats: Justin Wilson and Paul Prudhomme. I learned about layers of seasoning, and often I’d use those ideas in my own dishes.
When I moved to Rhode Island in 1990, I had yearly Mardi Gras parties at my house, and I cooked massive batches of these Cajun chicken breasts, using a spice mix I honed from my cooking experiments.
Double-dipping in the seasoned flour is a messy step, but it makes them extra crunchy and flavorful.
You can make this recipe gluten-free, simply by using a GF flour instead of the all-purpose flour.
1 cup all-purpose flour
1 tablespoon salt
1 1/2 teaspoons sweet paprika
1 teaspoon granulated onion
1 teaspoon granulated garlic
1 teaspoon basil
1/2 teaspoon black pepper
1/2 teaspoon dried thyme
1/4 teaspoon white pepper
1/4 teaspoon cayenne pepper
2 pounds boneless, skinless chicken breast
4 eggs
oil for frying (I like using a high smoke point oil like avocado or grape seed)
Cut the chicken breasts into manageable pieces, about 3″ square. If they’re too thick, slice them horizontally to make two thinner breasts. You want them about 1/4″ thick. A piece of chicken that’s too thick won’t cook all the way through. Plus, you want more crunchy crust per bite…trust me!
Combine the flour, salt, paprika, onion, garlic, basil, black pepper, thyme, white pepper, and cayenne in a bowl. Mix well.
Separate the 4 eggs, scrambling 2 eggs in each of 2 separate bowls. This keeps the first bowl “clean” and not gummed up with flour. You’ll see what I mean once you start, because it’s a bit messy. So, crack 2 eggs in the first bowl and the other 2 eggs in the second bowl. Scramble them up and put the bowls on either side of the seasoned flour bowl.
Pre-heat a pan of oil or a fryer to 350 degrees.
Dip the chicken in the first egg bowl and then the seasoned flour mixture. Shake off the excess flour and dip the chicken in the second egg bowl, making sure the flour is covered by egg. Then dip the chicken back into the flour for a second coat. I like to bread all of my chicken pieces before I start frying them so that I can get my hands clean for the next step.
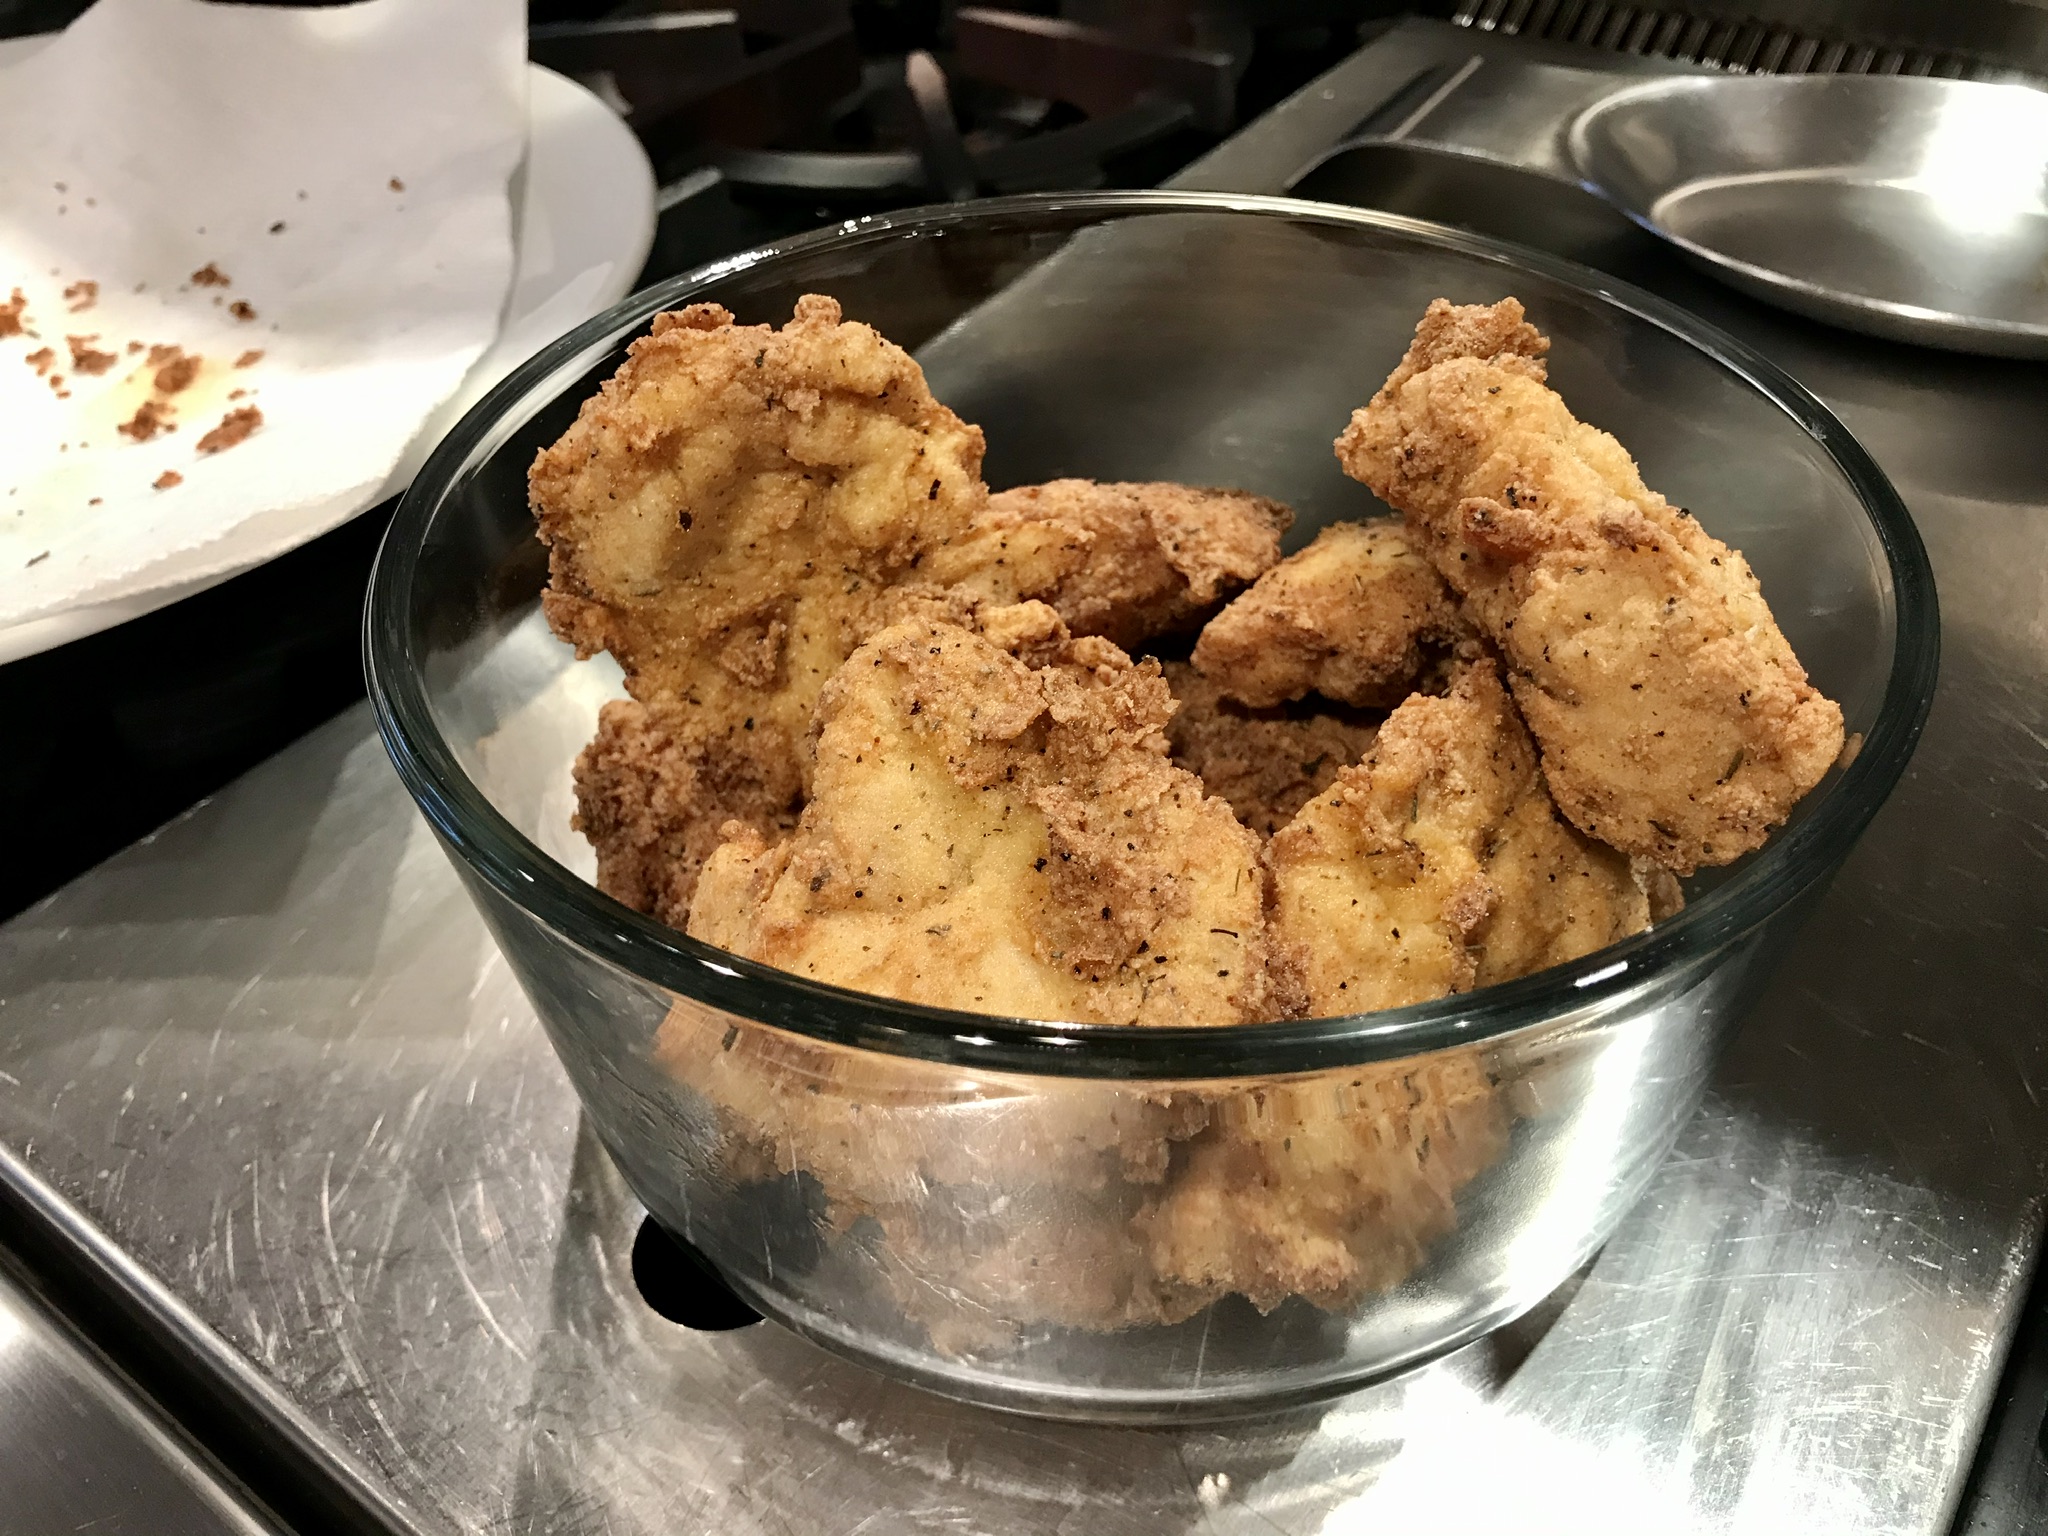
Carefully place the chicken in the pan. Don’t overcrowd the pan. Work in batches. Fry the chicken until it’s cooked all the way through and golden brown. Drain on a wire rack or paper towels.
Nothing like a hot, fresh batch!
If you need to feed a crowd, just double or triple the recipe. I used to make a 10x batch for my Mardi Gras parties!
I have to give credit for this recipe where it’s due. A few years ago, we traveled to Washington, DC, and one of our best dining experiences was at the Blue Duck Tavern, a stunning restaurant matched by its unique and beautifully prepared plates.
One of the most memorable appetizers I enjoyed was the roasted beef bone marrow, which had a delicious pretzel crumble on top. The moment I had a taste, I knew that I would have to recreate this for myself at home.
The bone marrow plate at the Blue Duck Tavern in Washington, DC. (Enough garlic for ya?)
Bone marrow played an important role in the evolution of early man. Perhaps that’s why some of us still have that primitive craving for it.
Early man had small teeth and ate anything he could lay his hands on, especially meat. But he was no hunter. Attracted by circling vultures, he probably scavenged the leftovers from a big kill such as an antelope left in a tree by a leopard, or a large animal such as a wildebeest that had been slaughtered by lions.
Because meat is relatively easy to digest and rich in calories and nutrients, early man lost the need for the big intestines of apes and earlier hominids. This freed up energy for use by other organs. This surplus of energy seems to have been diverted to one organ in particular – the brain. But scavenging meat from under the noses of big cats is a risky business, so good scavengers needed to be smart. At this stage in our evolution, a big brain was associated with greater intellect. Big brains require lots of energy to operate: the human brain uses 20% of the body’s total energy production. The concentrated calories and nutrition found in meat was responsible for an increase in the brain size of early humans.
But around two million years ago, telltale cut marks on the surface of animal bones reveal that early humans were using crude stone tools to smash open the bones and extract the marrow. Stone tools allowed early man to get at a food source that no other creature was able to obtain – bone marrow. Bone marrow contains long chain fatty acids that are vital for brain growth and development. This helped further fuel the increase in brain size, allowing our ancestors to make more complex tools. Many historians believe that the blunt force required to break bones with tools to extract the bone marrow was a crucial ingredient in the development of the human hand, and the unique dexterity it has over that of apes.
Of course, these days, we can simply go to our butcher and ask them to slice some beef bones for us so that we can enjoy the marrow like our ancestors did. It’s much more civilized.
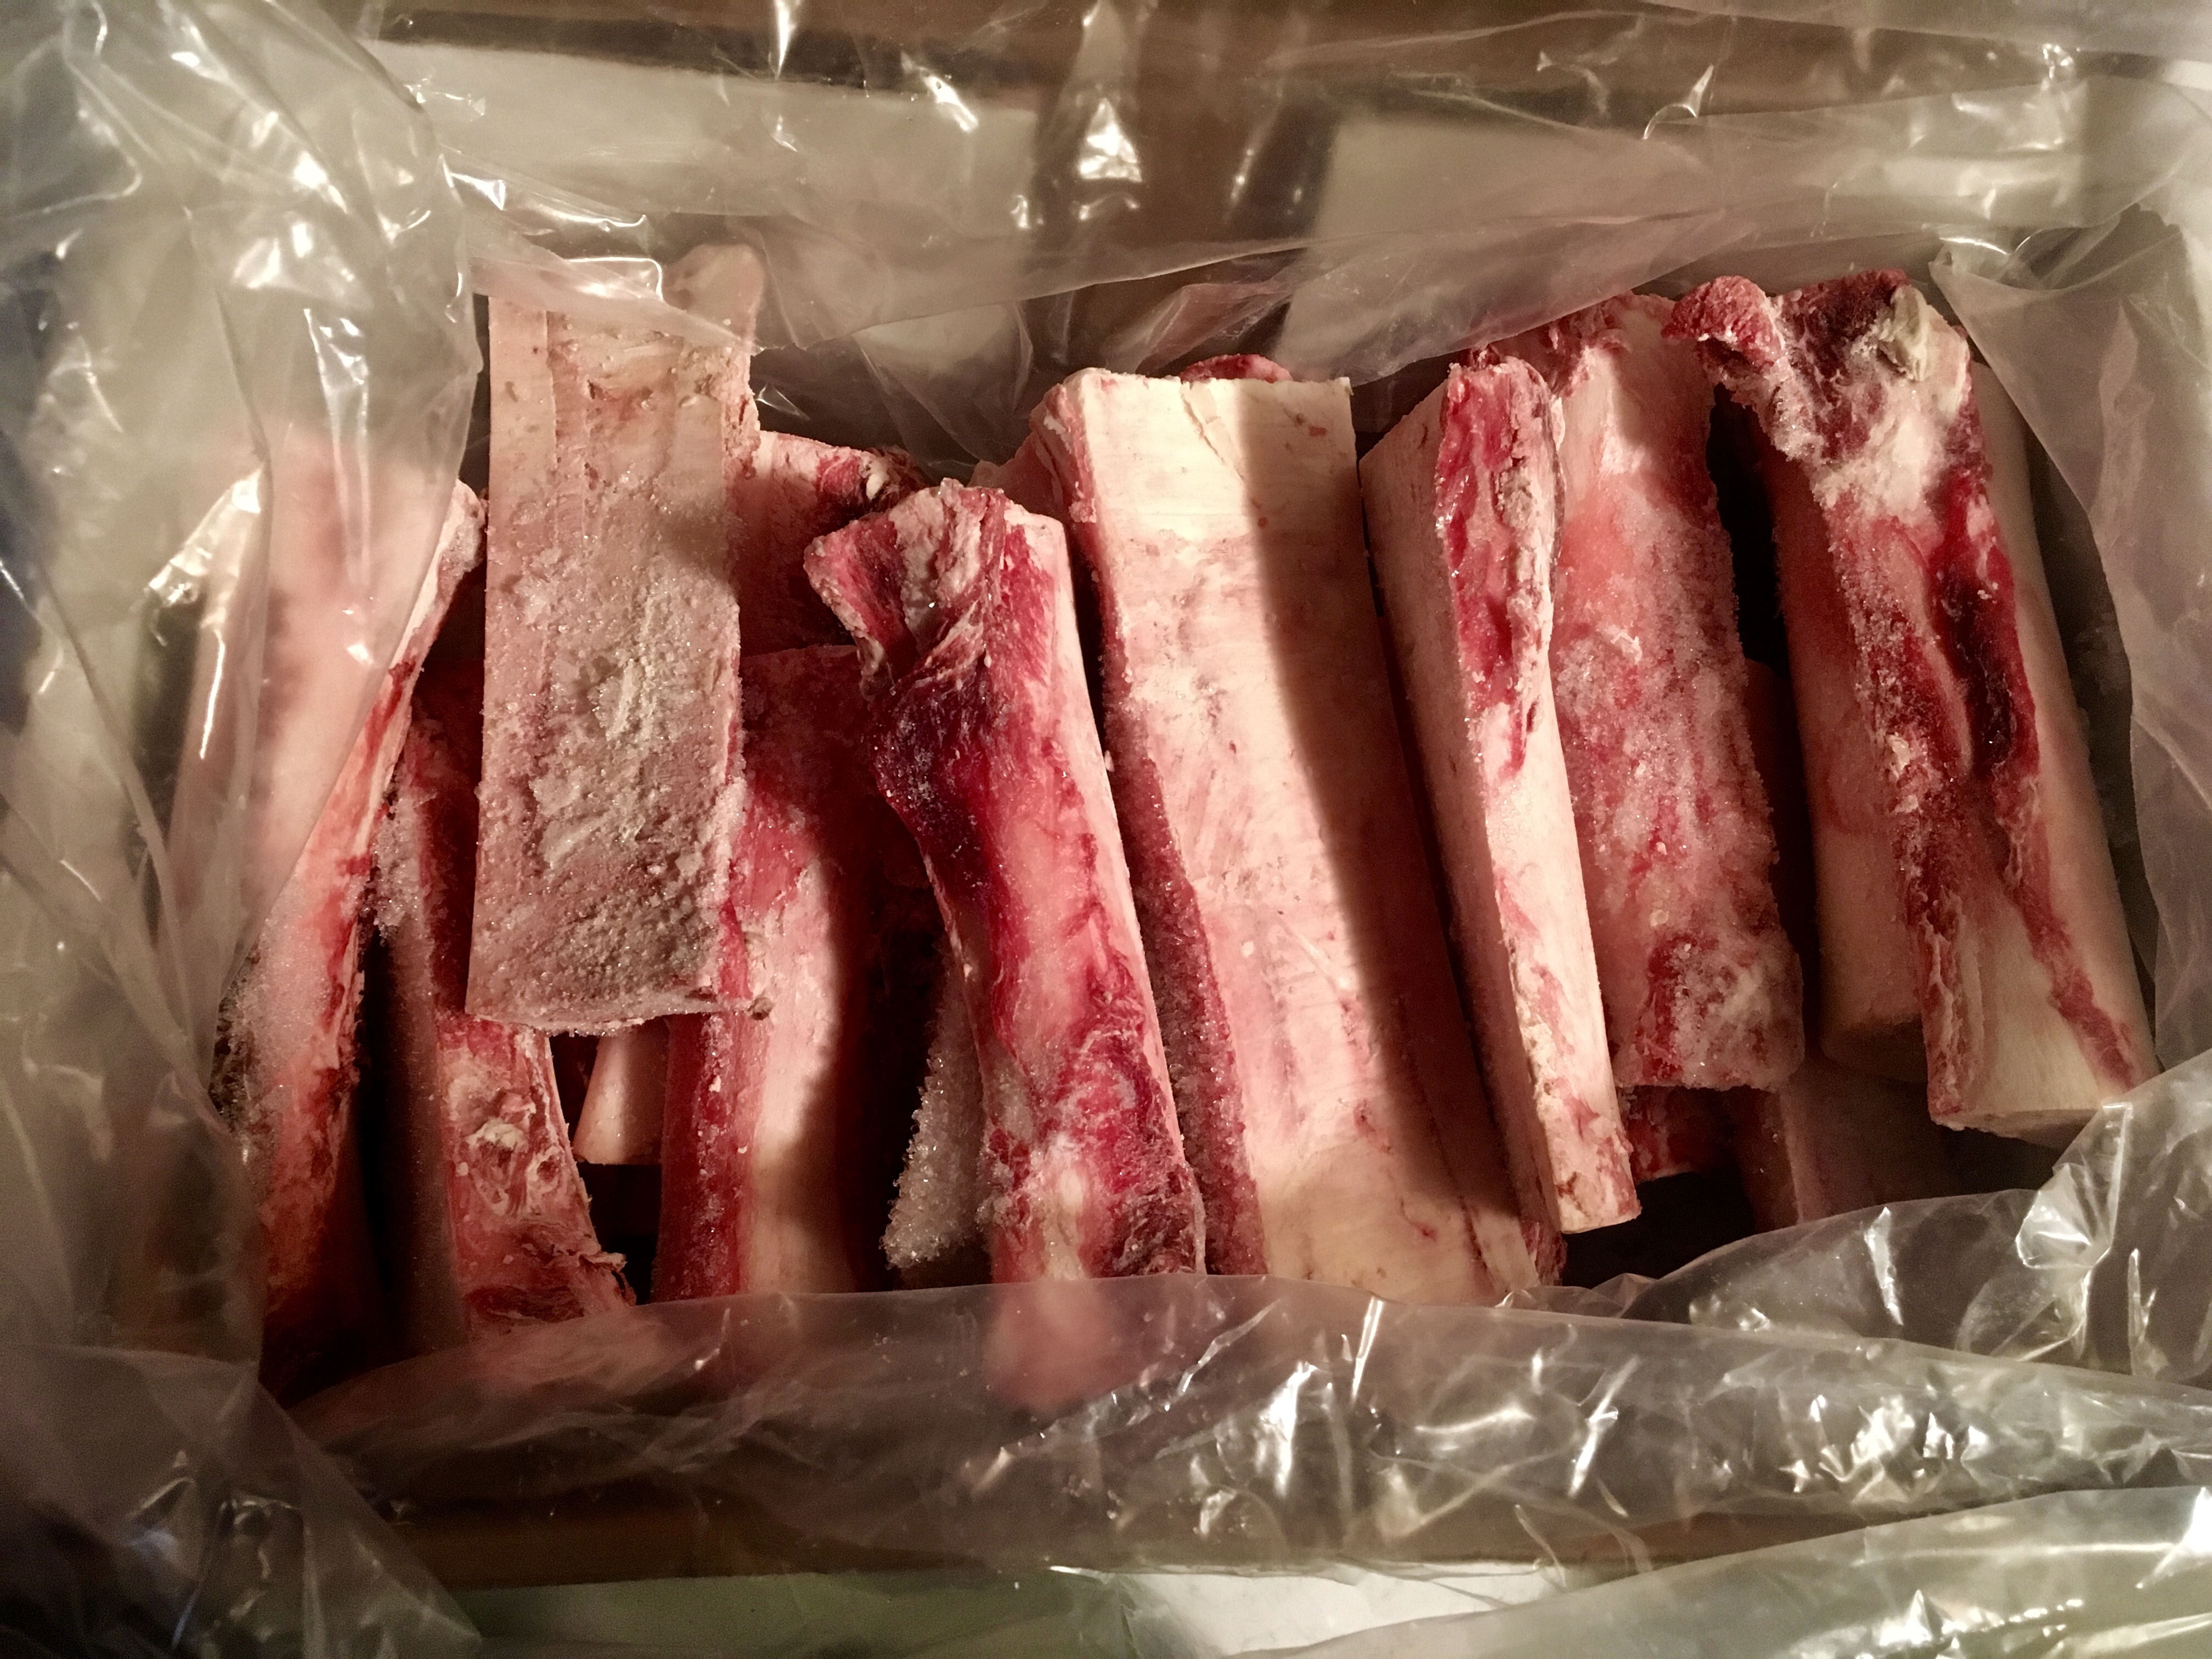
My box o’ frozen bones.
They key to roasting marrow bones properly is to keep an eye on them. The bones can go from frozen solid to blazing hot in no time, and that means the marrow can go beyond its rich, gelatinous perfection into a puddle of fat at the bottom of your pan in mere moments.
3 lbs. beef marrow bones (I like them sliced lengthwise)
I keep the beef bones frozen, moving them to the fridge until I’m ready to roast them.
Pre-heat the oven to 450 degrees.
Grind them up!
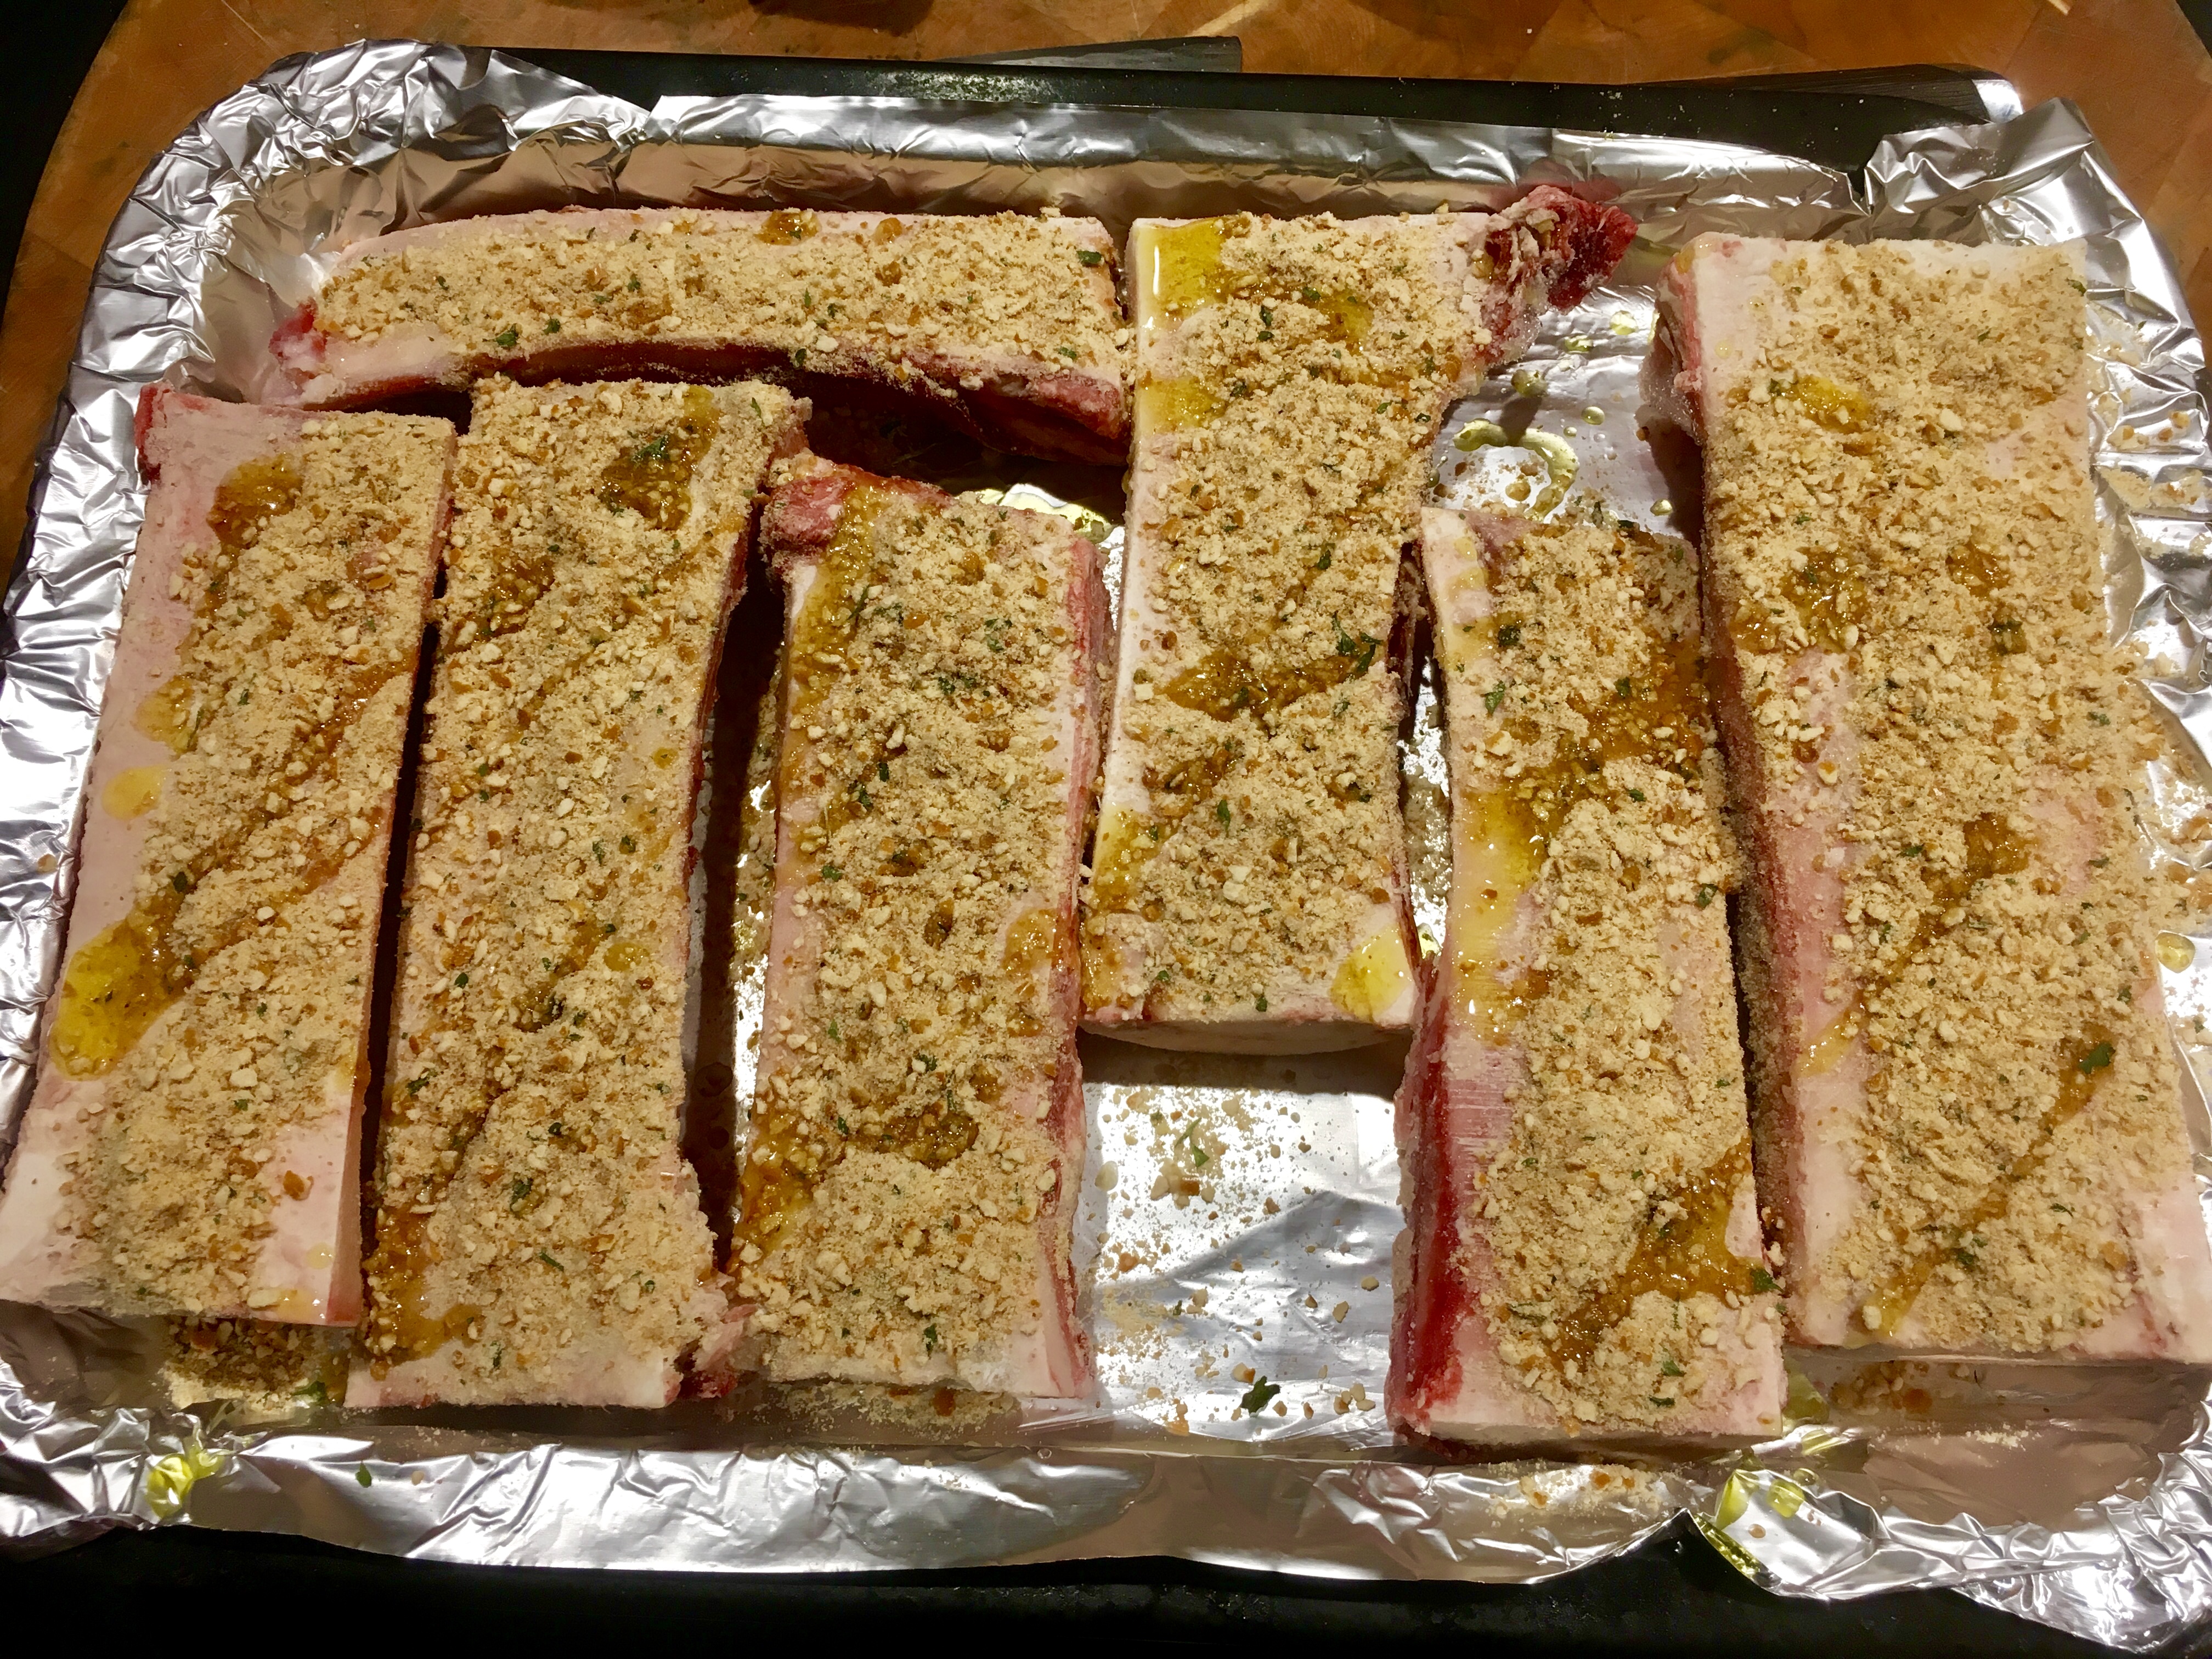
Place a handful of salted pretzel sticks in a food processor, and pulse them until the pretzels are ground fine. When you’ve got 3/4 cup of ground pretzel powder, move it to a bowl and add the parsley, onion, garlic and black pepper. (No salt is needed if the pretzels are salted.)
Lay the bones flat on a baking pan. If they wobble, place them on a layer of coarse salt to hold them steady. Sprinkle the pretzel mix on the bones, a little drizzle of olive oil on top, and place them in the oven.
Now you watch…there’s that one point where they go from “not quite yet” to perfection to “Oops! Too much!” …so be careful!
Perfection!
Some toasted bread on the side is all you need!
If you’re cooking gluten-free, try Snyder’s of Hanover GF pretzels. They are awesome…you’ll never know the difference.
Mardi Gras is a couple of weeks away!! Here’s a great dish from New Orleans…
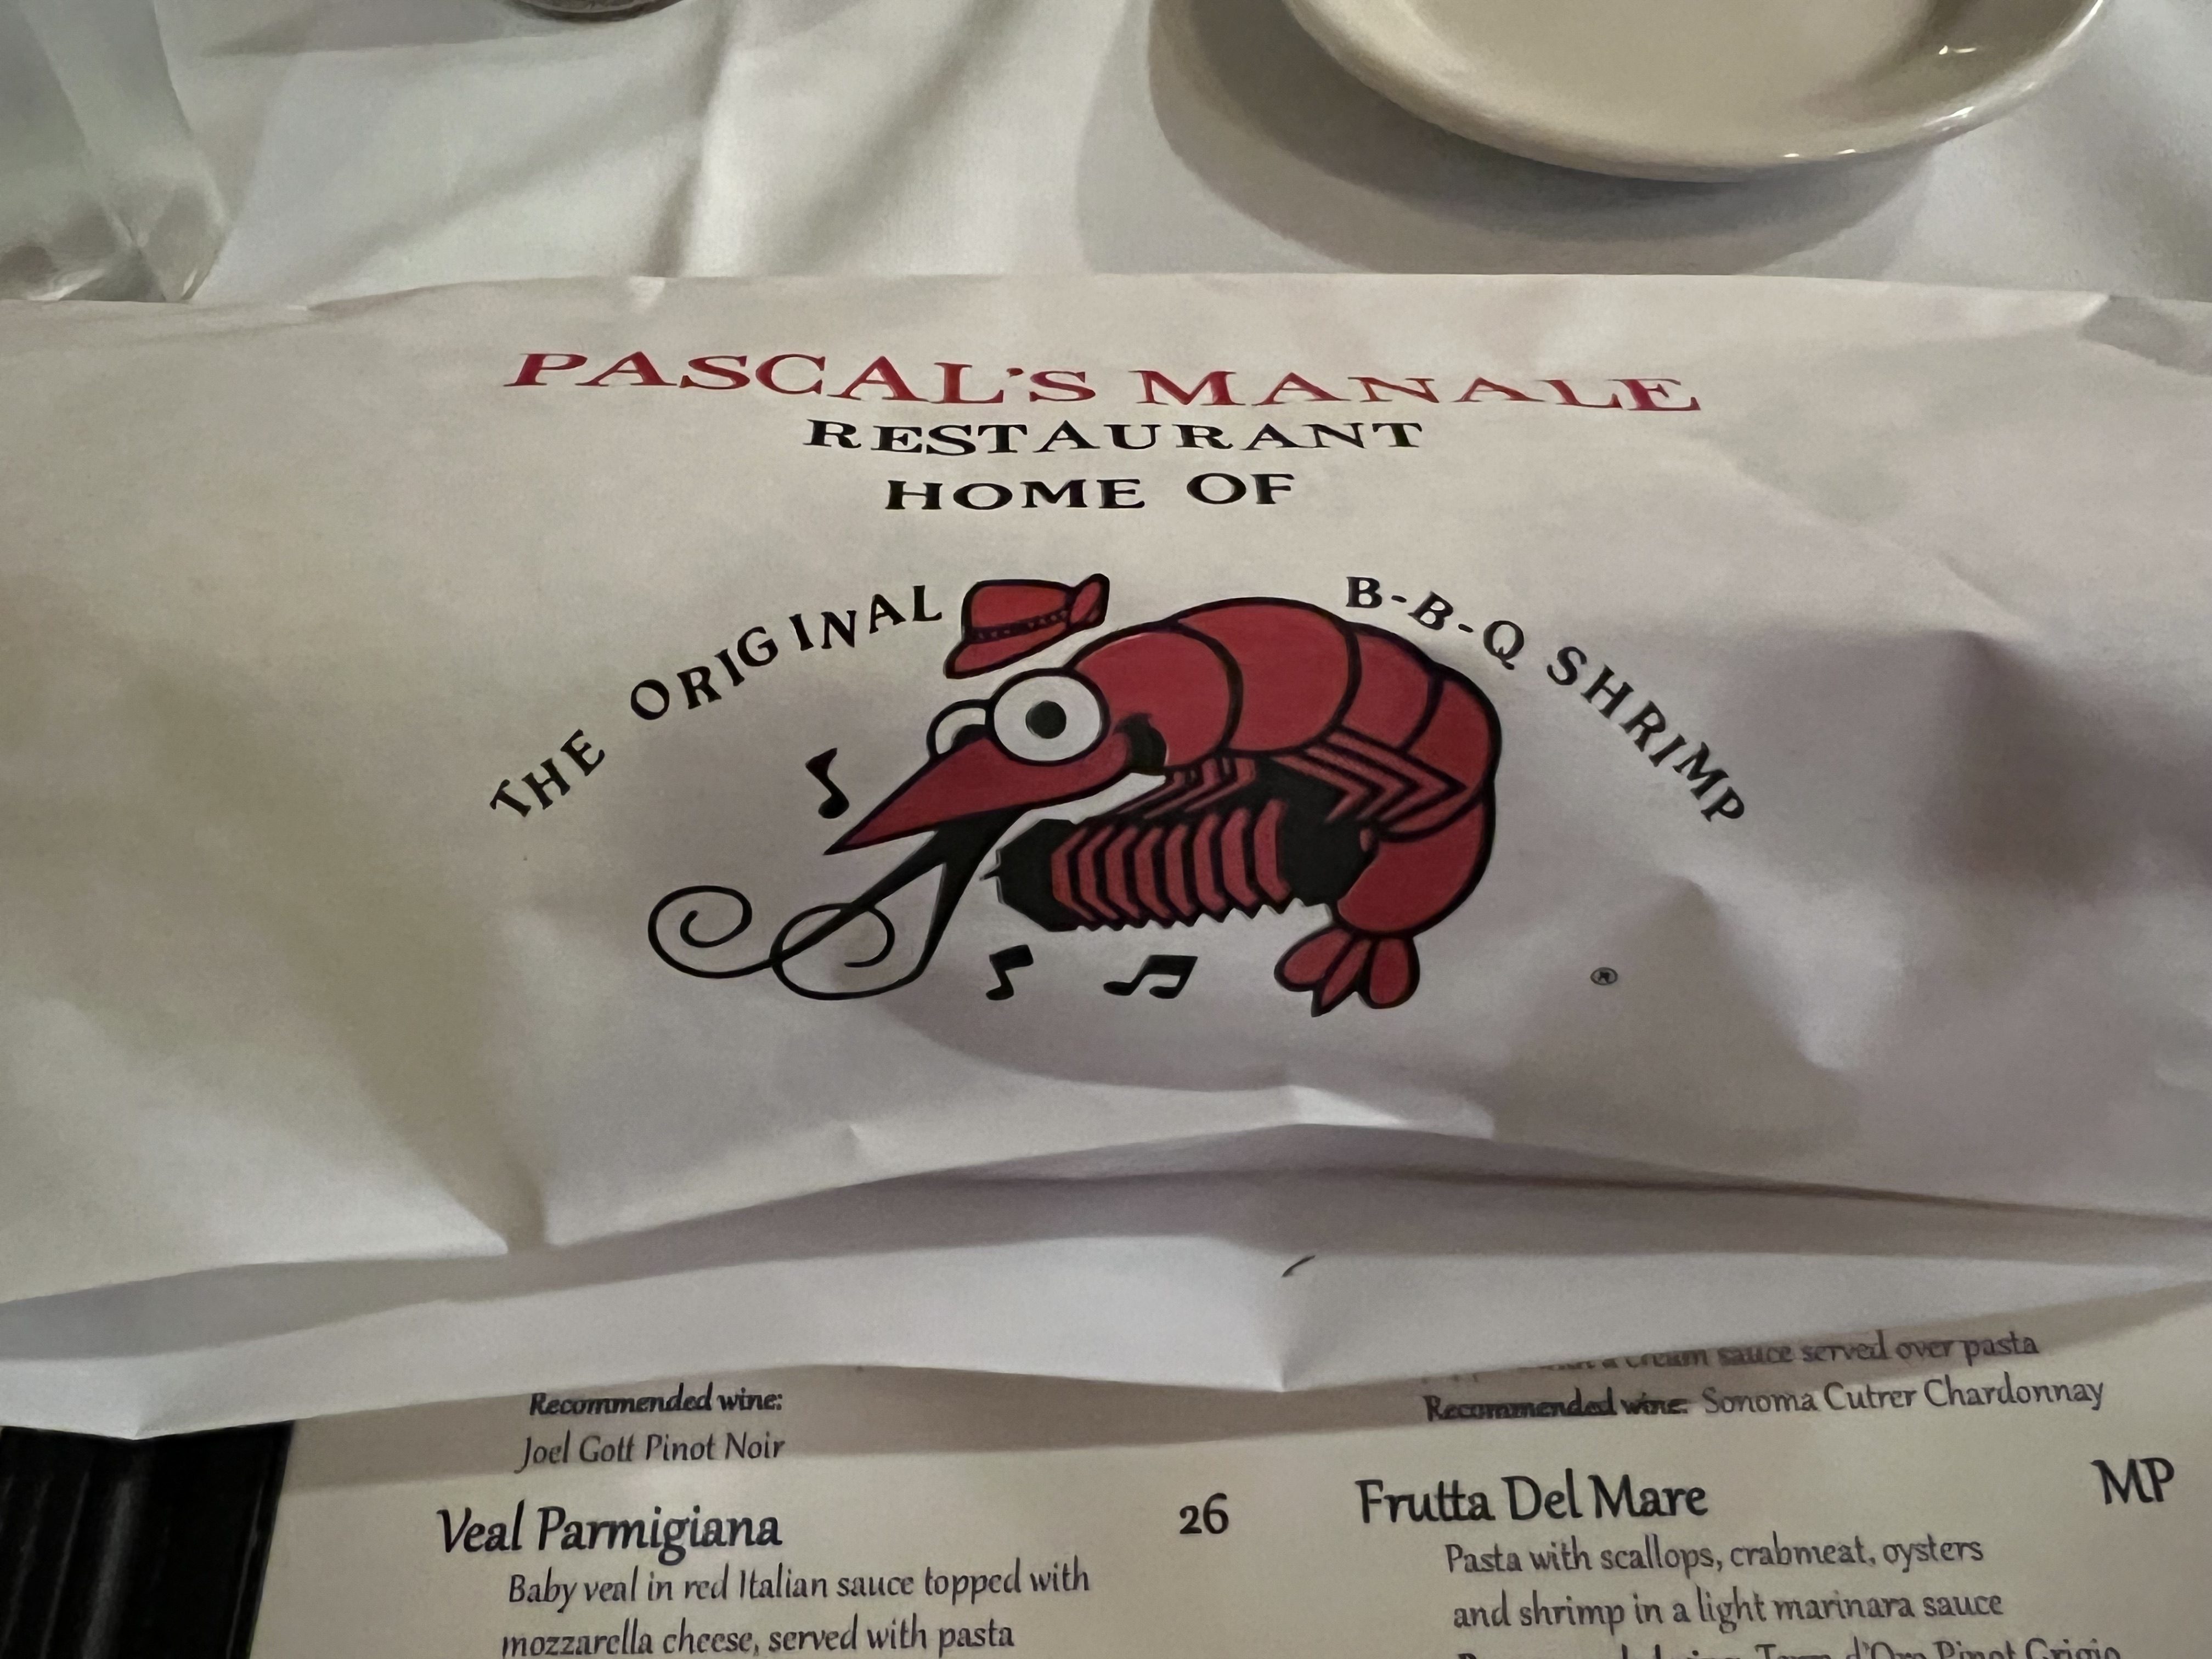
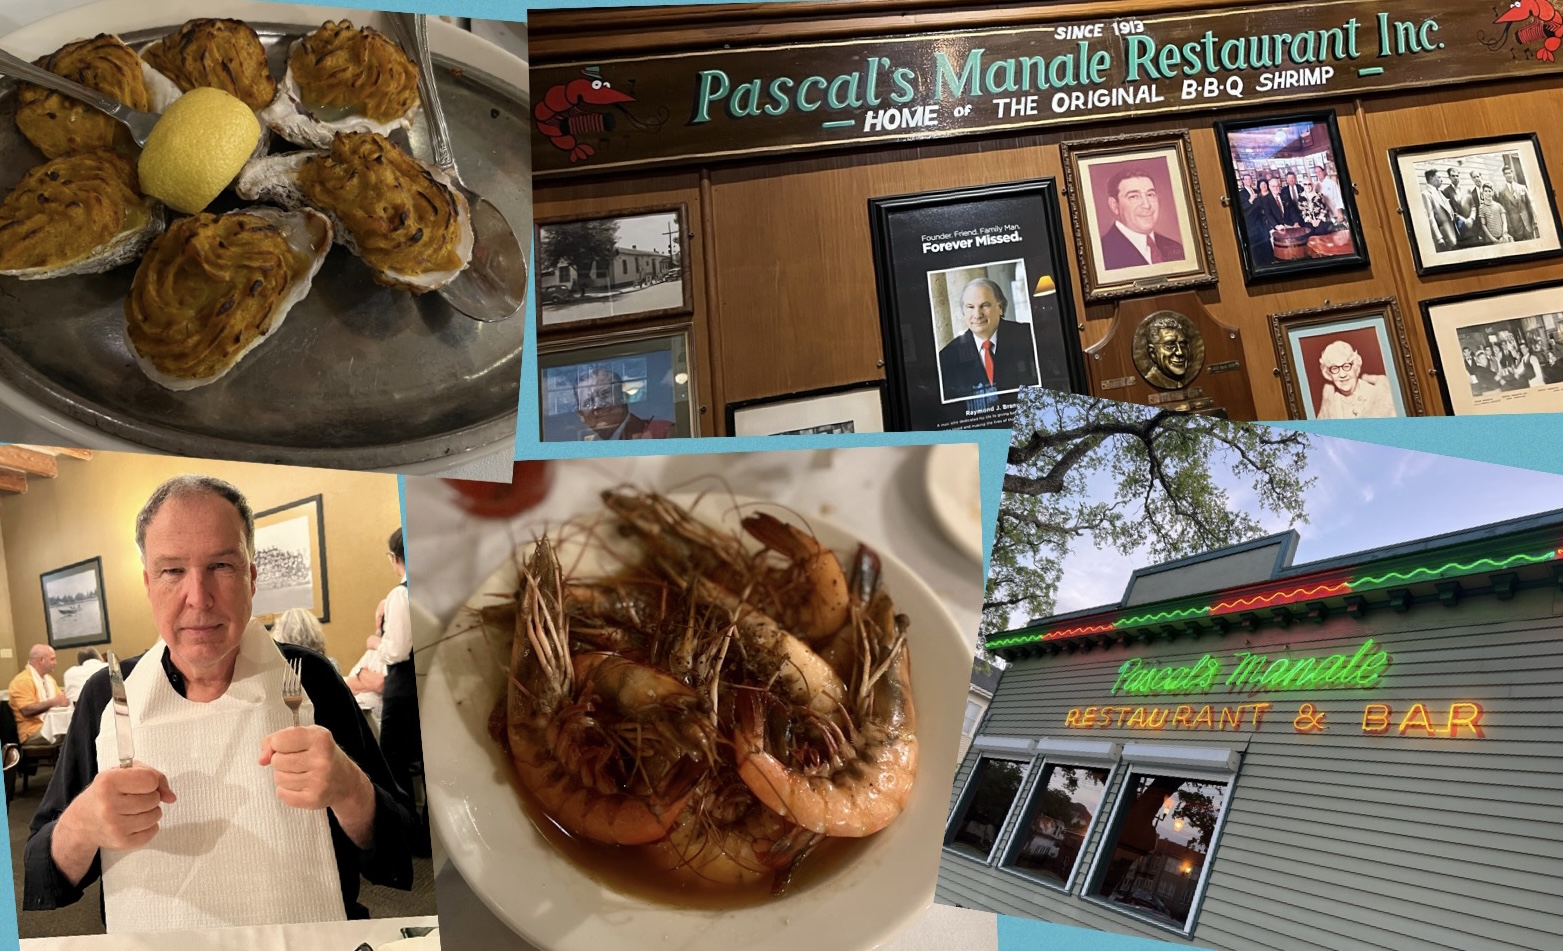
One of my favorite dishes to come out of New Orleans is Barbecue Shrimp, so on a visit to the Crescent City a couple of years ago, I had to make a stop at the place where it all started.
The first unusual thing you notice about the classic dish, New Orleans Barbecue Shrimp, is that it’s not cooked on a barbecue grill and it has no barbecue sauce.
So why the name?
Its origin goes back to the mid-1950’s, to an Italian restaurant in New Orleans called Pascale’s Manale. The story goes that a regular customer had just returned from Chicago, where he had dined on an amazing shrimp dish. He asked the chef at Pascale’sManale to try to replicate it, and what resulted was actually better than the original. And though no barbecue grill or sauce was used, it is believed that they gave it the name “BBQ Shrimp” to cash in on the backyard barbecuing craze that was all the rage at the time. Whatever they call it, I have to say that it’s worth a special trip to have the dish!
The classic New Orleans Barbecue Shrimp is served with shell-on shrimp, so you have to make a big, buttery mess of yourself as you devour it. And it’s served with plenty of crusty French bread.
At home, sometimes I’ll leave out the bread and go for rice instead. And I’ll peel the shrimp completely, using the shrimp shells to make the stock I cook the rice in.
2 lbs. large wild-caught American shrimp, peeled and de-veined 1 stick butter (4 oz.) 1/2 cup beer 1/4 cup Worcestershire sauce olive oil
For the rice…
1 cup rice (I like jasmine rice) 2 1/4 cups water or seafood stock (see below) 1 teaspoon olive oil 1/2 teaspoon Tony Chachere’s Original Creole Seasoning
Cook the rice following the directions on the package. I like using stock instead of water when I cook my rice, so after peeling all the shrimp, I toss the shells in a saucepan full of water and I boil the heck out of it, strain it, and use that stock to cook the rice. I add the olive oil and the Tony Chachere’s (available online or at your favorite food store) to the stock before cooking the rice.
To cook the shrimp, I heat a little olive oil in a large skillet over moderate heat. Then I add the shrimp, and sear them on one side (about 30 seconds) and then flip them over to sear on the other side (another 30 seconds.) I’m not trying to cook them all the way through, just get them a bit caramelized. Then I remove the shrimp from the skillet and set them aside.
(I often serve the BBQ Shrimp over the rice with broccoli. If you want to use broccoli, add a little butter and olive oil to the same pan you seared the shrimp in. Cook until the broccoli is nicely caramelized, then remove from the pan and set aside.)
In the same skillet, I heat the butter until the foam subsides. Then I add the beer, Worcestershire sauce, and 2 teaspoons of the seasoning mix. I mix well, then add the shrimp and broccoli back in the pan, simmering for about 5 minutes, stirring occasionally.
Chicken Rollatini was one of the first dishes I learned how to make back in my teenage days on Long Island, working at a local Italian restaurant called Pizza City East. (The original Pizza City was in Ozone Park, Queens.) It was a simple dish: a chicken breast rolled up with prosciutto and mozzarella, and baked in a mushroom cream sauce. My version these days substitutes ham for the prosciutto, provolone for the mozzarella, and an Alfredo-like sauce instead of the mushroom cream sauce.
4 chicken breasts cut lengthwise to make 8 thin breasts, about 2 pounds
8 slices sliced ham
8 slices of provolone cheese
Remove the chicken tender portion of the chicken breasts and set those aside for another day.
I don’t like to pound out my chicken breasts. I like the texture of “real meat.” So I take a large breast, and slice it lengthwise to make 2 thinner breasts. I lay the breast down on the cutting board, add a slice of “real” ham (not the deli-sliced stuff, but a ham that I sliced myself), then a slice of provolone, and carefully roll it up, securing it with toothpicks. Sometimes it’s easier to roll the ham and cheese first, then wrap the chicken around it. Place the rollatinis on a baking sheet. Set aside, preferably in the fridge, until ready to cook.
Peel and chop the parsnips and carrots into quarters. Peel and chop the onion in half. Chop the celery into quarters as well. Place all the vegetables on a sheet pan and drizzle olive oil over the top, tossing them in the oil. Roast the vegetables in a 400° oven until caramelized, and the carrots and parsnips are fork-tender, about 20 minutes. Remove the sheet pan from the oven and let the vegetables cool. Once the veggies have cooled, chop them finely with a knife or food processor. Set them aside.
3 cups your favorite rice, cooked
Cook the rice according to package directions. Once the rice is cooked, mix it with the chopped carrots, parsnips, celery and onion. Set it aside.
1 cup cream or half-and-half
3 tablespoons butter
1/2 cup freshly grated Parmigiano Reggiano
salt and pepper
For the Alfredo-like sauce, heat a saucepan over medium heat, melting the butter and then adding the cream or half-and-half. Once it’s warmed through, add the cheese and whisk until it has melted and the sauce is smooth. Season with salt and pepper. Set it aside, to re-warm later.
Take the pan of rollatinis out of the fridge to warm to room temperature, and reduce the heat of the oven to 350°.
Drizzle a little olive oil over the top of the rollatinis and rub it in. Sprinkle the breadcrumb mixture over the top and bake them for 30-45 minutes, until the chicken has cooked through.
To serve, remove the chicken rollatinis from the pan and plate on a bed of arugula (optional) with the rice on the side. Serve with the sauce.