Posts Tagged ‘food’

For years, I’ve made a simple fritter recipe using mussels that everybody raved about. But when the dietary needs of our family changed, and we had to start a gluten-free lifestyle, it seemed that fritters would have to be taken off the menu. I had nothing to lose by trying GF alternatives, and I was shocked at how delicious they were: crispy on the outside, soft and chewy on the inside.

Here in Rhode Island, fresh mussels are everywhere. But if you live in an area where they’re not easily found, frozen mussel meats are sometimes available in better seafood stores. Just make sure they come from the USA…I saw one package that had farm-grown Chilean mussels that were packed in Thailand. That’s about as nasty as it gets.

My original recipe calls for fritter flour, which you can usually find in any supermarket. If you’re using that, you can skip the baking powder. I added the baking powder to give a little lightness to the dough. My favorite beer for this recipe is Sam Adams Boston Lager, but again, I had to go gluten-free.

If you don’t have to worry about gluten, just use the regular versions of the ingredients.

fritter3

1 cup water
1 lb. fresh mussels
1 cup gluten-free flour (I use Cup4Cup)
1 teaspoon baking powder
1/3 cup gluten-free beer
oil, for frying (I use a combination of avocado and olive oils)
sea salt (I like Fleur de Sel)

Place the cup of water in a large pot and add a steamer basket. Pour in the mussels, turn the heat on high, and place a lid on top. Steam the mussels just until they open. Throw away any mussels that don’t open.

Remove the meats from the shells and chop them into very small pieces. Reserve about 1/4 to 1/3 cup of the steam water, which now has some mussel flavor. Try to avoid any grit. Let the mussels and broth cool a bit until they’re warm.

In a large bowl, add the flour, the baking powder, the mussels and the broth. Add the beer little by little as you stir gently. As soon as the dough is sticky and mixed, stop! Don’t over-mix. Let it rest about 15 minutes.

fritter1

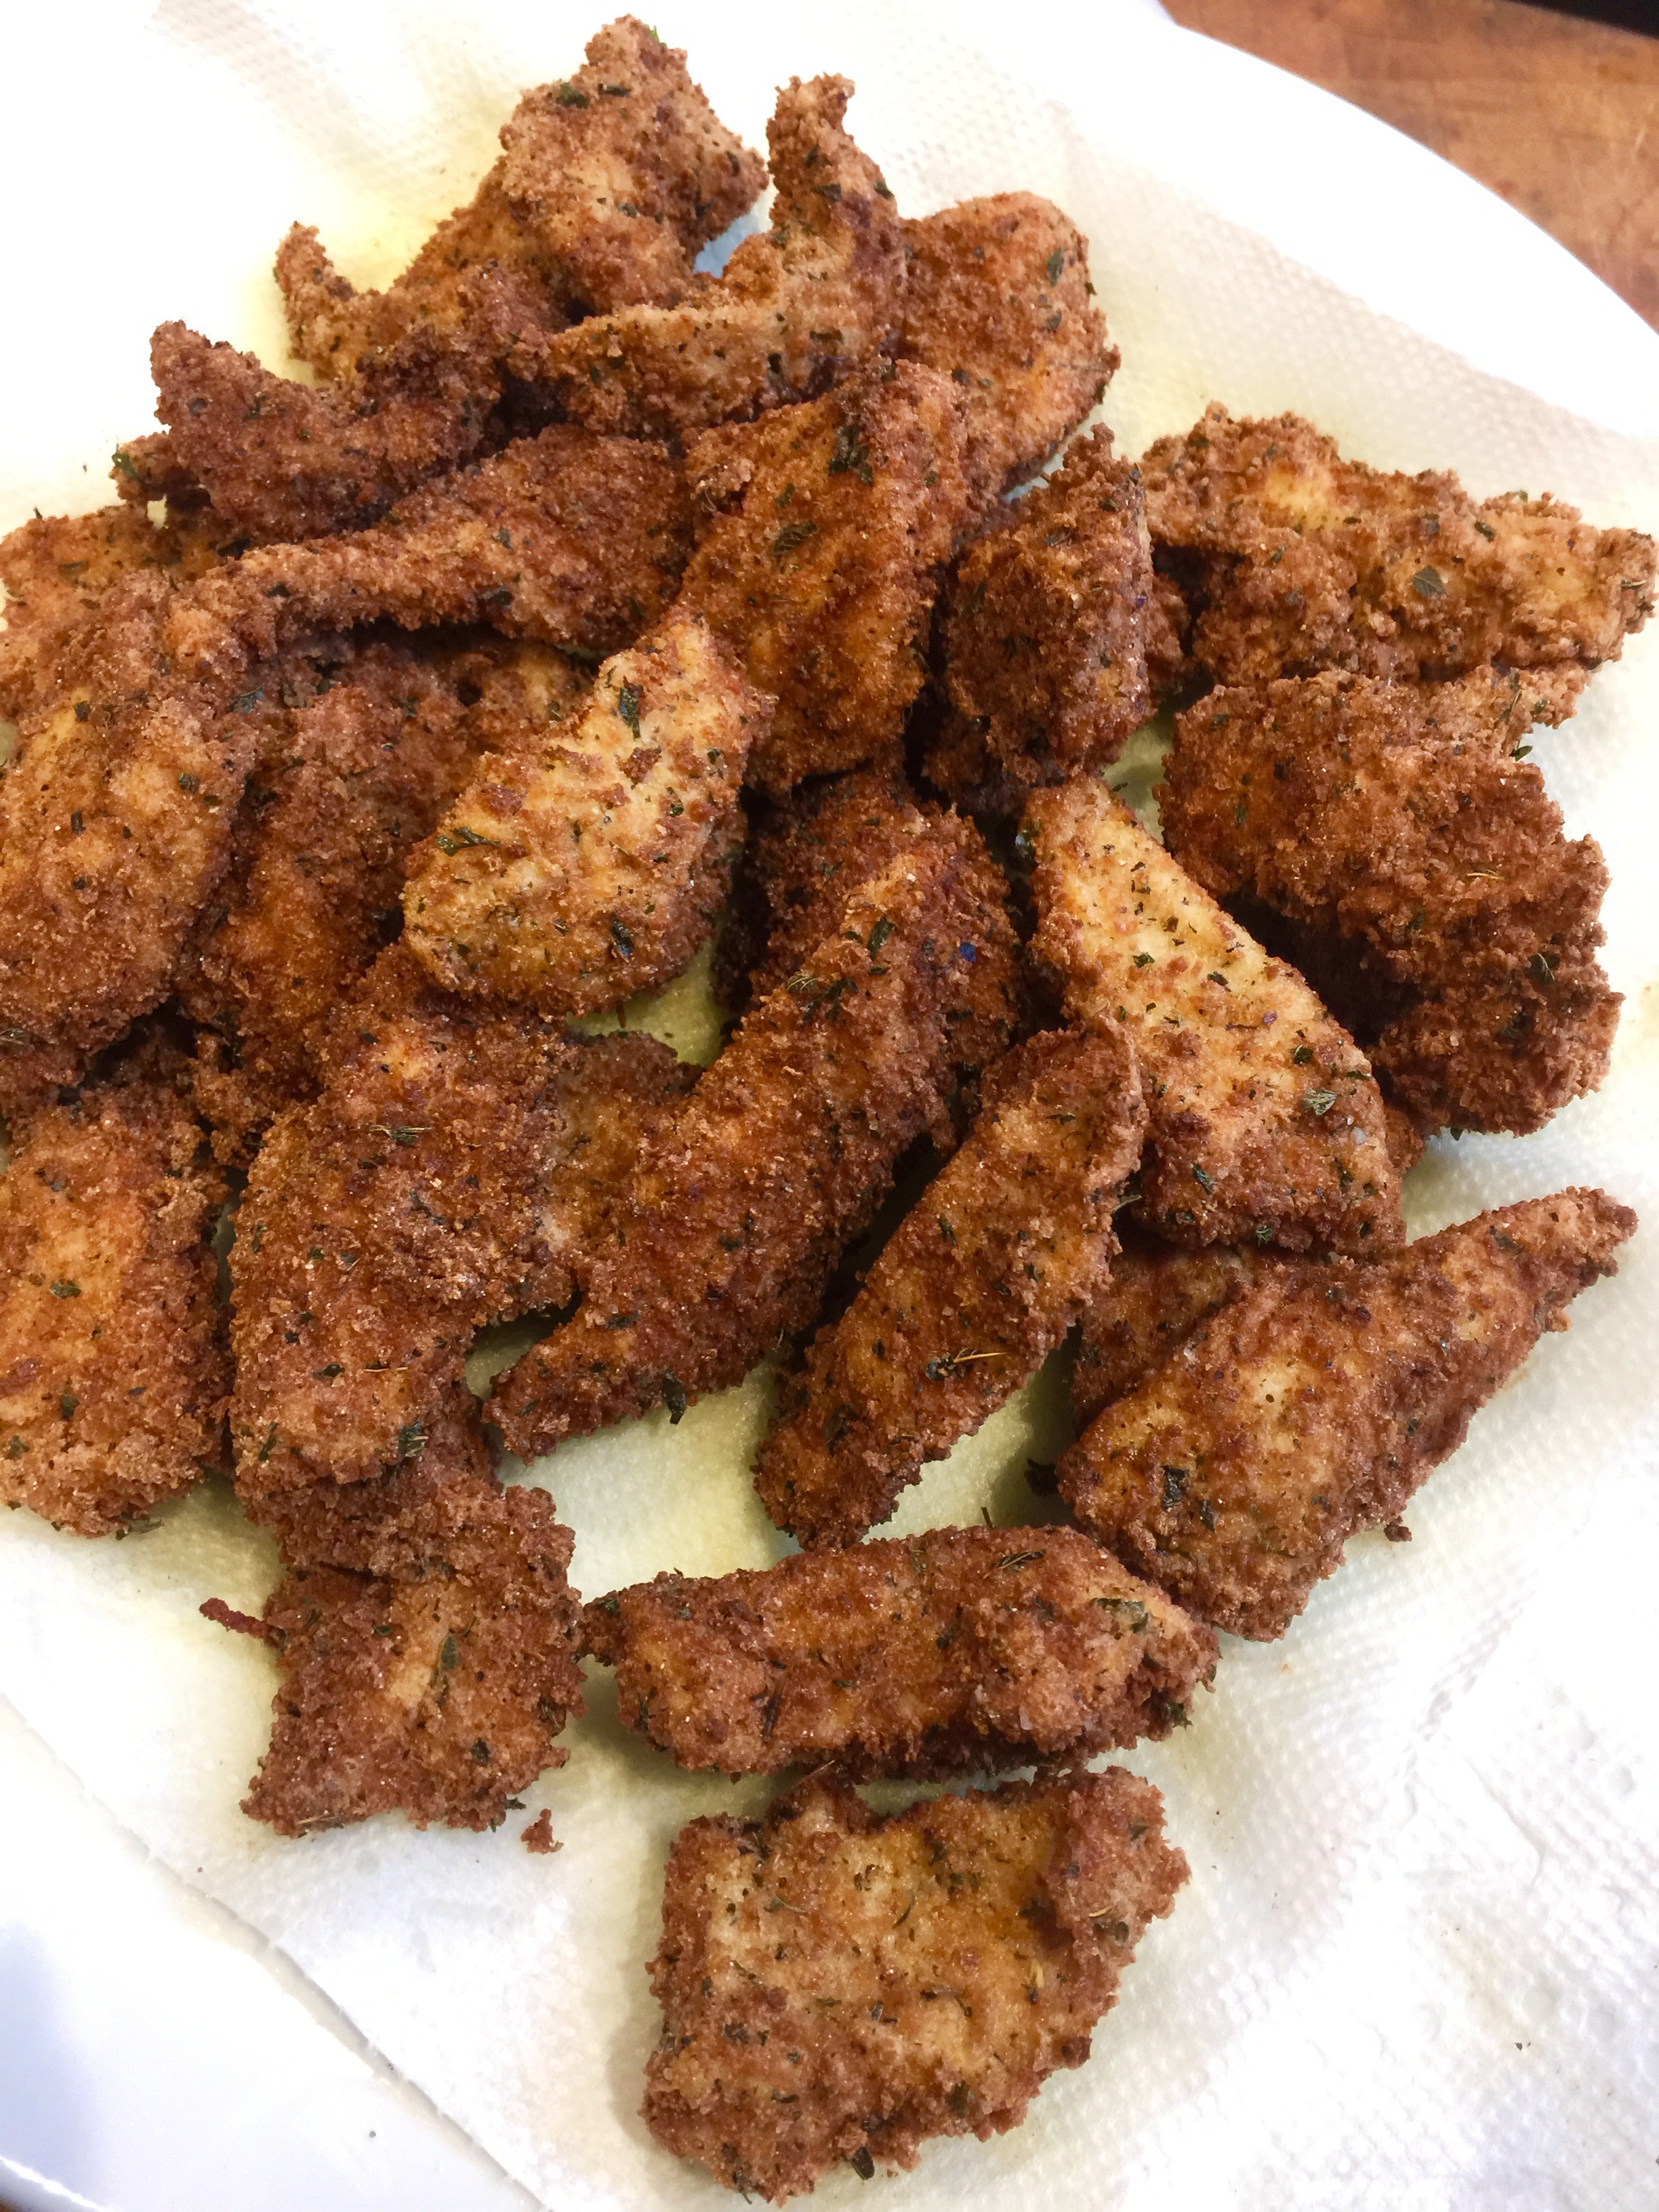
Heat the oil in a pan to 340. Working in small batches, drop 2″ blobs of dough into the oil, turning once when they are golden. Remove them from the oil when they’re done, placing them on paper towels, and sprinkling them immediately with salt.

You can enjoy them as is, or you can make a quick dipping sauce using mayonnaise and Ponzu sauce. I haven’t found a gluten-free Ponzu yet, so I combine mayo with GF soy sauce, and a squeeze of lemon juice.

fritter2


It may be the end of November, but the kale in my  garden is still growing! As the nights get longer and colder here in Southern New England, the first thing I go for is a great bowl of soup.

When I first posted my recipe of Portuguese kale soup, I was told by many Portuguese friends that my soup wasn’t authentic so I couldn’t call it that. Fair enough. Well, my Portuguese pal, Paula, has a great soup recipe that has been passed down from her Mom. Her Mom even adds chicken feet to the stock, which Paula chooses to leave out. Like most Portuguese soup recipes I’ve seen, there’s a ton of carbs: often potatoes with pasta with a lot of beans. But damn, it’s good! My version follows.

Paula’s Portuguese Soup

3 cans garbanzo beans
2 cans white cannellini beans
1 can pink beans
1 fennel bulb
Large bunch of kale
5-6 potatoes
1 cabbage
2 sticks hot chourico
Beef ribs
1 cup dry macaroni (elbows)
Red crushed pepper wet-optional

Drain and puree  3 cans of garbanzo beans in a food processor. Put the puree in a large pot with about a gallon of water.  Chop the chourico, and add it to the puree along with the ribs. Boil for 20 minutes. Chop the fennel bulb and cabbage into 2 inch squares.  Add the fennel and cabbage to soup and boil for 30 minutes.  Add the chopped kale, and boil for 30 minutes. Add the cubed potatoes and before the potatoes are done, add the remaining drained cans of beans. Add macaroni and cook for a short time at the end.

My version of the classic Portuguese kale soup.

My version of the classic Portuguese kale soup.

Here’s my version: carb-friendly and gluten-free, but still packs a lot of flavor.

4 cups home-made chicken or beef stock
4 cups water
1 cup lentils, rinsed in cold water
1 onion, finely chopped
1 carrot, finely chopped
2 stalks celery, finely chopped
1 clove garlic, through a press
1 lb. chourico, peeled and chopped into small cubes (I use Mello’s, out of Fall River, Mass.)
1 large bunch organic kale
salt and pepper

Add the stock and water to a large pot. Heat until boiling. Add the lentils.

In a saucepan with a little olive oil or bacon fat, saute the onions, carrots, celery, and garlic for a few minutes. Add the chopped chourico and saute a few minutes more. Add the contents of the saute pan in the pot.

Wash and de-stem the kale, tearing the leaves into smaller pieces. Add the leaves to the pot and stir. The stems go in your compost pile. (You can also use them in a juicer.)

Cook the soup until the lentils are al dente. Taste and season for salt and pepper before serving.

My Mom loves that nasty, gooey cranberry log that oozes out of the can. It would hit the bowl with a splurt and would wiggle for about an hour. I’m more than happy to avoid that and make this delicious side dish, which has become mandatory at our Thanksgiving table every year.

image


1 medium-sized butternut squash, washed and peeled with seeds removed
Olive oil
Salt
1 cup fresh cranberries
¼ cup sunflower seeds
¼ cup pumpkin seeds or pepitas
¼ cup sesame seeds
¼ cup maple syrup, more if you like it really sweet

image

Pre-heat the oven to 400 degrees.

Once you’ve washed, peeled and seeded the butternut squash, cut it into ½” chunks. Sprinkle a little olive oil and salt on them and toss them to coat. Then spread the squash cubes in a single layer on a baking sheet. Bake for about 30 minutes or until golden on the edges.

Remove the squash from the oven and pour the cranberries into the hot tray. Mix gently. Pour the squash/cranberry mix into a smaller, deeper baking pan.

Increase the oven to 425.

In a separate bowl, combine the sunflower seeds, pumpkin seeds and sesame seeds. Sprinkle the seeds evenly over the squash/cranberry mixture. Drizzle the maple syrup over everything and place the baking pan in the oven. Cook for another 20 minutes, until the seeds have roasted.


I’ve never been a huge fan of deep-fried turkey. Many years ago, when I lived in the South, my friends went through the trouble of buying and setting up all the special frying equipment, and the turkey did taste pretty good. But it wasn’t exceptional, and it didn’t justify the expense or the clean-up afterwards. For me, nothing beats the delicious smokiness of a grill-roasted turkey.

I get great results by cooking my turkey in my Weber grill. The standard Weber allows you to cook up to a 15 lb. bird–big enough for my purposes–and it comes out crispy, smokey and delicious. If you’re afraid to try this for the first time at Thanksgiving, wait a few months and buy a turkey when you have the craving and try it out.

The charcoal chimney with hot coals awaits.

Although I’ve stopped using charcoal briquettes a long time ago, and now strictly use natural hardwood charcoal, this recipe works best with standard Kingsford briquettes. The idea is for the coals to cook slowly and evenly. Never use lighter fluid…always start the fire with a few pieces of crumbled newspaper under a charcoal chimney.

Needed:

Weber grill, with the dome top
Kingsford charcoal briquettes (do not use Match Lite or other pre-soaked briquettes)
Heavy duty aluminum pan (disposable)

Ingredients:

Whole turkey, up to 15 lbs., thawed and previously brined (see my blog about brining a turkey)
Olive oil (to rub on turkey)
2 yellow onions, chopped
4 stalks of celery, chopped
½ lb. (2 sticks) of unsalted butter, melted
1 tablespoon granulated garlic
1 tablespoon onion powder
2 tablespoons salt
1 tablespoon pepper
Spreading the coals away from the center of the grill.

If you want stuffing, make it separately and cook it separately.

Light 8 to 10 lbs. of charcoal in the grill…depending on the size of the turkey and how cold it is outside.

Remove the giblets from the turkey. Place the bird in the aluminum pan.

In a small bowl, mix the granulated garlic, onion powder, salt and pepper Add any other seasonings you like.

Coarsely chop the onions and celery. Place them in a another bowl. Mix them with the melted butter and 1/3 of the salt/pepper/garlic powder mixture. Place a small handful of this “stuffing” mixture in the neck cavity of the turkey. Place the rest in the body cavity (where the stuffing would usually go.) You can fasten the bird with turkey skewers if you like. This “stuffing” is strictly to flavor the turkey…you don’t eat it!

The rubbed, stuffed and seasoned bird.

Rub the outside of the entire turkey with the olive oil and sprinkle the rest of the garlic/onion/salt/pepper mixture on the outside of the bird. Make sure you get the bird on the bottom as well.

When the coals in the grill have ashed over, spread them to the outside edges of the Weber equally. Put the cooking grill rack in place. Place the aluminum pan with the turkey in the center of the grill, keeping it away from the direct heat of the coals. If you’re using a meat thermometer (recommended), insert the probe into the thickest part of the breast, being careful not to hit the bone. Place the lid on the grill. (You may need to bend your pan a bit.) Open the vents on the bottom of the Weber as well as the lid. It’s important to get air circulating!

My meat thermometer calls me from as far as 100 feet away when the turkey reaches the optimum temperature that I pre-set. Time for a drink!

No basting is necessary.

Now here’s the tough part: DO NOT OPEN THE GRILL TO CHECK ON THE TURKEY! (If you must look, shine a flashlight into the vent holes on the lid to take a peek at the pop-up timer, if there is one.) The whole point is to keep the heat inside the kettle. You’ll know your turkey is done when no more smoke or heat rises from the grill, and the turkey inside stops making sizzling noises.

Remove the turkey and let it rest at least 20 minutes before carving.

Beautifully grilled, cooked to 180 degrees in less than 2 hours!

BRINING A TURKEY

Posted: November 17, 2016 in brining, Food, marinade, turkey
Tags: , , , ,

My brining and roasting turkey recipes get a lot of requests this time of year, so here we go…

Brining is a simple process of soaking a hunk of protein in a flavored salt solution before cooking, resulting in a much more juicy and flavorful final product.

It’s basic high school science: the brine has a greater concentration of salt and water than the molecules of the protein (in this case, a turkey) that is soaking in it. By simple diffusion, the protein molecules suck up the salty water and retain it. When you cook the meat, some of the water evaporates, but the meat still has far more moisture in it than it would have without the brine soaking, and you get a moister, delicious bird.

Some people use giant syringes to inject their turkeys with crazy solutions, but I think that the old way is still the best way when it comes to brining. Get a big pot, fill it with the brine, and soak the bird in it. Done.

Here’s my tried-and-true turkey brining recipe. Once the brining is done, you can cook the turkey whatever way you like best. I use a method where I grill it inside a Weber grill with charcoal. It comes out smokey and absolutely amazing. I’ll have that info in the next blog.


1 gallon of water
2 onions
3 carrots
3 stalks celery
1 cup kosher salt
1 tablespoon black peppercorns
1/2 cup light brown sugar
1.5 teaspoons whole allspice
4 bay leaves
1 gallon of ice water
14–15 lb turkey, thawed

Pour the first gallon of water in a large pot. Quarter the onions, carrots and celery (no need to peel them) and add them to the water. Add all the other ingredients, except the ice water and turkey.

Let the pot come to a boil for a few minutes. Remove from the heat and let the brine cool down to room temperature.

Remove the giblets from the turkey and place the bird in a container just big enough to hold it and 2 gallons of liquid.

Pour the now-cooled brine over the turkey, then pour in the gallon of ice water.

Make sure the turkey doesn’t float up by placing a plate on top. Put the turkey container in the fridge for 5 to 8 hours, flipping the turkey over in the container halfway through.

Drain turkey, pat dry with paper towels, and then cook using your favorite recipe.

Next time: cooking your turkey on a Weber grill in a fraction of the time.

Beef sirloin tips are a bit fatty, which makes them perfect for grill because they don’t dry out, even if you leave them on a little too long. But they can be chewy, so marinating them overnight before grilling tenderizes them and gives them great flavor.

There always seems to be 2 choices when it comes to beef tips at the supermarket: the nice, clean tips that cost a lot, and the fattier, gristlier ones that come cheap. I’ve bought both, figuring I’d still save money with the cheap ones if I cleaned them up myself. Generally speaking, after cleaning up the cheap cuts of meat and tossing all the fat and gristle in the trash, I’ve found that it winds up costing about the same. So now I go for the nicest sirloin tips I can find.

I’ve made many marinades in my day, but I’ve never used the “secret ingredient” that I used this time around. I make my own Lithuanian honey liqueur called Krupnikas (I’ll write more about it in a future blog), and the combination of honey and secret spices really added to the marinade. Unless you make your own Krupnikas, you’re SOL, so I recommend honey and a little bourbon.

Gochujang is a Korean hot sauce. Feel free to substitute with your favorite.

fullsizerender-11


2 lbs. beef sirloin tips, cut into 1 1/2″ cubes
2 tablespoons La Choy Stir Fry Teriyaki sauce and marinade
2 tablespoons honey
1 tablespoon bourbon
2 teaspoons peanut oil
1 teaspoon lite soy sauce
1/2 teaspoon chili garlic sauce
1/2 teaspoon sesame oil
1/4 teaspoon gochujang


Trim off the excess fat and gristle, as well as all the silver skin off the beef, then cut into 1 1/2″ pieces. Place them in a large Ziploc bag, sitting inside a bowl. (The bowl will keep the marinade from spilling into your fridge if the bag leaks.)

In a separate bowl, combine all the other ingredients and whisk to combine thoroughly. Pour this marinade over the beef in the bag, making sure every bit of the marinade makes contact with the meat. Seal the bag tightly, squeezing all the air out of it, and place it in the fridge overnight. Be sure to squish the bag every once in a while to make sure the marinade penetrates all parts of the beef.

The next day, light a hot grill and cook the beef tips to desired doneness. If you’re cooking indoors, heat some pork lard in a large cast iron skillet, and sear the beef tips on all sides until done.

Let the beef rest before digging in!


Chourico is as important to the Portuguese as bacon is to us Lithuanians. Here in Southern New England, they pronounce it “sha-rees,” not the exaggerated Spanish “chaw-reezo,” like you hear on the Food Network.

I was joking with a friend the other day that if I won the lottery, I could buy a lifetime supply of chourico at my favorite store: Mello’s in Fall River, Mass. His response was: “Is there such a thing as a lifetime supply of chourico?!”

Good point!

If you’ve had really great chourico, you’re always looking for new ways to include it in your cooking. And arugula is one of the easiest greens to grow in the spring or fall garden. Even now, in November, I’ve got lots of it growing, just waiting to be turned into pesto.

Inspired by chef Chuck Hughe’s recipe, this is a great chourico appetizer that’s really easy to make. Whip up the arugula pesto ahead of time and keep it in the fridge. Then when guests come, just slice the chourico, saute it in a pan until brown, and serve.

fullsizerender

3 cups fresh baby arugula
1/2 cup walnuts
1/2 cup olive oil
1 clove garlic
1 teaspoon salt
1/4 teaspoon pepper
1/2 cup + one tablespoon grated Parmigiano Reggiano or other good quality parmesan cheese
2 lbs. chourico, sliced into 1/2″ pieces

Combine the arugula, walnuts, olive oil, garlic, salt, pepper and the 1/2 cup of cheese in a food processor or blender and blend until smooth. Set the tablespoon of cheese aside for garnishing later.

fullsizerender-1

Remove the casing from the chourico and slice it into 1/2″ thick pieces. Saute the chourico in a pan until both sides are caramelized and golden.

Place the chourico on a plate, topping with some of the pesto. Sprinkle a touch of the grated cheese to garnish. Serve immediately, while the chourico is still hot!


fullsizerender-3


Spaghetti alla Carbonara and Fettuccine Alfredo are my two favorite pasta dishes. Little did I realize that if I took the best of each one, I’d have something that would just blow me (and my family) away. The addition of chicken and peas made for a more balanced plate. This will now be my go-to dish when guests arrive, since many parts can be prepared ahead of time. And you’d never know that this dish is completely gluten-free!

fullsizerender-4

Start with the chicken…

The breading for the chicken uses gluten-free bread that I’ve toasted, crumbled and put into a food processor to make breadcrumbs. You get a lot more flavor this way than using store-bought GF breadcrumbs from a can. I add gluten-free flour to it to lighten it up. Cup4Cup is by far the best GF flour I’ve tried.

1/2 lb. chicken breasts, cut into 1″ pieces
1 egg, scrambled
4 oz. sliced gluten-free bread, toasted (I use Udi’s frozen bread)
1/2 cup gluten-free flour (I use Cup4Cup)
3 teaspoons dried parsley
2 teaspoons dried oregano
1 teaspoon dried basil
1/2 teaspoon granulated garlic
1/2 teaspoon granulated onion
1 1/2 teaspoons salt
1/4 teaspoon pepper
olive oil, for frying

Scramble the egg in a bowl. Cut the chicken into pieces, and add them to the egg, making sure they get evenly coated. Set aside.

In another bowl, combine the bread crumbs, flour, parsley, oregano, basil, garlic, onion, salt and pepper. Set aside.

Fill a pan with about an inch of olive oil. Heat to medium-high, for frying.

In batches not to overcrowd the pan, take the chicken pieces out of the egg and toss them in the bread crumb mixture, shaking off the excess. Place them carefully in the hot oil and fry on both sides until golden. Since they’re small pieces, they should cook all the way through easily. Drain on a plate covered with paper towels. Do this with all the chicken and set aside. Try not to eat it all before you make the rest of the dish! (This chicken can also be eaten as is–these are my daughter’s favorite nuggets–or used with tomato sauce and cheese to make a delicious chicken parmigiana.)

fullsizerender-6

The carbonara factor…

Many recipes for Spaghetti alla Carbonara use pancetta or bacon. But the original recipe calls for guanciale: cured (but not smoked) pig jowls, or cheeks. It’s easy enough to find in a good Italian food store, but I cure my own. I buy raw heritage Berkshire pork jowls from a farm that raises the pigs humanely, and cure the jowls for about 3 weeks in a combination of salt, pepper and fresh thyme leaves. Then I rinse them, pat them dry, and cut them into portion-sized pieces, which I wrap individually and freeze until I need them. It’s a lot of work, but to me, totally worth it.

3 oz. guanciale

If the guanciale is frozen, let it thaw just a little, then cut it into the smallest cubes you can manage. Place it in a pan and cook them until they’ve browned and crisped beautifully. Keep an eye on the pan, as guanciale can burn easily. Use the fried meat bits for this recipe and save the fat for flavoring a future dish! Set aside.

The Alfredo sauce…

Despite what you get in crappy restaurants like Olive Garden, Alfredo sauce should not be runny or soupy. It should cling to the pasta and be rich in flavor. I use Garofalo gluten-free pasta exclusively, because it tastes just like real pasta. Believe me, I’ve tried every GF pasta out there. I buy mass quantities at Amazon.

1 cup heavy cream
3 tablespoons butter
Fleur de Sel or sea salt
1 lb. pasta, fresh or dried (I used linguine this time because that’s what I had in my pantry)
2/3 cup freshly grated Parmigiano Reggiano cheese
freshly ground black pepper
a very tiny grating of fresh nutmeg (optional for this dish–I leave it out–but used when I make Alfredo)


Put 2/3 of the cream and all the butter in a large saucepan that will later accommodate all the pasta. Simmer over medium heat for less than a minute, until the butter and cream have thickened a bit. Turn off the heat.

Drop the pasta in a bowl of boiling salted water. If the pasta is fresh, it will take just seconds. If it’s dry, it will take a few minutes. Gluten-free pasta, which is what I use, takes a little longer. Either way, you want to cook the pasta even firmer than al dente, because it will finish cooking in the pan with the butter and cream. Drain the pasta immediately when it reaches that firm stage, and transfer it to the pan with the butter and cream, tossing the pasta gently for a few seconds to coat.

Turn the heat under the saucepan on low, tossing the pasta, coating it with the sauce. Add the rest of the cream, all the Parmigiano Reggiano, a bit of pepper (no salt because the guanciale will add more saltiness later), and the nutmeg (if you’re using it.) Toss briefly until the sauce has thickened and the pasta is well-coated.


At this point, you don’t want the pasta to get to dry, so you add…

1 cup of frozen peas

…tossing gently to warm them through. Also add the cooked guanciale at this time.

fullsizerender-5


Plate the pasta in a bowl or dish and serve the chicken alongside.


Today is National Meatloaf Day. Few dishes scream out “comfort food” to me like meatloaf. My Mom’s meatloaf was awesome, and she’d cut a huge slab of it onto my plate, with fantastic butter-loaded Pennsylvania Dutch egg noodles on the side. I couldn’t stop eating it.

I never thought of making meatloaf when I moved away, because it gave my Mom something special to make for me when I came home to visit. She was thrilled that there was a dish she could make that I would devour every time, without hesitation. (The others were her roasted lamb and Lithuanian pierogis called koldūnai (kol-doon-ay).

But now that my Mom has moved into an assisted living facility where she can’t cook, I’ve had to take meatloaf matters into my own hands. I never got my Mom’s exact recipe. But I had an idea of what went into it, so I gave it a shot.

The standard mix for my Mom’s meatloaf was one-third each ground beef, pork and veal. I went 50-50 with the beef and pork instead. My Mom used Lipton onion soup mix in her meatloaf. I chose to stay away from packaged chemicals. And instead of layering slices of bacon on top as many people do, I used my own home-cured and smoked pre-cooked bacon that I chopped up and put inside the loaf.

To keep this dish gluten-free, I use GF breadcrumbs, and I also don’t use the Lipton onion soup mix, because it can contain non-GF ingredients.

image

1 yellow onion, minced
1 teaspoon salt
1/2 teaspoon pepper
1/2 teaspoon granulated garlic
pork fat or olive oil
1 lb. ground beef
1 lb. ground pork
1/2 cup breadcrumbs (I use gluten-free)
1/4 cup ketchup
4 strips of cooked bacon, chopped
2 eggs


Sauté the onion in a little oil or pork fat until translucent. Let it cool, then mix in the salt, pepper and garlic. Set aside.

In a bowl, combine the meat, breadcrumbs, ketchup, bacon, eggs, and the sautéed onion mixture. Form it into a loaf and place it in a loaf pan. Bake at 350 for about an hour.